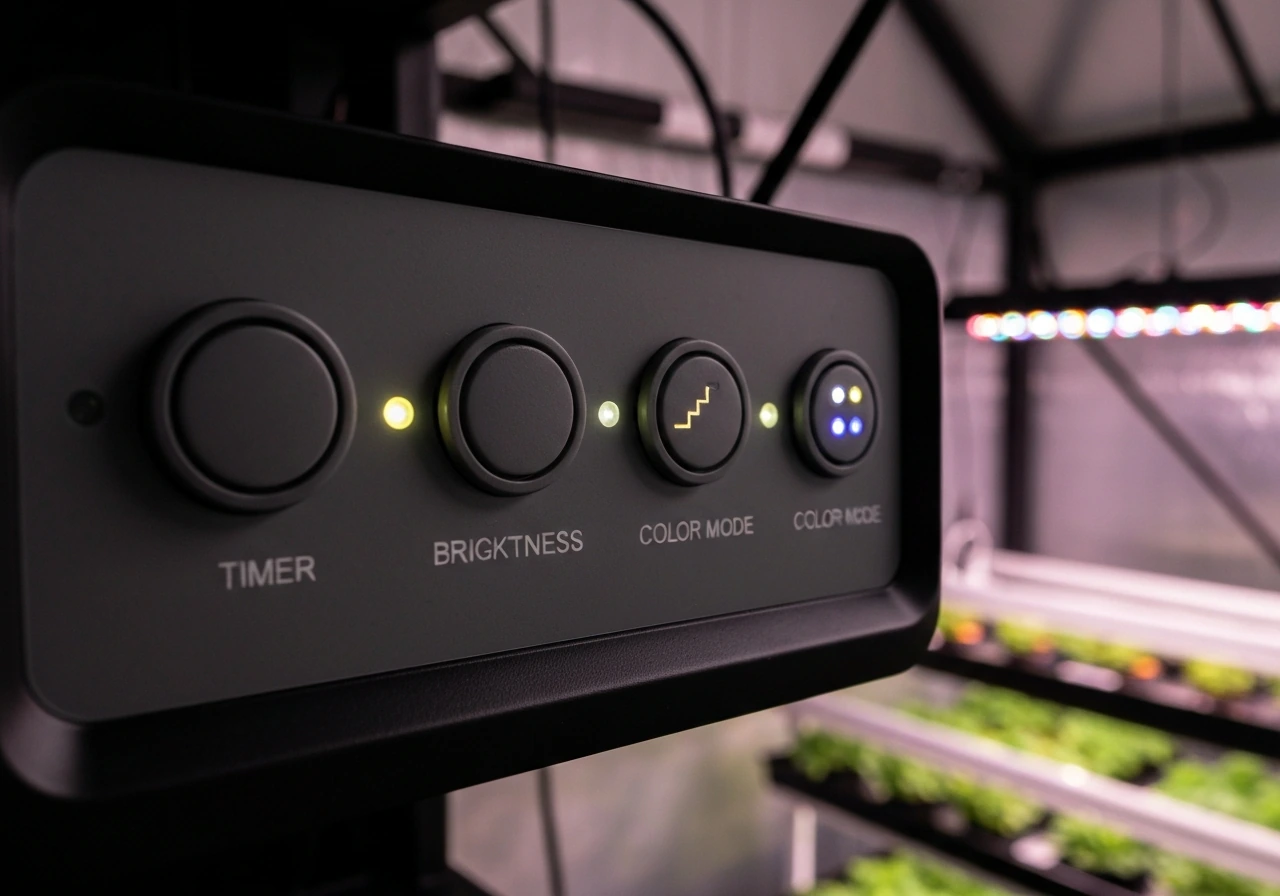
The Lxyoug LXGL-008 is a 30W full-spectrum LED grow light with three onboard controls: a switch button, a brightness adjustment button, and a timer button. Plug it in, press the switch to turn it on, choose your color mode, set the timer to 4H, 8H, or 12H depending on your plant's growth stage, and leave the power outlet on at all times so the built-in circular memory timer can repeat the schedule automatically every day. That's the short version. Everything below fills in the details so you get it right the first time.
Lxyoug Grow Light Manual: Setup, Controls, and Troubleshooting

Marcus Tillman
20 May 2026
What to know about your Lxyoug grow light before you plug it in
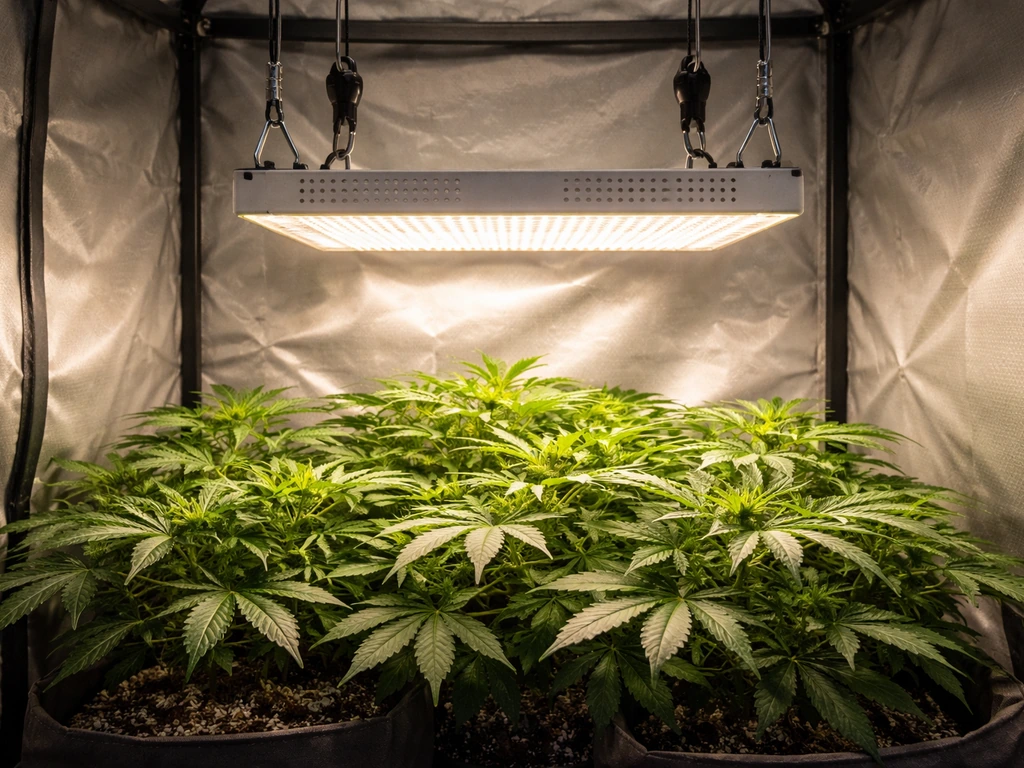
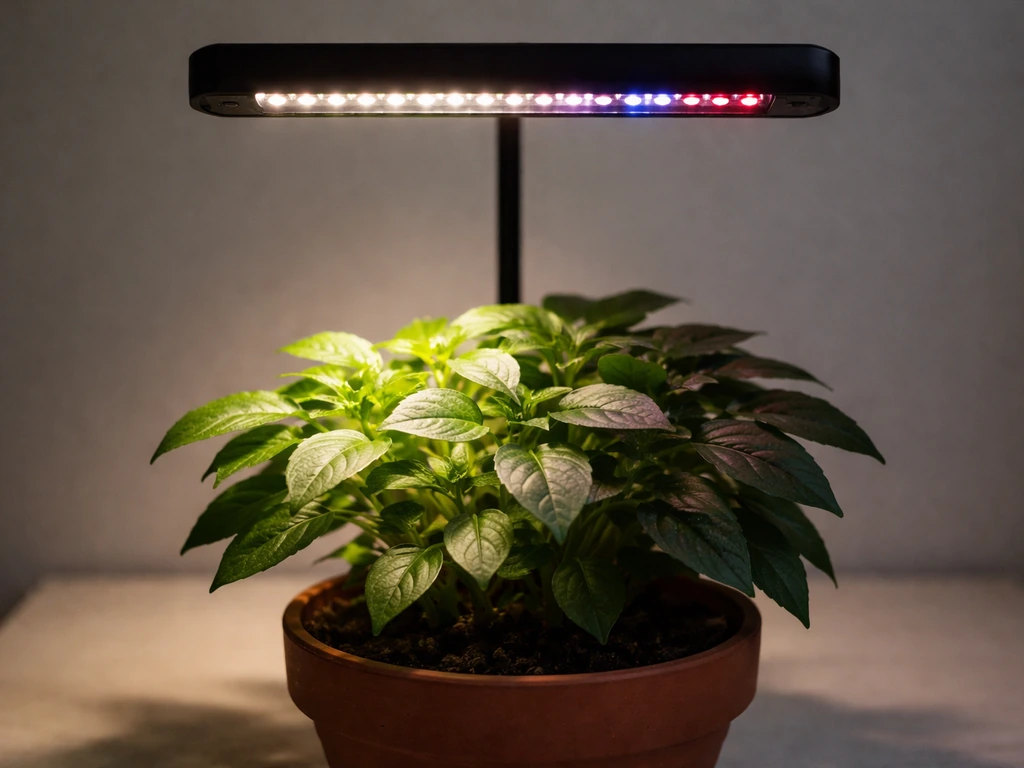
The LXGL-008 is a 30W LED panel rated for AC 110V–240V, so it works on both North American and international outlets. It runs a full spectrum from 380–780 nm, with a blue peak at 460 nm (good for leafy, vegetative growth), a red peak at 660 nm (good for flowering and fruiting), and a warm white channel at 3000K that fills in the broader spectrum plants use. That combination is more useful than older red-only or blue-only grow lights.
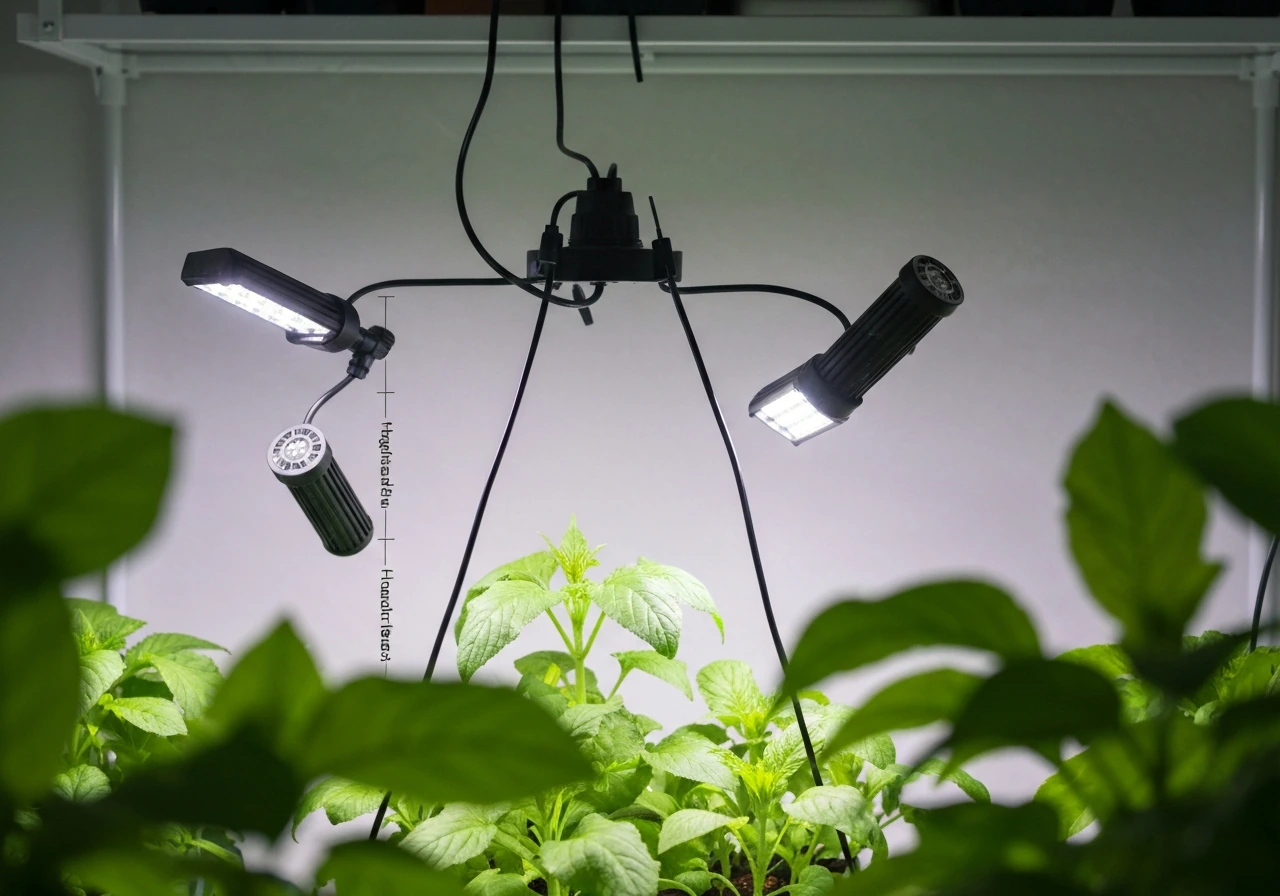
The fixture has five gooseneck or adjustable heads, and the switch button controls them together as a group. There is no remote control included with this model. All adjustments happen directly on the unit: the switch button turns the light on and off, the brightness adjustment button cycles through brightness levels in steps (10 presses per full cycle), and the timer button cycles through three preset durations: 4 hours, 8 hours, and 12 hours. The manual doesn't list a percentage range for dimming, so treat the 10-step cycle as going from low to high and back again as you press.
The built-in timer uses what the manual calls a circular memory function. Once you set a timer duration, the light will turn on and off on that same schedule automatically every day, as long as the outlet stays powered. The manual is explicit: do not turn off the power. If you switch off the outlet or the power strip, the timer memory resets and you have to set it again. There's a 3–5 minute deviation in the daily cycle, which is completely normal.
Unboxing and getting set up safely
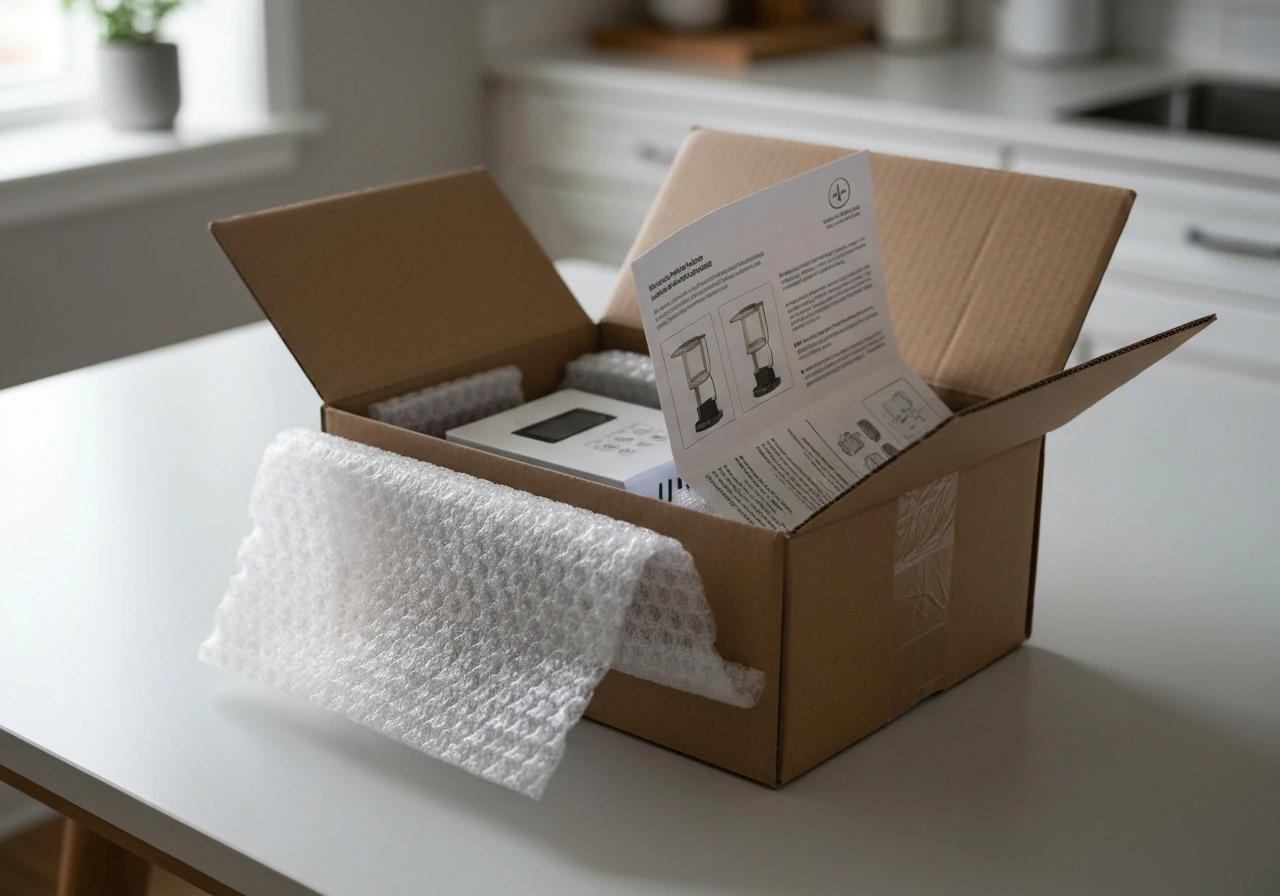
The box contains two things according to the official manual: the grow light itself and the user manual. If you need step-by-step guidance, the Lxyoug grow light manual also covers setup, controls, and safe operation for this model user manual. If you want the exact wording and safety notes, check the ghodec grow light manual that came with your unit. If you need the exact details, the ezorkas grow light user manual for your model will walk you through the same setup choices. Don't expect extra mounting hardware, hooks, or a remote to fall out of the packaging. If you need hooks, zip ties, or an adjustable arm clamp (which most Lxyoug gooseneck lights use), check whether your unit has a built-in clamp base or whether you ordered a version with a pot clip. Most LXGL-008 listings include a clip-on base that clamps to a pot rim or shelf edge.
If the light has been sitting in storage for more than 6 months, the manual recommends opening the box and running the light for a short period before putting it into regular use. That's a good habit with any LED that's been warehoused for a long time.
Before you plug in for the first time, check a few things. Make sure the area around your plants is not damp or wet. The manual is firm on this: keep the light away from moisture, rain, and any standing water. Do not run it in a bathroom, near a humidifier that sprays directly on the unit, or in an outdoor spot exposed to weather. The operating range is -20°C to 40°C (roughly -4°F to 104°F), so a normally heated or cooled indoor room is fine. The LXGL-008 user manual lists the working (input) voltage as AC 110V, 240V working (input) voltage as AC 110V–240V. Make sure your room has decent airflow since the manual specifically calls out that your space should be well ventilated while the light is running.
How to hang or position your Lxyoug for the best coverage
The LXGL-008 manual doesn't include a specific hanging height chart, which is frustrating but common with budget grow lights. Here's what works in practice for a 30W LED panel with this spectrum.
| Growth Stage | Recommended Height Above Canopy | Daily Light Duration |
|---|---|---|
| Seedlings / Cuttings | 18–24 inches (45–60 cm) | 16–18 hours |
| Vegetative growth | 12–18 inches (30–45 cm) | 14–16 hours |
| Flowering / Fruiting | 8–12 inches (20–30 cm) | 10–12 hours |
| Low-light houseplants | 18–30 inches (45–75 cm) | 10–12 hours |
Start on the higher end of each range and watch your plants for 3–5 days. If leaves look pale or stretched (reaching toward the light), lower it a few inches. If leaf edges start to curl, bleach, or feel warm to the touch, raise it. The gooseneck design lets you angle each head independently, so you can spread coverage across multiple small pots or focus it on a single plant. For a single pot, aim all heads toward the center canopy. For a row of seedling trays, fan the heads out evenly.
Avoid pointing any head at a steep downward angle from very close range. Even at 30W, LEDs concentrated on a small area from 4–6 inches away will create hotspots that bleach or stress leaves. A gentle 45-degree angle from 12 inches away covers more surface and distributes intensity better.
Using the controls: switch, timer, brightness, and color mode
Turning it on and off
Press the switch button once to turn the light on. Press it again to turn it off. That's it. If you want the exact button-by-button flow for the lbw grow light manual, follow the brand’s instructions in the manual for your specific model. The manual notes the switch divides control across the five heads as a group, so they all respond together. If you want step-by-step guidance for your exact model, refer to the keelixin grow light manual for the recommended setup and schedules. There's no way to turn individual heads on or off independently.
Setting the timer
- Turn the light on with the switch button.
- Press the timer button once to set a 4-hour cycle (the 4H indicator flashes).
- Press it again for 8 hours (8H indicator flashes).
- Press it a third time for 12 hours (12H indicator flashes).
- Press it a fourth time to cancel the timer and return to manual on/off mode.
- Once you've chosen your duration, leave the outlet powered on permanently. The light will now turn off after that duration, then turn back on at the same time the following day automatically.
Remember: if you switch off the wall outlet or power strip, the timer memory clears. Plug the light into an outlet or power strip that stays on all the time. The 3–5 minute daily drift the manual mentions is normal and won't affect your plants.
Adjusting brightness
Short-press the brightness adjustment button repeatedly to step through the brightness levels. The cycle runs 10 steps per full loop, meaning you'll cycle from low back to the same low setting after 10 presses. For seedlings or sensitive plants, stay in the lower half of the range. For flowering plants that want high intensity, press up toward the top of the cycle. There's no numeric display, so watch your plants rather than trying to count exact steps.
Choosing a light mode
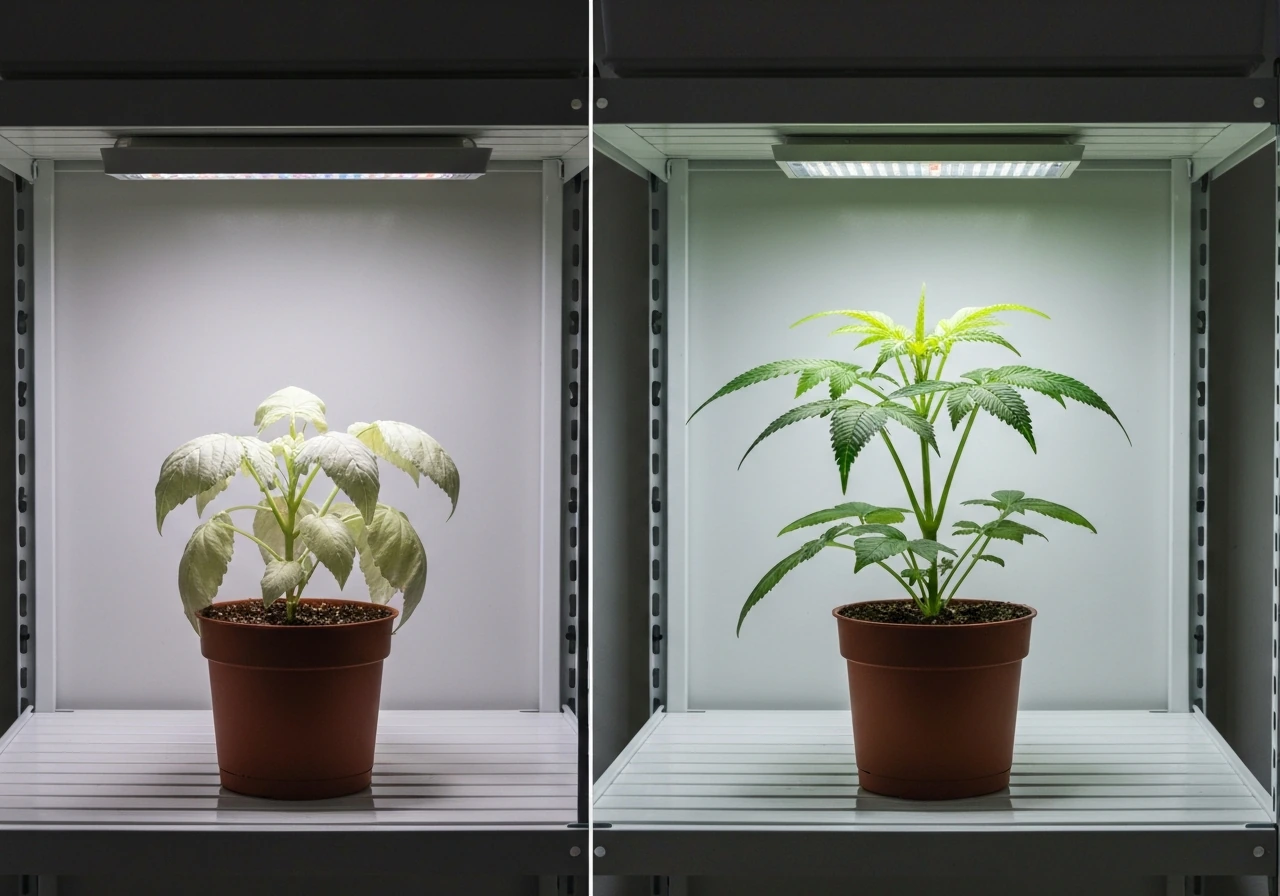
The color change button cycles between two modes: red+blue only, and a combined warm white plus red+blue mode. For most plants most of the time, the combined full-spectrum mode (warm white plus red plus blue) is the better choice. It provides a broader light range that more closely mimics natural sunlight. The red+blue-only mode is fine if you want to emphasize growth or flowering at specific stages, but full spectrum is the safer default if you're unsure.
Light schedules for different plants and growth stages
The 12H timer setting on this unit is the most useful one for most plants. Here's how to match the built-in options to what your plants actually need.
| Plant Type / Stage | Best Timer Setting | Color Mode | Height |
|---|---|---|---|
| Seedlings and cuttings | Use 16–18 hrs (run 12H + manual extension or supplement) | Full spectrum | 18–24 inches |
| Herbs (basil, mint, parsley) | 12H | Full spectrum | 12–18 inches |
| Leafy greens (lettuce, spinach) | 14–16 hrs | Full spectrum or red+blue | 12–18 inches |
| Tomatoes, peppers (vegetative) | 14–16 hrs | Full spectrum | 12–18 inches |
| Tomatoes, peppers (flowering) | 12H | Full spectrum | 8–12 inches |
| Succulents and cacti | 12H | Full spectrum | 18–24 inches |
| Low-light houseplants | 8H or 12H | Full spectrum | 18–30 inches |
The built-in timer only goes up to 12 hours per cycle, which is enough for most plants in the flowering and fruiting stage. Seedlings and leafy greens often benefit from 14–16 hours of light per day. If you need more than 12 hours, you have two options: use a separate outlet timer set for your target duration and plug the light into it (which will reset the built-in timer memory each day, so just leave the on-board timer in cancel mode), or manually press the switch to extend the light period in the morning or evening.
Always give plants at least 6 hours of darkness per day. Total darkness at night is important for plant hormone cycles, especially for flowering plants. Running lights 24 hours a day is not recommended and can cause stress in most species.
Troubleshooting: what to do when something goes wrong
Light won't turn on
- Check that the outlet is live. Plug in a phone charger or lamp to confirm.
- Make sure the power cord is fully seated in both the outlet and the light's power socket.
- Press the switch button firmly once. If nothing happens, try pressing it again in case it was already toggled mid-cycle.
- If the light was stored for more than 6 months, run it for a few minutes on first use as the manual recommends.
- If it still won't turn on, contact Lxyoug customer service. The manual says they respond within 24 hours. Do not attempt to open or disassemble the unit yourself.
Light flickers or turns off unexpectedly
- Flickering usually means a loose power connection. Reseat the cord at both ends.
- If you're on a power strip with multiple devices, try plugging directly into the wall to rule out an overloaded strip.
- Unexpected shutoffs can happen if the timer was accidentally set. Press the timer button repeatedly until no indicator light is flashing (cancel mode), then observe.
- If flickering continues with a direct wall connection, the unit may be defective. Request a replacement.
Uneven coverage or hot spots
- Readjust the gooseneck heads so they're spread more evenly over the plant canopy.
- Raise the light a few inches. The farther away the heads are, the more the light spreads.
- If one area of your plants looks burned or bleached while another looks healthy, that head is too close or angled too steeply. Adjust the angle to 30–45 degrees and raise it.
- Rotate pots every few days if you notice one-sided growth toward the light.
Timer stops repeating or resets daily
This is almost always caused by the outlet losing power. The circular memory timer only works if the outlet stays powered continuously. Check whether the outlet is on a switched circuit (some bathrooms and garages have wall switches for outlets), and if so, move the light to an always-on outlet. If you're using a smart plug that cycles power on a schedule, that will also clear the memory. Either use the smart plug as your sole timer (with the onboard timer in cancel mode) or use the onboard timer with a plain always-on outlet.
Plants aren't improving despite running the light
- Check the distance first. Too far away means too little light intensity. Start at 12–18 inches for most plants.
- Check the duration. If you set the 4H timer and forgot to change it, most plants won't get enough light.
- Make sure the full-spectrum mode is active, not just red+blue, especially for seedlings.
- Rule out other issues: watering habits, soil drainage, pot size, and temperature matter just as much as light.
- Give it at least 2 weeks before judging results. Plants respond slowly to light changes.
Overheating or the room feels unusually warm
At 30W, this unit should not generate significant heat. If the fixture body feels very hot to the touch, check that nothing is resting on top of it and that air can circulate around it. The operating max is 40°C (104°F), so if your room already runs warm in summer, position the light where airflow is best. If the unit is hot even in a cool, ventilated room, that's unusual for a 30W LED and worth flagging to customer support.
Maintenance, safety habits, and fine-tuning over time
Keeping the LEDs clean makes a real difference over time. Dust accumulating on the lens surface can reduce light output noticeably after a few months. Always turn off the power at the outlet before wiping down the light. Use a dry or very slightly damp cloth, never spray water directly on the unit, and never submerge any part of it in water. The manual makes this explicit with a clear warning: do not immerse in water.
Don't store the light near moisture, strong sunlight, or heat sources between uses. If you're putting it away for the season and it'll sit for more than 6 months, remember to run it for a few minutes when you take it back out before relying on it for plants.
Never try to open the housing or repair the internal components yourself. The manual specifically says not to disassemble it and to ask a technician for help if the light stops working. In practice, for a unit at this price point, contacting Lxyoug's customer service (24-hour response as stated) and requesting a replacement or repair is the right move if the unit fails outside of the issues covered in the troubleshooting section above.
Fine-tuning based on what you observe
Once you've been running the light for a couple of weeks, your plants will tell you what needs adjusting. Leggy, stretched stems reaching toward the light mean it's too far away or the duration is too short. Pale, yellowing, or bleached leaf tips mean the light is too close or intensity is too high. Dark green, compact growth with healthy new leaves means you've got it right. Make one adjustment at a time (height or duration, not both at once) and wait 5–7 days before evaluating the result.
Quick setup checklist
- Confirm the outlet is live and stays powered continuously.
- Position the light at the correct height for your plant's current growth stage (see table above).
- Press the switch button to turn the light on.
- Press the color change button to select full-spectrum mode (warm white plus red plus blue).
- Set brightness with the brightness button. Start at mid-range for most plants.
- Press the timer button to set 8H or 12H depending on your plant type.
- Do not switch off the outlet. Let the circular memory timer run automatically from this point.
- Check plants after 5–7 days and adjust height or duration as needed.
- Wipe down the LED surface monthly with the power off.
- Contact Lxyoug support if the unit won't power on or behaves erratically despite correct setup.
If you're researching grow light controls more broadly, the same kind of built-in timer and dimming logic appears across many similar budget brands. The principles here apply well beyond just the Lxyoug: keep the outlet live, match duration to growth stage, watch the canopy for stress signals, and adjust one variable at a time. If you’re using Stationeers grow light IC code, make sure the light schedule logic also keeps the power on continuously so the timer can repeat correctly keep the outlet live. Get those fundamentals right and the specific brand matters a lot less than consistent, well-timed light.
FAQ
How do I make sure the onboard timer schedule actually repeats every day?
Plug the light into an outlet that stays powered continuously, avoid any wall switch that cuts power, and if you use a smart plug, do not schedule the smart plug itself (it clears the light’s circular memory). Set the Lxyoug onboard timer once, then leave it alone.
Can I run the light longer than 12 hours using the built-in timer?
No, the onboard timer only cycles through 4, 8, or 12 hours. If you need 14–16 hours, use an external outlet timer for your target duration, and keep the light’s onboard timer in its cancel state (so you do not get conflicts from daily re-timing).
What should I do if the light turns on or off at the wrong time each day?
First confirm the outlet has not been turned off overnight or rebooted by a power strip. Then check for a scheduled smart plug, even if it is set to “always on.” The unit can show a few minutes of daily drift, so do not treat a 3–5 minute shift as a malfunction.
Is it safe to use a power strip with a switch or an extension cord?
It is safe to use a power strip that remains on all the time, but avoid strips with their own switch that you might accidentally toggle. Also avoid damp areas and keep the cord connections away from splash zones since the manual requires keeping the fixture away from moisture and standing water.
How do I choose the right brightness setting if there is no numeric display?
Use plant response as your guide and step through slowly. If you see pale or bleached tips, reduce brightness or raise the light, if plants are stretching and reaching, lower the light by a few inches or move toward higher brightness. Make one change at a time and wait about 5 to 7 days before deciding you need further adjustment.
Can I turn on only some of the five heads on the Lxyoug LXGL-008?
No. The switch controls the heads as a single group. If you want uneven coverage, the only practical method is adjusting the gooseneck angles and positions, not using independent head on/off control.
Why does the fixture feel warmer at one spot than another?
Gooseneck panels can create intensity hotspots, especially when a head is aimed steeply downward from close range. Re-aim to a gentler angle and increase distance slightly to distribute intensity more evenly, which also helps prevent localized leaf stress and excessive local heating.
What is the best starting height if I do not have the manufacturer’s height chart?
Start on the higher end of practical placement (so intensity is not immediately overwhelming), then adjust based on canopy signals. If leaves look stretched or pale, lower the light by a few inches. If edges curl, bleach, or feel warm to the touch, raise it and consider using a lower brightness step.
How can I tell if the problem is too much light versus too little light?
Too much light often shows as bleaching, curled leaf edges, or leaves that feel unusually warm near the hotspot. Too little light typically shows as leggy growth, stretched stems, and dark but sparse new growth. Also consider timing, if you changed the schedule recently and symptoms appear quickly.
Is it okay to wipe the grow light while it is plugged in?
No. Always turn off power at the outlet before cleaning, then wipe with a dry or barely damp cloth. Never spray water directly onto the fixture and never submerge it, even for quick cleaning.
How should I store the light between grow cycles, especially if it might sit for months?
Avoid storage near moisture, strong sunlight, or heat sources. If it will sit more than 6 months, run the light briefly when you bring it back out before relying on it for plants, so you can confirm it operates normally.
What should I check if the light stops working?
Before contacting support, verify the outlet is live (not switched), confirm the power strip is on, and ensure you are not using a timer device that cuts power unexpectedly. If it still fails, do not open the housing, request a replacement or technician help.
Next Article
Grow Light Manual: Setup, Use, and Troubleshooting
Step-by-step grow light manual for indoor gardens: choose, mount, set height and schedule, maintain, and troubleshoot gr