Set your light 24–30 inches above the canopy to start, run it 18 hours on / 6 hours off for seedlings and vegging plants, and drop to 12 hours on / 12 hours off once you flip to flower. That one combination, distance, schedule, and photoperiod, solves the majority of indoor grow light problems right out of the box. Everything else in this guide is about dialing those numbers in more precisely for your specific setup, your specific plants, and whatever symptoms you're seeing when things go sideways. If you're using an Ezorkas grow light, their user manual can help you set the correct height and timing for your specific model Ezorkas grow light user manual.
Grow Light Manual: Setup, Use, and Troubleshooting

Marcus Tillman
17 May 2026
What a grow light manual should actually tell you
Most grow light manuals are written by engineers, not gardeners. They're full of specs that matter but aren't explained, and they skip the practical stuff you actually need. So before you toss yours in a drawer, here's how to read the important parts. A Leoter grow light manual can help you translate those specs into real settings like height, PPFD, and schedule. A good ghodec grow light manual helps you translate those specs into real-world settings like height, dimming, and schedule. If you're using the Keelixin grow light manual, follow its PPFD and height guidance for your plant stage so your schedule stays dialed in.
The most important number on any spec sheet is PPFD, which stands for photosynthetic photon flux density and is measured in µmol/m²/s. Think of it as the intensity of usable light hitting your plant canopy right now. A good LED panel might list PPFD Avg of 217 µmol/m²/s at 24 inches, with a minimum of 150 and a maximum of 268 across the coverage area. If you want to tune a specific fixture, use its own grow light manual to interpret PPFD at your exact hanging height. That spread tells you how uniform your light is. Big gaps between min and max mean your coverage edges are weak.
PAR is the broader band of light plants use for photosynthesis, generally 400–700 nm. PAR is the photosynthetically active radiation band, commonly defined as 400 to 700 nm, and PPFD describes photon flux density within that band, often reported in µmol·m⁻²·s⁻¹ PAR is the broader band of light plants use for photosynthesis, generally 400–700 nm. PPFD is the measurement of that light at a specific point. Your manual may also mention DLI, or Daily Light Integral, which is the total amount of PAR your plant receives in a full day. DLI is calculated from PPFD multiplied by your photoperiod, expressed in mol/m²/day. You don't need to calculate this by hand, but understanding that DLI goes up when you either raise intensity or extend hours helps you tune your setup intelligently.
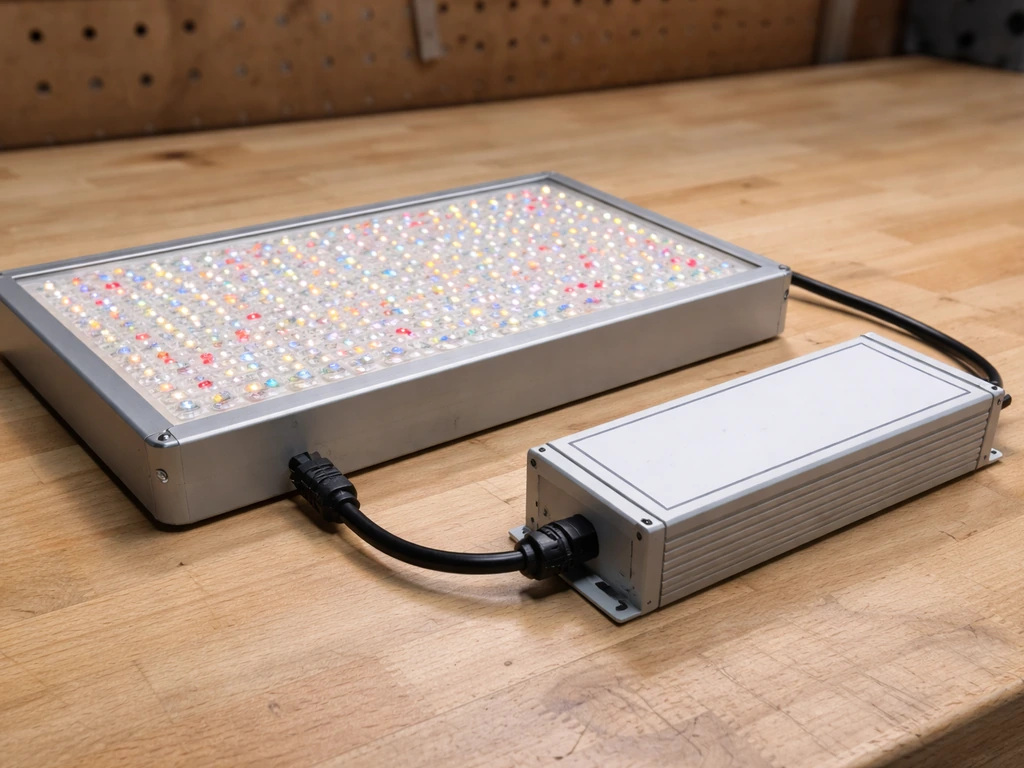
Other spec sheet terms worth knowing: CCT (correlated color temperature, like 5000K) tells you the color appearance of the light. CRI (color rendering index) measures how accurately the light renders color. An L70 rating like 100,000 hours at 55°C tells you how long the diodes will last before dropping to 70% of original brightness. Input voltage (120–277VAC is typical) and dimming range (often 10–100% via a 1–10V signal or knob) are the other two you'll actually use during setup. For safety, look for UL1598 listing and any IP or damp rating, which tells you whether the fixture can handle moisture.
Choosing the right light for your plant stage
The biggest mistake beginners make is buying one light and trying to run it the same way from seed to harvest. Your plants' light needs change dramatically at each stage, and most good LED fixtures are designed to be adjusted, not set and forgotten. The key variable is PPFD at the canopy.
| Stage | Target PPFD (µmol/m²/s) | Photoperiod | Approx. Hanging Height |
|---|---|---|---|
| Seedling / Clone | 150–250 | 18h on / 6h off | 24 inches |
| Vegetative | 250–500 | 18h on / 6h off | 18–24 inches |
| Early Flower | 300–500 | 12h on / 12h off | 18 inches |
| Late Flower / Fruiting | 500–700+ | 12h on / 12h off | 12–18 inches |
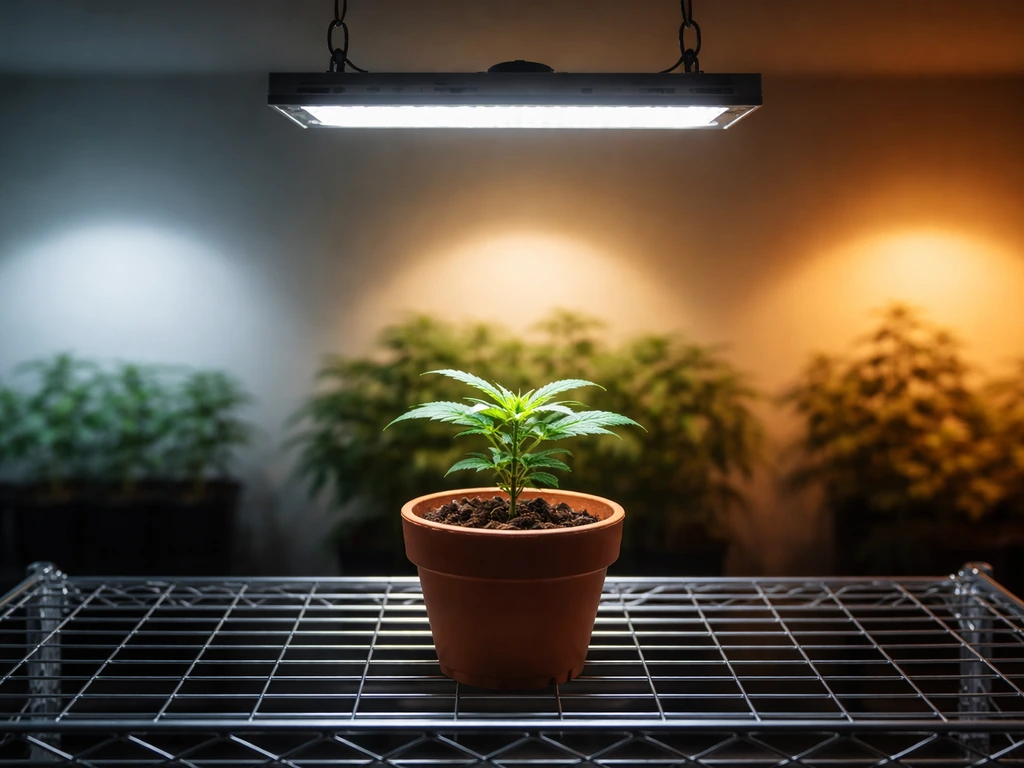
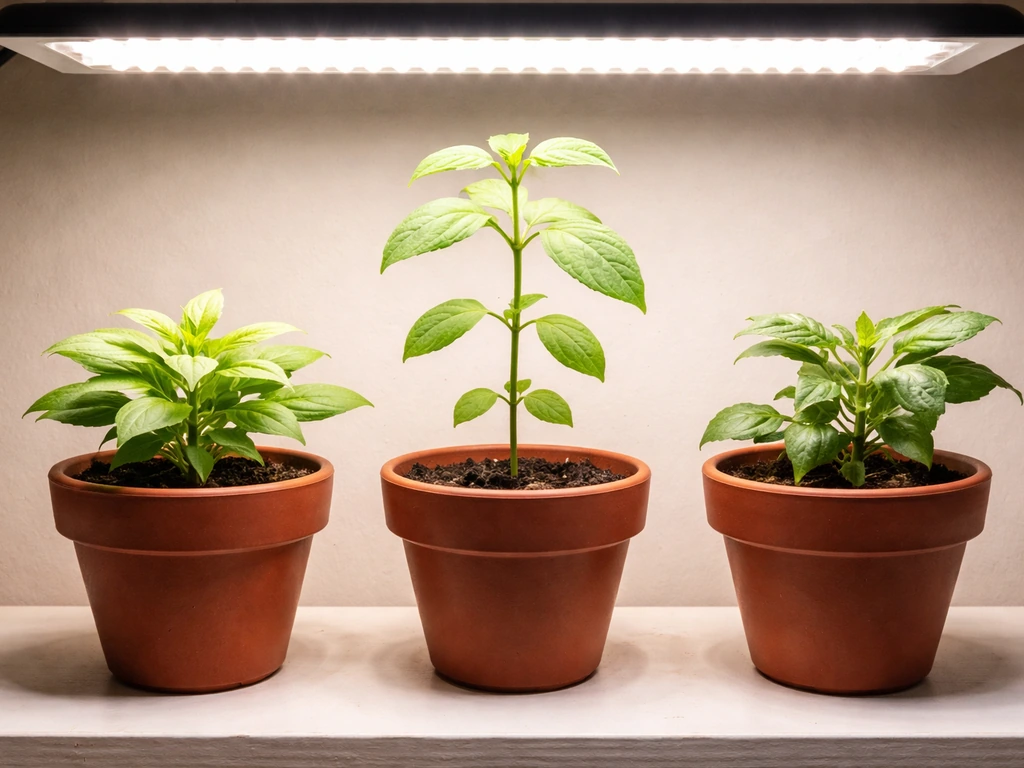
For houseplants, herbs, and greens that never flower, stay in the vegetative range: 18 hours of light, PPFD around 200–400 µmol/m²/s, and a height that puts you comfortably in that window. Fruiting crops like tomatoes and peppers need that higher-intensity, 12-hour flowering schedule to actually set fruit. Seedlings are the most fragile: too much light too early causes bleaching and stunted roots, so start at 24 inches and a lower dimmer setting for the first 3–4 days before lowering gradually.
If you're shopping for a new fixture, match wattage to your grow area roughly: a 200–300W LED covers around 4x4 feet for flowering, and a 100W handles 2x4 adequately for veg. Don't rely on wattage alone, though. A fixture with 2.7 µmol/J efficacy will grow far better plants than one at 1.8 µmol/J at the same power draw. Higher efficacy means more photons per watt, which means less heat and more growth for the same electricity bill.
Getting placement and height right
Height above the canopy is the single most powerful control variable you have, more adjustable and immediate than swapping bulbs or upgrading fixtures. Moving a light from 30 inches to 18 inches roughly doubles the intensity at the canopy. Move it from 18 inches to 12 inches and you've increased it again significantly. This means you can dial intensity without even touching a dimmer knob.
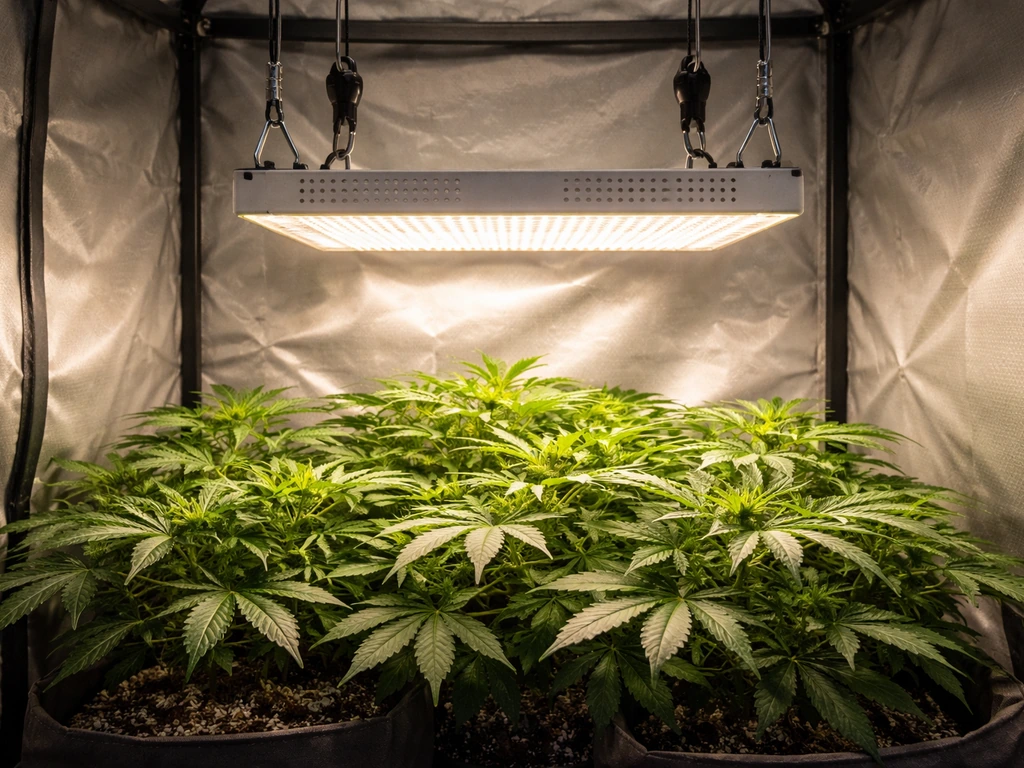
The safest default starting height for most LED panels is 24–30 inches above the canopy for vegetative growth and 18–24 inches for mid-stage plants. For late flowering with high-intensity fixtures, 12–18 inches is common. Never go below 6 inches unless the manufacturer explicitly supports it, and even then only for brief periods. New clones and transplants should always start at the higher end of the range for 3–4 days to acclimate before you lower the light.
Coverage area matters too. A 4x6 foot coverage footprint stated on the box is usually measured at a height of 24–36 inches. If you're hanging the light lower to boost intensity, your usable coverage shrinks. Plants at the edges of the footprint will always get less light than those directly below, so rotate pots weekly if you're working in a wide space. For grow tents, try to center the light over the canopy and keep it level, since tilting creates hotspots on one side.
Once you find a mounting height that works, treat it as your baseline and adjust from there as plants grow. The light stays put; you lower the canopy by training the plants or raise the light incrementally as they stretch upward. Pick a mounting method, whether flush ceiling mount or adjustable rope hangers, and stay consistent. Constantly repositioning your light every few days makes it impossible to diagnose problems.
Setting a light schedule that actually works

Photoperiod control is what separates a grow light setup from just having a lamp on. Plants measure darkness, not light, to trigger flowering. That's why the 12/12 schedule works: 12 consecutive hours of darkness is the biological signal that tells most photoperiod plants to shift into reproductive mode.
Here are the core schedules to know and when to use them:
- 18 hours on / 6 hours off: Standard vegetative schedule for most plants. Works for herbs, greens, seedlings, clones, and photoperiod plants you want to keep in veg. Also appropriate for autoflowering varieties throughout their entire life.
- 12 hours on / 12 hours off: The flowering trigger for photoperiod plants. Holds them in reproductive mode. Never allow light interruptions during the dark period or you risk stress and hermaphroditism in cannabis, or stalled flower set in tomatoes.
- 16 hours on / 8 hours off: A middle-ground option for some long-day crops like lettuce, spinach, and basil that benefit from extended light without the full 18-hour draw.
- 20 hours on / 4 hours off: Sometimes used for autoflowering cannabis or seedling propagation, though there's diminishing return beyond 18 hours for most species.
Start your light cycle when you want your "daytime" to begin. Running lights during nighttime hours (10pm to 4pm the next day, for example) keeps heat buildup during cooler hours if you're in a hot climate. Set your timer to run at least 15 minutes before you need to check on plants so you're not opening the tent during the dark period. Consistency matters more than the exact hours you choose.
When transitioning from veg to flower, switch the timer all at once. Don't step down gradually by an hour or two per week. Plants respond to the photoperiod threshold, and gradual shifts can confuse the trigger. Flip the timer to 12/12 and leave it.
Power, safety, and setup checklist
Electrical safety with grow lights isn't complicated, but it's not optional either. Most grow-related electrical problems come from undersized cords, overloaded outlets, and timers that aren't rated for the load. Here's how to set things up correctly from the start.
- Plug into a GFCI outlet. This is non-negotiable in a humid grow environment. GFCI outlets trip when they detect ground faults, which can happen when moisture is present. If your grow space doesn't have one, add a GFCI outlet or use a GFCI extension cord.
- Use a grounded (3-prong) timer or power strip. Only use ETL or UL listed timers rated for at least 15 amps. Never daisy-chain timers or extension cords together.
- Match cord ratings to your fixture. A 200W light drawing roughly 2 amps at 120V needs a cord rated for at least that load. Don't run a heavy fixture on a thin lamp cord—undersized cords heat up and are a fire risk.
- Check your outlet's circuit capacity. A standard 15-amp circuit handles about 1,800W safely. Add up all devices on that circuit, not just your light. Add fans, pumps, heaters, and anything else sharing the breaker.
- Mount lights with proper hardware. Use adjustable rope hangers rated for at least double your fixture weight. For hard-mount installs, use a grounded UL-listed junction box and follow the wiring diagram in your fixture manual exactly.
- For dimmable lights with RJ ports or 0–10V inputs, confirm the controller or dimmer is compatible before connecting. Mismatched dimmers can damage LED drivers.
- Keep the fixture dry unless it carries a damp or wet rating (IP65 or higher). Even damp-rated fixtures shouldn't be sprayed directly. Check your manual for the IP rating before deciding how close to irrigation you can run the fixture.
Troubleshooting: what to change first based on what you're seeing
Most grow light problems come from one of three things: too much light, too little light, or wrong timing. The symptoms are pretty distinct once you know what to look for. Here's a quick decision path for the most common issues.
Stretching and leggy growth
Long internodal spacing, thin stems, and plants leaning toward the light are classic signs of too little PPFD at the canopy. First move: lower the light by 4–6 inches and see if new growth is more compact over the next 5–7 days. If you're already at 12 inches and it's still stretching, you may need a higher-output fixture. Check that your timer is actually delivering the correct hours and that there are no light leaks during the dark period. In Stationeers, the same idea applies: accurate light control depends on coding the right schedule and intensity settings Stationeers grow light ic code.
Bleaching, whitening, or upward curling leaves
White or yellow patches on the upper leaves, leaves curling upward like tacos, and crispy edges are all symptoms of too much PPFD too close. Raise the light by 6 inches immediately and watch for recovery over 3–5 days. If you have a dimmable fixture, also pull back intensity by 20–30%. Do not increase watering or feeding in response to light stress, as that compounds the problem. Let the plant recover first.
Yellowing lower leaves
Yellowing that starts on lower, older leaves and moves upward is usually a nutrient issue (often nitrogen), not a light problem. But if it's happening on upper leaves too, or if growth is pale overall, check that your PPFD is in the right range for the stage. Pale new growth combined with slow progress often means the plant isn't getting enough light to drive photosynthesis at the rate you're feeding it.
Heat stress
If your canopy temperature is consistently above 85°F (30°C), that's heat stress territory regardless of light intensity. Hold your hand at canopy level for 30 seconds. If it's uncomfortable, it's uncomfortable for your plants too. Raise the light, improve airflow, or add an exhaust fan. Passive-cooled LED bars in tight spaces can raise ambient temperature more than you'd expect, especially in small tents.
Weak or patchy growth across the canopy
If plants directly under the fixture look fine but outer plants are lagging, you have a coverage uniformity problem. Either your fixture is too small for the space, or it's hanging too high. Lower it 4–6 inches to shrink but intensify the footprint, or add a second fixture. Rotating pots weekly is a simple fix for mild edge-to-center variation.
Timer or schedule problems
If photoperiod plants won't flower or revert to vegetative growth, the most common culprit is light contamination during the dark period. Even a few minutes of light from a phone, vent gap, or indicator LED can interrupt the dark signal. Seal light leaks and verify your timer is functioning correctly. Mechanical timers can drift or skip, so check them weekly. Digital timers with battery backup hold settings better through power outages.
Maintenance and keeping your setup running long-term
LED grow lights are low-maintenance compared to HID or fluorescent setups, but they do need attention. The biggest killer of LED lifespan isn't the diodes, it's heat, and heat is caused by dust blocking the heatsink.
Once a month, power down and unplug the fixture completely and let it cool for 15–20 minutes before touching it. Litelees recommends periodic maintenance like monthly power-down and cleaning steps to prevent dust buildup and protect LED thermal performance Once a month, power down and unplug the fixture completely and let it cool for 15–20 minutes before touching it.. Use compressed air to blow out dust from the heatsink fins, any fans, and around the driver. Don't use water on the fixture unless it's rated IP65 or higher, and even then, a damp cloth on the lens surface is safer than spraying. Dust on the lens can reduce output by 5–10% over time without you noticing.
For fixtures with active cooling fans, listen for changes. A fan that's getting louder or cycling on and off more frequently than it used to is a sign the heatsink is running hot, usually from dust buildup. Clean it immediately. Sustained high temperatures accelerate lumen depreciation and can cause driver failure well before the rated L70 lifespan.
LED drivers are the most failure-prone component in most fixtures. If your light flickers, won't dim correctly, or dims on its own without input, the driver is usually the problem. Many manufacturers sell replacement drivers and it's often cheaper to swap the driver than replace the whole fixture. Keep your purchase receipt and register your warranty if the brand offers it, because many warranty exclusions apply to dust buildup, improper mounting, and failure to follow operating instructions.
For COB-based fixtures specifically, thermal paste between the COB and the heatsink can dry out over several years. If you notice a significant drop in brightness in a COB fixture that's been running for 3+ years, reapplying thermal compound (after fully powering down and discharging) can sometimes restore performance. This is an advanced repair, but it's worth knowing about before you assume the whole fixture is dead.
Finally, keep a simple log. Write down your mounting height, dimmer setting, and schedule each time you change something. When growth looks off, you'll have a baseline to return to instead of guessing. It takes 30 seconds and saves hours of troubleshooting. Whether you're working from a brand-specific guide like those for the LBW, Lxyoug, Keelixin, Ezorkas, Ghodec, Yoyomax, or Leoter lines, or dialing in a custom setup, the principles are the same. If you are using an LBW grow light, the LBW grow light manual can also help you confirm safe settings for your model. Height, schedule, and intensity are the three levers. Adjust one at a time, observe for a week, then decide if you need to move another.
FAQ
Can I choose a grow light just by wattage and then follow the manual later?
Not in the long run. Wattage changes heat and power draw, but the plant-relevant control is canopy PPFD (and the DLI you deliver with your photoperiod). A 150W high-efficacy LED can outperform a 250W low-efficacy fixture if its PPFD at your hanging height is higher and more uniform.
What if I’m using a timer, but my photoperiod plants still won’t flower?
Add them up, then account for the time the tent is actually dark. Most timers switch whole outlets, but a separate controller, smart plug, or LED driver indicator can still leak light. Test your setup by turning lights off and checking for any visible LEDs through the vents, zippers, or gaps, then seal them.
How do I tell whether my light intensity is wrong if I do not own a PPFD meter?
Use the manufacturer’s specified hanging distance only as a starting point. If you do not have PPFD meter readings, make one change at a time (height or dimmer), then wait 5 to 7 days to judge new growth. With LEDs, “instant” symptoms often settle as pigments and leaf turgor adjust over several days.
How should I adjust the grow light manual settings when moving from clones to soil or hydro?
Run the same schedule, but reduce intensity earlier than you think if you see stress signs. For the first week after transplanting, use the upper end of your recommended distance range (less intense), then lower gradually. If you start too bright, you may bleach new growth and slow root establishment even if the timer is correct.
Can I keep the light on 24/7 and rely on dimming to prevent stress?
Yes, but only if the light is designed for it and the schedule matches the photoperiod needs. Many fixtures have dimming limits (for example, a driver that only supports down to 10% or below certain temperatures). If you dim, confirm your PPFD stays within the target range for seedlings, veg, or flower, not just “on-time.”
Does dimming a LED fixture affect flowering the same way as changing the schedule?
If the manual mentions a dimming method like 1-10V or a knob, follow it exactly, and do not exceed the controller’s signal requirements. Dimming changes PPFD, which means DLI changes too, so you may need to compensate by adjusting either height or photoperiod when you drop intensity.
How can I differentiate too much PPFD versus too much heat?
When lights are too close, the response is usually fast and localized, with upward curling, taco-shaped leaves, or bleached white patches on top growth. When lights are too far, the response tends to be stretching and longer internodes. Temperature stress can look similar to light stress, so check canopy temperature first.
Should I increase watering or nutrients when I see leaf damage from lights?
No. Heavy watering or extra nutrients can worsen light stress, especially if the real issue is PPFD being too high or the canopy is overheating. Instead, correct height or dimming, then keep feeding consistent and watch for recovery in new growth over 3 to 5 days.
My plants in the middle look fine, but outer plants are behind. What does that usually mean?
Yes, especially with tents and wide layouts. If you see center plants thriving but edges lagging, it usually means either the fixture is undersized for the footprint at your hanging height or you have poor uniformity from height or tilting. The fix is to center and keep level, rotate plants weekly, or add a second fixture.
Is it ever okay to hang an LED grow light closer than 6 inches?
Typically avoid going below 6 inches unless the manual explicitly allows it for your specific model and duty cycle. Even if plants “survive,” lenses and drivers can overheat, shortening LED and driver lifespan. If you need more intensity, raise canopy uniformity with better coverage or a higher-output fixture rather than extreme closeness.
How do I verify my timer is actually delivering the correct dark period?
Check your timer’s behavior at the switch point. Many mechanical timers drift, and some smart timers can miss schedules during power events. Use the simplest test: confirm lights are truly off for a full 12-hour darkness block every day, then verify there is no indicator light visible from outside the tent.
What should I write down to make troubleshooting faster later?
A maintenance log helps you pinpoint changes, especially when you have repeated symptoms. Track hanging height, dimmer %, schedule, and any fan/filter changes. Dust buildup is a common untracked variable, so add “cleaning date” to your log and repeat monthly cleaning if the environment is dusty.
If my manual gives PPFD targets, can I use them with my own readings from anywhere on the canopy?
Yes, but make sure you are measuring at canopy height and comparing like-for-like. PPFD values can vary across the coverage area, so a single measurement spot can mislead you. Measure at multiple points (center and corners) if possible, then adjust height or add fixtures for uniformity.
The fixture says L70 100,000 hours, so why did it fail early?
L70 ratings assume a specific operating temperature and conditions. If the heatsink runs hotter than expected due to dust, reduced airflow, or a closed tent, the driver can fail earlier even if the diodes remain within spec. That’s why cleaning and airflow checks matter as much as the paper rating.
If my LED has high CRI or a good CCT, does that mean it’s automatically strong enough for my plants?
For best results, do not rely on color appearance (CCT) to infer intensity. CCT and CRI affect perceived light quality, but they do not replace PPFD and DLI for growth. Use CCT/CRI to choose comfort or viewing needs, then dial intensity and photoperiod using the grow light manual guidance.
Next Article
Stationeers grow light IC code: identify and fix LED driver
Learn what the Stationeers grow light IC code means and use it to troubleshoot LED driver issues fast.