If you just pulled an LBW grow light out of the box and the included manual feels like it was written in a hurry, you are not alone. LBW makes several different LED grow light models, and the instructions vary quite a bit between them. This guide pulls everything together: how to figure out which unit you have, how to mount it correctly, and exactly how to set the timer so your plants get reliable light every day without you having to think about it.
LBW Grow Light Manual: Setup, Timer, Operation Guide

Marcus Tillman
6 Apr 2026
Quick ID: which LBW grow light do you have and what's in your box
Before you do anything else, find your model number. It is usually printed on a small sticker on the back or underside of the light head, or on the side of the box. LBW currently has several distinct models in circulation, and the timer buttons, dimming options, and coverage specs are different for each one. Getting this wrong means following the wrong button sequence, which is the number-one reason people end up frustrated in the first hour.
| Model | Timer Options | Dimming | Light Modes | Notes |
|---|---|---|---|---|
| 220503 | Cyclic on/off (multiple settings) | Yes | Full spectrum desk style | 10–26 inch adjustable height, '150W super bright' diodes |
| Tri-Head Full Spectrum | 3H / 6H / 12H (press timer button) | Not specified in manual | Tri-head lamp style | Three independent lamp heads on gooseneck arms |
| 230302 | 4H / 8H / 12H | 10 dimmable levels | 3 switch modes (one light, other light, both lights) | Two-panel or dual-head design |
| 230304 | 4H / 8H / 12H | 6 brightness levels | Standard | Controller UI similar to 230302 |
Once you have matched your model, check the box contents. You should have the light unit itself, a power adapter or cord, some form of mounting hardware (usually a clamp or a gooseneck base), and a small instruction sheet. Some units also include a hanging kit with wire rope and a carabiner clip. If anything is missing, contact the seller before you start mounting, because running a light with the wrong power supply can damage both the unit and your plants.
Not sure which brand or style you are even dealing with? A grow light manual comparison can help you cross-reference specs when your sticker is unreadable or missing entirely.
Safety and mounting: install correctly and keep it plant-safe
Mounting an LED grow light sounds simple, but a bad install is one of the most common reasons plants get burned or stunted in the first week. Here is how to do it right the first time.
Electrical safety first
- Always plug the light into a properly grounded outlet or a surge-protected power strip. Do not daisy-chain extension cords.
- Keep the driver or power brick off the floor if your growing area gets wet or humid. Set it on a shelf or zip-tie it to a rack.
- Never cover the driver or power supply with insulation, pots, or fabric. It needs airflow to dissipate heat.
- If the cord feels warm to the touch after an hour of use, unplug it and check for a loose connection or overloaded circuit.
Mounting height and angle
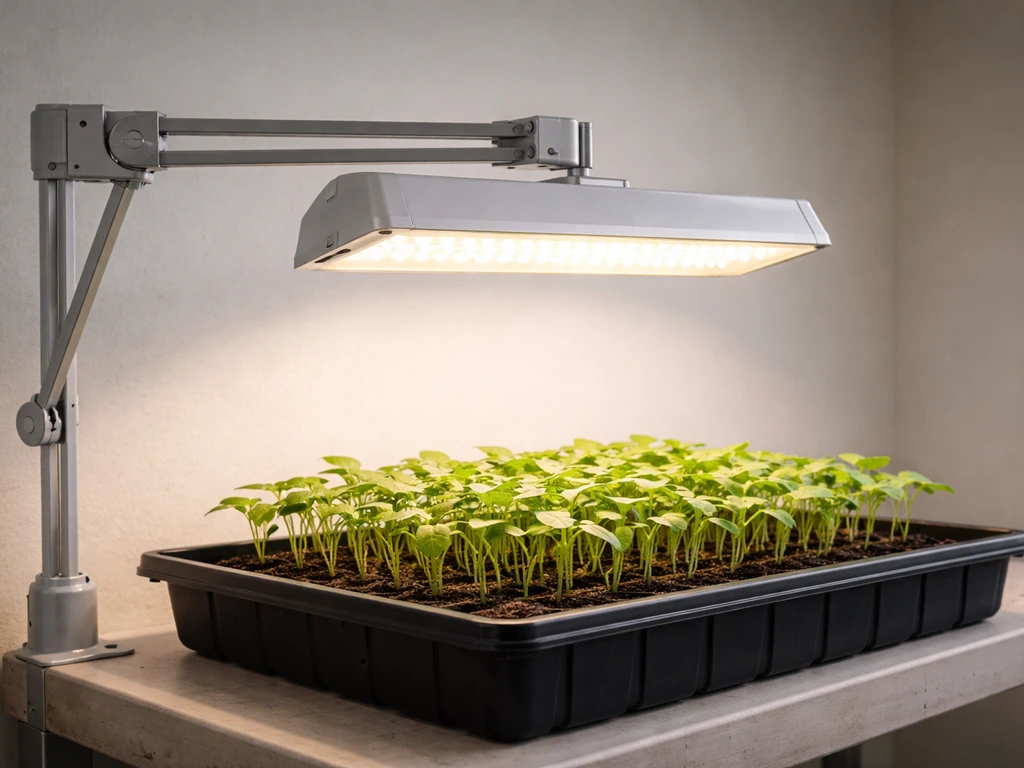
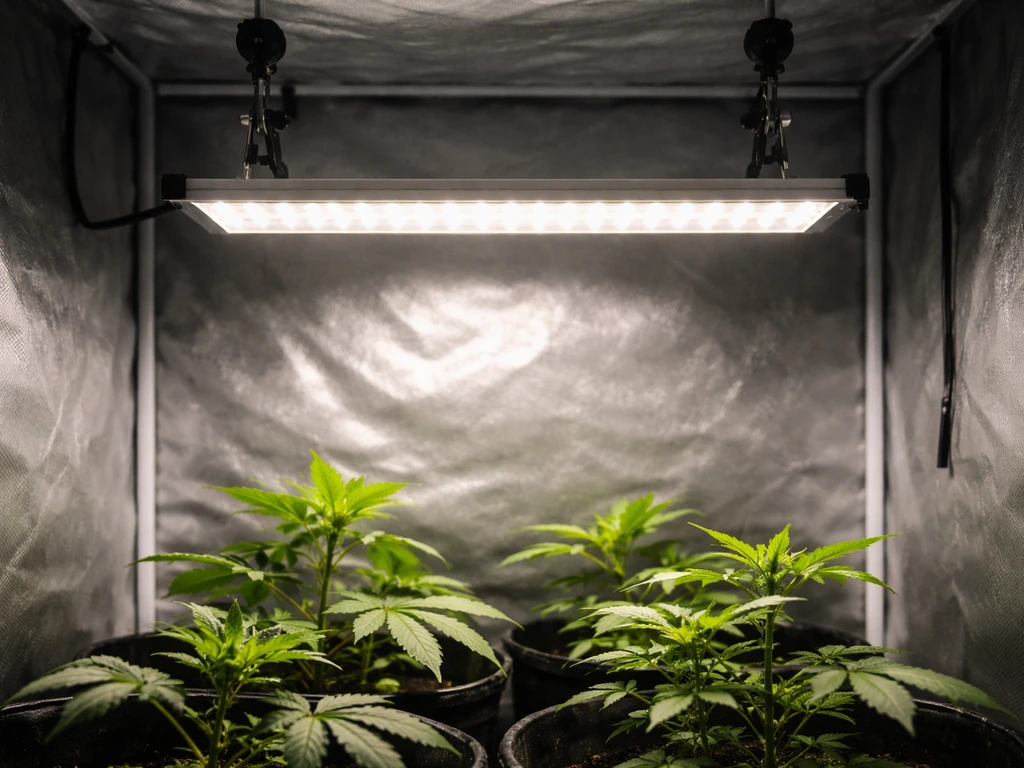
The Model 220503 specifies an adjustable height range of 10 to 26 inches above the plant canopy. That is your working window. For seedlings, start at the top of that range (around 24–26 inches) and work your way down only after the plants show healthy growth without any bleaching or curling. For houseplants that are already established, 18–22 inches is a reasonable starting point. The tri-head models give you more flexibility because you can angle each head independently, which is useful for uneven plant arrangements.
For panel-style models like the 230302 and 230304, aim for the light to be centered over your grow area. These panels spread light more evenly than a single point source, but if you offset the panel too far to one side, the plants on the edges will get noticeably less intensity. A good rule: the illuminated footprint should overlap your plant canopy by at least two inches on each side.
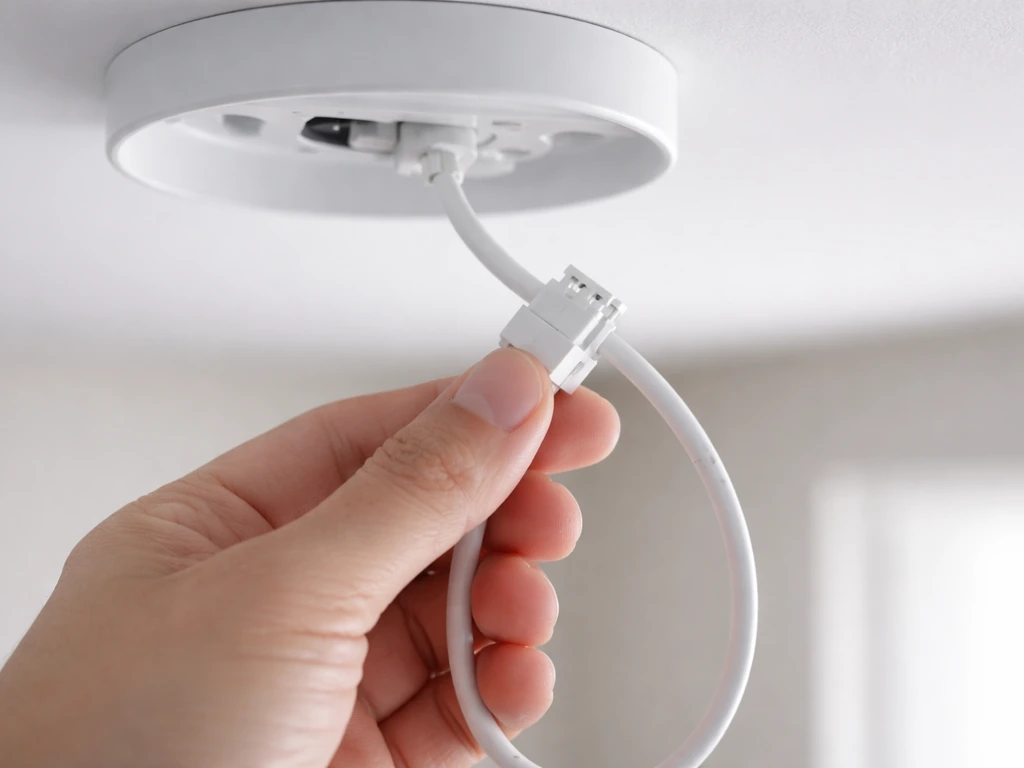
Clamp and hanging setup
Clamp-style bases (common on the desk and tri-head models) need a surface that is at least 1.5 inches thick to grip securely. Thin pot rims or lightweight shelving can flex under the weight and let the light shift overnight. If your surface is too thin, use a piece of scrap wood as a backing plate. For hanging panel models, the wire rope kit is rated for more than enough weight, but make sure you are anchoring into a joist, a tent pole, or a solid rack bar, not just into drywall.
Timer setup: step-by-step on/off scheduling

This is where most people get stuck. LBW lights use a cyclic timer, meaning you are not setting a specific clock time (like 7 AM on / 7 PM off). Instead, you are telling the light how many hours to stay on, after which it automatically turns off for the remainder of a 24-hour cycle. The moment you plug it in and activate the timer is your cycle start point, so the timing of your first plug-in matters.
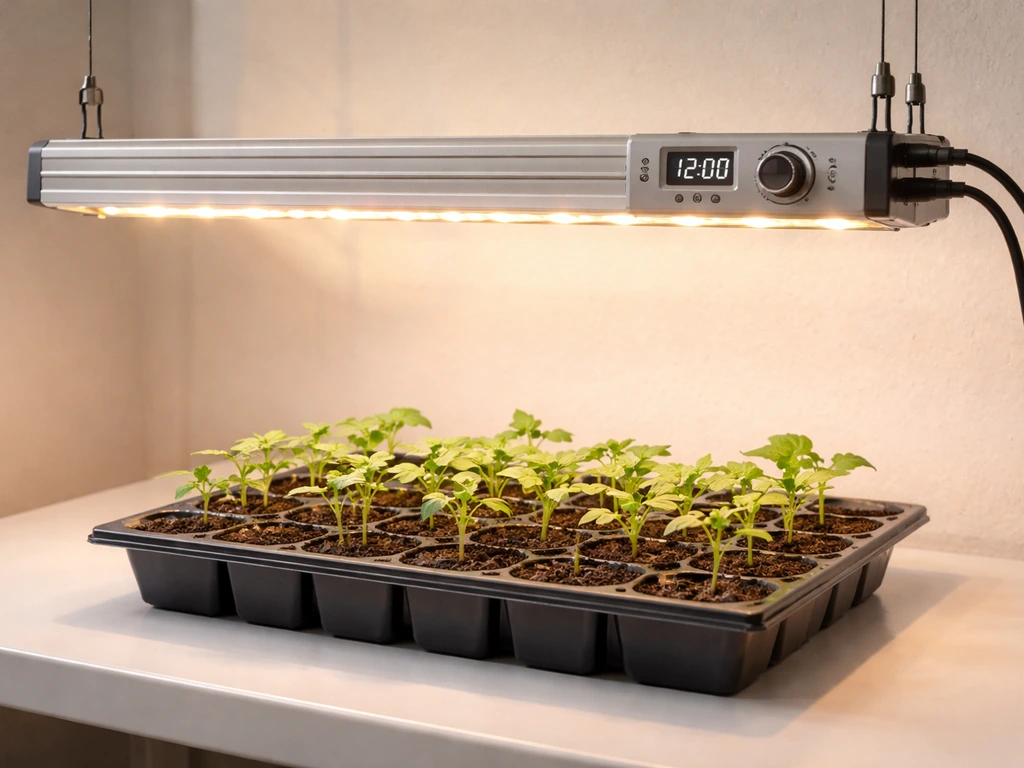
For the 230302 and 230304 models (4H / 8H / 12H timer)
- Plug the light into power. The light will come on in its default mode.
- Press the Timer button once. The display or indicator will show '4H' (4 hours on, then off until the next 24-hour cycle resets).
- Press the Timer button a second time to select '8H' (8 hours on).
- Press it a third time for '12H' (12 hours on). A fourth press cancels the timer and returns to always-on mode.
- Choose your setting and stop pressing. The timer is now active. The light will run for the selected number of hours, turn off, then repeat the same cycle every 24 hours automatically.
- Important: plug the light in at the time you want the ON period to begin. If you want your light running from 8 AM to 8 PM, plug it in and set the 12H timer at 8 AM.
For the Tri-Head model (3H / 6H / 12H timer)
- Plug in the unit and allow it to power on.
- Press the Timer button once for 3H, twice for 6H, or three times for 12H.
- The selected duration begins counting immediately from the moment you confirm your choice.
- As with the other models, the cycle repeats every 24 hours from that starting point.
For the Model 220503 (cyclic timer with multiple options)
The 220503 has a slightly more detailed cyclic timer with more than three options. Consult the folded insert that came with your unit for the exact cycle choices available. The same principle applies: the timer starts counting the moment you activate it, so plug in at your desired ON time. If the insert is missing, 12 hours on and 12 hours off is a reliable starting point for most plants while you get things dialed in.
Dimming while you are in there
If you have the 230302, you have 10 brightness levels to work with. For the 230302 specifically, its Circular Memory Timer can turn the light on and off on a 24-hour cycle at 4, 8, or 12 hour intervals. The 230304 gives you 6 levels. For seedlings, start at 40–50% brightness and raise it gradually over the first two weeks. For established houseplants, 60–70% is a solid starting point. Do not run at 100% right away, especially at close range, or you risk light stress before the plants have a chance to adapt.
Daily operation tips: using the light efficiently
Once the timer is set, most of what you do day-to-day is observation and minor adjustment. Here are the habits that make the biggest difference in practice.
- Check plant posture every morning. If leaves are reaching or leaning toward the light aggressively, the light is too far away or the intensity is too low. If leaf edges are curling upward or showing pale patches, the light is too close or too bright.
- Keep the lens clean. Dust buildup on the LED panel can reduce effective output by 10–15% over a few months. Wipe it gently with a dry microfiber cloth once a month.
- Do not move the light frequently. Every time you change the height or angle, you are resetting the light adaptation your plants have built up. Make one change at a time and give plants 3–5 days to respond.
- If you are using the 230302's three switch modes (one panel, other panel, or both), use the single-panel mode for small pots or narrow trays and both panels for wider coverage. Running both panels at medium brightness usually outperforms one panel at full brightness.
- Plants rest when the light is off. Resist the urge to run 18 or 20 hour cycles for extended periods with houseplants. Most houseplants do best with 12–16 hours of light per day, and seedlings typically benefit from 14–16 hours.
Honest performance review: what to expect and who it's best for
LBW grow lights sit firmly in the budget-to-midrange category. They are not replacing a commercial horticultural fixture, but for the price and the intended use case, they perform well when set up correctly. Here is a realistic picture of what you are working with.
Coverage and intensity
The panel models (230302, 230304) cover a 2x2 foot area reasonably well at 18–22 inches. Push beyond that footprint and you will notice the plants at the edges growing slower than those in the center. The tri-head model trades raw coverage for flexibility: each head targets a smaller area, but you can aim them independently at different pots. The desk-style 220503 is genuinely useful for single pots or small seedling trays, and the 10–26 inch height adjustment gives you real flexibility as plants grow.
Seedlings vs. houseplants
For seedlings, LBW lights work well when you follow the distance and dimming recommendations above. You will see germination and early growth that is on par with more expensive options as long as you keep the light close enough (12–16 inches once seedlings are a few days old) and run at least 14 hours per day. For houseplants, these lights are a practical solution for low-light situations: north-facing windowsills, interior rooms, or supplementing natural light in winter. They will not push flowering plants to bloom the way high-end horticultural LEDs might, but they keep foliage plants healthy and growing through the darker months.
If you are comparing LBW to other affordable brands in the same space, it is worth knowing how setup and performance stacks up across different options. For example, looking at how the lxyoug grow light handles timer setup and coverage can give you a useful benchmark, since it targets a similar audience and price point.
Who should buy one (and who should not)
| Use Case | LBW a Good Fit? | Notes |
|---|---|---|
| Houseplants in low-light rooms | Yes | 12H timer, 60–70% brightness, any model works |
| Starting seeds indoors | Yes | 14–16H cycle, 40–50% brightness, start at 20–24 inches |
| Growing herbs on a kitchen counter | Yes | Tri-head model is especially practical here |
| Fruiting vegetables (tomatoes, peppers) | Marginal | Coverage and intensity may fall short at flowering/fruiting stages |
| Large grow tents (4x4 or bigger) | No | Not enough coverage or intensity for this footprint |
| Professional or commercial growing | No | These are consumer/hobbyist lights |
For a sense of how other budget-friendly LED options compare when making a buying decision, the ezorkas grow light user manual and the ghodec grow light guide both cover similar form factors and are worth a look if you are still deciding.
Troubleshooting checklist for common timer and light issues
Something is not working right. Before you decide the light is defective, go through this list. Most problems have a simple fix.
Timer not following the schedule
- The timer resets if power is interrupted. If the outlet was switched off or there was a brief power outage, the timer starts over from zero when power returns. Plug into a dedicated outlet that stays on, or use a UPS (uninterruptible power supply) to prevent resets.
- You may have accidentally pressed the timer button a fourth time, which cancels the timer and returns to always-on. Press it again to reactivate.
- The cyclic timer counts from the moment you set it, not from a fixed clock time. If the light is turning on and off at the wrong time of day, unplug it and re-plug it at the time you want the ON cycle to start, then reset the timer immediately.
Light not turning on at all
- Check that the outlet is live. Plug in a phone charger or lamp to confirm power.
- Inspect the connection between the driver and the light head. On some models this is a barrel connector that can work loose during shipping.
- If the power indicator light is on but the LEDs are not illuminating, try pressing the power button once. Some models default to standby when first plugged in.
- Check that you have not put the light into a timer OFF window. If you set an 8H cycle and plug in during what is now the off period, it will appear dead. Unplug and re-plug at a fresh start time.
Flickering or partial illumination
- Flickering at startup is normal for the first few seconds on some LED drivers. If it persists beyond 30 seconds, unplug and inspect the cord and connector for damage.
- On the 230302, if only one panel is lighting up, check that you have not accidentally selected single-panel mode. Press the mode button to cycle through to both-panels mode.
- If individual LEDs are dark within the array, that is a hardware defect. Document it with a photo and contact the seller for a replacement under warranty.
Plants not responding after two weeks
- Measure your actual light distance. It is easy to set the height once and not check it again as seedlings grow. A light that started at 20 inches can end up at 8 inches once seedlings push up, causing light stress.
- Verify your timer is actually cycling. Check on the light at a time it should be off to confirm it is not running 24 hours.
- If plants are yellowing, rule out overwatering first. Grow lights do not cause yellowing directly, but they can accelerate heat stress if the light is too close and the room is warm.
Some issues are trickier to diagnose and come down to automation quirks. If you are interested in more advanced timer and control setups for grow lights, the stationeers grow light IC code guide covers programmable control logic that goes well beyond what a simple cyclic timer offers, which can be useful if you outgrow the built-in timer down the line.
Your dial-in plan: first-week schedule, distance, and adjustments
Here is the concrete plan to follow from day one. Do not overthink it. Start conservative, observe, and adjust. That is the entire process.
Day 1: setup and first run
- Mount the light at 20–24 inches above the plant canopy (or the top of your seedling tray).
- Set brightness to 50% if your model has dimming. If it does not, you rely entirely on distance to manage intensity.
- Plug in at the time you want the light to come on each day.
- Set the timer to 12H for houseplants or 14H for seedlings (use the 12H setting and supplement with 2 hours of natural light if available, or run 12H and observe).
- Take a photo of your plants at this point as a baseline.
Days 2 through 4: observe and do not change anything
Check the plants in the morning and evening. Look for leaf posture changes, color shifts, and any signs of stretching (etiolation) or burning. Seedlings that are stretching toward the light need the light closer or brighter. Leaves curling under or developing pale spots need the light farther away or dimmed. Make a note of what you observe but resist the urge to change two things at once.
Day 5: first adjustment if needed
Based on your observations, make one change: either adjust height by 2–4 inches or adjust brightness by one level. Do not change both at the same time. If your seedlings are stretching noticeably and you are already at 50% brightness, drop the height to 16–18 inches before increasing brightness. Height adjustments are easier to reverse than brightness changes if things go wrong.
End of week one: evaluate
By day 7, compare your plants to the baseline photo. Healthy seedlings under proper light should have doubled in size (cotyledons fully open, first true leaves emerging). Houseplants should show no yellowing or bleaching, and any new growth should be compact and green rather than pale and elongated. If growth looks good, hold your current settings for another week before making further changes. If something is off, refer back to the troubleshooting checklist above and make one targeted adjustment.
Other budget LED brands use similar cyclic timer logic and the same basic dial-in approach. If you have a friend using a different brand and want to compare notes, setups like the keelixin grow light, the yoyomax grow light, or the leoter grow light all follow the same general principles covered here, making it easy to cross-reference what is working across different setups.
Stick with the plan for two weeks before drawing any conclusions about the light itself. Most grow light disappointments come from skipping the dial-in phase, not from a bad product. Give your plants time to adjust, give yourself time to learn the hardware, and you will get reliable, useful results from your LBW light.
FAQ
If the timer is cyclic (hours-on), can I still run my lights at a specific clock time like 7 AM to 7 PM?
Most LBW cyclic timer lights use “hours on” rather than an exact clock schedule. So if your timer resets or you unplug it, the cycle start point changes, which can shift your effective photoperiod by a day. To keep it stable, plug it in at the same time each day, avoid frequent re-plugging, and if you must reset, change the timer only after the new plug-in moment is the one you want as your start.
What should I adjust first if my seedlings are bleaching or curling but the light is already at the recommended height?
If your plants look “too bright” quickly but you also cannot lower the fixture enough, use dimming first. Lowering brightness reduces the risk of immediate light stress at close range, while dropping height too far can worsen uneven hotspots on panel edges or on the hottest LED area. As a safe start, go to the lower brightness setting and then re-check leaf color after 24 to 48 hours before moving the light again.
How do I know whether the issue is height vs. the light being off-center on the canopy?
Place the light so the closest edge of the illuminated footprint covers your canopy, not the pot rim. If you see edge plants growing slower, it usually means the panel or head is offset too far from the plant bed. Re-center the light or raise it slightly (a small change) and retest, since height changes affect spread more predictably than rotating the fixture after plants have already adjusted.
My LBW grow light seems to flicker or behave oddly. Could the power adapter be the problem?
A cheap power adapter mismatch is a common cause of odd behavior, including timers not counting correctly or brightness switching inconsistently. Verify the adapter rating printed on your unit or sticker (voltage and output specs) matches what you are using, and only use the included cord or an equivalent that matches the label. If the light runs only when wiggled, stop using it and inspect the connector fully.
What’s the best way to prevent the fixture from slowly drifting after I mount it?
If you have a clamp base, secure it to a surface that cannot flex, since shifting by even 1 to 2 inches can create hotspots and uneven growth. For shelves, add a backing plate as described, tighten the clamp firmly, and check stability after the first 24 hours. Also keep cables from tugging on the fixture, because cable tension can gradually loosen mounting over time.
I keep changing settings daily. How can I fine-tune without overcorrecting?
For LED fixtures with adjustable height, a “one change at a time” rule matters more than exact perfection. Use a minimum step method: adjust height by 2 to 4 inches or change brightness by one level, then observe for about a day before making the next change. This prevents you from chasing your plants’ response lag, which is why many first-time setups look chaotic around week one.
Should I ever run at 100% brightness, and if so, when?
If your model uses multiple brightness levels, dimming is a useful way to reduce light stress during the initial adjustment period or during hotter room conditions. Start at a moderate level for the first week, then move gradually upward only if plants are stretching or staying too pale. Avoid staying at very high brightness long-term if you notice leaf tips bleaching or curling.
Can I increase the timer hours beyond the recommended range to speed up growth?
Many people assume more hours always equals better growth, but for most houseplants and seedlings you want a consistent photoperiod and you should not exceed the target you are using for your crop. If you extend the “hours on” setting, do it gradually and watch for slower growth, pale leaves, or signs of stress that appear after a few days rather than immediately.
What’s the simplest way to track progress so I can tell if the light settings are working?
During the first week, treat observation as data collection. Check morning and evening posture, then take a quick photo from the same angle each time so you can compare color and stretching accurately. If you cannot keep the fixture consistent, move things back to the baseline and let the plants stabilize before judging whether the light itself is underperforming.
I have more plants than the recommended coverage. Should I push the light farther out or add another fixture?
If your LBW light is for a small area like seedlings trays, the desk-style or tri-head setup often performs better than trying to stretch a larger panel footprint. Over-sizing the plant area relative to the fixture usually shows up as slower growth at the edges rather than total failure. If you need wider coverage than your model supports, either adjust the layout (place plants within the footprint) or add a second fixture rather than pushing one unit far outside its intended span.
Next Article
Innova Grow Light Instructions: Setup, Use, and Troubleshooting
Step-by-step Innova LED grow light instructions: setup, mounting, distance, schedules, intensity, and fast troubleshooti