Setting up an Ezorkas grow light is pretty straightforward once you know what each button does and how the timer actually works. The short answer: plug it in, press the power button, choose your spectrum and brightness, then press the timer button once (or multiple times) to set your preferred on/off cycle. Keep the adapter plugged in at all times so the timer can repeat automatically each day. Everything below goes step by step so you can get this running correctly today, whether you just pulled it out of the box or you're trying to figure out why the timer isn't behaving.
ezorkas Grow Light User Manual and Timer Setup Guide

Marcus Tillman
14 Apr 2026
What's in the box and what you actually need
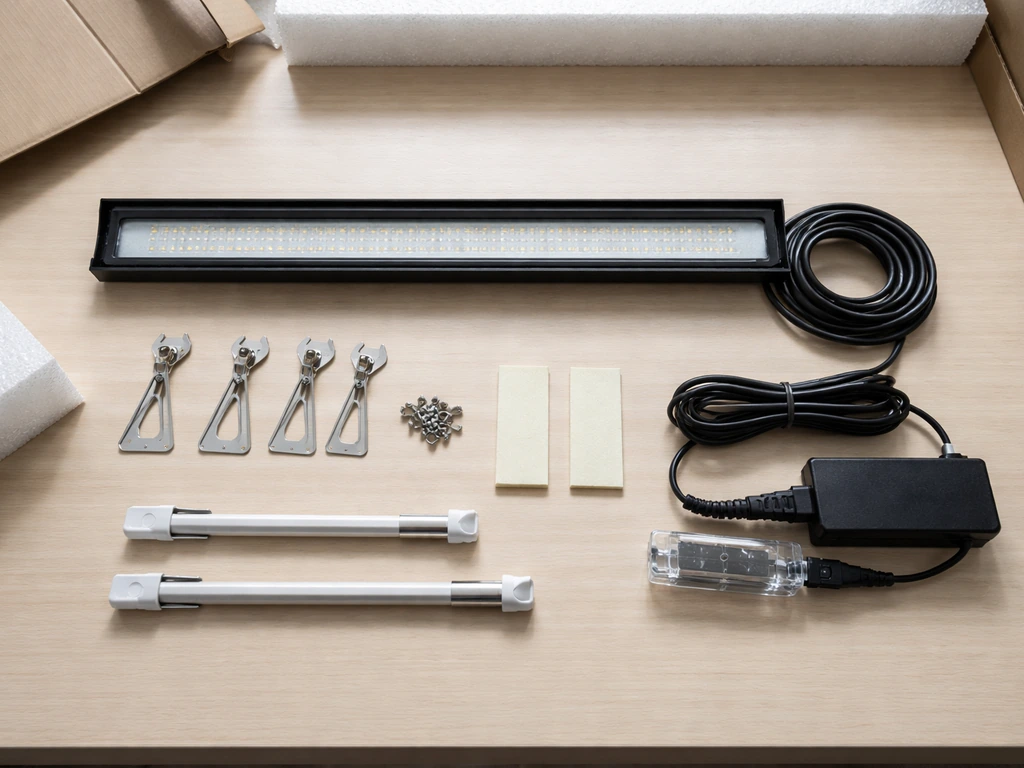
Ezorkas ships a few different light configurations, so what's in your box depends slightly on which model you ordered. Most panel and bar-style variants include: 1 LED grow light, 1 UL-listed power adapter, 4 screws, 2 pieces of foam tape, 6 cable zip ties, and 1 user manual. Walmart has a “Ezorkas grow light manual” search results page, which suggests there are multiple manual variants or listings available online for different models user manual. The tripod/stand version ships with the tripod grow light with controller, a power adapter, and a user manual. No matter which version you have, the adapter is non-negotiable. It should be a standard 5V/3A unit. If yours is missing or damaged, replace it with exactly that spec. Using the wrong adapter is one of the fastest ways to fry the lamp, and the manual is direct about it: the wrong adapter will easily damage the light.
Beyond the box, you'll need a stable surface or mounting point and access to a standard outlet. Have your zip ties handy if you're running the cable along a shelf or grow tent pole, they make a real difference in keeping things tidy and preventing accidental tugs on the connection.
Assembling and mounting the Ezorkas grow light
For the tripod/stand version
- Open the tripod stand and spread the legs fully until it sits stable on a flat surface.
- Rotate the central column counterclockwise (anticlockwise) to loosen it so you can raise or lower the pole.
- Adjust the stand height to match your plant shelf or grow area, then tighten the column by reversing the rotation.
- Adjust the light tubes (the gooseneck arms or clip heads) so they point directly down at your plants. Angle them slightly inward if you're covering a wider tray.
The tripod base is stable for most tabletop setups, but if you have pets or young children nearby, tuck the legs against a wall or use a plant pot to brace one leg. It's not the most robust stand in the world, but for casual indoor use it holds fine.
For panel and bar-style versions
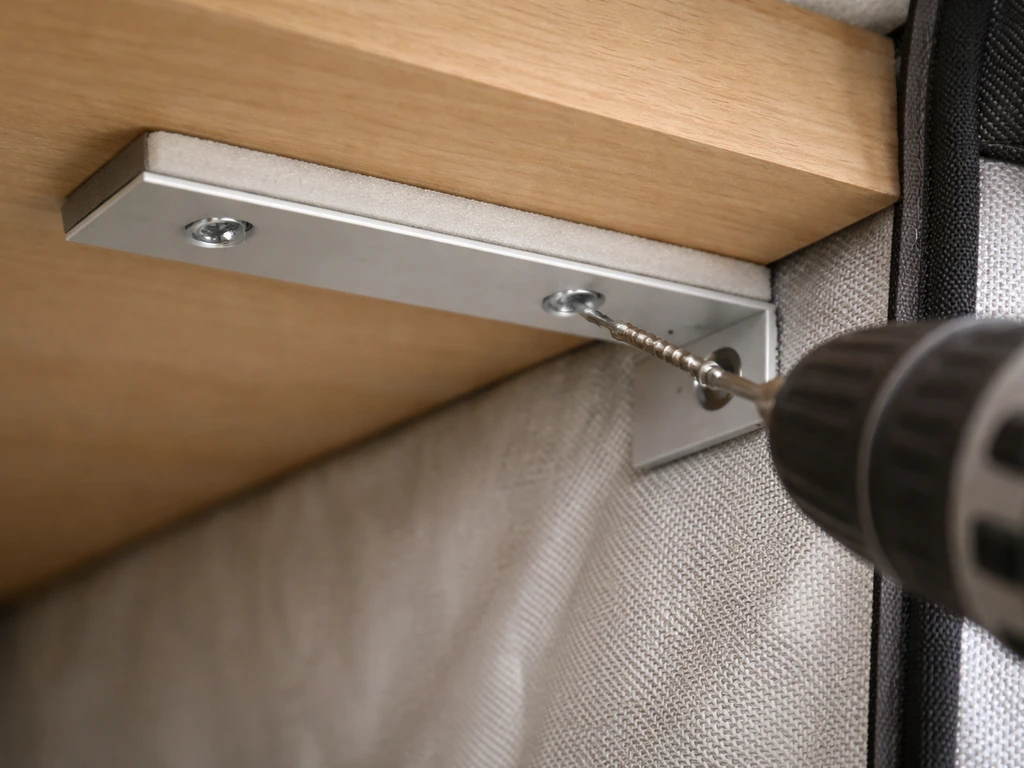
The included screws and foam tape give you two mounting options. If you want a permanent mount, use the screws through the bracket holes into a wooden shelf underside or grow tent crossbar. If you'd rather avoid drilling, peel the foam tape and press it firmly against a clean, flat surface. The foam tape hold is surprisingly solid on smooth shelves but won't work well on rough or textured surfaces. Use the zip ties to run the power cable cleanly along any poles or wires, keeping it away from water sources.
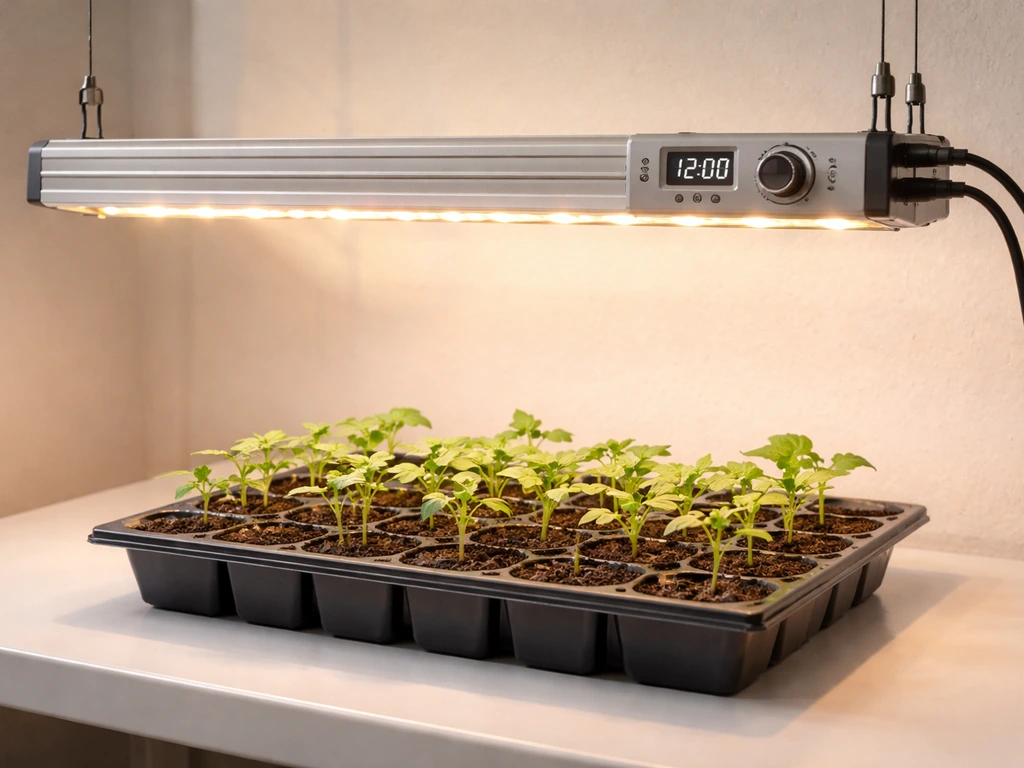
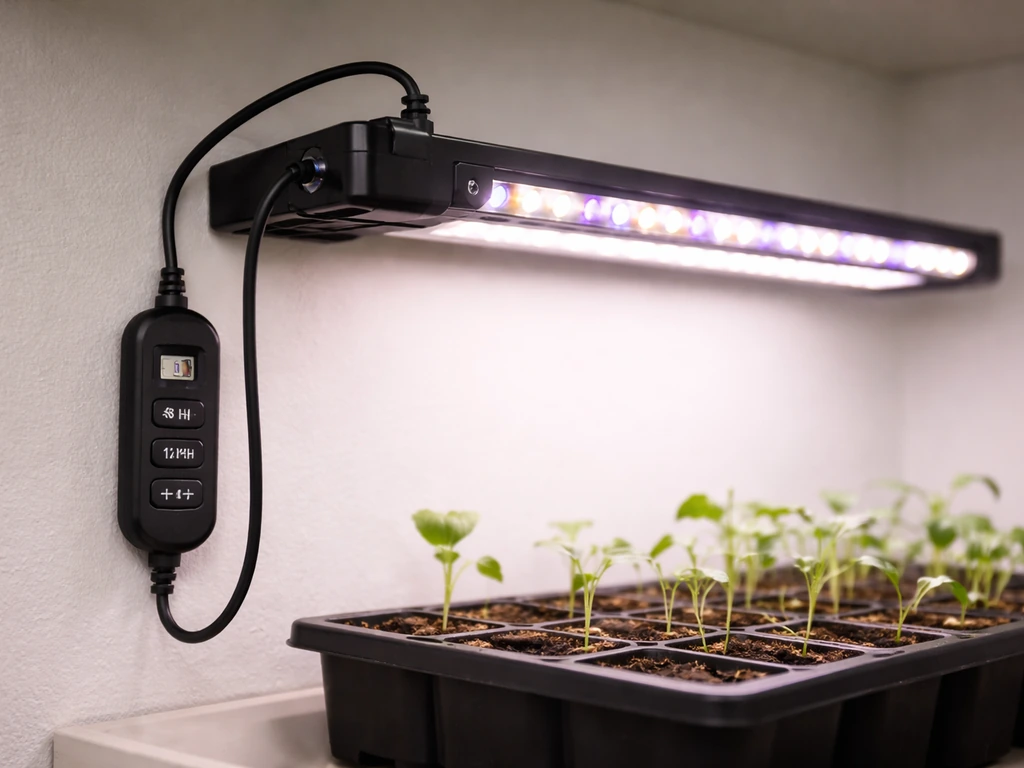
Powering on and understanding the controls
Once it's mounted, plug the adapter into a wall outlet. On most Ezorkas models you'll find a controller unit either built into the cord or attached to the light head. The main controls you'll use are a power button, a spectrum/mode switch, a dimming function, and a timer button. Here's what each one does.
| Control | What It Does | Options |
|---|---|---|
| Power Button | Turns the light on and off | On / Off |
| Spectrum / Switch Mode | Changes the light color output | Red & warm white / Blue / Full spectrum (3 modes) |
| Dimming | Adjusts brightness intensity | 9 to 10 levels: 20%, 30%, 40%, 50%, 60%, 70%, 80%, 90%, 100% |
| Timer Button | Sets automatic on/off cycle | 3H, 9H, or 12H (some models: 4H, 8H, 12H) |
Press the power button first to turn the light on. Then press the spectrum button to cycle through the three available light modes and land on the one that suits your plants right now (more on that below). Use the dimming button to step up or down through brightness levels. The controller works sequentially, each press moves you one step, so hold it and let it cycle rather than rapid-tapping. Once you're happy with the spectrum and brightness, move on to the timer.
Setting the timer and scheduling your light cycle
The timer is where most people get confused, so let's be precise. After you turn the light on, press the timer button. Each press cycles through the available time options. On full-spectrum bar models the options are 3H, 9H, and 12H. On the tripod controller model, the options are 4H, 8H, and 12H. In the controller instructions for the tripod model, the timer settings are listed as 4H, 8H, and 12H timer model, the options are 4H, 8H, and 12H. Stop pressing when you hit the duration you want. The timer indicator light on the controller will stay lit to confirm the timer is active.
Here's what actually happens after you set it: the light stays on for your chosen duration, then switches off automatically for the complementary rest period, then turns back on again at the same time the following day. The cycles look like this:
| Timer Setting | Light ON Duration | Light OFF Duration | Repeats Daily? |
|---|---|---|---|
| 3H | 3 hours | 21 hours | Yes, if power stays connected |
| 9H | 9 hours | 15 hours | Yes, if power stays connected |
| 12H | 12 hours | 12 hours | Yes, if power stays connected |
The key phrase is 'if power stays connected.' The Ezorkas timer does not have internal memory. If the power is cut during a cycle, the timer resets and you have to set it again from scratch. This is the single biggest gotcha with these lights. Do not plug this into a smart outlet or surge strip that cuts power when idle, and don't unplug the adapter between sessions unless you want to manually re-set the schedule every time.
Common timer setup mistakes
- Setting the timer before pressing power: the timer button usually won't register unless the light is already on. Turn it on first, then set the timer.
- Unplugging the adapter at night thinking you're saving energy: this resets the timer completely, so you lose your schedule.
- Expecting the timer to work through a smart plug that cuts power: same problem as unplugging. If you want smart plug control, skip the built-in timer and use the smart plug's schedule instead.
- Rapid-pressing the timer button and overshooting your target: press slowly and watch the indicator. One press, pause, confirm.
- Not confirming the timer indicator is lit: if the indicator light is off, the timer didn't register. Press again.
One thing I've seen trip people up that isn't in any manual: some Ezorkas-style lights require you to physically interact with the light (press power) before a scheduled timer cycle triggers correctly. If you notice your light isn't turning on at the expected time after a power interruption, it almost certainly needs a manual power-on press to re-initiate the cycle. Set it fresh and let it run uninterrupted.
Light distance and daily runtime for different plants
The two official distance references in Ezorkas manuals are 20 to 30 cm (roughly 8 to 12 inches) for the full-spectrum bar models, and a similar 6 to 12 inch range restated elsewhere. These are solid starting numbers. The key is that closer means more intense light, which is good for seedlings and succulents but can cause leaf scorch if you go too tight for too long.
| Plant Type / Stage | Recommended Distance | Daily Runtime | Spectrum Mode |
|---|---|---|---|
| Seedlings (first 2–4 weeks) | 10–12 inches (25–30 cm) | 14–16 hours | Full spectrum or blue-dominant |
| Leafy houseplants | 8–12 inches (20–30 cm) | 10–12 hours | Full spectrum |
| Succulents and cacti | 6–10 inches (15–25 cm) | 12 hours | Full spectrum or warm red |
| Flowering / fruiting plants | 8–12 inches (20–30 cm) | 12–16 hours | Full spectrum or red-dominant |
| Low-light tropicals | 12–16 inches (30–40 cm) | 8–10 hours | Full spectrum |
One thing the manual is correct and firm about: do not leave the light on all day, every day. Plants need a dark period to rest, just like they would get outdoors at night. The 12H timer setting is a good default for most setups because it mimics a natural photoperiod. If you're pushing for fast seedling growth, bump to the 16-hour range using a smart plug schedule, since the built-in timer only goes to 12H.
If your plants are stretching toward the light with long, thin stems (etiolation), the light is either too far away or running too few hours. Move it 2 inches closer first, then add an hour or two to your daily schedule before making bigger changes. If you see yellowing or bleaching at the top leaves closest to the light, you're too close. Raise the light 2 to 3 inches and reassess after 3 to 4 days.
When things go wrong: quick troubleshooting fixes
Light won't turn on at all
- Check the adapter connection at both ends: the wall outlet and the light's input port. A loose plug at the light end is the most common cause.
- Confirm the outlet works by plugging in something else. If the outlet is on a switched strip, make sure the strip is on.
- Verify you're using a 5V/3A adapter. If someone swapped it for a different charger, that may have already damaged the light.
- If the adapter feels unusually hot or smells burnt, stop using it and replace it before troubleshooting further.
Timer isn't repeating or the schedule is off
- Power was cut mid-cycle: reset the timer from scratch. Turn the light on manually, then press the timer button to your preferred setting.
- You set the timer before turning the light on: turn on the light first, then set the timer.
- The light came back on at the wrong time: this happens when power was briefly interrupted. The timer counts from the moment you set it, not from a fixed clock time. Reset at the time of day you actually want the cycle to start.
- Timer indicator light is off: the timer wasn't accepted. Press once, wait, confirm the indicator stays lit.
Light is flickering or dimming unexpectedly
- Loose adapter connection: unplug and reconnect firmly at both ends.
- Overheating: the manual warns against using the light near other heat sources or in direct sunlight. Move it to a cooler, well-ventilated spot.
- Wrong adapter voltage: if someone replaced the adapter with a non-5V/3A unit, inconsistent power delivery causes flicker. Replace the adapter.
- Check that the light isn't touching leaves, tent fabric, or other objects that could trap heat around the fixture.
Plants aren't responding (weak growth, pale color)
- Distance is too great: move the light within the 6–12 inch (15–30 cm) recommended range.
- Brightness is too low: check your dimming setting and increase toward 80–100% for most plants.
- Runtime is too short: bump your timer from 9H to 12H if you're running the shorter cycle.
- Wrong spectrum: blue light is better for leafy/vegetative growth; red and warm white promotes flowering. Use full spectrum if unsure.
One important safety note that applies throughout: never spray water directly on the lamp, and don't water plants with the light positioned right above them in a way that mist or splashes hit the fixture. This unit is not waterproof, and water contact can cause electrical damage or failure. Also avoid looking directly at the LEDs when they're running, especially on full brightness. The blue and full-spectrum modes are genuinely uncomfortable and can cause eye strain with prolonged direct viewing.
What it's actually like to use the Ezorkas grow light
Let's be honest about what these lights are and aren't. The Ezorkas is a budget-friendly, entry-level grow light that punches reasonably well for the price. The full spectrum output is legitimate, the dimming and spectrum controls are handy for adjusting to different plant types, and the included hardware (screws, foam tape, zip ties) shows someone actually thought about the installation experience. For seedling trays, small herb gardens, and houseplants on a north-facing shelf, it genuinely works.
The limitations are real though. The built-in timer is functional but basic: three or four preset options with no custom programming and no battery backup. If power hiccups, you're resetting. If you want anything more nuanced than 3H, 9H, or 12H cycles, you need a separate outlet timer. The dimming is stepwise, not smooth, so dialing in a very specific intensity takes a little patience. And the tripod stand, while convenient, isn't going to handle any real bumping around.
If you're comparing notes with setups from other popular budget brands, the control patterns you'll find in resources like the grow light manual general guide are very similar to what Ezorkas uses, which makes cross-referencing helpful. You'll also find that brands like Ghodec and Yoyomax use almost identical timer logic (preset cycles, no internal clock), which confirms this is a category-wide design choice rather than an Ezorkas-specific limitation.
For seedlings especially, the Ezorkas does what it promises at the 12-inch distance. I've seen good germination results using full spectrum at 80% brightness on a 12H cycle, positioned about 10 inches above the tray. The heat output is low enough that you're unlikely to cook anything unless you're placing it 2 inches above delicate seedlings on 100% brightness. For mature houseplants, full spectrum at 70% on a 10H timer works well and doesn't cause the bleaching you'd sometimes see with more powerful lights at close range.
Where it falls short is for high-demand fruiting plants like tomatoes or peppers at the fruiting stage. For those, you'd want a higher-output light and likely more deliberate scheduling control than the built-in timer provides. For herbs, leafy greens, tropical houseplants, and seedling starts, though, it's a genuinely solid value.
Getting the most out of your setup going forward
Once your Ezorkas is running correctly, the main ongoing task is checking plant response every three to four days for the first two weeks. Look at the newest leaf growth: is it a healthy green and normal size, or is it pale, small, or stretched? That tells you whether your distance and runtime are dialed in. Make one adjustment at a time so you know what actually made the difference.
If you want to expand your setup or compare how this light's timer and control system stacks up against similar products, the Lxyoug grow light manual and the Keelixin grow light manual cover nearly identical control interfaces, so the skills you build here transfer directly. If you're running a more automated or tech-forward grow setup, it's also worth knowing that some growers use more advanced scheduling tools entirely, like the kind of controller logic described in resources covering grow light IC code for automated systems, though that's well beyond what the Ezorkas hardware supports on its own.
For anyone adding a second light or scaling up, the LBW grow light manual covers a similar budget bracket and shares the same timer-reset-on-power-loss behavior, which is worth knowing before you wire multiple lights into one circuit. And if you're running a timer-focused setup where controlling your on/off schedule precisely is the priority, the Leoter grow light manual walks through a controller interface that gives a little more scheduling flexibility than the standard Ezorkas preset buttons.
The bottom line: the Ezorkas grow light is a capable, no-frills option that works well when you keep the adapter plugged in continuously, set your timer after powering on, and position the light within the 6 to 12 inch sweet spot. Treat the timer reset-on-power-loss as a design constraint to work around rather than a flaw, and this light will reliably serve most indoor plant setups without drama.
FAQ
Why won’t my Ezorkas light turn on during the scheduled time?
Check that the adapter stayed continuously plugged in (the timer has no memory). Also note that some units require you to press the power button once after any outage before the next scheduled cycle will reliably trigger.
Can I use a smart plug with the Ezorkas grow light timer?
It’s not recommended if the smart plug cuts power when “idle.” Because the timer resets on any power loss, the schedule can fail. If you must use a smart plug, leave it supplying power 24/7 and let the Ezorkas controller do the on/off.
What happens if there’s a power outage or flicker mid-cycle?
The cycle will reset. When power returns you will likely need to manually press the power button again, then re-set the Ezorkas timer duration so the next cycle lines up with your intended schedule.
How do I know the timer is actually active?
Look for the timer indicator light on the controller. It should remain lit after you stop on the desired duration, confirming the unit will continue repeating daily.
I tapped the timer button a bunch, did I pick the wrong duration?
Yes. Each press advances to the next preset, so rapid tapping can land you on a different cycle than you intended. Stop pressing exactly when the indicator corresponds to the duration you want.
My unit has multiple spectrum modes, which should I choose for seedlings vs. mature plants?
Start by using full-spectrum for general growth, then adjust brightness and distance first. If you’re seeing stress near the top leaves (paling or bleaching), reduce brightness or increase height before switching modes, since distance and intensity usually drive the problem faster than the mode.
Can I set a custom schedule longer than the built-in timer allows?
No, the built-in options are preset durations (commonly up to 12 hours). For anything beyond that, use an external outlet timer to create the longer photoperiod pattern you want.
How far should I mount it, and what if I already mounted it too low?
Use the manual’s distance guidance (roughly 6 to 12 inches depending on model). If you mounted too close and notice bleaching on the newest top leaves, raise the light by 2 to 3 inches and wait 3 to 4 days before further changes.
Is it safe to clean with water or spray around the plants when the light is on?
Do not spray water directly on the lamp. Positioning and watering should avoid mist or splashes reaching the fixture, since the unit is not waterproof and water contact can cause electrical damage.
Can I look at the LEDs while it’s running?
It’s better to avoid direct viewing, especially at full brightness and in blue or full-spectrum modes. Prolonged direct looking can cause discomfort and eye strain.
What adapter should I buy if I need a replacement?
Use the same spec the manual calls out, a standard 5V/3A adapter. Using a different voltage or current rating is a common cause of failure, and it can permanently damage the LEDs.
I’m adding a second light, can I plug both into one power strip or surge strip?
Avoid setups that cut power intermittently (some surge strips “idle off” or switch off when they think load is gone). Use a stable outlet source so each light’s controller sees uninterrupted power, or plan on setting each light’s timer independently.
Next Article
LBW Grow Light Manual: Setup, Timer, Operation Guide
Step-by-step LBW LED grow light manual: setup, timer instructions, daily use, troubleshooting, and honest review guidanc