If you searched 'Stationeers grow light IC code,' you are almost certainly looking for how to identify the controller IC or driver configuration code printed on your LED grow light's driver label, not anything related to the video game Stationeers. This article is about real grow lights for real plants, so let's get straight to it: the IC code on your grow light's driver is a short identifier (sometimes a model number, firmware version, or configuration string) that tells you exactly what dimming method the driver supports, what voltage and current ranges it operates at, and which replacement or controller hardware is electrically compatible. Find it, record it, and you can diagnose almost any problem your light is having.
Stationeers grow light IC code: identify and fix LED driver

Marcus Tillman
13 May 2026
What 'IC code' actually means on a grow light
On an LED grow light, the IC (integrated circuit) code refers to the specific controller chip or driver configuration that manages how electrical current is regulated and delivered to the LEDs. Think of it as the brain of the driver. It determines how the driver interprets a dimming signal, how it converts that signal into a regulated output current, and what safety thresholds (like over-temperature or over-current cutoff) are baked in. Some drivers, like those in the eldoLED SOLOdrive family, even store programmable dimming curves in non-volatile memory, meaning the IC code essentially includes a named dimming behavior such as linear, logarithmic, or soft-square. For example, eldoLED’s SOLOdrive product line supports programmable dimming curves and modes, so the driver itself defines how the dimming input maps to the regulated output eldoLED SOLOdrive product line explicitly supports programmable dimming curves. The practical upshot: two drivers that look identical on the outside may behave completely differently because they carry different IC configurations.
For home growers using budget LED panels from brands like the ones covered in grow light manuals across this site, the IC code is usually a simpler model or batch code on the driver label rather than a full programmable firmware version. But the principle is the same: it tells you what inputs the driver accepts, what outputs it produces, and what you can and cannot attach to it. Getting this code right before you buy a replacement driver or a new dimmer controller can save you from a frustrating and potentially dangerous mismatch.
Where to find the IC code on your grow light
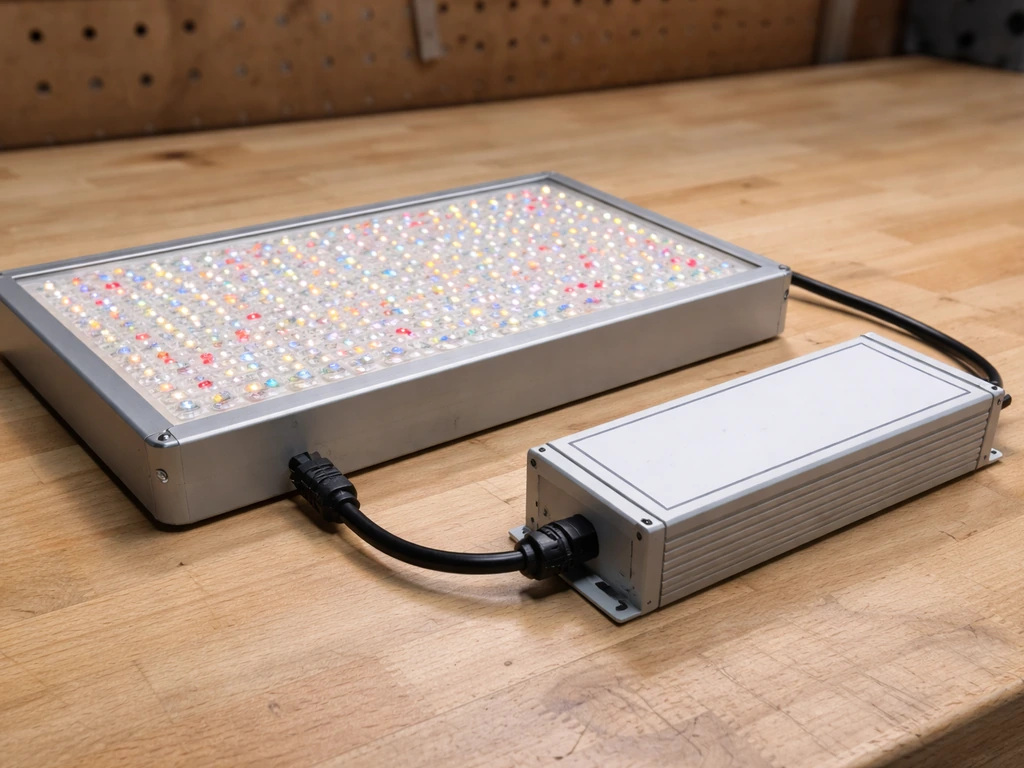
The driver is usually a separate rectangular metal or plastic box either built into the fixture housing or hanging externally via a cable. Start there. Look at every flat surface on the driver for a printed or adhesive label. On most LED drivers, the IC or configuration code appears in one of these places:
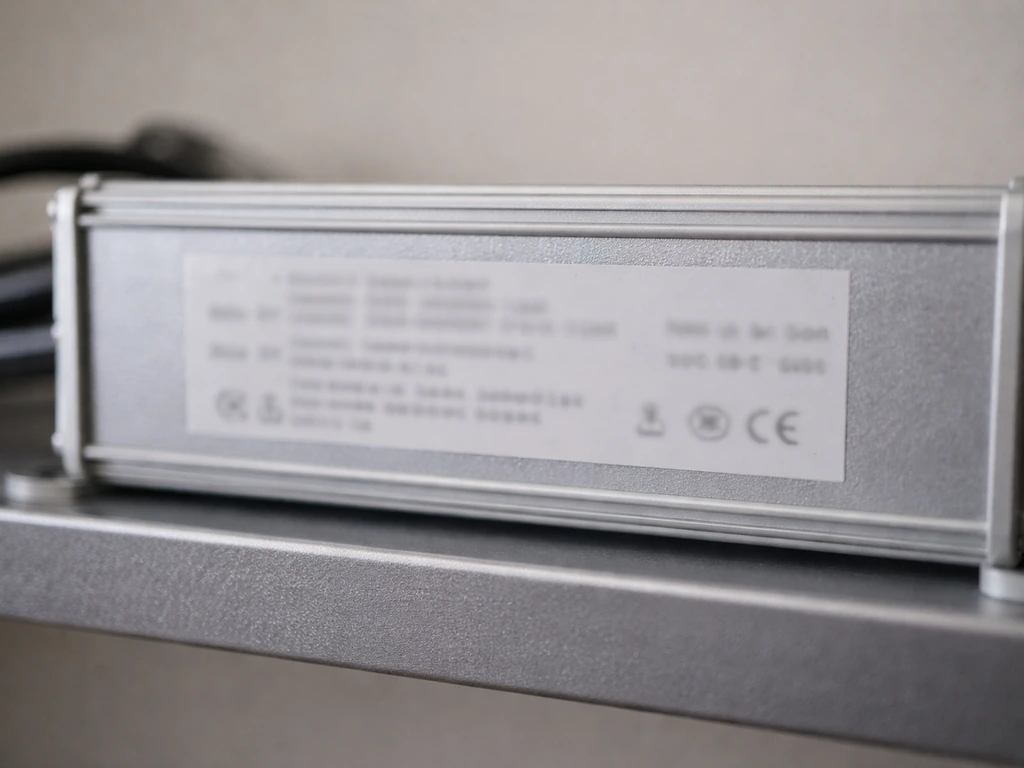
- Main driver label: Usually on the widest flat face. The model or part number here (e.g., HLG-320H-48A or a simpler OEM code) is often the IC configuration reference you need.
- Secondary sticker near the dimming wire terminals: Some manufacturers print a short code next to the DIM+/DIM- terminals indicating what dimming interface version the IC supports.
- PCB silkscreen on the LED board: If the light is a single integrated panel, the controller IC code may be screen-printed directly onto the green circuit board, typically near the largest chip on the board.
- Inside the housing end-cap: On tubular or bar-style fixtures, the driver is sometimes accessed by unscrewing an end-cap. The label is inside on the driver module.
- QR code or serial number sticker: Scan it. Many mid-range brands encode the full driver spec, including IC version, in the QR data.
If the label is heat-damaged or worn away (a common problem in high-humidity grow tent environments), check the packaging, any included manual, or the brand's product listing page. Brands like LBW, Keelixin, Ezorkas, and Ghodec typically publish driver specs in their manuals, and those documents are worth digging up before you assume the code is lost forever. If you want model-specific setup help, the leoter grow light manual for your exact unit can confirm the correct dimming inputs and wiring steps. If you have a Ghodec grow light, check the Ghodec grow light manual for the exact driver specs and dimming options for your model Ghodec typically publish driver specs in their manuals. If you need the Ezorkas grow light user manual, check those published documents for the driver specifications and IC-code notes. Keelixin’s grow light manuals can also show how to match the driver IC code and dimming inputs so your controller works correctly Keelixin grow light manual. If you need the specifics for operating a particular model, a lxyoug grow light manual can clarify the correct dimming method and settings manuals. If you have an LBW grow light, the LBW grow light manual is the quickest way to confirm which dimming signals and IC code references match your driver LBW manuals.
Record these specs from the driver label before doing anything else
Once you locate the driver, write down every number you can see. Do not rely on memory. Here is exactly what to capture:
| Spec to Record | Where to Find It | Why It Matters |
|---|---|---|
| Input voltage range | Label: 'INPUT' or 'AC INPUT' line, e.g., 100-240V~ | Tells you whether the driver is universal-voltage or region-locked |
| Output voltage range | Label: 'OUTPUT' or 'DC OUTPUT' line, e.g., 24-48V DC | Must match the LED string forward voltage or replacements won't work |
| Output current (mA) | Label: e.g., 700mA, 1050mA, or a range like 350-1050mA | Defines how bright the LEDs run; wrong current damages LEDs |
| Wattage | Label: e.g., '50W', '100W max' | Sets the ceiling for how much power the fixture can safely handle |
| Dimming method | Label or terminal markings: 0-10V, 1-10V, PWM, resistance, or DALI | Determines what dimmer or controller you can connect to it |
| Dimming connector type | Physical terminal block, RJ-style jack, or bare wire leads | Must match your controller's output connector physically |
| IC or model code | Anywhere on the label, usually top line or barcode area | The identifier needed to find datasheets and compatible replacements |
Pay particular attention to the dimming method. A driver using a 1-10V analog interface, like many Mean Well HLG-series units, requires a 1-10V compatible dimmer controller sending a DC signal between those two voltages. A PWM-capable driver may accept a 10V PWM signal in a frequency range of roughly 100 Hz to 3 kHz. If you attach a controller that operates outside those parameters, dimming simply will not work or will behave erratically. That frequency window is not a suggestion: it is set in the driver IC and cannot be changed without swapping the driver.
Matching your IC code to a compatible replacement or controller

Once you have the full code and specs recorded, matching a replacement driver or controller is straightforward. Search the IC code or driver model number directly, then compare the replacement's datasheet against every spec in your table above. All of these must match: output voltage range, output current range, dimming interface type, and input voltage. Output voltage and current are non-negotiable for LED safety. Dimming interface compatibility determines whether your timer controller or smart dimmer will actually communicate with the driver correctly.
If the IC code on your driver points to an OEM-only part (common on budget grow lights sold under house brands), search by the spec string instead. For example, '50W 1050mA 0-10V constant current LED driver' will surface dozens of compatible third-party options, typically from Mean Well, Inventronics, or similar reputable manufacturers. A Mean Well HLG-series driver is a reliable, well-documented upgrade for almost any constant-current LED panel in the 30W-320W range, and the HLG-320H specifically supports 1-10V analog, 10V PWM, and resistance dimming through its 3-in-1 interface, making it easy to pair with virtually any grow light timer or smart controller.
One important note on connector type: even if the electrical specs match perfectly, a mismatched physical dimming connector means either re-terminating wires or using an adapter. This is fine as long as you maintain correct polarity. DIM+ to DIM+ and DIM- to DIM- is essential. Reversing these will not necessarily damage the driver immediately, but it will cause the light to run at maximum output regardless of what the dimmer requests, which defeats the purpose entirely.
Troubleshooting common symptoms using the IC code
Light won't power on at all
First check that input voltage matches the driver label. A driver rated for 100-240V is universal and will work anywhere, but a driver marked '120V only' plugged into a 240V outlet will fail, often permanently. If the voltage is correct, check the dimming input terminals. Many constant-current drivers with a 0-10V or 1-10V dimming interface will not produce any output when the DIM signal is absent or reads 0V. The IC interprets 0V as 'off.' Connect the DIM+ and DIM- terminals together with a short wire jumper (this sets the signal to maximum/full output) to test if the driver powers the LEDs without a controller attached. If the light comes on, the driver is fine and the problem is the dimming controller or its wiring.
Flickering or unstable output
Flicker almost always comes from one of three sources: a loose connection at the driver terminals, a PWM dimming signal that is outside the IC's accepted frequency range, or a failing driver capacitor. Check all terminal screws first, they loosen over time especially with vibration or temperature cycling. If the flicker only happens when dimming is engaged, the PWM frequency of your controller may be outside the driver's accepted range. If your driver IC requires a PWM signal between 100 Hz and 3 kHz (as documented for the Mean Well HLG-320H), and your controller is sending a signal at 10 kHz or 50 Hz, you will get irregular flicker or no dimming response at all. Mean Well’s HLG-320H specifications document an accepted PWM frequency range for its dimming interface, which helps explain why signals outside that window cause irregular flicker or no dimming response Mean Well HLG-320H. Check your controller's output frequency setting in its app or manual and adjust it into the accepted window.
Wrong brightness or intensity
If the light is stuck at full power or stuck dim regardless of your dimmer setting, the IC is not receiving or interpreting the control signal correctly. Verify the dimming method matches: a 0-10V dimmer connected to a driver that expects a PWM signal will not produce proportional dimming. They speak different languages. Also check whether your driver uses a 0-10V range (where 0V = off) or a 1-10V range (where 1V = minimum and 10V = full output). Plugging a 0-10V controller into a 1-10V driver can cause the light to jump immediately to minimum brightness rather than going to zero, making it appear stuck.
Wrong spectrum or color output
If a multi-channel grow light (with separate warm white, cool white, red, or blue channels) is producing the wrong color balance, the issue is usually at the channel-specific driver or the controller channel assignment. Each channel may have its own driver IC with its own dimming input. Check whether all channels are receiving the correct dimming signal on each DIM pair. A common wiring mistake is connecting all channels to a single dimming output when each was designed for independent control. Some grow light ICs store default spectra internally and override external inputs if wired incorrectly, which is why spectrum feels 'locked' even with a multi-channel controller.
Overheating driver or hot spots on the panel
If the driver housing is too hot to hold for more than two seconds, something is wrong. Drivers should run warm, not burning. Overheating usually means the driver is being run above its rated wattage (check that the connected LED load does not exceed the driver's maximum output), ventilation around the driver is blocked, or the driver is failing internally and pulling more current than it should. Most quality driver ICs include over-temperature protection that dims or shuts off the output automatically, so a light that cuts out after 10-15 minutes and then comes back on after cooling is a classic over-temperature protection cycle. Give the driver more airspace, reduce ambient temperature in the grow tent, or lower the output power via the dimming interface.
Electrical safety checks before you touch any wiring
Please read this section before opening any driver housing or touching any terminals. These are not optional steps.
- Unplug the fixture from the wall completely. Not just turned off at the switch. Unplugged. LED drivers store charge in their capacitors and can deliver a painful or dangerous shock even after the power switch is off.
- Wait at least 60 seconds after unplugging before touching internal components. Some large-wattage drivers (above 100W) may need up to 2 minutes for capacitors to discharge.
- Use a multimeter set to DC voltage to verify that the output terminals on the driver read 0V before touching any wiring. If you see voltage still present after waiting, wait longer.
- Never work on a driver that shows visible burn marks, cracked housing, or a burning smell. These are signs of catastrophic internal failure. Replace the entire driver or the whole fixture.
- Do not splice or extend the low-voltage dimming wires using high-voltage rated connectors. Keep them separate from the AC input side. The DIM+/DIM- signal wires carry only a small voltage (0-10V), but running them alongside high-voltage AC lines can induce interference that causes erratic behavior.
- If you are replacing a driver in a fixture you did not build yourself, photograph all wire positions before disconnecting anything. Reconnecting wires to the wrong terminals is by far the most common source of new problems after a driver swap.
- Check that the replacement driver's output voltage range covers the LED string's forward voltage. Running LEDs above their rated forward voltage permanently damages them within minutes.
- If your country uses 240V mains and the driver label specifies 120V input only, do not use it. The driver IC and input capacitors are rated for specific voltage levels and will fail, sometimes dangerously.
If any step above reveals a problem you are not comfortable addressing, stop and contact the manufacturer's support line or a licensed electrician. There is no plant-growing result worth an electrical injury. Some budget grow lights from lesser-known brands carry driver components that do not meet safety certifications, and in those cases replacing the entire fixture is often the smarter and cheaper choice versus attempting driver-level repair.
Setting up placement and scheduling once your light is running correctly
Once you have confirmed the driver IC is working, the dimming interface is connected correctly, and everything is electrically sound, shift your focus to actually growing plants well. How you place the light and how long you run it each day matters as much as anything you just fixed.
Placement: start higher and move down
A common mistake with newly repaired or replaced grow lights is hanging them too close to plants out of enthusiasm. For seedlings, start at 24-30 inches above the canopy regardless of what the driver's maximum output is. Let the plants tell you over 3-4 days whether they want more or less intensity. Signs of too much light include bleached or curling leaf edges and stunted growth despite adequate water. Signs of too little include stretchy, leggy stems and pale green color. Move the light in 2-inch increments and wait 48 hours before judging the response.
Scheduling: match light duration to plant stage
For seedlings, 16-18 hours of light per day is the standard starting point. For established vegetative houseplants, 12-16 hours works well for most species. Use a simple plug-in timer or a smart controller if your driver supports a dimming interface, and build in a consistent off period every night. If you are using a YoYoMax controller or dimmer, check the YoYoMax grow light manual for its supported dimming interface and recommended settings. Plants need darkness for metabolic processes, and running LEDs 24 hours a day does not accelerate growth in most species, it stresses them. If your driver supports dimming (which you have now confirmed via the IC code and dimming interface specs), consider running at 70-80% output for 16 hours rather than 100% for 12 hours. If you are using a grow light manual to pick your schedule, double-check that the dimming settings you choose match what the driver supports so the plants get consistent light. The longer, slightly lower-intensity photoperiod is gentler and more efficient for seedlings and houseplants.
Using the dimming range your driver IC supports
Now that you know your driver's dimming method and the IC code behind it, you can use the full range intentionally. A driver with a 1-10V interface running at 3V is typically outputting somewhere between 20-30% of maximum power, which is ideal for delicate seedlings in their first week. Ramp up to 7-8V (roughly 70-80% output) as plants develop their second and third sets of true leaves. Use consistent, repeatable settings so you can troubleshoot plant health issues by ruling out light intensity as a variable. Keep a simple log: date, driver voltage setting, canopy distance, and any plant changes you observe. It sounds fussy, but two weeks of notes will save you hours of guessing later.
When to stop troubleshooting and just replace the fixture
Some grow lights are not worth repairing. If the driver IC code is completely unreadable, the driver housing shows burn damage, the IC code returns no datasheet results and the brand offers no support, or the fixture cost under $30 new, replacement is almost always more cost-effective and safer than driver-level repair. Budget LED grow lights from newer or less-documented brands may use OEM driver components without published datasheets at all, in which case you are essentially flying blind on compatibility. In that situation, treat the IC code search as a buying guide: record what you know, use it to choose a better-documented replacement fixture, and move on. You will spend less time and money than trying to resurrect an undocumented driver.
FAQ
What if my grow light driver label is missing or the IC code is unreadable?
Before you open anything, take sharp photos in bright, angled light and check for a second label on the driver’s side panel or the input terminal block area. If all identifying text is gone, use the wiring layout and measured electrical ratings (input voltage marking, output voltage range if present, and output current if the sticker lists it) to narrow replacements, but do not assume compatibility without matching the dimming interface type and 0V versus 1V behavior.
How can I tell whether my driver expects 0-10V or 1-10V dimming?
Look for DIM signal wording like “1-10V” or “0-10V” on the label or manual, and confirm the “off behavior.” If the light stays off when DIM is left unconnected or measured at 0V, that suggests 0V equals off. If the driver still outputs some level at 0V (or the manual says 1V is minimum), it is likely 1-10V. A simple multimeter check at the controller output can also reveal whether the controller ever goes below 1V.
My controller has both 0-10V and PWM settings, which one should I choose?
Match the driver’s dimming interface, not the controller’s capability. If the driver label says “analog 1-10V or 0-10V,” use the analog mode and connect DIM+ and DIM- to the driver’s dimming pair. If the driver requires PWM, use PWM mode and set the controller frequency into the driver’s specified window. Using the “wrong” mode often produces either no dimming or jumpy behavior.
Can I use a smart plug or basic on off timer instead of a dimmer for a constant-current driver?
You can typically switch power on and off, but you will lose proportional dimming control. Many constant-current drivers will also keep their output off unless the dimming signal is present and within range, so an “always on” driver plus a separate dimming controller is usually the intended setup. If your fixture includes a dimmer, removing it can make the light appear dead even when powered.
What happens if I reverse the DIM+ and DIM- wires?
Reversing polarity typically causes the driver to misinterpret the dimming signal, which often results in full output, minimum output, or unstable flicker. It usually will not immediately blow the driver, but it defeats control. If you see the light jump to a fixed brightness, stop and verify DIM+ to DIM+ and DIM- to DIM- with a continuity test before reapplying power.
Do I need to match connector types exactly when replacing a driver?
Not necessarily, but you must match the electrical pins and dimming polarity. A physical mismatch usually means you will either re-terminate the existing wires or use an adapter, as long as you preserve DIM+ and DIM- orientation and keep output wiring consistent. If the new driver uses different output connectors for the LED string, confirm the rated current and voltage for that exact LED wiring before powering up.
How should I test the driver safely before reconnecting LEDs?
Verify input voltage first, then test dimming behavior using a jumper between DIM+ and DIM- (as described in the article) to see whether the driver will command output. Do not assume output is correct just because the driver “powers” anything, and never operate a driver without its intended LED load unless the driver manufacturer explicitly allows it. If you have a dummy load recommendation from the datasheet, use that instead of experimenting.
My light flickers only at certain brightness levels, not all levels. What does that suggest?
That pattern often points to either a dimming interface mismatch at low duty cycles or a controller PWM frequency that only briefly crosses into the driver’s acceptance range. It can also happen if the dimming signal range is clipped, for example a controller that cannot reach the driver’s expected minimum or maximum. Adjust the controller’s output range and, if applicable, confirm PWM frequency stays inside the driver window.
Is it safe to keep the driver in a sealed grow tent with no extra airflow?
Most drivers tolerate warm operation, but they should not be too hot to hold for more than a couple of seconds. If the driver runs hot or goes into a protect-and-recover cycle, add airflow, increase spacing, or reduce output via the dimming interface. Sealed installation can also trap heat that reduces component life, even if it does not immediately trip protection.
When should I avoid replacing just the driver and instead replace the whole fixture?
If the driver IC code is unreadable and the driver’s datasheet cannot be identified, replacement becomes guesswork. It’s also a bad sign if the housing shows severe burn or if the light repeatedly cuts out after only short runtime even when dimming is set to maximum and wiring is verified. In those cases, replacing the entire fixture reduces risk and often costs less than repeated troubleshooting.
How do I pair a multi-channel controller with multiple drivers for correct spectrum control?
Confirm each channel has its own dimming pair running to its matching channel driver, do not combine channels unless the manual explicitly states it. If your controller outputs one dimming signal per channel but the wiring ties several channels together, the drivers may fall back to internal defaults and you will see “locked” spectrum behavior. A quick way to diagnose is to dim one channel at a time and observe whether only that color changes.
What records should I keep to troubleshoot both electronics and plant response later?
Keep a log that includes driver dimming type (0-10V, 1-10V, or PWM), the exact controller setting (voltage or PWM frequency and level), canopy distance, and the day count from transplant or seed. Add a note when you changed wiring, because flicker or brightness jumps after a change often trace back to connector polarity, loose terminal screws, or an incorrect dimming mode setting on the controller.
Next Article
Keelixin Grow Light Manual: Setup, Controls, Testing & Fixes
Step-by-step Keelixin grow light setup, controls, testing, placement and troubleshooting fixes for better indoor plant g