You can set up and run your Leoter grow light correctly even if the manual is missing, unclear, or doesn't match your exact model. Mount the light 30 to 45 cm above your plants, connect no more than 4 lamps to a single controller, set brightness to a mid-level (around 5 out of 10) to start, and use the built-in cyclic timer to run the light 8 to 12 hours per day. The most important thing to know upfront: never cut power to the controller while the timer is active, or it will reset and stop cycling automatically.
Leoter Grow Light Manual: Setup, Controls, and Troubleshooting

Marcus Tillman
27 Apr 2026
What the Leoter manual covers (and how to identify your model)
Leoter sells several grow light versions, and the details that matter most, wattage, connector type, timer options, and dimming behavior, vary between them. The most widely documented model is the HY-003, which runs at roughly 20W, accepts AC 85–265V input (so it works anywhere in the world), and is rated for around 50,000 hours of use. If you have a different model number, check the sticker on the controller box or the bottom of the light head, that's where Leoter prints the model code.
A complete Leoter box should include the light head (or multiple heads on gooseneck arms), a controller with an LCD screen, a power adapter, and any mounting hardware like clips or a base. The manual, when present, covers basic specs, timer programming steps, cleaning guidance, and safety precautions. If your manual is missing or clearly doesn't match your model, Leoter's official site and Manuals+ both host PDF versions, search your model number plus 'instruction manual' to find the right one. p3s2 manual. If you need a grow light manual that matches your exact Leoter version, use that search and confirm the model code before following the timer and distance instructions Leoter's official site and Manuals+. If you are also comparing other brands, such as a keelixin grow light manual, use the same distance and timer checks so your Leoter setup lines up with what the controls support. If you are specifically trying to match a different controller layout or UI, the yoyomax grow light manual can be a helpful adjacent reference for timer and brightness behavior. If you can't find an exact match, the HY-003 manual is a reliable reference because the controls are nearly identical across most Leoter desktop models.
One thing to check immediately: the controller-to-lamp limit. The HY-003 manual explicitly states one controller can drive up to 4 lamp heads. If you're daisy-chaining more than that, you'll get uneven brightness or the controller may struggle. Count your heads before you plug anything in.
Installing and setting up your Leoter grow light
Mounting and positioning
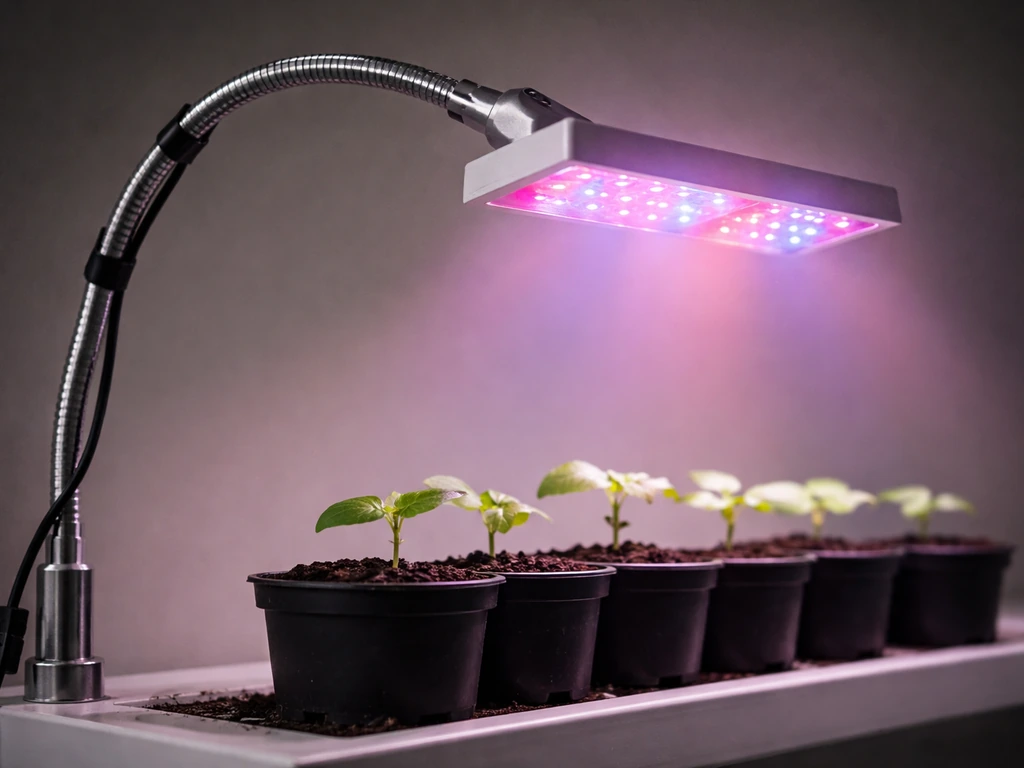
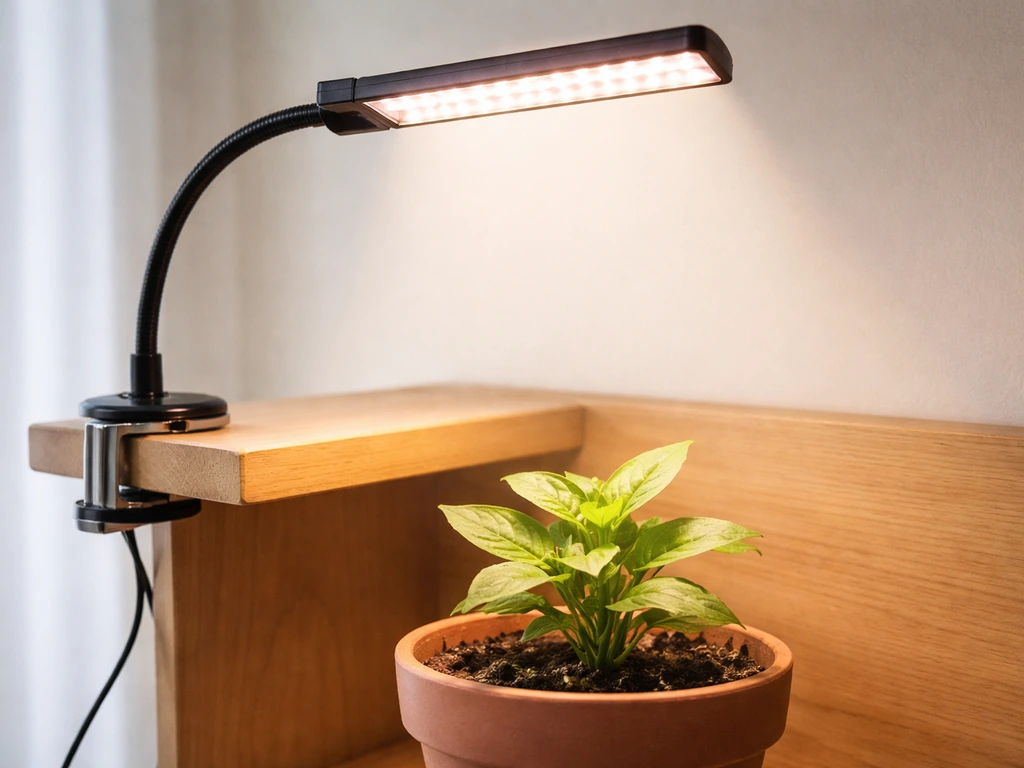
Most Leoter desktop models use flexible gooseneck arms that you bend into position over your plants. Tighten the base clamp onto a shelf edge, pot rim, or desk, then curve the neck so the light head points straight down at the plant canopy. Straight-down is almost always better than angled, it distributes light more evenly and reduces the chance of one side getting too much heat.
The manual specifies keeping 30 to 45 cm between the light and your plant. That's a good default for most houseplants and seedlings. If you're using a higher brightness setting, start at the upper end of that range (45 cm) and move closer only if plants look like they're stretching toward the light. More on exact distances for different plant stages is in the placement section below.
Power and connections
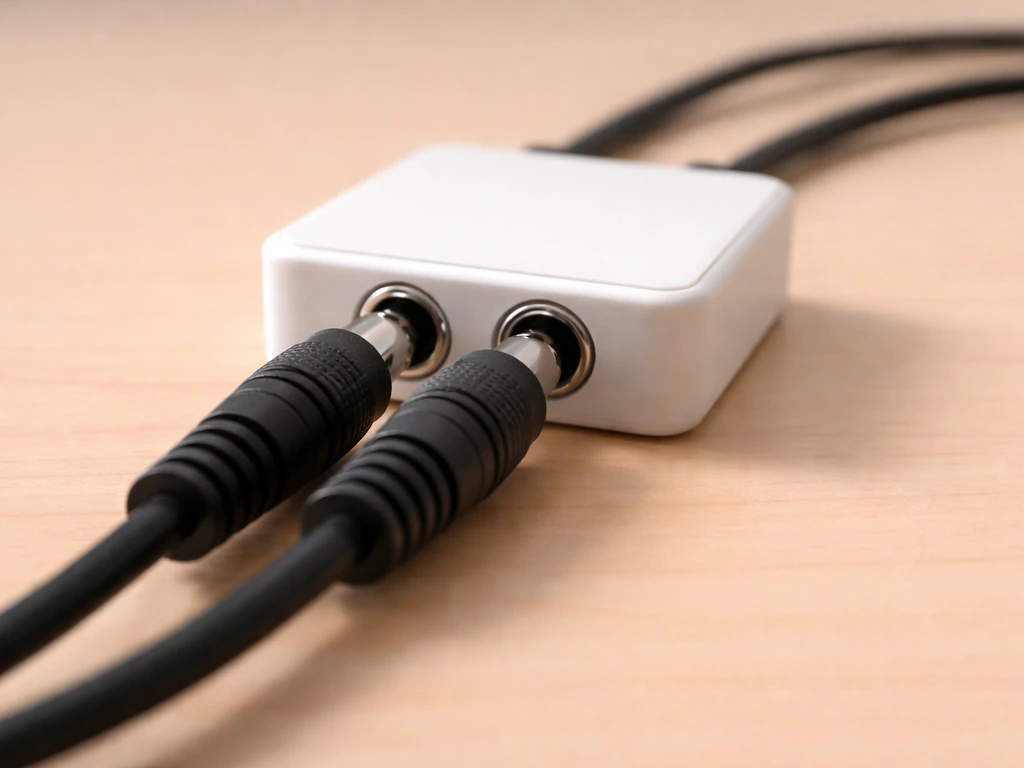
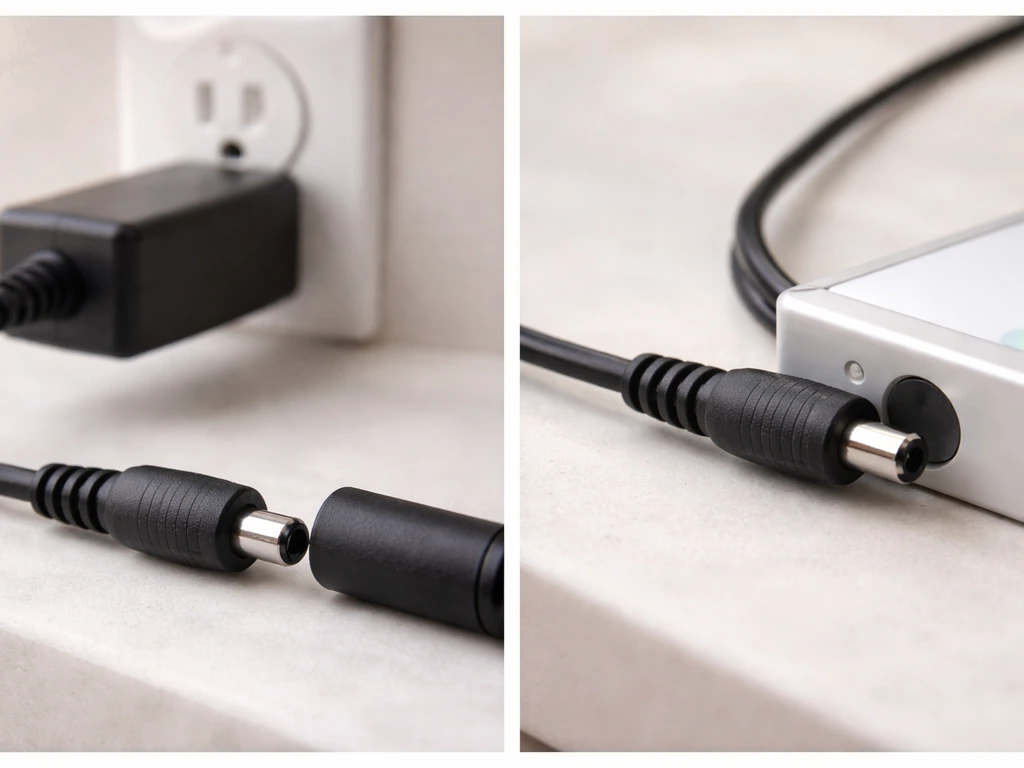
Plug the lamp head connectors into the controller ports first, then plug the power adapter into the wall. Don't force connectors, Leoter uses small round DC plugs that can look similar to other adapters but aren't always interchangeable. If you're using multiple heads, connect all of them to the controller before powering on. The LCD screen on the controller should light up when power is live. If it doesn't, check that the adapter is fully seated in the controller port, not just the wall outlet.
Controls and modes: timers, dimming, and switches
The controller is where everything happens on a Leoter. You'll typically find a power button, a timer button, and dimming buttons labeled + and -. Here's how each works in practice.
Using the dimmer
The HY-003 has 10 brightness levels, adjusted with the + and - buttons. Level 1 is the dimmest, level 10 is full power. The LCD display shows the current level. For seedlings, start around level 4 or 5. For established plants that need more light, you can push to 7 or 8. Running at full brightness (10) continuously isn't necessary for most houseplants and adds more heat than most small setups need.
Programming the timer
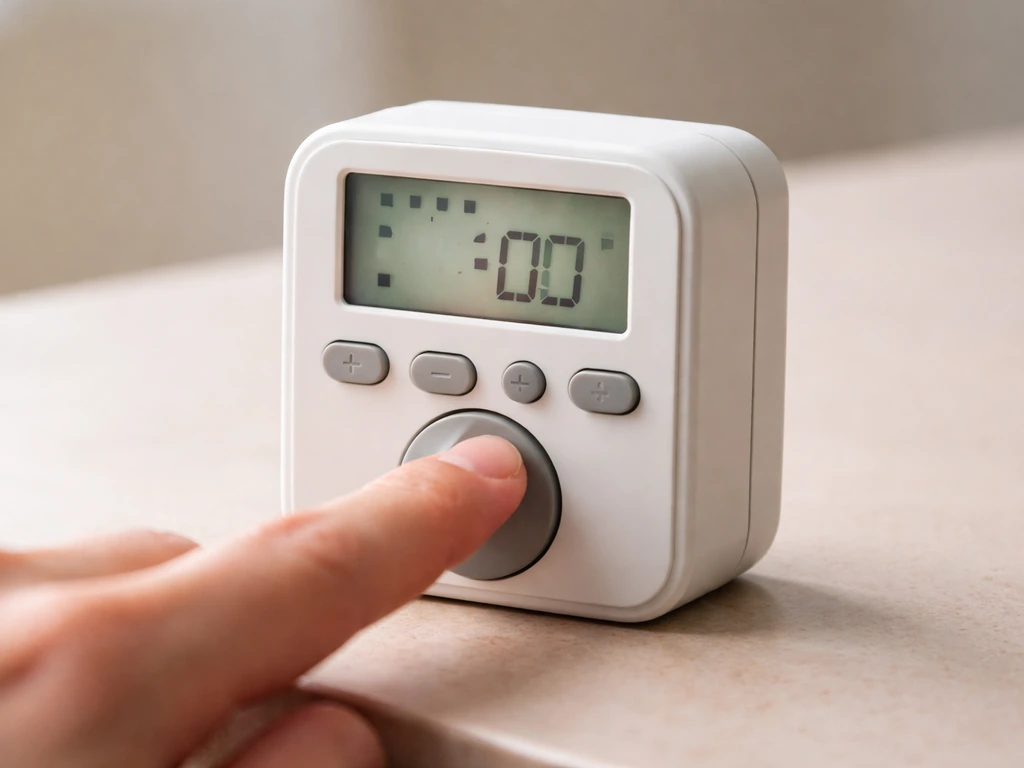
Leoter's cyclic memory timer is the feature that makes daily scheduling hands-free. Once set, it blank" rel="noopener noreferrer">turns the light on and off automatically every 24 hours from the point you program it. If you need Stationeers grow light IC code to automate the system in-game, match your timer and brightness settings to what this Leoter controller supports. The available preset durations are 3 hours, 9 hours, and 12 hours depending on your model. LEOTER’s official product information describes the lights as offering 10 distinct dimmable brightness levels and a cyclic memory timer with 3, 9, or 12 hour/day presets depending on the model. The HY-003 manual lists 3 and 9 hours as the explicit options, while Leoter's official product pages mention 3, 9, and 12 hours on other models.
To program the timer on the HY-003, long-press the timer button until the display enters setting mode. Use the + and - buttons to set the hour (0 to 23), then confirm and adjust the minute (0 to 50 in increments). Once set, the timer takes effect immediately and the LCD shows remaining on-time. When the lights shut off, the screen shows the time until the next on-cycle. To check your last setting during a live cycle, press the timer button briefly, it won't change anything, just shows you the programmed duration.
Here's the critical detail that trips people up: if you switch off the controller at the wall or unplug the adapter while the timer is running, the timer resets completely. After a power cut, you have to reprogram from scratch. This means you should leave the controller powered at all times and let the timer handle the on/off cycling, don't use a smart plug or wall switch to cut power to the whole unit as your daily on/off method.
Placement and coverage: getting the distance right for your plants
The 30 to 45 cm rule from the manual is a good baseline, but the right distance really depends on what stage your plants are at. Too close and you risk light burn or heat stress; too far and plants stretch and become leggy. Here's how to dial it in by plant stage.
| Plant Stage | Recommended Distance | Brightness Level | Notes |
|---|---|---|---|
| Seedlings / germination | 40–45 cm | 3–5 out of 10 | Gentle light prevents damping off; raise if seedlings bleach |
| Vegetative / leafy growth | 30–40 cm | 5–7 out of 10 | Most houseplants and herbs stay here throughout |
| Flowering / fruiting | 25–35 cm | 7–9 out of 10 | Higher intensity supports bud and fruit development |
| Established houseplants | 30–45 cm | 4–6 out of 10 | Match natural window-light levels; observe weekly |
Coverage area for a single 20W Leoter head is modest, realistically it covers one to three small to medium plants at desk-lamp range. If you have a wider tray of seedlings, you'll want to reposition the gooseneck every few days to rotate coverage, or add a second head. Don't rely on one light head to cover a full 60 cm seedling tray evenly; the outer edges will always be dimmer than the center.
Watch your plants more than you watch the measurements. Leaves curling downward or bleaching near the top usually means the light is too close or too bright. Stems stretching tall and thin (etiolation) means the light is too far away or runtime is too short. Adjust in small increments, 5 cm at a time, and give plants a few days to respond before changing again.
Lighting schedule: how many hours and when to adjust
The Leoter manual recommends 8 to 12 hours of light per day and explicitly warns against running the light for more than 16 hours. That ceiling exists because plants need a dark period for metabolic processes, running lights 24/7 doesn't speed up growth and actually stresses most plants over time.
As a practical starting point: 10 hours per day works well for most houseplants and leafy herbs. Seedlings can handle up to 14 to 16 hours during their first few weeks because they're in high-energy early growth, but don't push past 16 hours. Flowering plants like tomatoes or peppers that need a signal to flower often need a stricter 12-hours-on / 12-hours-off schedule to trigger blooming.
Set the timer to turn on in the morning when you wake up rather than overnight. This keeps the light cycle aligned with natural daylight patterns, which is gentler for most plants, and it makes it easier for you to observe your plants during the lit period. If you're supplementing a window rather than replacing it entirely, run the grow light during morning and evening hours to extend the natural photoperiod rather than overlap with peak sunlight.
Adjust the schedule based on what you see over two to three weeks. If leaves are deep green and new growth looks compact and healthy, your schedule is working. If growth stalls or lower leaves yellow, try adding one or two hours per day. If you see tip burn or pale patches on the top leaves, reduce hours by two and check your distance.
Troubleshooting common problems
Light won't turn on
Start with the obvious: check that the power adapter is fully plugged into both the wall and the controller port. The small round DC connector can feel seated when it isn't. Try pressing the power button while the LCD is lit, on some units the light heads default to off after power is restored. If the LCD is blank and nothing responds, try a different wall outlet to rule out a dead circuit. If the adapter feels warm but the light still doesn't come on, the adapter may have failed, Leoter uses standard-spec DC adapters that can be replaced without returning the full unit.
Flickering
Flickering in LED grow lights is usually a driver or dimming issue, not a bulb issue. If your light flickers at low brightness levels, try increasing the dimming level, some LED drivers produce visible flicker at the very bottom of their PWM range. If flickering happens at all levels, the driver inside the controller may be overheating. Make sure the controller isn't sitting in an enclosed cabinet or under insulation, it needs airflow. Flickering that comes and goes on a warm day is a thermal symptom, and the fix is better ventilation around the unit.
Output seems dim or weaker than expected
First, check the dimming level, it's easy to accidentally hit the - button and not notice the number on the LCD. If brightness is at level 10 and output still seems weak, the LEDs may be degrading (normal over a long lifespan) or the driver is running hot and throttling output. Clean the heat sink fins (more on that below) and give the unit 30 minutes in a cooler, well-ventilated spot. If output is consistently uneven with one arm noticeably dimmer than another, check the connector between that arm and the controller, a loose or partially seated connection is the most common cause.
Uneven coverage or hot spots
A single head at 30 cm will have a brighter center zone and dimmer edges. This is physics, not a defect. To even out coverage, raise the light height (which spreads the footprint at the cost of some intensity), add a second head, or rotate your pots every few days so all sides get time in the center zone. If one plant in a multi-pot setup is visibly darker green than others, it's getting more light, move the others closer or raise the whole light until coverage is more consistent.
Overheating
Leoter uses an aviation-grade heat sink design to manage thermals passively. If the light body feels very hot to the touch, that's somewhat normal for the LED surface, the manual specifically warns not to touch the LED surface while it's powered on. A grow light manual can also confirm the correct controller-to-lamp limit and the recommended operating distance for your specific Leoter model. What's not normal is the controller getting too hot to hold, or the unit shutting down mid-cycle. If that happens, check that the controller isn't resting on fabric or carpet that blocks its underside vents, and make sure nothing is stacked on top of it. Move it to a hard, flat surface with at least 5 cm of clearance on all sides.
Timer reset after power cut
If you walk in and find the light running when it should be off (or off when it should be on), the timer has reset. This almost always means the controller lost power, someone unplugged it, a breaker tripped, or a smart plug interrupted the circuit. Reprogram the timer by long-pressing the timer button and re-entering your on-time duration. Then protect the controller from future interruptions: plug it directly into a wall outlet rather than a power strip that might get bumped, and don't use an external timer switch in series with the Leoter's own timer.
Maintenance and safety checks
Cleaning the unit
Dust buildup on the heat sink fins and the LED surface reduces both light output and heat dissipation over time. Wipe down the unit monthly with a barely damp cloth, the manual is specific that you should use a small amount of water only and avoid alcohol, acetone, or any solvent-based cleaner, especially on the LCD screen and plastic housing. Turn the light off and unplug the adapter before cleaning, and let everything dry completely before powering back on. For the fins on the heat sink, a soft dry brush (like a clean paintbrush) works better than a damp cloth for getting into the gaps.
Electrical safety and cable care
Check the cable and adapter every few months for signs of wear: fraying insulation near the connector, kinks in the cord from gooseneck bending, or a warm adapter casing. A warm adapter is fine; a hot adapter that's uncomfortable to hold is a sign it's working outside its rated load, verify you're not exceeding 4 heads on one controller. The manual also says to keep the light away from rain, water splashes, and high humidity environments. It's not waterproof in any way, so keep it away from misting systems and humidifier output.
Ventilation and placement for the controller
The controller is the component most likely to shorten its own lifespan through heat. Never place it inside an enclosed grow tent without ventilation, and don't stack books or pots on top of it. If you're running multiple heads continuously for 12-hour cycles, check that the controller stays at a comfortable ambient temperature after an hour of operation. If it's warm but not hot, you're fine. If it's uncomfortable to hold for more than a few seconds, add a small fan to move air over it.
Lifespan and when to replace
At the rated 50,000-hour lifespan, a Leoter running 12 hours a day would theoretically last over 11 years. In real-world use, output gradually decreases over time, most LED grow lights are considered end-of-life when output drops to about 70% of original brightness. If you notice your plants stretching more than usual after a year or more of use at the same settings and distance, degraded output may be part of the reason. Compare current results to photos you took when the setup was new; if the difference is significant, a replacement head or unit is worth considering. Other brands with similar manual-based control systems, like LBW, Lxyoug, and Ezorkas, follow comparable maintenance intervals and can serve as reference points if you're comparing options.
FAQ
Can I use a smart plug or wall switch to turn the Leoter grow light on and off automatically?
Avoid it. Cutting power to the controller while its timer cycle is active resets the timer and forces you to reprogram it. If you need remote control, keep the controller’s timer as the main scheduler and use the smart plug only for powering the whole unit when you are sure the timer is not running.
My timer always turns off early or seems inconsistent. What should I check first?
Verify the controller has uninterrupted power for the entire cycle, then confirm the hours and minutes values you entered (minute steps are not every single minute). Also ensure you did not accidentally press brightness buttons during timer setup, which can change output while the schedule stays the same.
The light won’t turn on even though the adapter is plugged in. What are the likely causes?
Check that the DC plug is fully seated in the controller port (a loose connection can still power the LCD partially or intermittently). If the LCD remains blank, try a different wall outlet. If the adapter casing feels hot but the light still fails, the adapter may be defective and is often replaceable without replacing the entire unit.
How do I know whether my unit is the HY-003 or a different Leoter model?
Don’t rely on appearance alone. Look for the model code printed on the controller box sticker or on the bottom label of the light head, then use that exact code when you search for the leoter grow light manual for your controller and timer preset options.
Can I connect more than 4 lamp heads to one controller?
You should not. The HY-003 class controller is intended to drive up to 4 heads. Exceeding that limit can cause uneven brightness and potential driver strain, which may later show up as heat-related dimming or flicker.
Is straight-down placement always better, or can I angle the light for a wider coverage?
Straight-down usually gives the most even canopy lighting. Angling may widen coverage but it typically increases uneven hotspots and heat distribution. If you need wider coverage, the safer method is adding a second head or rotating pots rather than heavily tilting one head.
My plants look leggy at the edges. Is it a distance or coverage problem?
Most often it is coverage, not just distance. A single 20W head naturally has a brighter center zone. Try raising the light slightly to broaden the footprint, rotating trays every few days, or adding a second head so all plants spend time in the center zone.
What should I do if I see flickering, especially at low brightness?
First, confirm the dimming level is not accidentally set very low. If flicker happens mostly at the bottom of the brightness range, raise the level. If flicker persists at all levels and the unit feels hot, improve ventilation around the controller and clean heat sink fins to reduce driver overheating.
What maintenance is most important, and how often should I do it?
Monthly cleaning of the heat sink fins and LED surface area is the key. Use a barely damp cloth for general wipe-down, avoid alcohol, acetone, and solvent cleaners, and use a soft dry brush for the fin gaps. Always unplug and let the unit fully dry before powering back on.
The controller gets warm. How hot is too hot?
Warm to the touch is expected, but if it becomes uncomfortable to hold for more than a few seconds, add airflow. Don’t place it under fabric, carpets, or inside an enclosed tent without ventilation, and make sure there is clearance around the controller for air circulation.
How can I tell if LED output is degrading over time?
Compare current plant results to your own baseline, ideally photos taken when the setup was new. If growth seems slower or stretching increases at the same distance, brightness, and schedule after a year or more, output may have fallen toward end-of-life (many LED systems are effectively considered done around roughly 70% of original brightness).
Is it okay to run the light longer than 16 hours per day to speed growth?
No. Leoter guidance warns against exceeding 16 hours because plants still need a real dark period. For flowering triggers, many plants also respond better to stricter on/off patterns, so longer is not usually better.
Next Article
Yoyomax Grow Light Manual: Setup, Controls, Timers, Troubleshooting
Step-by-step Yoyomax grow light setup with controls, timers, mounting, daily schedules, and troubleshooting fixes.
