Hanging a grow light correctly comes down to four things: the right hardware, the right height, centered placement, and cables that won't cause a fire or trip hazard. Get those four right and your plants will be happy. Miss one and you'll either burn your canopy, get patchy coverage, or create a safety problem. This guide walks you through the whole process from start to finish, whether you're hanging one light or several in a grow tent.
How to Hang Grow Lights in a Tent: Step-by-Step
Marcus Tillman
2 Apr 2026
Gather what you need before you start
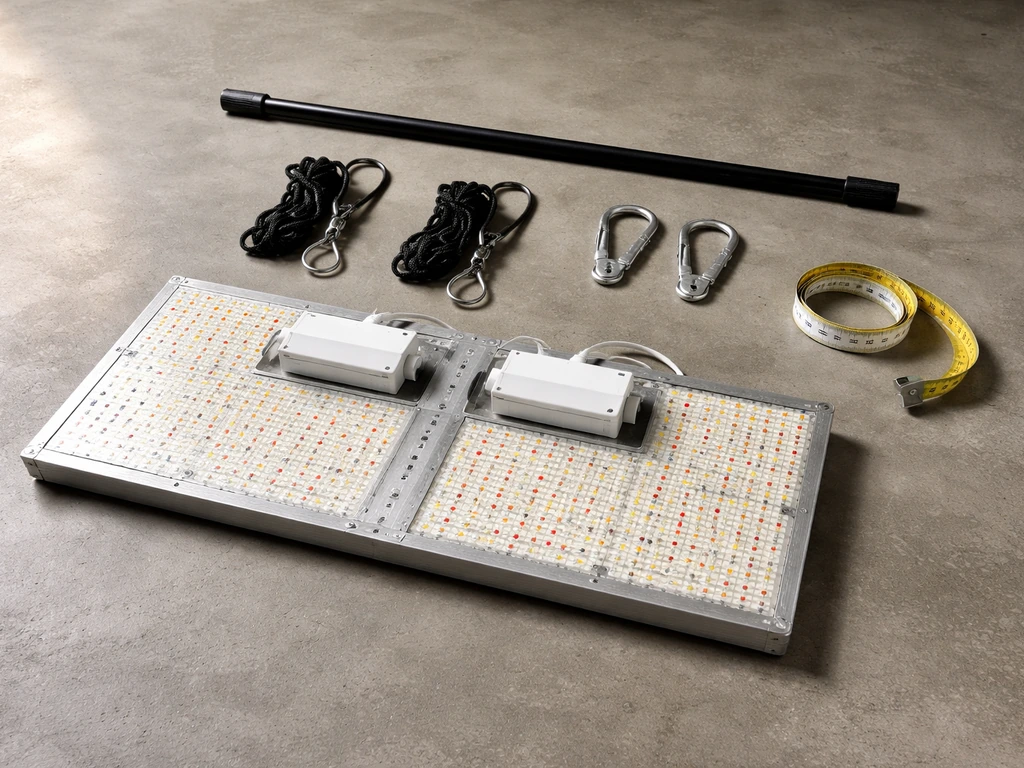
Before you touch the tent, collect everything so you're not hunting for parts mid-install. What you need depends on your light type, tent size, and how you plan to mount.
- Your grow light (note the weight—most LEDs run 5–30 lbs)
- A pair of ratchet rope hangers rated for your light's weight (more on this below)
- Carabiners if they aren't included with the hangers
- A tape measure
- Your grow tent's dimensions (floor area and interior height)
- The manufacturer's distance chart or PPFD map for your specific light
- A power strip or timer, ideally mounted above floor level
- Zip ties or velcro cable ties for cord management
Check your light's user manual for any minimum clearance warnings before you do anything else. Viparspectra's Pro-series manuals, for example, call out a minimum of 4 inches (10 cm) between adjacent lighting equipment and a full 40 inches (100 cm) between the light and any combustible materials. That kind of guidance matters both for safety and for keeping your warranty intact, improper hanging is specifically listed as a warranty exclusion in their documentation.
Pick your hang method and hardware
For almost every grow tent setup, ratchet rope hangers are the right answer. They're adjustable, they lock in place, and they're rated for serious weight. Most standard ratchet hanger pairs on the market, brands like 247Garden, VEVOR, and Grow Illumination all sell versions, are rated for 150 lbs per pair, or about 75 lbs per individual hanger. That's more than enough for virtually any LED grow light you'd use at home.
The basic setup works like this: the hanger hooks over the tent's cross bar, the rope feeds down through the ratchet mechanism, and a carabiner at the bottom clips directly to the hang point on your light. When you need to raise or lower the light, you pull the release tab and slide the rope. It takes about 30 seconds per adjustment once it's set up, which matters a lot as your plants grow.
Some tent kits come with their own suspension method. The AC Infinity Advance tent kit, for instance, uses rope clip hangers looped around the support beams with carabiners hooking into steel flanges on the light. If your kit includes that hardware, follow its specific instructions. If you're sourcing hangers separately, 1/8-inch rope ratchets from any reputable grow supply brand will work universally.
If drilling into the ceiling isn't an option, or if you're setting up on shelving, your mounting approach changes. hanging grow lights without drilling is entirely doable with tension rods, freestanding light stands, or the tent's own frame, and if shelves are your setup, there's a whole separate approach worth looking at for hanging grow lights on shelves that keeps things stable and adjustable.
Chains vs. rope ratchets vs. fixed cables
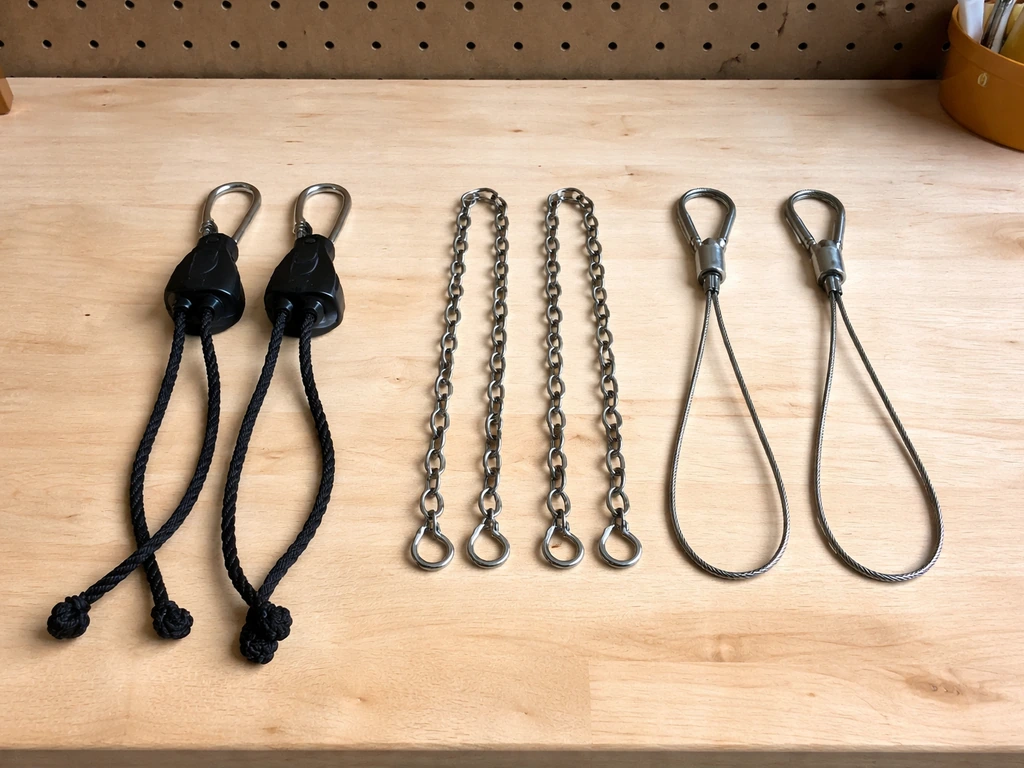
| Method | Adjustability | Weight Capacity | Best For |
|---|---|---|---|
| Ratchet rope hangers | Easy, tool-free | 75–150 lbs per pair | Grow tents, most LED setups |
| Jack chain / S-hooks | Manual, link-by-link | Varies (often 50+ lbs) | Permanent rooms, heavier fixtures |
| Fixed cables / zip ties | None | Low | Very lightweight panel lights only |
| Light stands / poles | Height adjustable | Depends on stand | No drilling, temporary setups |
Ratchet hangers win for tent use almost every time. Jack chain works fine in a permanent room where you won't be adjusting height often. Fixed cables or zip ties are not suitable for anything heavier than a tiny seedling panel, don't rely on them for a real fixture.
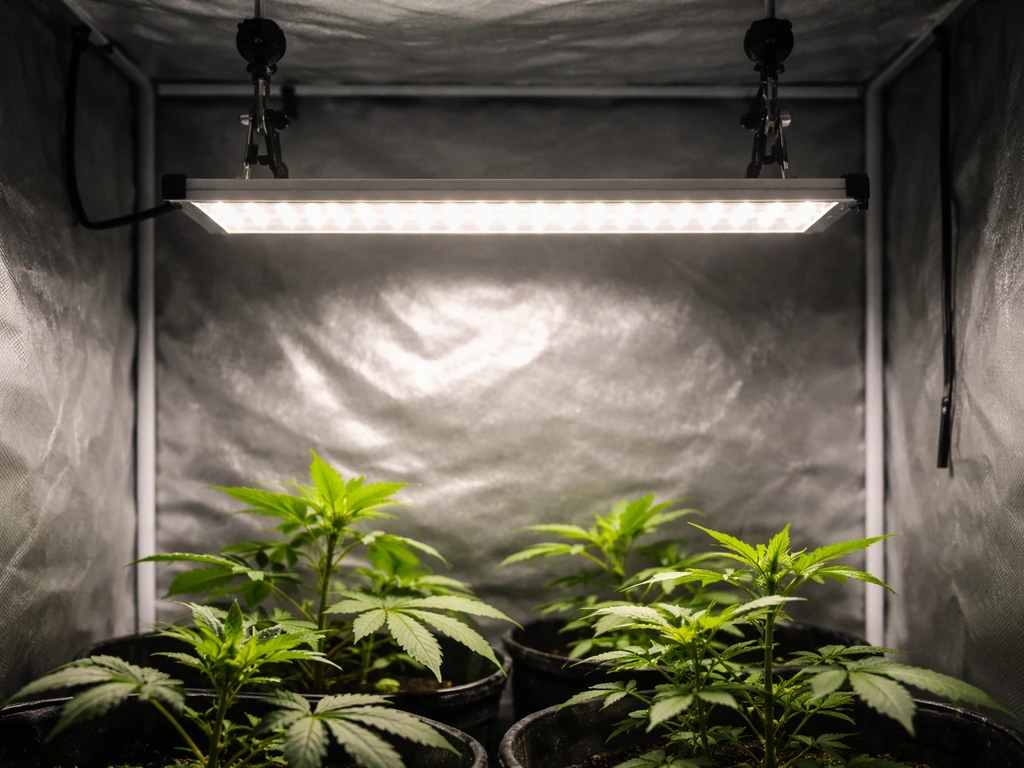
Plan placement: center it, cover the footprint, space multiple lights right
The goal is even light across your entire canopy. Start by finding the center of your tent's floor space and hanging the light directly above that point. For a single light in a 2x2 or 3x3 tent, centering is straightforward, hang it from the middle cross bar and you're done. For a 4x4 or larger tent with one light, make sure the light's rated coverage footprint actually matches the tent floor area. Most manufacturers specify a vegetative coverage area and a flowering coverage area; flowering coverage is always smaller because you want higher PPFD at that stage.
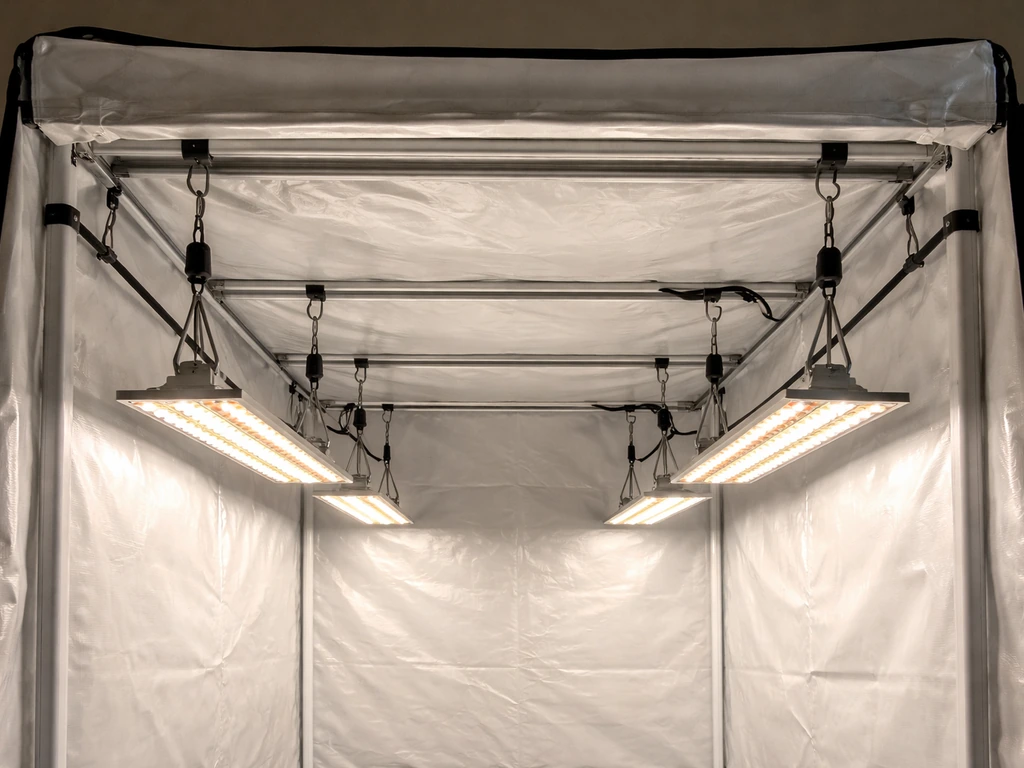
When you're running multiple lights, spacing matters as much as height. Place lights evenly across the tent so their footprints overlap slightly rather than leaving dark gaps. A useful rule of thumb: LED bars or panels spaced roughly 16–24 inches apart (depending on unit wattage) give you decent canopy overlap without creating hot spots in the center. The goal, as Sun System puts it, is uniform canopy coverage, consistent intensity across the whole footprint, not just a bright center ring.
For ceiling-mounted setups outside a tent, the approach is similar but you have more flexibility in where you anchor. If you're going that route, the specifics of hanging a grow light from the ceiling are worth reviewing, since anchor point selection and load distribution matter more when you're working with drywall or joists instead of a tent frame.
Set the starting height and get the light level
Height is the most important variable you'll set, and it changes with plant stage. Here are real numbers to work from, not vague ranges.
| Growth Stage | Starting Height (LED) | Intensity / Notes |
|---|---|---|
| Seedling | 16"–24" (40–60 cm) | 50% or less; ViparSpectra P600 specifies 16" at 50% brightness |
| Vegetative | 18"–24" (45–60 cm) | Ramp up intensity gradually; MLED-style guides suggest 40–60 cm |
| Early Flower | 12"–18" (30–45 cm) | Higher intensity; watch for light stress |
| Late Flower | 12"–18" (30–45 cm) | Maximum usable intensity; monitor canopy temp |
These are starting points, not final answers. Your specific light's wattage and optics change the numbers. A 100W light in a 2x2 tent at 18 inches delivers roughly 450 PPFD at the canopy, which is fine for seedlings and early veg but too low for flowering. As you increase wattage or lower the light, PPFD climbs. For seedlings specifically, most guidance puts the safe range at 12–24 inches, with the lower end reserved for lower-wattage or less-intense fixtures.
To understand exactly how high to hang your LED grow light for your specific fixture, check your light's PPFD map if it came with one. Those maps show you the actual light intensity at different heights and positions across the footprint. Use them. They're far more reliable than generic height charts.
Once you've set the height, check that the light is level. A tilted fixture creates uneven coverage, one edge of the canopy gets more light than the other. Hold a tape measure from the light to the floor at each corner of the fixture and adjust the hangers until all four measurements match. This takes an extra two minutes and makes a real difference in coverage uniformity.
A note on brand-specific hang points
Most LED fixtures have integrated hang brackets or slots for carabiners. If you're working with a Bestva light, the mounting hardware is similar to other panel-style LEDs but the hang point locations can vary by model, checking the Bestva grow light hanging guide will save you guesswork on bracket placement. For other panel or bar-style LEDs, the process of mounting an LED grow light follows the same basic steps: identify the hang points, clip carabiners, attach hangers to the tent bar, and set height.
Route cables safely and avoid heat and electrical hazards
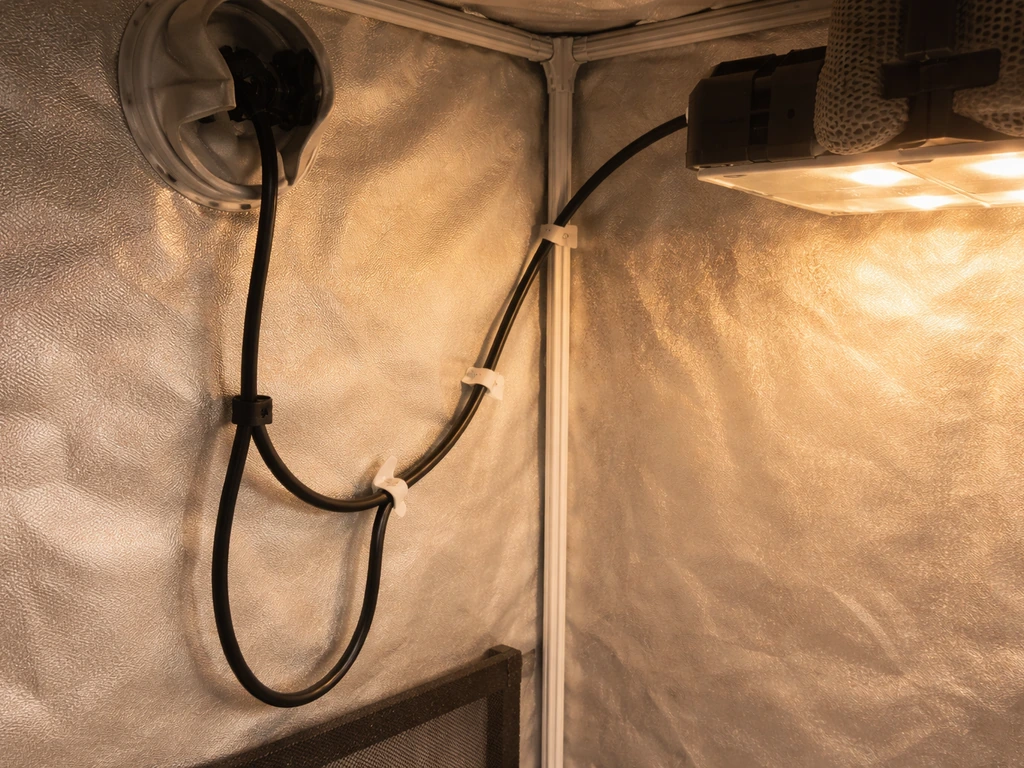
This step gets skipped more than any other, and it's the one most likely to cause a real problem. In a grow tent, you're dealing with high humidity, warm air, and multiple cords in a small space. Here's how to handle it properly.
- Form a drip loop in your power cable: let the cord hang below the plug connection point before it goes up to the outlet, so any moisture runs down the cord and drips off instead of running into the plug. This is one of the most consistently recommended safety tips from grow room safety resources.
- Keep plugs and connections off the floor. Power strips and timers should sit above the waterline—ideally mounted at light height or higher on the tent frame, not sitting on the ground where spills or drips can reach them.
- Don't let the power cable touch the light's heat sinks or housing. Route it along the tent frame using zip ties or velcro straps so it hangs freely.
- Avoid running the cord through a pinch point where the tent zipper or frame bar could cut into the insulation over time.
- Leave some slack in the cord between the light and the first anchor point. When you raise or lower the light, a cord with no slack can pull tight and stress the connection at the driver or plug.
If you're hanging a light in a smaller or enclosed space, cord management gets even more critical. The guide on hanging a grow light in a closet goes into more detail on routing cables when you have tight walls and less room to work with.
Adjust as your plants grow
The height you set on day one is not the height you'll use at week eight. Plants grow toward the light, and if you don't raise the fixture as the canopy climbs, you'll end up with light burn, bleaching, or heat stress on your tops. Ratchet hangers exist exactly for this reason, use them.
A simple approach: check canopy distance every few days during fast-growing phases like late vegetative or stretch in early flower. Measure from the top of the tallest plant to the bottom of the fixture. If that distance is getting below your target range for the current stage, raise the light 2–3 inches. Don't wait until you see stress symptoms.
Rather than thinking in fixed inches, think in PPFD targets per stage. Seedlings want roughly 100–300 PPFD. Veg plants generally do well at 400–600 PPFD. Flowering plants can handle 600–900+ PPFD depending on CO2 levels and cultivar. Height is just the tool you use to hit those targets, combined with your dimmer setting if your light has one. Mars Hydro's guidance specifically frames it this way: start seedlings at 18–24 inches with intensity at 25%, then use your light's distance and dimmer chart to dial in each subsequent stage rather than chasing a single fixed height.
One more thing worth knowing: raising your light doesn't just reduce intensity, it also changes uniformity. Migrolight's testing shows that increasing hang height to around 18 inches (45 cm) actually improves PAR intensity at the edges of the footprint and evens out the coverage pattern, at the cost of some total PAR reaching the canopy. That's a worthwhile trade-off if you're seeing hot spots in the center and dim edges.
If something's off: quick fixes for common problems
Light is too close
Signs: yellowing or bleaching on the tops of plants, crispy leaf tips, plants growing sideways to avoid the light. Fix: raise the light 3–4 inches and watch the new growth over the next 48 hours. Also check that you're not running intensity at 100% during early stages, dial back to 50–75% if needed.
Light is too far away
Signs: plants stretching tall with long internodal spacing, pale green color, slow growth. Fix: lower the light in 2-inch increments until you're hitting the target range for your stage. If you're already at the maximum recommended distance and still seeing stretch, your light may be underpowered for the space.
Uneven coverage across the canopy
Signs: one side of the tent growing faster or taller than the other, visible brightness difference across the floor. Fix: first check that the light is actually level, measure corner to corner and adjust. If it's level and you're still seeing uneven growth, the light's footprint may not be matched to your tent size. Either raise the light to spread the footprint wider (accepting lower overall intensity) or add a second light to fill the gap.
Coverage doesn't reach the edges
Signs: plants at the tent edges are visibly smaller or lighter green than center plants. Fix: raise the light slightly, this expands the footprint at the cost of some center intensity. Alternatively, position your most light-hungry plants toward the center and use the edges for less demanding ones. Too-close placement also creates hot spots while too-far placement reduces yield, so finding the right balance for your specific light and tent combination is worth taking the time to dial in properly.
Light keeps shifting or tilting
If your fixture is creeping sideways or tilting after setup, check that both ratchet hangers are bearing equal weight. If the light has two hang points that aren't centered on the fixture, the light will naturally tilt toward the heavier side. Adjust the rope length on each hanger individually until the fixture hangs level. Make sure the carabiners are fully closed and locked, an open gate can allow the fixture to shift under vibration from fans.
FAQ
How do I know the grow light’s coverage footprint really matches my tent?
Confirm your light’s vegetative and flowering coverage areas and compare them to your tent’s floor dimensions, then account for the stage you’re in. If the fixture is only rated for a smaller coverage area, you may need multiple lights or accept weaker edges during flowering even if the height is correct.
Should I start higher and lower later, or start low and raise?
Start at a conservative distance for the plant stage and intensity, then adjust based on measurements and response. If you start too low, you risk bleaching before you can correct it, so many growers begin toward the higher end of the suggested range and step down only if PPFD is below target.
What’s the safest way to prevent cord or power adapter heat buildup inside the tent?
Keep connections and adapters off the hottest airflow path and avoid letting cables hang against the light’s body. Route slack so it does not touch the fixture, and use cord clips so nothing can drift into contact when you raise or lower the light.
Can I use adjustable ratchet hangers for a heavy bar light that has multiple hang points?
Yes, but balance matters more than with a single-point panel. Use the correct hanger count for the fixture, clip each carabiner to the designated hang points, then adjust rope lengths until the load is shared evenly and the light stays level under its own weight.
How tight should the carabiners and ratchet ropes be?
Carabiners should be fully closed and locked so they cannot slip, and the rope should be snug enough that the ratchet holds position without slack. Too much slack makes height drift more likely, too much tension can pull hang points out of alignment or stress the fixture’s brackets.
Do I need to align the light to the tent’s vents or fans, or is “centered” enough?
Centered placement is the priority for even canopy intensity, but you should also avoid blocking direct airflow paths. Keep the fixture centered and level, then ensure fan circulation can still move across the canopy surface.
What if my tent has multiple cross bars and I’m not sure which one to use?
Choose the bar that lines up with the intended center point for your light and provides stable attachment at the correct height. If your light tilts or sits off-level after installation, it usually indicates the attachment points are not landing symmetrically on the chosen bar.
How often should I re-check height and alignment after the initial setup?
Re-check during fast growth phases every few days by measuring from the fixture to the top of the tallest plant, and verify it’s still level after any major canopy expansion, fan adjustments, or if the tent gets bumped. A 2 minute leveling check prevents a slow, unnoticed intensity imbalance.
What should I do if the light is level but one side of the tent still grows faster?
First verify uniformity visually and compare canopy brightness, then consider that the fixture’s footprint may be mismatched to your tent size or that plant loading is uneven. Raising slightly can spread light to the edges, or adding a second light can fill the coverage gap without sacrificing edge uniformity.
Is it ever okay to use zip ties, fixed cables, or chain instead of ratchet rope hangers?
For anything beyond a tiny seedling panel, it’s a bad tradeoff because you lose fine height adjustment and may not respond quickly to plant stage changes. Fixed hardware also increases the risk of accidental over-tightness or uneven tilt if the fixture shifts after installation.
My plants are stretching, but the light height looks correct. What else could cause it?
Check your intensity setting or dimmer level first, then confirm you’re measuring canopy distance to the tallest active growth point, not an average. Underpowered intensity (or starting at too low a dimmer percentage for the stage) can mimic effects of insufficient height.
How do I adjust height without disturbing my cord management and creating trip hazards?
Use a slack-management plan before you start, route cables along the tent frame, and keep strain relief near the top so the cord length does not change tension when you move the fixture. After each height change, do a quick scan to confirm no cables are pulling across the light or snagging on the door or fans.
Next Article
Innova Grow Light Instructions: Setup, Use, and Troubleshooting
Step-by-step Innova LED grow light instructions: setup, mounting, distance, schedules, intensity, and fast troubleshooti