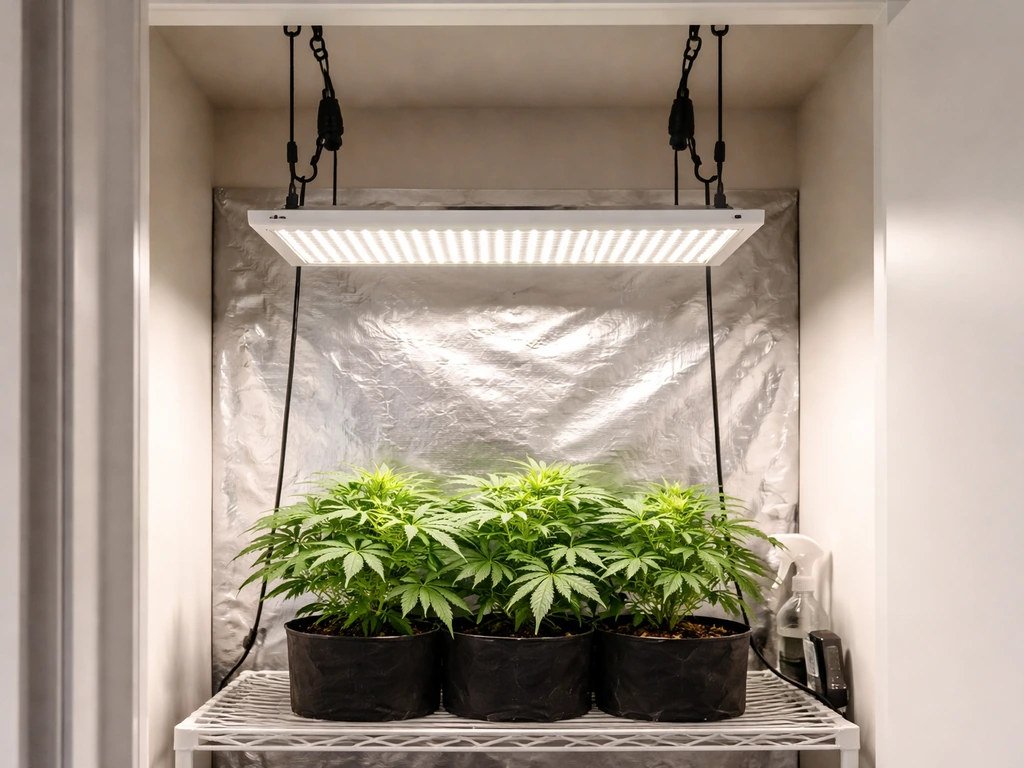
To hang grow lights on shelves, you anchor a hook, rail, or bracket to a solid point on or above each shelf, suspend the fixture with adjustable rope hangers or chain, then position it at the right height above your plants (typically 6–24 inches for LEDs, depending on the fixture and plant type). Getting even coverage across multiple shelves comes down to three things: picking hardware rated for your fixture's weight, setting the correct hang height for each plant type, and managing cords safely so nothing overheats or trips a breaker. This guide walks through every step so you can get your setup running today.
How to Hang Grow Lights on Shelves: Step-by-Step Guide

Marcus Tillman
7 May 2026
Plan before you hang anything
Measure your shelves first. Write down the interior width and depth of each shelf bay, the vertical clearance between shelves, and the mature height of the plants you're growing. Those three numbers drive every other decision. A seedling tray sits maybe 2 inches tall, so you have plenty of room to work. A mature tomato or pepper in a 5-gallon bucket might need 18–24 inches of headroom just for the plant, leaving little space for the light itself.
Think about your light goal, not just your light fixture. Seedlings need moderate but consistent light, somewhere in the range of a DLI (daily light integral) of 10–15 mol/m²/day to push strong growth without burning tender leaves. Houseplants vary widely, but most do fine in the 10–20 range depending on species. The DLI you hit depends on both the intensity your fixture delivers at a given height and how many hours you run it each day, so your hang height and your timer setting work together. Raise the light to reduce intensity; run fewer hours to cut total dose. You'll be adjusting both once plants are in place.
Sketch a quick shelf map. Mark where you'll anchor hardware, where the cord will route to an outlet, and which shelves get a dedicated fixture versus shared side-by-side coverage. This takes five minutes and saves you from drilling in the wrong spot or buying a fixture that's 2 inches too wide for the bay.
Choosing the right hardware and tools
Your hanging hardware needs to hold the fixture weight with a comfortable safety margin. Most panel-style LED grow lights weigh between 2 and 15 pounds. Adjustable rope ratchet hangers (the kind that come bundled with many grow light kits) are rated to handle serious loads: VIVOSUN's adjustable rope hangers, for example, are rated at 75 lbs per ratchet, or 150 lbs per pair, which far exceeds any home shelf fixture. Rail-based systems are a different story. A shelf rail hook system like the IKEA BROR rail is only rated to about 11 lbs per hook, which is fine for a lightweight LED strip but not for a heavier panel. Always check the load rating on whatever you're attaching to, not just the hanger itself.
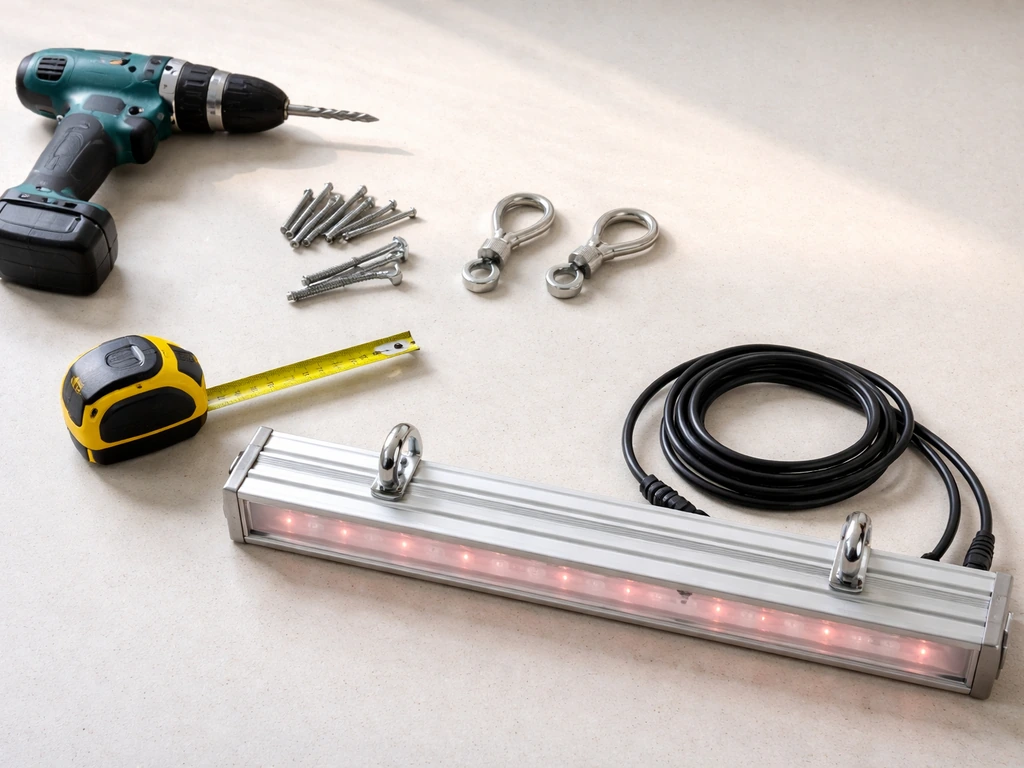
For most shelf setups, you'll need: a drill with a bit sized for your screws or hooks, a stud finder if you're going into a wall above an open shelving unit, a level, a tape measure, S-hooks or carabiner clips for connecting chain to a cross-bar or rail, and adjustable rope ratchet hangers or lightweight jack chain (available at any hardware store). If your shelves are wire rack style (like a Metro or similar utility shelf), you can skip the drill entirely and use zip ties, cable clips, or S-hooks directly on the wire frame.
- Drill and appropriate bit (for wood, metal, or wire shelving)
- Stud finder (for wall-mounted shelving systems)
- Tape measure and level
- Adjustable rope ratchet hangers or lightweight jack chain
- S-hooks or carabiner clips
- Zip ties and adhesive cable clips for cord management
- A timer (mechanical or smart plug)
- Optional: PAR/PPFD meter for dialing in coverage
Mounting methods: hooks, chains, cords, rails, and brackets
There's no single best method. The right choice depends on your shelf type, whether you want tool-free adjustment, and how permanent you want the setup to be. To mount an LED grow light, start by choosing a method that matches your shelf type and how adjustable you need the height to be. Here's how each approach works in practice. If you're mounting a grow light in a closet, focus first on choosing the right hanging method and then fine-tune the hang height for even coverage how to hang grow light in closet.
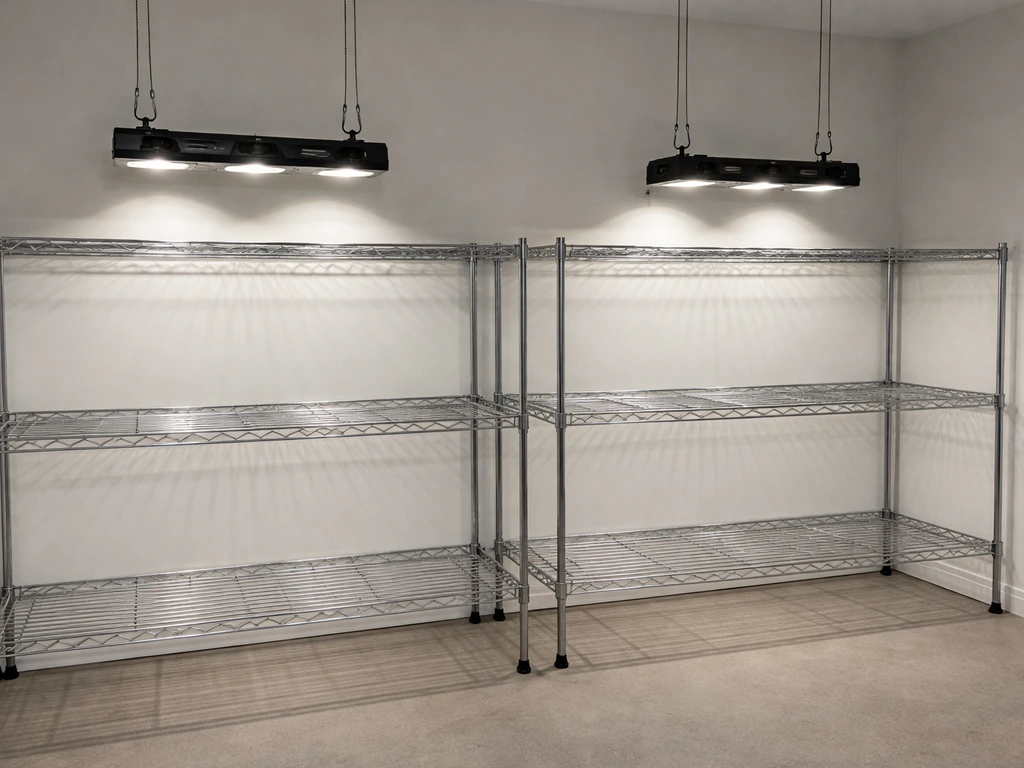
Rope ratchet hangers (most popular for good reason)
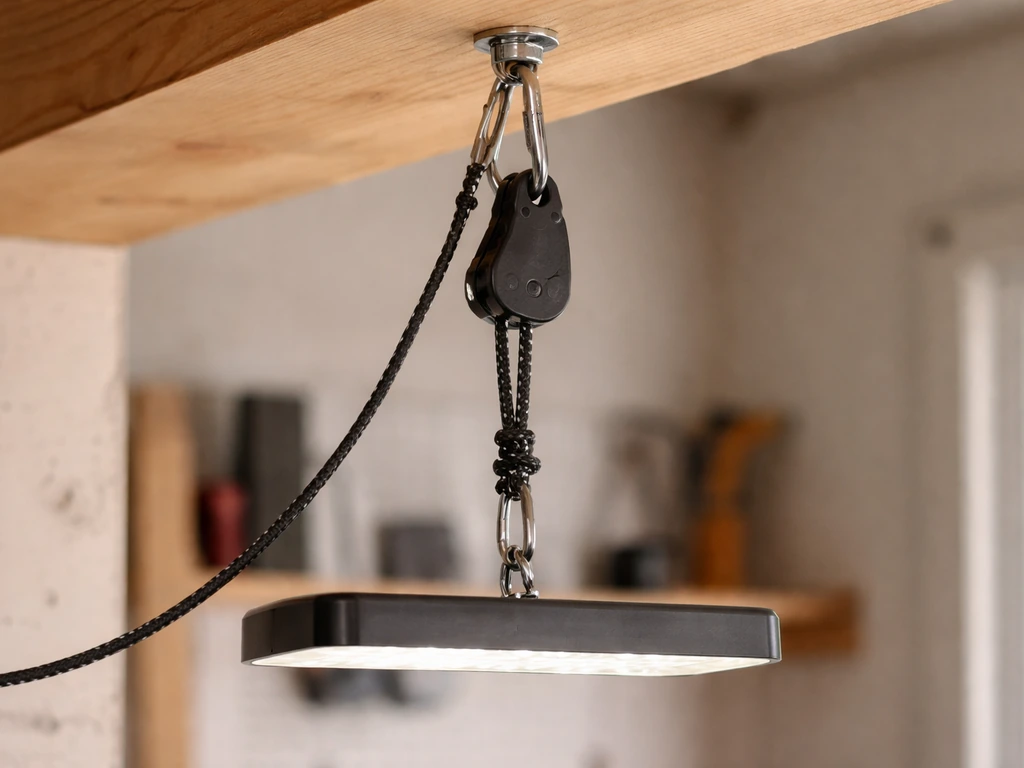
Screw a sturdy eyebolt or cup hook into the underside of the shelf above, or into a horizontal crossbar you've added. Clip the rope hanger's carabiner onto the hook, thread the rope through the fixture's hanging points, and you're done. The ratchet mechanism lets you raise or lower the fixture in seconds without tools. This is the go-to method for wire shelving units and any setup where you'll be adjusting height frequently as plants grow.
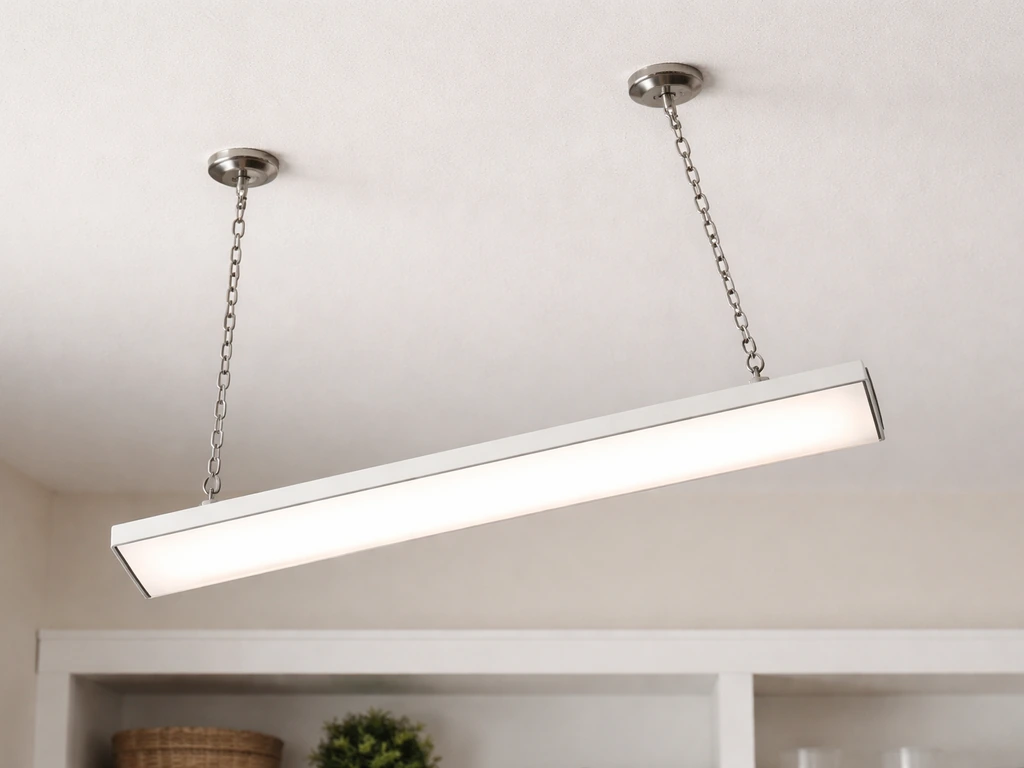
Chain and S-hooks
Jack chain is cheap, strong, and easy to find. Run a length of chain from a hook screwed into the underside of the shelf above, then use an S-hook to connect the chain to the fixture's hanging point. To change height, simply move the S-hook to a different chain link. It's slightly less convenient than rope ratchets but more rigid and better for heavy fixtures. Use at least two chain points per fixture to keep it level.
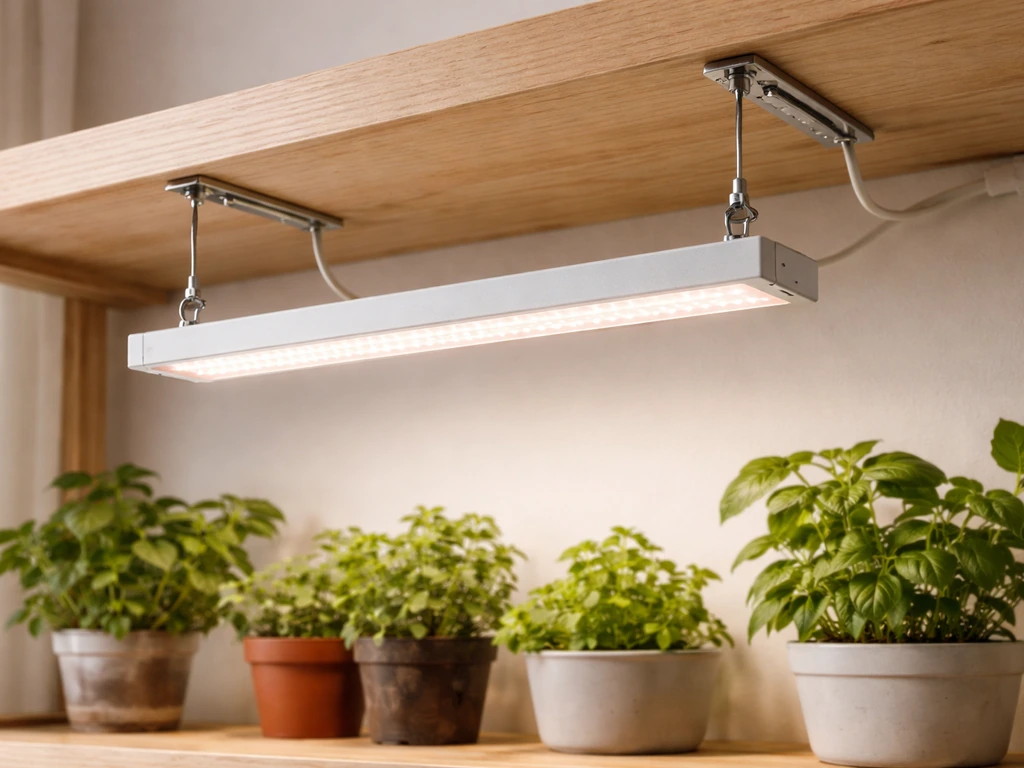
Rails and shelf-mounted brackets
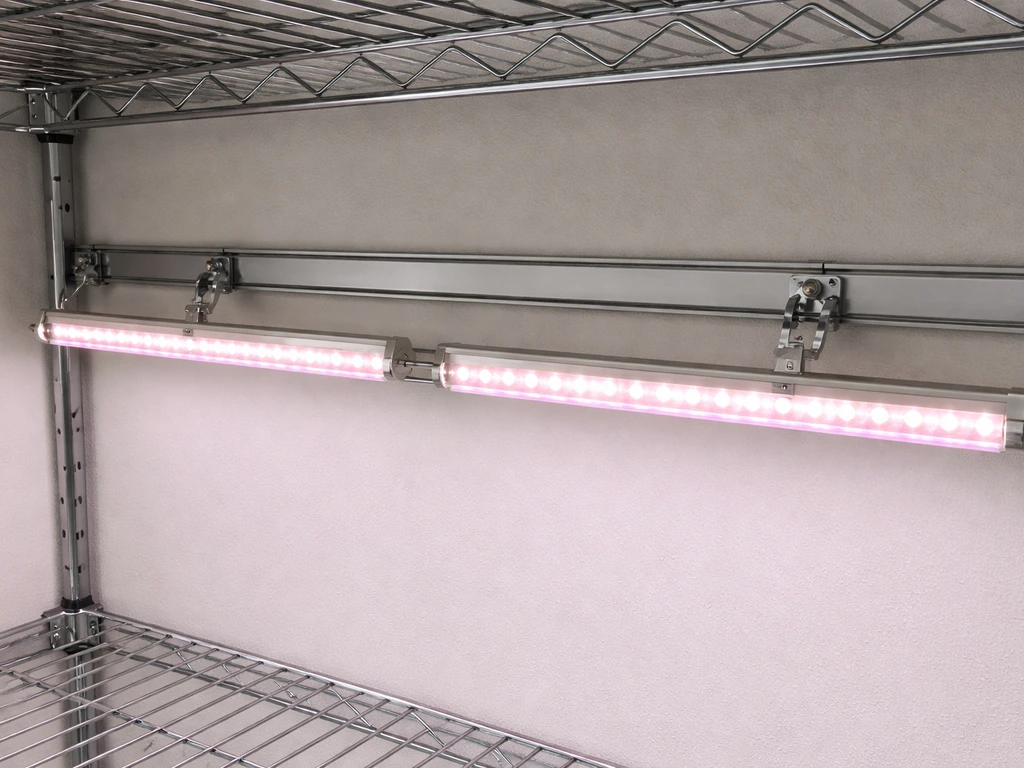
If you're running LED grow light strips rather than a single panel, a horizontal rail mounted to the back or sides of the shelf bay works well. The strips clip or hang from the rail at even intervals, and the whole assembly stays tidy. Keep in mind that rail hook systems have lower per-hook load limits than anchored eyebolts, so this method suits lightweight strips, not heavy panels. For wooden shelving units, you can also screw a small shelf bracket to the underside of the upper shelf and use it as a fixed mount point.
Zip ties and wire clips (for wire shelving)
Wire rack shelves (the kind used for garage storage or utility shelving) are actually great for grow lights because the open grid gives you countless attachment points. Loop a zip tie through the wire grid on the shelf above and through the fixture's hanging loop, then snug it down. Use two or more points for balance. The downside is that adjusting height means cutting the zip tie and refastening, so this works best for plants that won't change much in height, like propagation trays or low-growing herbs.
One important safety note on hanging
Never hang the fixture from its power cord. That sounds obvious, but in a tangle of equipment it's easy to accidentally loop a cord around a hook and let it bear weight. Grow light installation guides consistently flag this: the cord is not a structural element, and loading it can damage the insulation, create a shock hazard, or cause the fixture to fall. Always hang from the fixture's designated mounting points, and keep the cord slack and separate.
Positioning lights: distance, angle, and coverage across multiple shelves
Hang height is the single biggest variable in your grow light setup, and it's not a set-and-forget number. A useful physical principle to keep in mind: if you double the distance between your light and the plant canopy, the light intensity reaching the plants drops to about one-quarter. That's the inverse-square law in action, and it's why a 2-inch adjustment at close range makes a huge difference while the same move at 24 inches barely registers.
Starting distances by plant type
| Plant Type | Typical Starting Height Above Canopy | Notes |
|---|---|---|
| Seedlings / cuttings | 12–18 inches | Start higher, lower gradually once established |
| Leafy greens / herbs | 8–14 inches | Moderate intensity works well; watch for bleaching |
| Fruiting plants (tomato, pepper) | 18–24 inches | Need more intensity; lower as plants adjust |
| Low-light houseplants | 24–36 inches | High sensitivity to heat; err on the side of more distance |
| High-light succulents / cacti | 12–18 inches | Tolerate intensity but still start conservatively |
These are starting points. Your specific fixture's PPFD output at a given distance is what actually matters, and manufacturers often publish PPFD maps showing intensity at multiple distances (common reference points include 12, 24, 36, and 48 inches). If you have access to a PAR meter or PPFD meter, take a grid of readings at canopy level (at least 4–5 points spread across the growing area) and average them. A single center reading doesn't tell you how coverage varies toward the edges, and that's exactly where uneven growth problems start.
Getting even coverage across the shelf
LED fixtures are directional, meaning the light radiates in a defined beam pattern rather than scattering in all directions. For a single panel hanging in the center of a shelf bay, this usually works fine for a 2x2 to 2x4 foot area. For wider shelves or longer runs, you need either a wider-beam fixture or multiple fixtures positioned so their light patterns overlap slightly. A good rule of thumb when using strip lights: position them so adjacent strips' coverage patterns overlap by about 20–30 percent. That overlap eliminates the dim bands that appear between fixtures and cause uneven plant growth.
Angle matters too. In most shelf setups the fixture hangs flat and parallel to the growing surface, which is usually correct. But if you have plants at the edges of a wide shelf getting noticeably less light than center plants, tilting the outermost fixture or strip very slightly inward (5–10 degrees) can improve edge coverage without adding hardware.
Power, cord management, and electrical safety
Most shelf grow setups end up with multiple fixtures, timers, and fans all plugged into a single circuit. That's fine as long as you're not overloading it. Add up the wattage of everything plugged into that outlet and make sure you're staying well under 80 percent of the circuit's capacity (typically 1,440 watts on a standard 15-amp circuit, 1,920 watts on a 20-amp circuit). Do not daisy chain power strips or plug one strip into another. That series connection creates an overloading hazard that's a real fire risk, not just a theoretical one.
GFCI protection is required by the National Electrical Code (NEC 410.184) for horticultural lighting that uses flexible cords, which covers the vast majority of plug-in grow lights. If your outlet isn't already GFCI-protected, use a GFCI plug adapter. Indoor growing environments involve water, humidity, and condensation, and moisture near electrical connections is a genuine shock hazard. Don't skip this.
Route cords intentionally. Run them along the back edge or side of the shelf rather than across the growing area. Secure them with adhesive cable clips or velcro ties every 12–18 inches so they stay where you put them. Form a drip loop in any cord that runs near a watering zone: let the cord dip below the outlet entry point before plugging in, so any water that travels along the cord drips off at the bottom of the loop rather than running into the outlet. Keep cords away from the fixture itself and any hot surfaces. Extension cords are fine for temporary setups but shouldn't be your permanent solution, and damaged cords should be replaced, not taped.
Managing heat from LED fixtures
Modern LED grow lights run much cooler than older HID or fluorescent fixtures, but they still produce heat, especially higher-wattage panels. Hanging the fixture too close not only risks leaf burn from light intensity but can also raise the ambient temperature in an enclosed shelf bay. If you're running lights inside a closed shelf unit or grow cabinet, add a small fan to keep air circulating. This also helps prevent hot spots from forming directly under the fixture. Check that cords aren't resting on or near the light's heat sink, and don't drape fabric or other materials over a running fixture.
Setting your schedule: timers, dimming, and adjusting height over time
Plug your fixture into a timer from day one. Most indoor plants under supplemental grow lighting do best with 12–16 hours of light per day. The Iowa State Extension recommends 12–14 hours for general indoor plants. The University of Maine Extension notes that some houseplants benefit from up to 16–18 hours in low-natural-light conditions. Seedlings and propagations typically need 14–16 hours. Don't run lights 24 hours; plants need a dark period for respiration and hormonal processes. Set your timer once and let it run on the same schedule every day.
If your fixture has a dimmer, use it alongside height to fine-tune intensity. Raising the light reduces intensity but also reduces heat and spreads coverage over a wider footprint. Dimming keeps the fixture at the same height but reduces output. In practice, use height adjustment as your primary tool in the first couple of weeks (when you're still learning how your specific plants respond), then dial in with the dimmer once you've found a good position. The DLI your plants receive equals intensity multiplied by duration, so you can compensate for running fewer hours by lowering the light slightly, or stretch a light schedule by raising the fixture a few inches.
Raise the light as plants grow toward it. This sounds simple but it's easy to forget. Mark your fixture's current height with a piece of tape on the chain or rope and check it weekly. Never let seedlings or soft-leaved plants grow into physical contact with the fixture. Leaves that touch a running LED panel can burn even if the panel itself feels cool to the touch, because the concentrated light output at point-blank range is extreme.
Troubleshooting after installation
Uneven growth across the shelf
If plants near the edges of the shelf are growing more slowly, stretching toward the center, or looking pale compared to center plants, your coverage isn't even. First, check hang height: raising the fixture slightly spreads the light footprint and can improve edge coverage at the cost of slightly lower overall intensity. Second, check fixture position: is it centered over the plants, or shifted to one side? Third, consider adding a second fixture or strip for wide shelves. Plants don't lie, and uneven growth is the clearest possible signal that your light map has gaps.
Leaf burn and hotspots
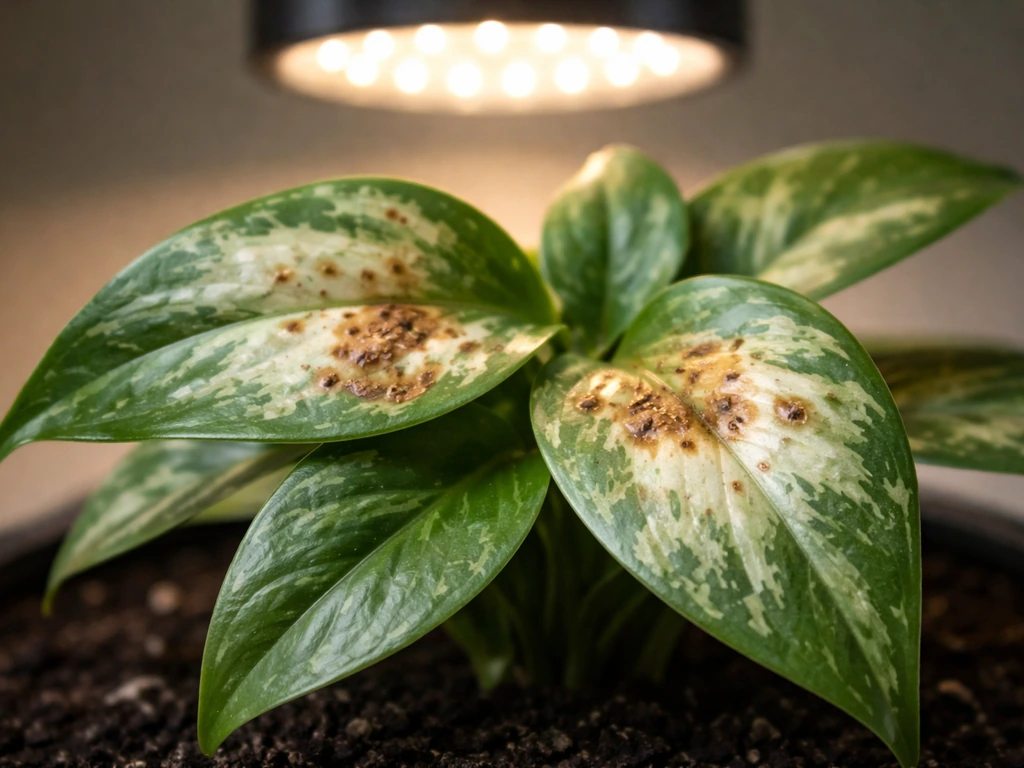
Bleached, white, or brown patches on the leaves directly under the fixture mean the light is too close or too intense. Raise the fixture by 2–4 inches and watch for improvement over the next few days. If you have a dimmer, reduce output by 20 percent and check again before lowering the fixture further. Hotspots are especially common with small-footprint, high-output fixtures hung in the center of a tray: the center plants get blasted while the edges stay dim. A wider fixture, a higher hang position, or supplemental edge lighting solves this.
Stretchy, leggy plants
Long, stretched stems with large gaps between leaf nodes (etiolation) mean plants aren't getting enough light. The causes are usually light hanging too high, too few hours per day on the timer, or a fixture that simply isn't powerful enough for the area it's trying to cover. Lower the fixture by 2–3 inches, check that your timer is actually running the full scheduled hours, and if neither helps, you may need a second fixture or an upgrade in wattage.
Light flickering
Flickering usually points to a loose cord connection, a failing driver, or an incompatible dimmer. Check that the power cord is fully seated at both the fixture and the outlet. If the fixture is on a smart plug or dimmer switch, confirm the dimmer is compatible with LED drivers (many standard wall dimmers are not). If the flicker persists after checking connections, the driver is likely failing and the fixture needs to be replaced or repaired under warranty.
Sagging, wobble, or uneven hang
A fixture that tilts to one side usually means one rope or chain run is set at a different length than the other. On rope ratchet hangers, release tension on the longer side and re-set it to match the shorter side. On chain, move the S-hook up or down one link. A fixture that slowly sags over time often has a ratchet mechanism that's worn or slipping under load. Replace the hanger rather than improvising a fix: a dropped fixture can damage plants, equipment, and potentially start a fire. If your anchor point is wobbling (a hook that was screwed into particleboard, for instance), pull it out and re-anchor into solid wood or add a backing plate.
Your post-install checklist
- Confirm anchor points are secure and hardware load ratings exceed your fixture weight
- Hang fixture at the recommended starting height for your plant type (use the table above)
- Level the fixture so light spreads evenly across the entire shelf
- Route and secure all cords with clips or ties, keeping them clear of heat and water
- Form a drip loop if cords run near any watering area
- Plug into a GFCI-protected outlet (use an adapter if needed)
- Set your timer: 12–14 hours for most plants, 14–16 hours for seedlings
- Check plants after 3–5 days for signs of burn (lower the fixture or dim) or stretch (raise slightly or add hours)
- Measure or estimate coverage at the shelf edges and adjust fixture position or add a second light if edge plants lag
- Raise the fixture as plant height increases, and never let leaves touch the fixture
Once your setup is running for a week, the adjustment cycle becomes routine. Most problems show up in the first few days as either burn or stretch, both of which are easy to fix with a small height change. Beyond shelf setups, the same principles around hang height, coverage, and scheduling apply whether you're working in a closet, mounting lights from a ceiling, or figuring out how high to hang a specific LED model above your canopy. The fundamentals don't change, just the mounting hardware.
FAQ
Can I hang grow lights from the underside of the shelf without a stud, or should I always hit wall studs/solid wood?
If you are anchoring into the underside of a shelf, use hardware rated for the fixture load and the material (wood, metal, particleboard). Avoid particleboard for structural mounts, if the shelf can flex or wobble, use solid wood or add a backing plate so the load spreads. For wall or bracket mounts above an open unit, hitting studs is usually safer than relying on drywall alone.
What’s the safest way to determine hang height when my plants are in different size pots on the same shelf?
If canopy levels differ, center the fixture based on the tallest plant canopy and manage shorter plants with spacers or pot stands, or use multiple shorter fixtures on separate zones. Relying on one fixed hang height for a mixed-canopy shelf often creates burn in tall spots and stretching in low spots.
How do I avoid uneven coverage when using multiple LED strips or panels on one shelf?
Check overlap and alignment, position adjacent strip segments so their effective light regions overlap slightly, and keep each strip parallel to the canopy. If you have a center hotspot, raise the whole assembly a few inches or stagger fixtures so their beams blend rather than stacking in the middle.
Should I measure at canopy level with the lights on, and how should I place readings across the shelf?
Yes, measure with the lights running at the intended settings, then take readings at multiple points across the canopy area (at least 4 to 5) including near the edges. Averaging edge and center values helps you tune hang height for even growth rather than optimizing only for the middle.
Is it okay to use a cheap plug-in timer, or do I need a specific type for grow lights?
A standard outlet timer is usually fine, but avoid low-quality timers that can drift or fail under high humidity. If you use a smart plug, choose one rated for the fixture’s wattage and ensure it switches reliably at the full current draw, otherwise you can get power cycling that stresses plants.
Can I mount a grow light directly above a watering area, for example over a tray or self-watering reservoir?
Keep the electrical connection and any exposed cord away from splashing zones, and use a drip loop so water does not track along the cord toward the outlet. If the shelf bay is enclosed, ensure airflow so humidity does not condense on the driver or cord connections.
How much cord slack should I leave, and should I coil extra cord anywhere?
Leave enough slack to adjust hang height without tension, but do not coil excess cord tightly near the fixture. Keep slack managed along the back or side of the shelf, secured with clips, and ensure cords do not rest on or contact the fixture heat sink.
What should I do if the fixture has a dangling power lead with its own strain relief, can I use that to help support it?
No, the power lead is for electrical connection only, do not use it as a support. Support the fixture exclusively at its designated hanging points, if the included lead limits your hanging geometry, adjust the anchor points instead of changing load-bearing method.
How can I tell whether my dimmer is safe to use with my LED grow light driver?
If you see flicker, buzzing, or inconsistent output, the dimmer is likely incompatible with the LED driver. Verify the dimmer is rated for LED drivers and matches the control type the fixture uses, many common wall dimmers for household lighting are not suitable for horticulture drivers.
What’s the best way to confirm my circuit load is safe when I have multiple devices on the same outlet?
Add up the wattage of every device on that outlet (fixtures, fans, controllers) and keep total draw well below 80 percent of the circuit rating. If you are near the limit or unsure, split the load across separate outlets or circuits rather than relying on extension cords or daisy chaining power strips.
If my plants are stretching, should I lower the light or increase the number of hours first?
Start with a hang height adjustment, lowering a few inches usually raises intensity at the canopy quickly. Then confirm your timer is delivering the full scheduled light hours, if time is already correct and stretching persists, increase run time gradually or add another fixture for the coverage gap.
My leaves are bleaching near the center, does that always mean the light is too low?
It usually means intensity is too high where those leaves receive the strongest beam, even if the fixture body feels cool. Raise the fixture in small steps (2 to 4 inches) and check if the problem improves within several days, for persistent center hotspots consider widening coverage or adding edge support.
What should I do if the fixture tilts or one side sags after a few weeks?
Rebalance the hang points, check that both sides are set to equal length or chain link position, and confirm the anchor is stable. If a rope ratchet starts slipping or shows wear, replace the hanger instead of retensioning repeatedly, and if the mount point wobbles, re-anchor into solid material.
Next Article
How to Hang Grow Light in a Closet Step by Step
Step-by-step guide to hang a grow light in a closet, choosing hardware, mounting height, safe wiring, and adjustments.