For most LED grow lights, start at 24 to 36 inches above your plant canopy for seedlings, then lower to 18 to 24 inches during vegetative growth, and drop to 12 to 18 inches once plants are flowering. Those ranges cover the vast majority of consumer LED fixtures and give you a safe starting point before you dial things in further. But the real answer depends on your specific light, your specific plants, and what stage of growth you're in, so let's break it all down.
How High to Hang LED Grow Light: Exact Height Guide

Marcus Tillman
15 Apr 2026
Quick starting heights by growth stage
If you just want a number to use right now, here it is. These are the ranges used across popular brands like Mars Hydro, BESTVA, and Spider Farmer, and they hold up well as a universal starting point.
| Growth Stage | Recommended Starting Height | Target PPFD Range |
|---|---|---|
| Seedlings / Clones | 24–36 inches (60–90 cm) | 150–300 µmol/m²/s |
| Vegetative growth | 18–24 inches (45–60 cm) | 400–600 µmol/m²/s |
| Flowering / Fruiting | 12–18 inches (30–45 cm) | 600–900 µmol/m²/s |
| Leafy greens / Herbs | 18–24 inches (45–60 cm) | 100–250 µmol/m²/s |
The Mars Hydro TS 600, for example, explicitly calls out 24 inches (60 cm) as the seedling hanging height. The BESTVA BP2000 manual says 18 to 24 inches for seedlings and drops to 12 to 18 inches for flowering. Spider Farmer recommends 24 to 36 inches above canopy for seedlings when running full-spectrum LEDs at full power. Those manufacturer numbers are consistent with each other, which tells you these starting ranges are solid, not just guesses.
If your light is dimmable, you have an extra tool: Mars Hydro recommends hanging at 18 to 24 inches but running at only about 25% intensity for seedlings, then raising intensity gradually rather than moving the fixture every few days. That approach is much more convenient when your setup is already locked in.
What actually controls the right hanging height
Hanging height isn't just about wattage. A lot of people assume a 300W light should always hang at X inches, but that's not how it works. Here are the real variables.
Light output and intensity (not just wattage)
True output (measured in PPFD, which is the amount of photosynthetically active light hitting your canopy per second) matters far more than the wattage label on the box. A 300W blurple panel from five years ago delivers far less usable light than a modern 200W full-spectrum bar light. Trusting the wattage number alone will get you into trouble. The only reliable comparison is the manufacturer's PPFD map, which shows actual light intensity at different distances.
Beam angle and coverage area
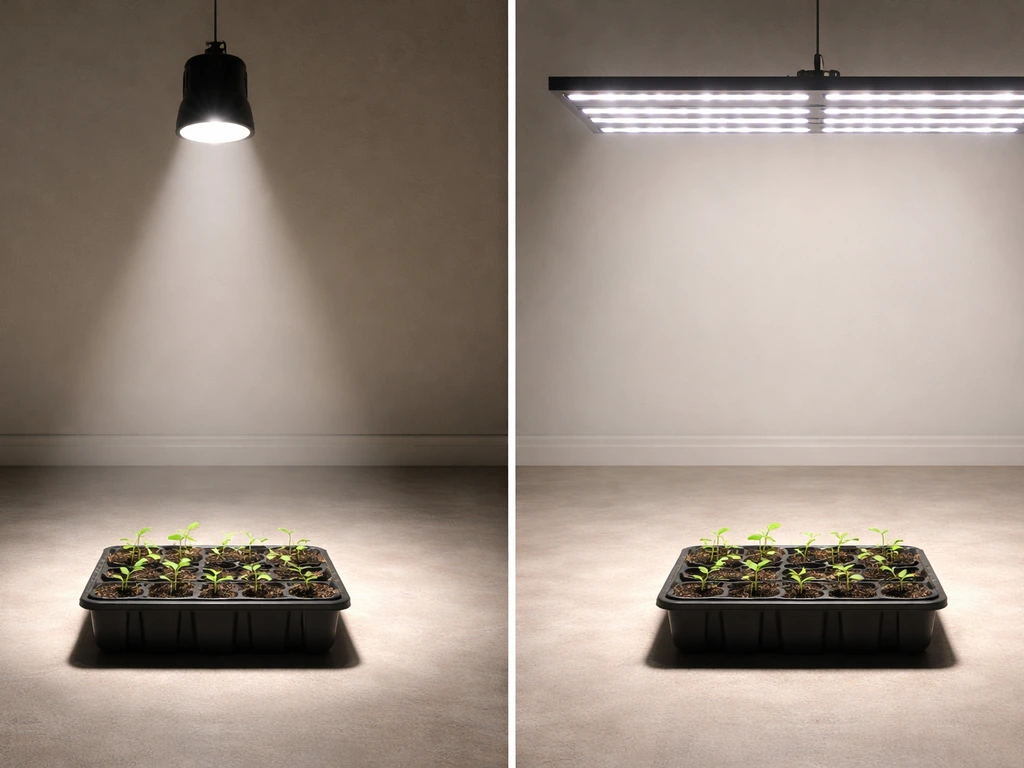
A light with a tight beam concentrates intensity in a smaller area and can burn plants even when hung high. A wide-angle or bar-style LED spreads light more evenly and is more forgiving at shorter distances. If your light has a reflector or secondary lens, it's more directional, meaning the effective distance where intensity is safe is narrower. Check your manual for the coverage footprint at different heights.
Plant type and stage
Seedlings are the most sensitive. Too much light early on can bleach or stress them before they even have a real root system. Leafy greens and herbs like basil or lettuce need surprisingly little light compared to tomatoes or cannabis in flower. Leafy greens thrive at PPFD levels of just 100 to 250 µmol/m²/s, which means you can often hang your light higher or dim it down and still get great results. Flowering and fruiting plants are the most demanding and benefit most from bringing the light closer.
Whether your light is dimmable
If your LED has a dimmer or adjustable driver, you have a lot more flexibility. You can keep the fixture at a consistent height and adjust intensity up as plants mature, rather than physically raising and lowering the light every few weeks. For fixed-output lights, hanging height is the only knob you have, so you'll be adjusting more often.
Reading your plants: the most reliable feedback loop
No chart beats watching your actual plants. Once you hang the light at your starting height, the plants will tell you whether it's right within a few days. Here's what to look for.
Signs the light is too far away
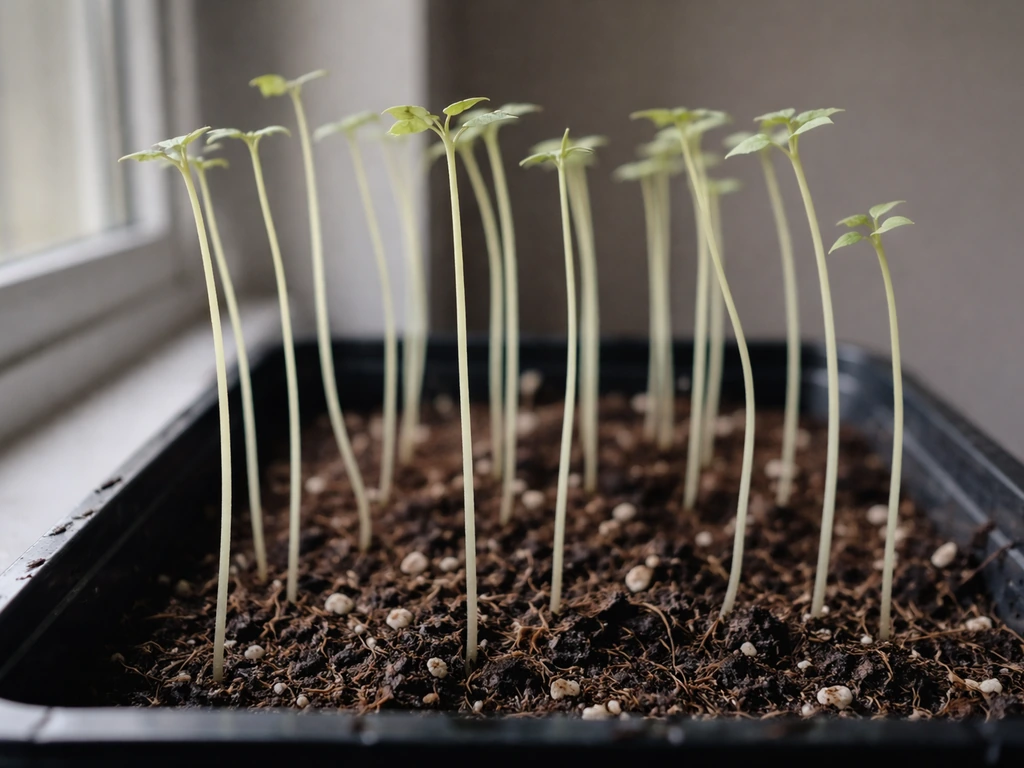
Stretching is the clearest signal. When plants don't get enough light, they elongate their stems trying to reach more of it. This is called etiolation, and it results in tall, spindly, weak plants that struggle to support themselves. Seedlings are especially prone to this. If your seedlings are reaching upward with long gaps between leaf nodes, your light is too high or too dim.
Signs the light is too close
Bleaching is the giveaway here. When leaves get hit with too much light intensity, the chlorophyll breaks down and leaves turn pale yellow or white, especially at the tops of plants closest to the fixture. This is photobleaching, and it's separate from heat stress, though both can happen simultaneously when a light is too close. Heat stress shows up as yellow-brown crispy spots or upward leaf curling. If you hold your hand palm-down at canopy level for 30 seconds and it feels uncomfortably hot, the light is too close.
Sustained temperatures above 90°F at canopy level can slow growth and trigger heat stress symptoms. The tricky part is that both too much light and too little light can cause yellowing, just in different patterns, so always check distance and temperature together before assuming it's a nutrient issue.
The fine-tuning workflow
- Hang the light at your stage-appropriate starting height from the table above.
- Wait 3 to 5 days and observe: are stems compact and leaves deep green? You're in range.
- If you see stretching, lower the light by 2 to 3 inches (or increase intensity if dimmable).
- If you see bleaching, pale tops, or heat stress, raise the light by 2 to 3 inches (or dim it down).
- Make one adjustment at a time and wait another 3 days before judging.
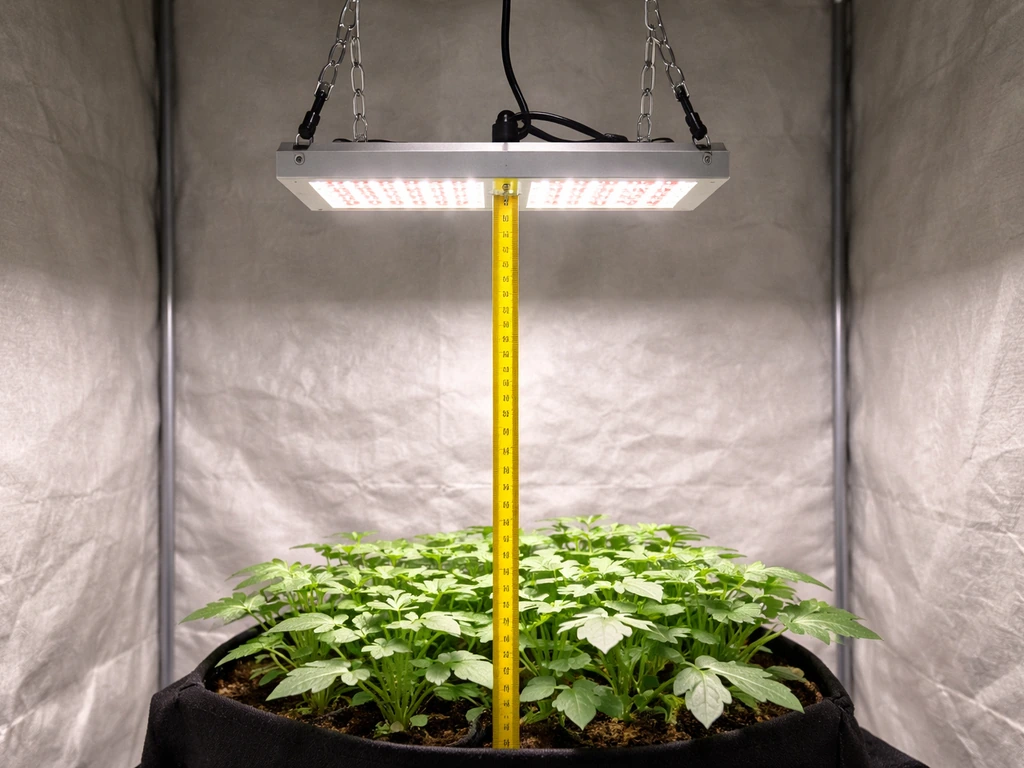
Using PPFD measurements to take the guesswork out
If you want to go beyond eyeballing it, measuring PPFD with a light meter is the most accurate way to set and verify your hanging height. PPFD (photosynthetic photon flux density) tells you exactly how many photons are hitting your canopy per second. The free Photone app on a smartphone gives you a reasonable estimate, and a dedicated PAR meter gives you a more accurate reading. Photone calibration guidance emphasizes aligning your Photone readings to a reference meter so your measurements match real PPFD under your lights Photone calibration guidance aligns Photone readings to a reference meter.
Spider Farmer specifically recommends using a PAR meter and targeting stage-based PPFD values rather than relying on distance alone. Once you know your target PPFD for the current growth stage, you simply raise or lower the fixture until your meter reads the right number at canopy level. This is especially useful if you've switched plants or added new fixtures to your space.
Understanding DLI (daily light integral)
PPFD is an instantaneous reading, but plants accumulate light over the whole day. DLI (daily light integral) measures total photons delivered per square meter per day. The formula is: DLI = 3.6 × 10⁻³ × PPFD × hours of light per day. So if your PPFD at canopy is 200 µmol/m²/s and you run lights for 16 hours, your DLI is about 11. This matches the standard DLI-from-PPFD relationship, which estimates DLI (mol/m²/day) from PPFD and the number of light-hours per day DLI can be estimated from PPFD using the relationship DLI (mol/m²/day) = 3.6×10⁻³ × PPFD (µmol/m²/s) × light-hours/day. 5 mol/m²/day. For seedlings and leafy greens, a DLI of 8 to 12 mol/m²/day is the sweet spot. Flowering plants typically need 20 to 40 mol/m²/day. Knowing this lets you trade off intensity and duration: run a dimmer light longer, or a brighter light for fewer hours, and hit the same DLI target.
One important physics note: light intensity doesn't drop linearly with distance. It follows the inverse-square law, meaning if you double the distance from your light to the canopy, intensity drops to roughly one quarter. Moving your light from 12 inches to 24 inches doesn't halve the light, it reduces it to about 25%. This is why even small adjustments in height have a big impact, and why starting conservatively and moving down gradually is safer than guessing.
Adjusting height as your plants grow
This is where a lot of beginners go wrong: they set the height once and never touch it again. But plants grow upward, and a light that was perfectly positioned at week two might be dangerously close by week six. You need to keep the distance between the fixture and the canopy consistent, not the distance between the fixture and the floor.
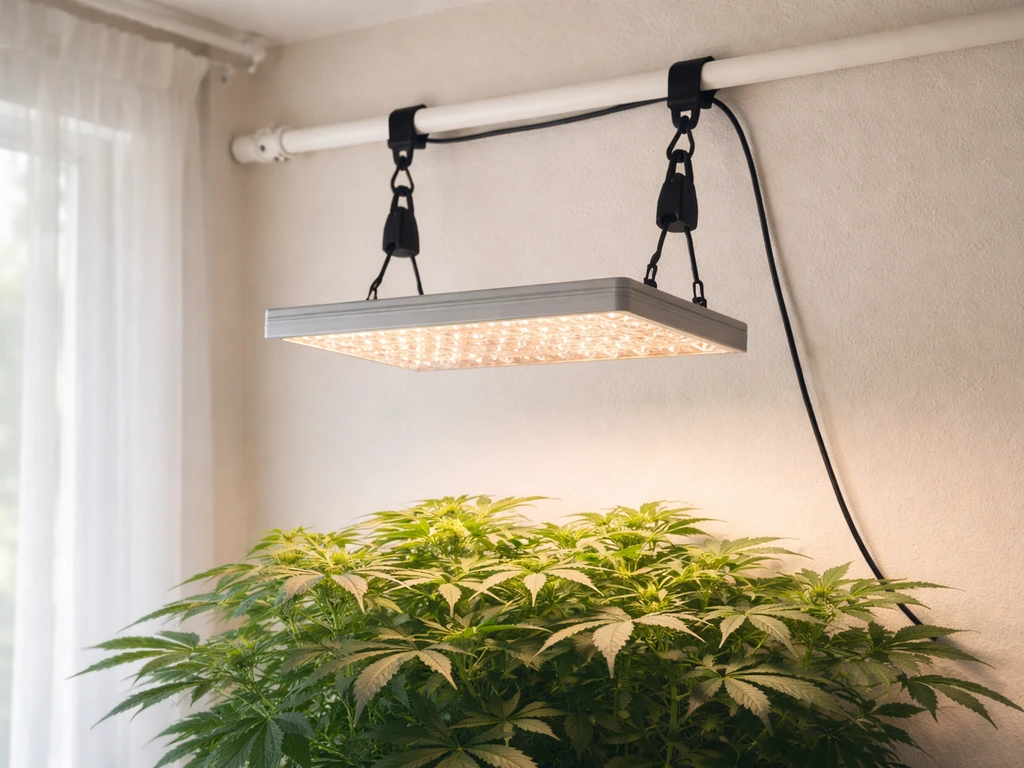
During the seedling stage, hang high (24 to 36 inches) and check every few days. Once plants enter vegetative growth and start growing fast, you'll likely need to raise the fixture every week or two to maintain your target distance. When transitioning to flowering, you can bring the light back down as plant height stabilizes. The easiest way to manage this is with an adjustable rope ratchet, which lets you change height in seconds without tools. If you're working in a tight space, hanging a grow light in a closet requires especially careful height management since vertical space is limited.
Stage-by-stage height adjustment guide
| Stage | Starting Height | Adjustment Frequency | What to Watch |
|---|---|---|---|
| Seedlings (weeks 1–3) | 24–36 inches | Every 3–5 days | Stretching, pale color |
| Early veg (weeks 3–6) | 18–24 inches | Every 1–2 weeks | Compact internodal spacing |
| Late veg / pre-flower | 16–22 inches | Weekly | Leaf color, no bleaching |
| Flower / fruit (weeks 1–end) | 12–18 inches | Every 1–2 weeks | Bleaching, heat at tops |
| Leafy greens / herbs (all stages) | 18–24 inches | Every 2 weeks | Stretch vs. compactness |
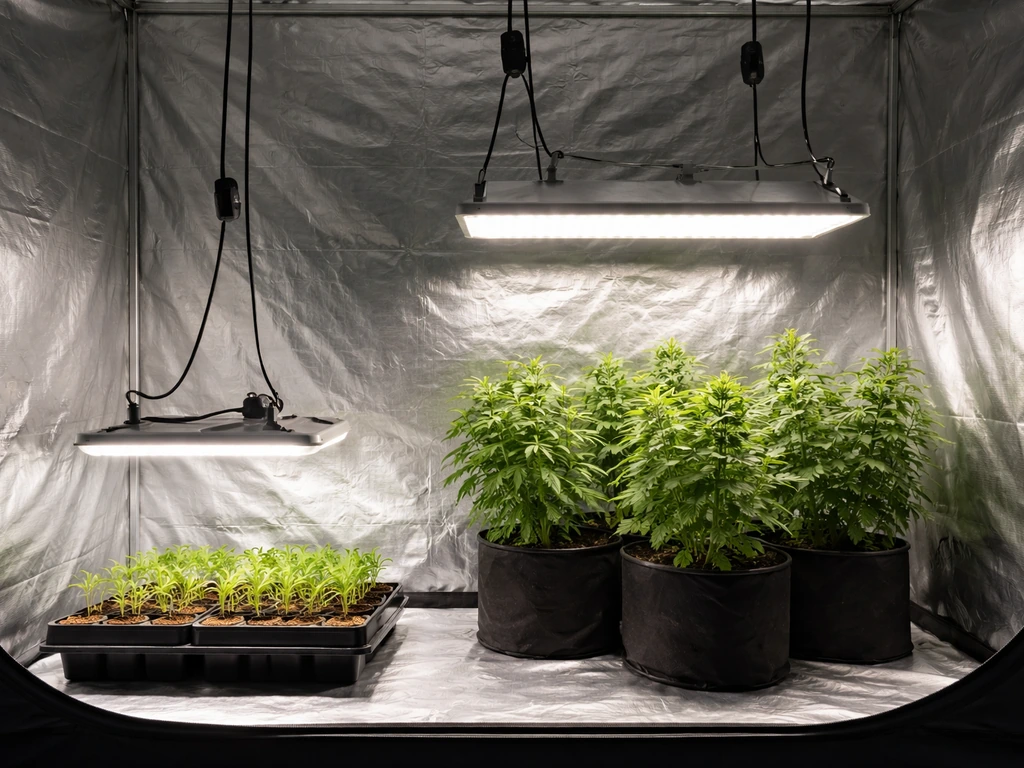
Running multiple lights: keeping coverage even
When you're working with more than one fixture, the main challenge shifts from intensity to uniformity. Uneven coverage means some plants get too much light while others stretch toward the gap between fixtures. The goal is an even canopy with consistent PPFD across the entire growing area.
For multiple lights over a single tray or bed, hang all fixtures at the same height and space them so their coverage footprints slightly overlap, but not so much that the center becomes significantly brighter than the edges. Most manufacturers publish PPFD maps for their lights at various heights, and those maps show the hotspot vs. edge intensity difference clearly. If your center reads 800 µmol/m²/s but your edges read 200, either raise the lights or move them further apart.
If you're growing plants of different heights in the same space (for example, tall tomatoes next to short herbs), you'll need separate fixtures at different heights, or you'll need to raise the shorter plants on risers. Trying to serve both with one light at a compromise height typically means one group is underpowered and the other is overpowered. If you're building out a tiered shelf setup, check out guidance on how to hang grow lights on shelves to get the spacing right for each level.
Planning with DLI and PPFD also helps with uniformity at scale. Targeting an average PPFD across the canopy (not just the peak at center) gives you a more realistic picture of what your plants are actually receiving. Measure PPFD at multiple points across your canopy, including corners and edges, not just directly under the fixture.
Safety checks and mistakes that are easy to avoid
Heat and airflow
Modern LEDs run much cooler than HID or fluorescent fixtures, but they still generate heat, and that heat needs somewhere to go. Spider Farmer's installation guidance recommends at least 1 inch of clearance between the fixture and any ceiling surface to allow for natural convection. Blocking airflow over the driver or heat sink causes components to run hotter than rated, which shortens lifespan and can create a fire risk. Always make sure your fixture has breathing room above it.
Hanging hardware and weight limits

Rope ratchets are the standard hanging method for a reason: they're adjustable, strong, and cheap. But they're only as strong as what they're attached to. Before you commit to a mounting point, verify it can hold the fixture weight plus a safety margin. If you're mounting to drywall with no stud, use a proper anchor rated for the load. For renters or anyone who can't put holes in the ceiling, there are good options covered in our guide on how to hang grow lights without drilling. For more general setup help, the full walkthrough on how to hang a grow light covers the hardware and process step by step.
Electrical safety
Keep power cables and connectors away from water, misting systems, and any condensation-prone surfaces. Use a surge-protected power strip and don't daisy-chain extension cords. BESTVA's DC2000 user guide specifically emphasizes keeping plants at a sufficient distance from the fixture and making sure hanging hardware is secure before powering on. Check connections and cables regularly, especially in humid grow spaces.
Common mistakes and how to avoid them
- Setting height once and never adjusting it as plants grow upward toward the fixture.
- Trusting wattage labels instead of checking the manufacturer's actual PPFD map.
- Confusing light stress symptoms (bleaching, stretching) with nutrient or pH problems.
- Running a light at full power from day one over fragile seedlings instead of starting dimmed or hung high.
- Measuring PPFD only at the center hotspot instead of averaging across the whole canopy.
- Hanging from unsecured drywall anchors or using ratchets rated below the fixture weight.
- Blocking airflow above the fixture by hanging it flush against the ceiling or reflective hood.
Brand-specific starting points worth knowing
Different manufacturers do publish their own recommended heights, and those numbers are worth using as your baseline before you start adjusting. If you have a BESTVA fixture, the official BESTVA grow light hanging guide gives you stage-specific distances straight from the manual. For ceiling-mount installs, there's a dedicated walkthrough on how to hang a grow light from the ceiling that covers the mechanical side of getting everything positioned correctly. If your setup involves a specific mounting style rather than hanging, the guide on how to mount an LED grow light walks through the bracket and fixed-mount options.
The bottom line is that manufacturer-published heights are a good starting point, but they assume average conditions. Your specific grow room, reflective walls, ambient temperature, and plant genetics will all shift the ideal height slightly. Use the starting range, watch the plant response, measure PPFD if you can, and adjust from there. That's the whole process, and it's more straightforward than it sounds once you've done it once.
FAQ
What’s the safest height to start if I don’t know my LED’s PPFD or coverage footprint?
Start at the higher end of the seedling range (about 30 to 36 inches) for your plant stage, then lower in small steps based on plant response (look for stretch first). Avoid dropping straight to flowering heights for seedlings, even if your fixture looks dim.
Should I measure height from the light to the top of the soil or to the leaf canopy?
Measure to the leaf canopy you want to target (the top of active growth), not the pot or the soil line. If plants sit on risers or shelves, keep the canopy-to-fixture distance consistent even as the rack level changes.
Do I need to lower the light during flowering even if my plants stop stretching?
Usually you bring height down when the canopy stabilizes, but you should verify by symptoms or PPFD. If the tops bleach or show crisping, raise the fixture slightly rather than continuing to lower it, because flowering plants can still be light-sensitive.
How do I tell the difference between too much light and too much heat?
Too much light often causes pale or white bleached patches, especially near the top, while heat stress commonly shows crispy yellow-brown spots or upward leaf curling. Also check canopy temperature at the same time, sustained readings above about 90°F suggest heat involvement even if the color looks similar.
My seedlings look “tall and leggy,” but the leaves aren’t pale. What’s the most likely cause?
Leggy growth without bleaching usually points to insufficient intensity (light too high or dim setting too low), not excess light. Lower the fixture a little or increase intensity, then recheck after a couple of days because seedlings can take time to respond.
Can I use a smartphone app like Photone instead of a PAR meter to set hanging height?
You can use it for a reasonable estimate, but it’s less precise than a PAR meter and can vary by phone camera and calibration. If you can, use the app for fast iteration, then confirm critical distances with a proper meter before dialing in exact PPFD/DLI targets.
If intensity does not drop linearly with distance, how big should my height changes be?
Make small adjustments, especially near the top end of the range. A practical approach is changing height by a few inches at a time and giving plants 2 to 3 days to react, because the inverse-square effect makes even modest distance changes meaningful.
What if my plants are different heights in the same tent?
Either split them under separate fixtures at different heights, or raise the shorter plants on risers to match canopy level. Trying to compromise with one fixed hanging height typically leaves one group underlit and the other stressed.
How can I reduce uneven light when using multiple fixtures?
Hang all fixtures at the same height and ensure their coverage footprints overlap slightly but not so much that the center becomes a hotspot. Measure PPFD at corners and edges, and if the hotspot is dramatically higher than the edges, adjust spacing or raise/lower the whole array.
Do I need to keep airflow and clearance in mind when hanging LED grow lights?
Yes. Keep at least about 1 inch of clearance to ceilings or surfaces so the driver and heat sink can dissipate heat via convection. Blocking airflow can raise component temperatures, shorten lifespan, and create reliability issues even if plants look fine.
Is it okay to keep the fixture at a fixed height and just change the timer or intensity?
If your light is dimmable, fixed height with intensity changes is often easier and can work well. If the fixture is not adjustable, then you must change height as plants grow, because the distance to canopy is the only meaningful control.
What’s the simplest way to translate PPFD targets into daily light integral (DLI) for my schedule?
Use the DLI formula DLI = 3.6 × 10⁻³ × PPFD × hours of light. If you maintain roughly the same daily duration but change PPFD via dimming or height, you can directly predict how DLI changes, then confirm with plant performance.
How do I know my hanging hardware is safe?
Verify the mounting point can hold the fixture weight plus a safety margin, not just the rated fixture mass. Use anchors rated for the load if mounting to drywall without studs, and recheck tension periodically since vibrations and humidity can loosen connections over time.
Next Article
How to Hang Grow Lights Without Drilling: 7 Safe Methods
7 no-drill ways to hang grow lights safely with step-by-step setup, cord routing, height tuning, and troubleshooting.