Hanging a grow light from the ceiling is one of those tasks that looks simple until you're standing on a ladder, holding a drill, and wondering whether your ceiling can actually support the weight. Here's the short answer: yes, you can hang grow lights from most ceilings safely, but the method matters a lot depending on whether you're hitting a joist or just drywall. This guide walks you through everything, from choosing the right hardware to positioning the light at the correct height, so you can get it done today without second-guessing yourself.
How to Hang Grow Light From Ceiling Step by Step

Marcus Tillman
3 Apr 2026
Choose the right hardware for ceiling mounting
Before you touch a drill, figure out what hardware you actually need. The answer depends on two things: how heavy your grow light is, and what your ceiling is made of (or more specifically, what's behind it). Most home ceilings are drywall over wooden joists, so you'll be working with one of three scenarios: screwing directly into a joist, using a ceiling anchor in drywall, or attaching to an exposed beam or structural element.
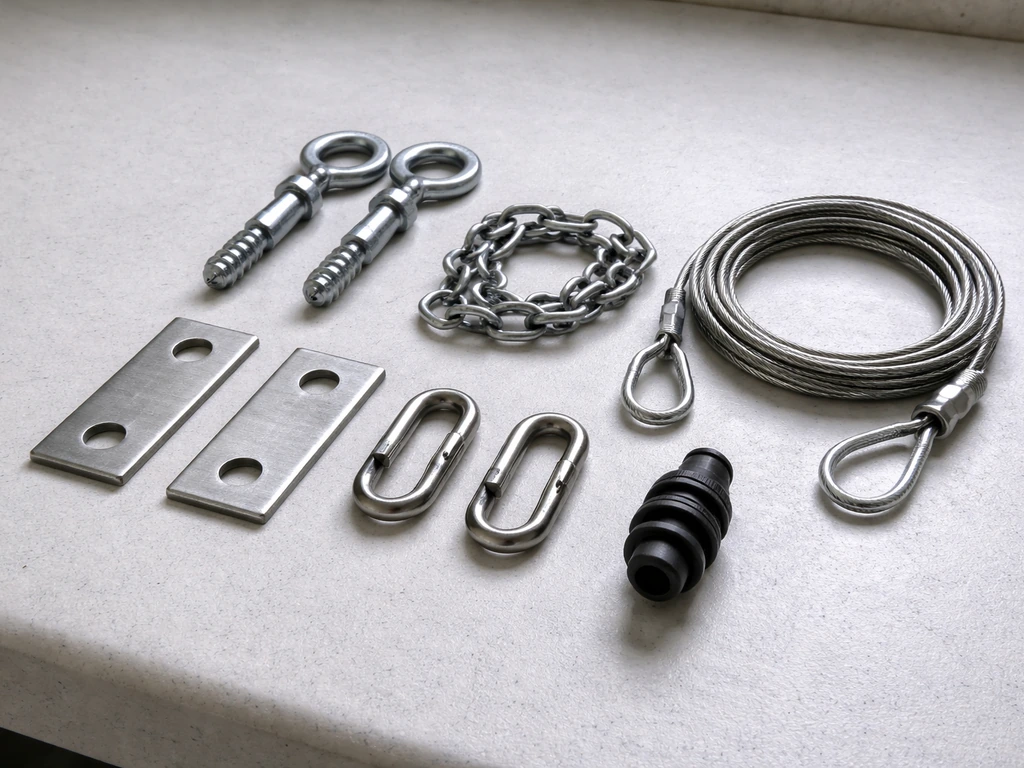
For most LED grow lights in the 5 to 50 lb range, here's what you'll need for a solid ceiling mount:
- Stud finder (to locate joists behind drywall)
- 3-inch wood screws or lag screws for joist mounting
- Heavy-duty toggle bolts for drywall-only mounting (more on this below)
- Ceiling hooks rated for at least 4x the weight of your light
- Ratchet hangers or adjustable rope ratchets (the kind that clip onto a hook and hold your light cord)
- A power drill with the right bit for wood or drywall
- A stud finder or small rare-earth magnet to locate screws in drywall
Ratchet hangers are worth calling out specifically because they make height adjustment dead simple. You clip them to your ceiling hooks, hook your grow light's hanging points onto the lower clips, and pull the cord to raise or lower the light in seconds. They're cheap, widely available, and almost universal in home grow setups. Most grow lights come with a pair included, but pick up spares if you're running multiple lights.
For the ceiling hook itself, a simple J-hook or eye bolt screwed into a joist is the most secure option. If you're going into drywall without a joist, skip the cheap plastic anchors from the dollar bin and use heavy-duty toggle bolts. The TOGGLER SNAPTOGGLE is a well-tested option that's rated up to 238 lb in half-inch drywall. That said, industry safety standards recommend treating about one-quarter of the rated load as your real working limit, so a single SNAPTOGGLE should be used for no more than roughly 55 to 60 lb in practice. For most LED grow lights, that's more than enough, but always check your light's actual weight before you commit to a mounting method.
Measure and plan placement (height, distance, coverage)
Getting the hanging position right before you drill saves you from filling holes and starting over. The two things you need to nail are: horizontal position (centered over your grow area) and hanging height (distance from the light to your plant canopy). If you're newer to this, the article on how high to hang led grow light goes deeper on the numbers by plant type and growth stage, but here are the core guidelines you need right now.
| Light Type / Wattage | Seedlings / Clones | Vegetative Stage | Flowering / Fruiting |
|---|---|---|---|
| LED, 100–200W | 24–30 inches | 18–24 inches | 12–18 inches |
| LED, 200–400W | 30–36 inches | 20–28 inches | 16–24 inches |
| LED, 400–600W (commercial style) | 36–48 inches | 24–36 inches | 18–24 inches |
| Small LED panel (under 100W) | 18–24 inches | 14–20 inches | 10–16 inches |
These are starting points, not absolutes. Watch your plants in the first few days. If leaves look bleached, pale, or are curling upward away from the light, raise the light by 3 to 4 inches. If lower leaves are stretching and plants look leggy, lower it slightly. The ideal height is always a bit of a dial you'll turn over the plant's life.
For horizontal positioning, measure your grow area and mark the center point on the ceiling. A single light should be centered directly above the grow space. For odd-shaped areas or tents with interior bars, drop a plumb line (a string with a small weight) from your planned hook location to confirm it's centered before you drill. Coverage area is usually listed in the manufacturer specs, so check that the light's stated footprint at your planned hanging height actually covers your full grow space.
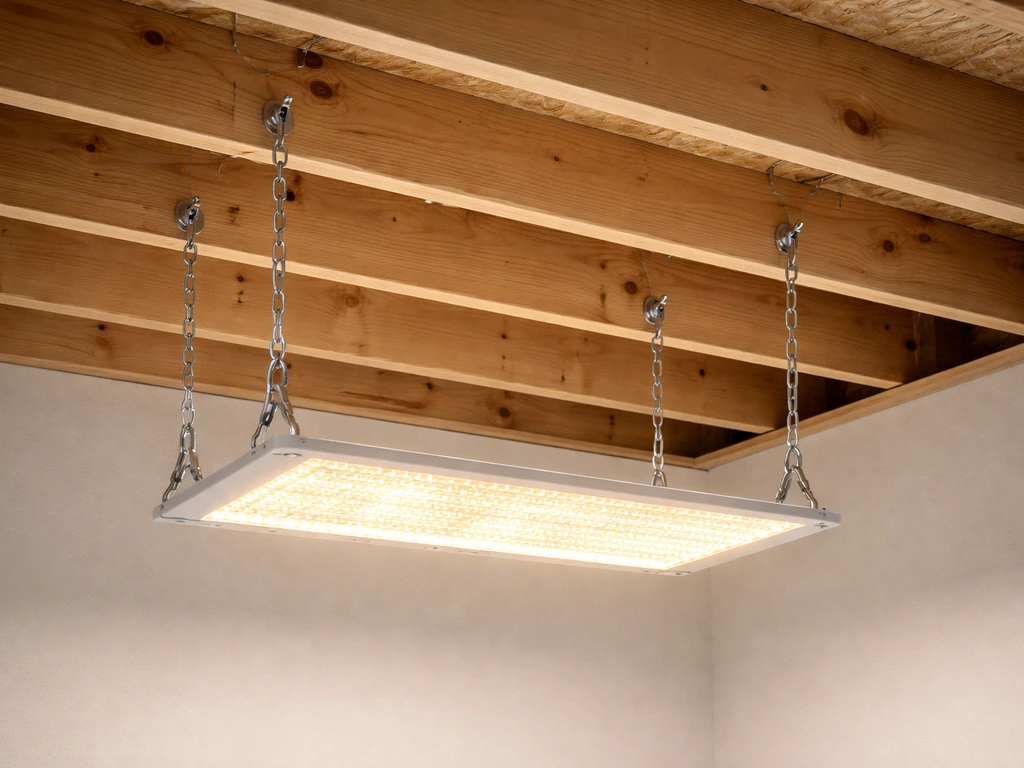
Step-by-step: hang a single grow light from the ceiling
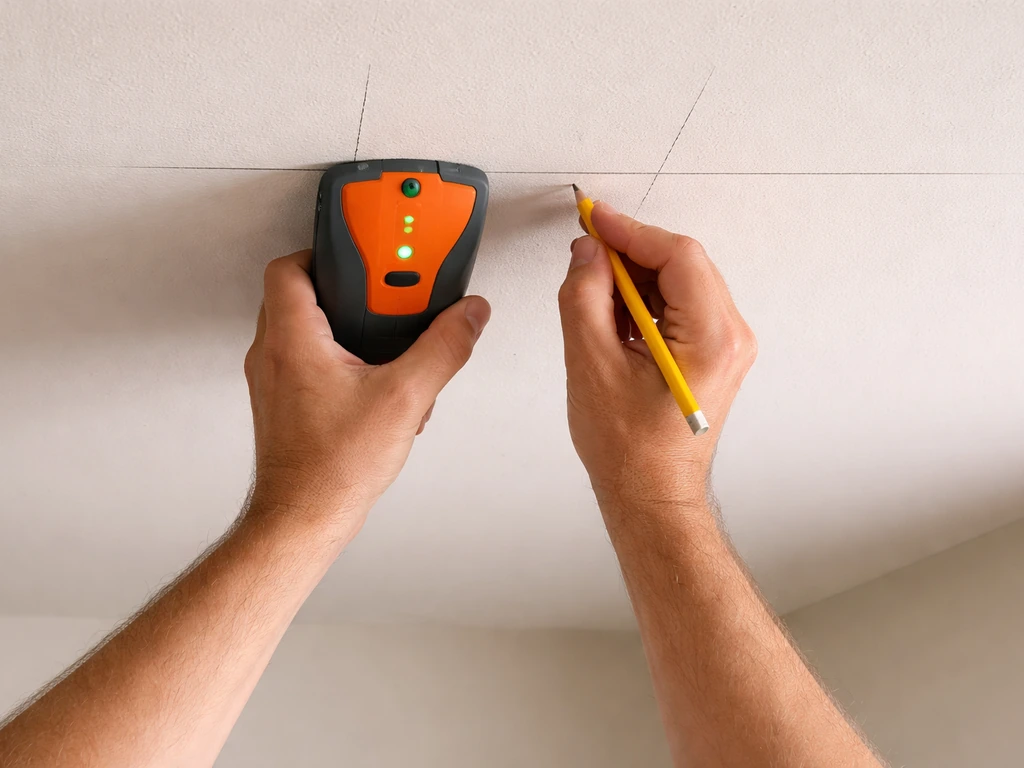
- Locate your ceiling joist with a stud finder. Run it slowly across the ceiling until it signals a joist, then mark both edges of the joist with a pencil so you know the center. If you can't find a joist in the ideal spot, plan to use a heavy-duty toggle bolt in the drywall (see the drywall section below).
- Mark your exact mounting point. Center your mark on the joist (or on your planned drywall anchor location) directly above where your plants will sit.
- Pre-drill a pilot hole if going into wood, or drill the correct size hole for your toggle bolt if going into drywall. For a 3-inch wood screw or lag screw, a 1/8-inch pilot hole prevents splitting.
- Install your ceiling hook or eye bolt. For a joist, thread in a sturdy eye bolt or J-hook by hand first, then finish with pliers or a screwdriver through the eye for extra torque. It should feel firm, not wobbly. For drywall, insert the toggle bolt per the manufacturer instructions (SNAPTOGGLE bolts snap into place before you tighten the bolt through the bracket).
- Attach your ratchet hangers to the ceiling hook. The top clip or loop goes over the hook; the adjustable cord hangs down.
- Connect the grow light. Most LED panels have two hanging points, one at each end. Clip or hook each ratchet hanger's lower end to the light's hanging brackets or through the hanging holes.
- Adjust height by pulling the ratchet cords until the light sits at the correct starting distance above your plants (use the table above as your guide).
- Plug in and check the light is level. If one side hangs lower, adjust that ratchet until both sides are even.
- Tug the light firmly with both hands to confirm the ceiling mount doesn't shift. If it moves, stop and re-evaluate the anchor point before running the lights.
One detail a lot of people skip: make sure your power cord has some slack and isn't pulling taut against the fixture. A cord under tension at the terminal connection point is a safety issue. Route the cord so it hangs freely or is loosely clipped to the ratchet cord, which effectively [acts as strain relief and keeps mechanical stress off the electrical connection](https://www. osha.
gov/laws-regs/regulations/standardnumber/1926/1926. 405). Federal regulation also requires flexible cords and cables to be connected using a knot, tape, or a special fitting so that tension is not transmitted to joints or terminal screws [strain relief and keeps mechanical stress off the electrical connection](https://www. law.
cornell. edu/cfr/text/46/111. 60-13). This is what OSHA's standard for flexible cord assemblies is getting at, and it's just good practice regardless of the regulation.
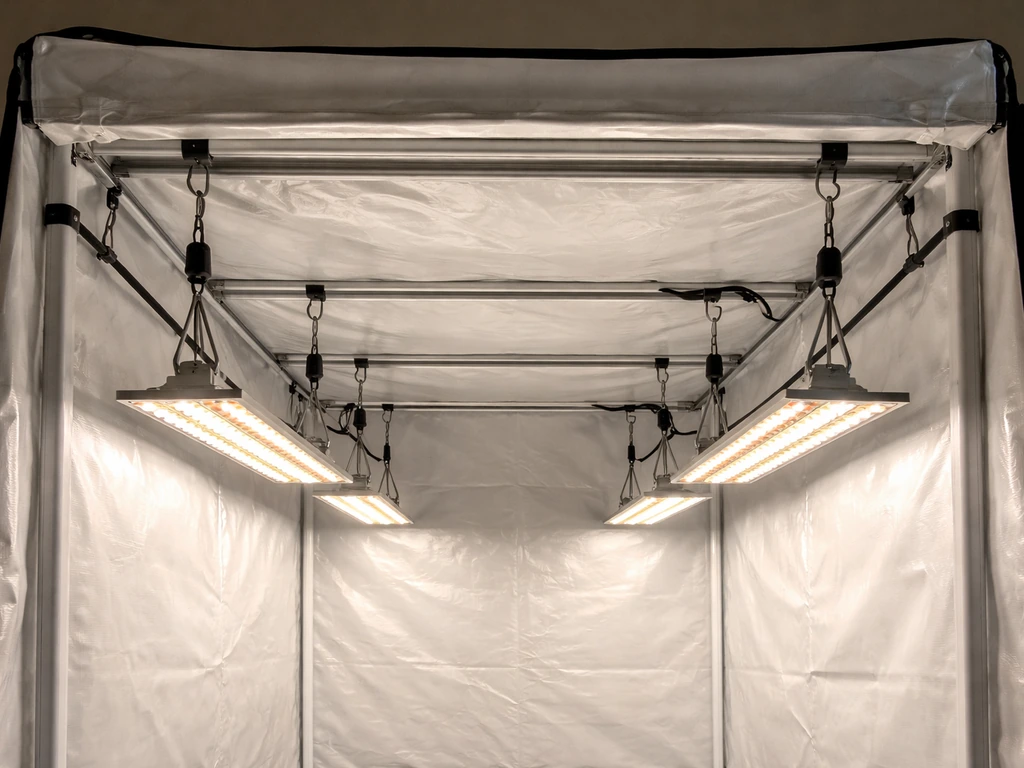
Step-by-step: hang multiple grow lights from a ceiling
Running two, three, or more lights from the same ceiling is totally doable but takes more planning upfront. The goal is even coverage with no hot spots or dark zones between fixtures. Before you drill a single hole, sketch your grow area on paper (or use painter's tape on the floor) and map out where each light's coverage footprint will land.
- Map your grow space. Measure the full length and width of the area you're lighting. Divide it into equal zones, one per light. For example, a 4x8 ft space with two lights becomes two 4x4 ft zones.
- Mark ceiling mount points for each light. Each light gets its own mounting point centered over its zone. Check that each planned point is either over a joist or in a location where a drywall anchor can handle the load.
- Check that your total ceiling load makes sense. Add up the weight of all lights plus hardware. If you're using drywall anchors, make sure each individual anchor is handling only its share of the load, well within the safe working limit.
- Install each ceiling hook or anchor following the same single-light steps above. Work one mount at a time before moving to the next.
- Hang each light on its own set of ratchet hangers. Do not try to daisy-chain multiple lights from a single ceiling hook unless that hook and anchor are explicitly rated for the combined weight.
- Adjust each light independently to the correct height. With multiple lights, use a tape measure at several points under each fixture to confirm consistent canopy distance.
- Power everything on and walk through the space looking for dark gaps between the lights' coverage zones. If you see a clear shadow zone, lower the lights slightly or shift a fixture a few inches toward the gap.
- Check all cords are routed safely, with no cord crossing another light's heat zone and each cord free from tension at its fixture connection.
If you're working in a more compact space like a closet setup, the approach changes a bit because ceiling height and wall proximity create different challenges. The guide on how to hang grow light in closet covers those specifics in detail. For shelf-based setups where you want to light multiple tiers independently, check out how to hang grow lights on shelves for a different approach entirely.
Mounting to drywall vs joists/structural framing
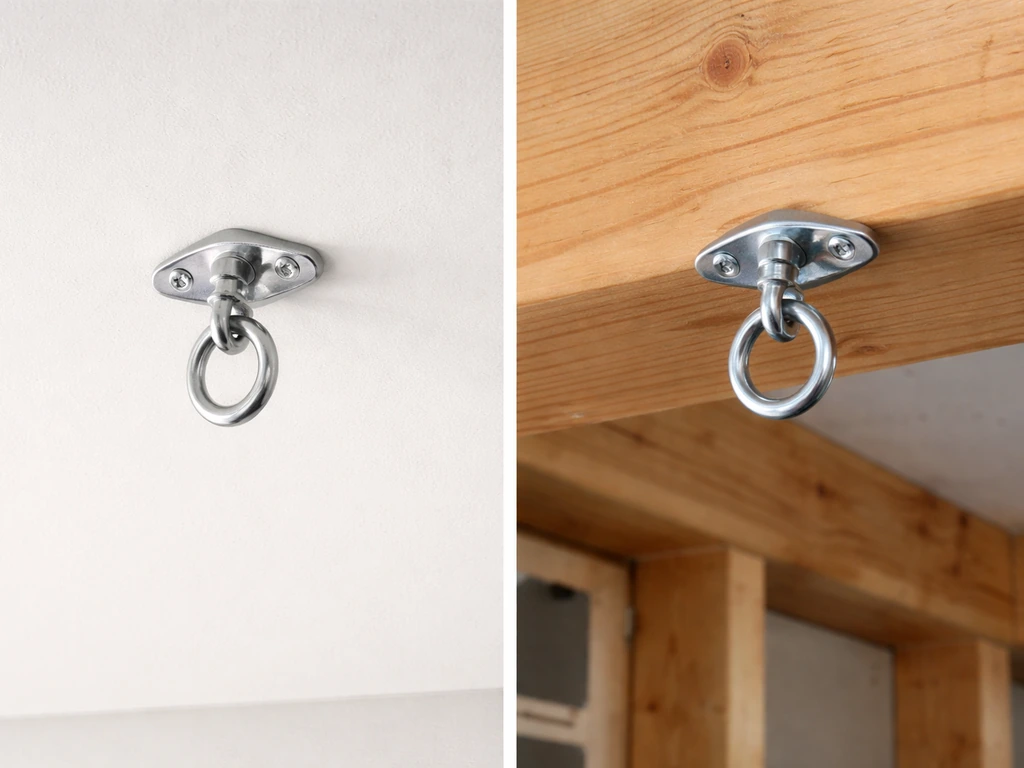
This is the part most guides gloss over, and it's actually the most important safety decision you'll make. Here's the real difference:
| Mounting Surface | Best Hardware | Typical Safe Load Limit | Notes |
|---|---|---|---|
| Wood joist (standard 2x4 or 2x6) | Lag screw or eye bolt, 3+ inch length | 100–300+ lb per mount point | Most secure option; always prefer this if a joist is in the right location |
| Drywall only (no joist) | Heavy-duty toggle bolt (e.g., SNAPTOGGLE) | ~55–60 lb per anchor at 1/4 of rated load | Rated 238 lb ultimate in 1/2 in drywall, but use 1/4 of that as your working limit |
| Exposed wood beam (basement, attic, workshop) | Lag screw or heavy eye bolt directly into beam | High load capacity | Excellent option; treat like a joist but verify beam is structural, not decorative |
| Concrete or masonry ceiling | Concrete anchor bolt or sleeve anchor | Very high capacity | Requires hammer drill and masonry bit; SNAPTOGGLE also rated up to 802 lb in concrete |
The takeaway here is clear: always try to hit a joist first. Use a stud finder and take the time to locate one, even if it means shifting your planned mount point by a few inches. A screw into a solid wood joist is dramatically more secure than any drywall anchor, and there's no weight-rating math to worry about.
When drywall is your only option, heavy-duty toggle bolts like the SNAPTOGGLE are the right call, not plastic expansion anchors and definitely not regular drywall screws on their own. Standard drywall screws have almost no pullout resistance when loaded from below and can fail without warning. Toggle bolts work by expanding a metal bar behind the drywall sheet, distributing the load across a wider area of the panel. Follow the installation instructions carefully, especially the part about not overtightening, which can deform the drywall and reduce holding strength.
If you'd rather avoid drilling altogether, there are ceiling-free approaches worth knowing about. Some growers use tension rods between walls, clip their lights to overhead shelving units, or build simple PVC or wood frames that stand on the floor and arch over the grow area. The article on how to hang grow lights without drilling covers those no-drill methods in full if you're working in a rental or just don't want to put holes in your ceiling.
Best-practice tips for LED grow lights and safe secure setup
LED grow lights are generally lighter than older HID or fluorescent fixtures, which makes ceiling mounting easier, but they still deserve the same safety attention. A light falling onto plants (or people) because of a bad mount is a real problem that's completely preventable.
For brand-specific rigs like a Bestva panel, which have their own hanging bracket configurations, the guide on how to hang bestva grow light walks through the specifics of those fixtures. For a broader look at alternative mounting hardware options including wall brackets and adjustable arm mounts, the article on how to mount led grow light is a good next read.
- Always verify stability before leaving the light unattended: hang the light, then give it a firm downward tug and a side-to-side push. Nothing should shift or creak.
- Use two mounting points per light, not one. Most LED panels have two hanging holes for a reason. A single-point hang creates a swing risk and uneven load on the anchor.
- Leave the power cord with slack at the fixture. A taut cord pulling on the terminal connection is a fire and equipment risk. Loop extra cord and secure it loosely with a cable tie to the ratchet hanger cord above.
- Raise lights as plants grow. Set a reminder to check canopy distance every 5 to 7 days during active growth stages. Most ratchet hangers can be adjusted in about 10 seconds.
- Check your hardware every 30 days. Give the ceiling hook a hand-test tug and inspect the ratchet hangers for any fraying or slipping. Replace any component that looks worn.
- Don't exceed the fixture's wattage on your circuit. A 240W LED pulling from a 15A shared circuit with other appliances can cause tripping or worse. Calculate your circuit load before adding another light.
- Keep the light's cooling vents clear. Most LED panels have built-in fans or passive heat sinks on the top. Don't press them flat against the ceiling or stack insulation directly above them.
Once everything is hung and stable, take 10 minutes to document your setup: write down the hanging height, the growth stage your plants are in, and the date. When you need to adjust in two weeks, you'll have a baseline to compare against. It sounds like extra work but it pays off fast when you're trying to figure out why one corner of your canopy is lagging behind the rest.
For a broader overview of the full hanging process that ties all these elements together, the article on how to hang grow light is a solid companion reference, especially if you're setting up a new space from scratch and want to think through the whole system before you start drilling. Get the hardware right, get the height dialed in, and your lights will do the work they're supposed to do.
FAQ
Can I hang a grow light using the power cord or the hanging straps on the driver?
Most ceiling mounts are intended for vertical hanging loads only, so avoid attaching the light by the power cord or letting the cord take any weight. Use the fixture's designated hanging points, and leave a small amount of slack so the cord can move slightly without pulling on the terminal or strain-relief area.
What should I do if I hit drywall but the joist location is a few inches away from where the light should be centered?
If you cannot reach a joist where you want the light, prioritize changing the hook location rather than relying on drywall. When you must use drywall, only use rated toggle bolts and apply the working-load rule (roughly one-quarter of the toggle's listed rating) to prevent failures from dynamic load or long-term creep.
How do I account for load when my grow light has more than two hanging points?
Assume you are working with a ceiling hook or eye bolt plus the ratchet hanger link, then calculate load on the weakest fastener. A practical approach is to use redundancy: one hook per light for a typical single fixture, and if your light has multiple hanging points, secure each point rather than “bridging” them to one anchor.
Why are plastic drywall anchors not recommended for hanging grow lights from ceilings?
Drywall anchors, including expansion-type plastic anchors, are a common failure point when the load is pulling downward over time. Toggle bolts rated for pull-out in drywall are different because they spread the load behind the sheet, follow the install instructions exactly, and do not overtighten beyond what the manufacturer specifies.
How quickly should I adjust the height after mounting, and what signs mean raise vs lower?
Use the manufacturer’s specified canopy-to-light distance as the initial target, then fine-tune over the first 3 to 7 days. Your first adjustment should focus on plant response, raising 3 to 4 inches if you see bleaching or leaf curl, and lowering slightly if plants look stretched, while keeping an eye on hot spots under the center of the fixture.
How can I tell if one ceiling-mounted light is actually covering my whole grow area?
Try to hang so the full listed coverage footprint matches your grow area at your target height, not at an arbitrary “manufacturer default” position. If your space is larger than the light’s coverage, you will typically get uneven growth unless you add fixtures or reposition to reduce dark zones.
What should I check once the light is hung to make sure everything is aligned and not stressing the ceiling hardware?
Avoid tightening the hanging hardware in a way that can bind the fixture’s suspension or twist the bracket. After installation, gently verify the light can be raised and lowered through its expected range without binding, and check that the hanger is aligned so the load transfers straight down into the hook and hanger clips.
How do I plan multiple ceiling-mounted grow lights so I do not end up with hot spots or dark corners?
In multi-light setups, center the first light over the middle of the grow area, then stagger additional fixtures so their coverage overlaps enough to remove dark zones. Sketching the footprint on the floor helps you avoid discovering the issue later when one corner ends up underlit.
Does hanging a grow light in a closet require different planning than in a normal room?
Yes, but closets often have limited ceiling clearance and wall proximity that can change effective distance and coverage. Before drilling, confirm you can route the cord with slack, ensure the light does not sit too close to walls or shelves, and consider mounting layouts that prevent light from reflecting excessively onto nearby surfaces.
What maintenance checks should I do after the first couple of weeks of running ceiling-mounted grow lights?
To reduce long-term risk, document your initial hanging height and date, then re-check tightness and cable slack after a couple of weeks. Also keep an eye on canopy uniformity, because uneven growth can indicate one side is effectively higher due to placement error or hanger clip positioning.
Are no-drill ceiling mounting methods safe, and how do I verify they will not slip?
If you cannot drill, no-drill options like tension rods or ceiling-adjacent shelving clips can work, but they depend heavily on the strength and stiffness of the surrounding structure. Before trusting them, load-test gently, confirm the light cannot slip, and route cords so they cannot act like a pull-down force on the fixture connection points.
Next Article
How to Hang Grow Lights in a Tent: Step-by-Step
Step-by-step guide to hang LED grow lights in a tent, choosing hardware, proper height, spacing, and safe cord routing.