Hanging a grow light in a closet comes down to four things done right: solid mounting hardware rated for the fixture's weight, the correct hang height for your plant stage, safe cord routing with a timer, and enough airflow so heat doesn't build up in that tight space. Get those four things right and your closet setup will outperform a lot of tents.
How to Hang Grow Light in a Closet Step by Step

Marcus Tillman
3 May 2026
Plan your closet grow light setup first
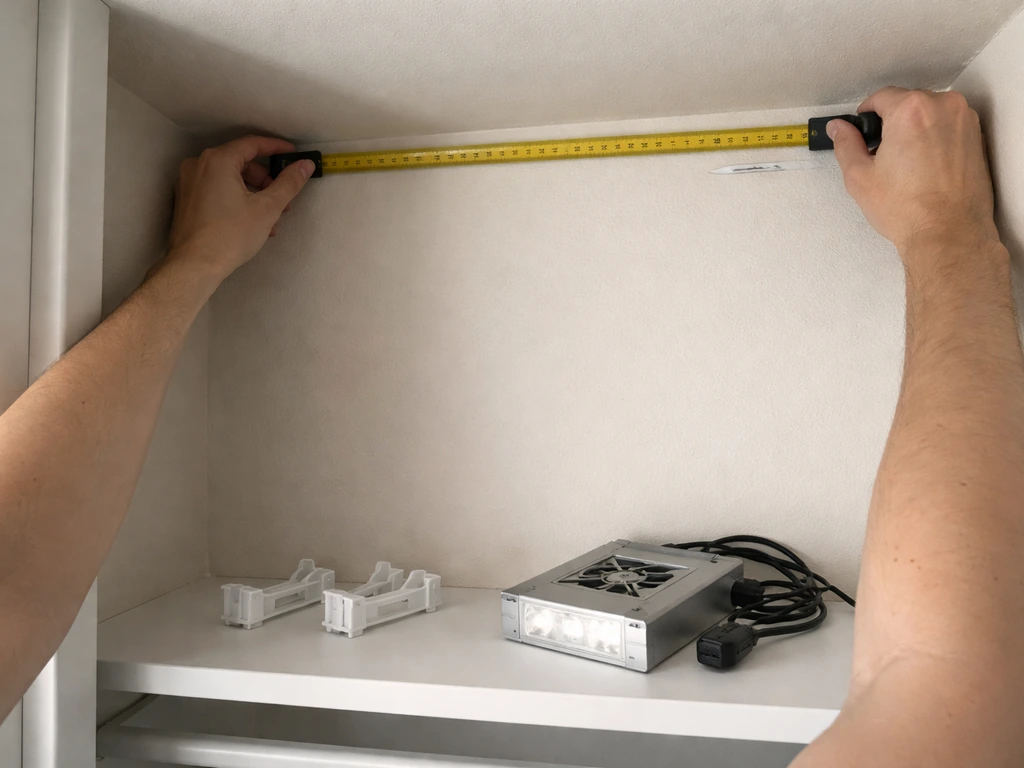
Before you touch a drill or hook, spend ten minutes measuring. If you are trying to avoid drilling, look at no-drill mounting options as the adjacent alternative to measuring first. Grab a tape measure and write down three numbers: closet width, closet depth, and ceiling height. These three measurements control everything else.
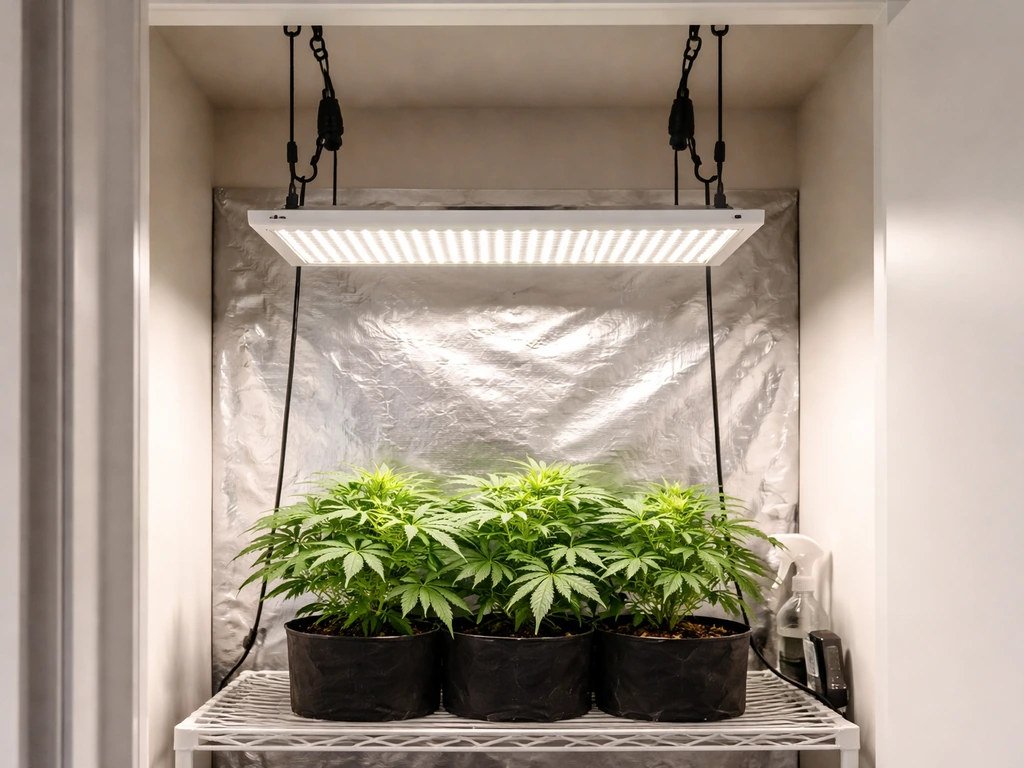
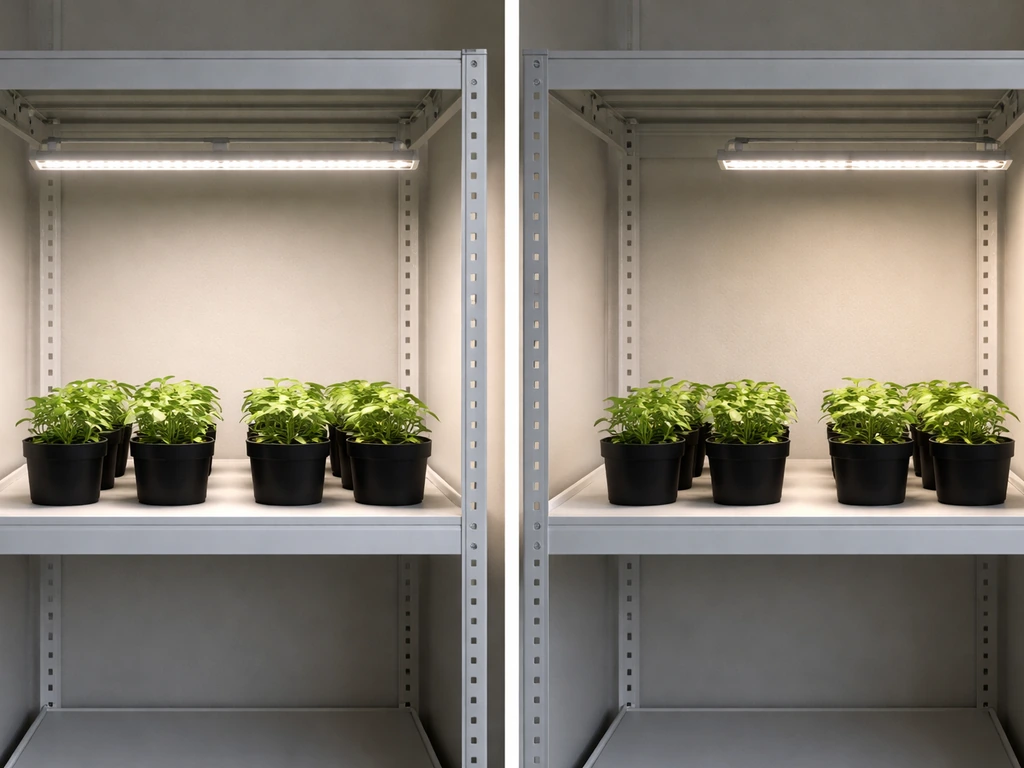
Your usable canopy footprint is usually smaller than the closet floor. Leave at least 6 inches on each wall side for airflow, so a 3-foot-wide closet gives you roughly a 2-foot canopy width. Most small closets land in the 2x2 to 2x4 foot range, which is actually a sweet spot for a single panel or bar-style LED fixture.
Ceiling height matters because you need room for the light itself, the hanging hardware (usually 4 to 8 inches), the distance from fixture to canopy (12 to 24 inches depending on growth stage), and the plant height. If you are figuring out how to hang grow light from ceiling, double-check that you leave enough vertical clearance for the fixture, the hanging hardware, and the distance down to the canopy. A standard 8-foot closet ceiling works fine. A 6-foot ceiling gets tight once plants mature, so plan your maximum plant height before you commit to a strain or vegetable variety.
Match your light to the canopy footprint, not just the watts. Manufacturers publish footprint targets at specific heights. As a real example, an HLG 600 Rspec covers 5x5 feet at 28 inches for flowering and 6x6 feet at 40 inches for veg. A smaller closet needs a smaller fixture. The goal is to hit 200 to 400 PPFD (micromoles per square meter per second) at the seedling stage, 400 to 600 PPFD for vegetative growth, and 600 to 900 PPFD for flowering, measured at the canopy, not at the fixture. If you want to get precise, tools like Hydrobuilder's coverage and PPFD calculator let you plug in your canopy area and target PPFD to figure out whether one fixture is enough.
Choose the right hanging hardware and mounting points
This is where most people cut corners and regret it. A grow light falling onto your plants (or your head) is not a minor inconvenience. Check the weight of your fixture before you buy a single hook.
Most LED panels weigh between 5 and 20 pounds. Bar-style lights are usually lighter. Whatever your fixture weighs, your mounting system should be rated for at least three times that load. If the light is 10 pounds, the hook, the anchor, and the structure it goes into need to handle 30 pounds without question.
What to mount into
A wood ceiling joist is your best friend. Use a stud finder to locate one, then screw a heavy-duty J-hook or eye-bolt directly into it. Learn how to hang the grow light safely in your specific closet by choosing the right mounting point and hang height. Drywall alone cannot support a grow light safely. If your closet has a hollow ceiling with no accessible joist, use a ceiling anchor rated for the load, or mount a horizontal wood beam across the closet width (screw each end into the wall studs) and hang your light from that beam. This is a common trick for small closets and it works reliably.
Hardware options compared
| Hardware Type | Best For | Adjustability | Typical Cost | Notes |
|---|---|---|---|---|
| Ratchet rope hangers | Most closet setups | High, very easy to adjust height | $5 to $15 per pair | Best beginner option, supports up to 150 lbs per pair |
| Chain and J-hook | Permanent or semi-permanent installs | Medium, must reposition chain links | $5 to $20 | Durable but adjusting height takes more effort |
| Adjustable rope clips | Lightweight fixtures under 10 lbs | High | $5 to $10 | Less beefy, verify weight rating |
| Ceiling bracket with bolt | Concrete or solid ceiling installs | Low without drilling again | $10 to $25 | Most permanent option, very secure |
| Wood beam across closet walls | Closets with no accessible joists | Medium | $5 to $15 in lumber | Mount beam into studs, then hang ratchets from beam |
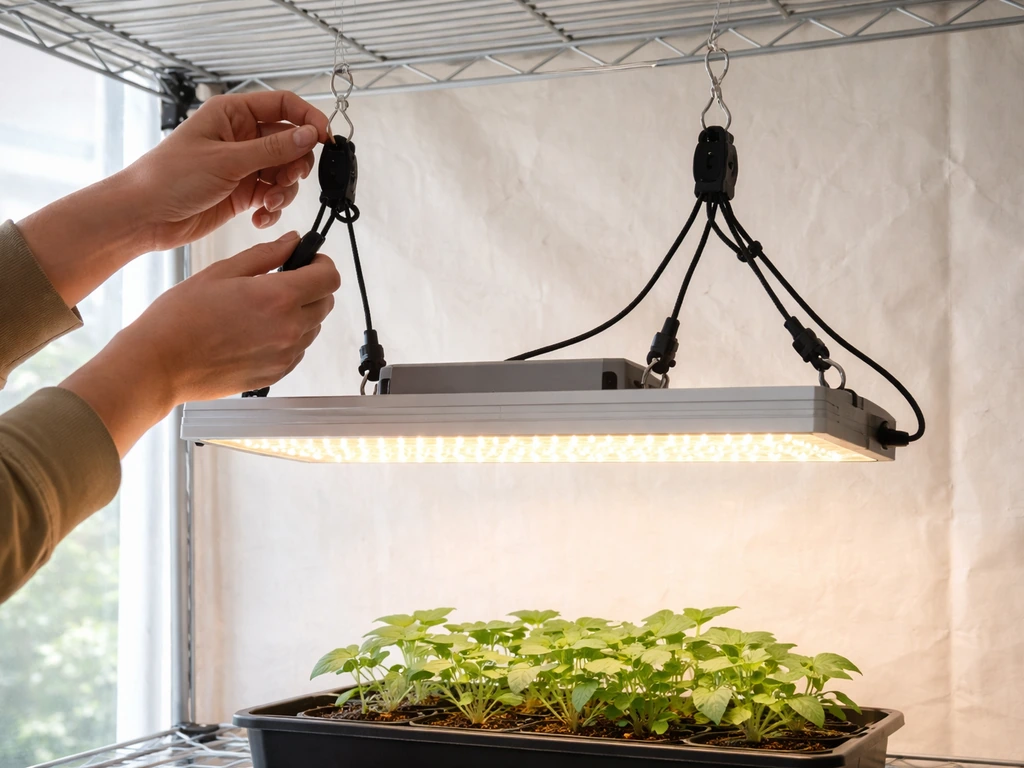
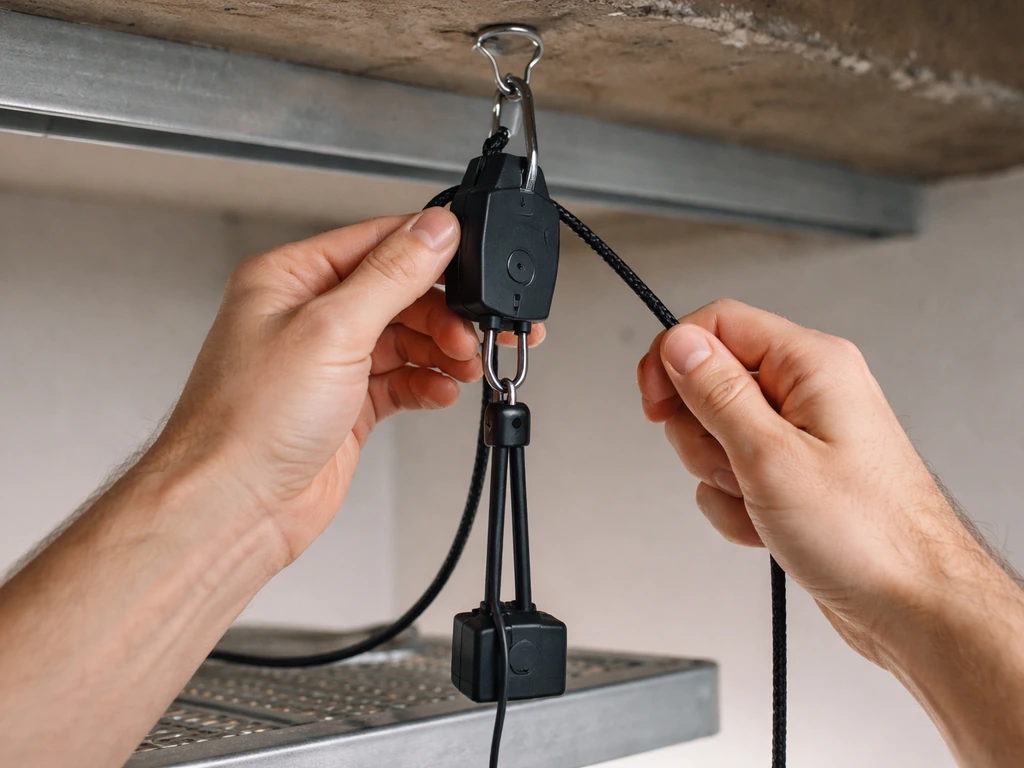
Ratchet rope hangers are the go-to recommendation for most closet grows. They come with most grow tent kits, they hold serious weight, and you can raise or lower the light in seconds as your plants grow. Clip the carabiner to the V-hook on your fixture, throw the strap over your J-hook or beam, and pull the rope to your desired height. Done.
How to hang and level your grow light (step by step)
- Find your mounting point. Use a stud finder to locate a ceiling joist directly above the center of your canopy area. Mark it with a pencil.
- Install the anchor. Screw a heavy-duty J-hook or eye-bolt into the joist. For a wood beam install, drill the beam ends into wall studs at the correct height, then add your J-hooks to the beam.
- Attach the hanging hardware to the fixture. Clip your ratchet hanger carabiners (or chain) to the V-hooks or hanging points on the light. Almost all fixtures have at least two hanging points, often four. Use all of them.
- Hang the straps on the ceiling hook. Loop the ratchet straps or chain over the J-hook. If using chain, pick the link that puts the fixture at roughly 24 inches above where your plant canopy will be (seedling starting height).
- Raise the light to initial height. Pull the ratchet straps to bring the fixture up. Use a tape measure to confirm the distance from the bottom of the fixture to the soil surface.
- Check for level. Look at the fixture from both the front and the side. A spirit level or even a level app on your phone placed on the fixture housing works fine. An unlevel light creates uneven coverage across the canopy.
- Adjust until level. If it's tilting, slightly shorten one strap or shift the chain link on one side. Small adjustments make a big difference.
- Give it a gentle shake test. Grab the fixture and push it side to side. If the anchor moves or anything feels loose, stop and reinforce before powering on.
- Plug in and confirm it fires up before you put any plants underneath.
Placement, height, and getting even light across the canopy
Center the light horizontally over the middle of your plant area. This is more important than most people think. A fixture positioned toward the back or side of the closet will create a hotspot on one side and starve the other plants of light. Aim for equal distance from the fixture edges to each closet wall on the left/right and front/back axes.
Starting heights by growth stage
| Growth Stage | Starting Hang Height (fixture to canopy) | Target PPFD at Canopy |
|---|---|---|
| Seedlings / clones | 24 inches | 200 to 400 PPFD |
| Vegetative | 18 inches | 400 to 600 PPFD |
| Flowering / fruiting | 12 to 16 inches | 600 to 900 PPFD |
These are starting points, not final settings. Every fixture is different, and closet walls reflect light back into the space, which changes your actual canopy intensity. If you have a par meter or a lux meter, take readings at the corners and center of your canopy after the fixture stabilizes for about 5 to 10 minutes. Corners should be no more than 30 percent dimmer than the center. If they are, you either need to raise the light a few inches to widen coverage or rotate/move edge plants toward the center.
Lining your closet walls with flat white paint or cheap mylar emergency blankets dramatically improves corner coverage. It is one of the cheapest upgrades you can make and it genuinely evens out light distribution without changing your hang height at all.
Remember the inverse-square relationship: moving a light from 12 inches to 24 inches above the canopy does not halve the intensity, it reduces it by about 75 percent. blank" rel="noopener noreferrer">PPFD drops sharply with increasing distance from the light, and the inverse-square relationship is a useful way to think about intensity changes when adjusting hanging height. Small height changes have big effects, especially at close ranges. Move in 2-inch increments when dialing in.
Power and cable management inside the closet
Electrical safety in a closet grow is not optional. You have heat, humidity, and cords all in a confined space, which is exactly the combination that causes problems if you get lazy about it.
Use a timer
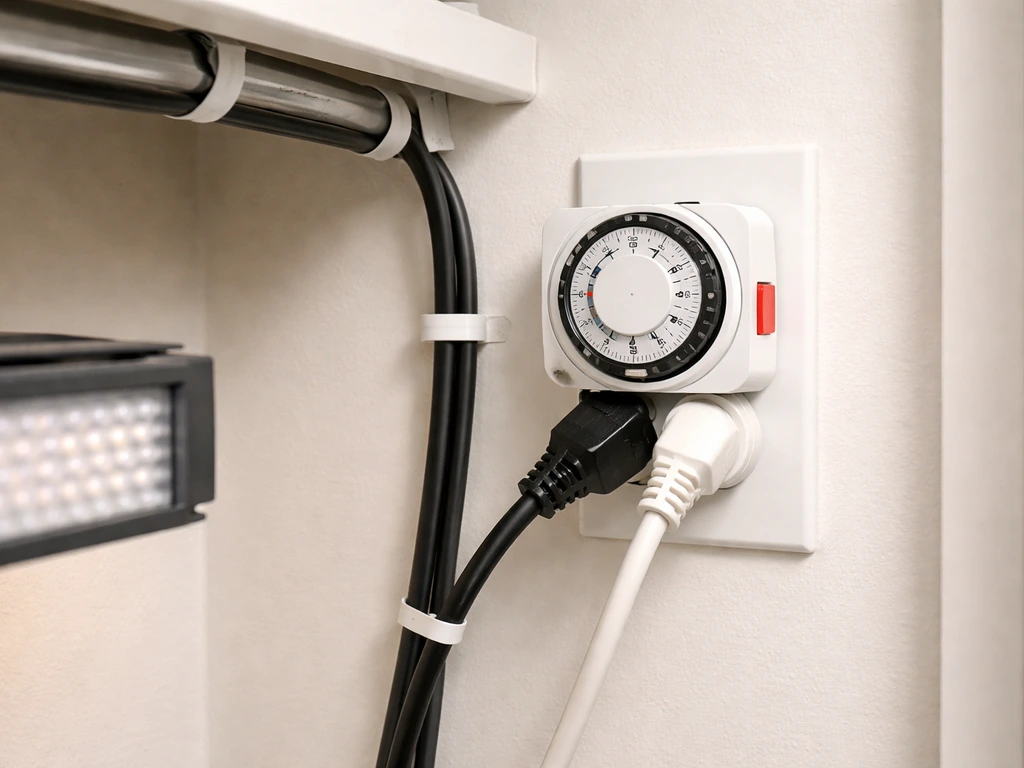
A mechanical or digital outlet timer is non-negotiable. Seedlings and vegging plants typically run 18 hours on, 6 hours off. Flowering plants need 12 hours on, 12 hours off. Plug the timer into the wall, plug the light into the timer, set your schedule, and stop thinking about it. A simple mechanical timer costs about $10 and will save your plants from the most common mistake new growers make, which is forgetting to flip the lights.
Cord routing rules
- Use a power strip or extension cord rated for the wattage of your fixture. Check the amperage draw on your fixture's label and make sure your extension cord gauge matches. A 16-gauge cord is the minimum for most LED panels up to about 300 watts. Use 14-gauge for anything larger.
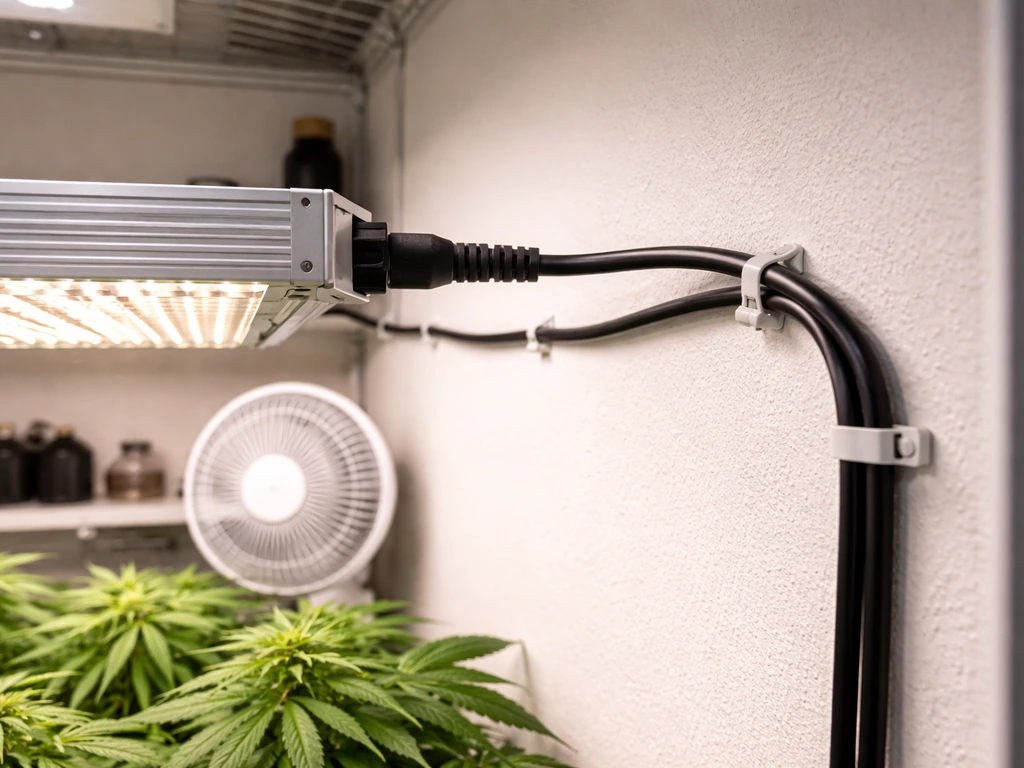
- Never run cords under rugs, behind shelving, or pinched under anything. Pinched cords build heat and can start fires. Route them along walls using cheap cable clips.
- Create a drip loop wherever a cord enters an outlet or power strip. This means letting the cord hang down in a U-shape below the outlet before going back up to plug in. If water or humidity travels down the cord, the drip loop directs it away from the outlet instead of into it.
- Keep the driver or power brick for your LED off the floor. Hang it on a hook or set it on a small shelf so it stays away from any humidity pooling near the ground and gets airflow around it.
- Plug your setup into a GFCI-protected outlet. If your closet does not have a GFCI outlet, use a GFCI plug adapter. This is the single most important shock and fire prevention step in a humid growing environment.
- Do not daisy-chain multiple power strips together. If you need more outlets, use one heavy-duty power strip plugged directly into the wall.
Strain relief for the fixture cord
Where the power cord connects to your fixture or driver, make sure there is no tension pulling the cord away from the connection point. Use a small cable tie or a hook to anchor the cord to the hanging hardware a few inches away from the fixture, so the weight of the hanging cord is not pulling on the connector. This is called strain relief and it prevents connection failures over time.
Ventilation and heat management in a closet
Closets trap heat. Even LEDs, which run much cooler than HID lights, will warm up the air in an enclosed 3x4 foot space within an hour. Without ventilation, heat stresses plants, accelerates humidity issues, and shortens the life of your LED driver.
The minimum setup is an oscillating fan inside the closet pointed at the canopy and some form of air exchange. The simplest air exchange method is leaving the closet door cracked a few inches or cutting ventilation holes near the floor (intake) and near the top (exhaust) for passive airflow. Hot air rises, so a vent or gap at the top of the door lets it escape while fresh cooler air pulls in from the bottom.
For a sealed closet or a more serious setup, a small inline fan with carbon filter and ducting (a 4-inch fan works for most closet sizes) is the most reliable option. Mount the fan near the top of the closet exhausting out, run ducting through a vent cut in the door or wall, and your heat problem is solved. Target a temperature at the canopy of 70 to 85 degrees Fahrenheit with lights on. Above 85 degrees consistently will reduce yields and stress most plants.
Humidity also matters from an electrical safety standpoint. Indoor damp or wet-location GFCI protection rules, including NEC 210.8 sections, are discussed in Eaton’s NEC GFCI updates/overview presentation PDF electrical safety standpoint. Condensation forming on your LED driver, power strip, or connectors can cause short circuits. Keep relative humidity in the 50 to 70 percent range during veg and 40 to 50 percent during flowering. If your closet is running high humidity, the exhaust fan approach above will help pull moist air out.
One more thing: always unplug the fixture before adjusting height, cleaning the lens, or doing any maintenance inside the closet. The LED panel itself can get warm enough to be uncomfortable to touch and you do not want to be working around live electrical connections in a tight space.
Troubleshooting and adjusting after the first week
Your first week is diagnostic mode. The plants will tell you exactly what is wrong if you know what to look for. Here are the most common closet grow light problems and how to fix them.
Plants are stretching and look leggy
This means the light is too far away or the intensity is too low. Seedlings stretching toward the light is the most common beginner mistake. Lower the light by 2 to 3 inches, wait 48 hours, and see if the new growth tightens up. If your fixture has a dimmer, try increasing intensity by 10 to 20 percent before lowering height. Do one thing at a time so you know what worked.
Leaves are bleaching or curling up at the edges
Light stress from being too close or too intense. Raise the fixture by 2 to 3 inches or dial the dimmer down by 10 to 15 percent. Check that your fastest-growing plant (the tallest one) has not grown into the minimum safe distance. In a closet, canopy height creeps up on you fast, especially during flowering stretch.
Middle plants look great but edges are thin and pale
Classic coverage mismatch. The fixture's footprint is smaller than your plant area, or the light is hanging off-center. First, confirm the fixture is centered. Then try raising it 3 to 4 inches to widen the spread, accepting slightly lower center intensity in exchange for better corner coverage. Rotating your plant positions weekly (edge plants move to center, center plants move to edge) is also an effective low-tech fix. If you have mylar or white paint on the walls, that will help reflect light back into the corners.
Center plants are burned and outer plants are fine
This is a hotspot issue. The fixture is too close, creating intense center light while the edges fall off quickly. Raise the light, reduce intensity on the dimmer, or do both. This is also more common with blurple-style or older single-point light sources than with modern spread-bar LEDs, which have more even distribution by design.
The mount feels loose or the fixture is sagging to one side
Do not ignore this. Unplug immediately. Check that your anchor (J-hook, eye-bolt, or beam) is secure in the structural member it is supposed to be in. If the fixture is sagging to one side, one strap or chain run is likely longer than the other. Equalize them. If the ceiling anchor itself is moving, it was probably set into drywall with no stud. Relocate it into a joist or add a cross-beam. A fixture falling is a fire, electrical, and plant damage risk all at once.
Temperature is running above 85 degrees
Add or upgrade ventilation before anything else. A small clip fan is not enough for a closed closet. Install an inline exhaust fan near the top of the closet and add an intake gap or vent near the bottom. If you already have that, check that the exhaust is not obstructed. You can also try running lights during the coolest part of the day (overnight) if your schedule allows.
Cords are a tangled mess
Take 20 minutes to reroute. Use adhesive cable clips (they cost about $5 for 50 of them) to run cords along the top edge of the closet wall, down one corner, and to your power strip. Velcro cable ties keep the excess cord bundled. A tidy closet is not just aesthetic: loose, dangling cords are trip hazards and can get tangled in a fan. Once it is organized, future height adjustments and plant access become much easier. If you plan to mount your grow lights on shelves instead of hanging them from the ceiling, use the same loading and spacing rules to keep the canopy evenly lit hang grow lights on shelves.
After making any significant change to hang height or intensity, give the plants three to five days before evaluating again. Plants respond slowly and making daily adjustments based on same-day observations just creates chaos. Change one variable, wait, observe, then decide.
FAQ
Can I hang a grow light from drywall or the ceiling surface if I do not hit a joist?
No. You should mount the light only into a structural element (ceiling joist, wall stud, or a properly engineered cross-beam). If you see recommendations to use drywall anchors, treat them as a last resort and only if the anchor is explicitly rated for the fixture load and installation is solid, otherwise you risk sagging and connector strain over time.
How do I prevent the power cord from pulling on the light connection?
Use the fixture manufacturer’s hanging points and keep straps or chains vertical, then confirm slack at the connection to the driver or power cord. A small amount of cord tension over days can loosen strain relief and cause intermittent power issues, so after hanging, gently tug the cord to ensure it moves freely without pulling on the connector.
What are my options if my closet ceiling has no accessible joists?
If the closet has no access to a joist, the most reliable workaround is a horizontal beam mounted into studs across the closet width (or a correctly rated standalone support rated for the load, not just the light weight). This keeps the load distributed and avoids relying on hollow-ceiling anchors that can loosen.
What does it mean to “center the light,” and how exact should it be in a closet?
Centering vertically is not enough. You also want equal left-to-right and front-to-back spacing relative to your plant footprint, because LEDs still create a footprint pattern at canopy level. After centering, do a quick corner versus center check (with a meter if possible) to confirm you are not accidentally creating a hotspot.
Can I adjust the hanging height weekly as plants grow?
Yes, but only within limits. For closet grows, raising the light usually reduces intensity and can harm flowering if you go too high, while lowering too much increases stress and edge bleaching. Make adjustments in small increments (a couple inches at a time), then wait several days before judging results so you do not overcorrect.
Can I use any outlet timer for an LED grow light in a closet?
Generally, yes, but verify compatibility with your fixture type and total power draw. Many LED grow lights can run on timers, but some drivers need specific switching behavior. If your timer is mechanical, avoid very fast cycling, and confirm the timer rating (amperage and wattage) supports the full system power, not just the light label wattage.
How do I know whether my closet ventilation is strong enough?
To avoid overheating and electrical risk, match ventilation to your smallest expected closet volume and plant stage. A common practical target is canopy temperatures in the 70 to 85°F range during lights on, if consistently higher you should increase exhaust airflow or reduce the load (more airflow often beats more “reduced dimmer” because it also helps humidity).
What should I watch for if I do not have temperature or humidity meters?
If you cannot measure, use behavior-based checks and a thermohygrometer. Look for leaf droop, excessive stretching, or persistent wilt (heat), plus condensation on driver housings or nearby connectors (humidity). When in doubt, prioritize more exhaust at the top and an intake at the bottom, then re-check temperatures after the fixture stabilizes.
How can I tell if my hanging hardware is shifting or installed unevenly?
Two common signs are a sagging or swinging fixture, and uneven strap length causing the light to tilt. Re-check the tightness and structure each time you change height, because ratchet systems can settle slightly after the first load cycles. If the fixture tilts, correct strap length so canopy coverage stays consistent across the whole footprint.
Why can my plants look fine in the center but still underperform in the corners?
Do not assume more watts automatically means better. Coverage depends on the light’s published footprint at the correct mounting height and on your desired PPFD at canopy level. If your canopy area is larger than the fixture’s target footprint, you will get corners that are underlit even if the center looks bright.
What is the easiest way to adjust light height without constantly opening the closet?
For many closet setups, you want to be able to raise and lower without climbing into the space while the light is on. If you plan to use ratchet hangers or rope systems, make sure the adjustment mechanism is accessible from outside the closet, and keep the cord and timer connections outside the highest humidity zone.
How do I plan clearance for flowering stretch so the light does not end up too close?
When you move from seedling to veg to flowering, keep the canopy intensity appropriate and also re-check vertical clearance. Stretch during flowering can quickly reduce distance to the fixture, so plan for maximum plant height and confirm you still have safe air gaps and enough room for the light to travel upward or downward as needed.
Next Article
How to Mount LED Grow Lights: Step-by-Step Guide
Step-by-step how to mount LED grow lights safely: hardware choice, placement planning, wiring tips, and troubleshooting