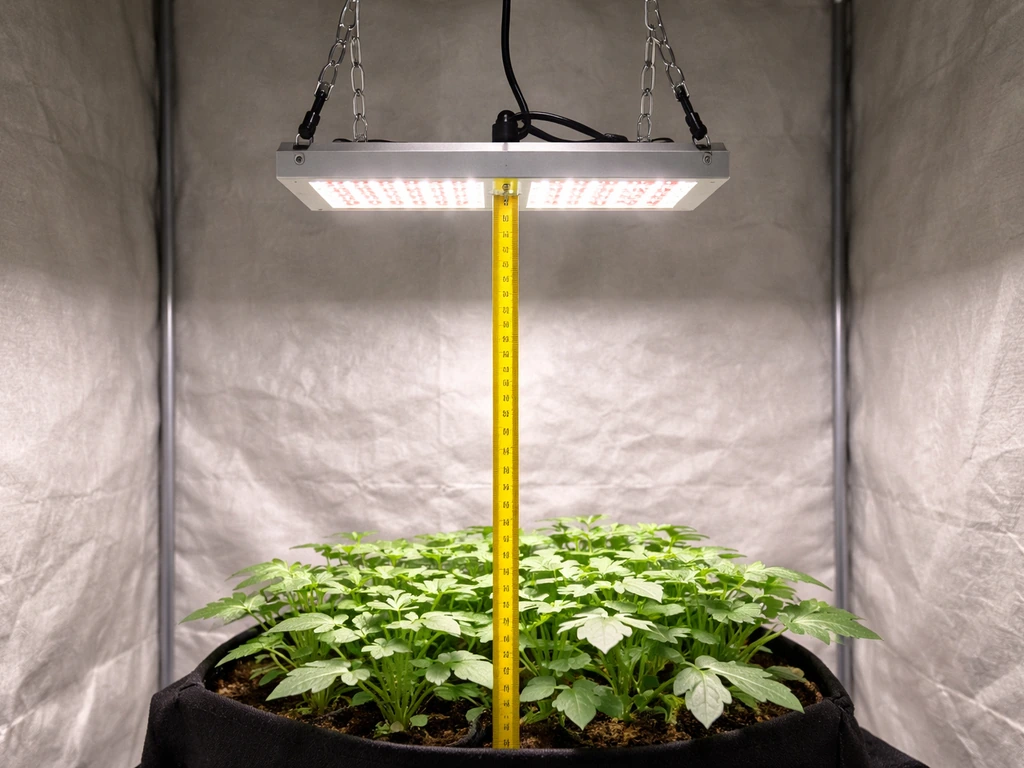
To mount an LED grow light safely, you hang it directly above your plants using ratchet rope hangers or chain attached to a ceiling hook, tent bar, or shelf frame, at a height between 12 and 30 inches from your canopy depending on plant stage. Seedlings need the light farther away (around 24–30 inches) to avoid light stress, while established plants in veg or flower can handle it closer (16–24 inches). Get the height right, secure the fixture so it can't swing or sag, route your cables away from heat and foot traffic, and plug into a timer. That's the whole job. The rest of this guide walks you through each part in detail.
How to Mount LED Grow Lights: Step-by-Step Guide

Marcus Tillman
2 May 2026
Choosing the right mounting hardware
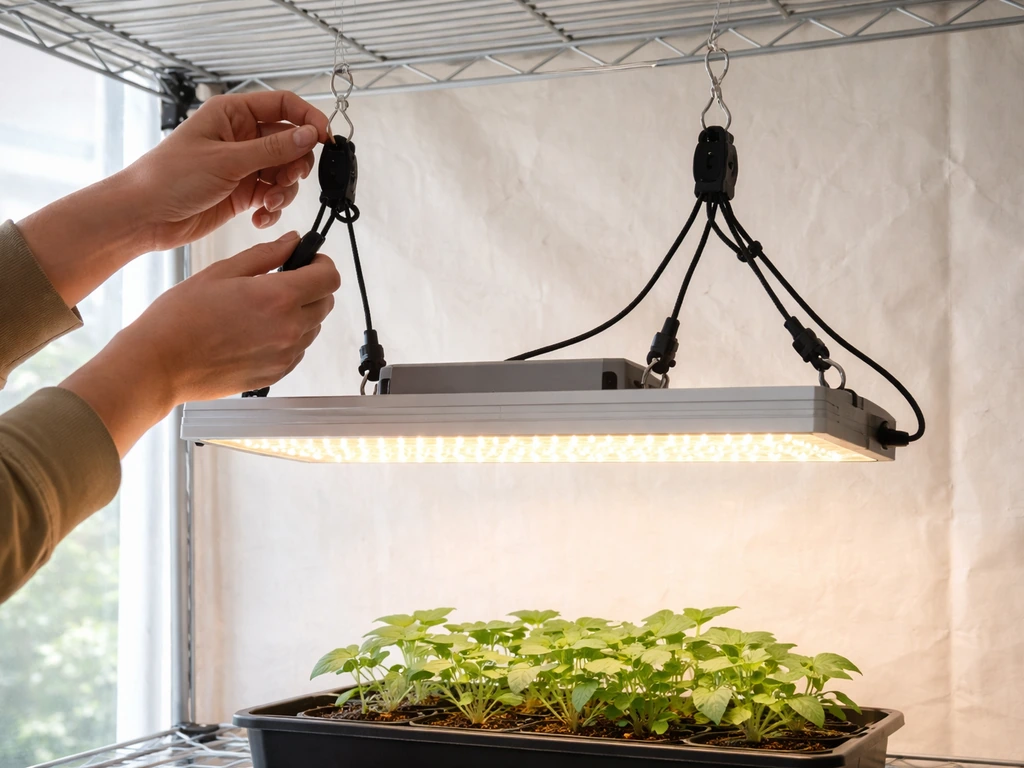
Most LED grow lights ship with some kind of hanging hardware, but not all of it is great. The most reliable and adjustable option is a pair of ratchet rope hangers. These let you raise or lower the light in seconds without tools, which matters a lot as your plants grow. If your light didn't come with them, a basic set costs a few dollars and fits nearly every fixture. If you want to hang grow lights without drilling, use hanging options like ratchet rope hangers, strap hangers, or ceiling hooks that don’t require you to fasten into studs.
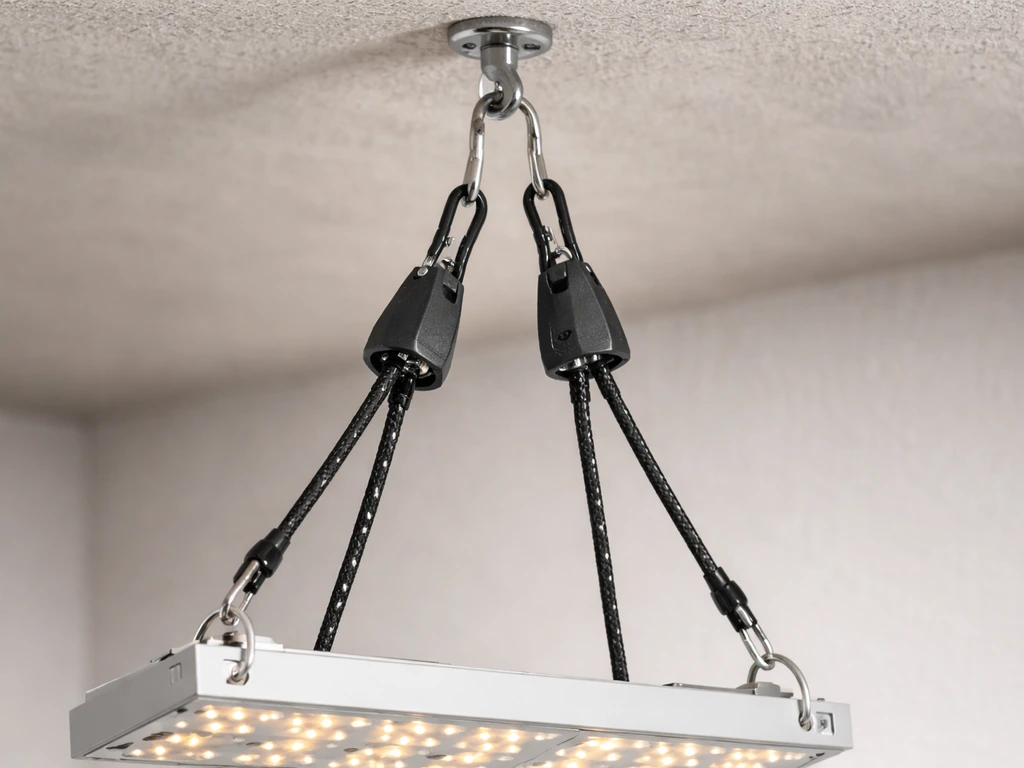
For ceiling or tent-bar mounting, you'll also need ceiling hooks rated for the fixture's weight. Heavy panel lights (anything over 5 lbs) should hang from two points using the fixture's built-in hanging brackets, not from a single hook. Black Dog LED, for example, specifically requires multiple hanging points on their PhytoMAX-2 panels and recommends having at least two people handle the installation. Even for lighter fixtures, two-point hanging prevents tilting and keeps coverage even.
If you're mounting to a shelf, rack, or grow tent pole, zip ties and adjustable strap hangers work well for smaller strip lights. For dedicated grow tents, the cross-bar poles are usually rated to handle light fixtures, but check your tent's weight limit before hanging anything heavy. Shelving setups call for small screw-in hooks or fixture clips, depending on the light style.
- Ratchet rope hangers: best for ceiling, tent bar, and overhead hooks; adjustable and reusable
- Jack chain with S-hooks: cheap and simple, but adjusting height means re-hooking links manually
- Zip ties and wire clips: ideal for LED strips on shelves or under cabinets
- Ceiling hooks or eye bolts: needed when mounting directly into joists or studs above a grow space
- Carabiner clips: useful for quickly swapping lights between hanging points
Whatever hardware you choose, make sure it's rated for at least twice the fixture's actual weight. Grow lights run warm and may stay hung for months or years, so undersized hardware is a real failure risk. Look for fixtures and hardware that carry UL 8800 certification, which is the specific safety standard for horticultural lighting equipment covering thermal, electrical, and structural requirements.
Planning placement, height, and light spread
Before you put a single hook in the ceiling, figure out where the light needs to live. The two things that matter most are height above the canopy and horizontal coverage. Get either one wrong and you'll either burn your plants or leave half of them in the dark.
Height by plant stage
Manufacturer guidance varies by fixture wattage and optics, but these ranges are a reliable starting point. FEIT Electric's mounting instructions call for 12 inches above seedlings during the first two weeks of veg, then 24–30 inches once plants are established. BESTVA-specific grow light mounting instructions can vary by model, so double-check the manual for the recommended hanging height and hardware. Their FAQs extend that to 16–30 inches for vegetative and flowering stages depending on intensity. If you're not sure where to start, hang the light at the top of the range and watch your plants for a week before moving it closer.
| Plant Stage | Recommended Height Above Canopy | Notes |
|---|---|---|
| Seedlings (0–2 weeks) | 24–30 inches | Young leaves are sensitive; start high and lower gradually |
| Early vegetative | 18–24 inches | Adjust down if plants are stretching toward the light |
| Late vegetative / pre-flower | 16–24 inches | Monitor for leaf curl or bleaching as a sign it's too close |
| Flowering | 16–30 inches | Depends heavily on fixture wattage; high-power lights stay higher |
| Houseplants / low-light plants | 12–24 inches | Most houseplants are fine at the higher end of this range |
Coverage area and beam angle
The higher you hang the light, the wider the coverage but the lower the intensity at canopy level. The lower you hang it, the more intense but the smaller the footprint. Most LED panels have a stated coverage area in their specs (something like '4x4 ft at 18 inches'), and that's a useful planning number. Lay out your plant containers on the floor before mounting anything and eyeball whether one fixture will cover them all, or whether you need to offset two lights.
Horizontal centering matters more than most people realize. A light mounted off to one side will give one plant intense direct light and leave the far edge dim. Measure and mark the center of your growing area before you put the hook in the ceiling. For grow tents, the center is obvious. For open shelves or closet setups, take a minute with a tape measure. For closet setups, the easiest way to get good placement is to start by measuring the center of the area your plants will occupy.
Also think about vertical clearance around the fixture itself. Fixtures with side vents need breathing room, and Black Dog LED specifies at least 6 inches of clearance on both vented sides. Superior Lighting recommends 12 inches of clearance around their LED grow fixtures for air movement. Don't mount a light flush against a shelf above it or in a cabinet corner with no airflow.
Step-by-step mounting methods
Hanging from the ceiling or ceiling hooks
- Find a ceiling joist using a stud finder. Hook screws driven into drywall alone will pull out under sustained weight.
- Screw in a ceiling hook rated for at least twice your fixture's weight. For a 10 lb light, use a hook rated for 20+ lbs.
- Thread ratchet rope hangers through the fixture's hanging brackets. Most panels have two or four mounting points.
- Clip the ratchet hanger hooks onto the ceiling hook (or a spreader bar if using multiple points).
- Pull the ratchet straps to raise the light to your target height. Use a tape measure to verify distance from canopy.
- Have a second person hold the fixture while you adjust if it's a large or heavy panel.
Mounting inside a grow tent
- Identify the horizontal cross-bar poles on the inside top frame of the tent.
- Drape ratchet rope hangers over the bar and clip the hooks through themselves to form a loop around the bar.
- Attach the lower hooks to the fixture's hanging brackets.
- Adjust the ratchets to your target height. Most tents let you position the bar at different spots to center the light.
- If hanging two lights side by side, space them evenly and check that coverage overlaps slightly in the middle.
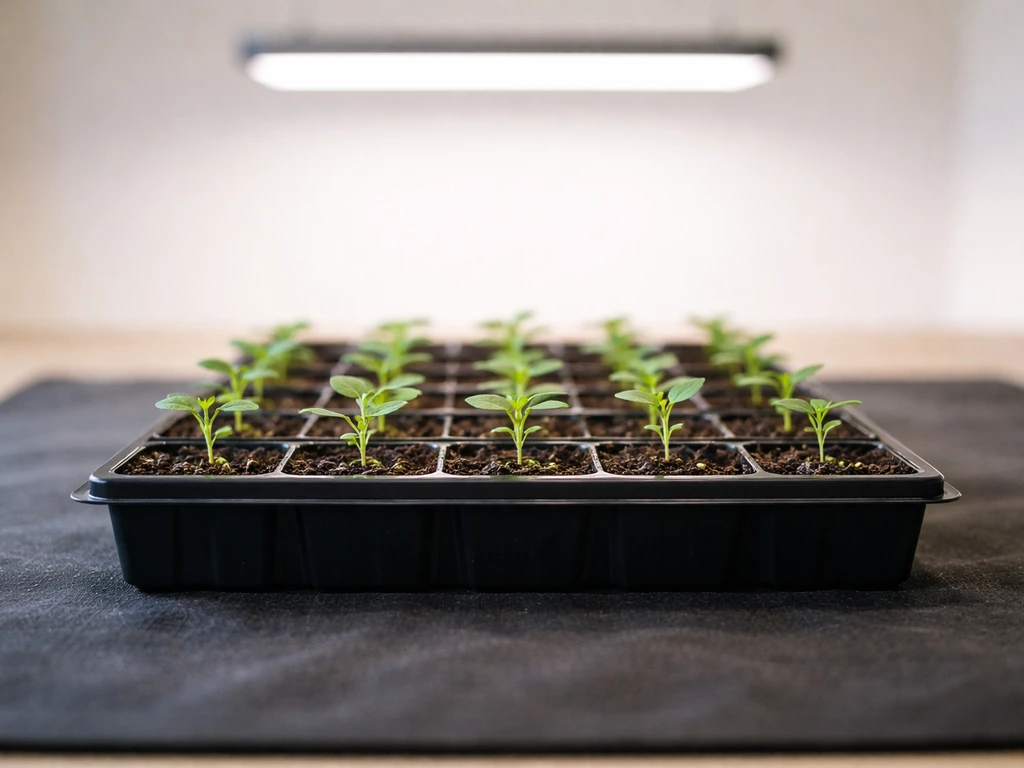
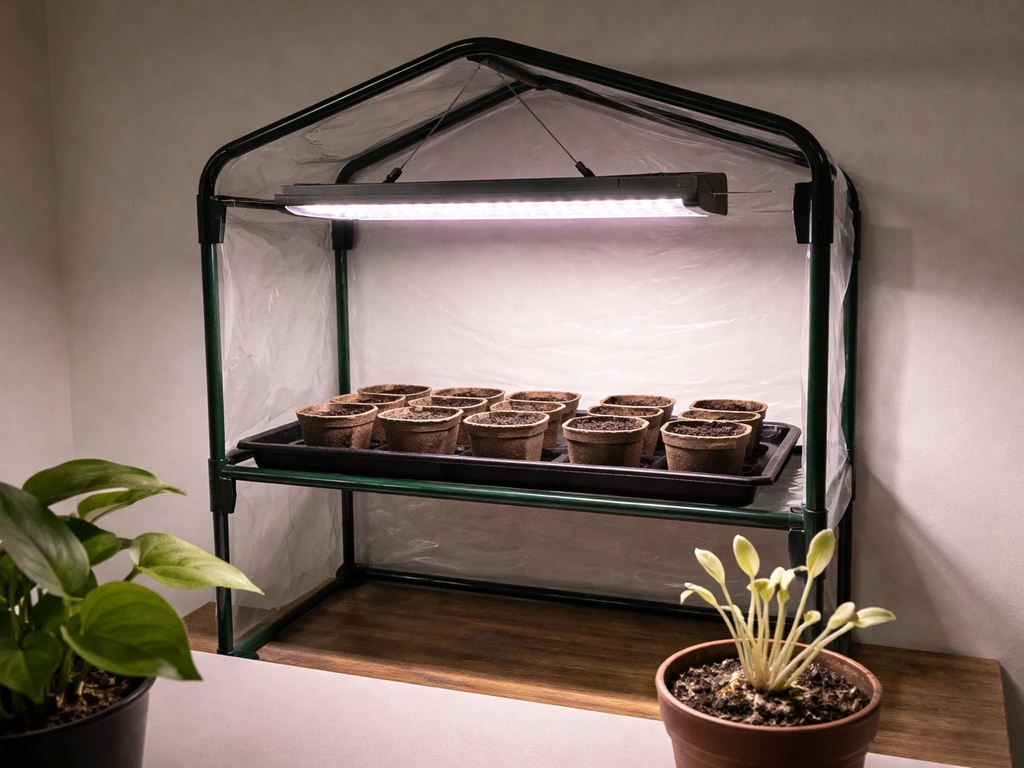
Mounting LED strips or bars on shelves
- Hold the strip or bar against the underside of the shelf above your plants to check fit and coverage.
- Use the included mounting clips or adhesive brackets to attach the strip. Screw-in clips are more reliable than adhesive for long-term use.
- Route the power cord along the shelf edge or frame using small zip ties or cable clips to keep it flat and out of the way.
- Leave at least 2–3 inches between the strip and any shelf surface above it for airflow.
- Test coverage by placing your hand at canopy level and moving it across the growing area to check for dark spots.
Wall or side-mounting for angled supplemental lighting
Some setups benefit from side lighting, especially for tall plants in deep closets or vertical racks. For this, use adjustable arm lamp brackets or side-mount fixture brackets screwed into wall studs. Angle the light so it hits the middle of the canopy rather than the top, and keep at least 12 inches between the fixture and the plant stems to avoid heat stress on leaves. Side-mounted lights are supplemental, not replacements for overhead lighting, so use them in addition to a top light, not instead of one.
Electrical safety and cable management
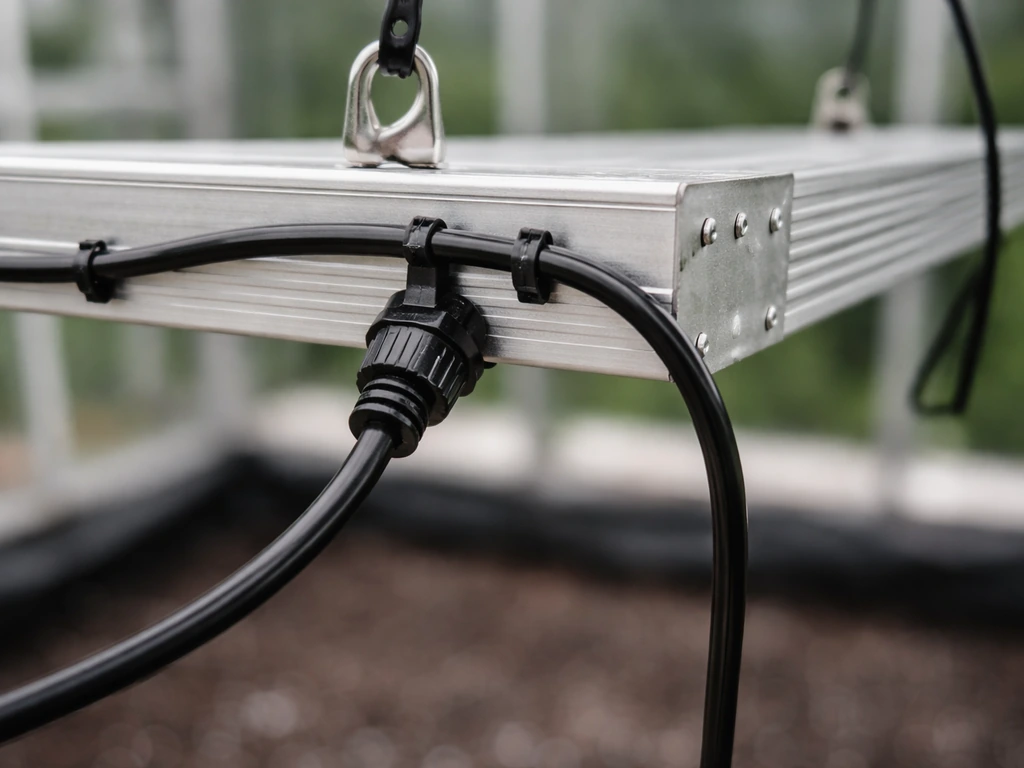
Grow light setups involve water, heat, and electricity in the same space, which is a combination that demands real attention. The CPSC specifically calls out strain relief as a critical safety feature for powered cords. What this means in practice: don't let the weight of a dangling cord pull on the socket where it connects to the fixture. That stress can loosen the connection over time and create a shock or fire hazard.
Use a zip tie or cable clip to anchor the cord to the hanging hardware within a few inches of where it exits the fixture. This transfers any cord weight to the structural hardware instead of the electrical connector. ANTLUX's instruction manual explicitly recommends securing the cord and connector area out of the work path using cable ties for exactly this reason.
- Always plug grow lights into a grounded (3-prong) outlet. Never remove or bypass the grounding prong.
- Use extension cords rated for the fixture's wattage. A 300W light on a lightweight extension cord is a fire risk.
- The CPSC recommends extension cords with sufficient wire gauge and overcurrent protection for safe use with powered equipment.
- Keep cords away from water, misting systems, and any surface that gets wet regularly.
- Don't run cords under rugs, through pinch points, or near the light's heat vents where insulation can degrade.
- Check the cord and connections monthly for signs of heat, discoloration, or melting.
- LED strip lights have an additional caution: don't mount them in ways that compress or kink the cord insulation.
For clean cable management, route power cords along tent poles, shelf edges, or wall surfaces using hook-and-loop cable wraps or small zip ties. Label cords at the outlet end if you're running multiple lights. Keep timer cords and dimmer cables bundled separately from the main power cords so you can easily trace and adjust them later.
Adjusting for plant growth
Mounting is not a one-time job. Knowing how to hang grow light hardware correctly will make it easier to adjust height as your plants change hang the light. Plants grow, and the right light height for a seedling is wrong for a flowering plant six weeks later. Build adjustability into your setup from the start by using ratchet hangers instead of fixed chains, and by checking height at least once a week during active growth phases.
Raising and lowering the light
FEIT Electric's grow light FAQ suggests raising the light by 2 inches at a time when plants show signs of stress, and lowering in similar increments when plants look like they're stretching for more light. Don't make large jumps. Moving a light from 30 inches to 12 inches overnight is a shock to the plant. Adjust in 2-inch steps over a few days and watch how the plants respond.
Angling and re-aiming
If your fixture has an adjustable mounting bracket, you can tilt it slightly to better cover an uneven canopy or compensate for plants that have grown taller on one side. Most panel lights don't have this feature, but many bar-style and strip lights do. Even a 10–15 degree tilt can even out coverage across an irregular plant layout.
Using dimmers and spectrum switches
If your light has a dimmer knob or spectrum switch, use it. Seedlings and clones don't need 100% intensity. Running at 50–75% for young plants reduces heat stress, extends the fixture's lifespan, and gives you room to increase intensity as plants mature. When you do increase power, do it gradually over a week. Spectrum switches (veg vs. bloom settings) are worth using as directed by the manufacturer, especially for flowering plants that respond to red-heavy light in late stages.
Troubleshooting common mounting problems
Uneven coverage or dark spots
If some plants are thriving and others look pale or stretched under the same light, coverage is uneven. First check that the light is centered over the growing area. Then check the height: if the light is very close (under 12 inches), the edges of the coverage area drop off sharply. Raising the light 4–6 inches usually solves edge-dimness, even if it reduces peak intensity slightly. You can also rotate plant containers every few days to give all plants equal exposure.
Fixture swinging or sagging
A light that swings when touched or slowly droops over time is a mounting failure waiting to happen. Check that ceiling hooks are screwed into joists, not just drywall. If you're in a tent, make sure the ratchet hanger loops are fully seated around the crossbar and not just resting on the edge. For very heavy fixtures, use a spreader bar between two hooks rather than a single center point. Once properly hung, a fixture should feel completely stationary with no play.
Light mounted too low
Signs of a light that's too close: leaf tips curling upward, bleaching or white patches near the top of the canopy, or unusually fast wilting even with adequate watering. Raise the light 4–6 inches and reassess after 48 hours. In most cases the plants will visibly recover within a day or two once the heat stress is removed.
Overheating and ventilation issues
LED grow lights run cooler than HID lights but they still produce heat, especially high-wattage panels. If the fixture feels hot to the touch (not just warm) or your grow space is consistently 5–10 degrees warmer near the top than the bottom, you have a ventilation problem. Make sure there's at least 6 inches of clearance on vented sides as recommended for fixtures with side vents, and at least 12 inches of open air around fixtures designed for open-space use. Add a small clip fan if needed to keep air moving across the fixture and through the canopy.
Cord or connector showing heat damage
If you spot discoloration, melted plastic, or smell burning near the cord or outlet, unplug the fixture immediately. This is not a 'fix it later' situation. Inspect the cord for damage, check that the outlet isn't overloaded, and replace any damaged components before using the light again. Don't use extension cords with inadequate wire gauge for high-wattage fixtures.
Setting a timer and testing after installation
Once the light is mounted and the cables are clean, the next thing you do is plug in a timer. This is non-negotiable for consistent plant growth. The University of Minnesota Extension and Cornell both recommend 16–18 hours of light per day for seedlings, with 6–8 hours of darkness. Most houseplants and established veg plants do well at 14–16 hours. Flowering plants often need a 12/12 (light/dark) cycle to trigger and maintain bloom.
Set your timer before the lights go on for the first time. Analog outlet timers work fine and cost almost nothing. Plug the grow light into the timer, set your on and off times, and plug the timer into the wall. Double-check that the timer is set to AM/PM correctly (it's an easy mistake to make) and that the clock is showing the current time accurately.
Testing your setup
- Turn the light on and let it run for 10–15 minutes before looking at coverage. Some fixtures take a moment to reach full output.
- Hold your hand palm-up at canopy level and move it across the full growing area. It should feel consistently warm, with no cold dark spots.
- Check that no plant is directly under a vent or heat exhaust point from the fixture.
- Measure the distance from the light to the tallest plant in your setup and confirm it matches your target height for that growth stage.
- Watch plants for 48–72 hours after first running the light. Look for leaf curl (too close or too intense), stretching toward the light (too far or too dim), or yellowing (wrong spectrum or duration).
- Adjust height, intensity, or photoperiod timer as needed based on what you observe.
Daily light integral (DLI) is worth understanding if you want to get precise. DLI measures the total amount of photosynthetically active light your plants receive in a full day. Research from OSU's controlled environment agriculture program targets a minimum of around 12 mol per square meter per day as a baseline for supplemental greenhouse lighting. For home growers without a PAR meter, running a quality LED at the right height for 16 hours a day will typically get you close for most plant types. A PAR meter is a useful tool if you want to dial things in more precisely later.
After your first week, revisit everything: height, timer schedule, cable routing, and plant response. Most mounting problems show up in the first week and are easy to fix early. By week two you'll have a feel for your specific setup, your specific plants, and what adjustments they need. From there it's mostly just raising the light as the canopy grows.
FAQ
Can I mount a grow light on a single ceiling hook?
Use 2 points for anything heavy enough that one hook would carry the full load, and treat the “single hook” method as risky unless the manufacturer explicitly says it is OK. Also confirm the ceiling hook rating is for the fixture’s weight plus your hanging hardware, and that the hook fastens into joists (not drywall only).
How do I tell if my ratchet rope hangers are installed correctly?
If your light is suspended from ratchet rope hangers, the loops should sit fully on the crossbar and then be tensioned so the fixture can’t rock. After tightening, gently push the fixture side to side and forward, it should feel rigid with no play, otherwise re-seat the hanger and re-tighten.
What’s the safest way to adjust hanging height if I’m unsure?
Start at the high end of the recommended height range, then adjust by small increments. If you go too low too fast, you can trigger heat stress and bleaching, so move in 2 inch steps over several days and reassess plant color and leaf position after about 48 hours.
How do I get even light across a canopy that is higher on one side?
For uneven canopies, use a fixture with a tilt or adjustable bracket if you have one. If you only have fixed mounting, level by adjusting suspension height on each side (for multi-point hangs) so the light center lands on the canopy, then verify coverage with plant response at the edges.
What should I do if my light is in a tight enclosure or closet?
Do not mount a vented fixture flush to a shelf top, back wall, or inside a cabinet corner. Leave the manufacturer’s stated clearance on vented sides (if none is given, use extra breathing room), and if temperatures stay high near the fixture, add a small clip fan to pull air across the heat sinks.
My fixture swings a little when touched. Is that normal?
Check for signs of structural failure early: ceiling movement, visible sag, or cords pulling the connector when you bump the fixture. Test by lightly touching the light and verifying there is no sway and the cord remains slack at the connector, then tighten or re-mount hardware if anything shifts.
Why is cord strain relief so important when mounting a grow light?
Secure the power cord so the weight does not hang from the fixture’s connector area. Use a zip tie or cable clip to anchor the cord to the hanging hardware within a few inches of where it exits the fixture, this transfers load to the structural hardware and reduces the chance of loose connections.
Can I use an extension cord to reach the outlet?
Yes, but only if the wiring is rated for the fixture’s power and you route the cord safely. For higher-wattage lights, use a properly sized extension cord or avoid them entirely, and keep connections off the floor where water or foot traffic could damage plugs.
What should I troubleshoot first if some plants look weaker under the same light?
If your plants look pale or stretched while others are fine, first verify horizontal centering, then re-check height because edge dimming gets worse when the fixture is very close. A small raise of 4 to 6 inches often fixes edge drop-off, and you can rotate containers to equalize exposure.
What should I do if I smell burning or see melted plastic near the cord?
Unplug immediately and inspect the cord, plug, and outlet for heat damage before restarting. Look for melted insulation or burning smells near the fixture’s cord path, and stop using damaged components, also avoid overloading the outlet by reducing other devices on that circuit.
How often should I re-check grow light mounting after installation?
Yes. Use adjustable hanging methods so you can tune height as plants change, and revisit weekly during active growth. Seedlings typically need more distance than flowering stages, so being able to raise or lower quickly prevents repeated mistakes.
How do I know whether one LED panel will cover my whole growing area?
Choose the light height based on optics coverage stated on the product specs (for example, coverage at a certain distance) and the footprint of your plant layout. Center the fixture over the area first, then decide if one fixture covers everything or if you need two offset fixtures rather than trying to “solve” coverage by lowering too far.
Can I mount a grow light closer if I’m using reflective material around it?
If you can, avoid covering the fixture with reflective boards or fabric that blocks airflow around vents. Reflective surfaces are useful near plants, but keep a gap around the fixture and ensure air can circulate from intake to exhaust vents.
When should I use side lighting instead of only an overhead light?
If you’re using side-mounted supplemental light, position it so it hits the middle of the canopy rather than only the top, and keep meaningful spacing from leaves to prevent localized heat stress. Side lights should supplement overhead light, not replace it, for most setups.
What are the most common timer setup mistakes for grow lights?
Timer placement and settings matter. Set the timer before the first run, then confirm AM/PM and that the clock is correct, because wrong settings can accidentally extend light hours and stress plants.
Next Article
How High to Hang LED Grow Light: Exact Height Guide
Get exact hanging height for LED grow lights. Adjust by plant response and coverage for seedlings to flowering.