You can absolutely hang a grow light without drilling a single hole, and the method you choose mostly depends on what your ceiling or existing structure looks like and how heavy your light is. The most reliable no-drill options are: ceiling beam hooks or strap hangers, picture rail or hanging rail systems, over-shelf and grow rack mounting, and tension rod or freestanding stand setups. Each one works well for specific scenarios, and this guide will walk you through picking the right one, buying the right hardware, and setting it all up safely.
How to Hang Grow Lights Without Drilling: 7 Safe Methods

Marcus Tillman
6 Apr 2026
No-drill hanging methods at a glance
The honest reason most people reach for a drill is convenience, not necessity. But renters, people with concrete ceilings, and anyone nervous about structural damage have real options. Here are the main no-drill approaches that actually work for grow lights:
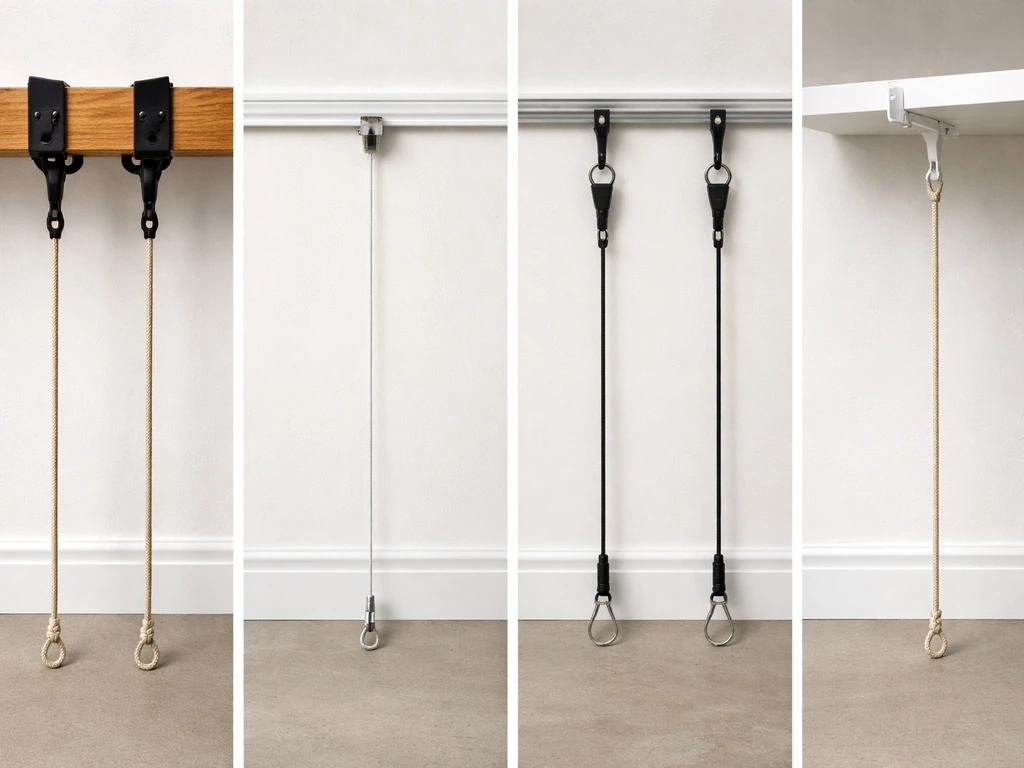
- Beam hooks or rafter hooks: clamp or strap around an exposed ceiling joist, beam, or rafter without any fasteners
- Picture hanging rail systems: track-and-cable systems that attach to an existing wall rail or crown molding
- Grow tent cross-bars: built-in metal bars at the top of a grow tent, purpose-built for hanging lights with no drilling required
- Wire shelving or grow rack mounting: attaching lights directly to shelf frames or rack uprights using zip ties, S-hooks, or adjustable hangers
- Tension rods: spring-loaded rods wedged between two walls or inside a closet opening to carry lightweight strip lights
- Freestanding grow light stands or tripods: self-supporting floor units that require zero wall or ceiling contact
Every one of these can work long-term when sized correctly. The failure point is almost always choosing a method rated for less weight than your light actually weighs. A single push-in adhesive or drywall hook is typically safe for only about 5 to 10 lbs, which rules it out for most LED panels and reflector-style fixtures right away. Know your light's weight before you pick a method.
Picking the right mount point for your room
Before you buy anything, spend five minutes looking at what's already above your plants. The structure you attach to matters more than the hardware you buy. If you have the wrong surface, even expensive hardware will fail.
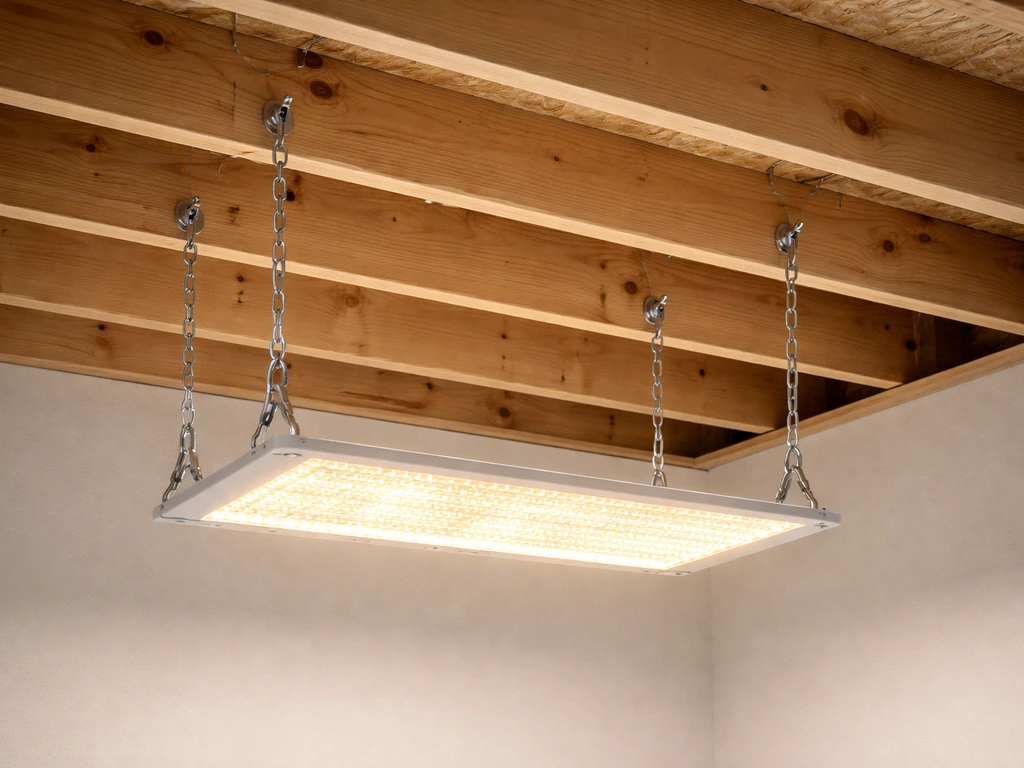
Exposed beams and ceiling joists
This is the gold standard for no-drill hanging. If you have exposed wooden beams, open basement joists, or rafter framing, you can loop a heavy-duty strap hanger or rafter hook around them with zero damage and a very high load rating. A pair of quality rope hangers (like the VIVOSUN adjustable type) rated at 150 lbs per pair can carry even large LED panels easily when hooked over solid wood. This is the method I'd use first if the ceiling allows it.
Drywall ceilings with no visible structure
Standard drywall ceilings are the trickiest surface. You can't hook into drywall alone for anything heavier than a few pounds. If you want to go overhead without drilling, a picture hanging rail or track system is your best bet here. A Gallery System hanger + hook weight chart provides specific combined load ratings for picture rail hanger setups (for example, 44 lb for a single hanger and hook and 88 lb for a double hanger and hook) picture hanging rail or track system. These rails typically mount to the wall at the top (sometimes clipped over existing crown molding with no screws) and use hanging cables to suspend items from the wall side rather than directly from the ceiling. Keep in mind that a hanging rail system's capacity is limited by its weakest component, whether that's the track, the cables, or the hooks, so match every piece to the same weight rating.
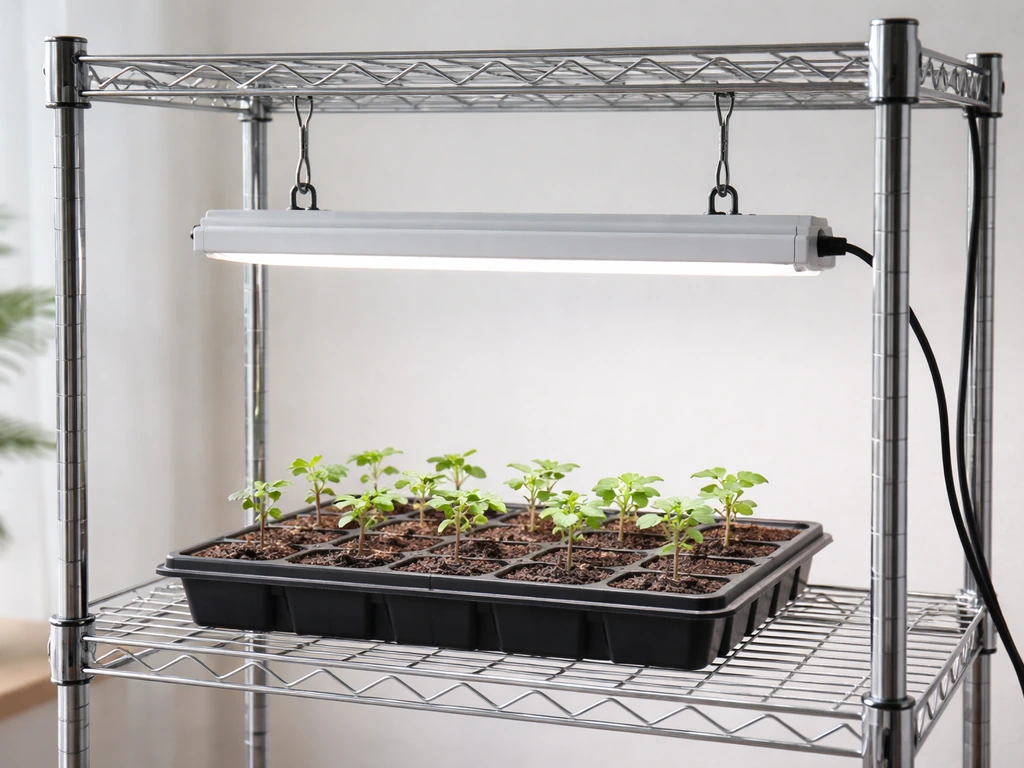
Shelves, wire racks, and grow tents
If you already own a wire shelving unit or a grow light shelf system, attaching your light to the frame above your plants is one of the cleanest and most adjustable setups available. Wire racks have built-in horizontal bars that accept S-hooks, zip ties, and ratchet hangers without modification. The same applies to grow tents: the top bars are designed specifically for this. Just check per-shelf weight limits before you add equipment. As a reference point, some two-tier LED grow shelving systems rate their lower shelves at 25 lbs each and the top shelf at only 10 lbs, so top-heavy setups need caution.
Closets, alcoves, and narrow spaces
Closets and alcoves give you walls on multiple sides, which opens up the tension rod method. For closet-specific setups, there are also dedicated approaches worth exploring: if you want a more detailed breakdown, hanging a grow light in a closet has its own considerations around airflow and cord routing that are worth reading separately.
Step-by-step installs for each no-drill method
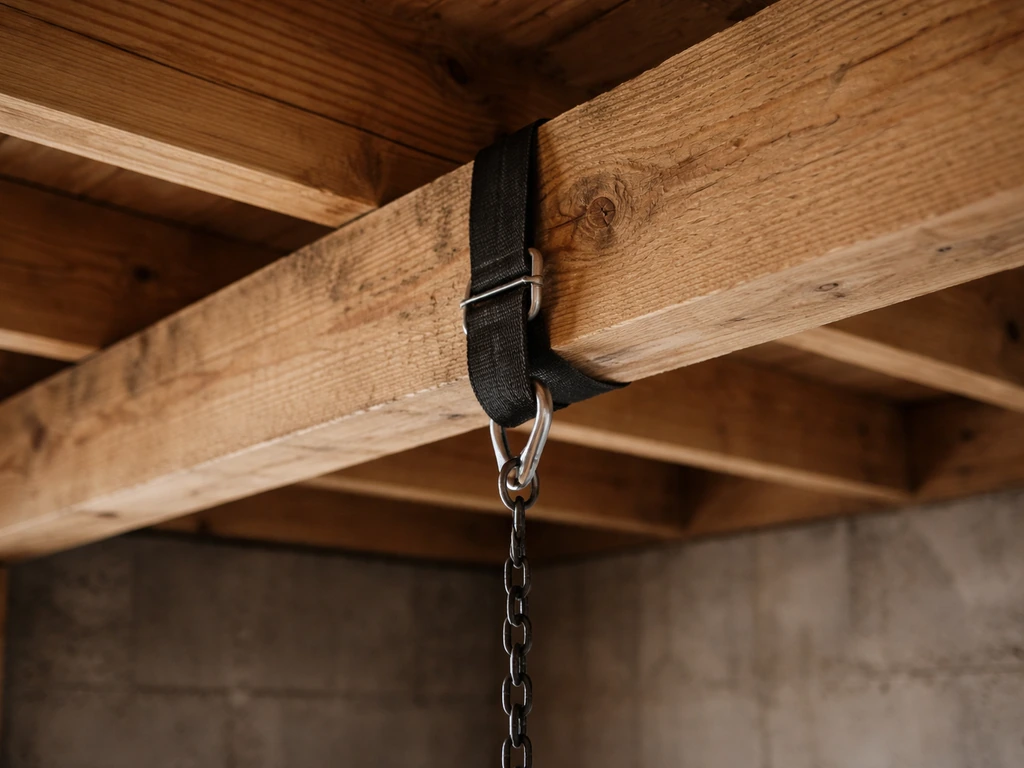
Method 1: Beam or rafter strap hooks
This works for exposed basement joists, garage rafters, or any visible wooden framing overhead.
- Buy two heavy-duty rafter hooks or beam straps rated for at least double your light's weight. For most LED panels, a pair of adjustable rope clip hangers rated at 150 lbs combined is more than sufficient.
- Loop or clamp the strap hook around the beam. For strap-style: wrap the strap fully around the beam and feed the end through the buckle. For hook-style: slide the hook up and over the beam from the side.
- Pull the strap snug until there is no slack. Give it a firm tug to test before attaching anything.
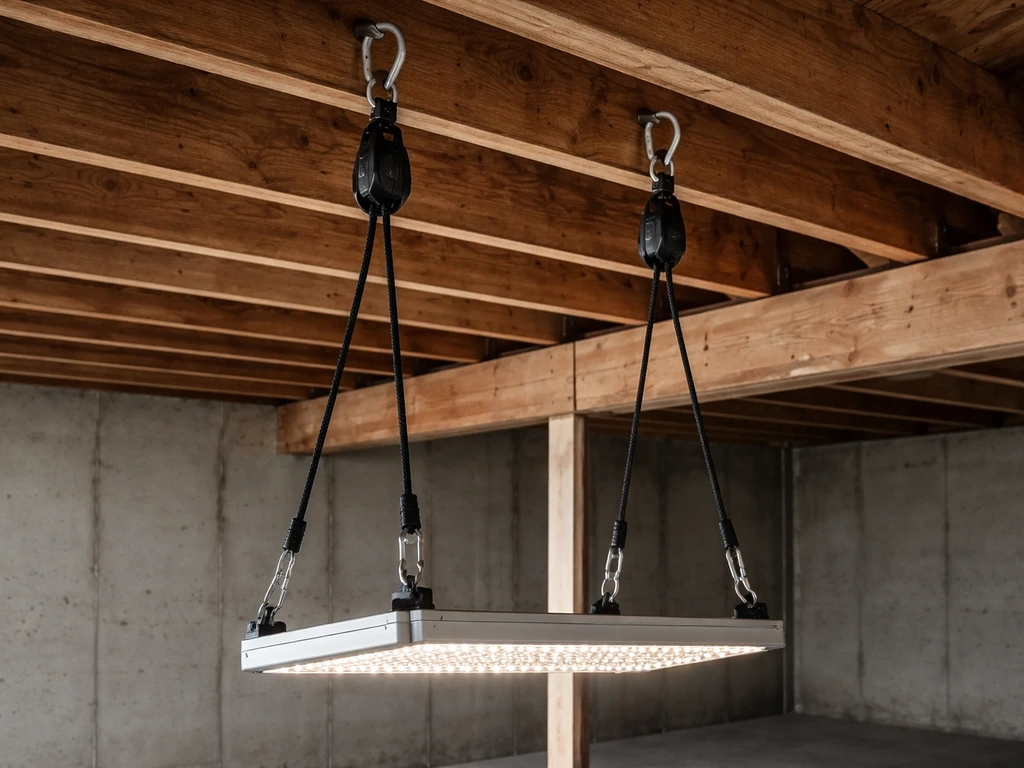
- Clip the adjustable grow light rope hanger (ratchet style) onto each strap hook using a carabiner or the built-in clip.
- Thread the rope hanger's loop through your light's hanging bracket or eyelet. Most bar-style LEDs and panels have these pre-installed.
- Pull the ratchet to raise the light to your starting height. Aim for 24 to 36 inches above seedlings as a starting point, adjustable later.
- Check that both hangers are level. An unlevel light creates uneven coverage across your plant canopy.
Method 2: Picture hanging rail or track system
Best for finished rooms with drywall ceilings where you want a clean, rental-safe look.
- Choose a picture rail system designed for the load you need. Check that the rail, cables, and hooks are all rated for the same weight. A typical grow light panel runs 5 to 20 lbs, so confirm the system covers that range with a safety margin.
- Mount the rail to existing crown molding using the system's included clips, or use a no-drill adhesive rail kit designed specifically to press onto smooth painted surfaces. Adhesive rails work best on flat, clean drywall, not textured ceilings.
- Hang the steel cable or cord from the rail hook, letting it drop to your desired light height.
- Attach a second hook or carabiner at the bottom of the cable and clip it to your light's hanging point.
- Adjust cable length by repositioning the cable clamp or using a separate inline adjuster. Many rail kits include these.
- For wider lights like bar-style LEDs, use two separate cable drop points spaced to match the light's width so it hangs level.
Method 3: Grow tent crossbar mounting
If you're growing inside a tent, you already have the ideal no-drill hanging structure.
- Identify the metal crossbars at the top of the tent frame. Most tents have two to four horizontal bars running across the top interior.
- Slide S-hooks or ratchet rope hangers directly over the crossbar. No clamps or straps needed.
- Attach the other end of the rope hanger to your light's hanging points.
- Use the ratchet mechanism to raise or lower the light. In a tent, this is the main way you'll adjust height as plants grow.
- Run the power cord along the tent frame down to the nearest port and out to the outlet. Most tents have dedicated cord exit ports.
Method 4: Wire rack or shelving frame mounting
This is one of the cleanest setups for seedlings and small plant collections on a budget.
- Position your wire shelving unit in your chosen grow space. Make sure it's on a flat, stable surface and fully assembled.
- Select the horizontal wire bar directly above the shelf where your plants will sit. This becomes your hanging point.
- Attach two zip ties or S-hooks to that bar, spaced to match the width of your grow light.
- Clip adjustable rope hangers through the zip tie loops or S-hooks, then attach to the light's hanging eyelets.
- Adjust the rope hangers to set your initial light height. For most seedling shelves, 6 to 12 inches above the plant tops is a good starting point for low-wattage strip or bar lights.
- Double-check that the shelf and rack can handle the combined weight of the light plus any pots and soil. Check per-shelf ratings before loading.
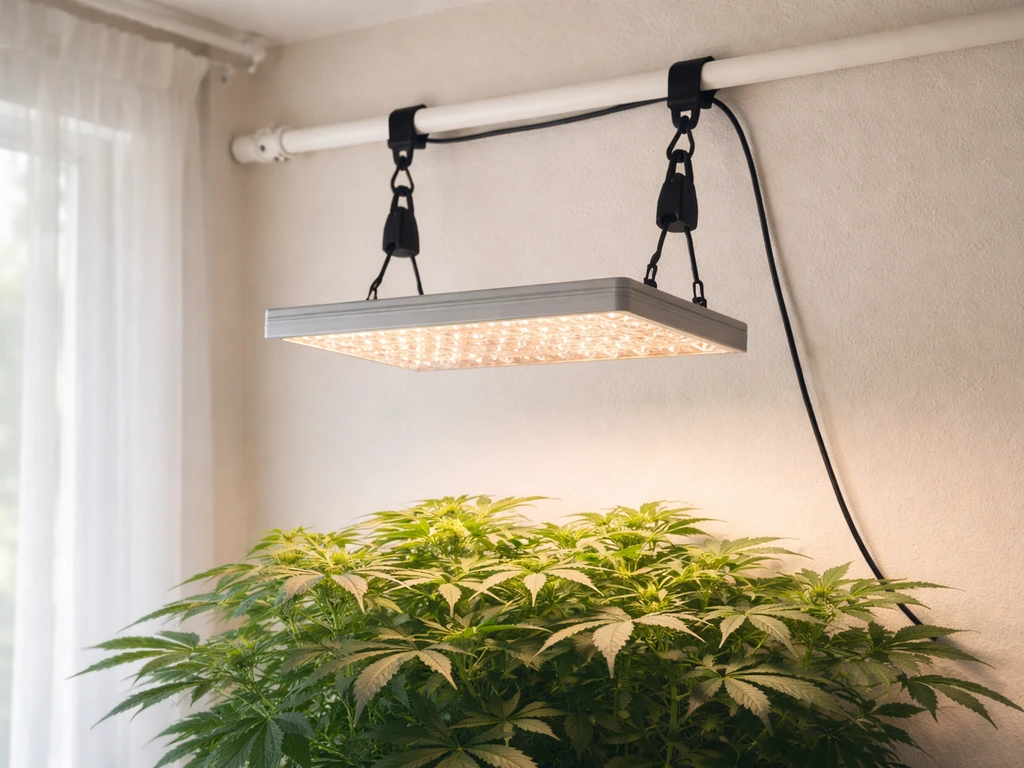
Method 5: Tension rod for lightweight strip lights
This only works for very light fixtures (under 3 to 4 lbs) in a space with two parallel walls or a closet opening.
- Measure the distance between the two walls where you want the rod to span.
- Buy a heavy-duty tension rod rated for at least twice the weight of your light. Standard closet rods work well.
- Extend the rod and press it firmly into place between the walls at your desired height. Twist it to lock, following the manufacturer's instructions.
- Hang your strip light or lightweight bar using S-hooks or zip ties over the rod.
- Test the tension by applying gentle downward pressure with your hand before attaching anything. If the rod slips, adjust the tension and try again.
Method 6: Freestanding grow light stand
For people who want zero ceiling or wall involvement at all, a freestanding tripod or gooseneck grow light stand is the most flexible option. These stands typically adjust from about 15 inches to 60 inches in height, work on any floor surface, and can be repositioned anytime. The trade-off is footprint: they take up floor space and are easier to knock over in a busy room. Weight limits vary by model, so check your stand's specs against your light's weight before purchasing.
Cable management, height adjustment, and safe clearances
Cords are the part people forget about until they become a problem. A dangling power cord near your canopy can catch on plants, create a trip hazard, or droop low enough to get wet if you overwater. Route cords upward from the light, along the hanging rope, and then horizontally along the beam, rack bar, or tent frame before dropping down to the outlet. Use velcro cable ties or simple zip ties to keep them bundled and off the floor.
Make sure there's at least 6 inches of clearance between your light's body and any fabric, wood, or other material above it. LEDs run cooler than HID lights but the driver and heat sink still need airflow. If you're inside a tent or closet, leave the top vents open.
For height adjustment as plants grow, ratchet-style rope hangers are the easiest tool available. You can raise or lower the light without unhooking anything: just pull the ratchet loop to go up, or press the release button to let it down. When you're initially dialing in how high to hang your LED grow light, start conservative (higher up) and lower it gradually over a few days rather than starting too close and burning leaves.
Power safety, GFCI outlets, and timer setup
Electricity and water near each other is the most serious risk in any grow space. Plants need watering, and water drips. Whenever your grow light is within 6 feet of an area where you regularly water, use a GFCI (ground fault circuit interrupter) outlet or a GFCI extension cord. GFCI protection rules for dwelling-unit branch-circuit receptacles are tied to how far the receptacle is from the sink, and one code Q&A notes that receptacles within 6 ft of the sink bowl require GFCI protection within 6 feet of an area where you regularly water. These cut power immediately if water contacts the circuit. Most modern grow spaces benefit from one regardless.
Never use a standard indoor extension cord as a permanent solution. If your outlet isn't close enough, use a heavy-duty grounded extension cord rated for the wattage of your light, or have an electrician add an outlet. Running a 300-watt LED on a thin 16-gauge cord is a fire risk. For reference, most LED grow lights draw far less than their stated wattage: a light marketed as 1000W equivalent may only draw 100 to 150 actual watts from the wall, so check the actual draw spec on the label before choosing your cord.
Timers are not optional for serious growing. Plug your light into a mechanical or digital outlet timer set to your target photoperiod. Seedlings and leafy plants generally want 16 to 18 hours of light per day. Flowering plants typically need a 12/12 split. Set the timer once and let it run. If your light has a built-in dimmer, set intensity at around 50 to 70 percent for new seedlings and ramp up to full power as plants mature and the light is raised.
Comparing the no-drill methods side by side
| Method | Best for | Max practical load | Adjustability | Rental-safe |
|---|---|---|---|---|
| Beam/rafter strap hooks | Exposed joists, basements, garages | 150+ lbs (per ratchet pair) | High (ratchet) | Yes |
| Picture hanging rail | Finished rooms, drywall ceilings | Varies by system; check all components | Moderate | Yes |
| Grow tent crossbars | Tent growers | Depends on tent frame rating | High (ratchet) | Yes |
| Wire rack / shelf frame | Seedling shelves, small collections | 25 lbs per shelf (varies) | Moderate | Yes |
| Tension rod | Closets, lightweight strip lights | Under 4 lbs | Low | Yes |
| Freestanding stand | Any room, any surface | Varies by stand model | Very high | Yes |
If you have exposed beams or a grow tent, use ratchet rope hangers over those structures and stop there. That's the most reliable, most adjustable, and safest option in almost every case. If you're working with a finished drywall ceiling and no visible structure, go with a picture hanging rail system rated to handle your light's weight. Everything else is situational.
Light placement and intensity for seedlings vs. leafy plants
Height and intensity work together. Getting one right while ignoring the other leads to stretched, pale seedlings or scorched leaf tips. Here's a practical starting framework you can adjust from:
| Plant stage | Starting height (LED panel) | Intensity setting | Hours per day |
|---|---|---|---|
| Germination / just sprouted | 24 to 36 inches | 30 to 50% | 16 to 18 hours |
| Seedling (first true leaves) | 18 to 24 inches | 50 to 60% | 16 to 18 hours |
| Vegetative / leafy plants | 12 to 18 inches | 70 to 100% | 14 to 16 hours |
| Flowering / fruiting | 10 to 16 inches | 100% | 12 hours |
These numbers assume a modern, mid-range LED panel or bar light. If you're using a brand-specific fixture and aren't sure where to start, the manufacturer's recommended hanging distance is a more reliable baseline than a generic chart. If you're working with a BESTVA fixture for the first time, looking up how to hang a BESTVA grow light specifically can save you a lot of trial and error since their reflector designs spread light differently than flat panels.
Watch your plants more than you watch the numbers. Seedlings stretching toward the light (getting leggy) means the light is too far away. Bleached or curling leaves mean it's too close or too intense. Adjust by 2 to 3 inches at a time and give plants 48 hours to respond before making another change.
Troubleshooting the most common setup failures
The light keeps tilting or hanging crooked
This almost always means your two hanging points are not at equal heights, or one rope hanger has more slack than the other. Adjust each ratchet individually and use a level app on your phone to confirm. A tilted light creates a hot spot on one side of your canopy and weak coverage on the other.
The mounting point is creeping or sagging over time
If you're using a strap-style beam hook, this usually means the strap isn't tight enough around the beam. Re-tighten and check weekly for the first two weeks. If you're using an adhesive-based hook or rail, sagging almost always means the surface wasn't clean and dry before application, or the adhesive wasn't given enough cure time. Most adhesive systems need 24 to 48 hours before they should bear any weight.
Cords sagging into the canopy
Route the power cord up and along the hanging rope first, securing it with velcro ties every 6 to 8 inches. Then run it horizontally to your exit point before dropping to the outlet. If the cord still dips, add a small adhesive cable clip to the nearest wall surface to hold the horizontal run in place.
Coverage is uneven across the plant tray
The usual cause is hanging the light too high (light spreads too wide and thins out) or positioning it off-center. For uniform coverage, the light should be centered above the plant area and hung at the recommended height for your specific fixture. If you're not sure about your particular model, the broader guidance on how to mount an LED grow light covers positioning strategies for different panel shapes and sizes.
The whole hanging setup feels unstable
This is usually a sign you've chosen a method that isn't rated for the load or surface. Go back to the comparison table above and honestly reassess. If your light weighs more than 10 lbs and you're relying on a single adhesive hook, that's the problem. Upgrade to a beam strap, rail system, or rack-mounted approach rated for at least twice your light's weight. For a complete picture of how general grow light hanging is approached from the ground up, the overview on how to hang a grow light covers the fundamental principles that apply whether you're drilling or not.
A few parting notes on making it permanent (or not)
The no-drill methods in this guide aren't just for renters or temporary setups. Ratchet rope hangers over exposed beams, rail systems, and grow rack mounts are genuinely superior in adjustability compared to a fixed bolt in the ceiling. You can move your light the same day you move your plants. That flexibility has real value when your setup evolves, and most indoor grow setups evolve constantly.
If you ever do want to explore drilling into a ceiling, whether into drywall or directly from above, the approach changes significantly. Hanging a grow light from the ceiling with fasteners requires finding joists and using appropriate anchors, which is a different process from everything covered here. But for most home growers, the no-drill methods are more than enough to get a reliable, safe, and adjustable setup running today.
FAQ
How much weight do I actually need my no-drill hardware to handle?
Use your light’s labeled weight (fixture plus reflector, driver if it’s included, and any mounted accessories) and then size for a safety margin. A practical rule is to pick hardware rated at least twice your light’s total weight, especially if you’re using straps, rail hangers, or any multi-part system where the weakest component limits capacity.
Can I hang multiple grow lights from the same no-drill setup?
Yes, but treat each light as its own load. Sum the total weight on the structure and also consider load distribution, if two lights create an offset pull or concentrated stress on one strap, rail section, or rack bar. If the system uses multiple cables or S-hooks, make sure they each have matching ratings and equal tension.
What’s the safest way to prevent a strap or rope hanger from slipping over time?
Before you hang anything, wrap straps around a solid, textured beam point (not loose trim) and tighten until there’s no visible gap. For rope hangers, set the ratchet so it’s snug, then re-check weekly for the first two weeks, especially after temperature changes. If you see shifting, retighten and inspect for fraying or compression of the strap material.
Are picture rail or hanging rail systems truly no-drill if I rent?
Often, yes, because many systems mount to wall track using clips or clamps over existing molding, but it depends on your specific room and the rail design. Before installation, verify whether the manufacturer requires screws, confirm how the track attaches to your wall surface, and check your lease rules about wall-mounted hardware.
What if my drywall ceiling has crown molding, can I use it instead of drilling?
In some rooms, you can use a rail system that clips over or uses existing trim, which keeps you out of the ceiling. The key is that the load is still transferred into the wall and trim, so you must confirm the molding and the mounting method are rated for the weight, not just the rail kit.
How do I choose between a freestanding stand and a no-drill overhead option?
Choose a stand if you can’t or don’t want any wall or ceiling involvement, or if you need rapid repositioning. Choose overhead if you need maximum floor clearance or your plants require consistent coverage over a larger footprint. Also compare stability, some stands wobble on uneven floors, so use adjustable feet or place on a level surface.
Can I use adhesive hooks at all for grow lights?
Only for very light fixtures, adhesive hooks are generally limited to small weights and can fail with heat, moisture, or repeated tension changes. If you want adhesive, pick a heavy-duty system with an explicit rating on the packaging, clean and fully dry the surface first, and allow the full cure time before hanging anything. For most grow lights above a few pounds, you should avoid relying on adhesive alone.
Why does my light create uneven brightness, even when the hangers are the same height?
Two common causes are the light is not centered over the plant canopy, or the fixture’s reflector spreads light unevenly based on orientation. Re-center the light directly above the target area, confirm the fixture is level using a phone level, and if your light has adjustable optics, set the manufacturer’s intended spread before changing height.
How long should I wait before adjusting height again after my first setup?
Give plants about 48 hours to react to an adjustment before making another change. Then adjust gradually, by about 2 to 3 inches at a time, especially during seedling stages, because leaves can scorch quickly if the light is brought too low too fast.
Do I need a GFCI if my outlet is already protected?
If you’re not sure, use the safer option. A GFCI outlet or GFCI extension cord is recommended when the light is within roughly 6 feet of watering, because water drips can reach the cord and plug. If you have a GFCI breaker in the panel, it may already provide protection, but confirming the specific outlet’s protection level is what matters.
What’s the best way to manage the power cord so it doesn’t snag plants or droop?
Keep the cord routed upward from the light along the hanging rope, then run it horizontally along the beam or rack bar, secured every 6 to 8 inches with Velcro ties or similar. If the horizontal segment still dips, add a small wall cable clip to hold it in place. Also confirm the cord cannot hang low enough to contact wet soil or puddles.
Can I run the grow light on an extension cord permanently?
Avoid it. If the outlet location is inconvenient, use a heavy-duty grounded extension cord that matches the light’s wattage draw and is rated for that load, or have an electrician add a proper outlet. Permanent use of thin indoor extension cords is a common cause of overheating risk.
How do I set the timer if my light has both a timer and a dimmer?
Use the outlet timer to control photoperiod, then use the dimmer for intensity. For new seedlings, start around mid-range intensity (commonly about 50 to 70 percent) and ramp up as plants mature and you lower or raise the fixture. If your device has multiple timing modes, keep the photoperiod setting consistent and avoid double-timing that can create on-off cycling.
Next Article
How to Hang Grow Light From Ceiling Step by Step
Step-by-step guide to hang LED grow lights from ceiling safely, choosing mounting points, heights, and hardware for jois