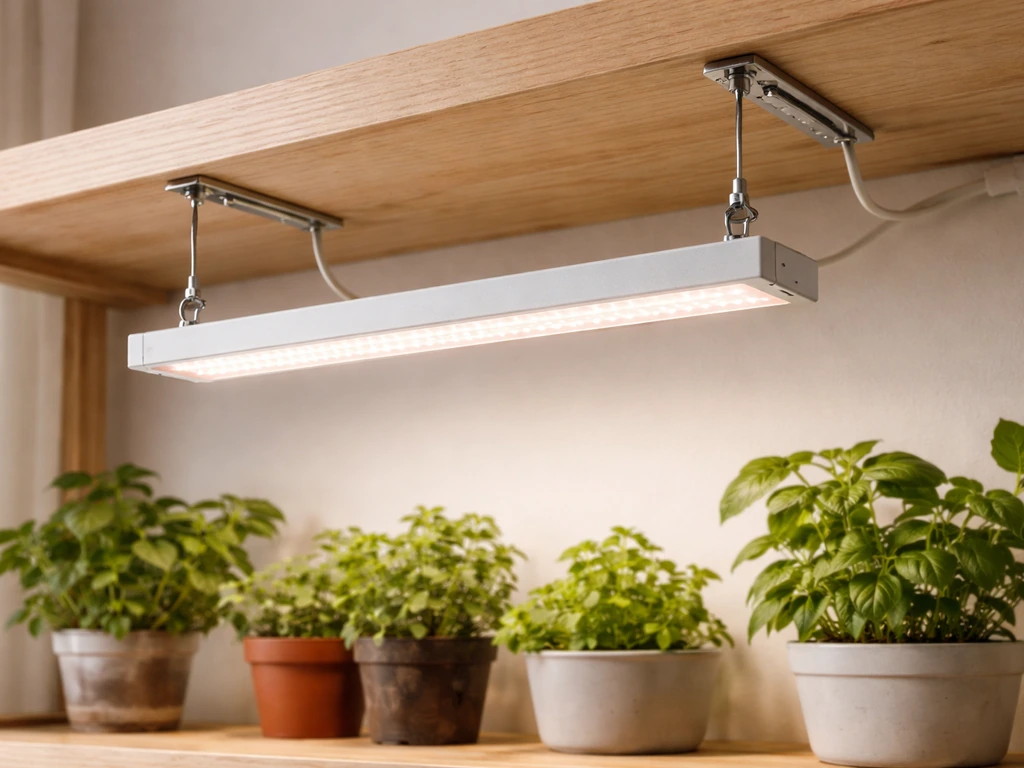
Hang your BESTVA grow light using the included ratchet rope hangers, position it 24–30 inches above seedlings and 18–24 inches above vegetative plants (12–18 inches for flowering), center it over your canopy so every plant gets even coverage, and then spend the first week watching your plants and nudging the height until they respond well. That's the whole process in one sentence. Everything below breaks it down into steps you can actually follow today.
How to Hang BESTVA Grow Light: Height, Distance, Setup

Marcus Tillman
18 May 2026
Choosing the right hanging method and hardware
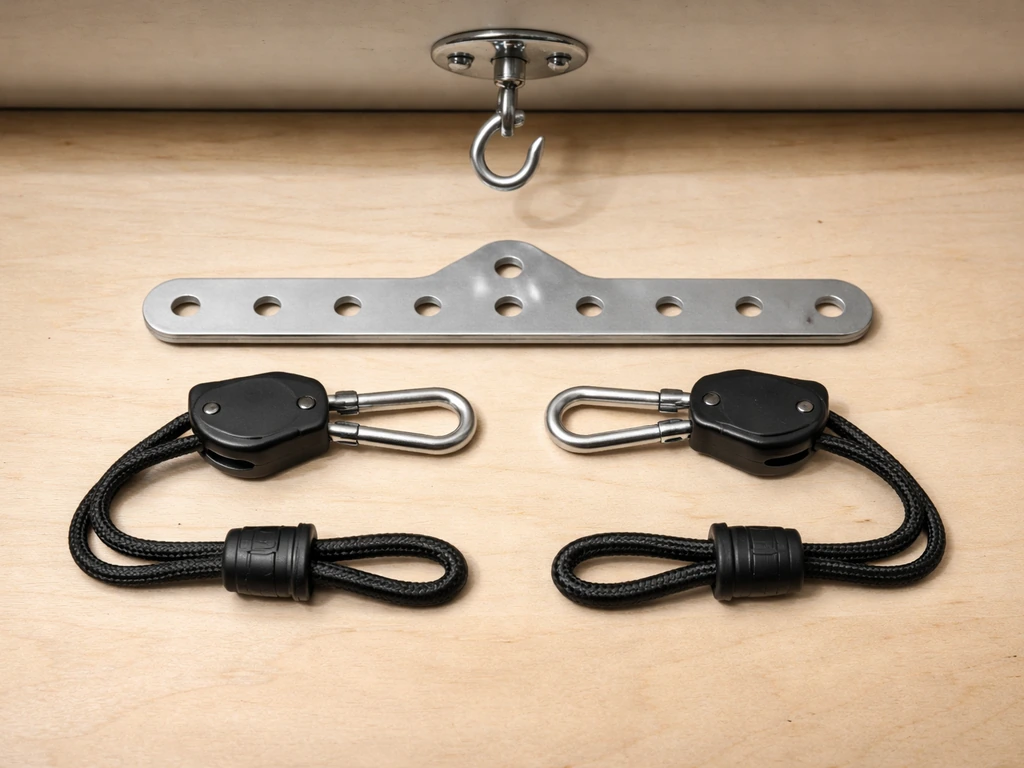
Most BESTVA models ship with an adjustable rope hanger kit in the box. The DC Series, for example, includes metal hanger hardware and small hooks that attach to the hanger holes on the back of the light. That kit is your first choice, not an afterthought, because BESTVA designed the load path around those attachment points. Use them. If your kit is missing or you want a backup, a pair of ratchet rope hangers (the kind with a pull-cord that locks at any height) from any grow supply store work perfectly and make height adjustment a one-handed job.
Whatever you hang from overhead, the anchor point matters just as much as the hanger. BESTVA grow lights are not heavy by fixture standards, but you still need to anchor into something real. A ceiling joist, a cross-bar in a grow tent, or a purpose-built light rail all work. Standard drywall anchors are not appropriate for overhead tensile loads, even if the packaging shows a weight rating, because those ratings are for wall shear loads, not ceiling pull-down forces.
If you're mounting in open space without a tent, find a stud with a stud finder and drive a forged eye-bolt rated for overhead use. Hardware-grade eye-bolts carry a Working Load Limit (WLL) based on a safety factor of at least 4:1, so a bolt rated for 50 lb WLL can actually hold 200 lb before failure. Use the WLL number, not the breaking strength.
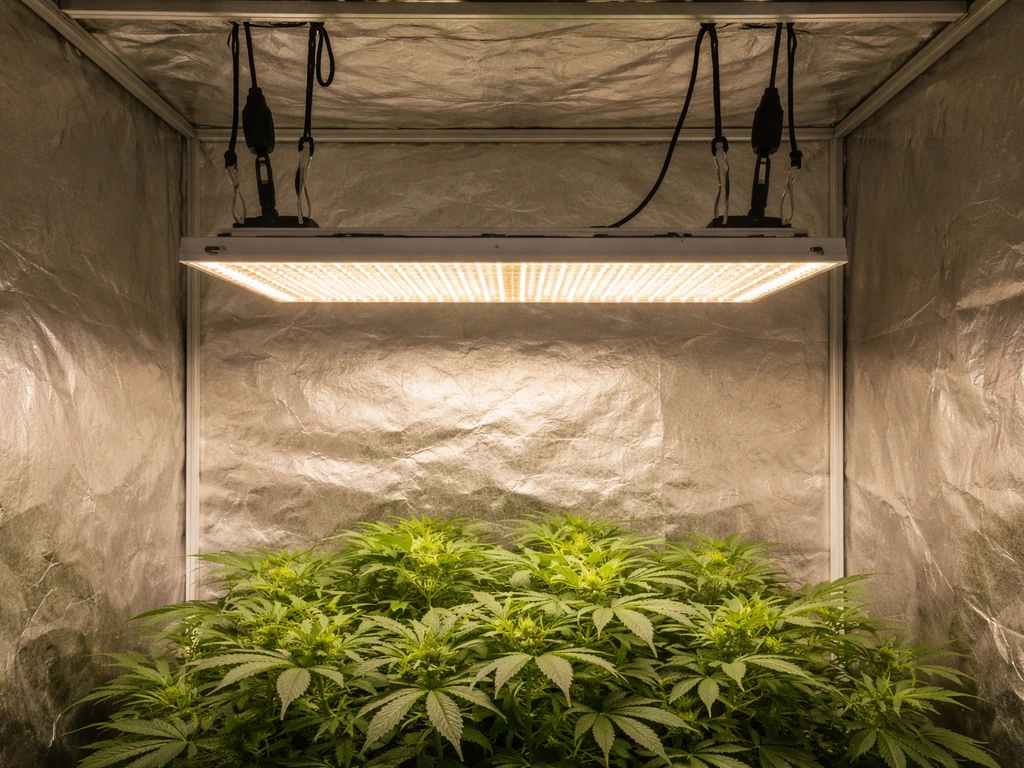
For most people growing in a tent, none of this is complicated. Tent frames have horizontal bars across the top specifically for hanging lights. Loop your rope hangers over the bar, clip the carabiner to the light's hanging holes, and you're done. If you're hanging from a ceiling joist in a basement or closet, the same approach applies, just with an eye-bolt instead of a tent bar.
Once the hardware is set up, you can dial in the hang height to get even coverage and the right intensity for your stage hang grow light. There are also no-drill options worth knowing about if you're working in a rental space or a small closet setup. If you need to hang grow lights without drilling, look for ratchet rope hangers or tent bars that attach to existing structure no-drill options.
Planning placement: coverage area and centering over plants
Before you hang anything, figure out where the light needs to sit horizontally. BESTVA's DC Series manual gives you a coverage table to work from. The DC1000 covers a 2×2 ft core area with a maximum spread of 3×3 ft. The DC2000 covers 3×3 ft core, max 4×4 ft. The DC3000 covers 4×4 ft core, max 5×5 ft. The DC4000 covers 4×5 ft core, max 7×5 ft. The 'core' area is where intensity is highest and most consistent. The 'max' area is where the light still reaches but intensity drops off toward the edges.
| Model | Core Coverage | Max Coverage |
|---|---|---|
| DC1000 | 2×2 ft | 3×3 ft |
| DC2000 | 3×3 ft | 4×4 ft |
| DC3000 | 4×4 ft | 5×5 ft |
| DC4000 | 4×5 ft | 7×5 ft |
Measure your plant area and find the center point. That center point is where the light hangs directly above. Use a measuring tape to mark it. If your plants are in a 3×3 ft tent with a DC2000, the light goes dead center over the tent. If your plants are arranged in an L-shape or staggered row, find the geometric center of the whole footprint. Plants near the edges will get slightly less light than those underneath, which is normal, but you minimize that problem by centering carefully.
Do not push the light to one side to avoid a wall or an electrical outlet. An off-center light is one of the most common causes of uneven growth, where plants on one side stretch tall reaching for the brighter center zone while plants directly under the light stay compact. A little rearranging to center the light correctly is always worth it.
Setting initial hanging height for seedlings vs mature plants
BESTVA gives stage-based height recommendations in their manuals, and they're consistent across models. If you need the exact hanging height, follow the stage-based recommendations in the manual and then fine-tune after a few days how high to hang led grow light. For the DC Series, start seedlings at 24–30 inches above the plant canopy. Move to 18–24 inches for vegetative growth. For the BP2000 and similar panel-style models, seedlings start at 18–24 inches and flowering plants drop to 12–18 inches. If you're unsure which range applies to your model, start at the higher end of whatever range you're working in. Going higher first is always the safer call.
| Growth Stage | DC Series Height | BP2000 Height |
|---|---|---|
| Seedlings | 24–30 inches | 18–24 inches |
| Vegetative | 18–24 inches | 18–24 inches |
| Flowering / Fruiting | Not specified; lower conservatively | 12–18 inches |
To set the height, hold a measuring tape at the top of the plant canopy (or the soil surface for seedlings that haven't emerged yet) and measure straight up to the bottom of the light fixture. Adjust the rope hangers until you hit your target. Ratchet hangers make this easy since you just pull the cord to raise or release it to lower. Once it's set, give the light a gentle shake to confirm nothing is slipping before you walk away. For step-by-step guidance, see our tips on how to hang grow light safely and at the right height.
Dialing in distance and intensity using plant response
The manufacturer's height ranges are a starting point, not a final answer. Every grow space is different because wall reflectivity, room temperature, and the exact output of your specific unit all affect how plants actually experience the light. The real tuning happens in the first one to two weeks by watching your plants closely.
If you want a number to aim for, PPFD (measured in µmol/m²/s) gives you that. Seedlings and clones do well in the 100–300 µmol/m²/s range. Leafy greens like lettuce thrive at 250–350 µmol/m²/s. Vegetative plants generally want 400–600 µmol/m²/s, and fruiting crops like tomatoes or peppers can handle 600–900 µmol/m²/s at peak growth.
OSU Extension also recommends using a broader PPFD target of 400 to 800 µmol·m⁻²·s⁻¹ for improved plant growth while matching it to crop and growth stage rather than treating it as a one-size-fits-all value Vegetative plants generally want 400–600 µmol/m²/s.
A cheap PAR meter or a smartphone app paired with a cosine-corrected sensor can give you a real measurement at canopy level in about 30 seconds. Hold the sensor at canopy height and check several spots across the coverage area to catch any hot spots or dim corners.
If you don't have a meter, you can still tune by observation. Compact, deep green, short-internoded growth means the light is in a good range. Pale, washed-out leaves or slightly bleached tips mean the light is too close or too intense. Thin, stretchy stems reaching upward mean the light is too far away or too weak for the stage. Adjust height in 2-inch increments, wait 3–4 days, and reassess. It sounds slow but it's actually the most reliable method because plants tell you the truth.
BESTVA's DC1000 manual includes a PPFD graph showing intensity at different points across a 3×3 ft footprint at 3 feet of height. If your model has a similar chart in the manual, use it as a reference before spending money on a meter. It won't be perfect for your specific room conditions, but it gives you a ballpark that's far better than guessing.
Preventing stretch, burn, uneven growth, and heat problems
Most hanging-related problems fall into four categories, and once you know what to look for, they're easy to diagnose and fix.
- Stretching (etiolation): Stems are long and thin, leaves are spaced far apart, and plants lean toward the light. Cause: light is too far away or photoperiod is too short. Fix: lower the light by 2–3 inches, check centering, and consider adding an hour to your light schedule.
- Leaf burn or bleaching: Leaf tips turn brown or white, upper leaves look washed out or papery. Cause: light is too close or the plant was moved under full intensity too quickly. Fix: raise the light by 2–3 inches and reduce intensity if your model has a dimmer. Let the plant recover for a few days before adjusting again.
- Uneven growth: Plants on one side are taller, more stretched, or darker than the other side. Cause: light is off-center or the coverage footprint doesn't reach the edges of your grow area. Fix: re-measure the center point and reposition the light. Rotate your pots a quarter turn every few days as an additional equalizer.
- Heat buildup: Leaves nearest the light feel warm to the touch, or your grow space stays above 85°F (29°C). Cause: inadequate airflow or light mounted too close to a ceiling with no ventilation. Fix: raise the light, add a small circulation fan, and ensure the room has some air exchange. BESTVA LEDs run much cooler than HPS lights, but they still produce heat that needs somewhere to go.
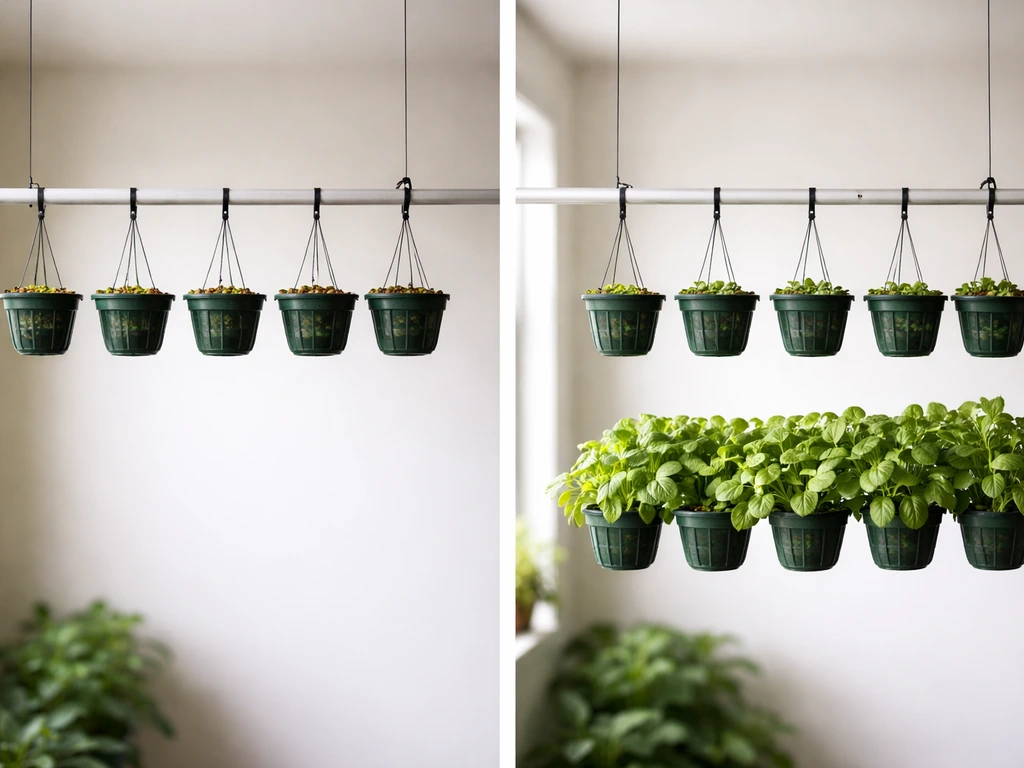
One underrated fix for uneven growth is simply rotating your plants. Even with perfect centering, the edges of the coverage area receive slightly less PPFD than the center. Rotating pots 90 degrees every three to four days averages out the exposure difference over time without requiring any hardware changes.
Scheduling and adjusting over time
Start conservatively. On day one with a new BESTVA light, hang it at the high end of the manufacturer's recommended range for your stage and run it for a shorter photoperiod than you ultimately plan. Something like 14–16 hours for seedlings or 18 hours for vegetative plants is a reasonable starting point. This gives plants time to acclimate to the new light source before you pile on full intensity and full duration.
During the first week, check plants daily. Look at internode spacing, leaf color, and stem thickness. If everything looks healthy after five to seven days, you can lower the light by 2 inches or extend the photoperiod by an hour, depending on whether you're trying to increase intensity or daily light dose. Don't do both at once. Changing one variable at a time means you know which adjustment caused any change you see.
PPFD and photoperiod work together as a concept called DLI (Daily Light Integral), which is the total amount of light energy your plant receives in a day. If your PPFD is lower (light hung higher), you can compensate with a longer photoperiod. If your PPFD is higher (light hung lower), a shorter photoperiod delivers the same daily dose. For reference, lettuce targets a DLI of roughly 12–17 mol/m²/day, achievable at 250 µmol/m²/s over 16 hours.
For example, a commercial supplemental lighting engineering white paper lists lettuce and arugula PPFD targets around 150, 250 µmol·m⁻²·s⁻¹ and DLI targets around 12, 17 mol·m⁻²·day lettuce targets a DLI of roughly 12–17 mol/m²/day.
Fruiting plants like tomatoes want much higher DLI values and benefit from higher PPFD levels over longer periods. Knowing this relationship helps you decide whether to lower the light or simply run it longer when plants seem hungry for more light.
As plants grow taller, the distance between the canopy and the light decreases naturally even if you never touch the hangers. Check your canopy-to-light distance every one to two weeks and raise the light to maintain your target range. A plant that starts under the light at 24 inches can be within 10 inches if you let it grow unchecked for a month. That's where burn happens even without any mistakes on your part.
Safety and electrical checklist before you power on
Run through this checklist before plugging in your BESTVA light for the first time. It takes two minutes and catches the problems that cause equipment damage or, more seriously, safety incidents.
- Anchor point is structural: The overhead anchor is a ceiling joist, tent bar, or purpose-built mounting point, not bare drywall. Drywall anchors are not rated for overhead tensile loads.
- Hanger hardware is rated for the load: Use the included BESTVA hangers or aftermarket ratchet hangers with a stated WLL. The light itself is relatively light, but use rated hardware anyway.
- Attachment points on the light are secure: The hooks or carabiners are fully seated in the light's hanger holes and not just resting on the edge.
- Light is level: A tilted fixture throws light unevenly. Check with a small bubble level or just step back and eyeball it from two angles.
- Cord is routed safely: The power cord is not pinched, kinked, or running across a path where it can be tripped over. Use cord clips or zip ties to route it along a wall or tent frame.
- Cord is not in contact with water: Keep the power cord and plug away from any drip, condensation surface, or misting system. If moisture is present in your grow area, use a GFCI outlet or GFCI adapter. This is non-negotiable.
- Strain relief is in place: The cord should not be the only thing holding the light's weight. The hanger hardware carries the load; the cord just carries electricity.
- Minimum clearance above the light: Make sure there's at least a few inches of airspace above the fixture for heat dissipation. Don't mount it flat against a ceiling.
- Plug-in is confirmed as the right voltage: BESTVA lights typically run on standard 120V US household current, but double-check your model's spec label before plugging into anything unusual.
- Manual is kept accessible: Keep the included BESTVA manual with the light or photograph the key pages. The PPFD charts and stage height tables in it are your most accurate reference for your specific model.
Once everything checks out, plug in, confirm the light turns on, and verify the height one more time from the top of your canopy to the bottom of the fixture. You're ready to grow. Come back in five to seven days, check your plants, and make one small adjustment if needed. That's really the whole job.
FAQ
Can I hang my BESTVA grow light by the power cord or chain instead of the hanger holes?
No. The load should be carried through the designed attachment points (hanger holes on the back) or ratchet rope hangers rated for overhead use. Suspending by the cord can damage wiring, and it also bypasses the intended load path.
What anchor should I choose if I’m using a tent but the top bar isn’t centered over my plants?
Hang the light from the bar at its available location, then center horizontally by using the measuring method for the canopy footprint. If the bar position makes centering difficult, add an adjustable hanging solution (like two ratchet hangers with independent adjustment) so the fixture can be moved to the geometric center.
How do I measure the correct height if my seedlings are not yet emerged?
Measure from the soil surface (or the top of the growing medium) up to the bottom of the fixture, as if the canopy were at that level. Once seedlings emerge and develop a visible canopy, re-measure from the actual canopy top and adjust within your target range.
Should I keep the light perfectly level across all four corners?
Yes. If one side is lower, you can get localized bleaching or stretching even when the average height looks right. After adjusting, check height at multiple points across the canopy, then fine-tune the ratchets so the fixture is level.
My light feels secure, but it still slowly creeps down over a few days. What could cause that?
Common causes are hanger stretch or rope slip, loose clips, or ratchet hangers that are not fully locked. Recheck clip orientation on the hanger holes, fully engage the ratchet teeth, and confirm nothing flexes under airflow. Also re-verify height after day 1, then again after 3 to 5 days.
Is it safe to use drywall anchors for hanging a BESTVA grow light in a non-tent setup?
Generally no. Drywall anchors are not meant for overhead pull-down loads. Use a stud, a properly installed overhead-rated eye-bolt, or a purpose-built rail. If you cannot hit structural framing, use an alternative mount designed for overhead tensile loads.
What if my canopy is irregular, like multiple heights in the same tent?
Pick a target canopy height based on your tallest consistent growth stage, then adjust in small increments. If you have extreme differences, consider grouping plants by height into zones because one fixed fixture height usually cannot optimize for both a low canopy and a tall canopy.
How quickly should I adjust if I see symptoms like pale leaves or stretching?
Change one variable at a time and wait. For height, use 2-inch increments and reassess after 3 to 4 days. If symptoms suggest high intensity (washed-out or bleached tips), raise the light first; if stems are stretching, lower it slightly.
Should I adjust photoperiod before changing hang height?
Prefer hang height adjustments when you are seeing strong intensity signs. If plants look generally healthy but “hungry” (slow growth, pale-but-not-bleached), you can extend photoperiod gradually. Either way, adjust only one variable at a time so you can attribute the result.
How do I use PPFD measurements without getting misleading readings?
Measure at canopy level and test several spots across the intended coverage area, not just the center. Make sure the sensor is oriented correctly and keep it at a consistent height while you move. If readings vary widely, correct by centering first, then adjust height.
If my BESTVA manual provides a PPFD graph, can I rely on it fully for my room?
Use it as a ballpark, not a guarantee. Wall reflectivity, air temperature, and your exact installation height can shift real canopy PPFD. Confirm with observation in the first 1 to 2 weeks, and use a meter only if you need tighter control.
How often should I re-check canopy-to-light distance as plants grow?
Check every 1 to 2 weeks, and also re-check right after you make any adjustment. Even with careful setup, the distance shrinks quickly over time, and staying in range is what prevents heat stress or light burn.
Can I rotate the pots more frequently than every 3 to 4 days?
You can, but avoid constant daily rearranging because it can disturb microclimates and feeding behavior. Every 3 to 4 days is a practical rhythm that evens out edge effects while keeping the plants stable.
Next Article
How to Hang Grow Lights on Shelves: Step-by-Step Guide
Step-by-step for hanging grow lights on shelves: mounting hardware, placement distance, cord routing, safety, and fixes