Setting up grow lights the right way comes down to four things: picking a fixture sized for your space, mounting it at the correct height, dialing in the right intensity for your plants' stage, and running it on a consistent schedule. Get those four things right and your plants will thrive. Get them wrong and you end up with stretchy seedlings, bleached leaves, or a power bill that makes no sense. This guide walks you through every step, with real numbers you can use today.
Grow Lights Setup for a Grow Room: Step by Step LED Guide
Marcus Tillman
2 Apr 2026
Choosing the right LED grow light for your grow room size
Forget lumens. Lumens measure light the way human eyes perceive it, not the way plants use it. What you want is PPFD (photosynthetically active radiation delivered per square meter per second, measured in µmol/m²/s). When you're comparing fixtures, look for a PAR map in the spec sheet. A PAR map shows actual PPFD readings across a defined footprint at a specific mounting height. That number tells you whether the light actually reaches your canopy at the intensity your plants need.
Here's the practical workflow: decide your target average PPFD at canopy level, then pull up the manufacturer's PPFD map at the mounting height you plan to use, and check whether the fixture delivers that PPFD across your full floor area. If a brand can't provide a PAR map, treat that as a red flag. Good LED manufacturers publish them in their spec sheets as a standard practice.
For rough sizing, here's a general wattage and style guide by tent or space footprint. Board or bar-style LED panels work well for most home setups because they spread light more evenly than a single puck-style fixture.
| Space Size | Recommended Style | Approximate True Wattage | Target PPFD at Canopy |
|---|---|---|---|
| 2×2 ft (0.37 m²) | Single bar or small board | 100–150W | 400–600 µmol/m²/s |
| 2×4 ft (0.74 m²) | Board or bar style | 200–300W | 400–700 µmol/m²/s |
| 4×4 ft (1.49 m²) | Single large board or 2 bars | 400–600W | 500–900 µmol/m²/s |
| 4×8 ft (2.97 m²) | 2 large boards or 4 bars | 800–1200W | 600–1000 µmol/m²/s |
| Closet (2×3 ft) | Single bar or strip | 80–150W | 300–500 µmol/m²/s |
If you're just getting started and want a solid walkthrough of fixture selection specifically for houseplants and common indoor starts, the guide on grow light setup for indoor plants covers fixture types and intensity targets for a range of common plant varieties. For a dedicated vegetable grow room, the approach shifts a bit because vegetables generally need higher DLI targets than decorative houseplants.
Planning coverage: layout, mounting height, and distance
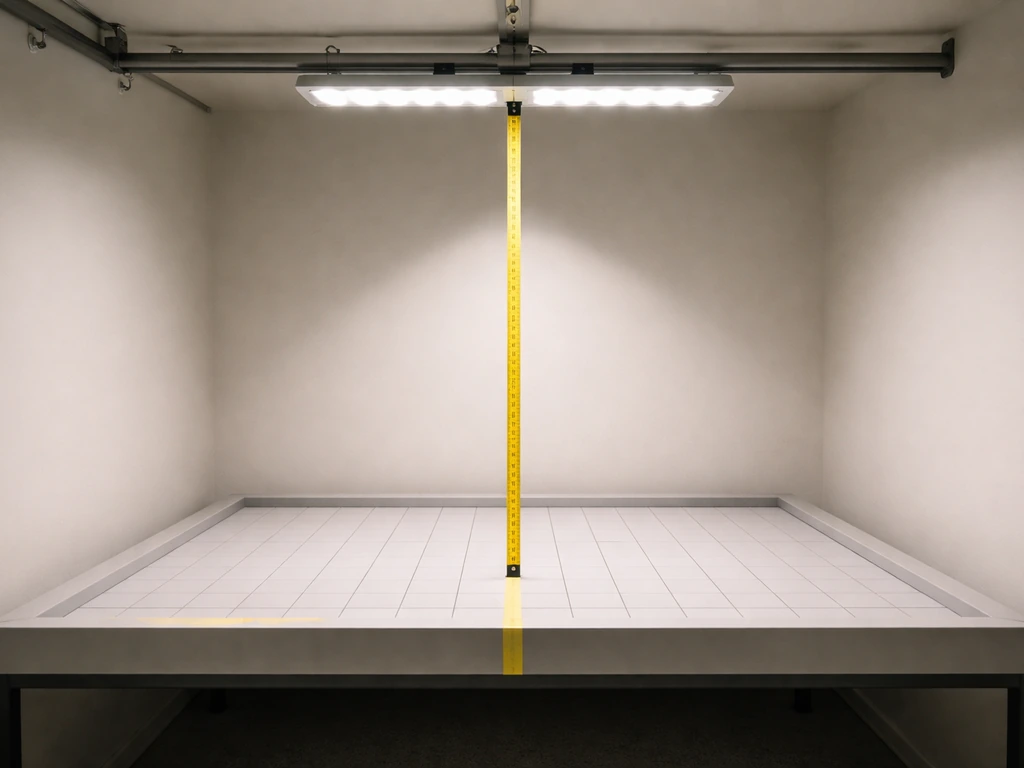
Mounting height directly controls how wide and how intense the light is at canopy level. The physics here is called the inverse square law: double the distance, and you get roughly one quarter of the intensity. Practically speaking, raising your fixture a few inches can significantly reduce PPFD at the canopy, which is both a safety valve (good for preventing light stress) and a way to improve coverage uniformity across a wider area.
Beam angle matters a lot here. Narrow-beam fixtures concentrate light in a tighter column, which means you need either tighter spacing between fixtures or a lower mounting height to avoid dark edges. Wide-angle optics spread light more broadly and can be mounted higher without losing the edges. Most board-style LEDs have a relatively wide spread, which is one reason they're popular for small grow rooms.
A practical uniformity goal to aim for is no more than 20% PPFD variation across the canopy. So if your target average is 600 µmol/m²/s, you don't want any spot on your canopy consistently sitting below 480 or above 720. The easiest way to check this is with a cheap quantum flux meter or by using your fixture's published PPFD map and comparing the center vs. edge readings at your actual mounting height.
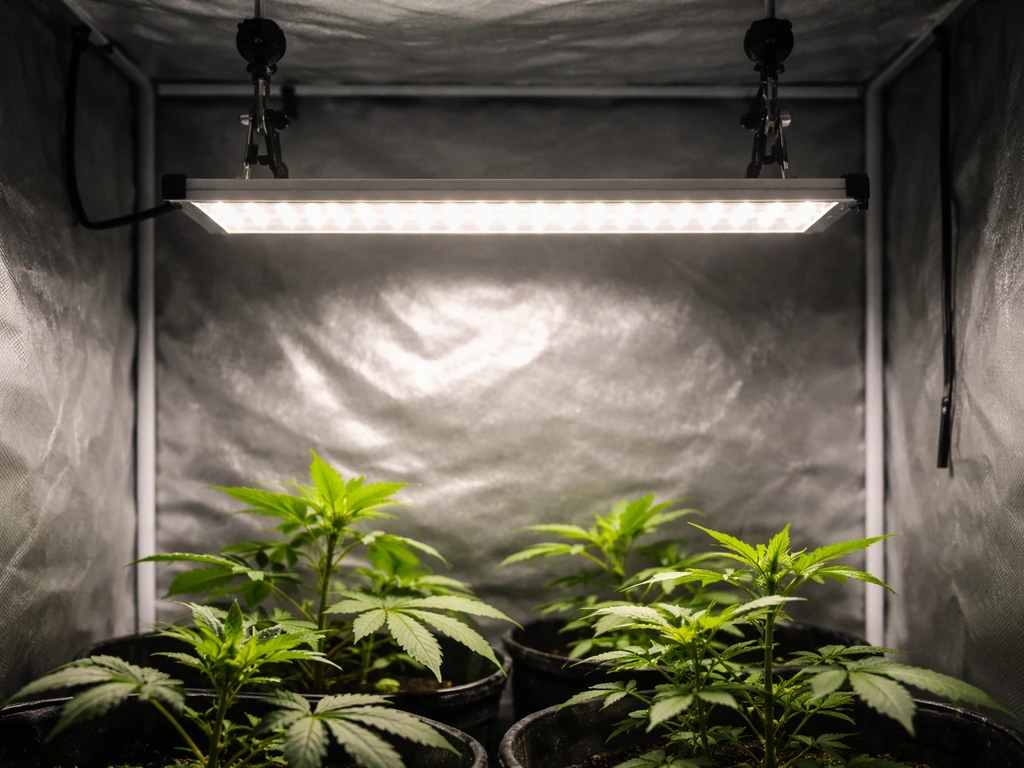
For most home LED setups, a starting mounting height of 18–24 inches (45–60 cm) above the canopy is a reasonable baseline. From there, adjust based on what you measure. If you're running a hanging fixture in a tent, level it carefully by adjusting the rope or ratchet hanger on each side. An unlevel fixture creates an instant coverage imbalance that's easy to miss until one side of your plants starts falling behind.
If you're building out a grow light shelf setup, the mounting challenge is different because you're working in a fixed vertical space between shelves. In those cases, plan your shelf spacing first (usually 12–18 inches per tier depending on plant height), then select a fixture thin enough to fit while still spreading light evenly across the shelf width.
Power, safety, and basic installation checklist
Before you plug anything in, cover a few safety basics. Most home grow setups run on standard 120V circuits, but larger setups (600W+) may need a dedicated 20A circuit. Check your total wattage draw against your circuit's capacity and leave a 20% headroom buffer. Overloaded circuits are a fire risk, full stop.
For grow rooms that involve regular watering, you want GFCI (ground-fault circuit-interrupter) protection at your outlets. In the U.S., the National Electrical Code governs safe wiring installation, and GFCI outlets are specifically required in wet or damp locations. If you're replacing an older non-grounding outlet in a grow space, GFCI protection is the code-compliant path forward. Just make sure to label it correctly as required.
If your fixture will be in a high-humidity environment, check its IP rating. IP65 means the fixture is dust-tight and can handle water jets, which is a solid minimum for a tent with active watering. Lower-rated fixtures can corrode or short out over time in humid conditions.
Heat management is the other big one. LEDs run much cooler than HPS lights, but the driver (the power supply component) still generates heat and needs airflow around it. One manufacturer instruction I've seen specifically notes: always ensure there is adequate room for airflow around the heatsink. In a tent, that means your exhaust fan should be pulling air out continuously when the lights are on. In a closet or open shelf setup, passive airflow may not be enough and a small clip fan can make a real difference.
- Calculate total wattage draw and verify your circuit can handle it with 20% headroom
- Use GFCI-protected outlets in any space where watering occurs
- Check IP rating on fixtures used in high-humidity environments (IP65 minimum recommended)
- Ensure continuous airflow around the driver and heatsink when lights are on
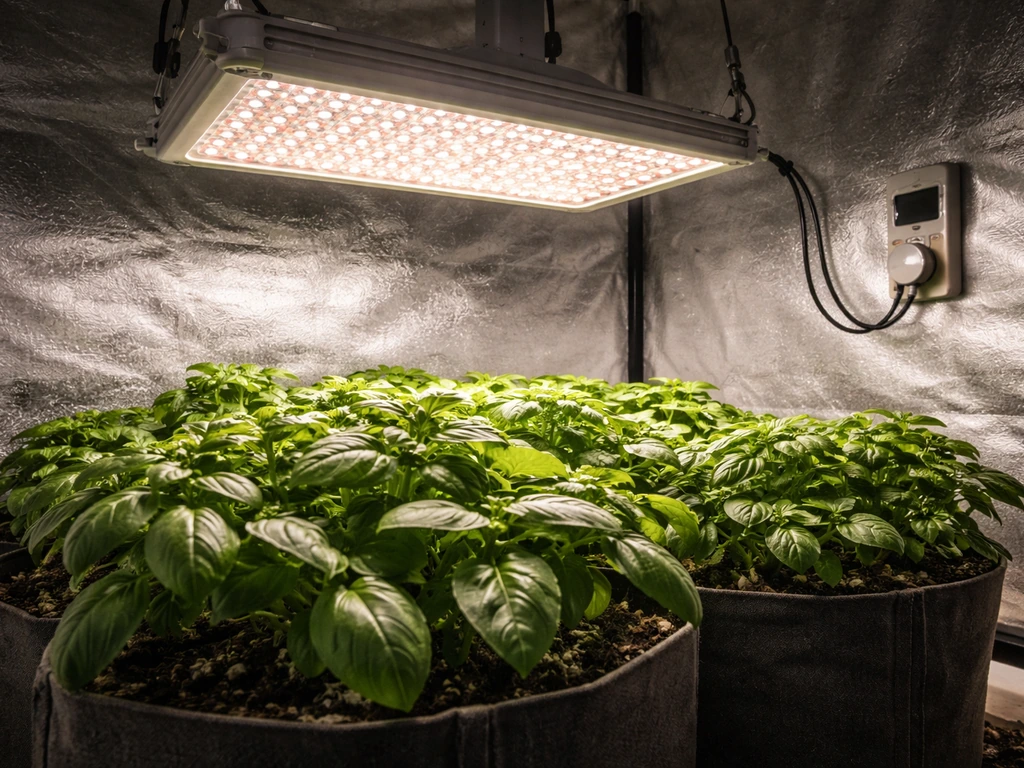
- Use a timer or smart plug with scheduling from day one, not as an afterthought
- Hang fixtures with rated ratchet hangers or manufacturer-supplied hardware only
- Double-check that hanging fixtures are level before starting any grow cycle
If you want a deeper look at keeping costs down while still meeting these safety and equipment requirements, the breakdown in the budget grow light setup guide is worth reading before you buy. It's easy to overspend on fixtures when mid-range options do the job just as well for most home grows.
Setting intensity and dialing in for seedlings vs mature plants
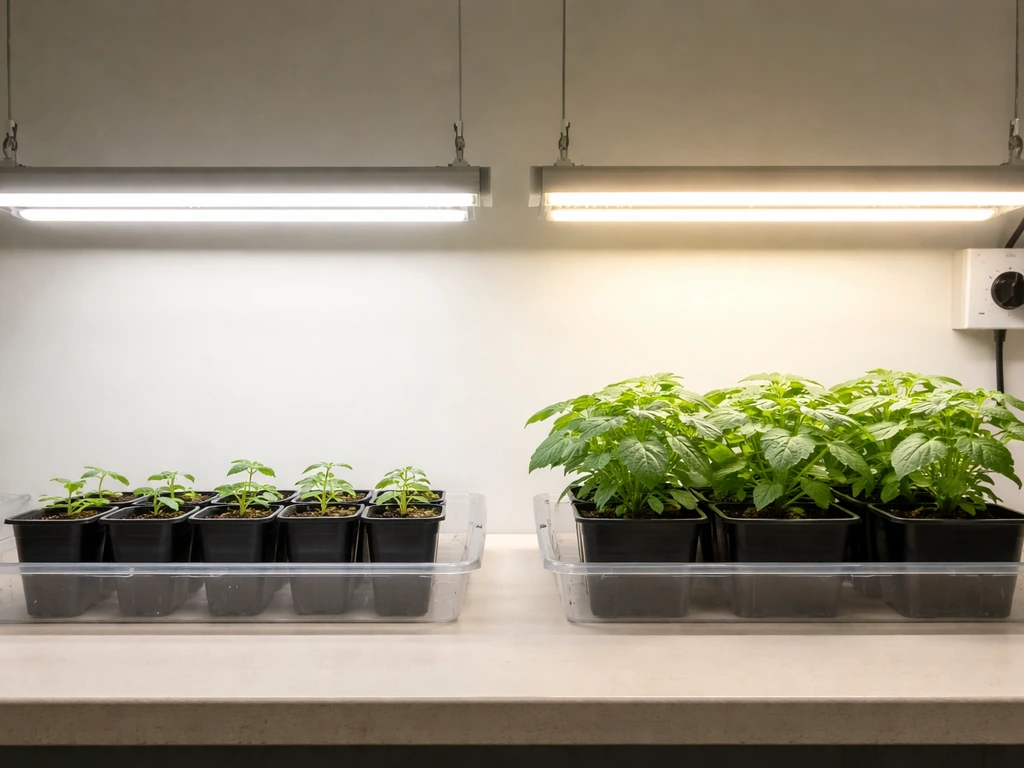
This is where most people get into trouble. More light is not always better. Plants at different growth stages have very different capacity to use light, and blasting seedlings with the same intensity you'd use on flowering plants is one of the fastest ways to stunt or damage them.
For seedlings, aim for 100–200 µmol/m²/s PPFD at canopy level. At that range, they get enough light to grow without being overwhelmed. As plants enter their vegetative stage and their leaf area increases, you can ramp up to 400–600 µmol/m²/s. Flowering or fruiting plants generally benefit from 600–900+ µmol/m²/s depending on the species. Cannabis flowering, as one well-known example, is typically targeted at 600–1000 µmol/m²/s with a DLI of 20–40 mol/m²/day.
DLI, or Daily Light Integral, is the total amount of light your plants receive in a day. The formula is simple: DLI = PPFD × hours × 0.0036. This is powerful because it lets you trade off intensity and duration. If you can't raise PPFD, you can extend hours to hit your DLI target, and vice versa. Mature seedlings typically need a DLI of 12–15 mol/m²/day delivered over 8–12 hours of light.
Most quality LED fixtures today include a dimmer or driver control. Start at 50–60% intensity for seedlings and ramp up gradually over 1–2 weeks as plants establish. Be aware that some LED drivers can produce light flicker at certain dimming levels, which is worth knowing if you notice odd behavior in sensitive plants or cameras. It's not usually a plant health issue at normal dimming levels, but it's something manufacturers are increasingly addressing in newer driver designs.
| Growth Stage | Target PPFD (µmol/m²/s) | Target DLI (mol/m²/day) | Dimmer Setting (starting point) |
|---|---|---|---|
| Germination / young seedlings | 100–200 | 5–10 | 30–40% |
| Established seedlings | 200–400 | 12–15 | 50–60% |
| Vegetative growth | 400–600 | 15–25 | 60–80% |
| Flowering / fruiting | 600–1000 | 20–40 | 80–100% |
Light schedules and timing: how many hours and when to adjust
For plants grown entirely under artificial light with no natural light contribution, you're in full control of the photoperiod. Most indoor grows use somewhere in the range of 12–18 hours of light per day depending on the plant type and growth stage. Seedlings and vegetative plants generally want longer days (14–18 hours), while flowering plants often need a shorter photoperiod to trigger or maintain bloom (12 hours is the standard for most light-sensitive flowering species).
For lettuce and leafy greens, 14–16 hours per day is a solid target throughout most of the growth cycle. For winter grows or supplemental lighting situations, a 14-hour photoperiod targeting a DLI of 15 mol/m²/day at 200–300 µmol/m²/s works well as a starting schedule. Use the DLI formula to verify your setup is actually hitting your target before assuming it's right.
Set your timer from day one. A programmable outlet timer costs almost nothing and removes the single most common scheduling mistake: forgetting to turn the lights off (or on). Most growers run lights during the daytime or early afternoon hours so that any heat buildup coincides with when the room is easier to ventilate, and the nighttime period (if applicable) stays cool and dark consistently.
Adjust your schedule when you change intensity. If you dim your lights by 20%, your DLI drops proportionally, so you'd need to add roughly 20% more hours to maintain the same daily total. This is where the DLI formula becomes really useful as a quick sanity check whenever you adjust your setup.
Troubleshooting common setup issues and correcting uneven growth
Most problems in a grow lights setup trace back to one of three things: too much light, too little light, or uneven coverage. Here's how to diagnose and fix each one.
Too much light (light stress and bleaching)
If your plants develop yellowing or white patches on the uppermost leaves closest to the fixture, that's likely photobleaching. This happens when the plant is receiving more light than it can use, creating an oxidative imbalance. The fix is straightforward: raise the fixture 2–4 inches at a time and wait 48 hours to see if the symptoms stop progressing. Alternatively, dial the dimmer back 10–15%. Don't do both at the same time or you won't know which one worked. Once new growth comes in healthy, you've found your correct distance and intensity.
Too little light (stretching and weak growth)
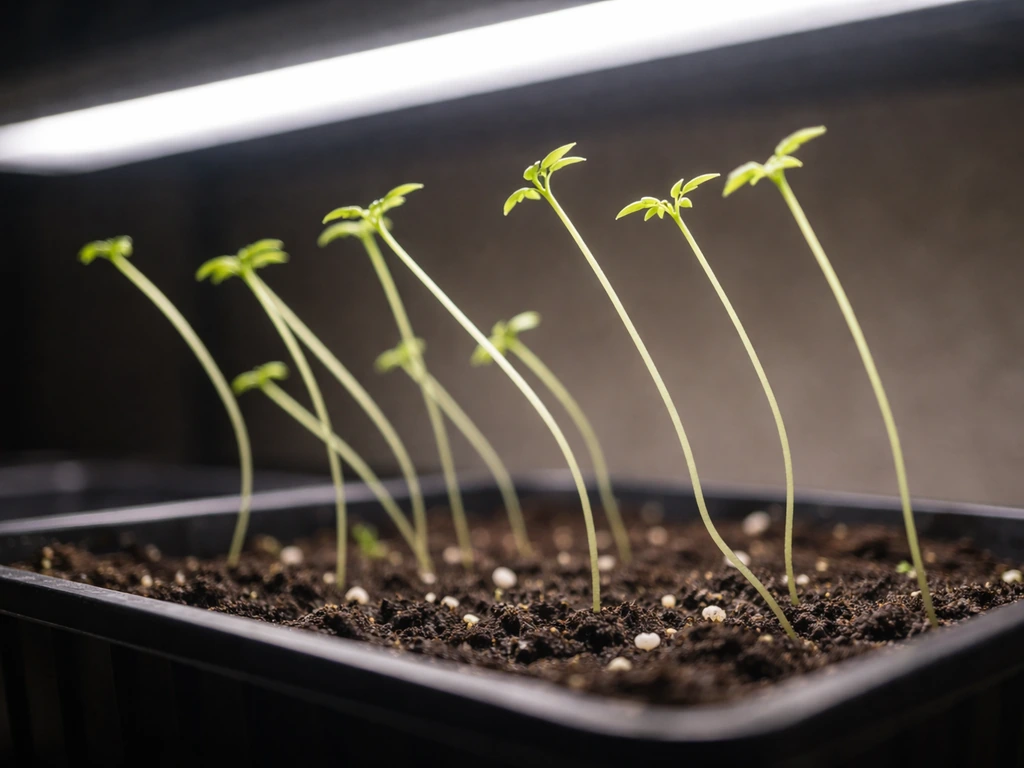
Stretchy, leggy seedlings with long gaps between nodes are a classic sign of insufficient light. Seedlings reaching toward the fixture, thin stems, and pale green color all point to low PPFD. Lower the fixture incrementally (keeping at least 12 inches above the canopy as a minimum) or increase dimmer output toward the 200 µmol/m²/s range. Extending photoperiod hours can also help if you're already at your fixture's maximum height adjustment.
Uneven coverage and hotspots
If plants on one side of your grow area are noticeably more vigorous than the other side, you have a coverage uniformity problem. Start by verifying the fixture is level. Even a slight tilt creates a measurable difference in PPFD from one edge to the other. After that, use your fixture's PAR map to see where the readings should be at your current mounting height, and compare that to what you're actually seeing in plant behavior. In a multi-fixture setup, adjusting the spacing between fixtures and adding some overlap in coverage zones is usually the fix. Aim for that 20% or less variation target across the full canopy. If one fixture simply can't cover your area evenly, adding a second fixture or switching to a bar-style light that distributes output over a longer footprint often solves the problem without raising costs too much.
For more community-sourced troubleshooting ideas and real-world setups people have actually tried, the grow light setup reddit roundup has some genuinely useful threads where growers document their before-and-after corrections in detail.
Grow room setup ideas for different spaces (closet, tent, shelves, single-room)
The right setup depends heavily on your physical space. Here's how to approach four of the most common home grow configurations.
Closet grow
A standard closet (roughly 2×3 to 2×4 feet) is one of the most manageable spaces to start with. You get natural walls to reflect light, easy access, and a door that opens for ventilation. One bar-style or small board LED in the 100–200W range is usually plenty. Mount it to the ceiling or closet rod with adjustable hangers so you can raise it as plants grow. Line the walls with Mylar emergency blankets or flat white paint to maximize light reflection back onto the canopy. A small 4-inch inline fan with carbon filter handles both heat and odor management in this footprint.
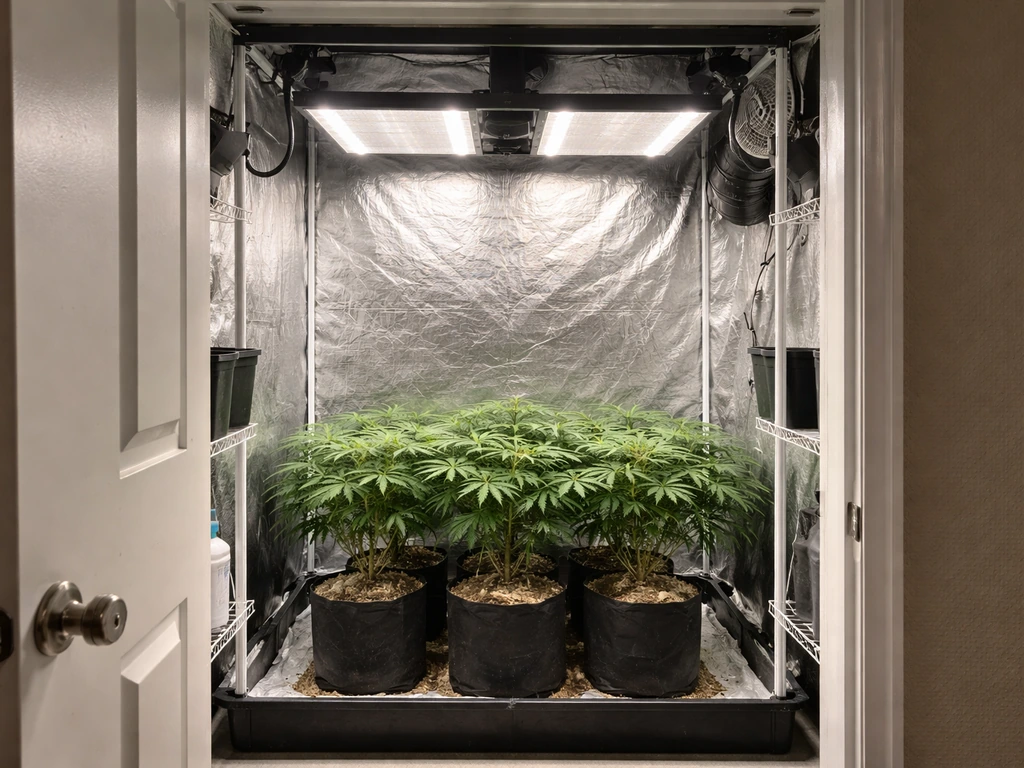
Grow tent
Tents are the most popular choice for good reason: they're reflective inside, portable, and have pre-built ports for ventilation and wiring. A 2×4 tent is the sweet spot for most beginners, accommodating a single 200–300W board-style LED. Match your exhaust fan to the tent volume (a 4-inch fan handles up to about 160 CFM, appropriate for a 2×4×5 tent). Use the ratchet hangers that come with most quality fixtures and take a minute to level them properly before starting your grow. The extra 2 minutes pays off across the whole cycle. When planning your grow lamp setup inside a tent, make sure your fixture's power cord can reach the tent's electrical port without tension, and route it cleanly to reduce tripping hazards.
Shelf or rack setup
Multi-tier shelving is ideal for seedling propagation or growing compact plants like herbs, lettuce, and microgreens. The key is thin, wide-spread fixtures that mount to the underside of each shelf. Hook-and-loop fasteners work surprisingly well for this, keeping fixtures flush against the shelf underside without drooping cords. For a cleaner look, routing the power cable through the shelf back or bracket keeps the setup tidy and reduces the chance of cables getting caught during watering. Plan your shelf spacing at 14–18 inches per tier to allow for fixture clearance and plant height, and use a single power strip with a timer feeding all tiers from one circuit. If you're building out a space like this, a grow light setup for vegetables at the shelf level needs to account for the taller mature height of plants like peppers or dwarf tomatoes compared to leafy greens.
Single-room or open setup
Growing in an open room (no tent or closet) is perfectly doable, especially for houseplants or a single grow station on a desk or table. The tradeoff is that you lose reflective walls, so more light scatters away from the canopy. Choose a fixture with a tight enough beam to focus output downward, and consider a small reflective backdrop or white wall behind the plants. In an open room you also have less control over the dark period, so use a timer and position your setup away from windows or ambient light sources that might interrupt your plants' dark cycle. A simple floating shelf with an LED strip or bar underneath can work beautifully for a compact single-room station, and the wiring can be routed through the shelf bracket for a surprisingly clean aesthetic.
No matter which space you're working with, start simple. One good fixture, one well-planned layout, and a reliable timer will outperform a complicated multi-light rig that isn't dialed in. Get one tier or one tent running well, observe your plants, make small adjustments, and then scale up from there. That's how most experienced growers built their setups, and it saves a lot of frustration along the way.
FAQ
If I buy a fixture with a PAR map, do I still need to measure anything after mounting?
Yes. Even if you follow PPFD targets, you should verify what your plants actually receive by measuring at canopy height with a quantum meter (or using the fixture’s PAR map at your chosen mounting height). Treat the manufacturer’s map as a starting point, because real-world results shift with hanging angle, shelter reflectivity, and how high your canopy sits over time.
How do I calculate overlap when running two grow lights to cover one large area?
Use the PAR map to avoid guessing, then decide your overlap so the combined PPFD variation stays within your uniformity goal. In practice, you want the “edge” zones of one fixture to land in the “middle” zones of the next, so dark bands do not form. After installation, check center vs edge with either a meter or a quick side-by-side plant response check across the canopy.
What happens to DLI if I extend the light hours but also change the dimmer?
DLI is the daily total, so if you change photoperiod you must re-check DLI, not just PPFD. For example, if you increase hours by 25% but also dim to reduce PPFD, the effects can cancel or compound. Use DLI = PPFD × hours × 0.0036 with your actual PPFD level at canopy, especially after you adjust intensity.
I’m noticing odd camera footage or plant behavior at certain dimmer settings, could flicker be the cause?
For most home LED setups, flicker is more likely to be visible when you dim aggressively, use camera-based observation, or run older drivers. If you see symptoms like leaf instability or odd growth, pause changes and test one variable at a time. If the issue is camera-related, switching to a higher dim level (less dimming) or a fixture with updated drivers usually resolves the concern.
Will lining my tent or closet with Mylar change the PPFD enough to affect my targets?
Yes, reflectivity matters. When you add Mylar or white surfaces, you increase how much light bounces back into the canopy, which can raise PPFD at the edges. A fixture’s PAR map often assumes a particular environment, so if you change wall material or add a new reflective panel, re-check uniformity rather than assuming nothing changed.
Can plants tolerate sudden changes if I mount the fixture at the right height but start the grow too bright?
Usually no, but it depends on your crop stage. Seedlings can be burned if they are suddenly moved from low natural light to high artificial intensity, even if your timer is correct. A practical approach is to start at the lower end of your PPFD range and ramp over 7 to 14 days, watching for bleaching (white upper-leaf patches) or stretching.
How can I tell photobleaching from low light when diagnosing problems?
Don’t use leaf color alone. Yellowing can mean too much light, too little light, or nutrient imbalance, and white patches specifically closer to the top can be more diagnostic of photobleaching. Use your symptoms with one targeted fix, then wait about 48 hours for new growth to show the effect, as intensity and distance changes take time.
How do I avoid mistakes with timers and accidental light during the dark period?
If your timer shifts lights later or earlier, you effectively change the daily photoperiod length, which changes DLI. In addition, some grow spaces get “ambient light” at the start or end of the dark cycle, which can disrupt photoperiod-sensitive flowering. Use a programmable timer with reliable daily switching and consider light blocking if you see glow around the tent zipper.
What’s the best way to manage heat so the driver and LEDs stay within safe operating conditions?
Warm air can pool near the driver and heatsink if your airflow pattern is poor. The safe move is to ensure the exhaust is actively removing air from the tent and that intake air enters from a lower port or crack, so air actually passes over the heat-producing components. If your exhaust fan is too small or runs intermittently, you may see reduced performance or shorter driver lifespan over time.
Do I only need to worry about the grow light’s wattage for my power circuit?
No. In most cases, the fixture draw is only part of the load, because fans, dehumidifiers, and humidifiers can add significant wattage. Calculate total wattage on the circuit, leave about 20% headroom, and confirm your outlet type and circuit rating match the plan before you add controllers or additional equipment.
What are common cable-management mistakes in a grow light shelf setup?
Yes. If you have a multi-tier shelf, cords and power strips can create a heat buildup point and also a trip hazard during watering. Route cables behind the shelf or through brackets, secure slack so it cannot hang into watering paths, and consider using one rated power strip with the timer to avoid multiple switched connections.
Next Article
Innova Grow Light Instructions: Setup, Use, and Troubleshooting
Step-by-step Innova LED grow light instructions: setup, mounting, distance, schedules, intensity, and fast troubleshooti