Pick a full-spectrum LED panel sized to cover your growing area, hang it 12 to 24 inches above your plants depending on their stage, run it 14 to 16 hours a day for seedlings and leafy greens or 12 hours for fruiting crops, and use a mechanical timer so you never have to think about it again. That combination covers about 90% of what a successful vegetable grow light setup actually needs. The rest of this guide fills in the details so you can dial it in properly without overbuying equipment or accidentally cooking your plants.
Grow Light Setup for Vegetables: Step-by-Step Guide

Marcus Tillman
20 May 2026
Choosing the right grow lights for vegetables
LED grow lights are the right choice for almost every home vegetable grower in 2026. They run cooler than HID or fluorescent alternatives, use significantly less electricity, last longer, and give you full-spectrum light that covers the wavelengths vegetables actually use. T5 fluorescent shop lights are a decent budget option for seedlings and leafy greens, but they don't produce enough intensity for fruiting crops like tomatoes or peppers once the plants mature. HID lights (HPS and MH) produce excellent light but run hot, cost more to operate, and are overkill for most home setups. Stick with LED unless you have a specific reason not to.
When you're shopping for LEDs, ignore wattage claims on cheap panels and focus on two numbers instead: the coverage area listed by the manufacturer and the PPFD rating. PPFD stands for photosynthetic photon flux density, which is just the technical way of measuring how much usable light is actually hitting the plant surface. University of Maine Extension gives these useful targets by growth stage: under 100 µmol/m²/s for seedlings and clones, 100 to 500 µmol/m²/s for vegetative growth, and 400 to 1,200 µmol/m²/s for flowering and fruiting crops. A quality LED panel rated for a 2x4 or 4x4 foot area will typically hit those numbers at the recommended hanging heights.
Beyond intensity, University of Maryland Extension points out that the three things that actually matter for plant light are intensity, duration, and spectrum quality. A full-spectrum LED that mimics daylight covers the spectrum requirement. Duration and intensity you'll dial in manually. Avoid LEDs marketed only with vague lumen ratings or PAR claims without actual PPFD maps, because those numbers don't tell you what's reaching the plant canopy.
| Light Type | Best For | Heat Output | Running Cost | Coverage |
|---|---|---|---|---|
| Full-spectrum LED panel | All stages, all vegetables | Low | Low | 2x2 to 5x5 ft panels available |
| T5 fluorescent | Seedlings, leafy greens | Low-medium | Medium | Limited to 1 to 2 ft below fixture |
| HID (HPS/MH) | Fruiting crops at scale | High | High | Requires ventilation system |
| CFL bulbs | Small seedling trays only | Low | Low-medium | Very limited, 6 in or less |
Planning placement, spacing, and height
Placement is where most beginners go wrong, and it's almost always because they hang the light too high. PPFD drops off sharply as you move the light farther from the plant surface, so a few extra inches of height can cut your effective light intensity dramatically. Utah State University Extension specifically calls this out: PPFD decreases with distance, so hanging height is not just a preference, it's a core part of getting the intensity right.
As a starting point, hang your LED panel 18 to 24 inches above seedling trays, then lower to 12 to 18 inches for vegetative growth, and keep it at 12 to 16 inches for fruiting crops that need higher intensity. These are starting numbers. If you see stretching or pale leaves, lower the light. If you see leaf curl or browning at the tips, raise it a couple of inches. Check your specific panel's manufacturer PPFD map for the most accurate guidance for that fixture.
For horizontal spacing, a single rectangular LED bar or panel should cover the full width of your growing tray or shelf. If you're using multiple lights side by side, overlap coverage areas by about 20% to avoid dark spots in the middle of the canopy. Leafy greens are less forgiving of uneven coverage than tomatoes, because every leaf is the harvest.
- Seedlings and clones: 18 to 24 inches below the light
- Vegetative stage: 12 to 18 inches below the light
- Flowering and fruiting: 12 to 16 inches below the light
- Multiple panels: overlap coverage zones by roughly 20%
- Reflective walls (white paint or mylar) improve edge coverage significantly
Sizing the setup by plant stage and crop type
Your light requirements shift a lot depending on what stage your plants are at and whether you're growing leafy greens or fruiting crops. Seedlings need very little intensity, somewhere under 100 µmol/m²/s, so even a basic T5 strip or a modest LED at its lowest dimmer setting works fine. You're really just trying to keep them from stretching toward a window at this point.
Once plants hit the vegetative stage, demand jumps to 100 to 500 µmol/m²/s. Leafy greens like lettuce, spinach, kale, and herbs sit comfortably in the lower part of that range and can complete their entire life cycle there. They're efficient, forgiving, and perfect for lower-wattage LED setups or a basic grow light shelf. If a budget grow light setup is what you're working with, leafy greens are the best crop to start with.
Fruiting crops like tomatoes, peppers, cucumbers, and beans need 400 to 1,200 µmol/m²/s during flowering, which requires a more powerful panel and closer hanging distance. They also grow taller, so you need either adjustable hanging hardware or a grow space tall enough that you have at least 24 to 30 inches between the top of your mature plant and the ceiling.
| Crop Type | Growth Stage | Target PPFD (µmol/m²/s) | Recommended Hanging Height | Daily Light Hours |
|---|---|---|---|---|
| Leafy greens (lettuce, spinach, kale) | Full cycle | 150 to 300 | 12 to 18 inches | 14 to 16 hours |
| Herbs (basil, parsley, cilantro) | Full cycle | 200 to 400 | 12 to 16 inches | 14 to 16 hours |
| Tomatoes, peppers (seedling) | Seedling | Under 100 | 18 to 24 inches | 16 hours |
| Tomatoes, peppers (vegetative) | Vegetative | 300 to 500 | 14 to 18 inches | 14 to 16 hours |
| Tomatoes, peppers (fruiting) | Flower/fruit | 600 to 1,000 | 12 to 14 inches | 12 hours |
Power, timers, and watering/heat management basics
A mechanical outlet timer costs about $10 and is one of the best purchases you'll make for your grow setup. Plug your light into it, set your on and off times, and you're done. Once you’ve picked your light and intensity, set up a grow lamp setup with the right timer so your plants get consistent daily light. Consistent light cycles matter more than most beginners expect. Inconsistent timing stresses plants, slows growth, and can trigger premature flowering in day-length-sensitive crops. Mechanical timers are reliable and don't need Wi-Fi or apps. Smart plugs work too if you already have them, but keep a backup schedule somewhere in case of a power outage reset.
On the electrical side, don't daisy-chain power strips or run too many high-wattage lights off a single outlet. A 200-watt LED panel draws roughly 1.7 amps. Most household circuits are 15 to 20 amps, so you have room for multiple panels, but check your total draw before plugging everything into one circuit. Use surge-protected power strips and make sure no wiring is near water sources. This is a place where boring and safe is the right call.
Heat management is mostly a solved problem with modern LEDs, but it still matters. Even a cool-running LED panel raises ambient temperature in an enclosed space. Keep a thermometer in your grow area and aim for 65 to 80 degrees Fahrenheit during the light period. If temps regularly exceed 85 degrees, add a small clip fan to keep air moving. Moving air also strengthens plant stems and reduces the risk of fungal issues. Position the fan to blow across the canopy, not directly down onto leaves, which can cause windburn.
Watering frequency increases under grow lights compared to a windowsill setup, because the light drives faster growth and slightly higher evaporation. Check soil moisture daily, especially for seedlings in small cells or plugs. A consistent watering rhythm is easier to maintain once you notice your plants' typical wet-to-dry cycle, which usually settles in within the first week.
Installation walkthrough and wiring setup
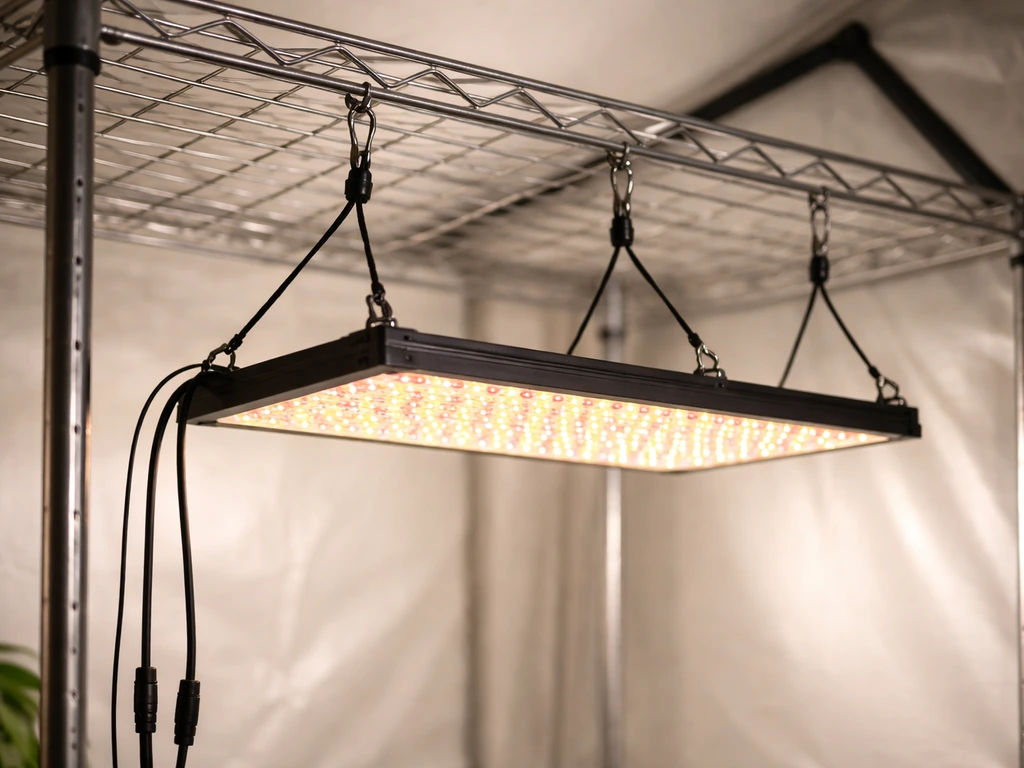
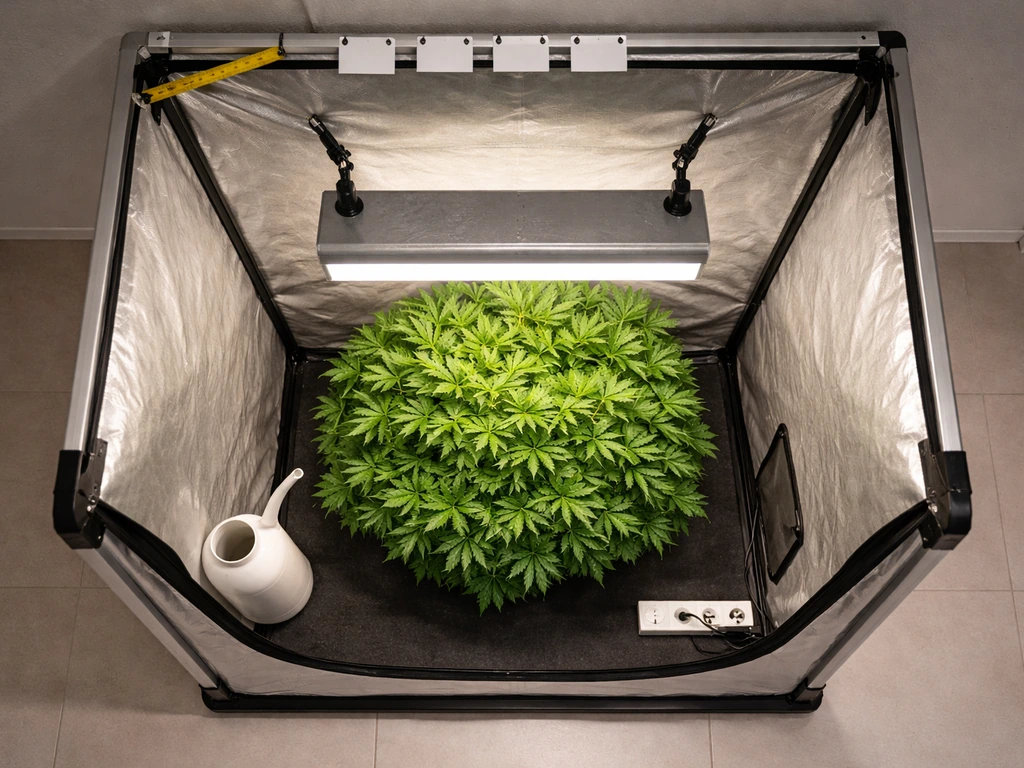
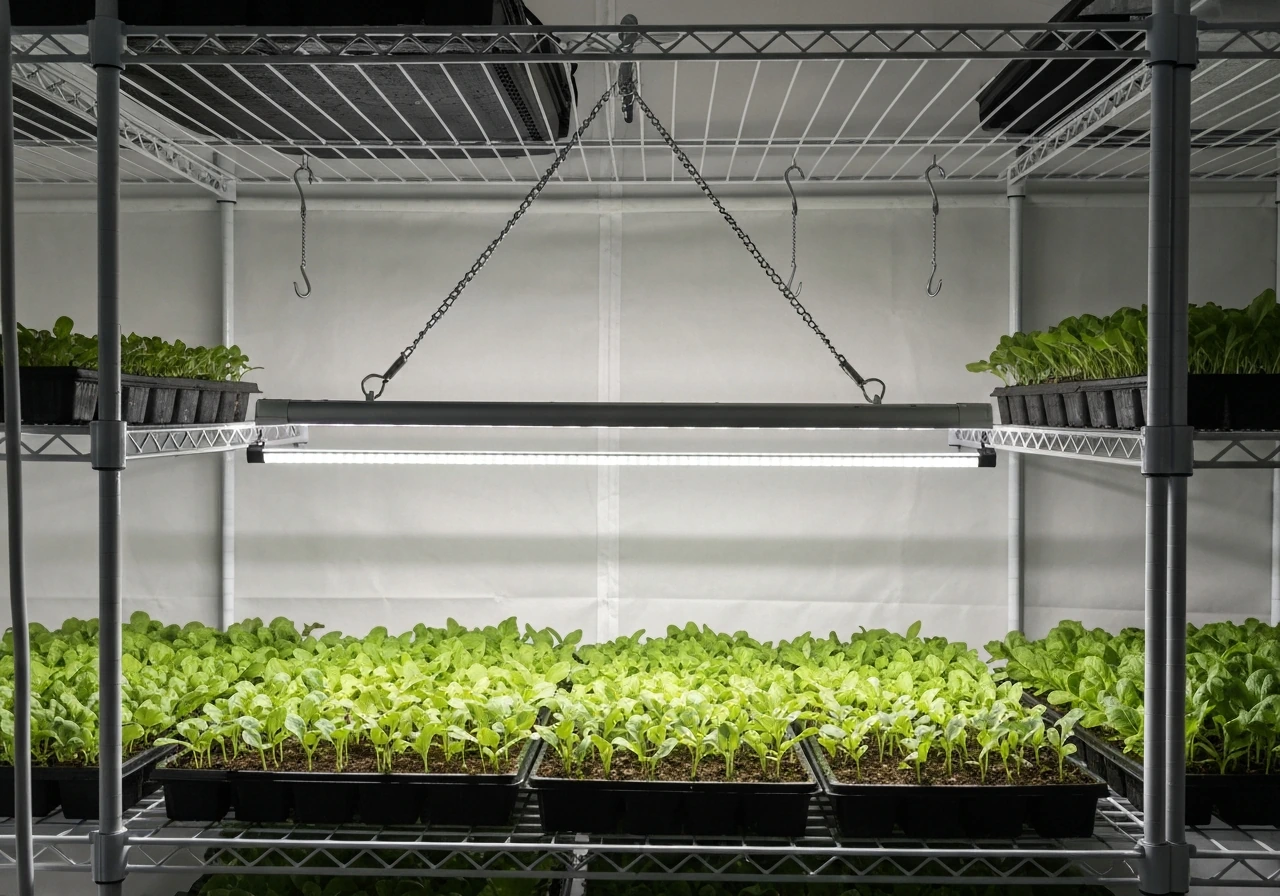
Most home vegetable growers are setting up on a wire shelving unit, a grow tent, or a dedicated shelf, and the installation process is straightforward in all three cases. Here's how to do it safely and efficiently.
- Choose your grow space first: a wire shelf gives you easy hanging points, a grow tent has built-in top bars, and a DIY shelf setup may need screw hooks in a wooden frame or ceiling joist.
- Hang your light at the correct starting height for your plant stage using adjustable rope ratchets or zip ties. Rope ratchets ($5 to $10 for a pair) are the best option because you can raise or lower the light in seconds without tools.
- Route the power cord away from the plant canopy and down the side of the shelf or tent wall so it's not in the way and can't drip water onto it.
- Plug the light's power cord into your timer, then plug the timer into the wall outlet. Set the timer for your desired on/off cycle before you turn anything on.
- Turn on the light and check for any flicker or unusual dimming, which can indicate a wiring issue with the fixture itself. New panels should illuminate evenly.
- Place a thermometer at plant canopy level and let the setup run for one hour. Record the temperature. If it's above 82 to 85 degrees Fahrenheit, add ventilation before putting plants in.
- Add your plants and measure the distance from the top of the plant to the bottom of the light fixture. Adjust rope ratchets until you hit your target height.
- Check back after 24 to 48 hours and look at the plants for any early signs of light stress (see troubleshooting section below).
If you're running multiple panels, wire them to separate outlets or use a power strip with individual switches so you can control each one independently during testing. Once everything is dialed in, you can simplify to a single timer controlling all lights if they're all on the same schedule.
Optimizing light schedule (hours/day) and intensity
The right daily light duration depends on your crop type. Leafy greens and most herbs are not day-length sensitive, so they grow well with 14 to 16 hours of light per day. Giving them more than 16 hours doesn't help much and wastes electricity. Fruiting crops including tomatoes and peppers do fine with 14 to 16 hours during the vegetative stage, but you can drop to 12 hours once they start flowering to mimic natural outdoor conditions and support fruit set. Beans and cucumbers can stay at 14 to 16 hours throughout.
Intensity adjustment is where having a dimmable LED panel pays off. Start seedlings at 30 to 50% intensity, then increase to 70 to 80% during vegetative growth, and push to 90 to 100% for fruiting crops that need maximum PPFD. If your panel isn't dimmable, manage intensity through hanging height: higher up means lower intensity. Just don't go so high that you fall below your target PPFD range.
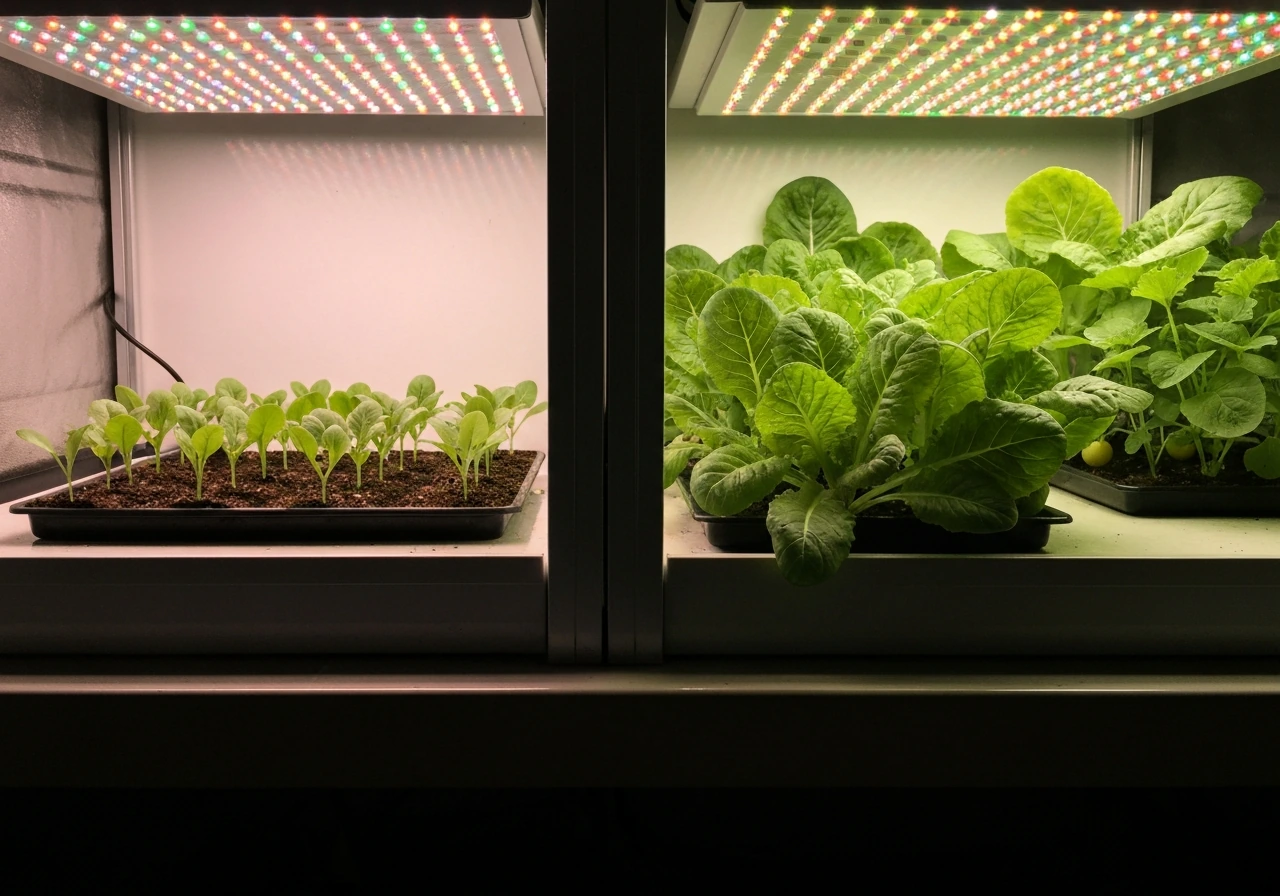
University of Vermont Extension recommends prioritizing even light distribution over sheer intensity, especially for seedlings. A consistent, evenly spread light field produces uniform germination and even canopy growth. If one corner of your tray is noticeably darker, rotate the tray 180 degrees every few days to compensate, or reposition the light so coverage is more centered.
One concept worth understanding is DLI, or daily light integral, which is the total amount of light your plant receives in a full day (intensity multiplied by hours). You can hit a good DLI either with higher intensity for fewer hours or lower intensity for more hours. For most home growers running standard panels, the straightforward approach is to use the PPFD targets above and run the schedule hours recommended for your crop type. That combination will put you in the right DLI range without needing a spreadsheet.
Troubleshooting common vegetable grow light problems
Most grow light problems show up in the plant before they show up anywhere else. Here's how to read what your vegetables are telling you and what to do about it.
Leggy, stretched seedlings
Stretching toward the light, thin stems, and long gaps between leaf nodes all mean the same thing: your plants aren't getting enough light intensity. Lower the light by 2 to 3 inches, increase intensity on your dimmer if you have one, or switch to a higher-output fixture if you've maxed out what your current panel can do. Leggy seedlings that aren't too far gone can be partially fixed by burying the extra stem when you transplant.
Pale yellow or light green leaves
Yellowing across the whole plant usually points to either insufficient light or a nitrogen deficiency. If your light schedule and placement look correct, check your nutrient regimen. If you're growing in plain potting mix with no supplemental feeding for more than three to four weeks, the plant has likely used up the available nitrogen. Start a light balanced fertilizer routine. If you've been feeding consistently and yellowing persists, lower the light by an inch or two and see if new growth comes in greener within a week.
Leaf tip burn or bleaching
Brown, crispy leaf edges or washed-out pale patches in the center of leaves mean too much light intensity. Raise the light by 2 to 3 inches or reduce your dimmer by 10 to 15%. This happens most often with seedlings placed under a panel set for mature plant intensity, or when a plant grows into the light without you adjusting height. Check your hanging height weekly when plants are actively growing.
Slow growth despite good light
If intensity and schedule look right but growth is still slow, check temperature and watering first. Temperatures below 60 degrees Fahrenheit slow almost all vegetable growth significantly. Underwatering under high light is also common because the light drives higher transpiration. Make sure the root zone stays consistently moist (not waterlogged) and that temps stay above 65 degrees during the light period.
Uneven growth across the tray
Plants on the edges of the tray are shorter or slower than plants in the center. This is a coverage and evenness problem. Add a second light or reflective material on the sides to bounce light toward the edges, or switch to a panel with a wider coverage footprint. Rotating the tray 180 degrees every few days is an easy temporary fix while you sort out the permanent solution.
Budget vs performance recommendations
You don't need to spend a lot to grow vegetables well indoors, but buying the cheapest possible panel usually means buying twice. Here's how to think about the range of options.
For a beginner starting with a 2x2 foot shelf of lettuce or herbs, a quality LED panel in the $40 to $80 range from a reputable brand (look for published PPFD specs, not just marketing copy) is genuinely all you need. A simple grow light shelf setup with one or two panels on a wire rack and a $10 mechanical timer can produce a lot of salad greens for very little money. If you want real-world opinions and example builds, search grow light setup reddit threads for setups that match your crop and space. For a grow light setup for indoor plants, start by choosing a full-spectrum LED and matching the hanging height to your plant stage so you get the intensity your crops need. If you want a complete grow lights setup plan, start with placement, then match the light schedule to your crop stage. This is where a budget grow light setup makes complete sense, because leafy greens don't need massive intensity. If you're building a budget grow light setup, use PPFD targets and a tested hanging height so you get the intensity your plants need without overspending.
For fruiting crops in a 2x4 foot space, plan to spend $100 to $200 on a quality full-spectrum LED bar or panel. The extra cost buys you higher PPFD output, better heat management, and usually a dimmer switch, which is genuinely useful. Avoid single-chip LEDs that produce a blurple (red/blue only) spectrum. Full-spectrum white LEDs produce better growth and are much easier to work under when you're inspecting plants.
At the higher end, $200 to $400 gets you a commercial-quality LED panel with detailed PPFD maps, daisy-chain capability, and the output to cover a 4x4 foot fruiting crop canopy. These are worth the investment if you're serious about growing tomatoes or peppers year-round, but they're not necessary for most home growers starting out.
| Budget Range | Best For | What You Get | What You Sacrifice |
|---|---|---|---|
| $25 to $50 | Seedling trays, small herb shelves | Basic LED strip or small panel, fixed intensity | No dimmer, lower PPFD, limited coverage |
| $60 to $100 | Leafy greens, herbs, seedlings up to transplant | Full-spectrum LED, some with dimmer, 2x2 to 2x4 coverage | May struggle with fruiting crops at mature stage |
| $100 to $200 | All vegetables including fruiting crops up to 2x4 ft | Higher PPFD output, dimmable, better heat management | Still limited for large spaces |
| $200 to $400+ | Serious fruiting crop production, 3x3 to 4x4 ft | Commercial quality, PPFD maps, daisy-chain, long lifespan | Higher upfront cost, may be overkill for beginners |
One honest note: the setup matters as much as the light itself. A $150 panel hung at the wrong height, run on a bad schedule, or placed in a space with poor airflow will underperform a $60 panel set up correctly. Get the fundamentals of placement, timing, and temperature right first, and you'll get a lot more out of whatever equipment you choose.
FAQ
Can I use one grow light setup for both seedlings and mature fruiting crops without replacing anything?
Yes, but only if you can dim or accurately control intensity, and you have enough hanging space to adjust height as the plants grow. If you keep seedlings under a panel set to mature-plant intensity, you often get crispy edges later or stalled growth because the PPFD is too high for that stage.
How do I know my hanging height is still correct after I rearrange the shelf or grow tent?
Re-verify the light every time you change shelves, racks, tent straps, or even the bulb position (for bar-style fixtures). Measure the distance from the light to the top of the current canopy, then confirm your manufacturer’s PPFD map matches that distance, because coverage changes fast with height.
Do LED wattage claims tell me enough to buy a light for vegetables?
Not necessarily. Two panels can have the same advertised wattage but very different PPFD and uniformity, especially with budget LEDs. If the listing does not provide PPFD targets or a coverage map, treat the wattage number as unreliable for a vegetables grow light setup.
What is the best way to fine-tune intensity once my timer and height are set?
If your panel is dimmable, small changes matter less than consistent placement. Use the timer and keep spectrum steady, then fine-tune intensity in steps (for example, 10 to 15% changes) while watching for stretching or leaf edge browning over 3 to 7 days.
Why do my seedlings look dry or unhealthy even when I think the light is correct?
For seedlings in small cells, typical issues are either underexposure (stretching) or drying out too fast under strong light. Water by checking soil moisture daily, and consider adding a humidity dome early (then remove it gradually) so seedlings do not dry out before their roots can keep up.
My plants are pale, how can I tell if it is light deficiency or a nutrient issue?
If plants look pale but not stretched, check nutrients before changing the light again. A common mistake is chasing “not enough light” when the real problem is nitrogen or overall fertilization, especially after potting mix nutrients are depleted.
Can too many hours under grow lights cause problems with flowering or fruit set?
Yes, some crops are more sensitive to excess light duration and heat than others. If your fruiting plants flower too early or develop stressed foliage, try reducing to the lower end of the crop schedule range and ensure your temperature stays within the target light-period window.
What should I do if my timer or smart plug loses power and the light schedule changes?
It can. With bright panels, a power outage reset can leave lights off for part of the photoperiod or turn back on later than planned. Mechanical timers reduce this risk, but if you have smart plugs, use a manual backup schedule and verify the outlet is not rebooting unexpectedly.
How should I space multiple LED panels so I do not get dark spots?
For small setups, start by avoiding overlap gaps between fixtures rather than maximizing brightness. If you run two lights side by side, overlap their coverage by about 20% so the center of the canopy does not get noticeably less PPFD.
My plants at the edges are smaller, is rotating the tray enough?
Measure at the canopy plane, not at the top of the fixture, and watch for weekly changes as plants grow. Rotating trays helps uniformity, but if the edge plants keep lagging, add reflective material on the sides or increase coverage width.
Leaf symptoms are confusing, how should I adjust the setup without making it worse?
Try a “stress check” approach: first adjust height by 2 to 3 inches, then change dimmer by 10 to 15% only if needed. Over-correcting every day can mask the cause, while symptoms like browning or stretching typically show clearer trends within about a week.
Do LED lights eliminate the need for temperature management?
Yes. If your space is cool, lights help, but if your enclosure is airtight or poorly ventilated, ambient temperature can still rise enough to stress plants. Use a thermometer and add a clip fan when temperatures exceed your target range during the light period.
Is full-spectrum always necessary, or can I mix different colored LEDs for vegetables?
Not if that “daylight” is your goal, but it matters if you’re using mixed spectrum sources. White full-spectrum LEDs are generally easier for vegetable growth consistency, while red/blue-only “blurple” designs can make diagnosis harder because plants may not respond the same way across stages.
What if my PPFD and schedule are correct but growth is still slow?
It depends on your crop and your thermometer location. If air is too cold, growth slows even at correct PPFD, so raise the room temperature or improve airflow, not just the light intensity. For most vegetables, keep the light-period temperature above 65°F as a practical baseline.
Next Article
Grow Light Setup Reddit Guide: Fast Indoor Checklist
Reddit-style checklist to set up grow lights indoors: placement, height, intensity, schedules, safety, and quick fixes.