Set your grow lamp at the right height for your plant stage, plug it into a timer set to the correct photoperiod, and make sure the light intensity at canopy level matches what your plants actually need: under 100 PPFD for seedlings, 100–500 PPFD for vegetative growth, and 400–1,200 PPFD for flowering and fruiting. Get those three things right and most grow lamp setup problems disappear before they start. If you need help getting started, a grow light setup should include the right light type, placement, and a safe timer. If you want a grow light setup for vegetables, focus on matching PPFD to vegetative growth and positioning the fixture for even canopy coverage.
Grow Lamp Setup Guide: Install, Adjust, Troubleshoot

Marcus Tillman
25 Apr 2026
Everything else in a grow lamp setup is just details that support those core numbers. This guide walks you through each step in order, from picking the right light to diagnosing why your plants are stretching or turning yellow, so you can get your system dialed in without a lot of expensive trial and error.
Choose the right grow lights

LED grow lights are the practical choice for most indoor setups right now. They run cooler than HPS or T5 fluorescents, use less electricity, and last longer. More importantly, quality LEDs emit light in the blue, red, and far-red regions that plants actually use for photosynthesis, which means you're not wasting energy on wavelengths that don't do much. For a basic setup covering a 2x2 foot area, a 100–200 watt LED panel is plenty. For a 4x4 foot tent or shelf, look at 300–600 watts.
When comparing lights, ignore the wattage claims on the box and look at PPFD output and coverage area instead. A light rated at 600W that only delivers 400 PPFD at 18 inches over a 3x3 area is weaker than a 300W quantum board that delivers 800 PPFD over the same footprint. Reputable brands publish their PPFD maps, and that's what you should be shopping from. If a brand doesn't publish one, that's a red flag.
For a simple grow light shelf setup with houseplants or seedlings, a T5 or LED strip light can work well and keeps costs down. If you're growing vegetables or flowering plants and want a budget grow light setup, a single-bar or quantum board LED in the 150–300 watt range gives you flexibility to dial intensity up or down as plants develop.
| Light Type | Best For | Heat Output | Typical Cost |
|---|---|---|---|
| LED Panel/Quantum Board | All stages, tents, shelves | Low | $$–$$$ |
| T5 Fluorescent | Seedlings, clones, low-light houseplants | Low–Medium | $ |
| HPS/CMH | Flowering, large spaces | High | $$–$$$ |
| LED Strip/Bar | Shelves, propagation trays | Very Low | $ |
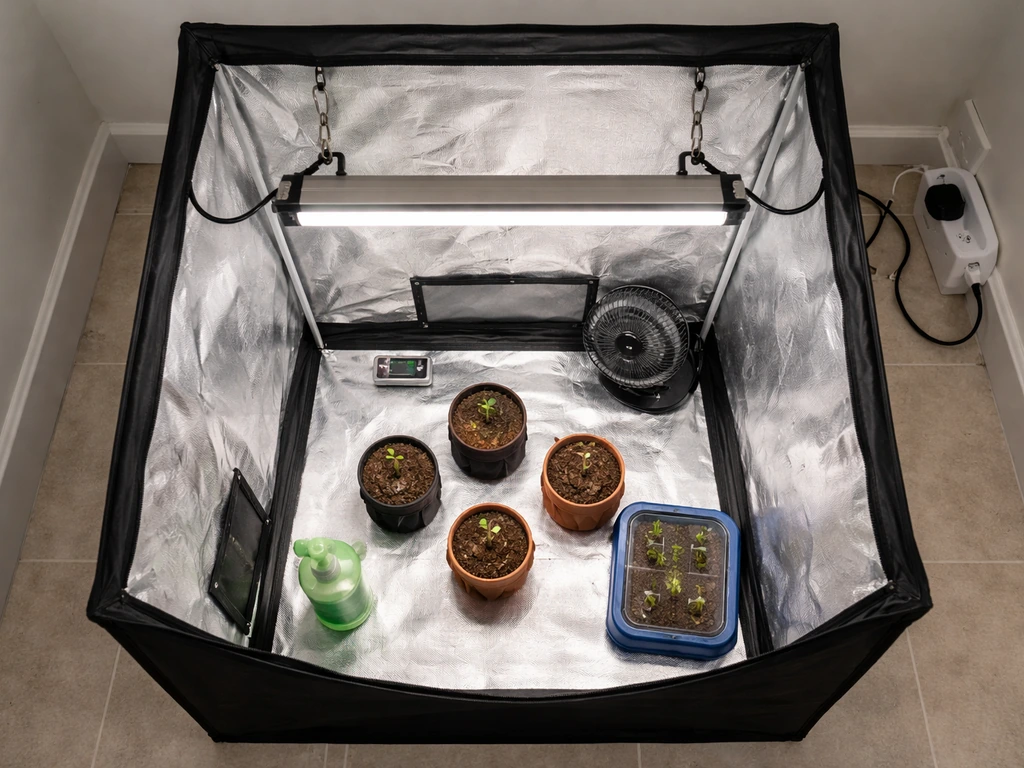
Plan placement and height
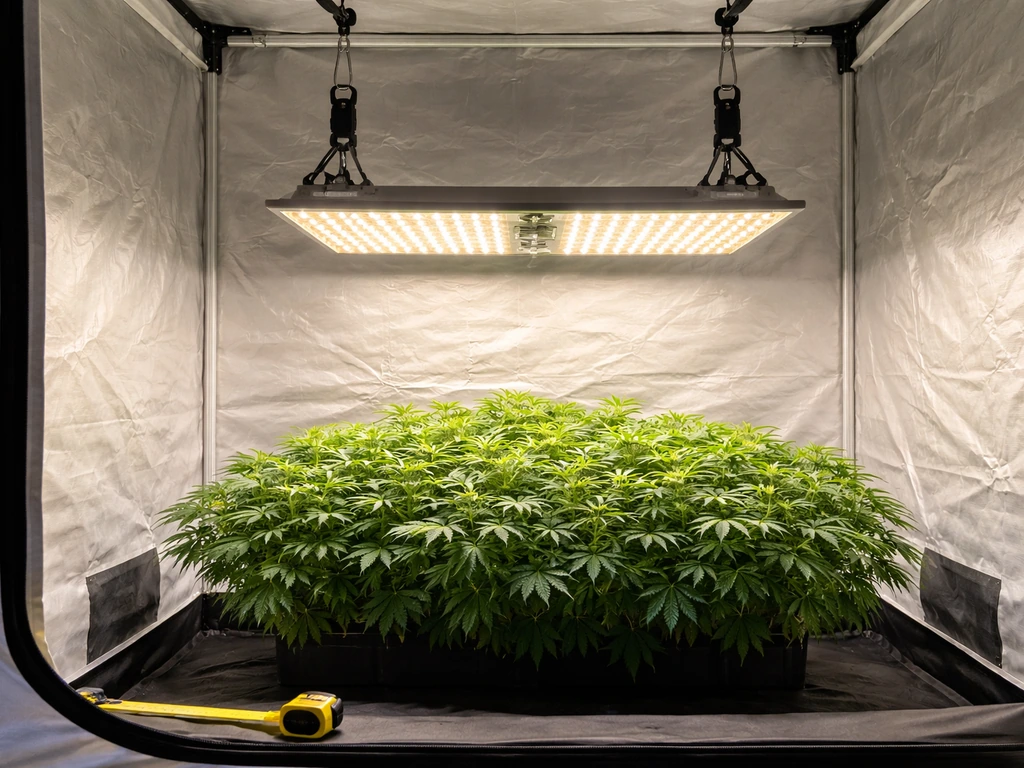
Where you hang the light matters almost as much as which light you buy. The goal is even coverage across your entire canopy with no hot spots in the center and no dim corners at the edges. Start by reading your light's recommended hanging height from its PPFD map, then adjust from there based on what your plants tell you.
As a general starting point: hang LEDs 24–36 inches above seedlings and clones, 18–24 inches above plants in vegetative growth, and 12–18 inches above plants in flower (closer only if heat isn't an issue). Fluorescent T5s can go much closer, sometimes 4–6 inches above seedlings, because they produce less heat and lower peak intensity. HPS lights usually need to stay 18–24 inches minimum because of heat.
Coverage area is where a lot of beginners go wrong. A single light placed in the center of a large space creates a bright middle and dim edges, which causes uneven plant growth. If you're covering a space wider than 3 feet, either use multiple fixtures or choose a light with a known wide beam angle and a PPFD map that confirms even spread. Measure from the center of the canopy to the edges and check that intensity drops by no more than 20–30% at the corners.
Use an adjustable rope ratchet or pulley system to hang your light. This lets you raise the fixture as plants grow taller and keeps intensity in the target range throughout the growing cycle without having to buy a new mount every time.
Set up power, wiring, and timers safely
Most grow lamps run on standard 120V household current, so no special wiring is needed for setups under about 1,200 watts. That said, you still need to take the electrical side seriously, especially in a grow tent or basement where humidity can be elevated.
If your grow space is in a damp or wet location, such as a basement, garage, or any area where water could splash or humidity runs consistently high, you need GFCI-protected outlets. This is a National Electrical Code requirement under NEC Article 406, and it's also just common sense when you're mixing electricity with a moist growing environment. If you need GFCI protection where [NEC Article 406](https://www. ecmweb.
com/national-electrical-code/code-basics/article/21267043/nec-requirements-for-receptacles) requires it, EC&M notes you can satisfy the requirement using a GFCI circuit breaker, a GFCI receptacle, or specific downstream arrangements. If your existing outlets aren't GFCI-protected, replace them or use a GFCI power strip before plugging in any grow equipment. Make sure any extension cords, power strips, or timers you use are UL-listed for the appropriate environment, whether that's dry, damp, or wet rated.
Keep cables off the ground and away from irrigation lines or drip trays. Use zip ties and cable clips to route wiring up and along the frame of your tent or shelf. A few minutes of cable management prevents a lot of headaches and hazards later.
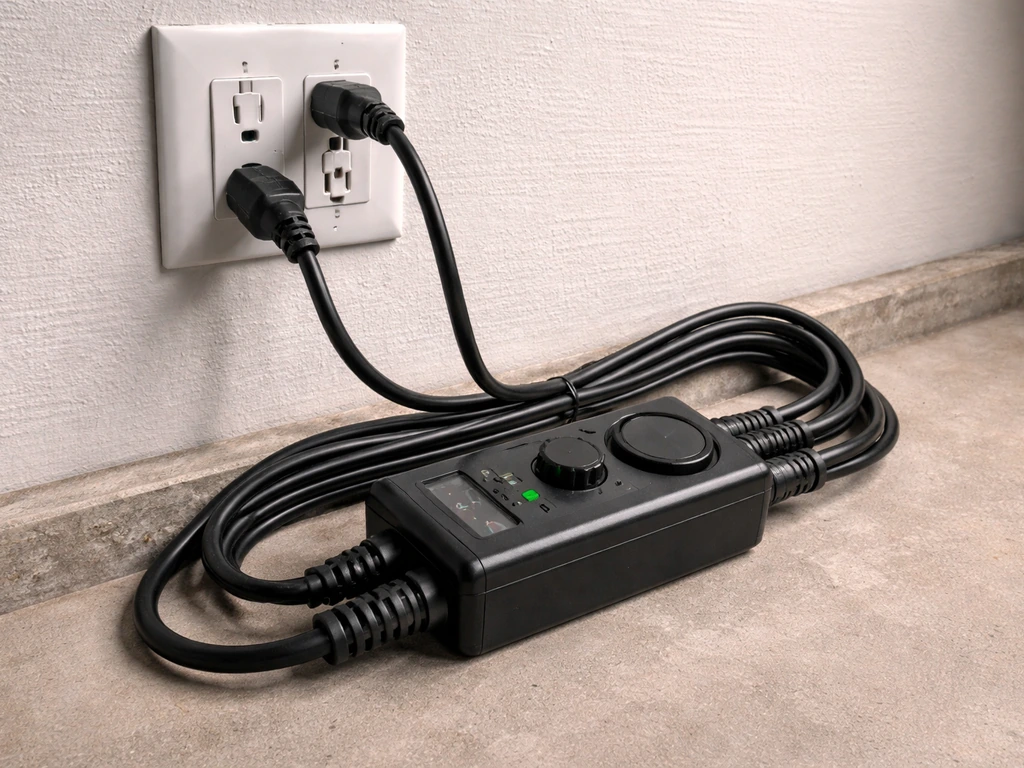
A mechanical or digital outlet timer is one of the most important pieces of your grow lamp setup, and it doesn't need to be expensive. If you want a deeper walkthrough of every component in a grow lamp setup, see the grow lights setup guide for wiring, spacing, and dialing in intensity. A basic 24-hour mechanical timer with 15-minute increments works fine for most photoperiod schedules.
If you want more precision, a digital timer like the Intermatic EI230 series allows you to set specific on/off windows and handles 120 VAC loads comfortably. Plug your grow light into the timer, set your schedule, and double-check that it's cycling correctly after the first 24 hours by watching it turn on and off yourself.
Dial in intensity, coverage, and distance
Once your light is hung and powered, the next step is measuring what's actually reaching your plants rather than guessing. A PAR meter or PPFD meter tells you exactly how much photosynthetically active light hits the canopy at a given height. You don't need a professional $400 meter. A decent Apogee or similar consumer meter in the $100–$150 range is accurate enough for home grows.
Take readings at the center of the canopy, at each corner, and at the midpoints of each edge. This gives you a clear picture of hot spots and dim zones. Then adjust height, angle, or fixture position until you hit the target PPFD range for your plant stage. The University of Maine Extension's benchmarks are a solid reference: under 100 PPFD for seedlings and clones, 100–500 PPFD for vegetative growth, and 400–1,200 PPFD for flowering and fruiting plants.
If you don't have a meter, you can estimate using the manufacturer's PPFD map and a tape measure, but treat those numbers as starting points. The map assumes ideal conditions with clean optics, no dust on the lens, and specific ceiling heights. Your real-world numbers will often be 10–20% lower. Iowa State University Extension recommends measuring actual intensity, then calculating your Daily Light Integral (DLI) by multiplying PPFD by hours of light and a conversion factor (PPFD x hours x 0.0036 = DLI in mol/m²/day). Most vegetative plants want a DLI of 10–20, while flowering plants benefit from 20–40.
If your light has a dimmer, use it. Running a full-power LED over seedlings that only need 50–80 PPFD wastes energy and risks light stress. Dim the light down, raise the fixture, or both. Then gradually increase intensity as plants mature and develop larger root systems capable of supporting faster growth.
Choose a schedule (day length) by plant stage
Photoperiod is the number of hours of light your plants receive each day, and it's one of the most powerful controls you have over plant development. Different plant types and growth stages need different day lengths, and getting this wrong is one of the most common reasons an otherwise decent grow lamp setup produces disappointing results.
| Plant Stage / Type | Recommended Photoperiod | Notes |
|---|---|---|
| Seedlings and clones | 16–18 hours light / 6–8 hours dark | Long days support root and shoot development |
| Vegetative growth (most plants) | 16–18 hours light / 6–8 hours dark | Maximize leafy growth before transition |
| Flowering / fruiting (photoperiod plants) | 12 hours light / 12 hours dark | Triggers reproductive stage in many species |
| Auto-flowering varieties | 18–20 hours light | Flower based on age, not day length |
| Houseplants and foliage plants | 12–16 hours light | Adjust based on natural light supplement needed |
For photoperiod-sensitive flowering plants like cannabis, transitioning from a long-day vegetative schedule (16 or more hours of light) to a 12/12 schedule signals the plant to begin reproductive growth. Research published in peer-reviewed horticultural literature confirms that a 12-hour photoperiod is the predominant protocol used to trigger flowering in photoperiod-sensitive species after a period of vegetative growth under long days.
For long-day flowering crops like some greenhouse varieties, even a small amount of supplemental light at night can be enough to extend the perceived day length and delay or prevent flowering. The Ohio State University Controlled Environment Agriculture Center notes that photoperiodic responses can sometimes be triggered at intensities as low as 1–3 PPFD, which is why light leaks in a grow tent are a real problem and not just a cosmetic issue.
Set your timer once, verify it, and then leave it alone. Inconsistent day lengths confuse plants and can cause stress, hermaphroditism in flowering species, or stunted growth. If you need to change the schedule, make gradual adjustments of 30 minutes per day rather than jumping directly to a new photoperiod.
Troubleshoot common setup problems
Most grow lamp setup problems come from a small set of installation mistakes. If you are seeing repeat issues, comparing your current approach with a grow light setup reddit thread on similar setups can help you spot the overlooked installation mistake. Here's how to diagnose and fix the most common ones.
Plants are stretching toward the light
Stretching (etiolation) almost always means insufficient light intensity at the canopy. Your PPFD is probably below 100 for seedlings or below 200 for vegetative plants. Lower your fixture, increase the dimmer setting, or both. Check that your photoperiod isn't too short, since plants reaching for more light during a very short day will also stretch. Aim for at least 16 hours of light during the vegetative stage.
Leaves are yellowing or bleaching
Yellowing from the bottom up usually points to a nutrient issue, not a light problem. But if the top leaves and growing tips are bleaching or turning pale, that's light stress from too much intensity or heat. Raise the fixture 4–6 inches and check canopy temperature. The ideal canopy temperature for most plants is 70–85°F. Anything above 90°F consistently will cause bleaching and damage even at moderate PPFD levels. Light-colored foliage on lower leaves that aren't receiving much light is a coverage gap issue, not heat stress.
Uneven growth across the canopy
If some plants or parts of the canopy are growing faster or taller than others, your light coverage is uneven. Take PPFD readings at multiple points and compare them. A difference of more than 30% between center and edge readings is enough to cause visible growth variation. Raise the fixture slightly to spread the light cone wider, add a second light at the edges, or use reflective walls (white poly film or Mylar) to bounce light back into dim zones.
Plants aren't flowering when they should
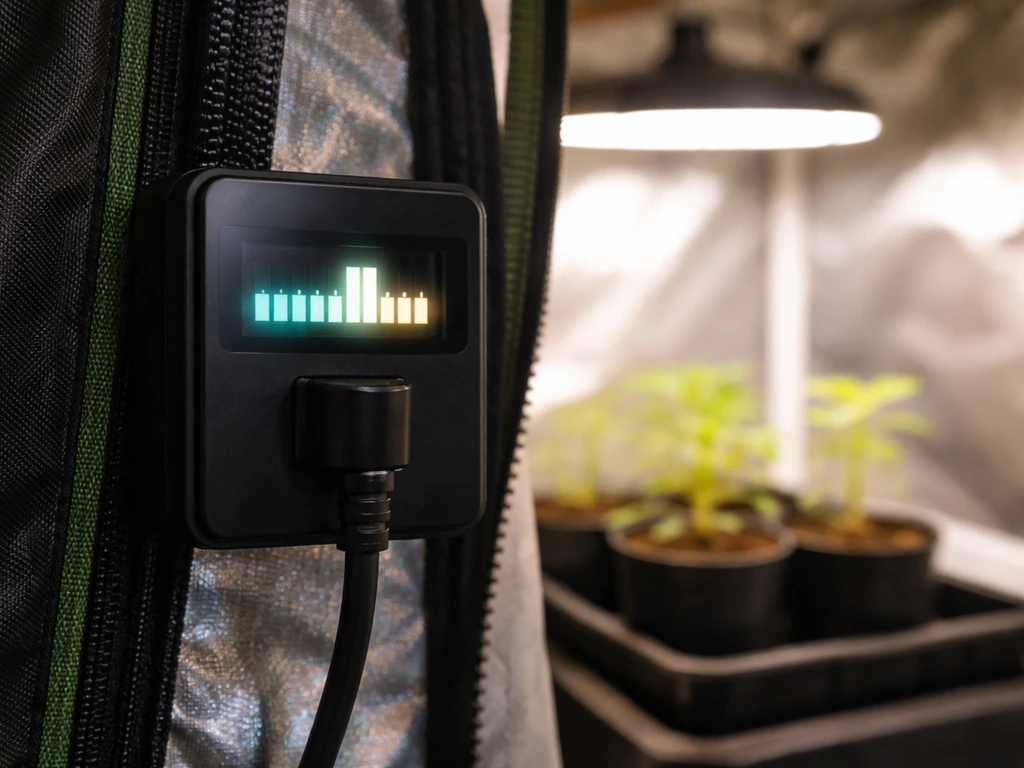
For photoperiod plants that should be flowering on a 12/12 schedule but aren't, the most likely culprit is a light leak. Even a small amount of light during the dark period (a timer LED, a power strip indicator, a gap in the tent zipper) can interrupt the dark cycle and prevent or delay flowering. Check your space for light leaks by standing inside with lights off for 5 minutes while your eyes adjust. Seal any gaps with black tape or light-proof material. Also verify your timer is actually running the correct schedule and hasn't drifted or been accidentally reset.
Heat stress and hotspots
If you notice wilting, curling leaves, or browning at leaf tips on the plants directly under the center of your fixture, heat stress is the likely cause. Raise the light, improve ventilation in the grow space, or both. An oscillating fan pointed above the canopy (not directly at the plants) moves warm air away from leaf surfaces and can drop canopy temperature by 5–10°F without stressing plants. LEDs produce far less heat than HPS lights, but they're not zero-heat, and in a small enclosed tent without airflow, even an LED can cook the top of the canopy.
Timer or scheduling problems
A timer that's running the wrong schedule is surprisingly common, especially after a power outage that resets the device. After any outage, check that your timer still shows the correct on/off times before assuming your light is running normally. Digital timers with battery backup avoid this, but even they should be verified periodically. If plants in a flowering schedule suddenly start showing vegetative growth again, a timer malfunction or a reset to a long-day schedule is almost always the cause.
Once your setup is dialed in and running stably, keep a simple log of your light height, dimmer setting, and photoperiod for each growth stage. When something goes wrong, that log makes it much easier to trace back what changed and fix it fast rather than having to start from scratch.
FAQ
How do I choose the correct grow lamp setup if I have more than one plant stage in the same tent?
Avoid mixing stages under one fixed light height. If possible, split the tent into zones or use separate shelves, otherwise keep the light set for the youngest or lowest PPFD requirement and raise or dim for the rest. When you must share one fixture, confirm canopy PPFD at the tallest and shortest plants, and expect you will not be perfectly on target for both stages at once.
Can I rely on the wattage on the box when setting up my grow lamp setup?
No, wattage is mainly a power draw, not a measure of usable intensity. Use the manufacturer PPFD map (or measure with a PPFD meter) at your actual hang height and footprint. If the brand does not provide a PPFD distribution for your model, treat the setup as uncalibrated and plan to verify intensity after installation.
What is the best way to prevent uneven growth across the canopy in a grow lamp setup?
Measure PPFD at center, corners, and edge midpoints, then correct coverage gaps rather than only adjusting height. If edges are low but the center is on target, try lowering slightly to broaden spread, repositioning the fixture, or adding a second smaller light to balance intensity. If the center is high and edges are low even after raising, you likely need a wider-coverage fixture.
How high should I hang the light when I do not have a PPFD map or a meter?
Start with the common stage ranges (seedlings 24 to 36 inches for LEDs, veg 18 to 24, flower 12 to 18) but plan a quick “calibration by symptoms” approach. After 24 to 72 hours, look for stretch (too little light) or bleaching/pale new growth (too much heat or intensity). Then adjust in small steps, usually 2 to 4 inches, and re-check plant response before changing the timer.
What PPFD should I target if I’m growing herbs or leafy greens that are not classic seedlings/veg/flower categories?
Use veg-like targets as a baseline (roughly 100 to 500 PPFD) and aim for stable leaf color rather than chasing maximum intensity. Then confirm performance using DLI goals (many leafy greens fall in the 10 to 20 mol/m²/day range). If plants grow fast but look pale or develop tip burn, your intensity or heat is likely too high even if PPFD seems acceptable.
My timer cycles correctly at first, then later the schedule drifts. What should I check in a grow lamp setup?
First, confirm the timer time setting did not reset after a power outage, even if the display still looks normal. Next, verify you are using the timer’s correct mode (hourly window vs. repeated daily schedule), and check whether the timer LED or an indicator is leaking light during the dark period. For recurring drift, consider a digital timer with battery backup and re-test the on/off behavior for at least 48 hours.
Do I need GFCI outlets for a grow lamp setup if I’m using a tent on a dry floor?
If water could splash, humidity stays consistently high, or you are in a basement or garage, yes, use GFCI protection as a safety baseline. Even with a tent, a drip line or reservoir can fail. If your existing outlet is not GFCI-protected, replace it or use a UL-listed GFCI power strip, and avoid standard extension cords not rated for the environment.
How do I check for light leaks that can interfere with flowering schedules?
Turn off the grow lights and wait 5 minutes for your eyes to adjust, then move around the tent and look for any glow from timer LEDs, power strips, zipper gaps, vent holes, or cable pass-throughs. Cover visible leaks with black tape or light-proof grommets, and consider using a timer that hides or shields its status indicator. Also re-check that your exhaust fan does not carry light from outside the tent.
What should I do if seedlings are stretching even though my photoperiod is correct?
Stretching usually means canopy PPFD is low for that stage. Lower the fixture or increase dimmer output, then verify PPFD if possible. Also check that plants are actually at the intended canopy level (leaf height can change quickly), and confirm you are not unintentionally running a shorter light window due to timer settings or power interruptions.
My top leaves bleach while lower leaves look normal. Is this always a light problem?
Not always, but it is often light stress combined with heat. Raise the fixture 4 to 6 inches, then measure canopy temperature and improve airflow. If canopy temperature is above about 90°F consistently, the bleaching is likely heat-related even at moderate PPFD, so the fix should prioritize ventilation and light placement before increasing dimmer settings.
Should I use a dimmer in my grow lamp setup, and how do I avoid overcorrecting?
Yes, dimming helps prevent giving seedlings excess intensity, but adjust gradually. Make one change at a time, for example reduce dimmer by a small step or raise the fixture slightly, then wait 24 to 48 hours to evaluate new growth response. If you see rapid improvement, keep it steady and avoid repeated daily oscillations in intensity.
Is it safe to run multiple lights on one timer for a grow lamp setup?
It can be, but confirm the total load is within the timer’s rated capacity and voltage, and ensure all fixtures are plugged into a properly grounded setup. If your timer only supports 120 VAC loads and you exceed its rating, use a relay-based controller or individual timers. Also make sure all lights share the same on/off windows so flowering schedules are synchronized.
How can I track progress without a full log every day?
At minimum, log three values per stage change: light height (or distance from canopy), dimmer percentage (or driver setting), and photoperiod hours. Then add a note when you adjust airflow or fans, because temperature changes often mimic PPFD changes. This minimal log is usually enough to diagnose why stretch, bleaching, or slow growth appears later.
Next Article
Budget Grow Light Setup: Step-by-Step Checklist for Success
Step-by-step checklist to build a budget grow light setup: choose LEDs or low-cost options, place, schedule, and trouble