For most budget setups, a 100–200W LED grow light (actual draw, not equivalent) hung 18–24 inches above your plants, run 14–16 hours a day for seedlings or 12–14 hours for leafy houseplants, on a $10 outlet timer, is all you need to get started. You can pull this off for under $80 total, and it will genuinely grow plants. The rest of this guide covers how to dial it in so you're not wasting money on the wrong gear or burning your plants out.
Budget Grow Light Setup: Step-by-Step Checklist for Success

Marcus Tillman
23 Apr 2026
How much light your plants actually need (and how to estimate it on a budget)
The two numbers that actually matter in grow lighting are PPFD and DLI. PPFD (photosynthetic photon flux density) is basically how intense the light is at a given point, measured in µmol/m²/s. blank" rel="noopener noreferrer">DLI (daily light integral) is the total dose of light your plants get in a full day, which is just PPFD multiplied by hours of light. You don't need to memorize the math, but knowing the target ranges helps you avoid the two most common budget mistakes: running lights too dim for too few hours, or cranking them so close to the canopy that leaves burn.
Here are the practical PPFD targets by growth stage that most indoor growers work from:
| Growth Stage | Target PPFD (µmol/m²/s) | Typical Daily Hours | Notes |
|---|---|---|---|
| Seedlings / clones | 200–400 | 14–16 hrs | Start at the low end; young plants are sensitive |
| Vegetative growth | 400–600 | 14–18 hrs | Most leafy greens and herbs live here |
| Flowering / fruiting | 600–1000 | 12 hrs (photoperiod crops) | Tomatoes, peppers, cannabis need more intensity |
| Houseplants (low-light) | 50–150 | 10–14 hrs | Pothos, snake plants, ferns |
| Houseplants (medium-light) | 150–300 | 12–16 hrs | Monsteras, peace lilies, most tropicals |
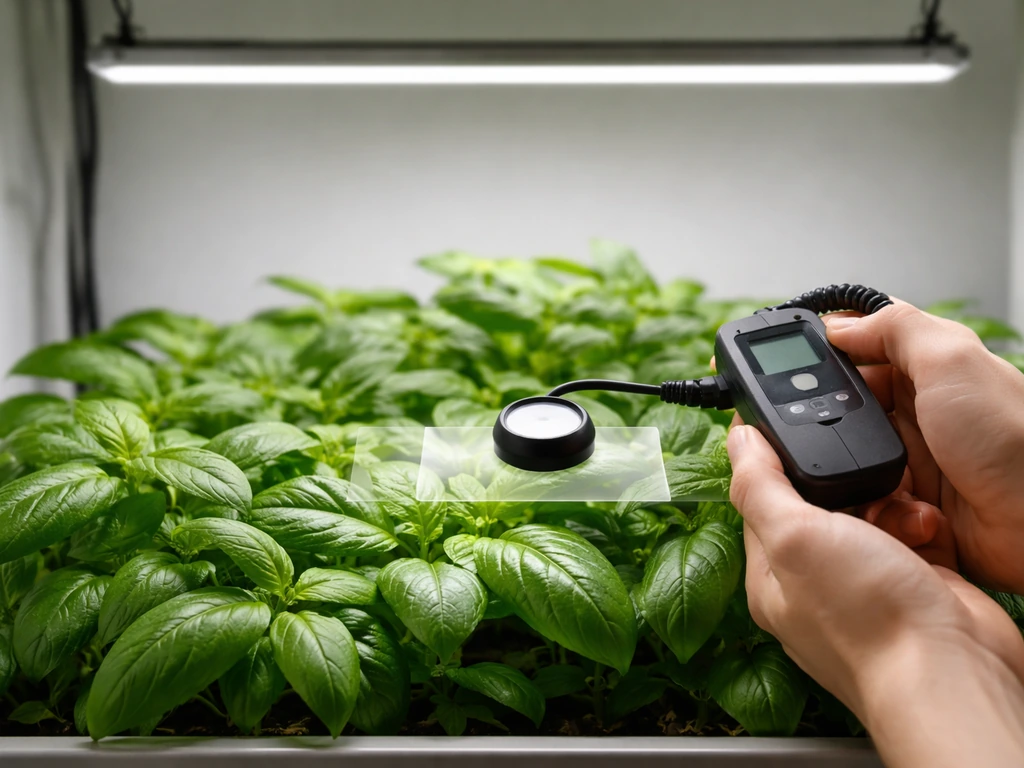
You don't need a $500 quantum sensor to measure your light. The free Photone app on your smartphone works well as a budget measurement tool when you attach their inexpensive diffuser accessory and follow the in-app calibration steps. Photone has been tested against professional-grade quantum sensors and produces comparable readings when used correctly. Without the diffuser, readings can be unreliable, so grab the accessory when you download the app. A UNI-T UT383 mini lux meter (around $15–20) is another option if you prefer a dedicated device. Either tool gives you enough real data to stop guessing and start adjusting.
One thing worth understanding early: mounting height dramatically changes the effective PPFD at your canopy. A tested LED bar required only about 8 hours per day to hit seedling DLI targets at 8 inches above the crop, but needed a full 16 hours per day when raised to 20 inches. That's the same light, same wattage, just different height. So when people say their cheap LED 'isn't strong enough,' often they just have it hung too high.
Choosing an affordable grow light type (LED vs fluorescent vs DIY)
On a budget in 2026, LEDs are the default choice for almost every setup. The price of decent LED bars and panels has dropped to the point where fluorescents rarely make financial sense for new builds. But there are situations where each type still makes sense, so here's a straight comparison.
| Type | Upfront Cost | Efficiency | Lifespan | Best For | Skip If |
|---|---|---|---|---|---|
| LED panel / bar | $25–$80 | High (90–150 lm/W or better) | 50,000+ hrs | Most setups, seedlings to veg to fruiting | You already own fluorescent fixtures in good shape |
| T5 fluorescent | $30–$60 for fixture+bulbs | ~104 lm/W | ~20,000 hrs | Seedlings, clones, low-light plants | You need coverage over 2+ sq ft without multiple fixtures |
| T8 fluorescent | $20–$50 | ~92 lm/W | ~20,000 hrs | Very low-budget seedling starts, herbs | You need any real intensity for fruiting plants |
| CFL (spiral) | $5–$15 per bulb | Moderate | 6,000–15,000 hrs | Single-plant setups, clones, tight spaces | You need even canopy coverage over a tray |
| DIY / used | Varies (often $0–$30) | Depends on components | Depends | Experienced tinkerers, large spaces on a shoestring | You're not comfortable with basic wiring |
For most people reading this, start with a quality LED bar or quantum board-style panel in the 100–200W actual draw range. Brands like Mars Hydro, Spider Farmer, and Vivosun all offer entry-level options in the $50–$80 range that work reliably for seedlings through vegetative growth. You'll see a lot of budget LED panels on Amazon with inflated wattage claims (a '1000W' LED that actually draws 65W). Always check the actual power draw in the specs, not the marketing wattage.
If you already own T5 or T8 fluorescent shop lights, they are genuinely fine for seedlings and low-light houseplants. Run them 2–4 inches above seedling trays and they do the job. Just know you'll be limited if you want to move into fruiting plants later. A DIY approach using repurposed LED shop light strips or salvaged fixtures can work well if you're comfortable sourcing components, but factor in the time cost honestly before going that route.
Shopping checklist: what to buy (and what to skip) for a basic budget setup
Here's what you actually need for a functional starter setup. This list assumes you're growing seedlings or houseplants in a 2x2 to 2x4 foot area.
Buy these
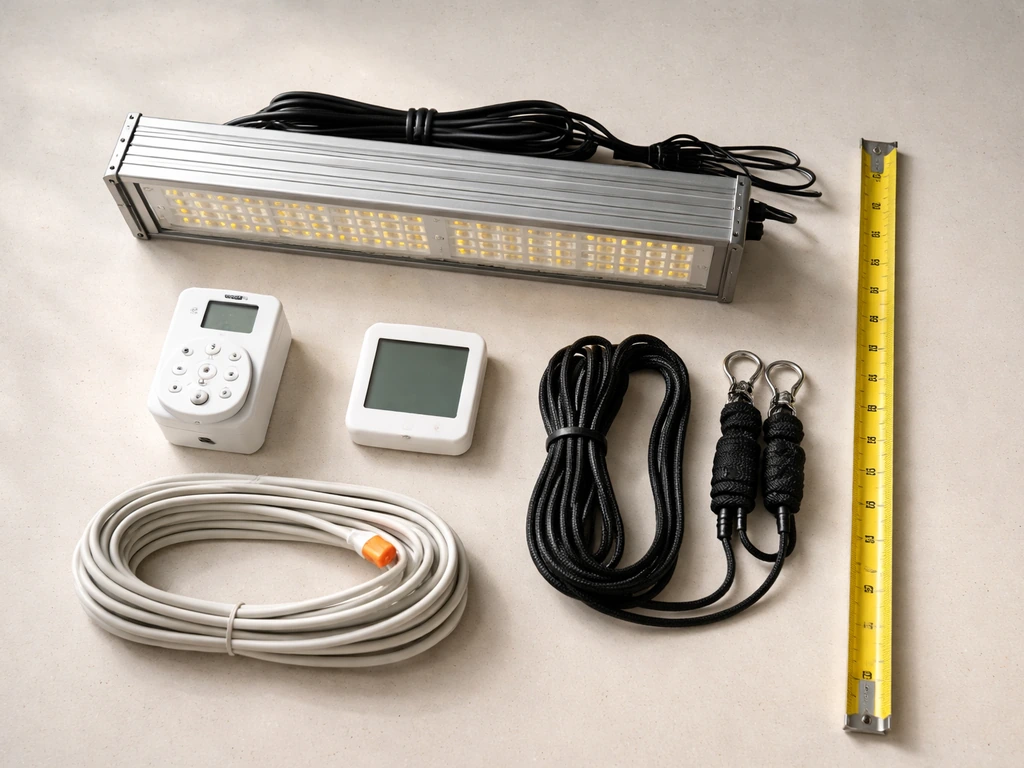
- LED grow light: 100–200W actual draw panel or bar ($40–$80). Look for full-spectrum (white/red blend or Samsung LM301 diodes for quality budget options).
- Outlet timer: mechanical or digital, ~$10. Non-negotiable. Manual on/off schedules fail within a week.
- Adjustable hanging kit or ratchet rope clips: usually included with LED panels, but buy separately if needed (~$8–$12). You need to be able to raise/lower the light easily.
- Power strip with surge protection: $15–$25. Keeps everything on one circuit and protects against voltage spikes.
- Photone app + diffuser accessory (~$5–$8) or a basic lux meter ($15–$20) to verify actual light levels at the canopy.
- Small fan (4–6 inch clip fan, ~$12–$15): LED panels generate less heat than HID lights, but airflow is still important for stem strength and preventing mold.
Skip these (at least for now)
- CO2 supplementation: meaningless until your light levels are dialed in and you're growing in a sealed space. Not a beginner concern.
- Expensive light movers: just get a slightly wider light instead.
- Cheap 'blurple' LED panels with only red and blue diodes: full-spectrum white LEDs outperform them for most plants and cost similar money today.
- High-wattage HID (HPS or MH) lights for a first budget setup: they work well but generate significant heat, require ballasts, and drive up your electricity bill. LEDs are simpler and cheaper to run.
- Smart plugs with app control for your first setup: a $10 mechanical timer does the same job with zero setup complexity.
- Expensive nutrient lines before you've confirmed your light is working: fix the light first.
Placement, height, and coverage: getting even light without overspending
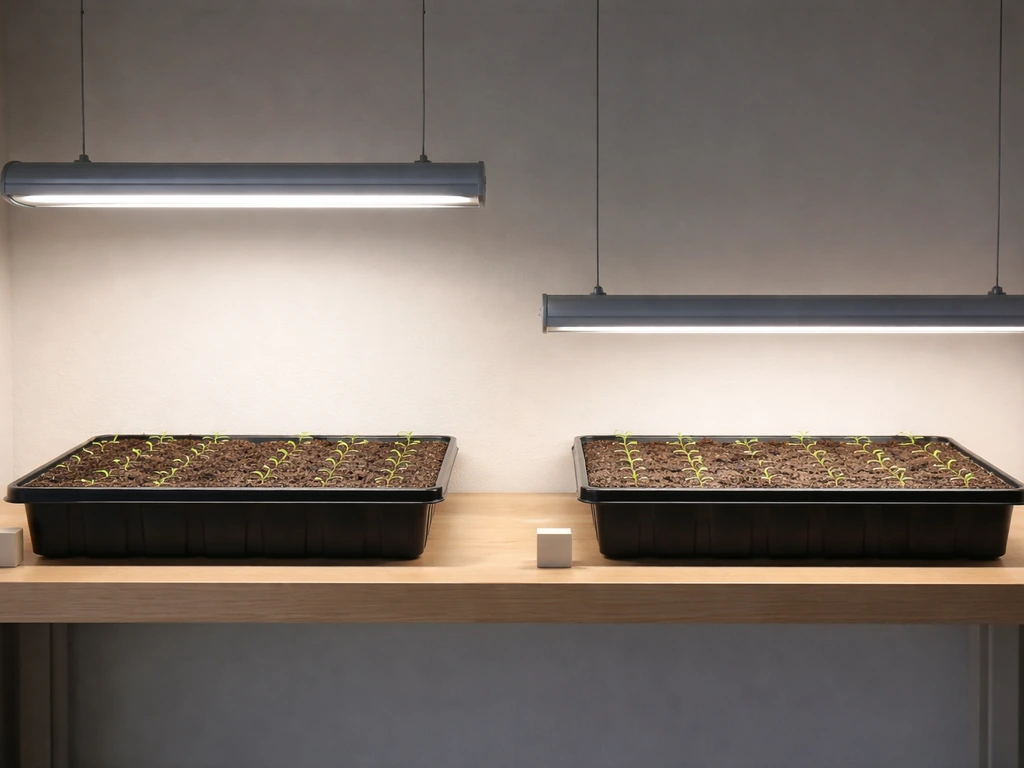
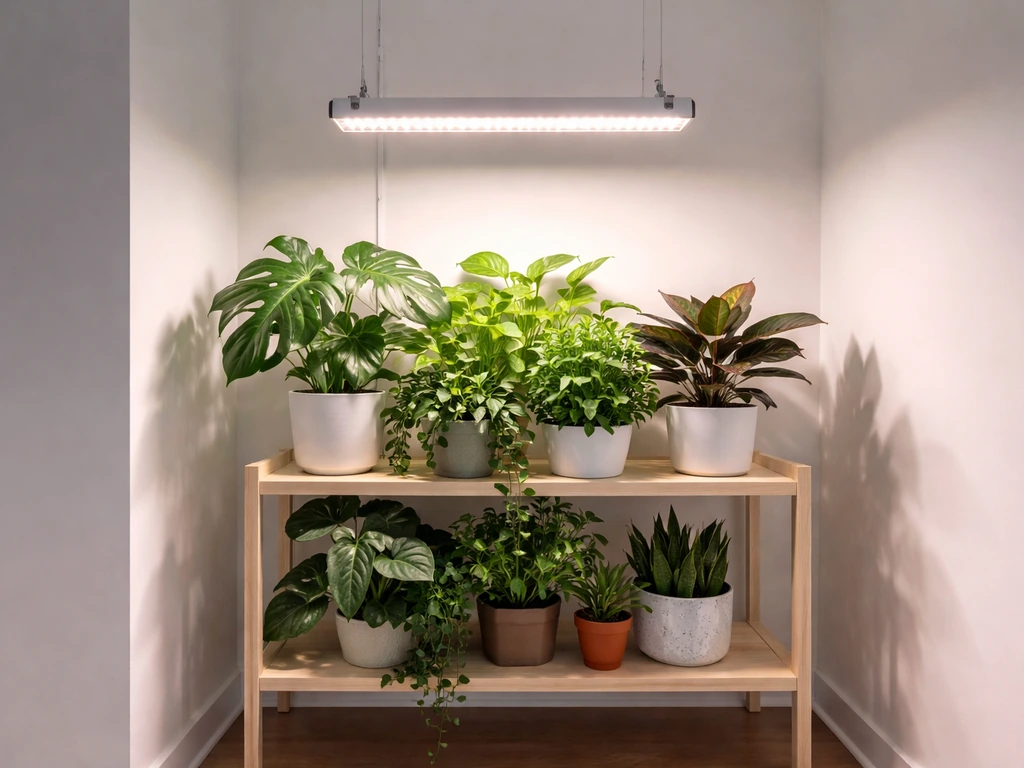
Height is the single most-adjusted variable in any grow light setup, and getting it right costs nothing. As a general starting point, hang most budget LED panels 18–24 inches above the canopy for vegetative growth and lower to 12–18 inches for fruiting or when you need more intensity. If you want a straightforward checklist for doing this step by step, see the grow lamp setup guide as a related option.
For seedlings under LEDs, start around 20–24 inches and watch the plants. If they stretch and lean toward the light (leggy growth), lower the light. If leaf edges cup upward or look bleached, raise it. If you're building a shelf grow light setup, start by dialing in height first so you get even coverage across the whole rack.
Coverage area is another number manufacturers inflate. A panel marketed as covering a 4x4 foot grow area is usually only covering that space adequately for vegetative plants at lower PPFD levels. For fruiting plants that need 600+ µmol/m²/s, the real usable coverage is often 2x3 or 3x3 feet. Plan your space based on actual light spread, not the box claims. If you're working on a shelf grow setup or a plant rack, this matters a lot because corners always receive less light than the center. For a practical walkthrough of how people actually build and tune LED distance, timers, and panel sizing, see grow light setup reddit as an adjacent reference point.
To improve coverage without buying a second light, try these practical approaches:
- Line the walls or back of your grow space with flat white paint or white foam board. White reflects around 85–90% of light back toward plants. Mylar or emergency blankets reflect even more (up to 97%) and cost about $3 at a dollar store.
- Rotate plants every few days so outer plants get center time under the light.
- Keep the light centered over the grow area, not pushed to one side.
- If you're using a shelf, consider two smaller LED bars spaced across the width instead of one center-mounted panel. This provides much more even coverage edge to edge.
You can verify your coverage using the Photone app or a lux meter. Take readings at the center of your tray and then at each corner. If corner readings are less than 50–60% of center readings, your light is too small for the space, your reflective surfaces are inadequate, or both. Adjust accordingly before assuming your plants just need more light.
Dialing in intensity and schedules (seedlings, veg, flowering, and houseplants)
Light schedules are not complicated, but they do matter. Start with these recommendations and adjust based on how your plants respond over 1–2 weeks.
Seedlings and clones
Run 14–16 hours of light per day. Start at the lower intensity end (200–300 µmol/m²/s PPFD, or around 20–24 inches from the canopy with a standard budget LED). Seedlings don't need a ton of light intensity, but they do need consistent hours. The 8-hour darkness period still matters even for seedlings. Set your timer and leave it alone for the first week before making changes.
Vegetative growth
For most non-photoperiod crops (tomatoes started indoors, peppers, basil, lettuce), run 14–18 hours per day at 400–600 µmol/m²/s. Lower the light to 16–20 inches above the canopy to hit that range with most budget LED panels. Photoperiod-sensitive crops like cannabis should be kept at 18 hours of light during veg if you don't want them to flower.
Flowering and fruiting
Drop to 12 hours on / 12 hours off for photoperiod-sensitive plants. For non-photoperiod crops like tomatoes or peppers, you can keep 14–16 hours but will want higher intensity (600–1000 µmol/m²/s), which means dropping your light to 12–16 inches above the canopy. Be especially attentive to heat buildup when running lights this close. Check for hot spots with your hand at canopy level.
Houseplants
Most tropical houseplants do well on 12–16 hours at 100–300 µmol/m²/s. You can keep the light 24–36 inches above the canopy and run it while you're at work. Low-light plants like pothos, ZZ plants, and snake plants can do fine with just 10–12 hours. High-light tropicals like bird of paradise or citrus need closer to 200–400 µmol/m²/s for 14–16 hours to really thrive indoors without a window.
If your budget LED has a dimmer, use it. Start at 50–70% intensity and only push higher if you're measuring too low at the canopy or seeing slow growth after 2 weeks. Running at full intensity from day one with the light too close is one of the most common ways to stress plants early.
Power, heat, and safety considerations (timers, wiring, ventilation)
Budget setups often involve extension cords, power strips, and cheap timers in humid environments. That combination creates real electrical hazards if you're not thoughtful. The CPSC specifically warns that undersized extension cords without strain relief or proper polarization present fire and shock risks. Use rated, grounded extension cords that match or exceed the amperage of your lights, and never daisy-chain multiple extension cords.
For safety with grow lights specifically, look for products that carry UL listing. Horticultural lighting equipment is evaluated under UL 8800, which covers electrical safety, fire risk, and photobiological hazards. This doesn't mean every unbranded Amazon LED is dangerous, but when you're buying from a no-name brand, checking for some form of UL or ETL listing on the fixture itself is worth doing. Risk Group 3 photobiological ratings (meaning high blue-light hazard) are not eligible for safety listing, so avoid any panel that emits very intense, narrow-spectrum blue light without eye protection guidance.
- Use a timer: this is both a safety and a plant health issue. Forgetting to turn off lights for 24+ hours can stress photoperiod plants and wastes electricity.
- Keep electrical connections out of the splash zone: if you're watering plants under grow lights, make sure outlets, timer plugs, and power strips are elevated and not directly below where water drips.
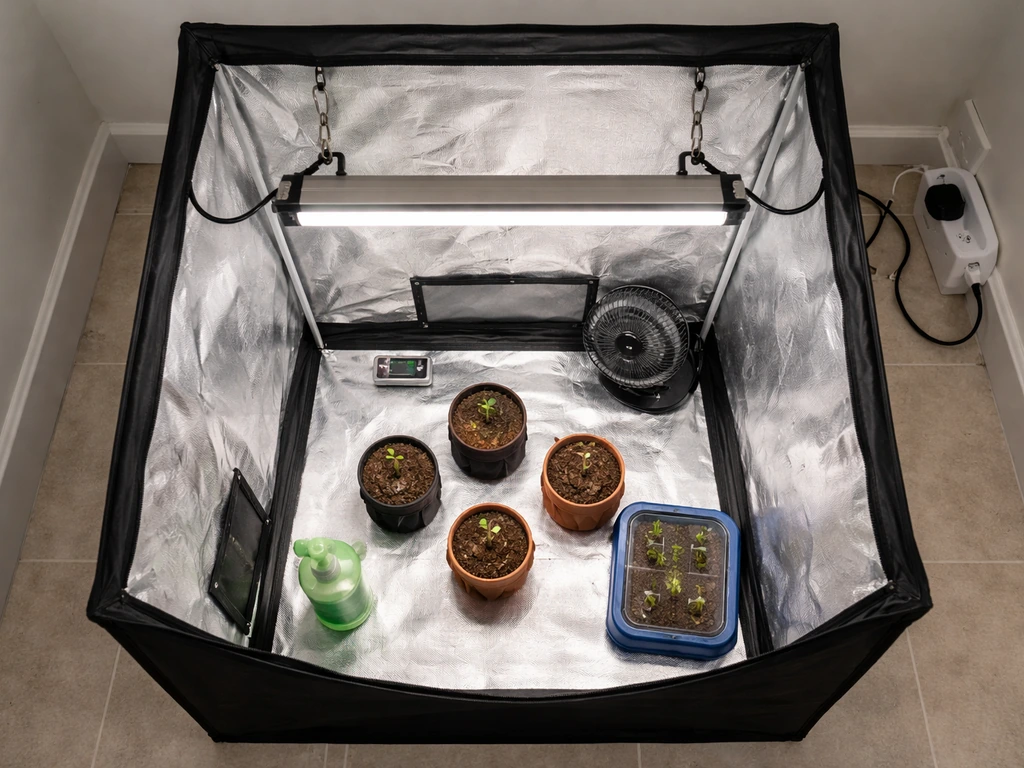
- Ventilate: even efficient LEDs add heat. In a small enclosed grow tent or cabinet, this can raise ambient temperature 5–15°F above room temp. A small fan circulating air out of the space keeps temps manageable and strengthens stems.
- Calculate your power cost: a 150W LED running 16 hours/day draws 2.4 kWh/day. At $0.16/kWh (average US residential), that's about $0.38/day or $11–$12/month. Not alarming, but worth knowing if you're running multiple lights.
- Don't run lights on the same circuit as your refrigerator or HVAC: grow lights combined with other high-draw appliances can trip breakers or cause voltage fluctuations.
Simple setup, mounting, and troubleshooting by common failure points
Basic setup steps
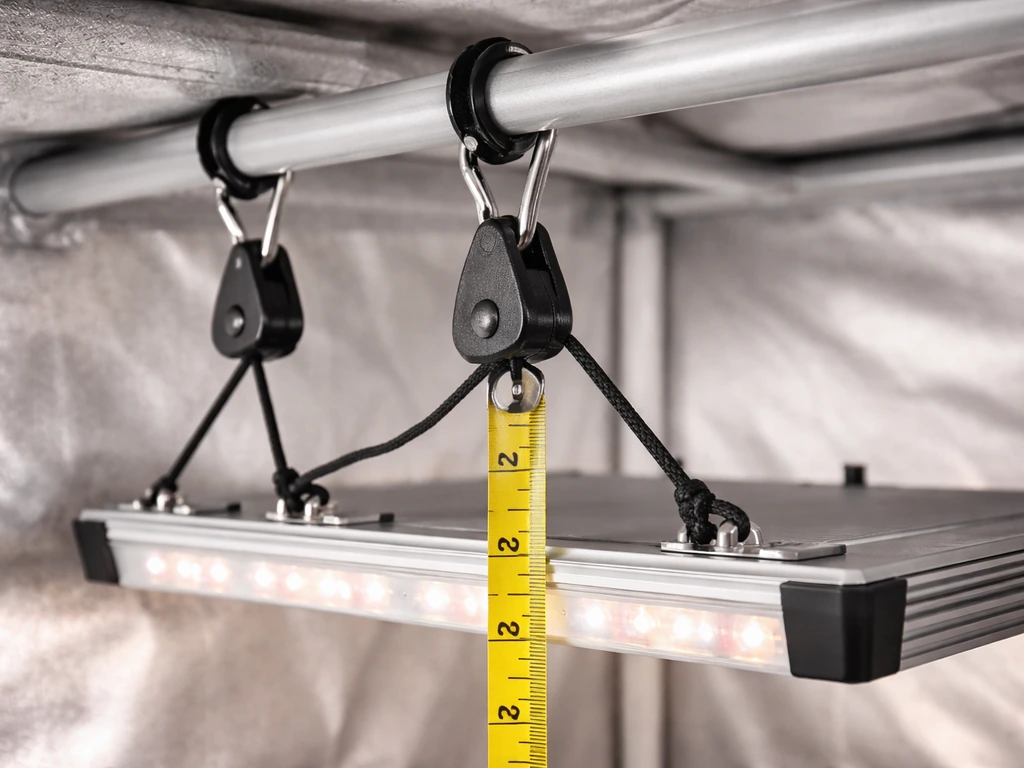
- Hang your light using the included ratchet clips or an adjustable hanging kit. Start at 22–24 inches above your plants.
- Plug the light into your timer, then plug the timer into a grounded outlet or surge-protected power strip.
- Set the timer to your target schedule (14–16 hours for seedlings, 12–14 for houseplants).
- Measure PPFD at the canopy center using Photone or a lux meter before committing to a height.
- Place your plants, run for 3–5 days, and watch for stretch (too far) or cupping/bleaching (too close).
- Adjust height in 2-inch increments and re-measure.
Troubleshooting common budget setup problems
| Symptom | Most Likely Cause | Fix |
|---|---|---|
| Leggy, stretching seedlings | Light too far away or too few hours | Lower light by 2–4 inches; confirm timer is running full schedule |
| Leaf tips curling up or light bleaching | Light too close or intensity too high | Raise light by 2–4 inches; reduce dimmer setting if available |
| Slow or no growth after 2+ weeks | Insufficient PPFD or too few hours | Measure with Photone; lower light or extend schedule by 1–2 hours |
| Uneven growth (one side better than other) | Off-center light placement or poor reflectivity | Re-center light; add white reflective material to walls; rotate plants |
| Plants fine in center, weak at edges | Light coverage too small for tray size | Add a second bar light or reduce tray size to match coverage area |
| Lights running but timer not cycling | Timer set incorrectly or mechanical timer skipped a slot | Re-set timer from scratch; try a digital timer if mechanical is unreliable |
| Hot spots on leaves directly under light | Light too close at center of beam | Raise light or reposition plants slightly off dead center |
| High room temperature under lights | Inadequate ventilation | Add a clip fan; crack tent flap or cabinet door; check ambient room temp |
One thing worth flagging for people building a more permanent or larger setup: if you're moving to a full shelf grow, a dedicated grow tent, or a vegetable-focused space, the considerations shift somewhat. If you're dialing in a grow light setup for vegetables specifically, double-check height and PPFD targets so fruiting plants get enough DLI. A shelf grow setup, for instance, benefits most from bar-style lights mounted close to each shelf level rather than one overhead panel. And if you're setting up specifically for vegetables that need to fruit, the intensity requirements jump significantly compared to what a basic houseplant or seedling setup needs.
The most important thing at this stage is to get a light in place, measure what you actually have at the canopy, and adjust from there. If you're still picking a layout, use this grow light setup guidance as a related option to nail height and coverage before buying more gear. Most budget grow light problems aren't equipment problems. They're placement and scheduling problems. A $50 LED at the right height on the right timer will outgrow a $200 light that's hung too high and run on a guessed schedule every single time.
FAQ
How can I tell if my budget grow light setup is underpowered for my specific room size?
To tell if your light is actually too far away, compare PPFD at the center and at the corners. If corner readings drop below about half of the center, the light is effectively undersized for your space, even if the brand claims a larger footprint. Then adjust height first (small changes) before you consider buying a bigger wattage unit.
What should I adjust first if my seedlings get leggy or lean toward the light?
If your plants look leggy and lean toward the lamp, raise intensity carefully by lowering the fixture a bit or increasing dimmer level, but change only one variable at a time. Also verify your schedule is stable for 7 to 14 days, because inconsistent timing can mimic “too much or too little light” stress.
My leaves look bleached or scorched, how do I troubleshoot height versus schedule?
At the first sign of scorching, stop lowering the light immediately. Raise it back to a safer band, usually several inches, and check PPFD at canopy level (not just at one point). Then confirm your timer accuracy, because running longer than planned is a common cause of bleaching even when height is “right.”
Do I really need a full dark period, or can I reduce light instead?
Use the 8 to 12 hours of darkness as a real off period, not “lights low.” If your outlet timer is set up for the wrong time zone or drifts, the total daily light integral can change day to day. A quick test is to confirm the on and off times using a wall clock and observe the plants’ behavior for a full week before major adjustments.
What’s a simple way to dial in DLI without doing complex calculations?
DLI targets depend on growth stage and plant type, but a practical way to avoid guessing is to measure PPFD at canopy and then calculate DLI using your chosen photoperiod. If you cannot or do not want to do the math, a simpler rule is to keep hours consistent first (like 14 to 16) and adjust height to bring PPFD into the expected range for your stage.
Is a lux meter good enough for a budget grow light setup?
A lux meter can be useful for quick checks, but lux is not the same as plant-relevant PPFD, especially for LEDs with different spectra. If you use lux, treat it as a comparative tool only (same light, same distance, same meter settings). For real accuracy, PPFD with a smartphone app and diffuser is the safer budget approach.
Why might Photone app readings be inconsistent, and how can I verify they’re working?
If the Photone app readings look suspicious, the biggest causes are missing or not properly seated diffuser accessory, measuring above a textured surface, or holding the phone in a way that blocks the sensor. Make repeated readings at the same spot, average them, and then compare center versus corners to confirm coverage uniformity.
How do I fix poor corner lighting in a shelf or small rack grow?
Corners usually get less PPFD because of distance and angle falloff. The fix is almost always either adding reflective sidewalls or adjusting fixture placement and height, or moving from one overhead light to multiple bars. If your corner-to-center ratio stays low after you change height, you likely need better reflectivity or a different layout.
Should I start my dimmable LED at 100% or dial it down in a budget setup?
If your panel has a dimmer, avoid starting at maximum output when you are also starting with uncertain height. Start at a mid setting, measure canopy PPFD, and then only increase after plants show stable growth for 1 to 2 weeks. This reduces early stress that can slow growth even if the total daily light eventually becomes “correct.”
What if my budget LED has no dimmer, how do I adjust intensity?
When a light has no dimmer, height becomes your control knob. Make gradual height changes, then wait several days to judge response. Also check that the fixture is level, because tilting can create hot spots near one end and leave other areas under lit.
What are common electrical mistakes in budget grow light setups, and what should I avoid?
Avoid daisy-chaining extension cords, and do not rely on the timer itself to “patch” an underpowered power strip or overloaded outlet. If you need multiple devices, use properly rated power strips (with surge protection if possible) and keep the grow light wiring tidy to reduce heat at connections.
How do I know if my grow light is actually electrically safe to use?
Search the product name for any electrical safety listing on the fixture itself, not only on the power cord. UL or ETL markings on the LED driver or fixture enclosure are a better signal than generic brand claims. If you cannot find any listing and the price is extremely low, treat it as a higher risk purchase.
Why does a budget grow light setup work for seedlings but not for fruiting crops?
If you are trying to grow fruiting plants (like peppers or tomatoes), budget setups often fail because they were sized for seedlings or houseplants. Fruit requires higher PPFD and usually more usable coverage, so one small panel may not deliver enough DLI across the whole canopy. Plan to either increase fixture count or choose a larger footprint that maintains acceptable PPFD in the corners.
How should I scale up my setup if I expand from a 2x2 to a bigger grow area?
If you move to a larger grow area, recalculate effective coverage, not just total watts. Many “cover” claims are made for smaller PPFD needs (vegetative) and assume ideal conditions. Measure PPFD at the corners of your expanded area, and if corner readings are too low, add a second fixture or switch to multiple evenly spaced bars.
What is the best order of operations for tuning a budget grow light setup?
A practical checklist is: set height first, measure center and corners for PPFD, choose a stable schedule, then adjust only one variable at a time. If you keep changing height and schedule simultaneously, it becomes hard to know whether growth problems are caused by DLI, heat, or uneven coverage.
Next Article
Grow Light Setup for Indoor Plants: Step-by-Step Guide
Step-by-step guide to set up indoor grow lights: choose fixtures, place correctly, size coverage, set timers, troublesho