A solid grow light shelf setup comes down to four things done right: a shelf that fits your plants and space, lights mounted at the correct height (12 to 18 inches above the canopy for most LEDs), a timer set to 16 to 18 hours on for seedlings or 12 to 14 hours for established houseplants, and enough intensity that your plants aren't stretching toward the light or getting bleached by it. 1 foot-candle (fc) equals 10.764 lux, which can help when you need to estimate or convert illuminance readings to lux-based light metrics (but PPFD requires spectrum-aware conversion). Get those four things dialed in and the rest is just fine-tuning.
Grow Light Shelf Setup: Step-by-Step Guide for Indoor Plants

Marcus Tillman
20 May 2026
Plan your shelf and plant goals first
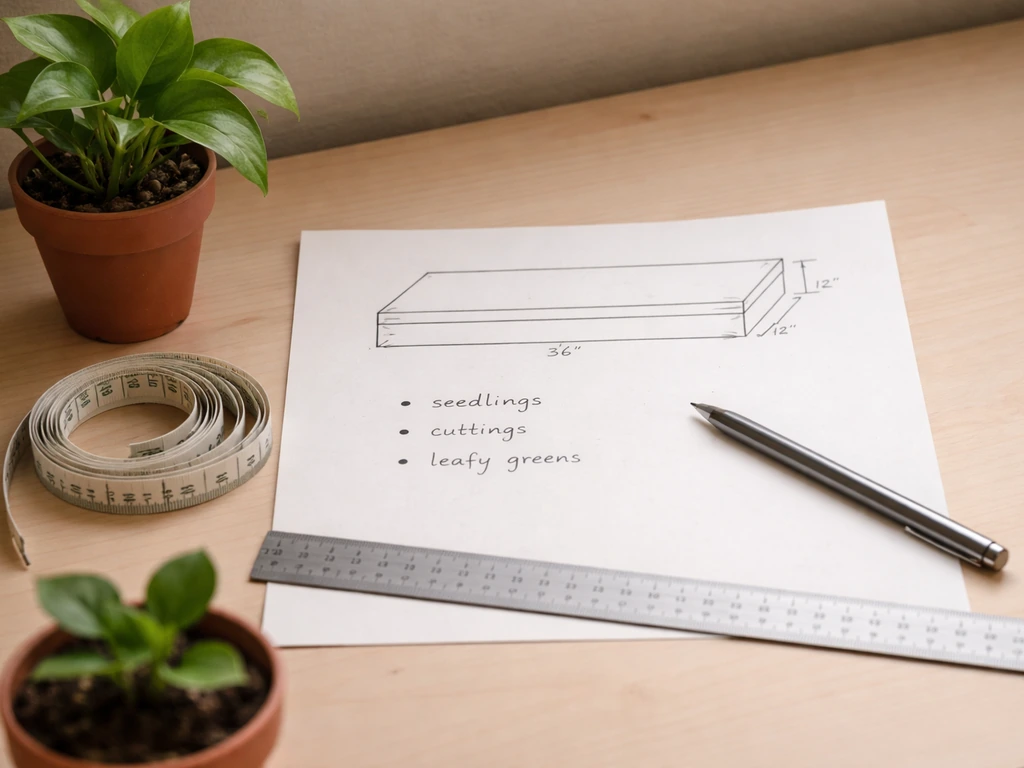
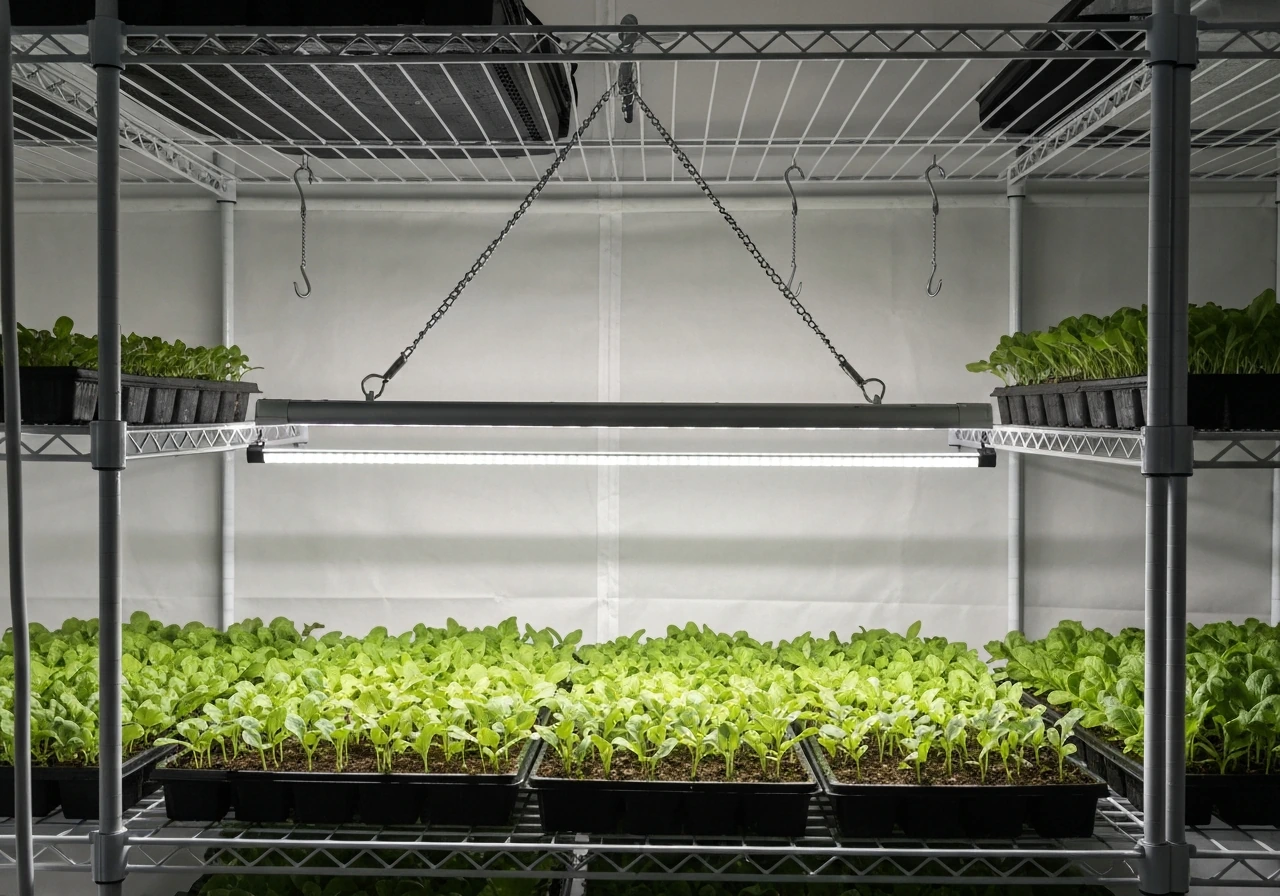
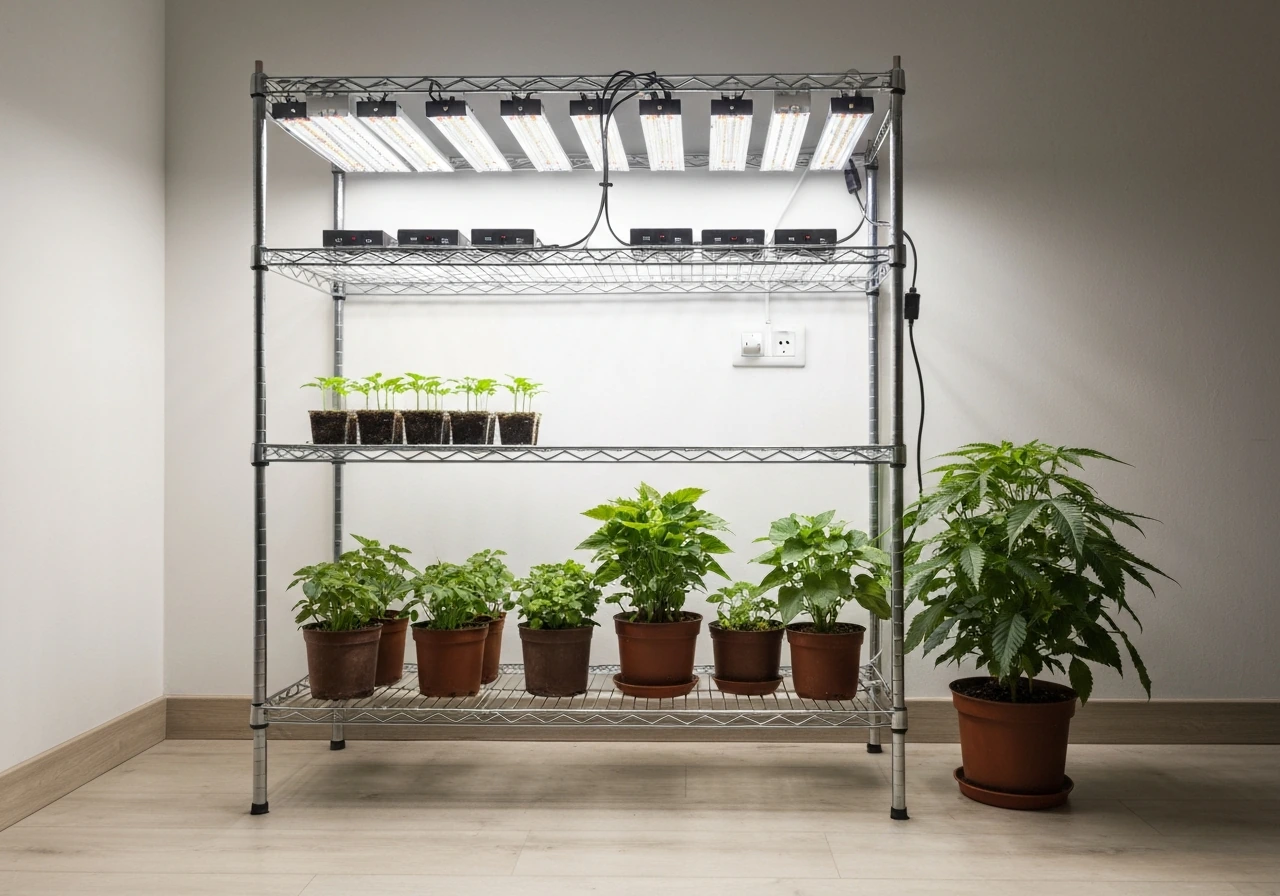
Before you buy a single light, get clear on what you're actually growing. Seedlings, cuttings, leafy greens, houseplants, and fruiting vegetables all have different light requirements, and your shelf layout should reflect that. A single-tier shelf with one or two fixtures works fine for starting seeds or keeping low-light houseplants happy. A multi-tier wire rack (the classic 4 or 5-shelf baker's rack style) is where most people land when they want to grow seedlings, propagate cuttings, and overwinter plants all at once.
Measure your shelf dimensions before anything else. Write down the width, depth, and the vertical clearance between shelves. Most wire shelving sits 12 to 18 inches between tiers, which works out almost perfectly for LED fixture mounting. If your shelf tiers are closer than 10 inches apart, you'll be fighting for space the moment plants put on any height. If you can choose your shelving, 16 to 18 inches of vertical clearance per tier gives you the most flexibility.
- Seedlings and cuttings: one tier per growth stage is ideal so you can set different heights and timers independently
- Leafy greens and herbs: medium intensity, typically one fixture per shelf covering a 2x4 ft footprint
- Houseplants: lower-light plants like pothos or ferns can share a shelf tier that higher-light plants might find too dim
- Fruiting vegetables (tomatoes, peppers): they need substantially more light and height than a typical shelf allows, so consider a dedicated taller setup for those
Also decide whether each shelf tier will be independent or grouped together. If you're running seedlings on one tier and cuttings on another, you'll want separate timers for each tier because their light schedules differ. Planning this now saves you from rewiring everything later.
Choose the right grow lights and accessories
Full-spectrum LED panels are the standard choice for shelf setups in 2026, and for good reason. They run cool, draw modest wattage, and they're available in bar-style or panel formats that fit neatly under a shelf. For a typical 2x4 ft shelf tier, a single LED bar fixture or two shorter bar lights side by side will cover the footprint adequately. Avoid fixtures marketed in watts alone, as wattage tells you nothing useful about how much light actually reaches your plants. What matters is PPFD (photosynthetic photon flux density, measured in µmol·m⁻²·s⁻¹), which tells you the intensity of usable light at canopy level.
For seedlings and cuttings, you're aiming for roughly 100 to 200 µmol·m⁻²·s⁻¹ at canopy level. For leafy greens, target 200 to 280 µmol·m⁻²·s⁻¹. Most mid-range LED bar lights rated for propagation or seedling use will hit these numbers at 12 to 18 inches. If you're buying blind without PPFD specs, look for fixtures from brands that publish a light map or PPFD chart, because that tells you they've actually measured their output.
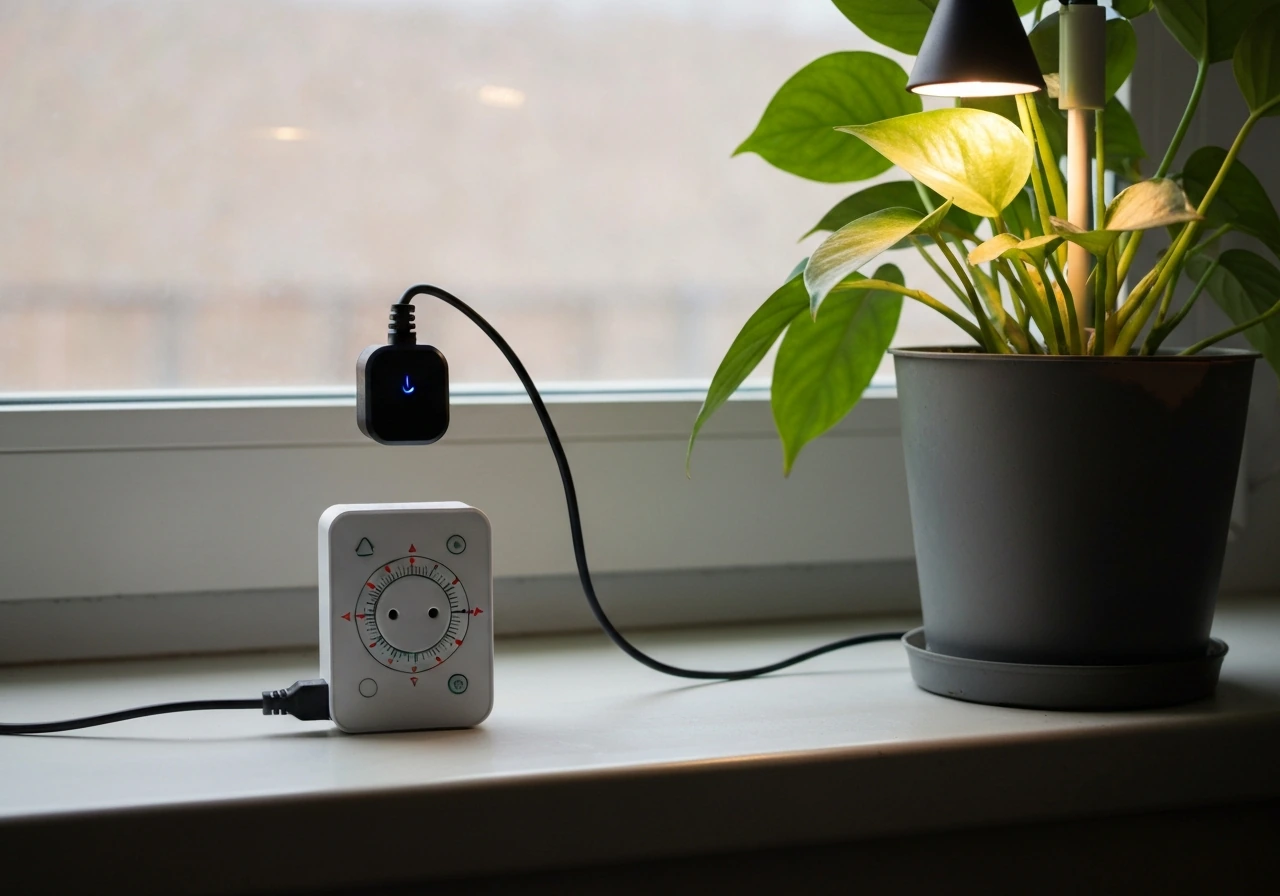
A few accessories make the whole setup work better. A mechanical or digital outlet timer is non-negotiable. A simple mechanical timer costs a few dollars and handles everything you need. If you want more control, a digital timer lets you set half-hour increments. A power strip with surge protection is useful for daisy-chaining multiple fixtures, but use a UL-listed strip and never plug one power strip into another. If you can swing it, a cheap PPFD meter or the Photone app on your phone gives you an actual intensity reading at canopy level instead of guessing.
| Light Type | Best For | Typical PPFD Range | Heat Output | Cost Range |
|---|---|---|---|---|
| Full-spectrum LED bar | Seedlings, cuttings, herbs, shelves | 100–400 µmol·m⁻²·s⁻¹ | Low | $ to $$$ |
| Full-spectrum LED panel | Larger shelf footprints, veg plants | 200–600+ µmol·m⁻²·s⁻¹ | Low to moderate | $$ to $$$ |
| T5/T8 fluorescent | Seedlings, low-light plants | 80–200 µmol·m⁻²·s⁻¹ | Moderate | $ to $$ |
| HID (HPS/MH) | Not recommended for shelves | High but hard to control on shelf | High | $$$ |
LED bar lights are the clear recommendation for a multi-tier shelf setup. They're thin, mount easily under a shelf, run cool enough that you won't cook plants on the tier below the fixture, and most come with hanging hardware or adhesive clips. T5 fluorescents are a decent budget option if you already have them, though they require closer mounting (2 to 4 inches) to hit useful PPFD levels. Skip HID lighting entirely for shelves, as the heat output alone makes it impractical in a tight vertical space.
Mounting and placement: height, spacing, and coverage
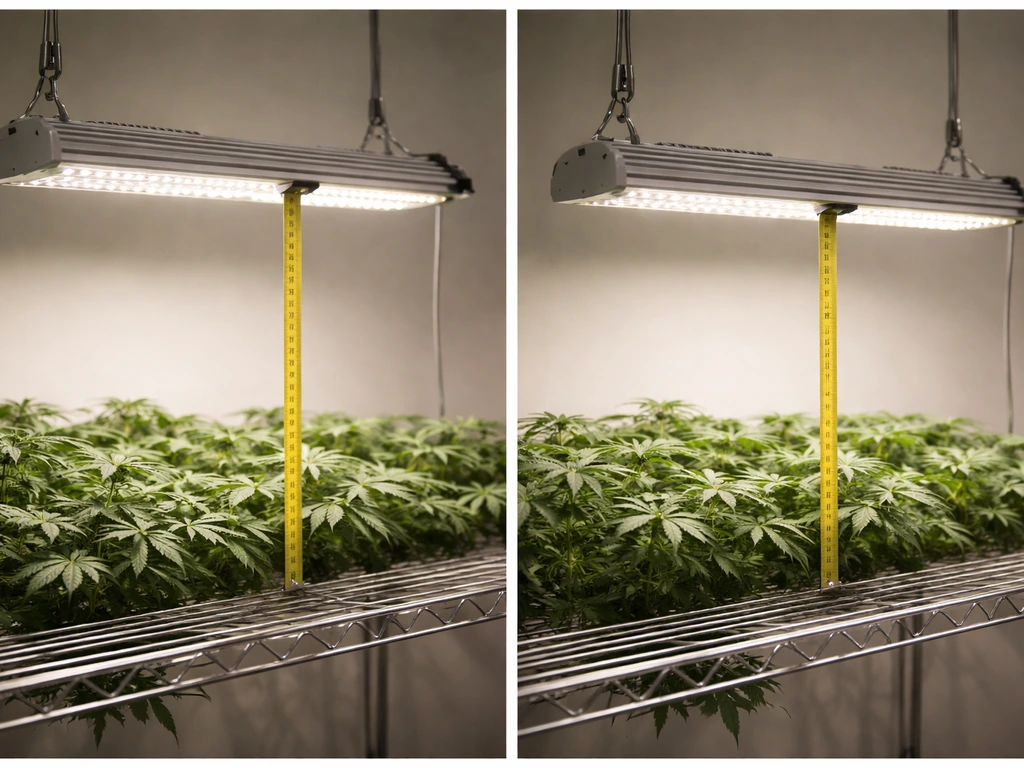
The single most common mistake beginners make is mounting the light too high. When you mount an LED fixture 24 inches or more above the canopy, the light intensity drops off significantly, and plants start stretching. PPFD follows an inverse-square relationship with distance, which means doubling the distance doesn't just reduce the light a little, it reduces it dramatically. Start at 12 to 18 inches above the top of your plants and adjust from there based on what you see.
For a standard wire shelf, clip the fixture directly to the underside of the shelf above. Most bar lights have hanging cables or zip-tie slots that let you adjust height easily. Set the fixture at 14 to 16 inches above where the plant tops will sit when they're young, and lower it gradually as plants establish or raise it if you see stress. Mark your starting position with a piece of tape on the hanging cord so you have a reference point.
Coverage and spacing matter especially when you're running multiple fixtures on one shelf. Light intensity drops off toward the edges of any fixture, and if you leave large gaps between two bar lights, you get a shadow zone in the middle where plants grow unevenly. Overlap the coverage of adjacent fixtures slightly, roughly 2 to 3 inches of overlap, so there's no dark strip running through your growing area.
Once your layout is covered, you can dial in a grow light setup for indoor plants by matching PPFD across the shelf and adjusting mounting height as plants change. If your fixture has a narrow beam angle (60 degrees or less), you'll need either more fixtures or a lower mount height to fill the footprint.
Wide-angle fixtures (90 to 120 degrees) cover more area per fixture but deliver lower intensity at any given point.
- Attach the fixture to the underside of the shelf above using the manufacturer's mounting hardware or zip ties through the wire shelf grid
- Set initial height at 14 to 16 inches above canopy for seedlings and cuttings, or 12 to 14 inches for leafy greens
- If running two bar lights side by side, position them so their edges overlap by 2 to 3 inches over the center of the shelf
- Turn on the lights and hold your hand flat at canopy height for 30 seconds — you should feel warmth but no discomfort; if it's hot, raise the fixture
- Use a PPFD meter or Photone app to spot-check intensity at the center and corners of the shelf before you put plants in place
Safe wiring and practical setup details
Electrical safety on a grow shelf is straightforward if you follow a few firm rules. Use a UL-listed power strip with surge protection for your fixtures, and plug it directly into a wall outlet. Do not daisy-chain power strips. Do not use extension cords that are undersized for the load, and inspect any cord or strip for fraying or heat discoloration before trusting it. If your growing area ever gets humid (especially if you're misting cuttings or running a humidity dome), use a GFCI outlet or plug a GFCI adapter between the outlet and your power strip. GFCI protection is the difference between a tripped breaker and a genuine shock hazard.
Route cords so they don't drape across the shelf surface where you're placing plants or watering. Use hook-and-loop cable ties or small binder clips to run cords along the shelf frame. Keep plug connections and the power strip off the shelf surface itself and elevated above floor level where water could pool. Many growers zip-tie the power strip to the back vertical post of the shelf rack, which keeps it off the ground and out of the way.
Plug your timer into the wall outlet first, then plug your power strip or fixture into the timer. Set the timer before you plug in the lights so you know exactly when the cycle will start. Most mechanical timers have a 24-hour dial with 15-minute increment tabs; push down the tabs for the hours you want the light on. Test the setup by manually advancing the timer through a cycle before you walk away from it.
- Use a UL-listed power strip rated for at least 15 amps with surge protection
- Never stack extension cords or plug power strips into each other
- Use GFCI protection anywhere you're watering, misting, or running a humidifier nearby
- Keep power connections elevated off the floor and away from the watering zone
- Route all cords along the shelf frame and secure them with cable ties so nothing hangs loose over plants
Light schedule and timing for different plants
Light schedule is where a lot of beginners get it wrong by either running lights too few hours (plants starve for light) or running them 24/7 (plants can't rest and may show stress depending on species and intensity). The right schedule depends on what you're growing and how bright your fixture is.
The concept behind scheduling is DLI, or daily light integral. DLI is the total amount of light your plants receive in a day, and it's the product of intensity (PPFD) and duration (hours). You can hit a target DLI by running a dimmer fixture for more hours or a brighter fixture for fewer hours. This is useful to understand because if your fixture can't hit 200 µmol·m⁻²·s⁻¹ at your desired mounting height, you can compensate by extending the photoperiod slightly.
| Plant Type | Target PPFD | Photoperiod | Target DLI |
|---|---|---|---|
| Cuttings / clones | 100–200 µmol·m⁻²·s⁻¹ | 18 hrs on / 6 hrs off | 4–10 mol·m⁻²·d⁻¹ |
| Seedlings (general) | 150–200 µmol·m⁻²·s⁻¹ | 16–18 hrs on / 6–8 hrs off | 6–15 mol·m⁻²·d⁻¹ |
| Leafy greens / herbs | 200–280 µmol·m⁻²·s⁻¹ | 16 hrs on / 8 hrs off | 11–15 mol·m⁻²·d⁻¹ |
| Low-light houseplants | 50–150 µmol·m⁻²·s⁻¹ | 12–14 hrs on / 10–12 hrs off | 3–8 mol·m⁻²·d⁻¹ |
| Fruiting plants (tomatoes, peppers) | 400–600 µmol·m⁻²·s⁻¹ | 14–16 hrs on / 8–10 hrs off | 20–30 mol·m⁻²·d⁻¹ |
For seedlings specifically, start at 16 hours on and 8 hours off. This is a widely used baseline and gives young plants a long enough photoperiod to build energy without the risk of continuous light stress. Don't jump straight to full intensity on day one. If your fixture has a dimmer, start at 50 to 60 percent intensity for the first week and ramp up as the seedlings develop their first true leaves.
For cuttings, keep light on the lower end (around 100 µmol·m⁻²·s⁻¹) and run 18 hours on while roots establish, since high intensity before rooting just stresses the cutting. For a grow light setup for vegetables, you can use the same intensity and mounting-height process, then dial the schedule to your plants’ stage.
Running lights 24 hours a day is generally not necessary and can be counterproductive. Some plant species are sensitive to continuous light and will show symptoms like yellowing or leaf curl. Even for plants that tolerate it, the energy savings from giving them 6 to 8 hours of darkness are real, and most plants simply don't need around-the-clock light to thrive under a well-sized fixture.
Dialing in intensity and preventing leggy or bleached plants
Leggy, stretched plants are the most common sign that something is off with your setup, and the cause is almost always not enough light at the canopy level. When a plant doesn't get sufficient intensity, it puts energy into vertical growth (etiolation) trying to reach a brighter zone. You'll see long, thin stems, wide spacing between leaf nodes, and pale coloration. The fix is nearly always moving the light closer, not running it longer.
Bleaching or whitening on the newest growth at the top of the plant is the opposite problem: the light is too intense or too close. LEDs can deliver very high PPFD at close range, and young leaf tissue is especially sensitive. If you see pale or white patches on the uppermost leaves while lower leaves look fine, raise the fixture by 2 to 3 inches and check again in a few days. Bleaching is not the same as yellowing from nutrient deficiency, which typically starts on older, lower leaves first.
Spectrum also plays a role in stretching. Fixtures that are heavily weighted toward red wavelengths with little blue can trigger shade-avoidance responses in some plants, causing them to stretch even at adequate intensity. Full-spectrum LEDs that include a meaningful blue component (around 400 to 500 nm) help keep growth compact. If your plants are stretching despite adequate PPFD, it's worth checking whether your fixture is truly full-spectrum or heavily warm-toned.
To measure intensity without guessing, hold your PPFD meter or phone running the Photone app at the height of the plant canopy with all other lights off. Take readings at the center and at each corner of the shelf. If the center reads 250 µmol·m⁻²·s⁻¹ but the corners read 80 µmol·m⁻²·s⁻¹, you have a coverage issue, not just an intensity issue. Use this data to decide whether you need a wider fixture, a lower mount height, or a second light.
Troubleshooting uneven growth and common setup mistakes
Uneven growth across a shelf, where some plants thrive and others look stunted or stretched, is one of the most frustrating things to diagnose. It almost always comes down to uneven light distribution. Plants near the center of the shelf under the fixture get the most intensity, while plants toward the edges receive far less. The fix is rotating your trays or pots every few days so every plant spends time in the high-intensity center zone. It sounds almost too simple, but it works.
If rotating doesn't fully resolve the issue, you likely have a coverage gap. Map your shelf by measuring PPFD at a grid of points (center, midpoints, corners) and look for where intensity drops below your target. Add a second fixture if you have a large footprint, lower the mounting height to spread coverage, or try repositioning fixtures so their coverage overlaps more evenly. Remember that light follows an inverse-square drop-off with distance, so even a couple of extra inches of mounting height meaningfully reduces intensity at the edges.
Plants bending or leaning toward one side of the shelf usually means the light source is off-center, or one side of the shelf is getting significantly more light than the other. This is phototropism: plants physically grow toward the brighter direction. If you see your whole tray leaning the same way, check whether your fixture is centered over the shelf and whether it's level. Also look for nearby windows contributing uneven ambient light during daytime hours.
Here are the most common setup mistakes and how to address them quickly:
- Lights mounted too high: lower the fixture to 12 to 18 inches above canopy and watch for improvement within a week
- Timer not set correctly: double-check the on/off tabs on mechanical timers, which are easy to bump out of position accidentally
- No timer at all: irregular light schedules confuse plants more than most people expect; use a timer from day one
- Single light covering too large a shelf: one fixture rarely covers a full 2x4 ft shelf at the edges; add a second bar or use a fixture with wider beam angle
- Running lights 24/7: give plants 6 to 8 hours of darkness, especially if you notice leaf curling, tip burn, or slow growth despite adequate intensity
- Watering near exposed electrical connections: reorganize cord routing and elevate your power strip off the floor immediately if this is happening
- Ignoring the ramp-up period for new seedlings: start at lower intensity or higher mounting height for the first week, then gradually move the light closer
One last note: if you're running a budget setup and feeling like nothing is working, resist the urge to immediately buy more gear. Work through the height and timer adjustments first, because those cost nothing and solve the majority of problems. After you dial in height and timing, make sure your budget grow light setup matches the right PPFD and coverage for your plants.
A lot of grow light shelf troubleshooting is just methodically eliminating variables: distance, duration, coverage, and spectrum, in that order. If you're dialing in a grow lamp setup, start with distance, duration, coverage, and spectrum just like you would for a shelf. If you're still stuck, searching “grow light setup reddit” can help you compare real-world shelf builds, timer settings, and common fixes people mention grow light shelf troubleshooting.
Most issues trace back to one of those four things, and fixing them doesn't require new equipment.
FAQ
How do I choose a shelf tier height if my plants will grow taller during the first few weeks?
Pick an initial mounting height that fits your tallest plants by using an adjustment plan, such as mounting lights with hanging cords that let you lower fixtures 2 to 3 inches later. Then start at the lower end of the recommended range (around 12 to 14 inches for many LEDs), and plan a re-check after the first true leaves appear so you do not end up stuck with a fixed-height fixture.
What PPFD do I use when the canopy is uneven, like seedlings in different trays or sizes?
Use the lowest and most stressed canopy height when deciding whether you are meeting the target, because plants at higher positions will bleach first. For practical setup, measure PPFD at the height of the shortest seedlings and again at the tallest ones, then adjust mounting height to protect the top canopy while staying within your target range for the rest.
Can I run one timer for multiple shelf tiers if the plants are at different stages?
Only if the schedules are genuinely similar, for example both tiers are seedlings on the same photoperiod. If one tier is cuttings at a lower intensity or different hour count, use separate timers per tier so you do not have to compromise, because changing photoperiod is often easier than trying to match DLI with intensity alone.
How do I prevent cord and shelf water splashes from becoming an electrical hazard?
Keep the power strip above the shelf surface, route cords along the shelf frame with clips, and avoid any cable routing that crosses where you water. If you mist, spray, or run a humidity dome, use GFCI protection and consider using drip trays below the shelf to keep pooled water away from outlet areas.
My plants look fine in the center but weak at the edges, what should I try first?
First, overlap the coverage between adjacent fixtures (about 2 to 3 inches) and reduce gaps, because shadows create uneven growth. If that is already addressed, lower the mounting height slightly and rotate trays every few days, since distance changes intensity at the edges more dramatically than at the center.
What if my fixture does not publish PPFD charts, how can I tell if it is strong enough?
You can still check, but you need a measurement tool. Use a PPFD meter or a phone app like Photone at canopy height with other lights off, then compare readings against your target range, seedlings or cuttings roughly 100 to 200 and leafy greens roughly 200 to 280 µmol·m⁻²·s⁻¹.
Is it better to extend the photoperiod or increase intensity if I am missing my DLI target?
Prefer adjusting intensity first when possible, because many plants respond better to appropriate intensity with a reasonable dark period. If your fixture cannot reach target PPFD at the safest mounting height, then you can extend duration modestly to reach DLI, but avoid 24/7 schedules since rest periods matter for many species.
How do I dial in light height without repeatedly stressing the plants?
Change height in small steps, about 1 to 2 inches at a time, then re-evaluate after several days. Start with a conservative height to avoid bleaching on tender new growth, and keep notes on day and time so you can connect symptoms like stretching or whitening to the adjustment you made.
Do I need dimmers for a grow light shelf setup?
Not always, but they help if you are propagating or transitioning plant stages. A dimmer makes it easier to ramp intensity during the first week, which reduces shock, especially for seedlings and cuttings that would otherwise be exposed to full output immediately.
Why are my plants stretching even though the lights are at the recommended height?
Check spectrum and beam angle, not just distance. If your fixture has a narrow beam (around 60 degrees or less) or is not truly full-spectrum, parts of the plant may be underexposed even at the right height, and plants can still stretch. Also verify the fixture is level and centered, since a shift can create a dim zone across part of the tray.
Next Article
Grow Light Setup for Vegetables: Step-by-Step Guide
Step-by-step grow light setup for vegetables: choose LEDs, hang height, spacing, schedules, and troubleshoot light stres