Set your Koscheal LED grow light 18 to 24 inches above your plant canopy, plug it into a standard outlet, flip the Veg/Bloom switch to match your growth stage, and run it 18 to 24 hours a day for vegetables or 12 to 16 hours for flowering. That gets you operational in under 10 minutes. The rest of this guide fills in everything else: model identification, mounting, wiring, scheduling, and what to do when something looks off. After you get the Koscheal light running, the same general mounting, wiring, and scheduling steps also apply when you are installing Barrina LED grow lights install Barrina LED grow lights.
Koscheal Grow Light Instructions: Setup, Height, Timing

Marcus Tillman
1 May 2026
Identify Your Koscheal Model and What Comes in the Box
Koscheal makes several grow light models, and the setup details can vary between them. The most widely documented is the KS-S (item model number: KS-S), a 1200W LED panel that puts out around 2,400 lumens and uses a remote control. Before you do anything else, flip the unit over or check the box and locate the model number. It will usually be printed on a sticker on the back of the fixture or on the packaging label.
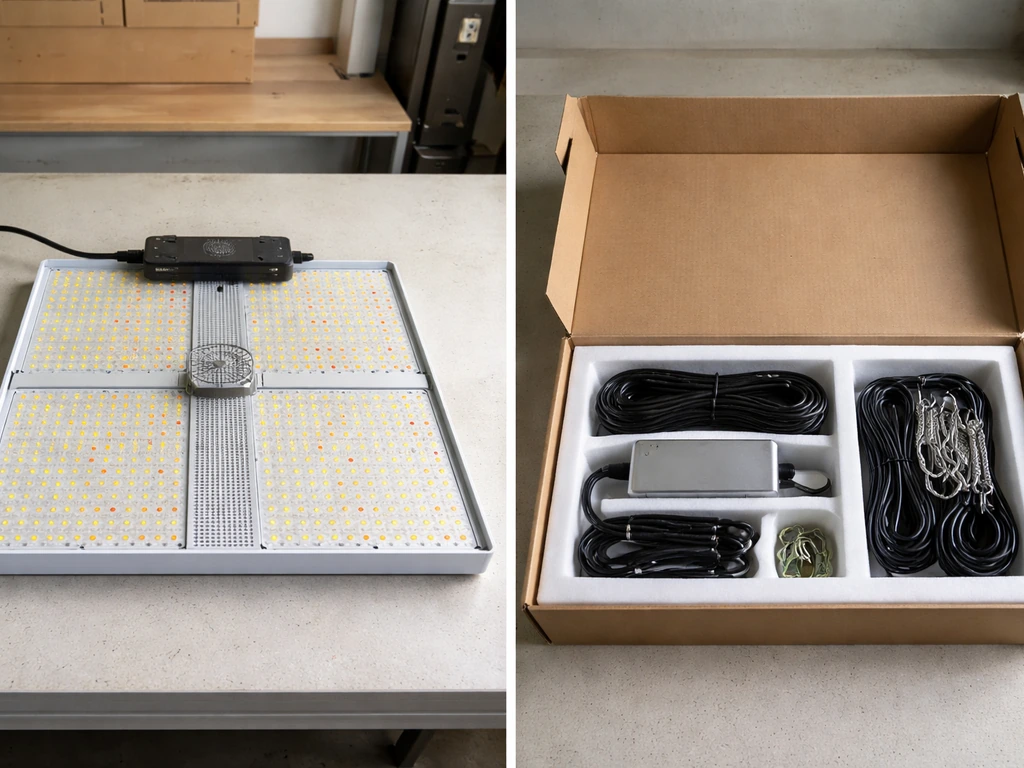
Once you know your model, check what came in the box. A standard Koscheal KS-S kit typically includes the grow light panel itself, a hanging kit (steel wire hangers or ratchet rope hangers), a power cord, a remote control, and a user manual. Some kits also include a daisy-chain connector cable for linking multiple units side by side. If anything is missing or the remote has no battery, sort that out before mounting the light, because testing the remote is part of the initial setup check.
Mounting, Hanging, and Positioning
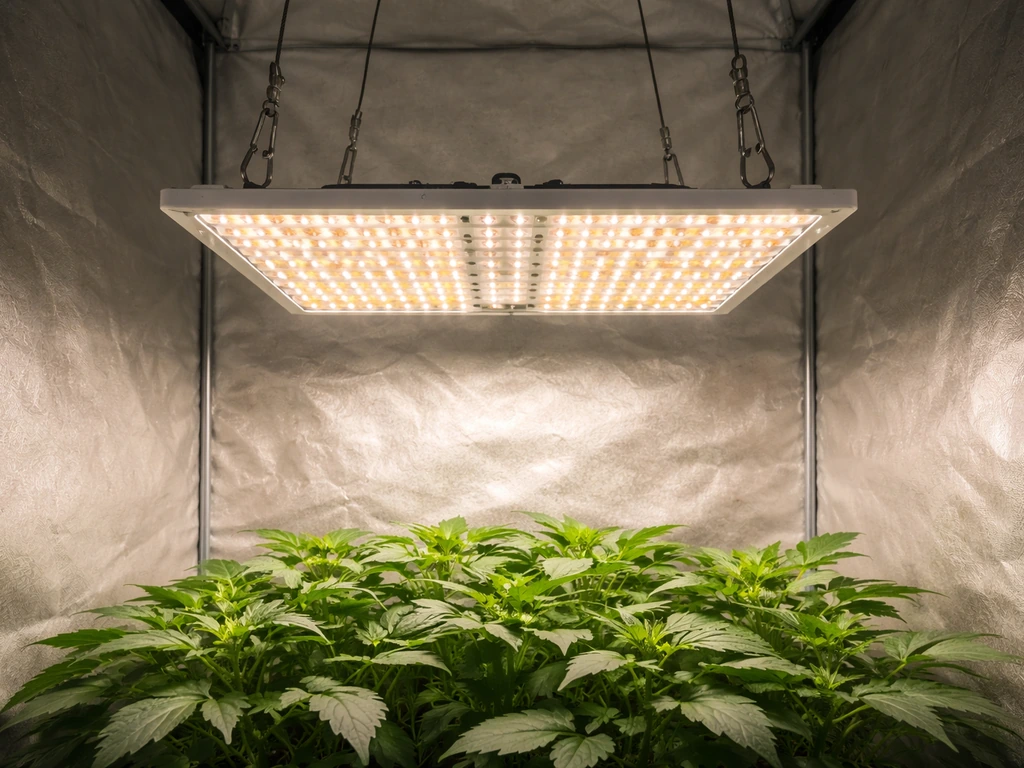
Pick your mounting location first. You need a solid, secure anchor point directly above your growing area. A grow tent crossbar, a ceiling hook rated for at least 10 lbs, or a sturdy shelf bracket all work. Avoid anything that flexes or shifts, because an unstable light that drifts sideways will create hotspots and uneven coverage.
The KS-S is designed to cover a 3x3 foot area during the vegetative stage and a 2x2 foot area during bloom. Position the light centered over your canopy so coverage is even across all your plants. If you are running multiple units, use the included daisy-chain connectors to link them and maintain even spacing between fixtures.
- Attach the hanging hooks or ratchet hangers to your anchor point before connecting them to the light.
- Clip or thread the hangers through the light's corner mounting holes.
- Raise the light to approximately 24 inches above the current canopy height as a starting point.
- Use a tape measure, not your eye, to confirm the distance. Eyeballing it usually means plants end up too close or too far.
- Check that the light hangs level. A tilted panel sends more light to one side of your canopy.
- Make sure the power cord can reach the outlet without being pulled taut. A cable under tension is a safety issue.
Wiring and Power Setup

The Koscheal KS-S plugs into a standard 90V AC power outlet, so no special wiring or external driver is required for a single unit. In the KS1200/KS-series manual listing, the specifications section lists the model input voltage as 100-240V AC Specifications section stating input voltage for the model (listed as 100-240V AC). That said, there are a few things worth getting right before you flip the switch.
First, inspect every cable and connector before plugging in. The manual explicitly calls this out: check that all connectors are firmly seated and that no cable is frayed, kinked, or pinched by the fixture. A loose connector is the most common cause of flickering and intermittent power issues.
If you are daisy-chaining multiple Koscheal lights, connect the daisy-chain cables between units before plugging the lead unit into the wall. All the connections should be secure and the cable runs should not cross a walkway or hang where they can be tripped over.
Adding a programmable timer is strongly recommended. A mechanical or digital outlet timer (look for one rated at 15 amps or higher) lets you automate the on/off cycle so your plants get consistent light periods without you having to remember to switch things manually. Plug the timer into the wall, then plug the Koscheal power cord into the timer. Set the timer before your first full run.
Two safety rules the manual is firm about: keep the installation area dry (no water splashed near the outlet or connector ends), and keep the light away from combustible materials. A grow tent is generally fine, but don't position the fixture directly against fabric walls or above a pile of dry growing medium.
Light Distance and Intensity by Growth Stage
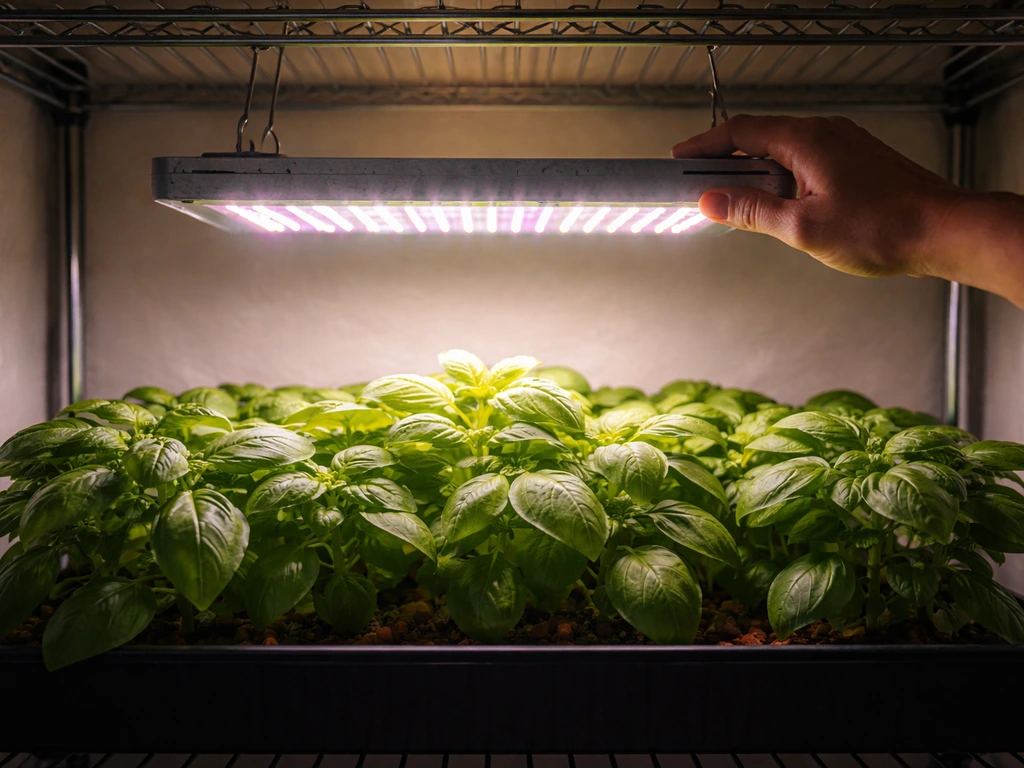
The height you hang your Koscheal light is the single biggest variable in whether your plants thrive or struggle. Too close and you get light burn and bleaching. Too far and plants stretch, get leggy, and produce less. The manual's baseline is 18 to 24 inches from the light to the canopy, but where in that range you land depends on the growth stage.
| Growth Stage | Recommended Height Above Canopy | Veg/Bloom Switch Setting | Coverage Area |
|---|---|---|---|
| Seedlings / Clones | 24 inches (start here, adjust down gradually) | Veg | 3x3 ft |
| Vegetative Growth | 18 to 24 inches | Veg | 3x3 ft |
| Flowering / Bloom | 18 to 20 inches | Bloom | 2x2 ft |
The KS-S has a dedicated Veg/Bloom switch that changes the light spectrum to match what your plants need at each stage. Flip it to Veg during seedling and vegetative growth for a spectrum weighted toward blue, which drives leafy, compact development. Switch it to Bloom when your plants transition to flowering for a spectrum shifted toward red, which supports bud development and fruit set. This is one of the most overlooked controls on the unit, but it genuinely makes a difference.
If you are using the dimmer function via the remote control, start seedlings at 50 to 60 percent intensity and ramp up to full power over the first week or two. Mature plants in veg or bloom can handle full intensity at the correct height.
Daily Schedule and Timing

Plants need a consistent light cycle, and the hours matter. Garland grow light garden instructions follow the same fundamentals of correct light height, proper spectrum settings, and a steady daily schedule. The Koscheal KS-S manual is specific about this: run 18 to 24 hours of light per day during vegetative growth, and switch to 12 to 16 hours during bloom. If you are growing plants that flower based on photoperiod (like cannabis, certain herbs, or specific fruiting vegetables), the 12-hour bloom schedule triggers and maintains the flowering stage.
| Growth Phase | Daily Light Hours | Daily Dark Hours |
|---|---|---|
| Seedlings | 18 hours on / 6 hours off | 6 hours |
| Vegetative | 18 to 24 hours on | 0 to 6 hours |
| Flowering / Bloom | 12 hours on / 12 hours off | 12 hours |
For most herbs, leafy greens, and non-photoperiod vegetables, 16 to 18 hours of light per day is a practical sweet spot that keeps electricity costs reasonable without sacrificing growth speed. Running the light 24 hours a day is technically within spec for the KS-S, but most plants benefit from at least a short dark period for respiration and stress recovery. If you want more detailed help, follow the bseah grow light instructions for setup, mounting, and scheduling.
When you first set up the light, ramp into the full schedule rather than jumping straight to 18 or 24 hours. Start at 12 hours for the first three days, then increase by 2 hours every two to three days until you reach your target. This is especially important for seedlings and young transplants, which can be stressed by immediate full-intensity, long-duration exposure.
Quick-Start Calibration Using Plant Response
After your first two to three days of operation, your plants will tell you if something needs adjusting. This is the easiest calibration method available, and it is more reliable than any light meter for diagnosing basic setup problems.
Also run the manual's recommended power-on check: once the light is mounted and plugged in, point the remote at the unit and test each button. The KS-S remote should control on/off, dimming, and the timer function. The Koscheal KS-S user manual also notes that you can control key settings from the remote, including intensity and Veg/Bloom spectrum-related options KS-S remote should control on/off, dimming, and the timer function. If the remote does not respond, check the battery first, then ensure you are within about 10 feet of the sensor on the light. Confirm the unit is running smoothly and that the light level reaching your plants looks even across the canopy.
- Stretching or legginess (long gaps between leaf nodes): the light is too far away or intensity is too low. Lower the fixture by 2 to 3 inches or increase dimmer output.
- Leaf curling upward or pale/yellowed new growth at the top of the canopy: the light is too close or intensity is too high. Raise the fixture by 2 to 3 inches.
- Brown or bleached spots on upper leaves: light burn from being too close. Raise immediately by at least 4 inches.
- Outer plants growing faster than center plants: coverage is uneven. Re-center the light or adjust the height to widen the beam spread.
- Slow overall growth with no visible stress symptoms: check that the Veg/Bloom switch is set correctly for the current stage and that your daily light hours are on target.
Troubleshooting Common Koscheal Grow Light Issues
Dim or No Light Output
If the light powers on but output seems much lower than expected, check the dimmer setting via the remote. The KS-S can be dimmed down significantly, and it is easy to leave it at a low setting without realizing it. Bring it to 100 percent and see if output improves. If the unit is at full power and still looks dim, check whether the outlet itself is functioning (plug in something else to confirm), and inspect the power cord and connectors for damage.
Flickering
Flickering almost always comes down to a loose connection. Unplug the unit, reseat every connector including the daisy-chain cables if you are using them, and plug back in. If flickering continues, try a different outlet. Persistent flickering with a secure connection can indicate a failing driver component, at which point you should contact Koscheal support.
Hotspots and Uneven Coverage
Hotspots (some plants getting intense light while others look underlit) usually mean the fixture is too close to the canopy or not centered properly. Raise the light a few inches and re-center it over the growing area. The KS-S has a narrower effective bloom coverage (2x2 ft) than veg coverage (3x3 ft), so if you are in bloom mode and running plants across a larger footprint, plants at the edges will receive less light. Either bring the plants closer together or add a second unit. If you are using a lighthouse 2.0 grow tent, these same spacing and positioning principles help you dial in uniform light coverage.
Overheating
The KS-S includes cooling fans. If the fixture feels excessively hot to the touch or you notice heat stress in the top of your canopy despite correct distance, check that the fans are actually spinning. You should be able to hear them and feel airflow from the top of the unit. Make sure the area around the light has adequate air circulation, meaning the light is not crammed into a sealed space with no room for heat to escape. A small clip fan in your grow tent improves both plant health and light longevity.
Remote Not Working
Replace the battery first. Then stand within 10 feet of the unit with a clear line of sight to the sensor. If the remote still does not respond, try pointing it directly at the sensor window on the fixture and pressing each button slowly. Some users find the sensor is more responsive from a slightly lower angle rather than pointing straight at the face of the panel.
Maintenance and Safety Over Time
LED grow lights require very little ongoing maintenance, but a few small habits keep them running well for their full lifespan. The Koscheal KS-S manual recommends wiping down the light surface with a soft, dry cloth every one to two weeks. Dust buildup on the lens and heat sink reduces light output and traps heat, both of which hurt performance over time. Never use water or cleaning spray directly on the fixture.
Every month or so, do a quick connection check. Unplug the unit, inspect all connectors and the power cord for any signs of wear, fraying, or discoloration (discoloration near a connector usually means heat from a loose or corroded connection). Reseat any connectors that feel loose. Check that your timer is still cycling correctly by observing one full on/off transition.
LED grow lights generally last significantly longer than HID or fluorescent options, but output does degrade gradually over years of use. If your plants start stretching or slowing down with no other obvious cause after an extended period, reduced LED output from aging diodes may be worth considering. Good quality LED panels like the KS-S are typically rated for tens of thousands of hours of operation, so this is a long-term consideration rather than something to worry about in the first year or two.
- Wipe the fixture with a dry cloth every one to two weeks.
- Keep the installation area dry at all times. No misting near the light.
- Confirm the cooling fans are spinning every time you do a visual check.
- Keep the light away from grow tent walls, reflective tarps, and any combustible materials.
- Never modify the power cord or open the fixture housing.
- Use a timer rated for at least 15 amps to avoid overloading it.
- If anything smells like burning plastic or the fixture gets too hot to briefly touch, unplug it immediately and do not use it again until you have identified the cause.
Your Next Steps Checklist
Before you walk away from your setup, run through this checklist to confirm everything is dialed in correctly. It takes about five minutes and saves a lot of troubleshooting later.
- Model confirmed: check the sticker on the back of your fixture for the model number (KS-S or otherwise).
- All components are in the box: light, hangers, power cord, remote, and daisy-chain cable if applicable.
- Light is mounted securely and hanging level over the center of your growing area.
- Height is set to 24 inches above canopy for seedlings, 18 to 24 inches for veg and bloom.
- Veg/Bloom switch is set to match your current growth stage.
- Power cord is plugged into a 90V AC outlet (or into a timer, then into the outlet).
- All connectors are firmly seated and no cable is frayed or under tension.
- Remote control has been tested and the unit responds correctly.
- Timer is programmed for 18 hours on / 6 hours off (veg) or 12 hours on / 12 hours off (bloom).
- Fans are audible and airflow is felt from the top of the unit.
- You have a plan to check plant response in 48 to 72 hours and adjust height or intensity if needed.
If you found this setup process straightforward, the same core approach applies to other brands covered on this site. Barrina LED bars, Bionic fixtures, and other panel-style grow lights follow similar mounting and scheduling logic, even when the specific controls differ. The principles of height, spectrum, and timing stay consistent no matter which brand you are working with.
FAQ
Can I leave my Koscheal grow light on 24 hours a day, and will it hurt plants?
You can run 24 hours, it is within the KS-S guidance, but many plants do better with a daily dark window. If you see stress signs like slow growth, leaf tip burn, or droop during the hottest part of the day, switch to a shorter schedule (for example 18 hours) before changing height or spectrum.
What should I do if my seedlings look stretched even though the light is at the recommended 18 to 24 inch height?
First confirm the Veg/Bloom switch is on Veg, and make sure the remote dimmer is at 100 percent. Stretched seedlings often happen when intensity is accidentally lowered or the timer cycle is shorter than expected, so verify the timer is actually turning the light on for your full intended window.
How do I know if I have the light centered correctly over my canopy?
Do a simple uniformity check after 1 to 3 days: rotate or reposition plants at the edges and observe whether some areas consistently look lighter or show bleaching sooner. If hotspots persist at one side only, re-center the fixture and ensure the hanging kit is not twisted or uneven.
Is it safe to run the Koscheal grow light inside a grow tent, and where should the power outlet be?
Yes, a tent is generally fine if the area stays dry and you do not route the cord directly against combustible tent surfaces. Keep the outlet and any connector ends outside splash zones, and avoid placing the cord where it can be kinked by door movement or plant contact.
Can I connect multiple Koscheal units together, and what’s the safest way to daisy-chain?
If your kit includes daisy-chain cables, connect units together before plugging the first unit into the wall through your timer. Keep cable runs clear of walkways and make sure each connector fully seats, because partial seating is a common cause of flicker and intermittent output.
My timer is set, but the light sometimes turns off early. What are the usual causes?
Most issues come from the timer settings not actually matching the current day and time, or from using a timer rated too low for the load. Confirm the outlet timer rating is 15 amps or higher, then test by watching one full on and off cycle with the light on a single day.
What’s the difference between the Veg/Bloom switch and the remote dimmer, and which should I change first?
Veg/Bloom changes spectrum, dimmer changes intensity. If plants look stressed or have bleaching, adjust height first and then lower intensity temporarily. If plants look slow or overly compact in the wrong stage, switch spectrum (Veg for vegetative, Bloom for flowering) before you permanently change intensity.
Should I adjust height gradually or all at once if I change from Veg to Bloom?
Adjust gradually if you are within the 18 to 24 inch range. A sudden change plus a spectrum shift can confuse new growth, so consider moving the fixture a few inches and re-checking plant response over 2 to 3 days, rather than making large jumps immediately.
How can I prevent hotspots at the edges when I’m in Bloom mode?
Bloom coverage is smaller than Veg, so edge plants may under-receive light. Either move plants closer to the center footprint, reduce the number of plants per unit footprint, or add a second unit rather than just lowering the light further.
What should I check if the light feels hot even though the fans appear to be working?
Verify airflow around the fixture, the light should not be wedged into a sealed or crowded area. If the top of the canopy shows heat stress, improve ventilation with a small clip fan and check that the fixture is not touching tent fabric or a surface that traps heat.
My remote won’t control the light. What’s the best troubleshooting order?
First replace the remote battery, then stand within about 10 feet with line of sight to the sensor window. If it still fails, point the remote more directly at the sensor and press slowly, then confirm the light is not dimmed or in a state that seems unresponsive due to a low intensity setting.
Is dust cleaning required, and how do I do it without damaging the light?
Wipe the fixture surface with a soft dry cloth every 1 to 2 weeks, especially around the lens area where dust accumulates. Do not use water, sprays, or wet cloths on the unit, and wait for the fixture to cool fully before cleaning.
Next Article
Barrina Grow Light Instructions: Setup, Placement, and Timing
Step-by-step Barrina grow light setup with placement, timing, settings, and troubleshooting for seedlings to houseplants