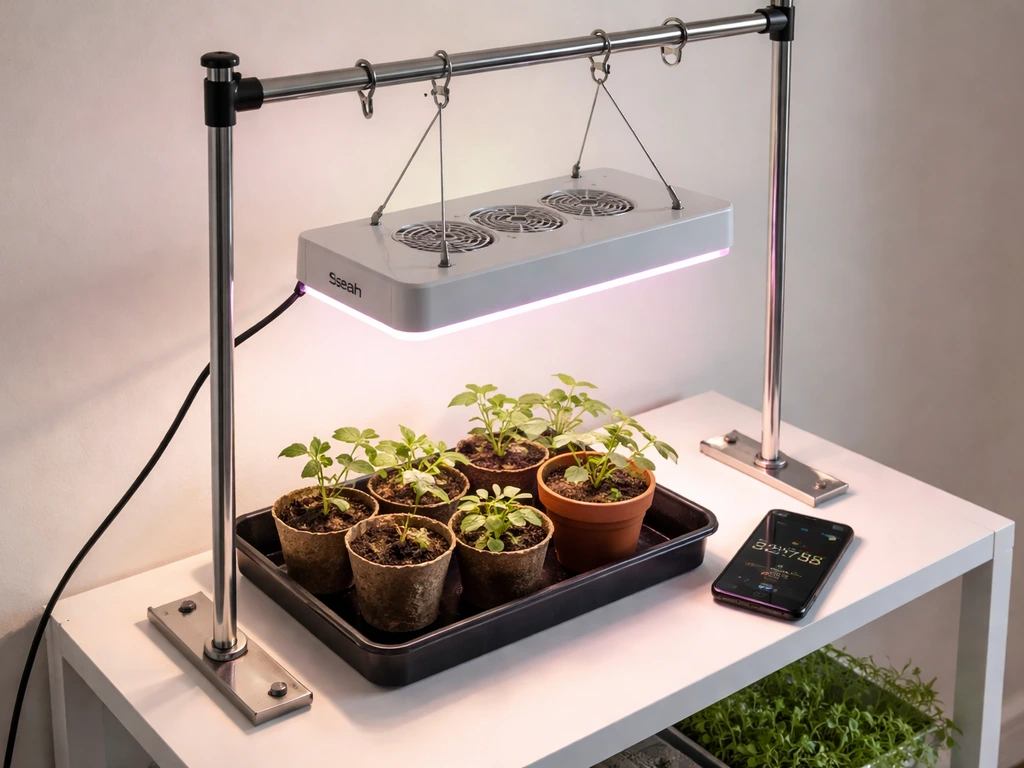
The Bell + Howell Bionic Grow Light is a compact, USB-powered, multi-head LED fixture designed for indoor plants on desks, shelves, and windowsills. If you just pulled it out of the box and aren't sure where to start, this guide walks you through every step: assembly, mounting, powering it on, setting your schedule, dialing in the right intensity, and placing it correctly for the plants you're actually growing.
Bionic Grow Light Instructions: Setup, Mounting, and Dial-In

Marcus Tillman
18 Apr 2026
What the Bionic Grow Light kit actually includes (and a safety note)
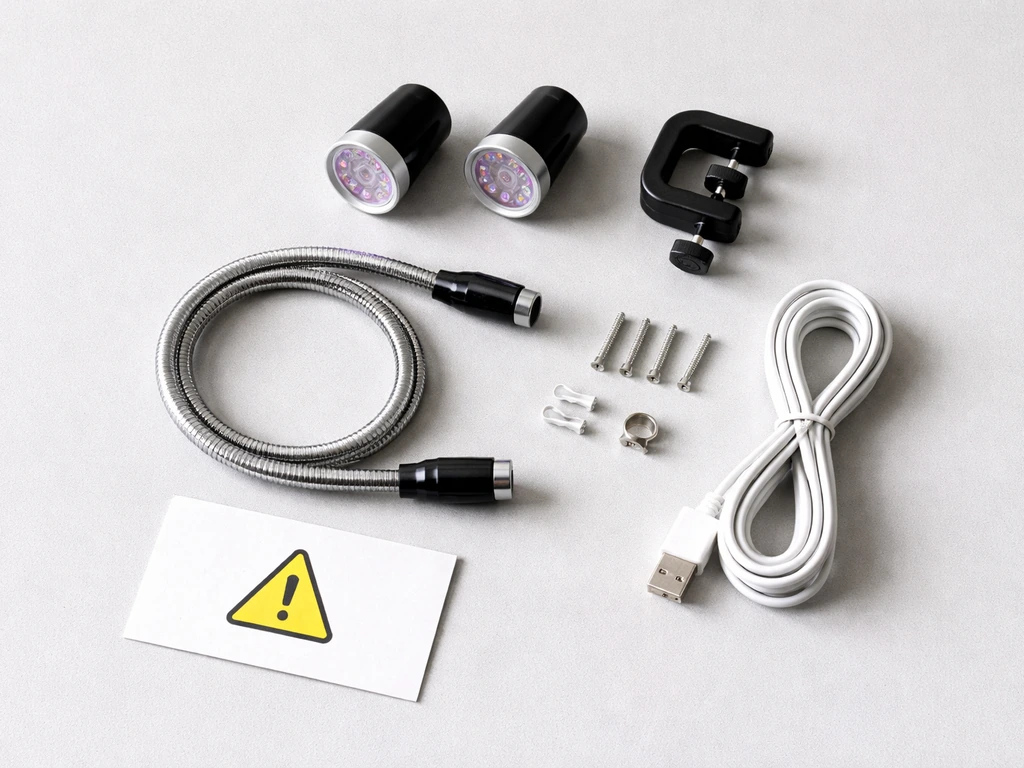
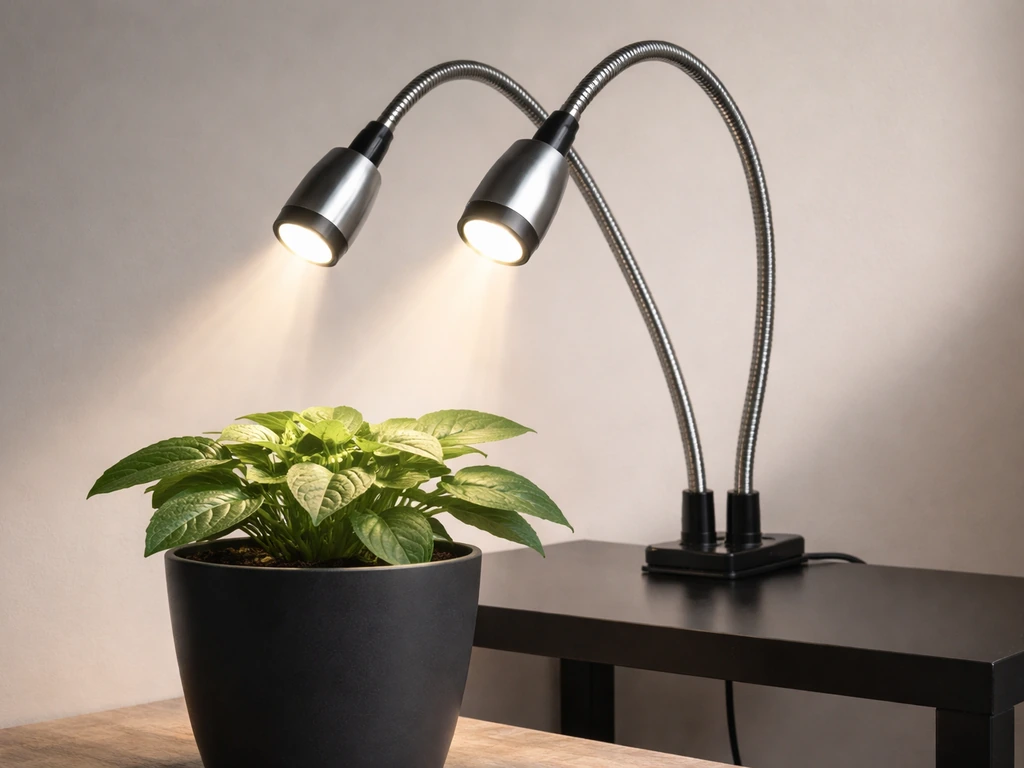
The main product you're likely working with is the Bell + Howell SKU 8573 (also sold as model 8717 or 8718 depending on the retailer). It's a flexible gooseneck LED lamp with 2, 3, or 4 adjustable light heads depending on which version you bought. The arm is about 15 inches long with a control unit in the middle. Before you do anything else, lay everything out and confirm you have what's in the box.
- LED grow light fixture with flexible gooseneck arm (15" approximate length)
- Clip-on base that squeezes onto a table or shelf edge
- Mounting bracket with 4 screws for permanent surface mounting
- USB power cable (a 5V 2A USB power adapter is NOT included — you need to supply your own)
- Instruction sheet
The one thing that catches people off guard: the Bionic Grow Light is USB-powered, not plug-in. That means you need either a USB port (a laptop or computer works fine) or a USB wall adapter rated at DC 5V 2A. Using an underpowered adapter, like a cheap 0.5A phone charger left in a drawer, is the number one reason people think the light isn't working when it actually just isn't getting enough power. Get a proper 5V 2A adapter before you start.
Safety-wise, this is a low-voltage, low-wattage LED (around 9 watts equivalent), so it's much safer to handle than high-powered grow lights. Still: keep the connection point dry, don't run the USB cable under rugs or pinched in doorways, and don't leave it running unattended for the first day or two until you're confident everything is working correctly.
Step-by-step installation: mounting, assembly, and powering on
The Bionic Grow Light gives you three ways to mount it. Pick the one that fits your space, then connect power. If you’re specifically looking at Barrina LED grow lights, the install steps are similar but you’ll also want to mount the bar correctly and confirm the right power and spacing for your setup. Here's how each method works.
Method 1: Clip-on (fastest, most flexible)
Squeeze the clip base open and attach it to the edge of a table, shelf, or pot rim. This is the easiest method and the one most people use. The clip holds firmly on surfaces up to about an inch thick. Once clipped, bend the gooseneck so the light heads point directly down at your plants.
Method 2: Tabletop stand (for portability)
Insert the base into the included mounting bracket and set it on any flat surface. No tools needed. This works well if you're moving the light between plants or don't want to attach anything permanently. Just make sure the base is stable and the gooseneck isn't top-heavy and prone to tipping.
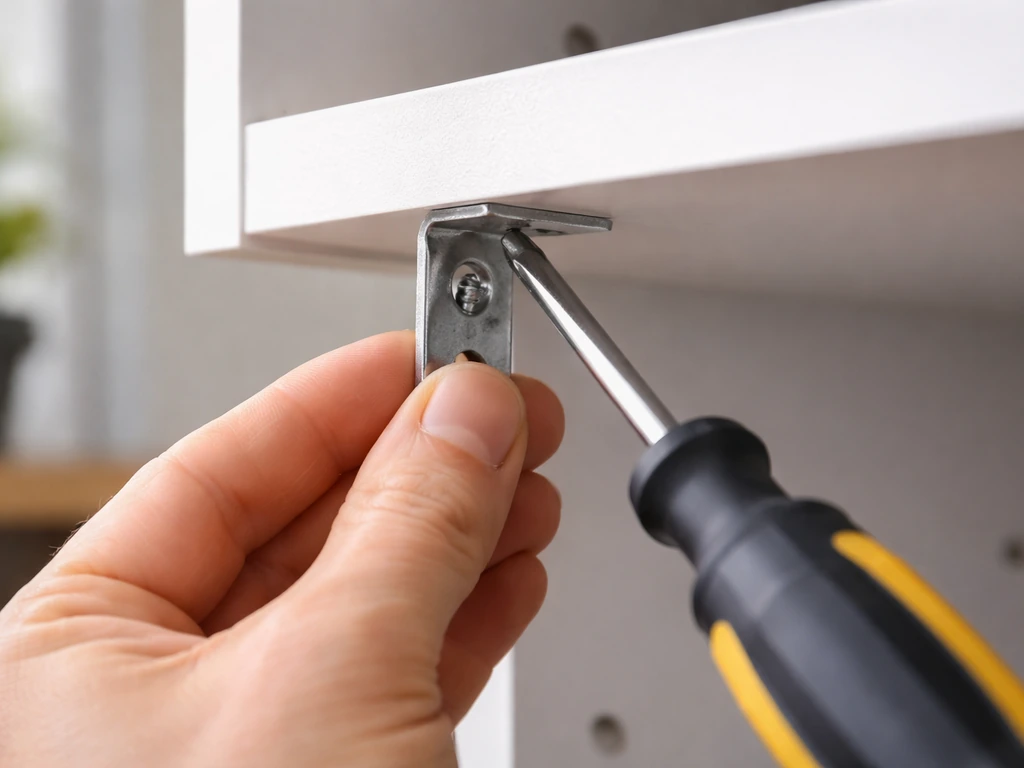
Method 3: Screw-mount (permanent, most secure)
Use the 4 included screws to attach the mounting bracket directly to a wall, shelf underside, or grow cabinet. Mark your four screw holes, drill if needed for harder surfaces, and fasten the bracket. Then attach the light base to the bracket. This is the most stable option for a dedicated grow space and lets you route the USB cable neatly along the surface.
Connecting power and turning it on
- Connect the USB cable from the light to your 5V 2A USB wall adapter (or a computer USB port as a temporary option).
- Plug the adapter into a standard wall outlet.
- Press and hold the POWER button for 2 full seconds. The light heads should illuminate.
- If nothing happens, double-check your adapter rating and try a different USB port or adapter before assuming the light is faulty.
One important behavior to know upfront: every time you unplug the light or press and hold the power button to turn it off, all your previous settings (brightness, color mode, timer) get reset. You will need to re-enter them each session unless the built-in timer is active and repeating (more on that below).
How to position the light over your plants
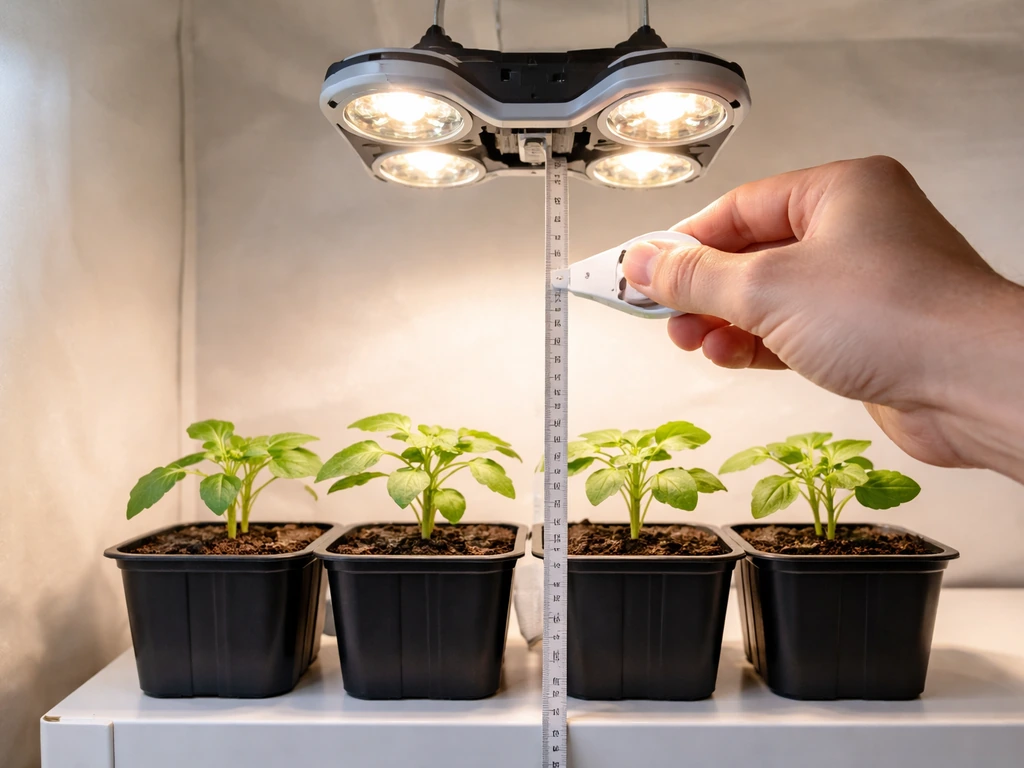
Distance from the plant canopy matters more than most beginners expect. Too far and your plants stretch toward the light (etiolation). Too close and you risk bleaching leaves or creating hot spots. The Bionic Grow Light is a compact LED, so it's forgiving, but you still need to get this right.
| Plant type | Recommended height above canopy | Light mode to use |
|---|---|---|
| Seedlings / cuttings | 4–6 inches | Blue or full spectrum (mixed) |
| Leafy houseplants / vegetative growth | 6–12 inches | Blue or full spectrum (mixed) |
| Flowering plants / fruiting stage | 6–10 inches | Red or full spectrum (mixed) |
| Succulents / cacti | 8–14 inches | Full spectrum (mixed) |
The gooseneck arm gives you about 15 inches of reach, so bend it to put the light heads at the right height over your plant's top leaves. If you have the 3 or 4-head version, spread the heads so they cover the full canopy rather than pointing them all at one spot. Rotate your pot every few days if coverage seems uneven.
A quick test for distance: hold your hand at canopy level for 30 seconds. If you feel noticeable warmth, raise the light. If your hand barely registers the light, bring it closer. This simple check works for any small LED fixture like this one.
Programming the timer, choosing a schedule, and adjusting brightness
The control panel on the Bionic Grow Light (8573/8717) has four main controls: POWER, COLOR, TIMER, and brightness +/-. Here's exactly how to use each one.
Selecting how many heads to run
After turning the light on with a 2-second hold on POWER, tap the POWER button (short tap, don't hold) to cycle through how many heads are active: 3 heads, 2 heads, or 1 head. Use all heads for maximum coverage, or reduce to 1 or 2 for smaller pots or seedlings that don't need full intensity yet.
Choosing your light color mode
Press the COLOR button to cycle through three modes: blue light, red light, and mixed (full spectrum UV). Blue is best for vegetative growth (leafy plants, seedlings, anything you want to grow bushy and compact). Red is best for encouraging flowering and fruiting. Mixed/full spectrum is a good default if you're not sure, and works well for most houseplants all season long.
Setting brightness
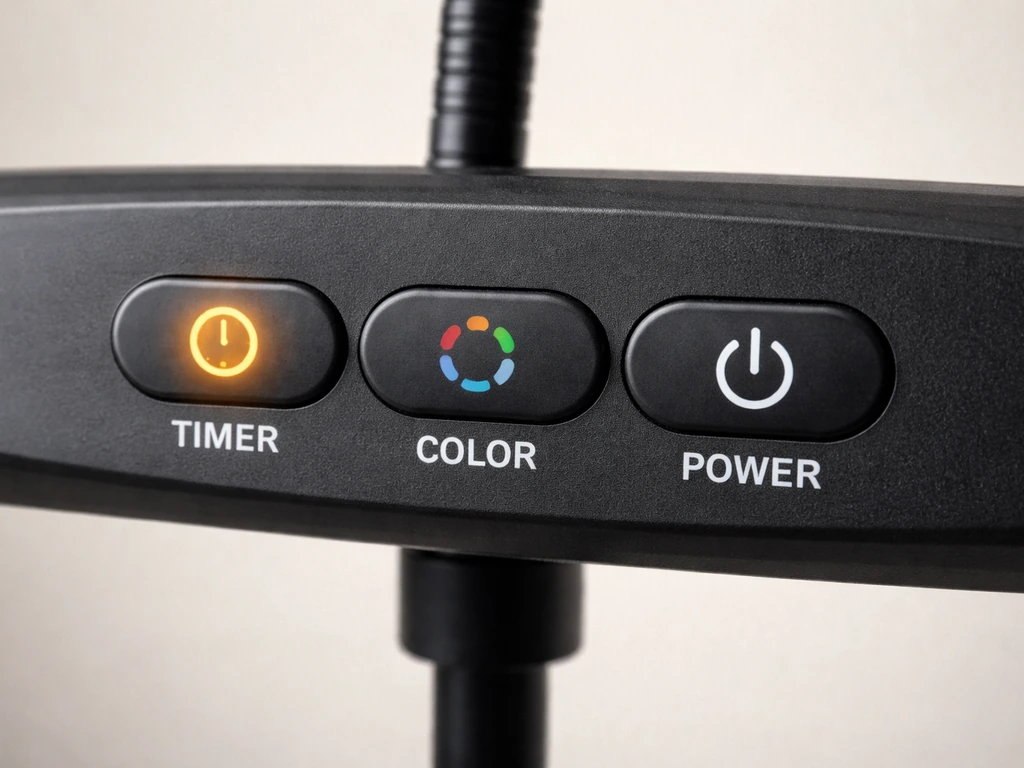
Use the – and + buttons to move through 8 brightness levels. Start at 50% (around level 4) for most plants and adjust up or down based on plant response over the next week. Seedlings and low-light plants like pothos or peace lilies do fine at 30–50%. Sun-loving herbs and flowering plants can handle 70–100%.
Setting the built-in timer
With the light on, press the TIMER button once for a 3-hour cycle, again for 6 hours, and a third time for 9 hours. A small indicator light confirms which setting is active. Once set, the timer will automatically turn the light on and off at the same times every day, as long as the unit stays plugged in and the timer indicator light remains on. For example: if you press the 6-hour timer at 10 AM, the light turns off at 4 PM, then turns back on at 10 AM the next morning automatically.
The key detail here: if you unplug the light or power it off completely, the timer resets. If you're relying on the auto-repeat schedule, leave it plugged in and let the timer do the work rather than manually turning it off at night.
Recommended daily schedules by plant type
| Plant type | Daily light hours | Timer setting to use | Notes |
|---|---|---|---|
| Seedlings | 14–16 hours | Use 9H timer twice, or supplement with a plug-in timer | Keep at lower brightness to start |
| Leafy houseplants | 10–12 hours | 9H timer once + supplement | Mixed or blue mode works well |
| Herbs (basil, cilantro, etc.) | 12–14 hours | 9H + manual or external timer for extra hours | Full spectrum recommended |
| Flowering plants | 8–10 hours | 9H or 6H depending on stage | Switch to red mode at flower initiation |
| Succulents / cacti | 8–10 hours | 9H or 6H | Full spectrum, higher placement |
If you need more than 9 hours of daily light, the built-in timer tops out at 9 hours per cycle. For longer schedules, plug the USB adapter into a cheap mechanical outlet timer (available for a few dollars) set to your desired total duration, and leave the Bionic's own timer off.
Getting the setup right for your specific plants
Seedlings
Seedlings need more light hours than most people give them, but at lower intensity. Position the heads 4–6 inches above the tray, use blue or full spectrum mode, set brightness to level 3 or 4 out of 8, and aim for 14–16 hours per day. Watch for stretching (stems getting long and weak between nodes) as a sign the light is too dim or too far away. Compact, stocky seedlings mean you've got it right.
Leafy houseplants
For pothos, ferns, snake plants, peace lilies, and similar houseplants, the Bionic Grow Light is genuinely well-suited. Position it 8–12 inches above the foliage, use mixed or blue mode, run it 10–12 hours per day, and start at mid-brightness. These plants aren't demanding, so the 9-watt equivalent output is enough for maintenance and modest growth.
Flowering plants
For plants you want to push into bloom (African violets, orchids, small fruiting plants), switch to red mode or full spectrum and drop the height to 6–10 inches above the canopy. Run 8–10 hours per day consistently. Irregular light schedules confuse flowering plants more than they confuse leafy ones, so set your timer and leave it alone.
Troubleshooting: what to check when things go wrong
Light won't turn on
This is almost always a power issue. First, confirm you're holding the POWER button for a full 2 seconds (not just tapping it). Then check your USB adapter: blank" rel="noopener noreferrer">it must be rated at DC 5V 2A. For additional bseah grow light instructions, also review the setup, timer settings, and distance tips in the guide above. For more general grow light setup tips beyond this model, see the koscheal grow light instructions. If you are setting up a grow tent, follow the lighthouse 2.0 grow tent instructions for placement and timing in an enclosed space. If you want broader tower garden setup help, follow the tower garden LED grow lights instructions for placement and timing. A 5V 1A or 5V 0.5A adapter may not provide enough power to turn all the heads on. Try plugging into a laptop USB port to rule out the adapter, then swap adapters if needed. Also check that the USB cable is fully seated at both ends.
Light is flickering or dimmer than expected
Flickering almost always points to insufficient power supply. Confirm your adapter is rated 5V 2A. Also check that no other high-draw devices are sharing the same USB hub. If you're running all 3 or 4 heads at full brightness, you're at the edge of the power draw for lower-rated adapters. Try reducing active heads to 2 or dropping brightness a level or two to stabilize it, then upgrade your adapter.
Timer doesn't seem to be working
The most common mistake: people press TIMER but the indicator light doesn't come on, so the timer isn't actually set. Confirm the small timer indicator light is lit after you press the TIMER button. If the indicator is off, press TIMER again until you see the corresponding indicator (3H, 6H, or 9H) illuminated. Also remember that unplugging the unit or pressing and holding POWER resets everything, including the timer.
Plants aren't growing or look weak under the light
Run through this quick checklist: Is the light close enough (within 4–12 inches of the canopy depending on plant type)? For more general garland grow light garden instructions, review the setup basics and adjust the distance and schedule to match your plants. Are you running it long enough per day (seedlings need 14–16 hours, most others need at least 10)? Are you using the right color mode (blue for leafy, red for flowering)? Is brightness set above 50%? If you've checked all four and growth is still weak after two weeks, the Bionic Grow Light may simply be undersized for the plant you're trying to grow. High-light plants like full-sun herbs or fruiting vegetables really need a stronger fixture.
Leaves are yellowing, bleaching, or showing brown tips
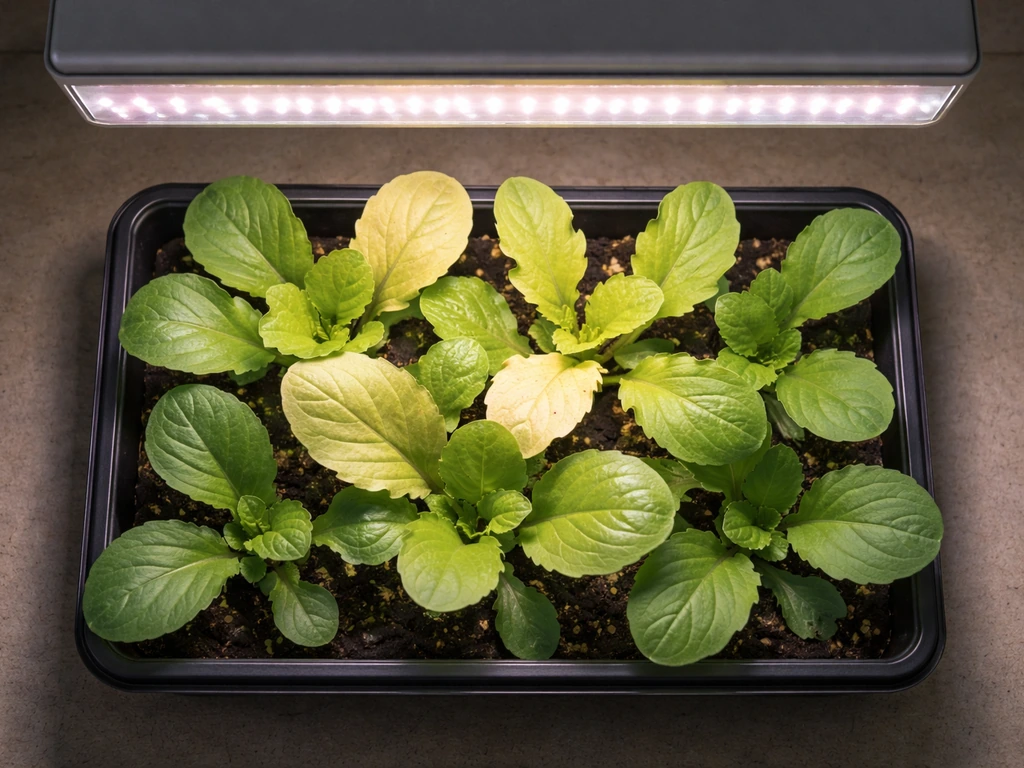
If leaves directly under the light are pale, washed out, or developing brown tips, the light is too close or intensity is too high. Raise the fixture 2–3 inches and/or drop brightness one or two levels. Give the plant a week to recover before making further adjustments. Bleaching near the light source while lower leaves look fine is a clear sign of too-close placement, not a watering or nutrient problem.
Coverage seems uneven across a wider tray
The Bionic Grow Light is designed for single pots or small clusters, not wide trays. If you're covering a 12-inch or wider planting area, spread the individual heads apart as much as the gooseneck allows, and raise the fixture so the light spreads more broadly (higher placement = wider coverage but lower intensity). Rotate pots 180 degrees every few days. For wide seed trays or multiple plants across a shelf, consider a dedicated bar-style LED fixture instead.
Quick-start checklist and your first fine-tuning plan
Use this as your day-one checklist to get plants under light fast, then follow the fine-tuning steps over the first two weeks. If you need the exact step-by-step approach beyond this model, see these barrina grow light instructions as a related setup comparison fine-tuning plan. If you're using a different model such as a Purple Reign grow light, follow the purple reign grow light instructions for the right height, color mode, and timer setup.
Day-one setup checklist
- Confirm USB adapter is rated 5V 2A.
- Choose your mounting method (clip, tabletop stand, or screw mount) and secure the fixture.
- Bend the gooseneck so light heads are 6–10 inches above plant canopy (4–6 inches for seedlings).
- Connect USB cable and plug in.
- Hold POWER button for 2 seconds to turn on.
- Tap POWER to select number of active heads (start with all heads on).
- Press COLOR to choose your mode: blue for seedlings/leafy, red for flowering, mixed for general use.
- Press + to set brightness to level 4 (50%) as a starting point.
- Press TIMER once for 3H, twice for 6H, or three times for 9H depending on your plant type. Confirm the indicator light is on.
- Note the time you set the timer so you know when it will cycle.
Fine-tuning over the first two weeks
Day 3–4: Check for stretching (light too far or too few hours) or bleaching (light too close or too bright). Adjust height by 2 inches in the appropriate direction. Day 7: If plants look healthy and are producing new growth, your setup is working. If growth is slow or pale, increase brightness one level and add light hours if possible using an outlet timer. Day 14: Rotate all pots 180 degrees to ensure even coverage, and reassess whether any plants have grown enough that the light height needs to be raised.
The Bionic Grow Light is a genuinely useful little fixture for houseplants, seedling starts, and low-to-medium light plants. It's compact enough to fit anywhere and simple enough that once you understand the reset behavior and power requirements, it runs reliably. If you find yourself needing more coverage or more intensity as your setup grows, bar-style LED fixtures (similar in concept to models covered in the Barrina grow light guides on this site) are a natural next step. But for a single pot or a small cluster of plants on a desk or shelf, this light does exactly what it's designed to do.
FAQ
Can I leave my Bionic grow light on 24 hours a day with the built-in timer?
Not directly. The built-in timer only repeats on a 3, 6, or 9-hour cycle, and it resets if you unplug or fully power off the unit. For 24-hour operation, leave the timer off and run it continuously, but monitor plants for bleaching or leaf tip burn, then reduce brightness if you see stress.
Why does my light come on when plugged in, but won’t keep my previous settings?
Because power interruptions clear the device state. If you unplug the USB cable, disconnect the adapter, or press and hold POWER to shut it down, brightness, color mode, and timer settings reset. If you want consistent schedules, keep it plugged in and use the timer indicator settings rather than manually turning it off.
What should I do if only some light heads turn on when I set it to 3 or 4 heads?
First, verify you used a short tap on POWER after the 2-second hold to cycle head counts. If heads still do not engage, check that the USB adapter can supply 5V at 2A and that the cable is fully seated at both ends, since underpowered setups can drop performance. Also confirm you did not damage any head during assembly.
Is it safe to use a USB extension cable with the light?
It can work, but longer or low-quality USB cables can cause voltage drop, which shows up as dim output or flickering. If you use an extension, keep it short and use a decent cable rated for USB power. If you see flicker, skip the extension and test with a direct connection to a 5V 2A source.
What’s the best way to position the heads for an uneven canopy or taller plants?
Instead of aiming the heads at one point, adjust each head so their light cones overlap around the main canopy area. If one plant is taller, raise the fixture slightly and reduce intensity to avoid bleaching on the shorter plants. For best results, rotate pots every few days as the article notes, then re-bend any heads that shift coverage.
My plants look stretched and weak even though I set the timer. How do I tell if it’s height versus light hours?
Do a two-step adjustment. First, verify the timer indicator is lit and actually set to the number of hours you expect. Then adjust distance by about 2 inches in the right direction and watch for change within 3 to 7 days. If spacing, leaves, and distance are correct but growth stays stretched, increase daily hours (using an outlet timer if you need beyond 9) rather than only raising brightness.
Leaves are pale or show brown tips, but my timer and mode seem correct. What should I adjust first?
Start with distance and intensity. Raise the light 2 to 3 inches and/or drop brightness by one or two levels, then wait about a week for recovery. If bleaching is localized right under the fixture while lower leaves look fine, it usually indicates the light is too close or too intense, not a watering or nutrient issue.
Can I use the Bionic grow light for seedlings and keep them shorter without slowing growth too much?
Yes, but use lower brightness with blue or full spectrum as your baseline. Keep seedlings roughly 4 to 6 inches above the tray and aim for 14 to 16 hours per day. If stems begin to lengthen between nodes, increase height correction first (move closer slightly or raise hours) rather than only increasing brightness, since very bright close light can still cause stress.
How do I run longer than 9 hours per day without relying on the light’s timer?
Use an outlet timer to control the plug’s power and leave the Bionic’s own timer off. This avoids the device’s 9-hour cap while still giving you repeatable on and off times. After you set the outlet timer, do a short test day to confirm your actual start and stop times match what you intended.
What’s the minimum adapter rating that will reliably power the fixture?
Use a USB adapter rated for DC 5V at 2A. A 5V 1A or 5V 0.5A adapter may not provide enough power, especially when running multiple heads at higher brightness, and can lead to no-start, dim output, or flickering. If you’re unsure, test with a laptop USB port first to isolate whether the adapter is the problem.
Can I use the USB hub output from a computer to power it long term?
Often yes, but it depends on the port’s power delivery. Some USB hubs limit current or reduce output when other devices are connected, which can cause flicker. If you want stable performance, use a dedicated 5V 2A adapter, or ensure the hub is powered and can consistently deliver the needed current.
Should I cover the light heads all the way for every plant size?
Not necessarily. For small pots and seedlings, using fewer active heads (1 or 2) can prevent hotspots and make it easier to dial in without bleaching. For wider coverage, spread and use more heads, then raise the fixture slightly so the light spreads rather than concentrates in one spot.
Next Article
Bseah Grow Light Instructions: Setup, Placement, Timer, Fixes
Step-by-step bseah grow light instructions for mounting, placement, timer setup, distance tuning, and quick troubleshoot