Getting a Bseah grow light set up correctly takes about 15 minutes once you know which model you have and what the controls actually do. The tricky part is that Bseah sells several different lights, and the instructions that come in the box are often short on detail. This guide walks you through everything: identifying your exact model, confirming all the parts arrived, mounting and positioning the light, dialing in intensity and distance, programming the timer, and troubleshooting the most common problems people hit in the first week.
Bseah Grow Light Instructions: Setup, Placement, Timer, Fixes

Marcus Tillman
13 Apr 2026
Figure out which Bseah model you have
Before you do anything else, find your model number. It is usually printed on a small label on the back of the light or on the power cable housing. The two most common models are the HB-02 and the FSZD-12, and they work quite differently, so following the wrong setup steps will cause real problems.
| Feature | HB-02 | FSZD-12 |
|---|---|---|
| Form factor | Dual LED tube + gooseneck clamp | Full-spectrum circular/panel |
| Power input | DC 5V via USB (10 W) | USB-powered |
| Brightness | 4,500 lux | Not published |
| Spectrum modes | Yellow, White, Yellow & White | Full spectrum (single mode) |
| Dimming control | 10 levels via + and - buttons | Not adjustable |
| Timer options | 3H / 9H / 12H auto cycle | 3H / 9H / 12H memory timer |
| Mounting method | Clamp + metal gooseneck arms | Clamp-based |
| LED lifespan | Up to 50,000 hours | Not specified in manual |
Once you confirm whether you have the HB-02 or the FSZD-12, keep the model name in mind as you read through this guide. Where the two models differ significantly, both are covered. If you are shopping around and comparing similar setups from other brands, the barrina grow light instructions guide on this site covers another popular tube-style option that uses a similar clamp-and-arm design.
Unboxing and parts check
Open the box on a flat surface and lay everything out before you start connecting anything. A missing part is much easier to catch now than after you have already mounted the light.
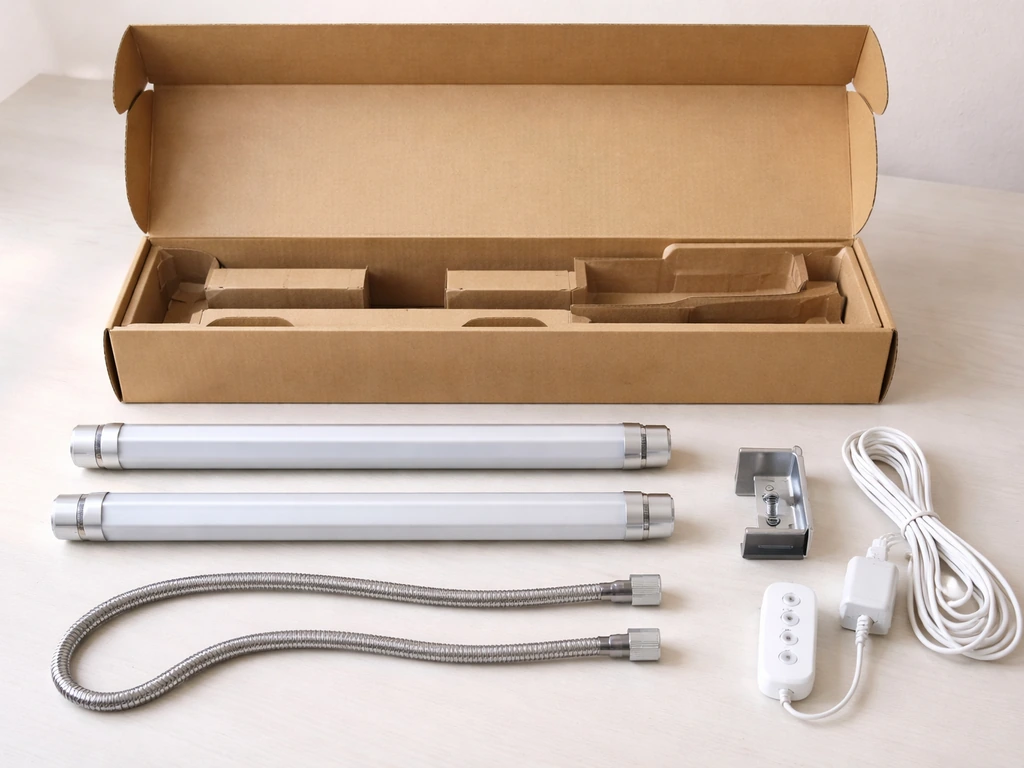
What should be in the HB-02 box
- Two LED tube heads
- Two flexible metal gooseneck arms
- One mounting clamp (usually with a screw-tighten base)
- One inline control panel with power button, +/- dimming buttons, mode/spectrum button, and timer button
- One USB cable connecting the control panel to the light heads
- One high-efficiency USB power adapter (wall plug)
- User manual (often very brief)
What should be in the FSZD-12 box
- One circular or panel-style LED grow light head
- One mounting clamp
- USB cable and power adapter
- User manual with timer instructions
Check all cables for nicks, fraying, or bent connector pins. Inspect the clamp mechanism to make sure the screw or tension grip moves smoothly. If anything looks damaged before you even plug it in, contact the seller rather than trying to use it. Damaged USB connectors on low-voltage grow lights can cause flickering and intermittent power loss, which is one of the most common complaints and almost always traces back to a connector that was bent during shipping.
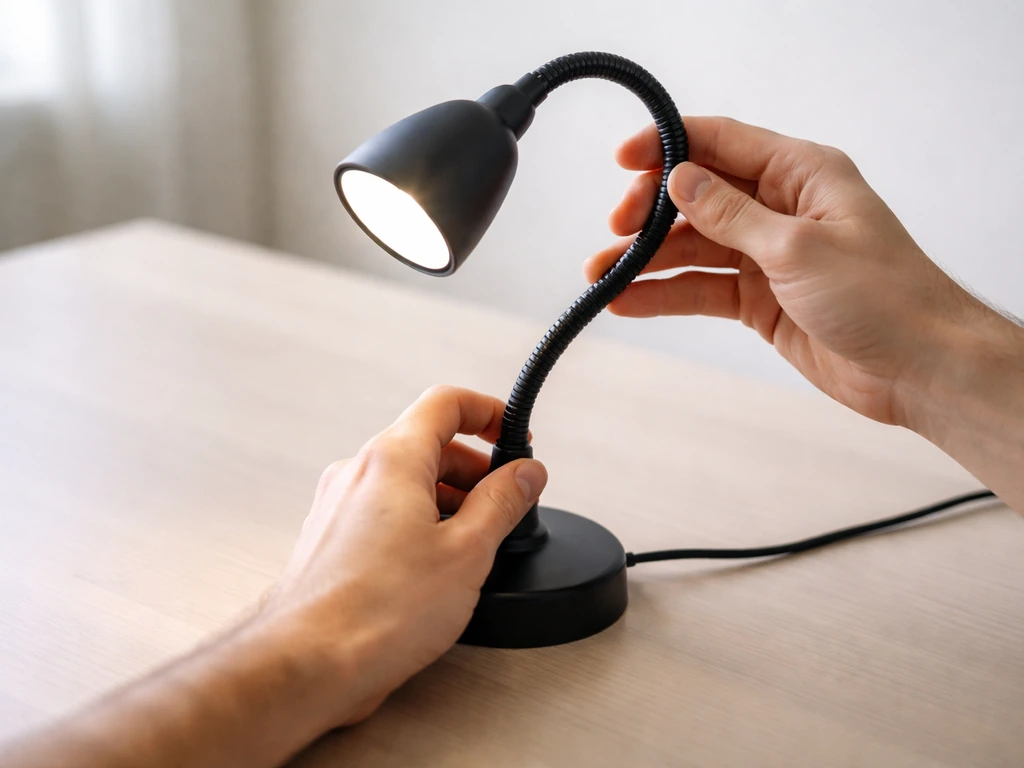
Mounting and placement, step by step
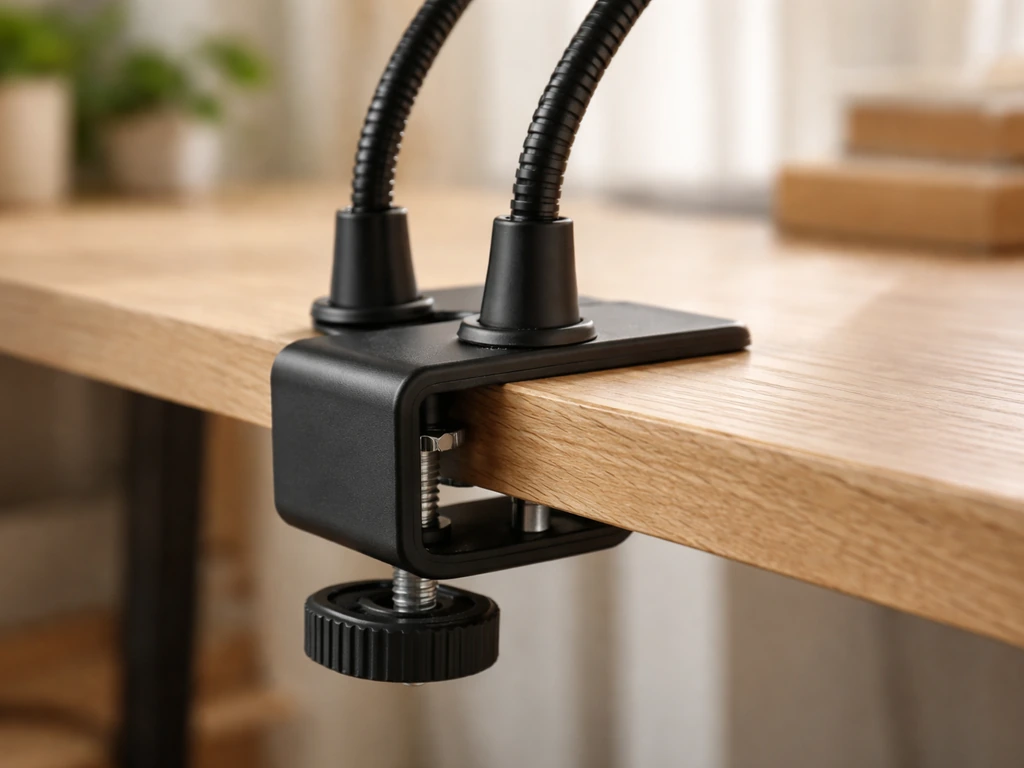
Both Bseah models use a clamp mount, which makes installation genuinely simple. The clamp grips a shelf edge, pot rim, desk, or wire shelving unit. Here is how to do it properly.
- Choose a stable surface. The clamp needs to grip something solid and at least 0.5 inches (1.3 cm) thick. Wire shelving units, wooden shelves, and desk edges all work well. Thin plastic or cardboard will not hold the clamp securely.
- Open the clamp jaws fully and position them above and below your chosen surface, then tighten the thumb screw firmly. The FSZD-12 manual specifically flags clamp stability as a safety check, so do not just hand-tighten it loosely.
- For the HB-02, thread each gooseneck arm through the clamp base or attach them to the clamp's arm ports. Gooseneck arms should feel stiff enough to hold the angle you set. If they flop around, the clamp is not tight enough on the base.
- Route the cables along the shelf edge or along the gooseneck arm and away from the plant canopy. The FSZD-12 manual recommends securing cables to avoid tripping or accidental disconnection.
- Position the light heads so they point directly down (or at a slight angle) toward the plant canopy. For the HB-02's two-tube design, angle both heads inward slightly so the coverage areas overlap at canopy level.
- Run the USB cable from the control panel to the USB power adapter, then plug the adapter into a standard electrical outlet. The HB-02 runs on DC 5V at 10 W, which is well within what any standard USB wall adapter handles, but use the included adapter to avoid compatibility issues.
- Power the light on with a brief press of the power button on the inline control panel. Both tubes (or the panel) should light up immediately.
If you are mounting inside a grow tent rather than on open shelving, the process is similar but you can also use the tent's internal hanging bars. For a full walkthrough of enclosed setups, the lighthouse 2.0 grow tent instructions article covers how to rig lights inside a tent frame, which translates well to clamp-style lights used vertically.
Dialing in intensity and distance
The HB-02 outputs a rated 4,500 lux at its brightest setting. That is enough for most houseplants and seedlings but on the lower end for heavy-flowering plants. Distance between the light and the plant canopy is the main variable you control, and it matters a lot: too close causes leaf bleaching or tip burn, too far causes stretching and weak growth.
| Plant stage / type | Recommended height above canopy | Dimming level (HB-02) | Hours per day |
|---|---|---|---|
| Seedlings / propagation | 4 to 6 inches (10 to 15 cm) | Level 5 to 7 out of 10 | 14 to 16 hours |
| Vegetative / leafy growth | 6 to 10 inches (15 to 25 cm) | Level 7 to 10 out of 10 | 12 to 14 hours |
| Flowering / fruiting | 8 to 12 inches (20 to 30 cm) | Level 8 to 10 out of 10 | 10 to 12 hours |
| Houseplants (general) | 10 to 16 inches (25 to 40 cm) | Level 5 to 8 out of 10 | 10 to 12 hours |
On the HB-02, press the + button on the inline control panel to increase brightness and the - button to decrease it. The light cycles through 10 discrete levels. Start at level 5 and watch your plants for 48 hours before adjusting further. Signs of too much intensity include bleached or yellowing patches at the center of the leaf and upward-curling leaf edges. Signs of too little include stems stretching visibly toward the light and pale new growth.
The FSZD-12 does not have adjustable dimming, so distance is your only intensity control. The FSZD-12 manual explicitly instructs you to adjust the light height as plant height changes, so build that into your routine: check height every week as plants grow and lower the light gradually to maintain consistent distance above the canopy.
Choosing the right spectrum mode (HB-02 only)
The HB-02 offers three spectrum options via the mode button on the inline controller. Yellow mode is best for general growth and flowering. White mode suits germination and early seedling development. Yellow and White combined gives you the broadest spectrum and works for all growth stages. If you are not sure which to use, start with the combined mode and you cannot go wrong. This matters more than most beginners expect: running a flowering plant under White-only mode gives it the wrong spectrum ratio and will slow bud development.
Programming the timer and daily schedule

Both the HB-02 and the FSZD-12 use the same basic timer system: press the timer button to select 3 hours, 9 hours, or 12 hours. Once selected, the light turns itself on and off at the same time every day automatically. This is a memory timer, meaning the cycle repeats daily without you touching anything again. The catch is that the cycle is anchored to the moment you first set it, so set the timer at the time of day you want the light to turn on.
- Turn the light on at the exact time you want your daily light cycle to begin (for example, 7:00 AM).
- Press the timer button once for 3H, twice for 9H, or three times for 12H. The display or indicator will confirm your selection.
- Leave the light plugged in. The timer relies on consistent power to maintain its daily cycle, so avoid unplugging the adapter between sessions.
- The light will turn off after the selected duration and turn back on 24 hours after the original start time.
For most indoor plants, a 12-hour on / 12-hour off schedule is a reliable default. Seedlings benefit from more light (up to 16 hours), but avoid running any Bseah grow light for more than 12 continuous hours at a stretch if you have the FSZD-12. The FSZD-12 manual recommends six hours on, then off, then six hours on again (two sessions per day totaling 12 hours) to prevent overheating. The HB-02 runs cooler at 10 W and handles 12-hour continuous sessions without issue for most use cases.
If you want more scheduling flexibility than the built-in timer offers, an external mechanical outlet timer (around $8 to $12 at any hardware store) gives you more control over exact on/off times. Many growers use this approach with simple clamp lights. For context on how more advanced grow light controllers handle scheduling, the tower garden LED grow lights instructions article covers programmable timing on a more sophisticated system.
Troubleshooting the problems you will actually run into
Light will not turn on
Check the USB connection first. Unplug the cable from the power adapter, wait five seconds, and plug it back in firmly. If the FSZD-12 shows no output after that, the FSZD-12 manual points directly to the USB port or power connection as the first thing to check. Try a different outlet. If you are using a power strip, plug directly into a wall outlet to rule out a dead strip port. A damaged USB cable from the box is not unheard of; if you have another USB cable of the same type, swap it as a test.
Flickering or flashing light
Flickering in the FSZD-12 almost always means a loose or failing connection. The FSZD-12 troubleshooting section in the manual is direct about this: if the light is flashing or uneven, it recommends replacing the unit. Before you go that route, check both ends of the USB cable and make sure the connector seats fully. If the flickering started after weeks of use rather than immediately, dust buildup around connectors can be the cause. If you cannot resolve it by reseating the cable, contact the retailer.
Output seems dimmer than expected
On the HB-02, check your dimming level first. It is easy to accidentally press the - button and drop several levels without noticing. Press + repeatedly until you reach level 10 and see if the output looks right. If you are running the light in Yellow mode only, switching to the Yellow and White combined mode will also make the light appear brighter because more LEDs are active. For the FSZD-12, weak output after confirming the connection is correct usually points to a unit defect.
Gooseneck arms will not hold position (HB-02)
This is the most common physical complaint with the HB-02. The fix is simple: tighten the clamp more. The gooseneck arms rely on tension at the base, and if the clamp is not biting the surface firmly, the arms will slowly drop under the weight of the LED heads. Tighten the clamp screw until it resists, then re-angle the arms. If they still will not hold, the gooseneck itself may be worn and you should contact the seller about a replacement.
Uneven coverage or hot spots
If one side of your plant tray gets more light than the other, adjust the angle of the light heads or arms. For the HB-02, rotate one arm outward to spread coverage. For the FSZD-12, the manual specifically says to adjust the angle and position for uniform coverage if you notice uneven spread. Raising the light a few inches also helps even out the coverage area, though it reduces overall intensity, so compensate by increasing dimming level if your model allows it.
Overheating concerns
The HB-02 is a 10 W light and does not generate significant heat. The FSZD-12 runs hotter relative to its size, which is why its manual advises the two-session-per-day approach rather than one long continuous run. Keep the heat sink on the FSZD-12 free of dust and residue, and position it in a spot with some air circulation rather than sealed inside an enclosed cabinet with no airflow. The manual also warns to keep it away from water and humid locations, so do not position it directly over a misting system or in a bathroom setup without good ventilation.
If you want a comparison point for how other small grow lights handle heat management, the koscheal grow light instructions article covers a similarly sized clamp-style LED that has a built-in cooling design worth looking at.
The right setup for each plant type
Seedlings and propagation
Keep the HB-02 4 to 6 inches above the seedling tray on the White spectrum mode. Seedlings need light for photosynthesis but their thin stems are sensitive to heat and intensity, so start at dimming level 5 and increase only if you see stretching toward the light. Run 14 to 16 hours per day during germination and early growth. Once true leaves appear and stems thicken, you can transition to the combined spectrum and push the dimming level higher.
For growers using a dedicated seedling shelf, the garland grow light garden instructions article covers a full-shelf grow light setup that works well for starting large numbers of seedlings simultaneously.
Vegetative and leafy growth
Herbs, leafy greens, and plants in active vegetative growth do well with the HB-02 in combined spectrum mode at level 7 to 10, positioned 6 to 10 inches above the canopy. Run 12 to 14 hours daily. Leafy plants are forgiving, but watch for yellowing between leaf veins (too far away) or bleaching at the center of new leaves (too close). Adjust height by 1 to 2 inches at a time and wait two to three days to see how the plant responds before making another change.
Flowering and fruiting plants
Switch the HB-02 to Yellow mode or combined mode for flowering plants. Yellow spectrum encourages blooming and is the right call once your plant has begun to set flower buds. Position the light 8 to 12 inches above the canopy and run it 10 to 12 hours per day. Flowering plants often need a longer dark period than vegetative plants, so do not over-extend your timer in the name of more light.
If you have the FSZD-12, the 12-hour timer setting (split into two six-hour sessions using an external outlet timer) is the most effective approach for flowering stage. For a comparison on how another brand handles flowering-specific spectrum setup, the purple reign grow light instructions article goes deep on spectrum tuning for bloom.
Common houseplants
Most houseplants (pothos, peace lilies, snake plants, ferns, and similar) do not need intense light and are often damaged by too much intensity before too little. Position the HB-02 10 to 16 inches above the leaves at level 5 to 6 brightness and run 10 to 12 hours daily. The combined spectrum works well here, but Yellow mode alone is also fine for established foliage plants. If you are using a Bseah light as a supplement to existing window light, drop the daily duration to 6 to 8 hours and let the plant decide: new growth that is compact and healthy-colored means the setup is working.
Scaling up or using multiple lights
If you are covering a larger shelf or a grow tent with multiple Bseah lights, space them so coverage areas overlap slightly at canopy level rather than leaving dark gaps. For setups using strip-style or tube lights in rows, the how to install barrina LED grow lights guide is a useful reference for spacing and mounting multiple tube lights effectively. And if you ever want to compare how a different brand of compact grow light handles its controls and timer, the bionic grow light instructions article covers another clamp-style option with a similar control layout.
Your baseline setup checklist
Before you walk away from your newly installed Bseah grow light, run through this quick checklist. It takes two minutes and catches the problems that most people only notice two weeks later when their plants start looking off.
- Model confirmed (HB-02 or FSZD-12) and correct manual referenced.
- Clamp tightened firmly on a stable surface and cables routed safely away from foot traffic.
- Light heads positioned at the correct height for your plant stage (see the distance table above).
- HB-02: spectrum mode selected and dimming level set appropriately.
- Timer set by turning the light on at your desired daily start time, then pressing the timer button to select 3H, 9H, or 12H.
- Power adapter plugged directly into a wall outlet (not a loose power strip).
- FSZD-12: heat sink area clear of dust and unit positioned with airflow around it.
- Marked your calendar to check plant response in 48 hours and adjust height or intensity if needed.
Plants tell you when the setup is right. New growth that is compact, green, and oriented naturally (not stretched toward the light or curling away from it) means your distance, intensity, and timing are all in a good place. Give it a week before making major changes, and adjust only one variable at a time so you can tell what actually made the difference.
FAQ
Can I leave the Bseah grow light on all day if my plants seem hungry for light?
For the HB-02, 12 hours continuous is usually fine, but for the FSZD-12 avoid one long run. If you want near-maximum light, use the two-session approach (6 hours on, 6 hours off, then 6 hours on) to reduce overheating risk, then confirm plant response after 48 to 72 hours.
How do I set the HB-02 timer if I want the light to turn on in the morning but I first installed it at night?
The built-in cycle is anchored to the moment you press the timer, so it will repeat at that same clock time daily. Set the timer while you are able to align it with your desired on-time, or use an external outlet timer to override the exact start time without changing the light’s own repeat behavior.
My HB-02 suddenly looks dimmer even though nothing changed. What should I check first?
Recheck the dimming level selection, because it is easy to step down multiple levels with the - button. Also inspect the clamp seating point, if the light has sagged slightly, effective distance increases and the output will look weaker even if the brightness setting is unchanged.
What’s the safest way to clean the FSZD-12 heat sink and avoid damaging the electronics?
Unplug first, then clean when the light is cool. Use a dry soft brush or dry cloth to remove dust from the heat sink fins, avoid getting any moisture near the USB connection, and let it fully dry before reconnecting if you used any slightly damp material.
Will using a power strip work reliably with these Bseah grow lights?
It can, but it adds another potential failure point. If you see intermittent operation, plug the adapter directly into a wall outlet to rule out a dead or loose strip port, and verify the adapter is fully seated. If flickering starts after moving the strip or adapters, suspect the connection rather than the timer setting.
Can I use the Bseah clamp light on a rounded or narrow surface like a pole or curved shelf edge?
Clamp lights grip best on flat, grippy edges. If the surface is rounded or too narrow for the clamp to bite, the light can slowly slide, causing uneven coverage or sagging. Consider using a different mounting surface or a more secure mounting method, since a poorly gripped clamp is a common cause of “one week later” problems.
How close should I place the light to seedlings during the first few days, and when should I adjust?
Start at a moderate height and level, then adjust slowly. If you see stretching or pale new growth, raise the dimming slightly or lower the light by about 1 to 2 inches, wait two to three days, then reassess. For bleaching or scorched-looking patches, immediately increase height and drop intensity.
Is it better to run the HB-02 in White-only for everything, or should I switch spectrum modes?
White-only can be useful for germination and early seedlings, but flowering typically needs a different balance. If your flowering plants look slow to bud or produce mostly leafy growth, switch to Yellow or the combined Yellow and White mode and keep the light timing appropriate for the stage.
For uneven growth, should I adjust light height or arm angle first?
Adjust angle first if the difference is clearly left-to-right, then tweak height. For uneven spread, rotating one arm outward or repositioning the heads helps balance coverage without reducing intensity globally, then raise or lower a few inches only after you see how plants respond for a couple of days.
What should I do if my FSZD-12 flickers only sometimes, for example when the cable moves?
If flickering correlates with cable movement, the connection is not fully seated or the cable is failing internally. Reseat both ends firmly, avoid sharp bends near the connector, and try a known-good compatible USB cable. If the issue persists, the manual’s guidance is to replace the unit.
Can I place the FSZD-12 in a humid location like near a spray bottle or bathroom window?
Avoid it. The unit should not be positioned over misting systems, and humid enclosed areas without airflow increase the risk of residue buildup and connection problems. If you need humidity control, keep the light in a drier area and ensure ventilation so the heat sink can dissipate heat safely.
How can I tell whether my schedule is too intense even if there is no obvious bleaching?
Look for more subtle stress signs after several days, such as leaf edge curl, unusually dark or hardened foliage, or slowed new growth despite adequate light distance. If you suspect overexposure, reduce either the daily duration (time) or intensity level (brightness) first, change one variable, and evaluate again after 48 hours.
Next Article
Innova Grow Light Instructions: Setup, Use, and Troubleshooting
Step-by-step Innova LED grow light instructions: setup, mounting, distance, schedules, intensity, and fast troubleshooti