Set your Barrina LED grow light 12 to 18 inches above seedlings, 18 to 24 inches above herbs and greens, and 24 to 36 inches above houseplants. Run it 16 hours on and 8 hours off for seedlings, 14 hours on for herbs and greens, and 12 hours on for most houseplants. If your model has a mechanical timer, plug the timer into the outlet first, then plug the light into the timer. If it has the built-in CRO24H-style cycle timer, choose your on-duration (3, 6, or 12 hours) and the light auto-repeats that cycle around the clock. That covers the core setup. Everything below explains how to do it right, step by step, for your specific model.
Barrina Grow Light Instructions: Setup, Placement, and Timing

Marcus Tillman
1 May 2026
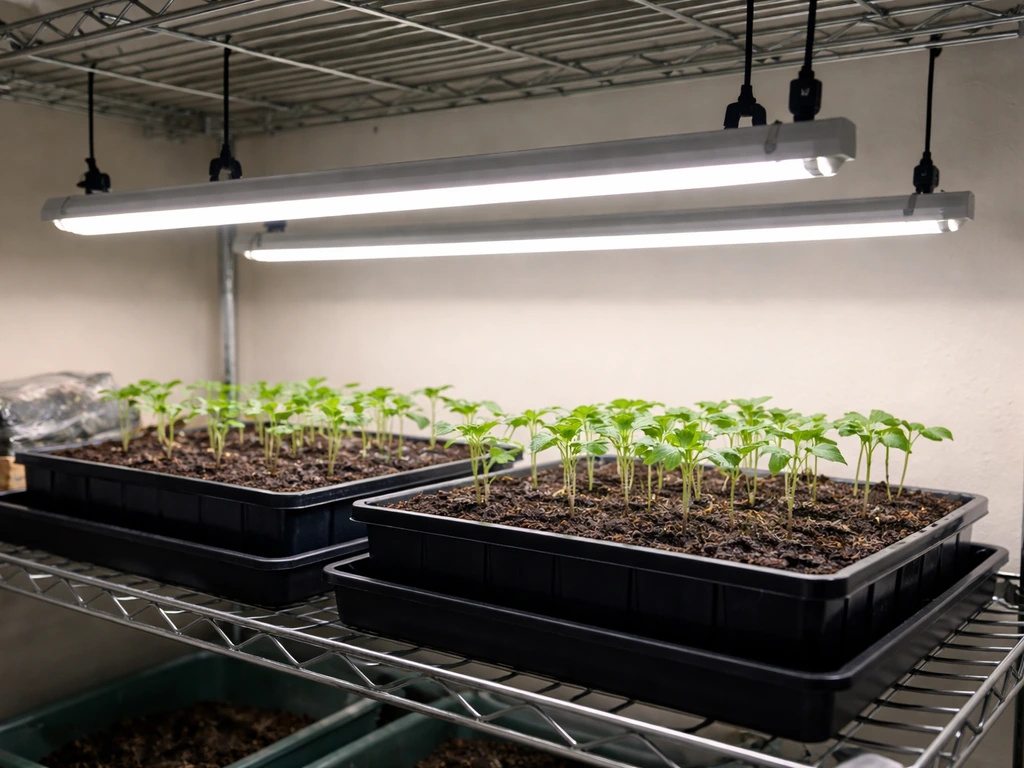
Figure out exactly which Barrina model you have
Barrina makes several grow light lines and the controls are genuinely different between them, so this step matters. The model number is printed on a sticker on the fixture itself, usually on the back of the bar or on the power brick. Look for it before you do anything else. Here are the main models you're likely to have:
| Model | Controls / Timer | Dimmable? | Notes |
|---|---|---|---|
| T5 MF10 | On/Off switch only | No | Plug-in strip light; daisy-chainable; no built-in timer |
| TX-L84 (4FT) | Mechanical timer included | No | Timer is a separate plug-in unit in the box |
| T10 Pro (T1042, 42W) | Mechanical timer included | No | Standing floor lamp style; 4FT to 5.6FT adjustable |
| CRO24H (24W) | Built-in 24H cycle timer | 3 brightness levels | Cycle options: 3H/6H/12H on, then auto-off for remainder |
If your model ends in "MF10" or "TX-L84," you have a bar-style strip light. The MF10 has no timer at all and is not dimmable. The TX-L84 includes a mechanical timer in the box but is also not dimmable. The T1042 is a standing lamp that also ships with a mechanical timer. The CRO24H is the odd one out because it has a built-in programmable cycle timer and three brightness levels, making it the most flexible of the bunch. Once you've confirmed your model, the rest of this guide will make a lot more sense.
Unbox, inspect, and assemble your fixture safely
Before you plug anything in, do a full inspection. Shipping damages LED drivers and connection points more often than people expect, and a cracked housing or bent pin can cause a flicker or a dead fixture on day one.
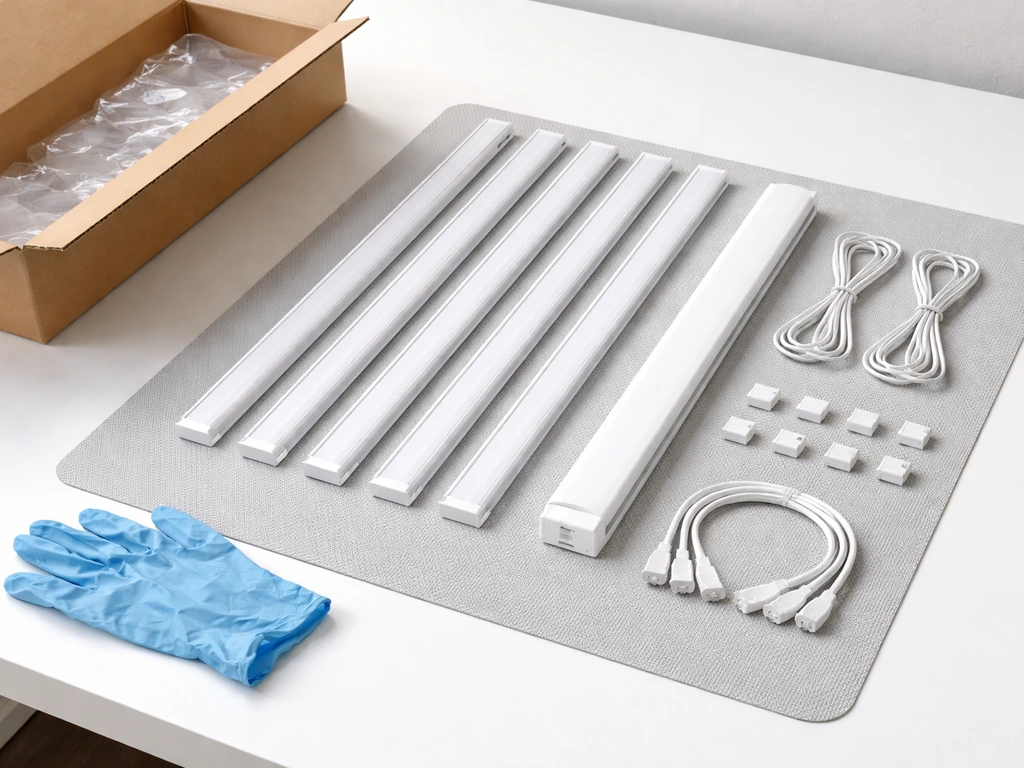
- Remove everything from the box and lay it out flat. Check the manual contents list to confirm you have all parts: bars, linking cables, mounting clips or hooks, the power cord, and the timer (if included).
- Inspect every bar along its full length. Look for cracks in the plastic housing, bent LED strips, or any discoloration on the lens. A small ding on the casing is usually fine; a crack near a connector is not.
- Check every cable end and connector for bent or pushed-back pins. Gently straighten any bent pin with a toothpick before connecting. Never force a connector.
- For strip-style models (MF10, TX-L84), connect the bars together using the linking cables before mounting. Most Barrina T5 and T8 bars connect end-to-end in a single chain from one power cord. The manual will show the maximum number of bars you can daisy-chain (typically 4 to 8 bars per chain, depending on wattage).
- For the T10 Pro standing lamp, extend the telescoping pole to your target height before placing it, and lock each section before adding the head.
- Do not plug in until the fixture is fully assembled and positioned.
One safety note that often gets skipped: Barrina bar lights run warm but should not get hot enough to burn your hand. Before your first full session, run the light for 10 minutes and touch the back of a bar. Warm is normal. Hot enough to pull your hand away means the driver is working too hard, usually because you've chained too many bars on one cord or the room temperature is above 85 degrees Fahrenheit. Deal with that before leaving it unattended overnight.
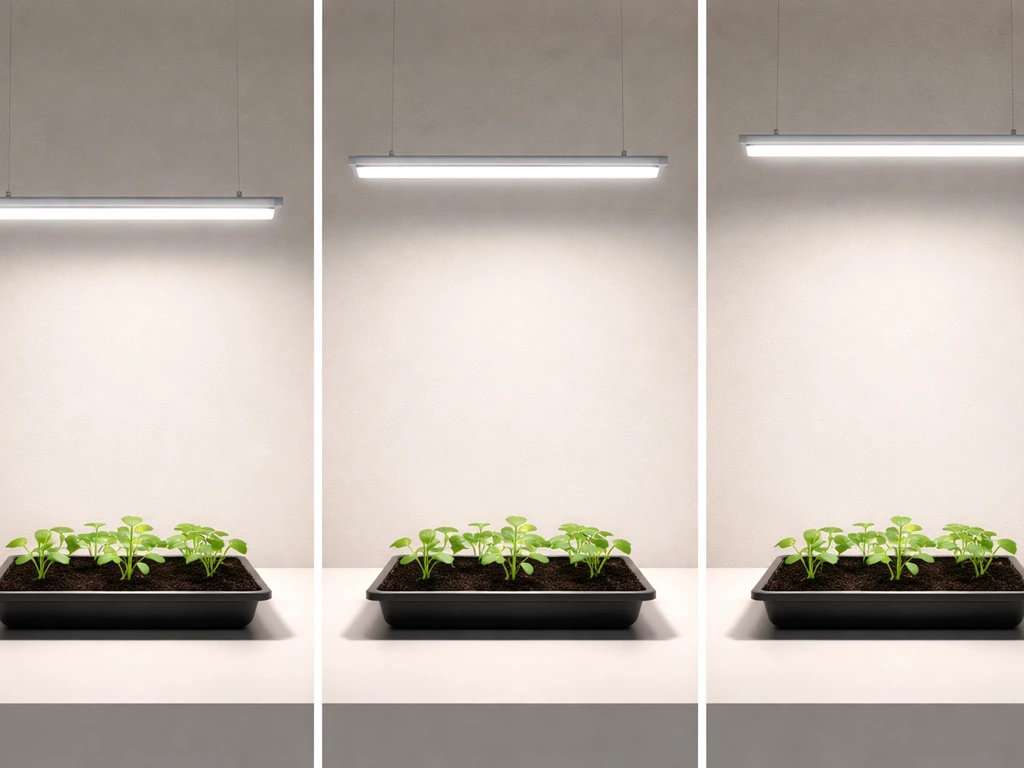
Where to mount it and how high to hang it
Height above the canopy is the single most important variable in your setup. Too close and you get light burn or bleaching on leaves. Too far and the light intensity drops off sharply, leaving plants stretching and leggy. These numbers are starting points based on the light output typical of Barrina bar-style LEDs. Adjust based on what you see in the first week.
| Plant Type | Starting Height Above Canopy | Coverage Per 4FT Bar | Notes |
|---|---|---|---|
| Seedlings / propagation | 12 to 18 inches | 1 to 2 sq ft per bar | Keep lower end of range for germination trays |
| Herbs (basil, mint, cilantro) | 18 to 24 inches | 2 to 3 sq ft per bar | Herbs tolerate slightly more intensity |
| Leafy greens (lettuce, spinach, kale) | 18 to 24 inches | 2 to 3 sq ft per bar | Consistent height keeps growth even across tray |
| Fruiting plants (tomatoes, peppers) | 12 to 18 inches | 1 to 2 sq ft per bar | Use multiple bars for adequate density |
| Tropical houseplants | 24 to 36 inches | 3 to 4 sq ft per bar | Most houseplants prefer lower intensity |
For mounting, Barrina includes either adjustable hanging hooks or rope ratchets depending on the model. Rope ratchets are the better option because you can raise and lower the light in seconds as your plants grow. If yours came with fixed clips, buy a set of adjustable rope ratchet hangers separately. They cost about five dollars and will save you a lot of frustration. If you're mounting to shelving, the included clips usually work fine for wire rack shelves. For solid wood shelves, you'll need small screw-in hooks.
Positioning bars for even coverage
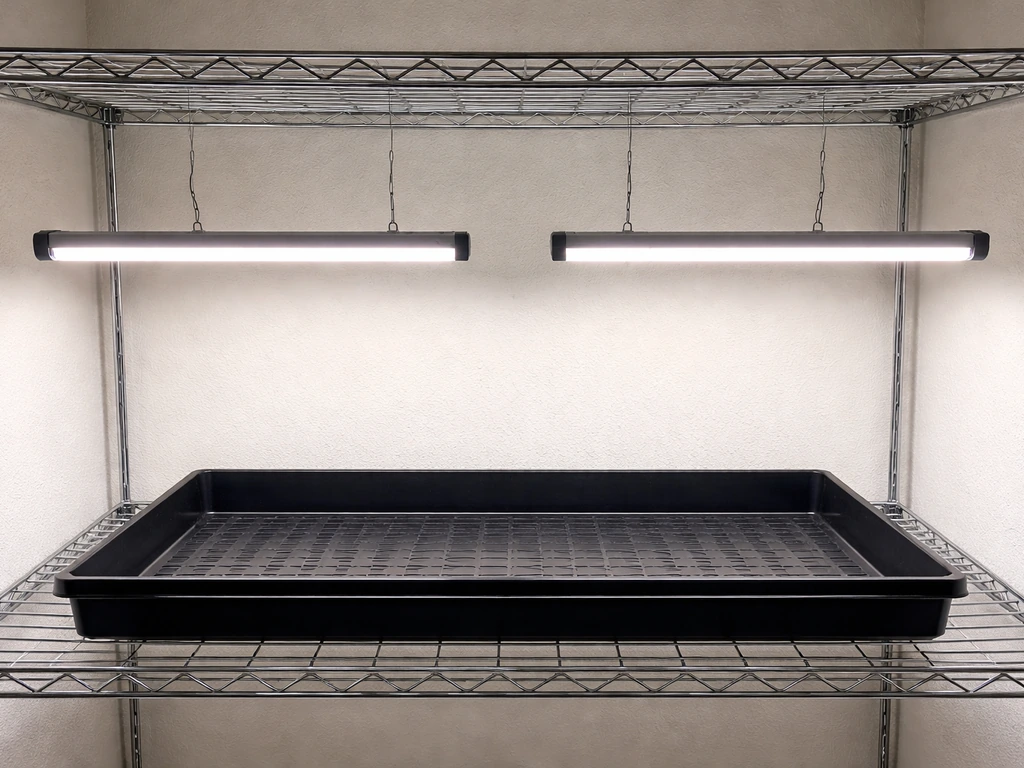
A single 4-foot bar positioned down the center of a standard 2-foot-wide shelf will leave the edges significantly dimmer than the center. For a 2-foot by 4-foot growing area, two bars spaced about 8 to 10 inches apart (centered on the growing surface) give much more even coverage. If you're growing in a 2-foot by 2-foot tent or shelf section, one bar works, but position it directly over the densest part of your canopy rather than dead center if your plants aren't evenly distributed.
Dialing in intensity: spacing, number of bars, and dimmer settings
Barrina's most popular strip light models (MF10 and TX-L84) are not dimmable, which means intensity adjustment comes from height and from how many bars you use, not from a dial. The CRO24H is the exception and gives you three brightness levels. Here's how to work with what you have.
Non-dimmable models (MF10, TX-L84, T1042)
Since you can't turn the power down, you control intensity through distance. Every 6 inches you raise the light roughly halves the intensity reaching your plants (this is the inverse square law in action). So if your seedlings are showing bleached or yellowing tips, raise the light 4 to 6 inches before anything else. If your plants are stretching toward the light with long, weak stems, lower it. For coverage, add more bars rather than trying to stretch one bar over a large area. A general rule is one 4-foot, 20 to 24-watt bar per square foot of growing space for seedlings and herbs. For houseplants, one bar per 3 to 4 square feet is usually enough.
CRO24H brightness levels
If you have the CRO24H, the brightness button cycles through low, medium, and high. Start on medium for most plants. Use low for sensitive seedlings in the first two weeks, or for low-light houseplants like pothos or peace lilies. Use high for herbs, leafy greens, or any plant that's not responding well after a week on medium (signs of under-lighting include pale new growth, stretched stems, and slow development).
The built-in timer on the CRO24H runs in repeating cycles: if you select 6H, the light stays on for 6 hours then turns off for 18 hours and repeats that pattern automatically. If you are using koscheal grow lights, follow the same height and timer timing principles so the light cycle stays consistent for your plants. This is convenient but means you need to time your first power-on carefully so the "on" window falls during daytime hours.
Setting the timer and scheduling your light cycles
Getting the on/off schedule right matters more than almost any other variable. Plants need a consistent dark period, not just enough total hours of light. Here are the schedules to start with, and when to adjust them.
| Plant Type / Stage | Daily Light Hours | Daily Dark Hours | When to Adjust |
|---|---|---|---|
| Seeds / germination | 16 hours on | 8 hours off | Drop to 14H once true leaves appear |
| Seedlings (first 4 weeks) | 16 hours on | 8 hours off | Stable through vegetative stage |
| Herbs and leafy greens | 14 to 16 hours on | 8 to 10 hours off | Reduce to 12H in summer if growing near a window |
| Fruiting plants (vegetative) | 16 to 18 hours on | 6 to 8 hours off | Switch to 12H/12H to trigger flowering |
| Fruiting plants (flowering) | 12 hours on | 12 hours off | Hold through fruit set |
| Tropical / low-light houseplants | 10 to 12 hours on | 12 to 14 hours off | Stable year-round for most species |
Using the mechanical timer (TX-L84 and T1042)
The mechanical timer that ships with the TX-L84 and T1042 is a standard 24-hour dial with push-down tabs around the edge. Each tab represents 15 minutes.
Push down the tabs that correspond to the hours you want the light to be ON. Then rotate the dial so the arrow lines up with the current time. Plug the timer into the wall outlet, then plug the grow light into the timer. The dial rotates continuously and the light will turn on and off as the tabs engage and disengage the internal switch.
One common mistake is pushing up the wrong tabs. On most of these timers, the tabs you push DOWN are the ON periods. Check the label on the side of your specific timer to confirm which direction means on, because it varies by manufacturer.
Using the CRO24H built-in cycle timer
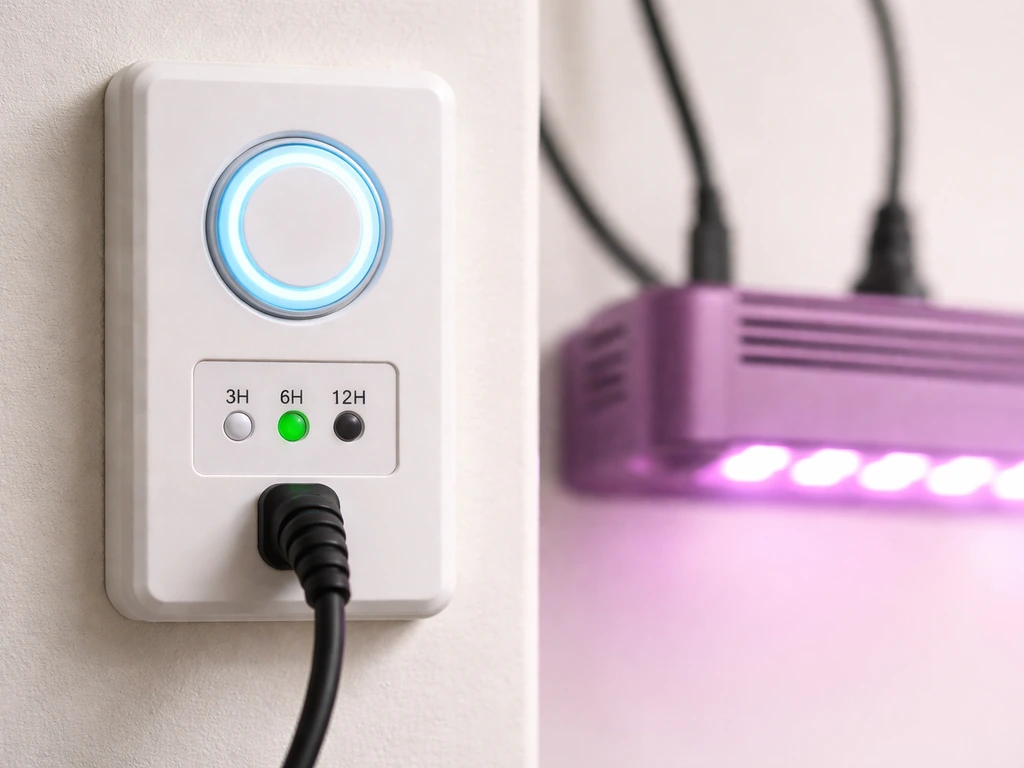
Press the timer button to cycle through 3H, 6H, and 12H cycle options. If you are also following purple reign grow light instructions, the same cycle-timing idea applies so your plants get a consistent on and off rhythm cycle options. The number you select is how long the light stays on before automatically shutting off.
Barrina’s CRO24H listing specifies that its built-in 24H cycle auto on/off timer keeps the light on for 3, 6, or 12 hours, then turns it off for the rest of the 24-hour cycle and repeats around the clock how long the light stays on before automatically shutting off. After the off period (which fills the remaining hours to make 24 total), it turns back on and repeats.
For a 14-hour daily light schedule, you can't set this exactly with the built-in timer alone. Your best option is to use the 12H setting and supplement with a separate plug-in mechanical timer to control when the cycle starts and stops, or just use the 12H built-in cycle and accept a 12-hours-on schedule, which works well for most plants.
MF10 and other non-timer models
If your Barrina model (like the MF10) has no timer at all, buy a simple mechanical outlet timer for around six to ten dollars. If you need bionic grow light instructions for a non-timer setup, follow the same approach of using a simple outlet timer and consistent daily scheduling. You won't remember to manually switch the light on and off at consistent times every single day, and inconsistency stresses plants more than most people realize. A basic 24-hour dial timer from any hardware store works perfectly.
Your first-week setup checklist and how to fix common problems
The first seven days are when most setup mistakes surface. Work through this checklist before you walk away from your new setup, then check back on days 3 and 7 to catch any issues early.
Day-one checklist
- Confirm model number and match it to the correct controls (see the model table above).
- Inspect all bars and cables for damage before connecting anything.
- Assemble and position the fixture at the correct starting height for your plant type.
- Set your timer (mechanical or built-in) to the correct schedule and confirm the current time is set accurately on the dial.
- Plug in and let the light run for 10 minutes, then check the bars for excessive heat.
- Observe your plant canopy from the side. Canopy should be evenly lit. Shadows or bright spots indicate uneven bar spacing.
- Note the starting height so you can track adjustments over the week.
Flickering light
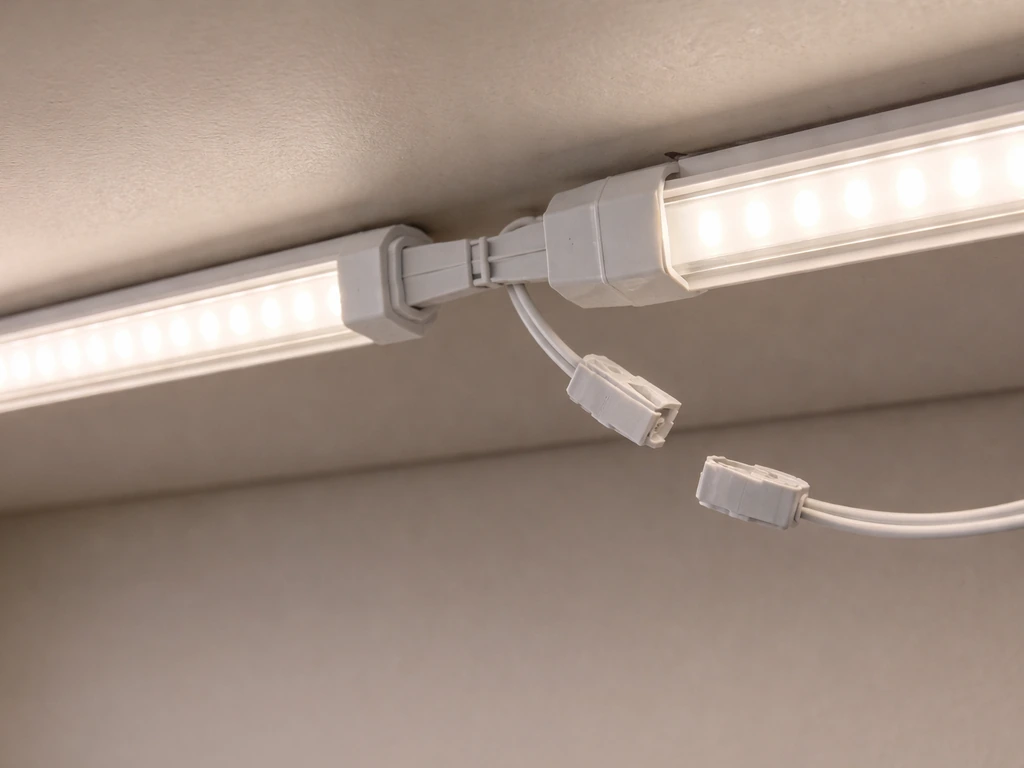
Flicker on a new Barrina fixture almost always comes from a loose cable connection between bars, not a defective LED. Unplug everything, disconnect and firmly reseat each linking cable between bars, then plug back in. If the flicker is isolated to one bar in a chain, that bar's connector is the culprit. Try swapping the cable. If flicker persists after reseating all connections, the driver (power supply) may be faulty and the fixture needs to be returned or exchanged.
Uneven brightness across the bars
If one bar in a daisy-chain is noticeably dimmer than the others, you're likely exceeding the maximum chain length for that power supply. Check your manual for the maximum number of bars allowed per cord. Most Barrina T5 kits max out at 4 to 8 bars. If you've hit that limit, split the chain into two shorter chains with a second power cord. Also check that all bars are the same model and wattage. Mixing bars from different Barrina kits on one chain causes uneven brightness.
Plants not responding after the first week
If seedlings are stretching, pale, or barely growing after 7 days, the two most common causes are the light being too far away and the schedule being too short. First, confirm your actual height with a tape measure. If you follow these tower garden led grow lights instructions, you can fine-tune distance and timing for better results. It's easy to eyeball 18 inches and end up at 28. Second, check that your timer is actually running correctly by watching it cycle through a full on/off event. A mechanical timer with the wrong time set on the dial will run the light at the wrong hours, sometimes during the night when you're not there to notice.
Overheating concerns
Barrina LED bars are designed to run warm, not hot. The driver housing (the thick part at one end of the bar) will be the warmest component. If it's too hot to touch for more than a couple of seconds, check three things: room temperature (keep the grow space below 85 degrees Fahrenheit), airflow around the bars (don't press them flat against insulating material like foam or thick fabric), and chain length (too many bars on one driver overloads it).
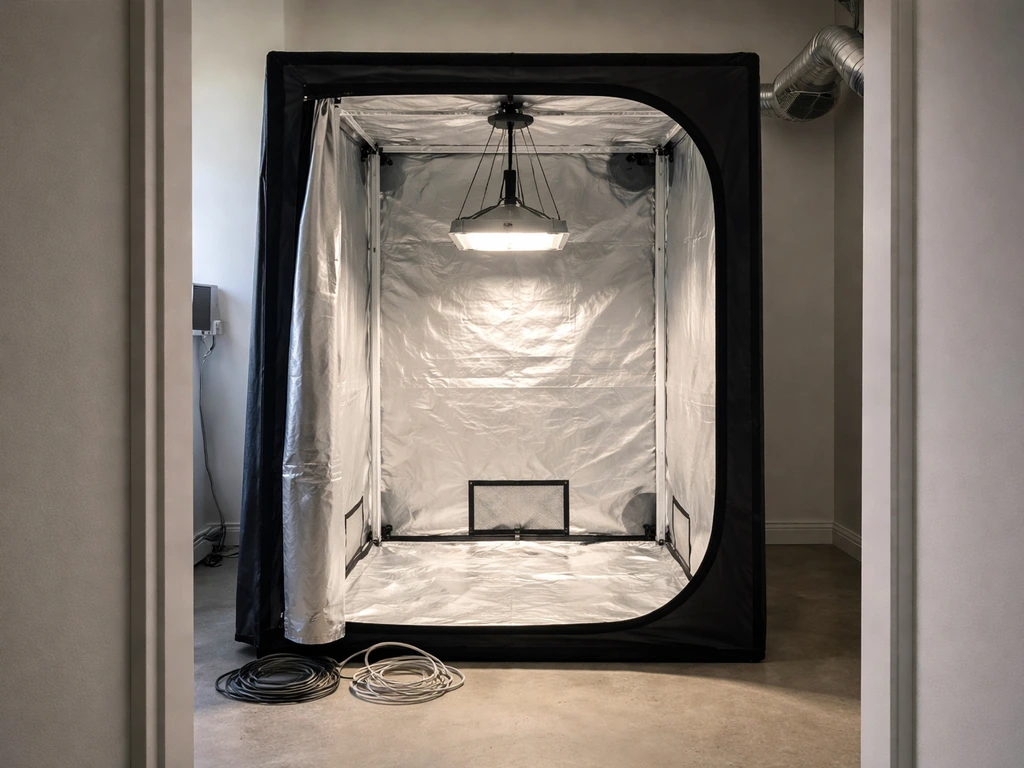
If you're running a grow tent, make sure ventilation is on when the lights are running. If you are using a grow tent, these Lighthouse 2. 0 grow tent instructions can help you dial in the layout and airflow. If you need detailed garland grow light garden instructions, the same height, timing, and coverage principles above will help you dial in consistent results 0 grow tent instructions.
Timer problems and power confusion
The most common timer mistake is plugging the grow light directly into the wall and the timer into nothing, or connecting them in the wrong order. The correct order is always: wall outlet, then timer, then grow light. If you have a power strip involved, plug the timer into the strip and the grow light into the timer, not the other way around. For the CRO24H's built-in timer, if the light isn't cycling as expected, press and hold the timer button for 3 seconds to reset it, then reselect your preferred cycle duration.
A few adjustments to make in weeks two and three
Once your plants are responding well, raise the light slightly every 5 to 7 days as the canopy grows toward it. Your goal is to maintain the same distance above the canopy, not above the pot or the shelf. Most people set the light once and forget it, then wonder why their plants start showing bleaching after three weeks. Keep a sticky note nearby with your current height and the date you last adjusted it. If you're growing seedlings that you plan to transplant outside, spend the last week of indoor growth raising the light gradually to simulate lower intensity and start hardening them off.
If you're looking at other grow light systems and want to compare how Barrina's setup process stacks up, the installation approach for Barrina is fairly similar to what you'd follow for other bar-style LED brands. The main differences come down to timer type and whether the model is dimmable. Barrina's non-dimmable strip models are among the simpler setups out there, which makes them a solid starting point for beginners. The trade-off is less flexibility to fine-tune intensity without changing height, which is worth keeping in mind if you're growing a mix of plant types with different light needs on the same shelf.
FAQ
Do I measure the 12 to 36 inches from the top of the pot, or from the plant leaves?
Use a tape measure to the top of the tallest leaves in the canopy, not the pot rim or shelf. If your plants vary a lot in height, set the light for the tallest group and consider separating taller plants, so only part of the canopy does not get overexposed.
Can I cover or insulate around the Barrina bars, like on foam mats or inside a tight tent?
Yes, you can, but avoid putting it on a thick, heat-trapping surface. Use small spacers or keep airflow around the bars, and re-check the “too hot to touch” rule during the first run to confirm the driver is not overheating.
If my Barrina model has no built-in timer, what’s the best way to automate the schedule?
For non-timer models, a simple 24-hour outlet dial timer is safest. For example, set it to turn off overnight for the first week you test, then adjust by 1 to 2 hours if plants show stretching (too little light) or bleaching (too much light).
Should all bars on the same shelf share the exact same on and off times?
If you use multiple bars on one setup, keep every bar on the same daily schedule and restart timing whenever you change the cycle length or cycle-start time. The easiest approach is to leave the timer settings alone for at least 3 to 7 days, then adjust one variable at a time.
What should I check first if one section flickers or shuts off?
Flicker usually comes from a loose linking cable or connector between bars. If you still see flicker after reseating every connector, try removing bars one at a time to identify whether you are over the driver’s maximum chain length, since overload can cause unstable output.
How do I troubleshoot a driver that feels too hot during operation?
If the driver feels too hot to keep your hand there comfortably after a couple seconds, do not just lower brightness, because many models are not dimmable. Reduce chain length first (fewer bars per power cord), improve airflow, and keep the room under about 85°F.
My plants were fine at first, then bleached after I added a second bar. What’s the typical cause?
If you see bleaching only after you add more bars, the likely issue is intensity jumping because you effectively increased output while keeping the same height. Raise the light a few inches or remove one bar, then observe new growth over 3 to 7 days.
After a power outage, how do I make sure the CRO24H timer is back in the correct on window?
For the CRO24H cycle timer, reset it if the cycle seems off (for example, after a power outage). Then start the “on” window during your daytime routine, because the built-in cycle repeats and you can end up with the wrong hours if you power it on at night.
What’s the right way to adjust height or schedule without confusing my plants?
Do not chase problems by rapidly changing height and hours in the same day. If you suspect under-lighting, adjust height by 4 to 6 inches (or a smaller step once you dial in), keep the schedule stable for several days, and judge by new growth rather than older leaves.
Are there common placement mistakes when hanging multiple Barrina bars in a tent?
Yes, but choose stable placement. Avoid cord strain where the bars hang, keep connections out of areas where they will flex constantly, and ensure the driver and cable connections stay below any condensation points if you have high humidity.
Can I mix seedlings and herbs under the same Barrina light setup?
If you have a mix of seedlings and herbs on the same shelf, you can’t independently tune distance for each plant group. The practical fix is zoning, use separate shelves or stagger heights by using different bars for different plant types.
How can I tell whether my outlet timer or power strip is rated safely for the Barrina lights?
Yes. If your timer and outlet are rated lower than the light draw, the timer can fail or behave inconsistently. Check the wattage listed for your Barrina model and make sure the timer and any power strip are rated for that total load.
How often should I raise the light once plants start growing quickly?
Many people forget to adjust for canopy growth. Use the canopy, not the pots, and raise the light every 5 to 7 days or whenever the distance to the top leaves changes meaningfully, then record the date and height on a sticky note.
Next Article
Lighthouse 2.0 Grow Tent Instructions Setup Guide
Step-by-step Lighthouse 2.0 grow tent and light setup: assembly, lighting height, airflow, humidity, and troubleshooting