To suspend a grow light safely, you need a rated anchor point (a ceiling joist, grow tent crossbar, or a metal rack), a properly sized hanging system (ratchet hangers for most home growers, jack chain for heavier fixtures), and the light centered at the right height above your canopy. Most ratchet hangers like the Vivosun adjustable hangers handle 75 lbs each or 150 lbs per pair, which covers the vast majority of LED panels. Get the anchor right, match the hardware to the weight, and you can hang, level, and adjust a light in about 30 minutes.
How to Suspend Grow Lights: Step-by-Step Safety Guide

Marcus Tillman
19 May 2026
Choose your mount: ceiling, rack, or tent crossbar
Before you touch a drill or hook, decide where the load is actually going. Your three realistic options are a ceiling joist, a freestanding grow rack or wire shelf, or the crossbars inside a grow tent. Each has real trade-offs.
Ceiling joists
A ceiling joist is the most secure option for a permanent setup. The critical rule here: [never hang a grow light from drywall alone. ](https://manuals. harborfreight.
com/manuals/59000-59999/59250-193175463784. pdf) A Harbor Freight safety guide and multiple fastener references are clear that drywall anchors, including toggle bolts, are not rated for overhead fixture loads in the way you might hope. Eugene Fasteners' guides note that for any meaningful ceiling load, you must anchor into the joist itself. Find the joist with a stud finder, drill a pilot hole, and drive a heavy-duty eye bolt directly into the wood.
A 5/16-inch or 3/8-inch eye bolt driven at least 1. 5 inches into solid joist lumber gives you a rock-solid anchor for lights up to 50 lbs with no concerns.
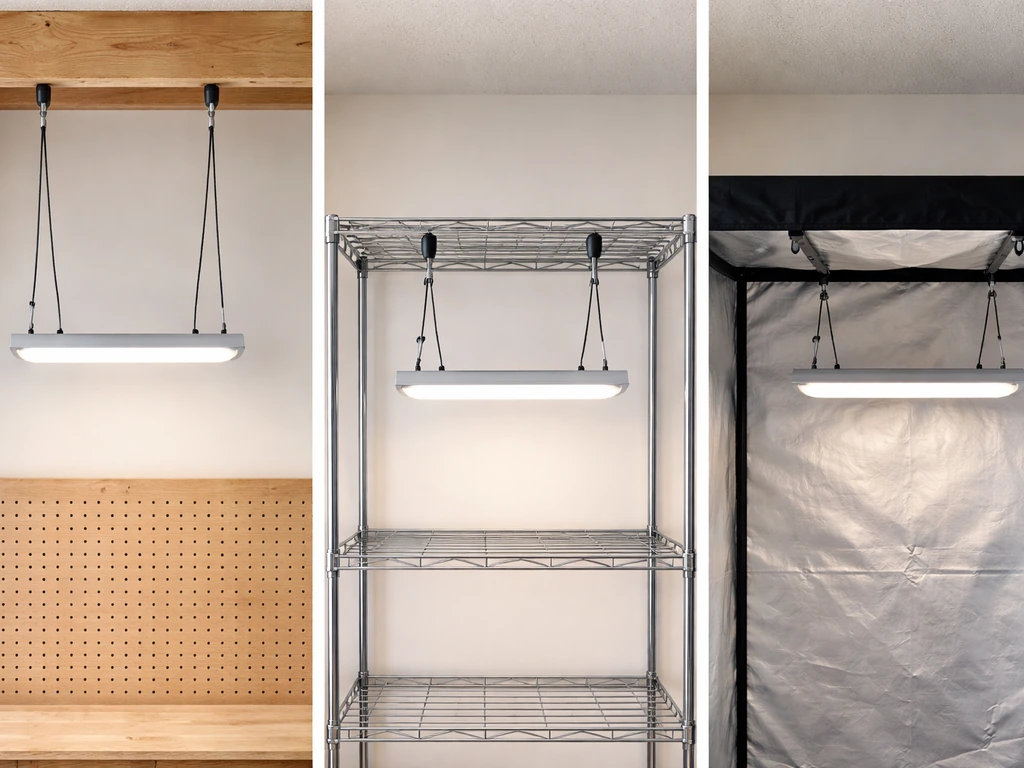
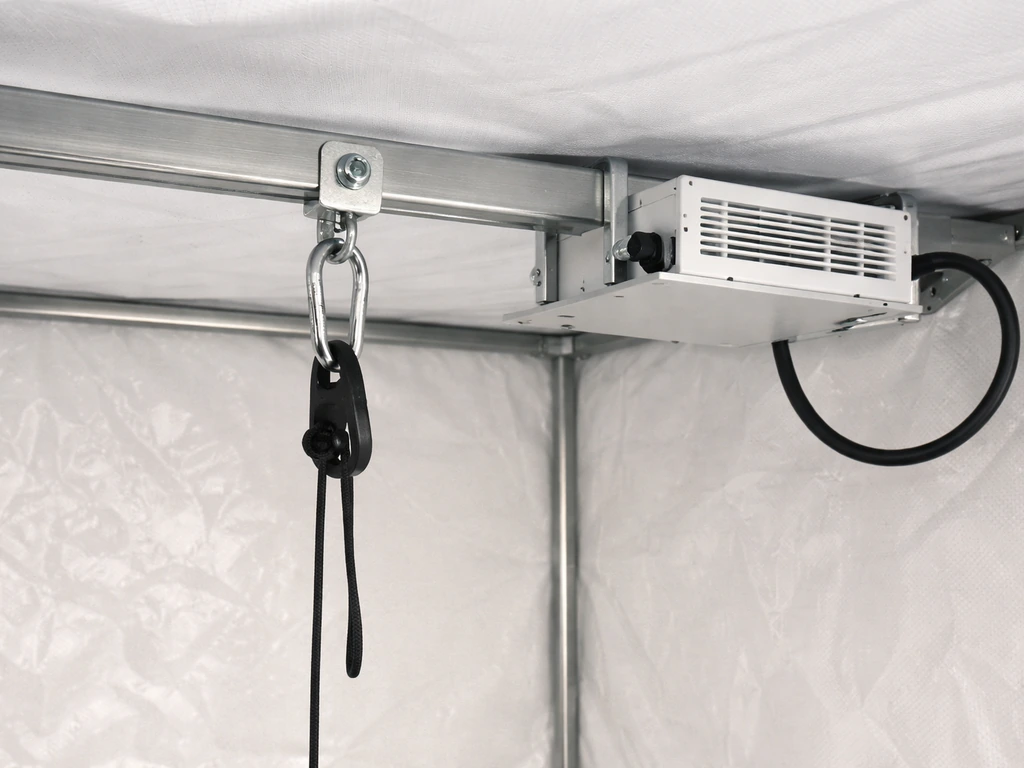
Grow tents
If you are in a grow tent, the steel crossbars at the top of the frame are your anchor points. This is the easiest setup for beginners because the bars are already there and rated for hanging lights. Clip or tie your ratchet hangers directly over the bars. You do not need any drilling at all, and adjusting height later is dead simple.
Freestanding racks and shelving
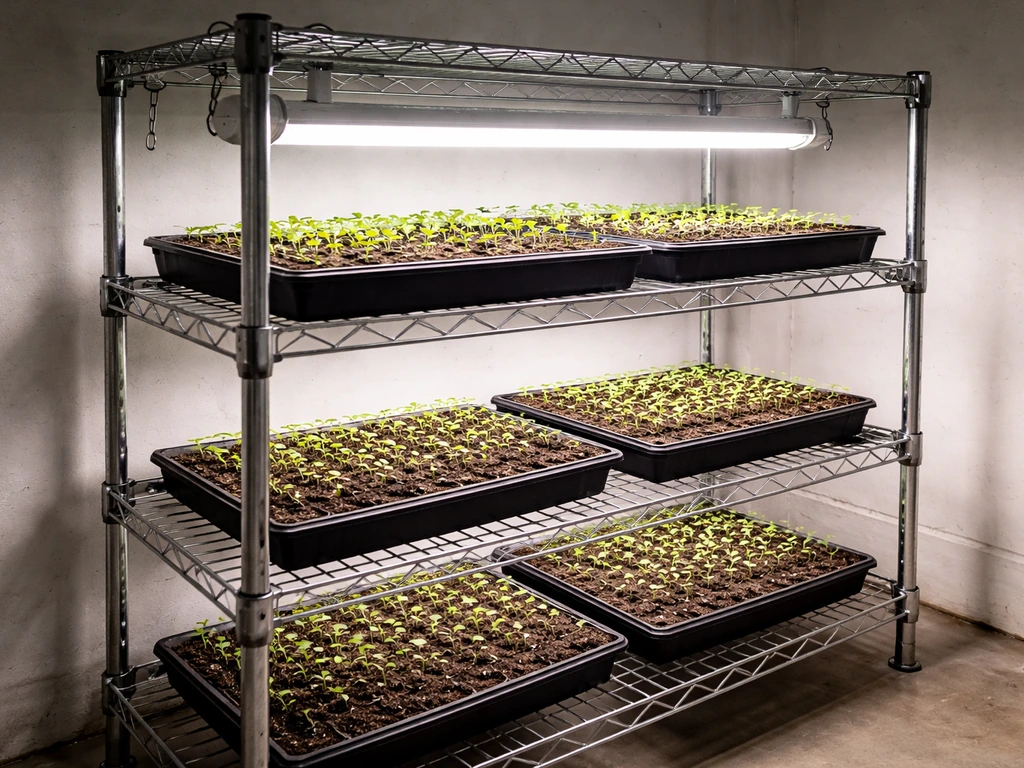
Wire metro shelves and metal grow racks work well for seedling trays and smaller fixtures. Clip your light to the shelf above the tray using zip ties, S-hooks, or short chain links. The limitation is height: you are working with fixed shelf spacing, so adjustability is more limited unless you have an adjustable-height wire shelf system. ACF Greenhouses-style ceiling hangers rated to around 40 lbs fit this scenario perfectly for smaller fixtures.
Do the math before you hang anything
Three numbers matter: the weight of your fixture, the load rating of your hardware, and how much vertical range you need. Get these wrong and you either drop an expensive light or cannot adjust it properly.
Weight rating
Check your light's spec sheet or the manufacturer's manual for the actual fixture weight. A Growlite GLH-OG-8 reflector, for example, weighs 33 lbs, which is a typical benchmark for mid-size commercial-style fixtures. Most modern LED panels for home growers weigh between 5 and 25 lbs. Once you have the number, your suspension hardware's safe working load (SWL) should be at least double the fixture weight.
A pair of Vivosun ratchet hangers rated at 150 lbs per pair is more than enough for anything under 75 lbs. If you are using aircraft cable, a 1/8-inch 7x19 galvanized cable has an SWL of around 340 lbs, so it is massively overbuilt for typical home grow setups but useful if you want maximum confidence.
Vertical clearance and cable length
Measure from your anchor point down to the top of your shortest plant container. That is your total working range. You need suspension hardware that can cover that full span. Most ratchet hangers give you about 8 feet of rope, which handles ceiling heights up to 10 feet with a standard-height bench or floor setup. If your anchor is unusually high, you may need to add a short section of chain or a carabiner extender between the anchor and the top of the ratchet. Also factor in the light's own body depth, since a thick reflector hood can easily add 6 to 8 inches to the hanging assembly.
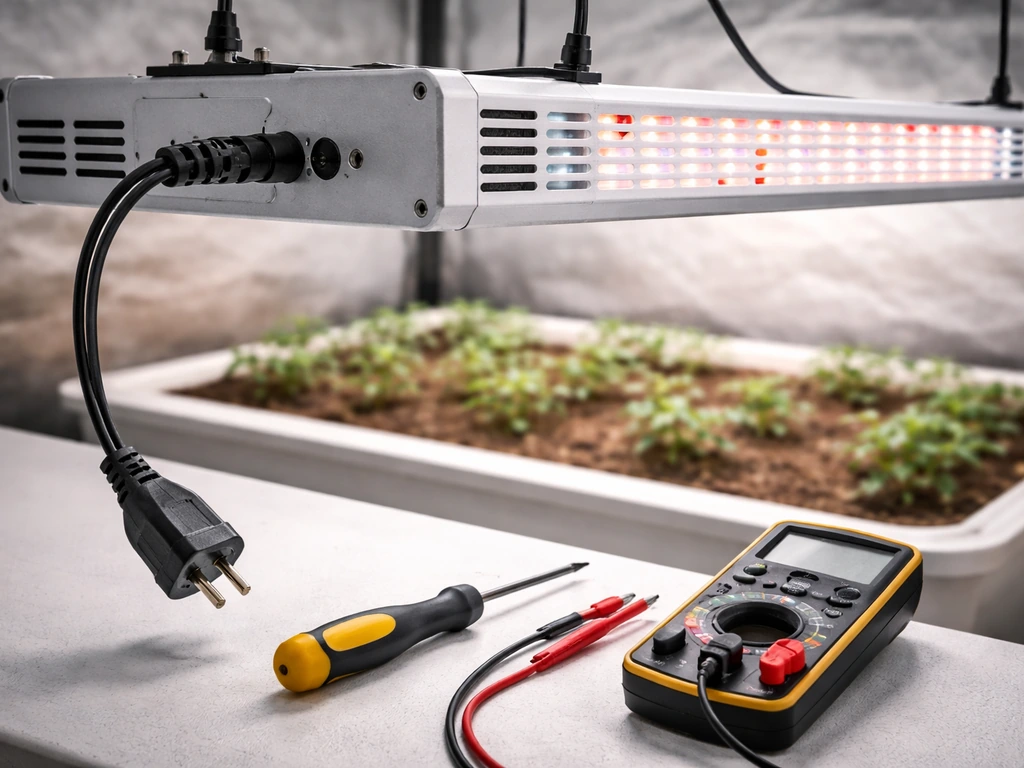
Power cord routing
Plan where the power cord exits the light and how it reaches the outlet before you finalize the anchor position. Running the cord out of the nearest tent cord hole (as the HydroBuilder tent manual recommends) reduces strain on the cord where it connects to the fixture.
For a clean look, plan how the lights and cords sit in the tent or on the ceiling so you can hide the grow lights without creating airflow or heat issues tent cord hole. Leave a little slack at the fixture end so the cord is not pulled taut when you raise or lower the light. Strain relief at the cord connection point prevents the wire from being yanked or kinked over time.
Step by step: anchor installation and hanging the light
- Locate your anchor point. Use a stud finder to mark a ceiling joist, or identify the crossbar in your tent. If using a rack, confirm the shelf above is firmly locked.
- Install the ceiling anchor. Drill a pilot hole slightly narrower than your eye bolt's threads, then drive a 5/16-inch or 3/8-inch eye bolt into the joist by hand until it is flush and snug. For tents, skip this step entirely.
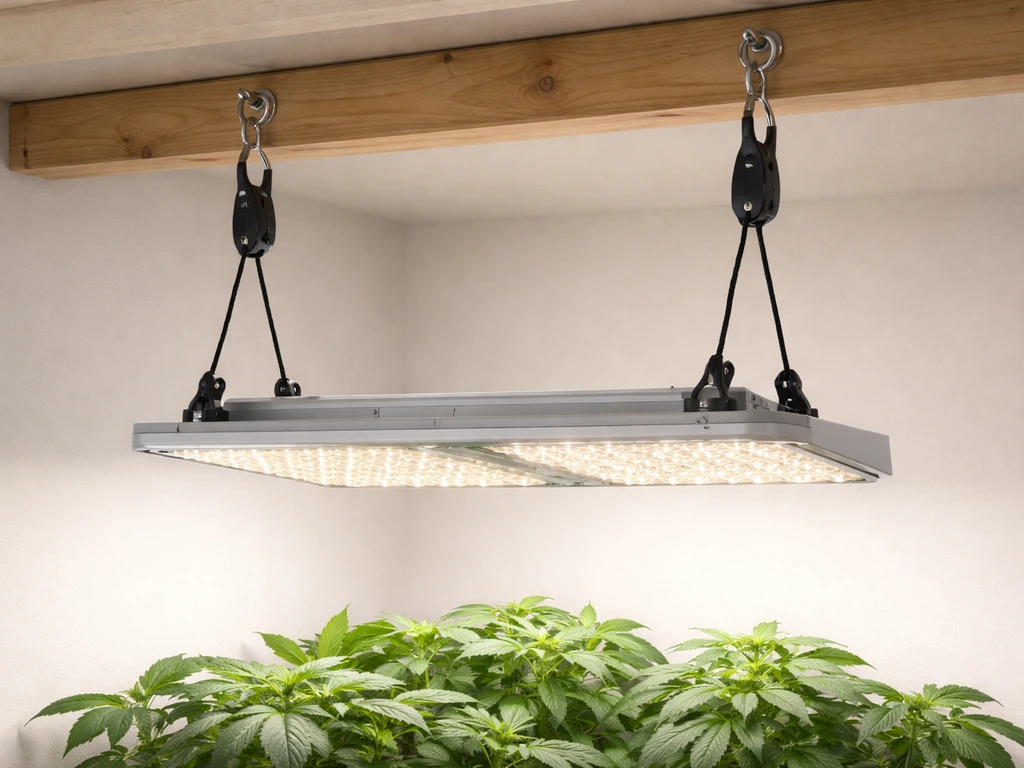
- Attach the top hook of each ratchet hanger (or the top of your chain) to the anchor point. For a tent, loop the long end of the ratchet rope over the crossbar, pull it through the locking mechanism, and clip it as the Vivosun instructions describe: hang on the crossbar, loop it over, connect it, then lock before tuning.
- Attach carabiners or S-hooks at the bottom end of the hangers to the mounting points on the light fixture. Most panels have built-in grommets or hanging brackets at two or four corners.
- Lift the fixture and connect both sides before letting it hang free. Having a second person hold the light while you connect the second hanger makes this much easier.
- Set the hooks on both ratchet ropes to equal positions before pulling them tight, as the HydroBuilder manual advises. This prevents one side from hanging lower before you even start leveling.
- Route the power cord out of a cord hole or cable management slot and leave a slack loop near the fixture. Do not let the cord pull tight against the fixture's strain relief point.
- Check the whole assembly visually: both hangers at the same tension, fixture sitting level, cord with slack, no components touching the light's heat zones.
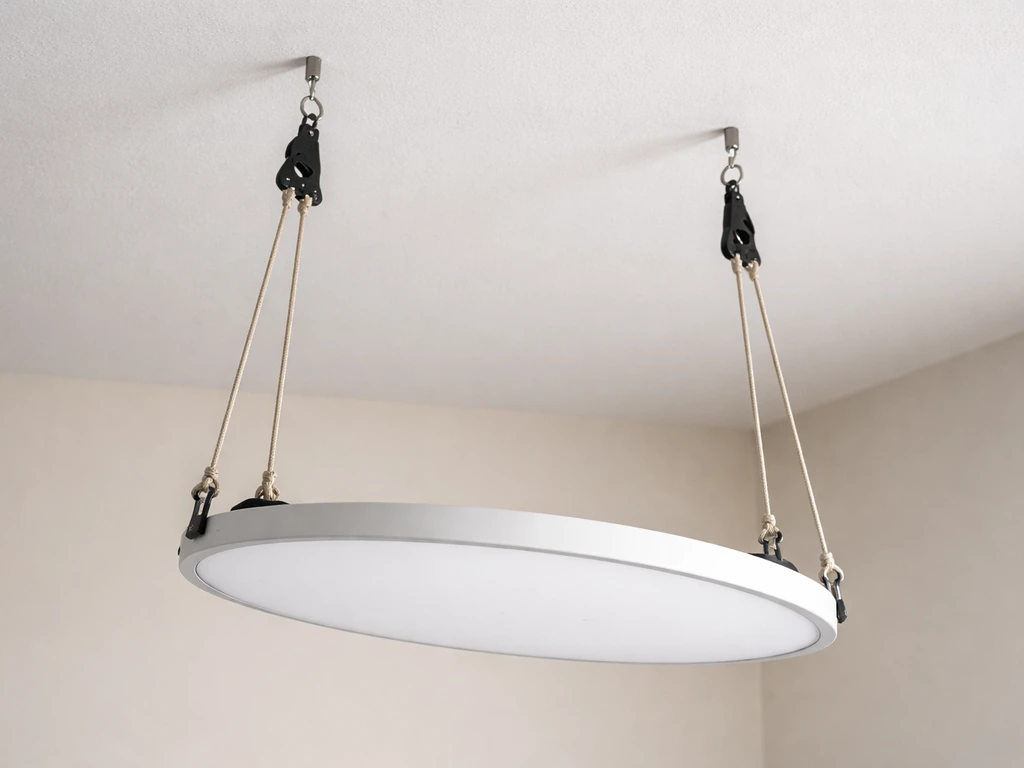
Adjust and level the hanging height
Once the light is up and the cord is routed, you need to level it and set it to the right initial height. Ratchet hangers make this the easiest part of the whole job. Pull both ratchet cords simultaneously and in equal increments to raise the light without tilting it. To lower, press the release tab on the ratchet body and let rope out a few inches at a time.
To check level, use a tape measure or a simple ruler from the bottom of the light to the top of your tallest plant container at each corner of the fixture. If one corner reads 24 inches and another reads 20 inches, the light is tilted. Adjust the lower-side ratchet independently until both sides read the same. A bubble level resting on top of a flat panel fixture also works great for this check.
If you are using jack chain instead of ratchets, adjust height by moving the S-hook to a different link. This is less convenient but totally reliable, especially for heavier fixtures where ratchet ropes might stretch slightly under load over time. The Growlite GLH-OG-8 installation guide specifically recommends jack chain for this reason on heavier reflector setups.
Setting the right height for each plant stage
Hang height directly controls how much light energy reaches your plants. Too close and you get bleaching or heat stress; too far and plants stretch toward the light, get leggy, and produce less. Here are practical starting points for common growth stages.
| Growth Stage | Recommended Starting Height (LED) | Target PPFD Range | Notes |
|---|---|---|---|
| Seedlings | 24–36 inches above canopy | 100–300 µmol/m²/s | Err toward farther to avoid heat stress on tender seedlings |
| Vegetative | 18–24 inches above canopy | 400–600 µmol/m²/s | Raise if plants are showing light bleaching or leaf curl |
| Flowering | 12–18 inches above canopy | 600–900 µmol/m²/s | Watch for heat stress, especially with HID or high-watt LEDs |
| Leafy greens / herbs | 12–24 inches above canopy | 200–400 µmol/m²/s | Wider range acceptable; lower end suits lettuce and basil well |
These are starting points, not gospel. The best way to dial in height after installation is to use a PAR meter or a phone-based PPFD app like Photone at canopy level. GrowLightMeter and Toledo Indoor Garden both recommend re-measuring weekly and adjusting height to keep PPFD in the target range as plants grow taller. GrowLightScience's guidance adds that using dimming alongside hang height gives you the most precise control: raise the light a few inches if the canopy is getting too much, or dim it a bit if plants are too close for you to raise further.
As plants grow through veg and into flower, you will need to raise the light every few days to maintain the same canopy distance. Ratchet hangers make this a 30-second job each time, which is one of the main reasons they are the standard recommendation for home growers.
Fixing common suspension problems
Light is sagging or tilting over time
Rope ratchet hangers can stretch slightly under sustained load, especially with heavier fixtures. If your light has drifted 2 to 3 inches lower after a week, the ropes have stretched. Re-tension both ratchets equally and mark the rope position with a piece of tape or a marker line so you can check drift easily. For fixtures over 20 lbs, switching to jack chain on one or both sides eliminates the stretch problem entirely.
Light is swaying
Sway happens when the anchor points are too far apart relative to the fixture width, or when you are only using a single center hang point for a bar-style light. The fix is to use two hang points spaced as wide as your fixture allows, ideally matching the built-in grommet spacing. For multi-bar fixtures, use four hang points, one at each corner. If you are in a tent and the crossbars themselves flex, add a brace or use a second bar as a second anchor.
Uneven height between multiple lights
When running two or more lights in a grid, small differences in ratchet tension add up fast. Measure from the floor to the bottom of each fixture with a tape measure, not just by eye, and set all fixtures to the same number. Mark the ratchet rope with a permanent marker at the locking point once you have the right height, then you can quickly reset any light that drifts.
Light is too low but you cannot raise it further
If your ratchet hangers are fully retracted and the light is still too close to the canopy, you have two options: dim the light if your fixture supports it, or lower the plants rather than raising the light. Move containers to the floor, add a lower bench, or remove a shelf tier. Some growers add a short chain extension above the ratchet to buy extra height when the tent frame is too low.
Heat and wiring safety concerns
Make sure your mounting hardware (chains, hooks, S-hooks) does not rest against or touch the driver housing, exhaust vent, or ballast of the fixture. blank" rel="noopener noreferrer">Growlite's installation instructions specify minimum mounting clearance on all sides specifically to allow heat to dissipate. If a metal hook is sitting on a warm surface for weeks, it is not a fire risk from the hook itself, but heat buildup in the fixture can shorten driver life. Keep hangers attached to the fixture's designated hanging brackets only. Proper air-cooling grow lights also benefit from mounting clearance so heat can escape without the fixture overheating.
On the power cord side, never let the cord kink sharply at the point it exits the fixture. Use the strain relief grip if the fixture provides one, as Philips and other manufacturers recommend in their installation guides. Route the cord away from hot surfaces, do not run it under the light directly above a heat vent, and avoid coiling excess cord tightly near the driver. A loosely bundled cord clipped to the tent frame is fine. A cord pinched under a heavy fixture bracket is not.
Anchor pulled from ceiling
If an eye bolt or hook pulls out, it almost always means it went into drywall rather than a joist, or the pilot hole was too large and the threads never gripped. Re-install into a confirmed joist location. If no joist is accessible where you need it, use a properly rated beam clamp across two joists, or switch to a freestanding rack and eliminate the ceiling anchor entirely.
A few things that pair well with a good suspension setup
Once your light is hung level and secure, you are going to find yourself tuning other things alongside it. Dimming the light is often the fastest way to fine-tune intensity without changing height at all, especially in the seedling stage when you want very low PPFD but do not want the fixture swinging around 36 inches in the air.
Keeping lenses and reflectors clean matters too, since a dusty panel throws off your PPFD readings at canopy level and makes height-tuning harder than it needs to be. Keeping lenses and reflectors clean is an important part of maintaining LED grow lights, because grime can reduce light output and throw off your PPFD readings. And if you are in a tent, managing heat from the fixture plays directly into how close you can hang it safely.
After you hang your LED grow lights, cooling them properly is the next step to protect drivers and keep temperatures in range how to cool LED grow lights.
FAQ
Can I hang a grow light from drywall if I use a heavy-duty toggle bolt?
No. Toggle bolts can improve holding power, but drywall is still not the right substrate for overhead fixture loads. If a joist is available, drill a pilot hole and anchor into the joist with a properly rated eye bolt. If no joist is accessible, use a freestanding rack or a properly rated beam clamp that spans two structural members.
How do I confirm the weight rating I should trust, safe working load vs maximum load?
Use the safe working load (SWL) or working load limit (WLL), not the “breaking strength.” Match hardware SWL to your fixture weight, and follow the practical rule from the article: hardware rating should be at least double the fixture weight (and double again if you expect shock loads, rough handling, or long-term drift concerns).
What’s the correct way to choose hanging hardware if my fixture has multiple hanging points?
Use the manufacturer’s intended hanging points and distribute the load evenly. If you have multi-point grommet spacing, align two or four hang points to those locations (based on fixture width) so the frame is supported without twisting. Avoid centering everything on one point if the fixture is wide or bar-style.
My ratchet ropes are fully retracted but the light is still too low, what should I do?
Do not stack risky improvisations that change hardware geometry. Prefer one of these options: dim the fixture if it supports dimming, lower the plants (bench or floor move), remove shelf tiers, or add a short, purpose-built chain extension above the ratchet to regain vertical range.
Should I center the light above the canopy or spread it evenly over the whole tent?
Centering is ideal for symmetric fixtures, but coverage depends on your layout and the fixture’s beam spread. After installation, re-check PPFD at canopy level (corners and center) and adjust height or fixture placement so the low-light areas are within your target range, not just the middle.
How much slack should I leave in the power cord when suspending the light?
Leave enough slack so the cord is not pulled taut when you raise or lower the light, but avoid large loops that can swing and contact the fixture or hot surfaces. Strain relief at the cord connection matters, and you should prevent sharp kinks at the exit point from the fixture.
Is aircraft cable a better choice than ratchet hangers for heavier LED fixtures?
Aircraft cable can be very robust, but the key advantage is different from ratchets. For heavier reflectors, jack chain often solves stretching and re-leveling issues in a simpler way. Cable can be “massively overbuilt,” but you still must ensure the attachment points and clamps are correctly rated and properly installed to avoid slip.
What causes a light to tilt even when I set it level at installation?
Common causes are uneven ratchet tension (pulling one side slightly more), one corner supported on different effective heights (rope length differences), or subtle fixture weight shifts if a hang point is not aligned to the frame. Re-measure from fixture corners to canopy with a tape measure after a day or two, then fine-tune by adjusting only the lower side.
How often should I re-check height, and what should I watch for besides distance?
Re-check weekly or sooner if you see plant response that suggests intensity mismatch. Also watch for slow sag on rope hangers (drift of a few inches after the first week), fixture sway, and any movement of cord routing that could increase heat exposure or cause contact with vents.
What should I do if the hook or eye bolt pulls out?
Treat it as a load path failure. Usually it means the fastener went into drywall instead of a joist, or the pilot hole was oversized so threads did not grip well. Re-install after confirming joist location, or switch to a beam clamp across two joists, or use a freestanding rack to eliminate the ceiling anchor.
Can I suspend the light from a wire shelf or metro shelf if it’s rated for storage?
Often not safely. Storage ratings do not automatically translate to overhead dynamic loads from a live, vibrating, adjustable suspension. If you use a shelf, confirm it is designed for overhead hanging loads, distribute load to reduce bending, and use proper connectors like S-hooks or short chain links rather than letting the fixture rest on the driver housing.
Do I need to keep the hanging hardware from touching the fixture at all times?
Yes, especially for long-term contact. Ensure hooks, chains, and S-hooks do not rest against the driver housing, exhaust vent, or any specified heat-transfer areas. Maintain the minimum clearance stated in the fixture installation guidance to prevent overheating that can shorten driver life.
Next Article
How to Fix LED Grow Light: Troubleshooting and Repairs
Step-by-step troubleshooting to fix LED grow lights that won’t power, flicker, dim, overheat, or fail partially, plus sa