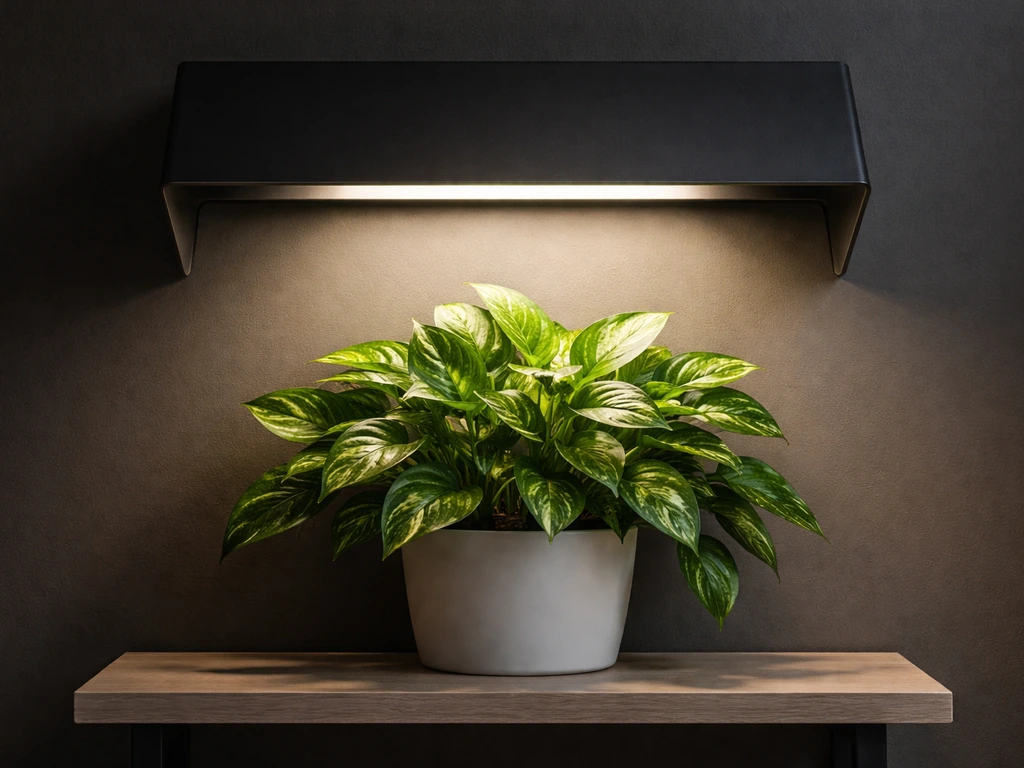
LED grow lights do run hot, but the fix is usually simple: improve airflow around the fixture, mount it at the right height, and dial back intensity if your grow space is already warm. Most overheating problems come down to one of three things: not enough air moving over the heat sink, the light mounted too close to the ceiling (or canopy), or the ambient temperature in the room creeping above 35°C (95°F), which is the upper operating limit for common fixtures like the Spider Farmer SF600. Spider Farmer lists an operating temperature range of -20, 35°C (-4, 95°F) for the SF600 blank" rel="noopener noreferrer">operating temperature range of -20–35°C. Fix those first before buying any accessories.
How to Cool LED Grow Lights: Step-by-Step Fixes

Marcus Tillman
7 May 2026

Why LED grow lights run hot (and what cooling actually means)
LEDs are far more efficient than HID or fluorescent lights, but they still convert a meaningful chunk of electrical power into heat rather than light. That heat concentrates at the LED junction, the tiny point where electricity becomes light inside each diode. Junction temperature is the number that actually matters for LED health, and here's why: for every 10°C rise in junction temperature, luminous efficacy drops by roughly 1.8%. That doesn't sound like much, but it compounds quickly. A light running hot will put out measurably less usable light than the same fixture running cool, even at the same wattage draw. Push it hard enough and you're spending full power for reduced output.
The heat sink on your fixture exists to pull heat away from those junctions and spread it into the surrounding air. When airflow around the heat sink is blocked or the ambient temperature is too high, the heat has nowhere to go, junction temperatures climb, and the driver protection circuits eventually kick in. MEAN WELL drivers (used in a huge number of commercial and hobbyist fixtures) have over-temperature protection set at around 100°C internally. When that threshold is hit, the driver shuts down output and recovers automatically once things cool off. That's the cycling or flickering you might be seeing. Cooling your LED grow light means keeping those junction and driver temperatures inside their safe operating windows, not just making the fixture feel cool to the touch.
Quick checks: heat sources, ventilation, and safe temperatures
Before you buy a fan or change anything, do these checks first. They take five minutes and solve most problems.
- Measure your ambient temperature. The safe operating range for most LED grow lights is -20°C to 35°C (-4°F to 95°F). If your grow tent or room regularly hits 30°C or above, you're already close to the limit before the fixture adds any heat. Use a cheap thermometer/hygrometer inside the grow space, not the room outside it.
- Check ceiling clearance. There should be at least 6 to 12 inches of open space between the top of your LED fixture and the ceiling or tent canopy above it. Mounting flush to the ceiling traps hot air directly over the heat sink fins and completely defeats passive cooling.
- Look for blocked heat sink fins. Dust, debris, or even a zip tie routed over the top of the fixture can obstruct airflow through the fins. Fins need open air on both sides to work. If your fins are clogged, clean them before doing anything else.
- Check whether the driver is separate or integrated. Some fixtures have the driver module built into the same housing as the LEDs. If yours does, the driver is generating its own heat right next to the LED array, which compounds the thermal load. External drivers mounted away from the canopy run cooler.
- Confirm your power supply isn't undersized. An undersized or failing driver works harder than it should and runs hotter as a result. If the fixture is relatively new and overheating from day one, verify the driver wattage matches the fixture spec.
- Look for any heat sources near the light. Other equipment, HVAC vents blowing warm air onto the fixture, or lights stacked too close together all raise the ambient temperature the fixture has to work against.
Cooling methods that work: airflow, heat sinks, fans, and mounting height
Airflow is the single most effective tool you have. LED heat sinks are designed around convective cooling, meaning they rely on air moving over their fins to carry heat away. The geometry of the fins matters too: wider spacing between fins is actually better for natural convection than tightly packed fins, because air can flow through more freely. But passive natural convection only gets you so far, especially in an enclosed grow tent. Adding active airflow with a fan makes a dramatic difference.
Mounting height and clearance
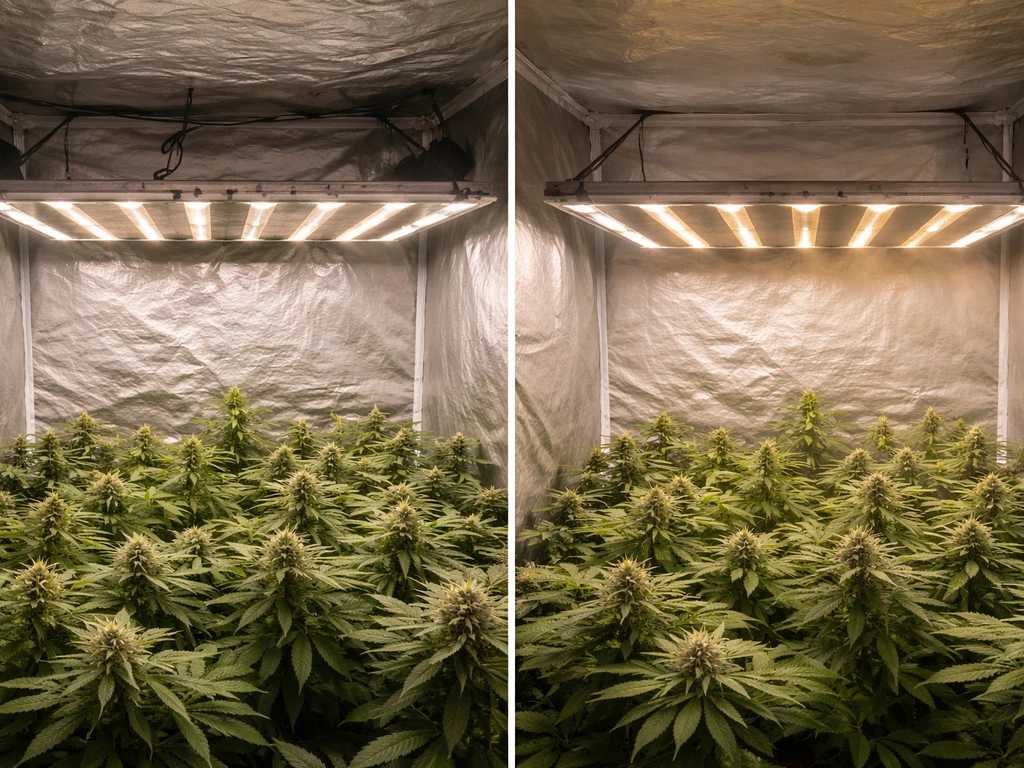
Get your fixture at least 6 to 12 inches below the ceiling or tent top. This isn't just about plant distance; it's about letting hot air escape from above the fixture instead of pooling there. When you mount a light too close to the ceiling, you create a stagnant hot zone right where the heat sink is trying to dump heat. To keep things safe and avoid thermal cycling, follow a clear process for how to suspend grow lights at a proper height and with enough airflow. Drop the light lower on its hangers, and you immediately improve thermal performance without spending anything.
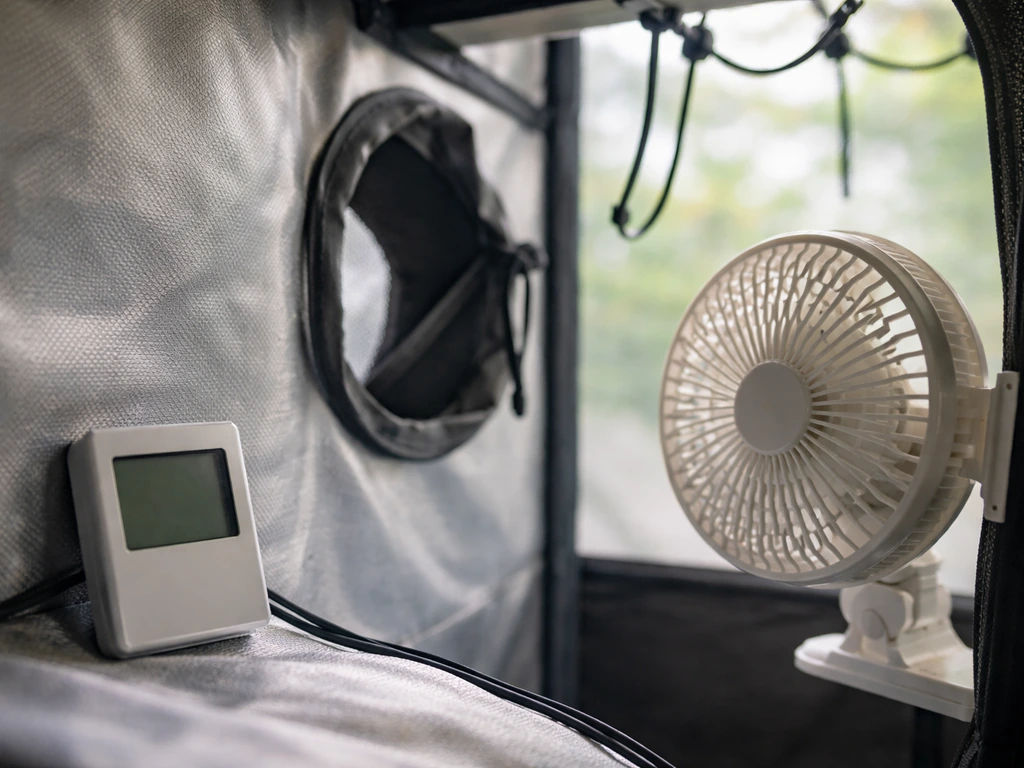
Fans and active airflow
A simple oscillating fan aimed across the top of your fixture (not directly into the plants) dramatically improves heat sink performance. You're not trying to blow cold air at the LEDs; you're replacing the hot stagnant air sitting over the fins with cooler air from the rest of the room. Even a small 6-inch clip fan positioned to blow across the top of the fixture makes a real difference. If you're in a tent, positioning an inline fan to exhaust hot air from the top of the tent is even more effective, since hot air naturally rises and pools up there anyway.
Passive cooling and heat sink design
If your fixture has a passive (fanless) cooling design, fin orientation matters. The fins should be oriented vertically so natural convection can pull cool air in from the bottom and exhaust warm air from the top. If your light is mounted sideways or the fins are horizontal, natural convection is significantly reduced. Check your manual for the intended mounting orientation and stick to it. Blocking the top of the heat sink (with a shelf, cable bundle, or the ceiling itself) kills passive cooling capacity, so keep the top open.
Reducing heat at the plant: placement, dimming, and intensity/duration settings
You don't always need to cool the fixture itself. Sometimes the smarter move is to reduce how hard you're running it, which lowers heat output at the source. This is especially relevant if you're growing seedlings, young plants, or anything that doesn't need maximum intensity anyway.
Dimming the light
Most modern LED grow lights include a dimmer knob or dial. Dropping intensity from 100% to 75% doesn't just reduce light output; it directly reduces the wattage being converted to heat. A light running at lower power produces less heat and runs cooler through both the LED junctions and the driver. If your fixture is thermally stressed and your plants don't need full power right now (seedlings, clones, or houseplants especially), dimming is the lowest-effort way to cut heat immediately.
Distance from the canopy
Increasing the distance between the fixture and the plant canopy reduces the heat your plants actually feel at leaf level, even if it doesn't change what the fixture itself is producing. Most LED grow light manufacturers publish a recommended hanging height range, typically 18 to 24 inches for vegetative growth and slightly closer for flowering. If your canopy temperature (measured at leaf level with a thermometer) is above 28°C to 30°C, raise the light a few inches and check again. You can compensate for the reduced intensity by slightly extending your light schedule.
Scheduling and run time
Running lights during the coolest part of the day (often at night if you're in a hot climate) is a simple scheduling trick that reduces thermal pressure on both the fixture and the plants. If your grow space gets hot during afternoon hours, set your light schedule to run from evening through early morning. Your plants don't care what clock time it is, only that they get consistent photoperiods. Controllers like the Spider Farmer GGS can automate this, letting you set temperature thresholds that adjust light behavior automatically without you having to babysit it.
Thermal management accessories: ducting, active vs passive cooling, and controller tweaks
Once you've covered the basics, a few accessories can meaningfully improve thermal management in more demanding setups.
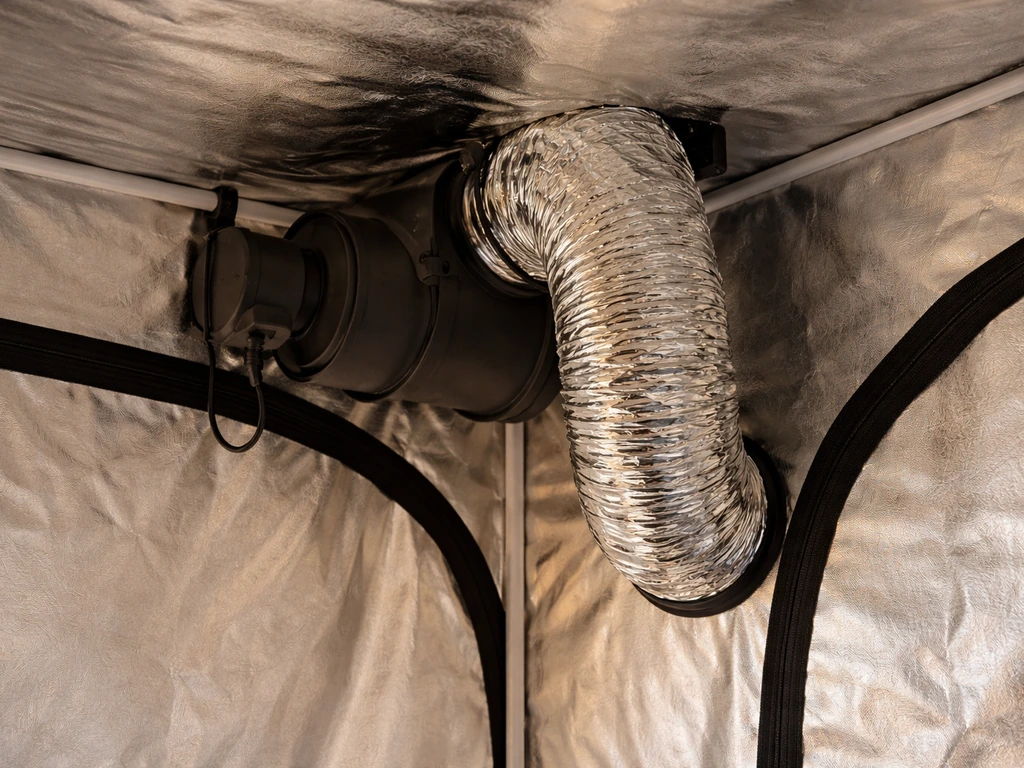
Inline fans and ducting
An inline fan pulling hot air out of the top of your grow tent is the standard setup for a reason: it works extremely well. Size your inline fan to exchange the air volume in your tent at least once every one to three minutes (manufacturers usually publish CFM ratings for their fans alongside tent volume calculations). Pair it with a carbon filter if smell is a concern. Route the exhaust duct so it's pulling from the highest point in the tent, since that's where hot air collects. A passive intake vent near the bottom of the tent completes the loop, bringing in cooler room-temperature air.
Active vs passive cooling: which one do you need?
| Cooling Type | Best For | Cost | Noise | Effectiveness |
|---|---|---|---|---|
| Passive (heat sink only) | Small fixtures under 100W, well-ventilated rooms | Free (built-in) | Silent | Moderate |
| Active fan on fixture | Fixtures with integrated fans, higher wattage | Low (built-in) | Low to moderate | Good |
| External oscillating fan | Any setup; improves heat sink airflow | Low ($15-30) | Low | Good |
| Inline exhaust fan + ducting | Enclosed tents, high-wattage fixtures | Medium ($50-150) | Moderate | Excellent |
| Controller-managed dimming | Any setup with a compatible dimmer or controller | Low to medium | Silent | Very good (source reduction) |
For most home growers running a single fixture in a tent, the combination of an inline exhaust fan and a clip fan near the top of the tent covers nearly every scenario. You don't need air conditioning or water cooling for typical hobbyist LED setups. If your ambient room temperature stays below 25°C, passive cooling plus a good exhaust setup is usually enough.
Controller tweaks and temperature-based automation
If you're running a smart controller, set up a temperature-based dimming or shutdown rule. Controllers like the Spider Farmer GGS allow you to define ambient temperature thresholds that automatically reduce light intensity when the grow space gets too warm. This is a genuinely useful safety net: if your exhaust fan fails on a hot day, the controller backs the light off before temperatures become damaging. It's not a substitute for proper ventilation, but it's a good last line of defense.
Troubleshooting common problems
Here's how to read the symptoms your light is showing and what to do about each one.
The light turns off by itself and comes back on later
This is almost always thermal protection doing exactly what it's designed to do. MEAN WELL drivers shut down output when internal temperatures exceed roughly 100°C and recover automatically once they cool. If this is happening repeatedly, it means your fixture is consistently hitting its thermal limit. Check ceiling clearance, clean the heat sink fins, add a fan over the fixture, and lower the dimmer if applicable. Repeated thermal cycling shortens driver life even if the protection circuit prevents immediate failure, so don't just tolerate it. If you want to prevent thermal cycling in the first place, learn how to hide grow lights effectively while keeping airflow around the fixture.
The light seems dimmer than it used to be
Reduced output is a classic sign of chronic thermal stress. Rising junction temperatures decrease both forward voltage and lumen output in LEDs. If your fixture has been running hot for weeks or months, you may have accumulated permanent lumen degradation. Check your thermal setup and fix any ventilation issues. If the light has been running within its rated temperature range and output is still dropping, that's a different issue (possibly LED degradation from age or manufacturing variation) and worth contacting the manufacturer about.
Flickering or unstable output
Flickering usually points to the driver, not the LED boards themselves. Driver overheating can cause intermittent protection trips that look like flickering to the eye. It can also indicate a failing driver, a loose connection, or an undersized driver being pushed beyond its rating. Start by improving ventilation and see if the flickering stops. If it continues after the fixture has cooled down completely, check all wiring connections. If connections are fine and the flickering persists, the driver is likely failing and should be replaced.
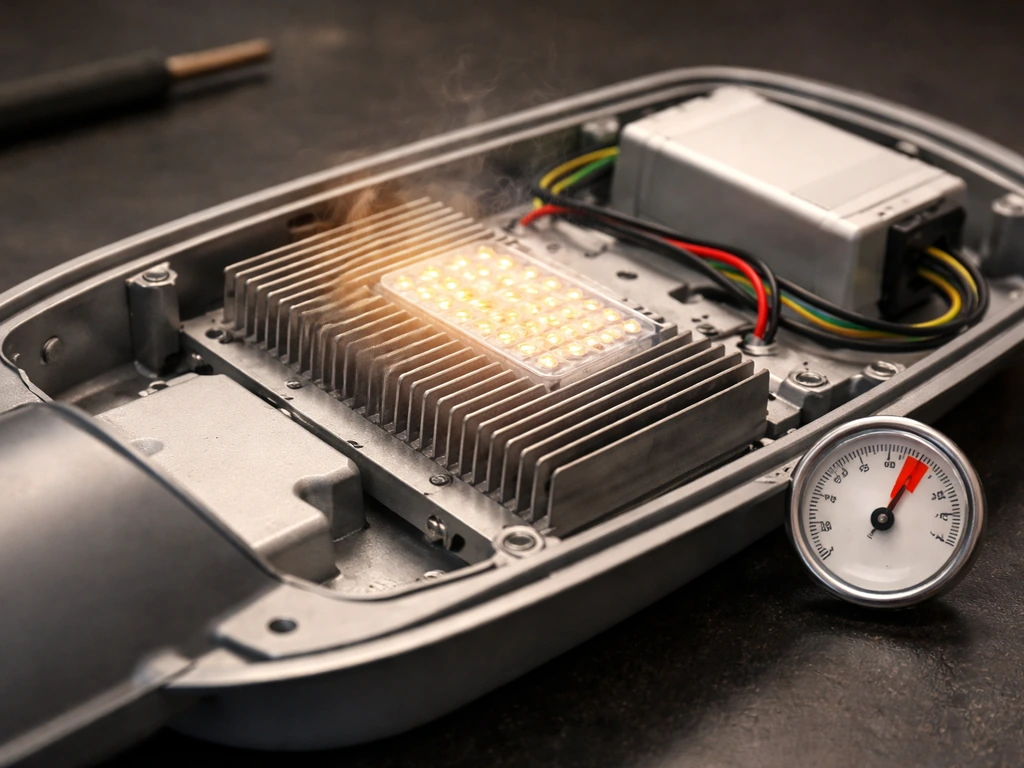
Burning smell or discoloration
A burning smell or visible discoloration (yellowing or browning of the housing, PCB, or wiring) is serious. Turn the light off immediately. This indicates components have been running beyond their safe thermal limits long enough to cause physical damage. Inspect the fixture carefully: if you see scorched PCB material, melted insulation, or discolored components, the fixture should not be used again without professional repair or replacement. This is the point where you contact the manufacturer, especially if the fixture is under warranty.
When to replace vs repair
If the light is shutting down due to heat but shows no physical damage, fix the ventilation first before writing it off. If it returns to normal operation after thermal improvements, you're fine. If the fixture has visible burn damage, continues to flicker or shut down after the thermal environment is corrected, or if lumen output has dropped noticeably and permanently, it's time to replace the driver (if it's a user-serviceable unit) or the whole fixture. Many driver manufacturers sell replacement units separately, and swapping a MEAN WELL driver is usually straightforward if you're comfortable with basic electrical work. When in doubt, contact the manufacturer with your ambient temperature data, symptoms, and how long the issue has been occurring. That information helps them diagnose quickly and determines whether you're covered under warranty.
FAQ
Is it safe to point a fan directly at the LED panels, or should it be aimed across the heat sink only?
Aim airflow across the top of the heat sink rather than blasting the LEDs or plants. Directly hitting the panel usually gives less effective fin airflow and can dry foliage unevenly, especially in tents. If you use an oscillating clip fan, keep it angled so the moving air passes over the fins, not straight into leaves.
How do I know whether the problem is ambient heat or a blockage around the heat sink?
Compare two temps: room ambient and canopy temperature, plus check whether the fixture cycles when the air is still versus when airflow is added. If adding a top clip fan stops thermal shutdowns, it’s usually a heat sink convection or stagnant-air issue. If temperatures stay high even with airflow improvements, ambient temperature or inadequate exhaust likely is the driver.
What’s the quickest way to confirm if my LED is actually overheating versus just feeling hot?
Watch for driver protection symptoms, not surface temperature. If you see repeated cycling, flickering, or reduced output after the fixture warms up, that indicates thermal stress even if the housing feels “only warm.” If it stays steady with no dimming or cycling, junction and driver temps are likely within range.
Can I cool an LED grow light by adding extra insulation or enclosing it to reduce drafts?
Generally no. Insulating or enclosing the fixture reduces convective cooling and can raise internal driver temperatures, triggering protection. If you want to control drafts for plants, redirect airflow to pass over the heat sink and exhaust hot air away, instead of trapping air around the fixture.
Does cleaning the heat sink really matter, and how often should I clean it?
Yes, dust on fins can significantly reduce airflow and heat transfer, which makes thermal cycling more likely. Clean fins when performance degrades or on a routine schedule, especially if you have lint-heavy bedding, frequent pruning, or a dusty environment. Use a soft brush and avoid damaging thermal interfaces, and let everything fully dry before powering on.
How should I place the exhaust fan if I’m using both an inline exhaust and clip fans?
Exhaust should pull from the highest point where hot air accumulates, ideally directly above or near the tent top. Clip fans should move air across the fixture heat sink toward that exhaust path, not toward the intake. If exhaust is pulling from the side or bottom, hot air can recirculate and keep the fixture stressed.
If my light flickers, when should I assume it’s a failing driver versus just thermal protection?
If flickering happens only after warm-up and stops after cooling and ventilation improvements, thermal protection is likely. If flickering continues after the fixture has fully cooled and you confirm wiring connections are secure, a driver problem or failing connection is more likely, and replacement may be necessary.
What dimming setting is “safer” for cooling, and should I run seedlings at lower power automatically?
Running at lower power reduces heat at the source, but use your plants’ needs as the guide. For seedlings and clones, start lower and increase gradually as they recover, then reassess canopy temperature. If your controller supports it, set temperature-based dimming so you do not need to guess a permanent dimmer percentage.
How much higher should I hang the light if my leaf-level temperature is above 30°C?
Raise it a few inches, then recheck canopy temperature after the system stabilizes (often 10 to 20 minutes with fans running). If you move it up, consider a slightly longer or more intense schedule only if the fixture remains within thermal and output targets. The goal is reducing leaf-level heat exposure without starving the heat sink of airflow.
Is there a risk to repeatedly letting the driver thermal-protect and cycle on and off?
Yes. Even if protection prevents immediate failure, repeated thermal cycling can shorten driver life. Treat cycling as a warning sign to correct airflow, mounting clearance, and ambient temperature, then only use dimming or automated shutdown rules as a safety net, not the main solution.
Should I replace the whole fixture or just the driver if it keeps overheating?
If there is no physical burn damage and ventilation fixes restore normal behavior, don’t replace anything. If thermal protection persists despite correct airflow and the fixture flickers or lumen output remains permanently reduced, replace the driver if it is user-serviceable and known to be replaceable by the manufacturer. If there is scorch or melted insulation, replace the fixture and follow up with the manufacturer for warranty options.
Can I use a temperature controller to shut the light off instead of just dimming it?
Yes, but set it as a last line of defense. A dimming step usually prevents abrupt photoperiod changes, but if ambient temperature keeps climbing or exhaust fails, a shutdown threshold can protect components. Make sure your thresholds account for sensor placement, for example near the canopy or near the exhaust stream, so readings reflect actual heat exposure.
Next Article
How to Hide Grow Lights Without Losing Plant Power
Hide grow lights from view and glare while keeping full plant output with smart placement, hoods, baffles, and safe encl