You can dim most modern LED grow lights using a built-in knob, a 0–10V dimming signal from a compatible driver, or an external controller, but the real question is whether you actually need to dim at all. If you are trying to hide grow lights for a cleaner look, keep the brightness and placement appropriate so the plants still get the right intensity and schedule. For seedlings, the answer is usually yes: starting at around 50% power and adjusting from there keeps young plants from getting stressed or bleached while still delivering enough light to prevent the leggy stretching that comes from too little intensity. For established plants, dimming is mostly useful for managing heat, matching a plant's growth stage, or compensating for a light that's simply too powerful for your space.
How to Dim LED Grow Lights for Seedlings and More

Should you even dim your LED grow light?
Dimming isn't always the right move. Before reaching for the dial, it helps to understand what problem you're actually trying to solve. There are three good reasons to dim: your plants are showing stress (bleaching, curling, or heat damage), your light is significantly overpowered for your canopy size, or you're growing young seedlings that don't yet need full intensity. Outside of those situations, adjusting the hanging height is often a better first step than reducing power, especially if you're already running a mid-range fixture at a reasonable distance. If you want the same end result but need to change hanging height instead, see how to suspend grow lights for step-by-step placement and spacing suspend grow lights for placement.
That said, dimming is genuinely useful for seedlings and early vegetative growth. Young plants need a daily light integral (DLI) of roughly 5–10 mol·m−2·d−1 according to Virginia Tech Extension and Michigan State research, and many modern LED grow lights are built for mature flowering plants that want 20–40 mol·m−2·d−1 or more. Running a full-power 600W LED 18 inches over a tray of two-week-old tomato seedlings is a recipe for stress. For more specific cleaning steps and safe materials to use, see our guide on how to clean LED grow lights. Dialing the light back to 40–60% at that stage is exactly the right call.
When you should NOT dim: if your seedlings are already pale, stretching toward the light, or growing thin and floppy, that's a sign they're not getting enough light, dimming would make things worse. In that case, lower the fixture, increase intensity, or extend the photoperiod instead.
Getting seedling intensity right
Seedlings are the stage where getting intensity wrong causes the most visible damage, so it's worth being specific. The target DLI for early-stage seedlings is 5–10 mol·m−2·d−1, with 6–10 mol·m−2·d−1 being the commonly cited range for plugs and young starts. DLI sounds technical, but it's just the total amount of usable light your plants receive over the course of a day, it's calculated from PPFD (the light intensity hitting the canopy at any given moment) multiplied by how many seconds the light runs, divided by one million.
To hit a DLI of 8 mol·m−2·d−1 with a 16-hour photoperiod, you need a PPFD of roughly 139 µmol·m−2·s−1 at canopy level. At 18 hours, you only need about 123 µmol·m−2·s−1. Those are relatively modest numbers, most grow lights can hit that at 40–60% power from 18–24 inches above the seedling tray. The key is to measure at canopy height with a PAR/PPFD meter rather than guessing. A dedicated meter like the Apogee DLI-500 will show you PPFD, DLI, and photoperiod all at once, which removes a lot of the guesswork.
UNH Extension research puts the leggy-seedling problem in plain terms: when seedlings don't get enough light, they stretch toward it, producing long, weak stems. That's why keeping the light close (within 12–18 inches for most LEDs at reduced power) matters as much as the dimmer setting. Don't dim so aggressively that you have to compensate by running the light for 20+ hours, that's a sign the intensity is too low, not that the schedule needs adjusting.
How to actually dim your LED grow light
There are three common ways to dim an LED grow light, and which one applies to you depends entirely on what fixture you have. Here's how each method works in practice.
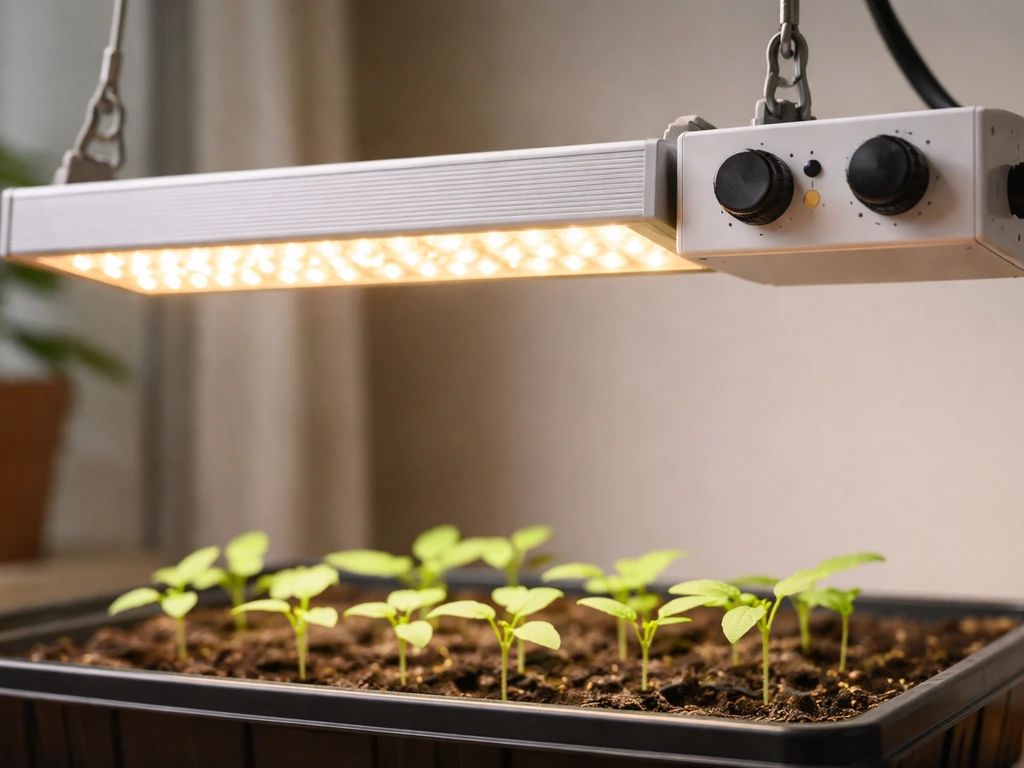
Built-in dimmer knob or switch
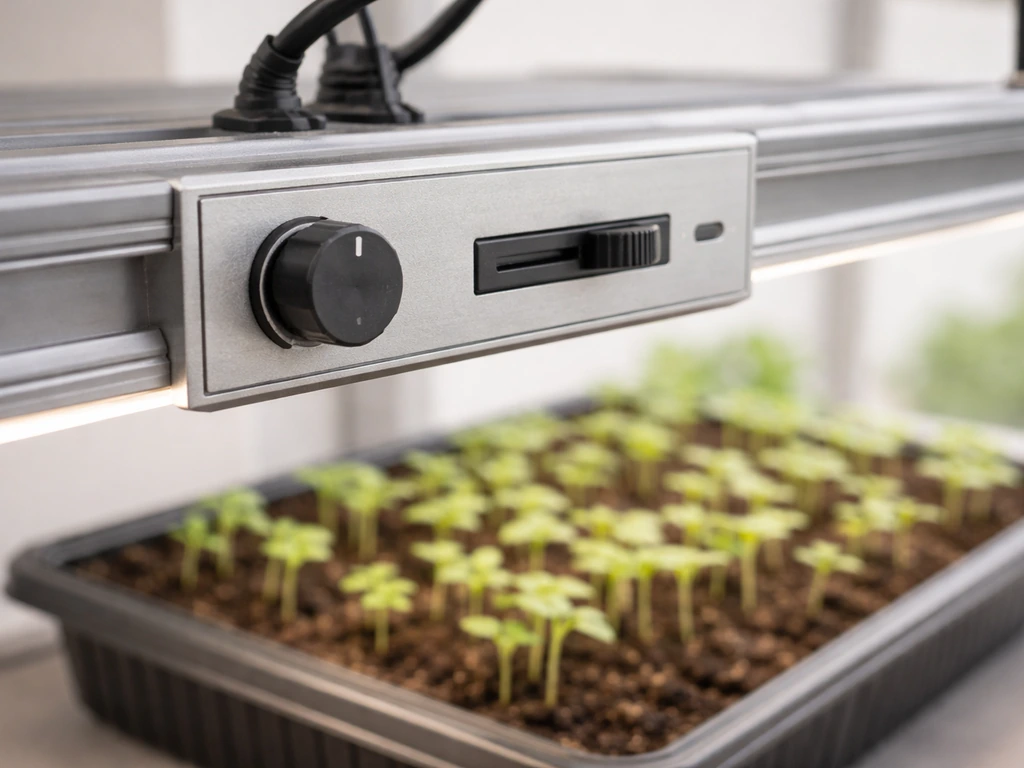
Most consumer and prosumer LED grow lights sold today have a rotary knob or sliding switch on the driver housing. For a quick walkthrough, you’ll typically use the built-in dimmer knob, a 0, 10V dimming input, or a smart controller depending on what your fixture supports rotary knob. You turn it, and the light output changes, simple as that. Some fixtures have separate veg and bloom channels with their own dimmers. If yours has this, start by setting both channels to 50–60% for seedlings and adjust from there based on plant response. There's no wiring involved; just plug in and turn the dial.
External 0–10V controller or dimming cable
Higher-end fixtures and commercial LED drivers (like the Mean Well series) support external dimming via a low-voltage signal, typically 0–10VDC, a 10V PWM signal, or a resistance-based connection wired to dedicated DIM+ and DIM− terminals on the driver. This lets you connect a separate wall-mounted controller or an automated system that can ramp intensity up and down on a schedule. If you're using a driver-based fixture, check the spec sheet for exactly which dimming input it accepts before buying a controller, not all controllers are compatible with all drivers.
Smart controllers and app-based systems
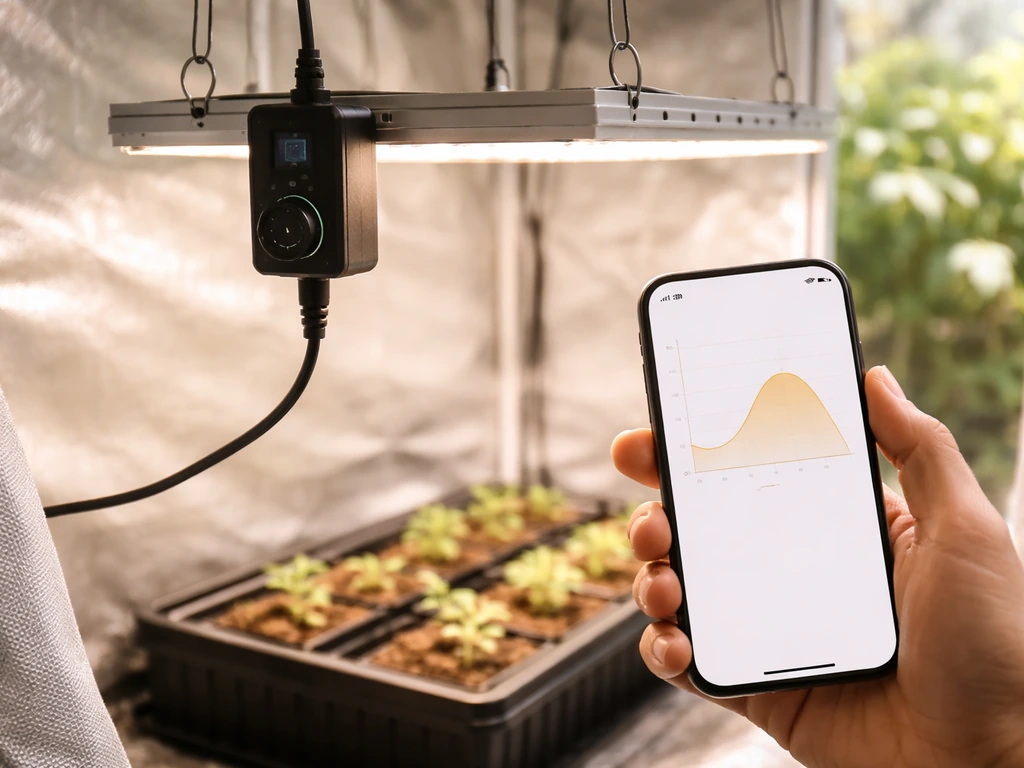
Some LED grow light brands (AC Infinity, Spider Farmer, Mars Hydro, and others) offer proprietary controllers or app-based systems that let you program intensity curves over time, ramping up from 30% at week one to 80% at week four, for example. These are genuinely useful for seedling-to-veg transitions and take the guesswork out of manual adjustments. If your light supports this, it's worth setting up from day one rather than managing it manually.
| Dimming method | Best for | Hardware needed | Notes |
|---|---|---|---|
| Built-in knob/dial | Most home growers | Nothing extra — built into fixture | Check both channels if veg/bloom are separate |
| 0–10V or PWM signal | Intermediate growers, driver-based fixtures | Compatible external controller or wiring | Must match driver's input spec exactly |
| Smart controller / app | Growers wanting automation | Brand-specific controller or hub | Enables intensity scheduling and ramp curves |
| TRIAC / phase-cut dimmer | Rarely needed for LEDs | Compatible dimmer module | Check driver compatibility — many LEDs don't support TRIAC |
Step-by-step: dialing in placement and intensity from scratch
If you're setting up a grow light for the first time or troubleshooting an existing setup, this is the process I'd walk through in order. Once you have your placement dialed in, you can also choose the right dimming method so your grow lights deliver the right intensity for seedlings and veg how to air cool grow lights.
- Hang the light at the manufacturer's recommended starting height — usually 18–24 inches above the canopy for seedlings. If there's no guidance, start at 24 inches.
- Set the dimmer to 50% if you're working with seedlings, or 75% if you're starting with established vegetative plants.
- Use a PAR/PPFD meter to measure the light intensity at canopy level. For seedlings, you're targeting 100–200 µmol·m−2·s−1. For vegetative growth, aim for 200–400 µmol·m−2·s−1. For flowering, 400–600+ µmol·m−2·s−1 depending on species.
- Calculate your DLI: multiply your PPFD reading by your photoperiod in seconds, then divide by one million. For seedlings, you want 5–10 mol·m−2·d−1. Adjust dimmer setting or hanging height to hit that range.
- Run the light for 2–3 days and watch your plants. Look for stress signs (see the checklist below) and adjust by 10% increments rather than big jumps.
- Raise intensity gradually as plants mature — increase by about 10–15% per week during the seedling-to-veg transition, rechecking PPFD at canopy height after each change.
- Revisit height and intensity any time you move to a new growth stage, add more plants, or notice the canopy has grown significantly closer to the fixture.
How to tell if your plants need dimming, or more light
Your plants will tell you when something is off, but the signals for too much light and too little light can sometimes look similar at first glance. Here's what to look for.
Signs the light is too intense (dim it or raise the fixture)
- Leaf bleaching or yellowing directly under the light while lower leaves stay green
- Leaf edges or tips curling upward (canoe-shaped leaves)
- Brown or white dry patches appearing on the tops of leaves — not wet or slimy
- Plants appear stunted despite healthy color — growth has slowed or stopped
- Soil or growing media drying out much faster than usual due to heat from the light
- Seedlings look healthy but compact — this is fine, not a problem to fix
Signs the light is too weak (raise intensity or lower the fixture)
- Seedlings stretching upward with long internodal gaps between leaves — the classic leggy look
- Stems are thin, weak, and unable to support themselves without leaning
- Leaves are pale green or yellowish-green overall, not just at the top
- Plants lean or tilt toward the light source even when positioned directly underneath it
- Growth is very slow relative to the expected rate for the plant type and age
Common mistakes and how to fix them
Flickering after dimming
If your light flickers when dimmed, the most common cause is a mismatch between the dimmer's control method and what the driver supports. If you think your dimming setup is causing weak growth, start by checking the fixture height and whether your driver supports the dimming input you’re using how to fix led grow light. A TRIAC-style dimmer (the kind used for household incandescent bulbs) will cause flickering or complete failure on most LED grow light drivers. Check your driver's spec sheet and use only the dimming input method it lists, usually 0–10V, PWM, or a resistance-based pot. Replacing the controller with a compatible one almost always solves this immediately.
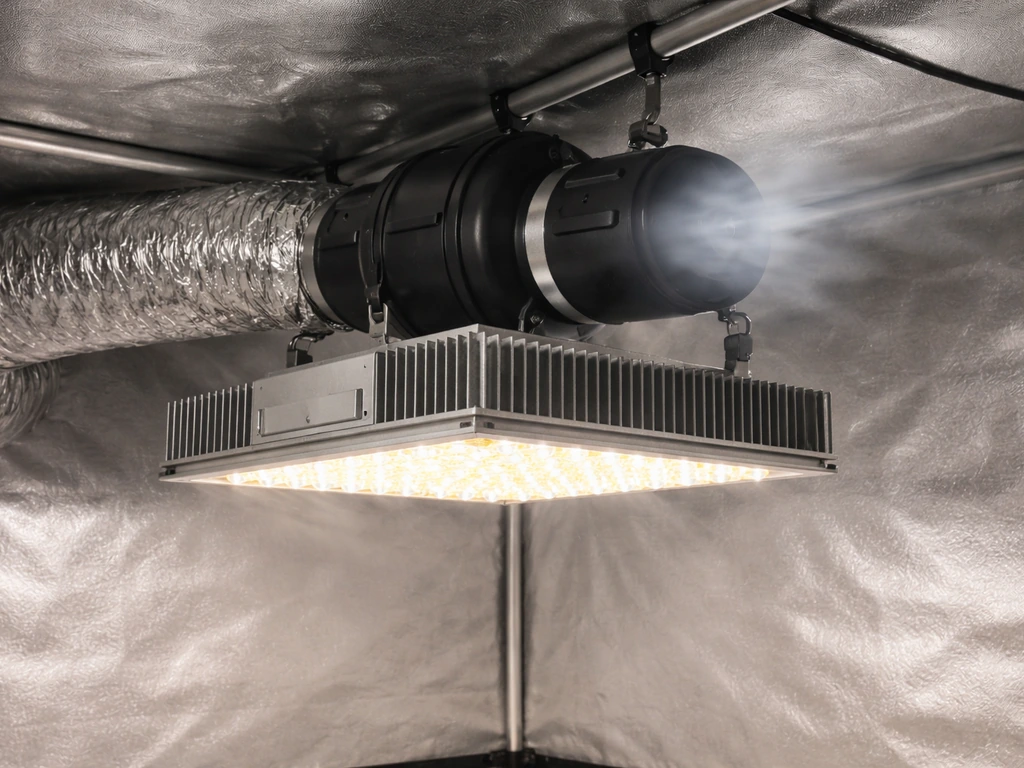
Heat problems even at lower power
Dimming reduces light output but doesn't always reduce heat output proportionally, especially with older or lower-quality drivers. If your grow space is still running hot after dimming, look at airflow and ventilation first. A small inline fan or oscillating fan directed at the driver housing makes a meaningful difference. Managing heat with proper airflow is worth addressing alongside dimming rather than treating them as separate problems.
Uneven coverage across the canopy
Dimming a single fixture can expose uneven coverage that full power was masking. Plants at the edges of the canopy receive less intensity than those directly underneath, and at lower power settings that gap becomes more noticeable. Fix this by raising the fixture slightly (which widens the beam spread) or by checking whether your fixture is centered over the canopy. If you're working with multiple lights, stagger them rather than clustering them in one area.
Wrong photoperiod combined with wrong intensity
A common beginner mistake is compensating for low intensity by running lights for very long hours, sometimes 20 hours or more. While DLI does accumulate over time, plants also need a dark period for metabolic processes, and many species are triggered into flowering by photoperiod length. Running lights for 22+ hours to make up for a dimmed setting that's too low is a sign you need to increase intensity, not extend the schedule. The better fix is to raise the dimmer setting or lower the fixture until you can hit your DLI target within a 16–18 hour photoperiod.
Pairing your dimmer setting with your light schedule
Dimming and photoperiod work together to determine how much total light your plants receive each day, that's your DLI. Virginia Tech Extension also explains that you can calculate and use Daily Light Integral (blank" rel="noopener noreferrer">DLI, mol·m−2·d−1) by using PPFD (µmol·m−2·s−1) together with photoperiod. Think of them as two levers: intensity (set by your dimmer) and duration (set by your timer). Changing one affects the DLI your plants accumulate, so you should think about them together rather than independently.
For seedlings, a practical starting schedule is 16 hours on / 8 hours off at 50% intensity, then measure PPFD and calculate whether you're hitting 5–10 mol·m−2·d−1. As plants move into active vegetative growth, increase intensity by 10–15% per week while keeping the photoperiod the same, rechecking your DLI each time you adjust. Most growers target 14–18 hours for veg and drop to 12 hours for flowering species, at that point you'll likely be running the light at or near full power.
The key principle here is that you should adjust your dimmer to hit the right PPFD, then use your timer to set the photoperiod appropriate for the growth stage, not the other way around. Resist the urge to compensate for a too-dim setting with extra hours. Get the intensity right first, then set the schedule for the plant's biological needs.
If you've got a smart controller that supports intensity scheduling, use it to build a ramp curve across the seedling and veg stages, for example, 40% in week one, 55% in week two, 70% in week three, and 85–100% by the time you reach full veg. This mimics natural light increases as seasons progress and tends to produce more resilient, well-adapted plants than jumping straight to full power.
FAQ
How do I know whether dimming my LED grow light will hurt my plants?
If your fixtures support 0–10V, PWM, or driver-specific resistance dimming, you can usually dim safely, but you still need to hit the right canopy PPFD. A good check is to measure PPFD at plant height with a PAR meter, then confirm the resulting DLI for your planned photoperiod (for seedlings, the target is often 5 to 10 mol·m−2·d−1). If you do not have a meter, avoid lowering below the point where plants start thinning or stretching.
What is the best way to tell if I should dim or change photoperiod?
Use the same fixture height and aim, then change only one variable at a time. Dimming changes intensity, photoperiod changes duration, and either can affect outcomes that look similar early on. For example, pale, slow seedlings after dimming often need higher PPFD rather than more hours, while heat stress can improve with dimming even if the PPFD targets are still met.
Can I use a normal wall dimmer to dim my LED grow light?
Do not use a household TRIAC dimmer for LED grow lights unless the manufacturer explicitly says it is compatible. TRIAC-style control commonly causes flicker, driver failure, or unstable output. If flicker happens only at certain knob positions, it usually indicates a control compatibility issue, not a planting problem.
How can I tell if a smart controller will work with my grow light?
Yes, but only if the controller is designed for your driver and dimming method. With 0–10V dimming, the controller’s output must match what the driver expects (voltage range and input type). If you connect a smart controller to an incompatible driver input, the light can flicker or get stuck at a low output.
Why is my grow space still too hot after I dim the lights?
Dimming can reduce light output, but heat from the driver and LEDs may not drop proportionally, especially on older or lower-quality drivers. If your space stays hot after dimming, prioritize ventilation, increase airflow across the fixture, and ensure the light is mounted so vents are not blocked. A simple inline fan aimed at the driver housing often helps more than further dimming.
Why do my plants at the edges look worse when I dim the light?
If one side of your canopy looks healthier than the other at lower dim settings, you likely have uneven coverage that was masked at full power. Try centering the fixture over the canopy, consider slightly increasing hanging height to widen the footprint, or split the area with additional fixtures rather than relying on one dimmed light for uniformity.
Should I dim more or lower the light when seedlings stretch?
For most LED setups, moving from dimming to changing fixture height should be your first troubleshooting step when plants are stretching, because it often improves uniformity and canopy contact without pushing the driver into very low output ranges. A practical approach is to adjust height modestly, then re-measure PPFD and only then decide whether to change the dimmer.
What should I do instead of running the lights for 22 hours to compensate for dimming?
Avoid “making up” for low intensity by running lights for 20 hours or more. If you cannot reach your seedling DLI within a typical 16 to 18 hour window, increase PPFD by raising the dimmer or lowering the fixture until you hit the target. Long photoperiods can also affect species-specific development and dark-period requirements.
Is it better to ramp intensity slowly or jump to higher dimmer settings?
It depends on your goal. If you are transitioning from seedlings to vegetative growth, ramp intensity gradually (for example, increasing about 10 to 15 percent per week) while keeping the photoperiod stable, then verify with PPFD or at least plant response. A sudden jump to high intensity often causes stress even if the final DLI looks correct.
Can I use both a timer and dimmer, and which should control what?
Most common dimming methods still allow you to use a timer, but you should keep the timer controlling the photoperiod and let the dimmer handle intensity changes. For smooth transitions, use the controller’s scheduling if available, or at minimum step intensity changes at the same time each day so the plant experiences consistent daily patterns.
How to Air Cool Grow Lights: Fan and Duct Setup Guide
Step-by-step guide to air cool grow lights with fans and ducts: sizing, mounting, intake exhaust, airflow, and troublesh