The safest way to clean an LED grow light is to unplug it, let it cool completely, then wipe the housing with a dry lint-free cloth, clear the vents with a few bursts of compressed air, and clean the lenses or reflectors with distilled water on a soft non-abrasive cloth. That is the core of it. Everything else below is about doing each step correctly so you do not damage coatings, short out a driver, or put your light back up still running at 70% because of a film you missed.
How to Clean LED Grow Lights Safely and Effectively

Marcus Tillman
12 Apr 2026
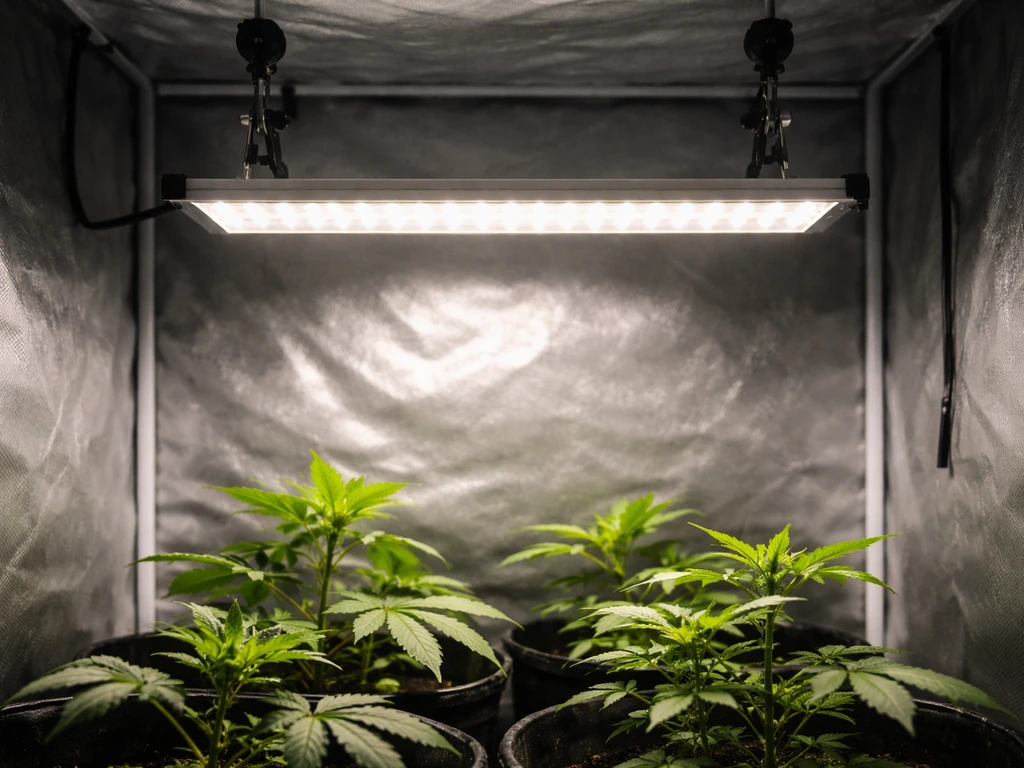
Why cleaning your grow light actually matters
Dust is a slow thief. A thin layer of dust on the lens or reflector of your LED panel can drop light output by 10 to 20 percent over a few months without you noticing until your plants start stretching or yields drop. The light is still on, it still looks bright to your eyes, but your canopy is getting less photosynthetically active radiation than it should. That translates directly to slower growth.
The other problem is heat. Blocked fan vents and clogged heat sinks make the driver and diodes run hotter than they were designed to, which shortens lifespan and can trigger thermal throttling on smarter units that dial back output automatically to protect themselves. If you have ever wondered why your light seems dimmer in summer or in a warmer grow tent, a clogged vent is one of the first things to check. If overheating is an ongoing issue even after cleaning, it is worth reading up on how to cool LED grow lights more broadly.
Grime and nutrient residue (common in humid grow tents where foliar sprays drift) create a patchy film on lenses that causes hotspots and uneven coverage. Some spots in your canopy get overlit while others are starved. Cleaning fixes all of this, and it takes less than 20 minutes once you know the process.
How often to clean, and what to look for first
For most indoor setups, a light wipe-down every four to six weeks is enough to stay ahead of dust buildup. If you are running a soil grow with fans circulating particulates, or you have pets, or your grow space has poor air filtration, bump that to every three weeks. A full deep clean (lenses, fans, reflectors, mounts) makes sense every three to four months.
Before you schedule anything, do a quick visual inspection. Here is what you are looking for:
- A grey or beige dust layer on the top of the housing or across the lens face
- Haze or a milky film on the secondary optics or diffuser panel
- Spider webs, fungus gnat debris, or other insect residue near the vents
- White mineral crust or brown nutrient residue from spray drift on the lens
- Visible lint or compacted dust blocking fan vent slots
If you see any of those, clean now rather than waiting for your next scheduled date. And while you are up there inspecting, check that the mounting hardware looks solid. If you are unsure whether your light is hung securely, that is a separate issue worth addressing: there is a full walkthrough on how to suspend grow lights safely if you need it.
Safety first: the non-negotiable steps before you touch anything

This part is short but not optional. LED grow lights run at line voltage, and some drivers store charge briefly after power-off. The diodes also get genuinely hot during operation. Skipping safety steps is how you damage electronics or burn yourself.
- Unplug the light completely from the wall or power strip. Do not just turn it off at the controller or dim it to zero. Pull the plug.
- Wait at least 15 to 20 minutes for the housing, heat sink, and diodes to cool down. Larger quantum board fixtures (300W and up) can stay warm longer, so give those 30 minutes.
- If your light has a daisy-chain cord or a dimmer cord connected to other units, unplug all of those connections too.
- Never spray water, cleaning solution, or any liquid directly onto the light. No LED grow light sold for home growing is fully waterproof. Even IP-rated fixtures are only splash-resistant on specific surfaces.
- Keep your cleaning cloths damp, not wet. Wring them out until no water drips from them before touching any part of the light.
- Do not use alcohol, acetone, bleach, or multi-surface spray cleaners. These strip coatings, cloud lenses, and can degrade plastic housings over time.
Mars Hydro states it clearly in their product documentation: do not clean directly with water. VIPARSPECTRA manuals say the same thing, noting their lights are not waterproof and should be protected from dampness. Treating every LED grow light as moisture-sensitive regardless of brand is the right default.
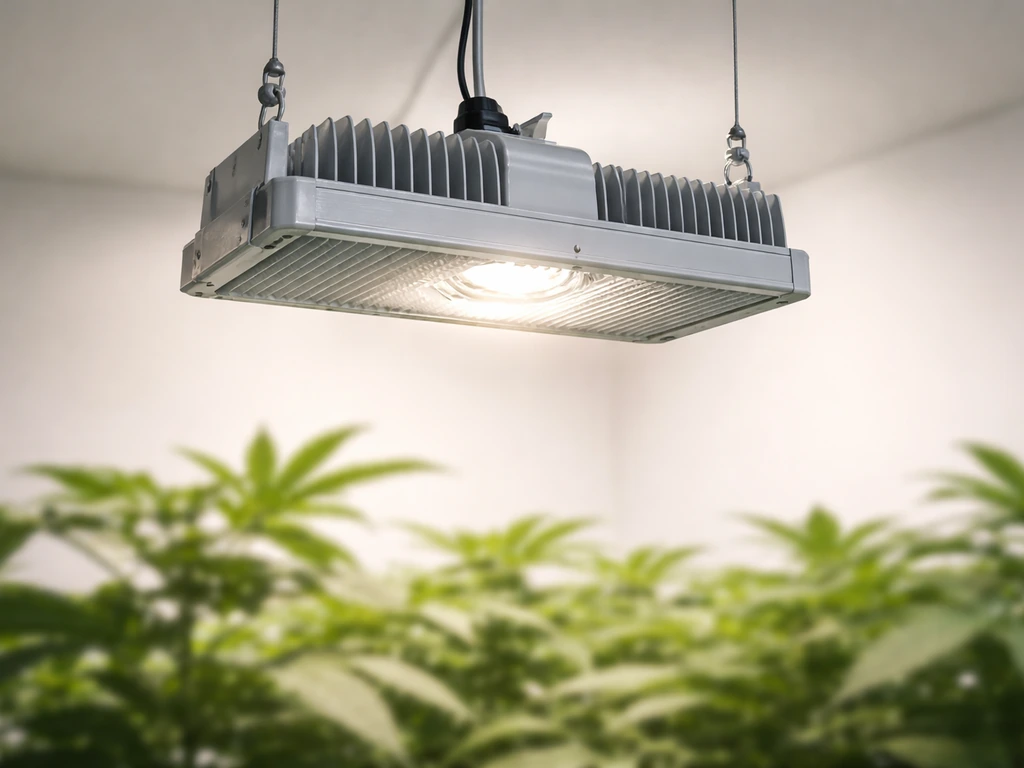
Step-by-step cleaning for different light types
Most LED grow lights fall into one of three categories: quantum board panels (flat, with exposed or lightly diffused diodes), bar lights (individual LED bars connected by a frame), and older blurple or chip-on-board (COB) fixtures with reflector cups around each diode. The basic process is the same for all three, but a few details differ.
Quantum boards and bar lights
- Start with the top of the housing. Use a dry microfiber cloth and wipe from the center outward to avoid pushing dust into the vents.
- Flip the light over (if it is down from its mount) or shine a flashlight at it from below. Look at the board surface for any haze or residue.
- Dampen a second lint-free cloth with distilled water only. Wring it out well. Wipe the board or diffuser surface with gentle, even strokes. Do not scrub.
- For stubborn residue on the board surface, use a cotton swab dampened with distilled water and work the spot in small circles.
- Let the surface air dry completely before rehanging. Five to ten minutes at room temperature is enough.
COB and blurple fixtures with reflector cups
- Use a can of compressed air first. Hold the can upright, use short 2-second bursts, and blow dust out of each reflector cup from about 6 inches away.
- Wipe the outer housing and between the reflectors with a dry microfiber cloth.
- Use a cotton swab with distilled water to clean inside each reflector cup, being careful not to touch the LED die directly if it is exposed.
- Wipe the lens over each COB cluster with a damp lint-free cloth, then follow with a dry cloth pass to remove any streaks.
SANlight's guidance for their EVO-series fixtures recommends using a soft, non-abrasive cloth with distilled water specifically for secondary optics, and they flag protecting plug connections with a protective cap before any cleaning. That principle applies universally: protect all plug and connection points from moisture before you start wiping anywhere near them.
Cleaning the lenses, reflectors, and fans
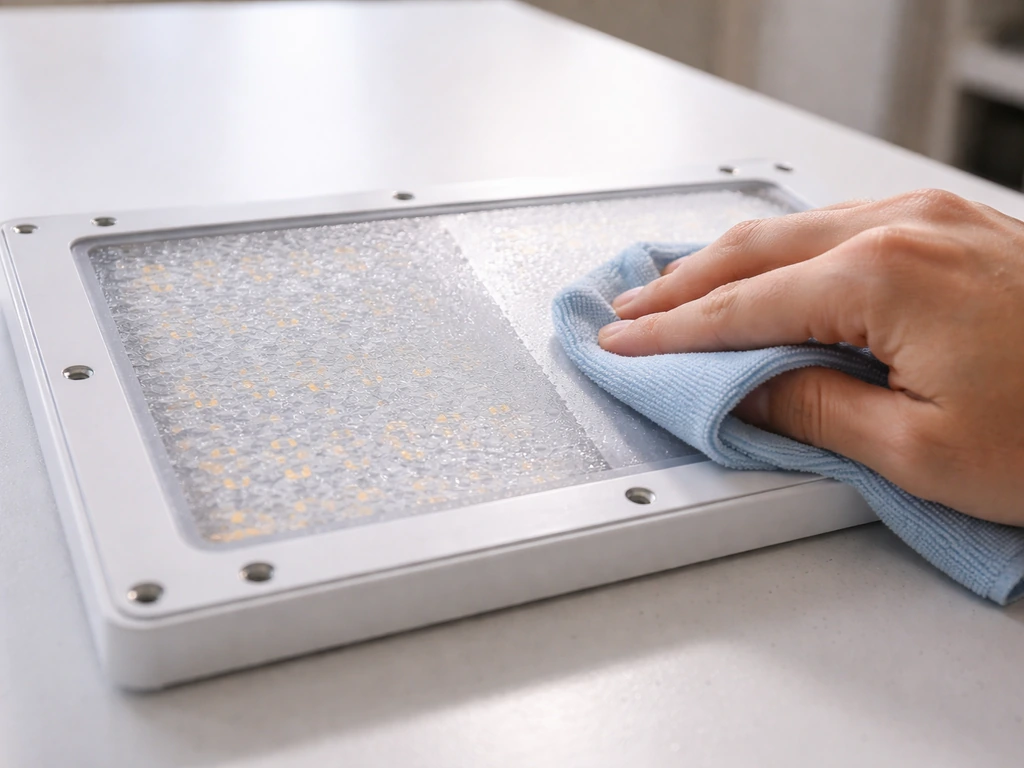
Lenses and diffuser panels
The lens or diffuser is the highest-priority surface to clean because it is directly in the light path. Even a thin haze here hits your PPFD numbers. Use only distilled water (never tap water, which leaves mineral deposits) on a soft cloth. Wipe in one direction rather than circular motions to avoid micro-scratching polycarbonate lenses. If the surface still looks hazy after wiping, it may have a film from foliar spray or calcium buildup. In that case, let a slightly damp cloth sit on the surface for 30 seconds to loosen it, then wipe again. Still hazy after two passes? See the troubleshooting section below.
Reflectors and reflective surfaces
Reflectors on COB-style lights are usually aluminium with a polished or anodized finish. These scratch easily. Use only a soft microfiber cloth and very light pressure. If there is stubborn grime, a cotton swab with distilled water is the right tool. Do not use paper towels, tissues, or abrasive cleaning pads on any reflective surface. A scratched reflector scatters light in unpredictable directions instead of focusing it at the canopy.
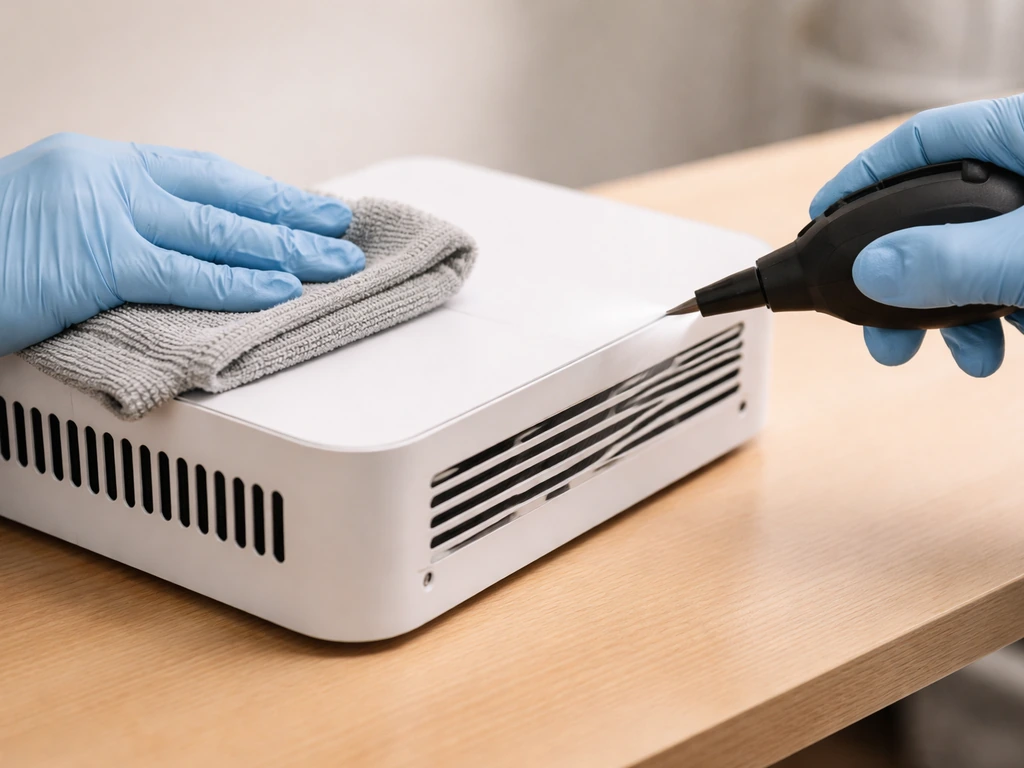
Fans and vents
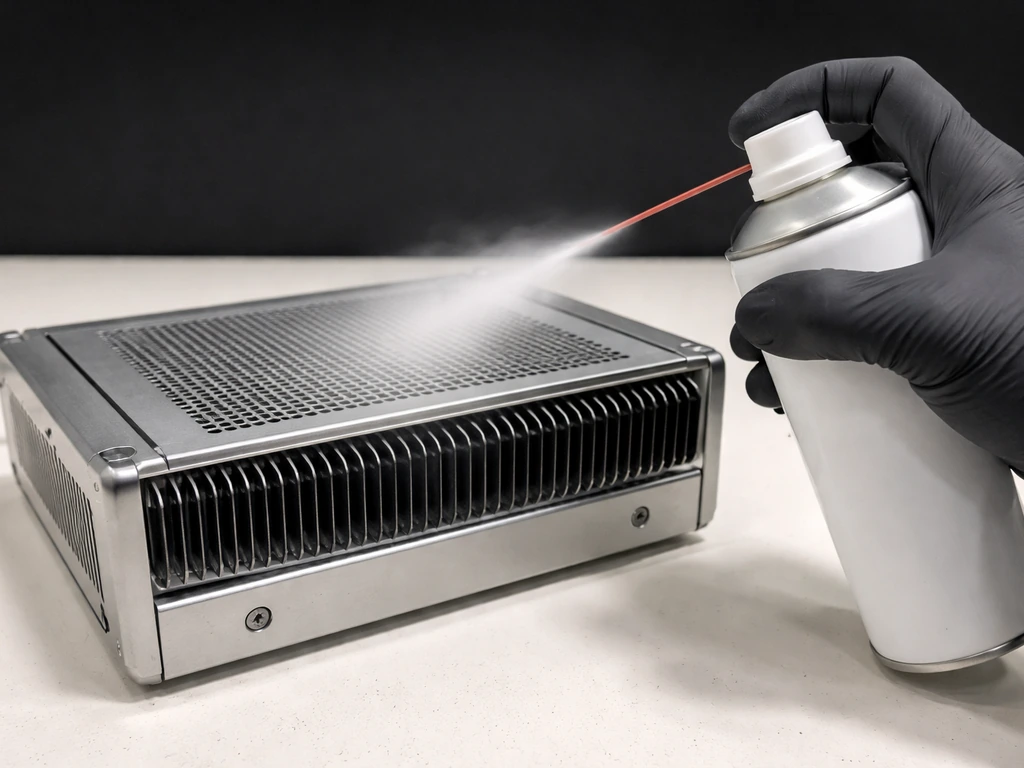
Active cooling fans are the most overlooked part of any grow light cleaning routine, and they are often the reason a light overheats. Spider Farmer, VIPARSPECTRA, and most other brands with active-cooled fixtures either recommend or permit the use of compressed air to clear dust from fan vents. Here is how to do it without causing damage:
- Hold the compressed air can upright at all times to prevent liquid propellant from discharging onto the electronics.
- Aim short 2-second bursts into the vent slots from about 4 to 6 inches away.
- If you can access the fan blades directly (some fixtures allow this), wipe each blade with a dry cotton swab.
- Use a small soft-bristle brush (a clean paintbrush or pastry brush works) to dislodge any compacted dust at the vent edges before the compressed air pass.
- After blowing out the vents, wipe the surrounding housing to catch the dust that got redistributed.
If your fan seems noisy or sluggish even after cleaning, that is a separate problem from dirty blades. A bearing that is starting to fail will sound gritty or intermittent. That is worth diagnosing before it causes a bigger issue. The guide on how to fix an LED grow light covers fan and driver problems in more detail.
Do not forget the cords, hangers, and mounts
Power cords collect grease, dust, and grime, especially in grow tents where humidity and particulates are high. A dirty cord is not just cosmetic: built-up residue traps heat around the insulation and can obscure signs of wear or damage like cracked insulation or loose connection points. While you have the light unplugged, run a dry microfiber cloth along the full length of the power cord. Check for any sticky spots, discoloration, or areas where the insulation looks stressed near the plug or the fixture connection.
Ratchet hangers and rope ratchets accumulate surprising amounts of dust and can also corrode in humid tent environments. Wipe them down with a dry cloth and check that the locking mechanism engages cleanly. The carabiners or hooks at the connection points are worth inspecting for rust or deformation. If you find corrosion on any metal hanging component, replace it rather than cleaning around it. A light falling onto a canopy from two feet up causes real damage to plants and equipment.
The mounting bar or crossbar that the light hangs from (in tent setups, this is usually a steel pole in a sleeve) should also get a wipe. Dust sitting on the mounting bar can fall onto the light lens the moment you brush past the tent. And if you have ever wondered whether you could run your light setup in a less visible part of your home, making the whole system look tidier is a nice side benefit of a clean rig. There are some practical ideas in this piece on how to hide grow lights if that is something you are thinking about.
Troubleshooting after you clean
Most of the time, you plug the light back in and everything is fine, often noticeably brighter. But sometimes something seems off. Here is what to check.
Light seems dimmer than before
First, check that the dimmer knob or controller did not get bumped during cleaning. It happens more often than you would expect. If your light has a dedicated dimmer, verify the setting matches where it was before. If you want to understand how that dimming circuit works, the walkthrough on how to dim LED grow lights is a good reference. If the dimmer setting is correct but the light is still noticeably less bright, check that all connection cables (especially daisy-chain dimmer cords) are fully seated. A partially connected cord can drop output.
Flickering or flashing after reassembly
Flickering usually means a loose connection. Go back and check the power cable connection at the fixture end, any removable driver connections, and if your light has a power switch, cycle it off and on. If flickering continues, moisture may have gotten into a connection point. Unplug the light immediately, let it dry in a warm room for 24 hours with good airflow, and try again. Do not run a flickering light in your grow space.
Hotspots or uneven light coverage
If some spots in your canopy are noticeably brighter than others after cleaning, and this was not the case before, you may have left streaks or moisture residue on the lens that is scattering light unevenly. Let the lens dry fully and check again. If the issue was there before cleaning and cleaning did not fix it, the problem is more likely a partially failed diode or a reflector that has shifted position, neither of which cleaning will address.
Dust or film that will not come off
If distilled water and a lint-free cloth are not shifting a stubborn haze on a polycarbonate lens, the film may be polymerized residue from foliar sprays or hard water that has baked on under heat. A 50/50 mix of distilled water and white vinegar on a cloth (wrung out well) can break this down without damaging polycarbonate. Test in a small corner first. Do not use vinegar on anodized aluminium reflectors or on any painted surface, as it can etch those finishes.
Fan still sounds rough after cleaning
If the fan noise did not improve after clearing the dust, the bearing is likely worn. Running a grow light with a failing fan means the heat sink is not being cooled properly. This is a real risk to the driver and diodes. Replacing a small axial fan in a grow light is often a DIY repair, and pairing active cooling upgrades with the right airflow setup can help too. The article on how to air cool grow lights goes into how to set up proper airflow around your fixtures so they do not work as hard between cleanings.
Quick reference: cleaning tools and what they are for
| Tool | What it cleans | What to avoid |
|---|---|---|
| Dry microfiber cloth | Housing exterior, top surfaces, cord | Do not scrub lenses with excessive pressure |
| Lint-free cloth dampened with distilled water | Lenses, diffusers, secondary optics | Do not use tap water (leaves mineral deposits) |
| Compressed air can (held upright) | Fan vents, vent slots, reflector cups | Do not invert can or hold too close (within 4 inches) |
| Cotton swabs with distilled water | Inside reflector cups, stubborn spots on lens edges | Do not touch exposed LED dies directly |
| Soft-bristle brush (clean paintbrush) | Vent edges, fan blade edges, housing seams | Do not use stiff-bristle brushes on lens surfaces |
| 50/50 distilled water and white vinegar cloth | Baked-on foliar spray residue on polycarbonate lenses | Do not use on anodized aluminium or painted surfaces |
That is the full process. Unplug, cool, dry wipe the housing, compressed air on the vents, distilled water cloth on the lenses and reflectors, check the cords and hardware, and let everything dry before plugging back in. Do it every four to six weeks and you will hold onto the light output you paid for, keep the fixture running cooler, and avoid the kind of gradual performance loss that is easy to miss until it has already cost you a grow cycle.
FAQ
Can I clean my LED grow light while it is still warm or running?
If you already wiped with a damp cloth, do not power the light back on right away. Unplug it, let it sit dry in a warm room with good airflow, then verify the lens and any plug areas are completely dry before reconnecting. A practical rule is at least overnight drying for anything that may have contacted the housing seams or driver area.
What is the safest way to apply water or cleaner to the light?
Avoid soaking any part of the fixture. For lens or diffuser cleaning, lightly wet a soft non-abrasive cloth with distilled water rather than pouring water onto the light. Keep liquid away from vents, seams, and connection points, since capillary flow can carry moisture into electronics even if the surface looks dry.
Is vinegar always safe to use on LED grow light lenses or reflectors?
Not all coatings tolerate the same cleaning approach. Use distilled water for regular haze, and only use a vinegar mixture as a troubleshooting step when diluted distilled water does not work on polycarbonate lenses. Test in a small hidden corner first, and do not apply vinegar to anodized aluminum reflectors or any painted surfaces because it can etch finishes.
My lens is still hazy after cleaning, what should I do next?
If you cannot get the haze off with distilled water and a soft cloth, it usually indicates baked-on residue from foliar sprays or minerals. Let a slightly damp cloth sit on the lens for about 30 seconds to loosen film, wipe again, and if it still resists use the distilled water and white vinegar method on polycarbonate (tested first).
What cleaning products should I avoid on LED grow lights?
Do not use alcohol, glass cleaners, bleach, or abrasive pads on LED optics. These can damage polycarbonate diffusers, strip protective coatings, or leave a residue that spreads unevenly under the LEDs. Stick to distilled water and cloths designed to be non-abrasive, and only use vinegar (diluted) for the specific haze scenario mentioned.
Can I use compressed air on every part of the light?
Compressed air is fine for clearing dust from vents, but use short bursts and keep the nozzle angled so you do not blast dust deeper into seams. Also keep the light unplugged and cooled, because forcing air around a hot driver area can stress components and increase the chance of moisture or loosened dust getting where you do not want it.
What should I check if the light seems dimmer or uneven after cleaning?
After cleaning, verify brightness by checking your dimmer setting and controller state first, then confirm all cables are fully seated (especially daisy-chain dimmer cords). If you see flickering or uneven brightness that did not exist before, inspect for moisture at connection points and ensure the lens is fully dry and streak-free.
If the fan is still noisy after cleaning, is it okay to keep using the light?
Yes, but only if you address the underlying cause. If the fan does not return to normal noise level after dust removal, do not keep running it. A failing bearing can lead to overheating, which can shorten driver and diode lifespan even if the light otherwise looks clean.
How often should I clean LED grow lights in different grow setups?
It depends on your environment, but use the article’s baseline schedule as a starting point. If you have humid tents, foliar spray drift, pets, or heavy particulate exposure, shorten the wipe-down interval (for example, from four to six weeks to about three weeks). If your environment is clean and dry, you can usually stay closer to the longer interval.
What if my hangers or ratchets show rust or corrosion?
If the mounting hardware shows corrosion, replace the affected metal components rather than trying to clean around them. Corroded ratchets, hooks, or carriers can loosen unexpectedly, and a small drop from even a couple of feet can damage plants and equipment.
How long should I let an LED grow light dry before plugging it back in?
For drying, aim for complete evaporation at both the lens surface and any areas where moisture could have migrated. Ensure power cords and plug ends are dry too, then allow at least several hours in a warm, ventilated space, and overnight if you suspect moisture near connections. Never plug in a flickering light or one that still seems wet.
Next Article
Innova Grow Light Instructions: Setup, Use, and Troubleshooting
Step-by-step Innova LED grow light instructions: setup, mounting, distance, schedules, intensity, and fast troubleshooti