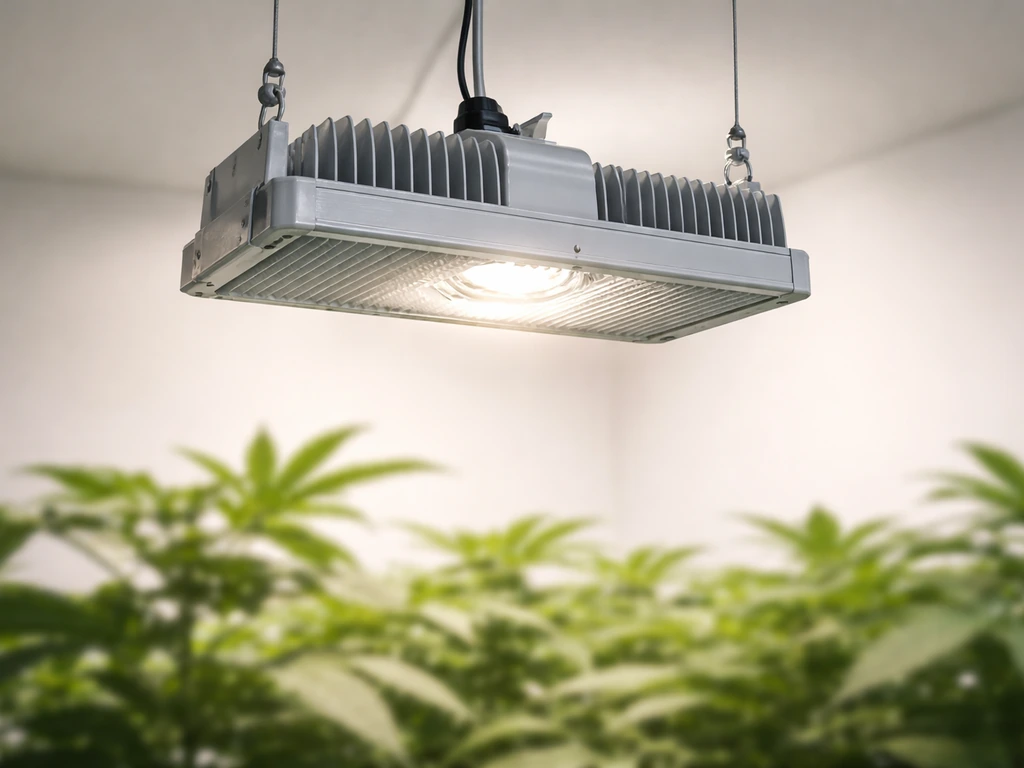
Air cooling your grow lights means moving air deliberately across or through the fixture's heatsink using fans, ducting, or both, so the light stays below its maximum safe operating temperature of 35°C (95°F). Most LED panels and bar lights are already rated for that upper limit, and once you push past it, light output drops, LED lifespan shortens, and your plants start showing heat stress. A small clip-on fan pointed at the heatsink, or a 4-inch inline fan exhausting warm air out of the grow space, is usually all it takes to keep things under control.
How to Air Cool Grow Lights: Fan and Duct Setup Guide

Marcus Tillman
24 Apr 2026
What 'air cooling' means for grow lights and why it matters
In the grow light world, air cooling simply means using forced airflow (fans, ducting, or a combination) to pull heat away from the fixture before it builds up and causes problems. It is not the same as water cooling or liquid-cooled fixtures. The heat source is the LED driver and the aluminum heatsink fins on the back or sides of the light. When air moves across those fins, it carries the heat away. When air is stagnant, heat piles up.
This matters for a few concrete reasons. Most popular LED grow lights, including Spider Farmer SF series and NOKATECH ECCO-660 fixtures, are rated to operate safely up to 35°C (95°F) ambient temperature. Go above that and you are shortening the life of the diodes and the driver. ARAY's official guidance is blunt about it: never cover the grow light or restrict airflow across the heatsink under any circumstances. The heatsink is doing the cooling work, and air is the medium that makes it possible.
Beyond fixture lifespan, heat from the light directly raises the air temperature around your canopy. Plants under intense light in a warm room can show wilting, leaf curl, and bleaching, even if the light intensity itself is correct. Controlling the heat at the source, the fixture, keeps the canopy environment stable so you can focus on dialing in the right light schedule and distance without fighting a thermal problem at the same time.
Quick safety checks and measuring temps before you add fans
Before you buy a single fan, spend ten minutes checking a few things. First, pull up the manual for your specific fixture and confirm the maximum ambient operating temperature. For example, Spider Farmer’s G5000 product page lists an operating temperature range of -20 to 35°C (-4 to 95°F) blank" rel="noopener noreferrer">confirm the maximum ambient operating temperature. For most modern LEDs it is 35°C (95°F), but check anyway. If you are running a KingLED KP4000, Spider Farmer SF600, or similar, that 35°C ceiling applies. Some fixtures with older driver designs run tighter. If you want a practical rundown on the whole process, see how to cool led grow lights as an adjacent guide for setup and troubleshooting. If you want a practical rundown on the whole process, see how to suspend grow lights as an adjacent guide for setup and troubleshooting.
Next, measure what you actually have. Use a cheap digital thermometer or an infrared (IR) thermometer gun. Hang the thermometer probe at canopy height and let the light run for 30 minutes with the room in its normal state. Also point the IR gun at the heatsink surface itself. If the heatsink is reading above 60°C (140°F) or the ambient air near the fixture is above 30°C (86°F), you have a real cooling problem that needs solving before you push the light harder. If it is reading under 28°C (82°F) ambient, you have some headroom and might only need basic air circulation.
While you are doing that check, look at the space around the fixture. Is there at least 6 to 12 inches of clearance above the light for warm air to escape? Are the heatsink fins blocked by reflective material, zip ties, or cables? Is the driver box sitting directly against a wall with no room to breathe? These physical restrictions are often the whole problem, and fixing them costs nothing.
- Confirm your fixture's max ambient temp from the manual (usually 35°C / 95°F)
- Measure heatsink surface temp with an IR gun after 30 minutes of operation
- Measure ambient air temp at canopy height with a digital thermometer
- Check that heatsink fins are unobstructed and have 6+ inches of clearance above
- Verify the driver box is not pressed against a wall or enclosed surface
- Look for any cables, straps, or sheeting draped over the fixture
Choosing the right fan setup
The right fan for the job depends on your grow space size, how hot things are running, and whether you need to move air through ducting or just across an open room. Here is how to think through it.
CFM: how much airflow you actually need
CFM (cubic feet per minute) is the number that tells you how much air the fan moves. A basic rule for grow tents is to exchange the full air volume every 1 to 3 minutes. So if your tent is 4x4x7 feet (112 cubic feet), you want at least 40 to 112 CFM. For a 2x4 setup (56 cubic feet), a 4-inch inline fan rated around 200 CFM gives you more than enough margin, especially once you account for the resistance from ducting and carbon filters (which can cut rated CFM by 25 to 50 percent).
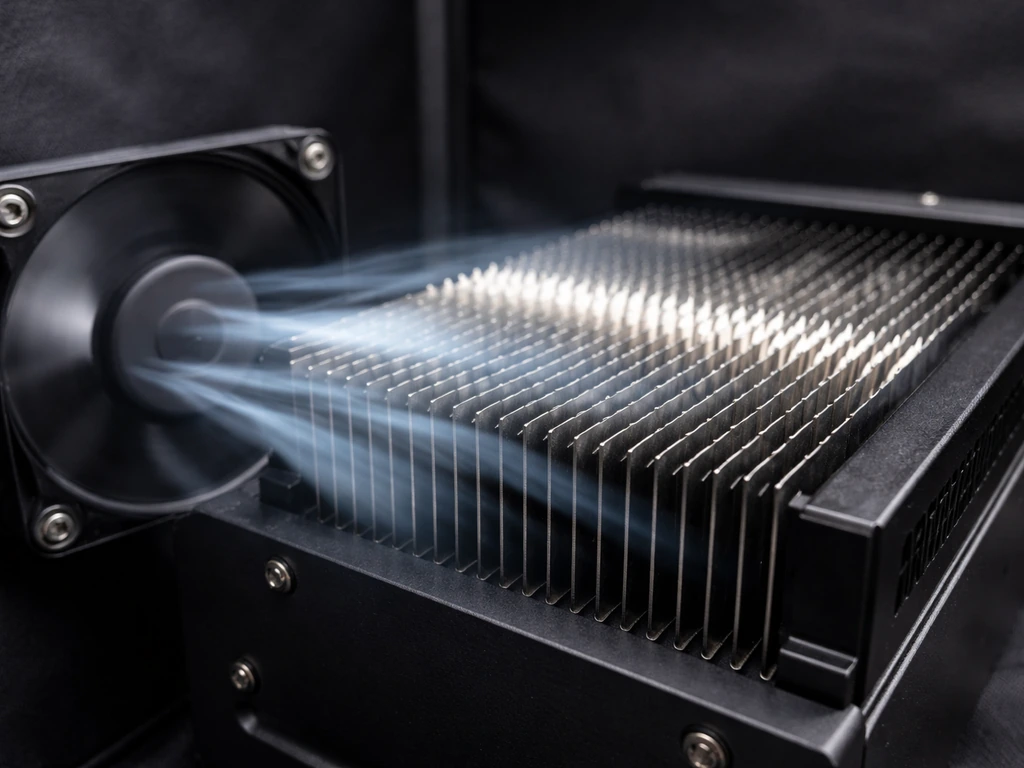
If you are just adding a small clip-on fan to a single LED panel in an open space, a PC-style 120mm fan (around 50 to 80 CFM) aimed directly at the heatsink fins can drop heatsink temps by 5 to 15°C on its own. It is the cheapest fix available and often enough for a single fixture in a room with decent ambient control.
Static pressure vs open-air fans
If you are running ducting (a 4-inch or 6-inch flex duct from the light to a wall or window), you need a fan with decent static pressure, not just high open-air CFM. Inline fans with backward-curved impellers (like the AC Infinity CLOUDLINE series or comparable budget options) are designed for this. A fan with high static pressure pushes air through bends and resistance without losing most of its flow. PC fans and cheap box fans are open-air fans, fine for blowing across a heatsink but not suitable for ducted setups.
Noise and speed controllers
Fan noise is a real concern if your grow space is in a bedroom or living area. Inline fans on speed controllers run much quieter at 50 to 70 percent speed than at full throttle, and for most situations 70 percent is more than enough. A basic analog speed controller (around $10 to $15) lets you manually dial back the fan. A thermostatic controller (around $25 to $40) does it automatically: you set a target temperature, and the fan ramps up only when needed. The thermostat option is worth it if you are not going to babysit the tent, because summer ambient temps can spike mid-afternoon and cook your lights before you notice.
| Fan Type | Best For | Typical CFM | Ducting Compatible | Noise Level |
|---|---|---|---|---|
| Clip-on / PC fan (120mm) | Single fixture, open space, quick fix | 50–80 CFM | No | Low |
| 4-inch inline fan | Small tents (2x2 to 2x4), light ducting | 100–200 CFM rated | Yes | Low to medium |
| 6-inch inline fan | Medium tents (4x4), carbon filter + duct runs | 200–400 CFM rated | Yes | Medium |
| 8-inch inline fan | Large rooms, multiple fixtures, long duct runs | 400–700 CFM rated | Yes | Medium to high |
Best airflow layout: intake, exhaust, and ducting
Air cooling only works if you have somewhere for the hot air to go and somewhere for cooler air to come from. The basic principle is: bring cooler air in low, push hot air out high. Heat rises, so your exhaust should always be at the top of the space and your intake at the bottom or at least lower than the exhaust.
Inside a grow tent
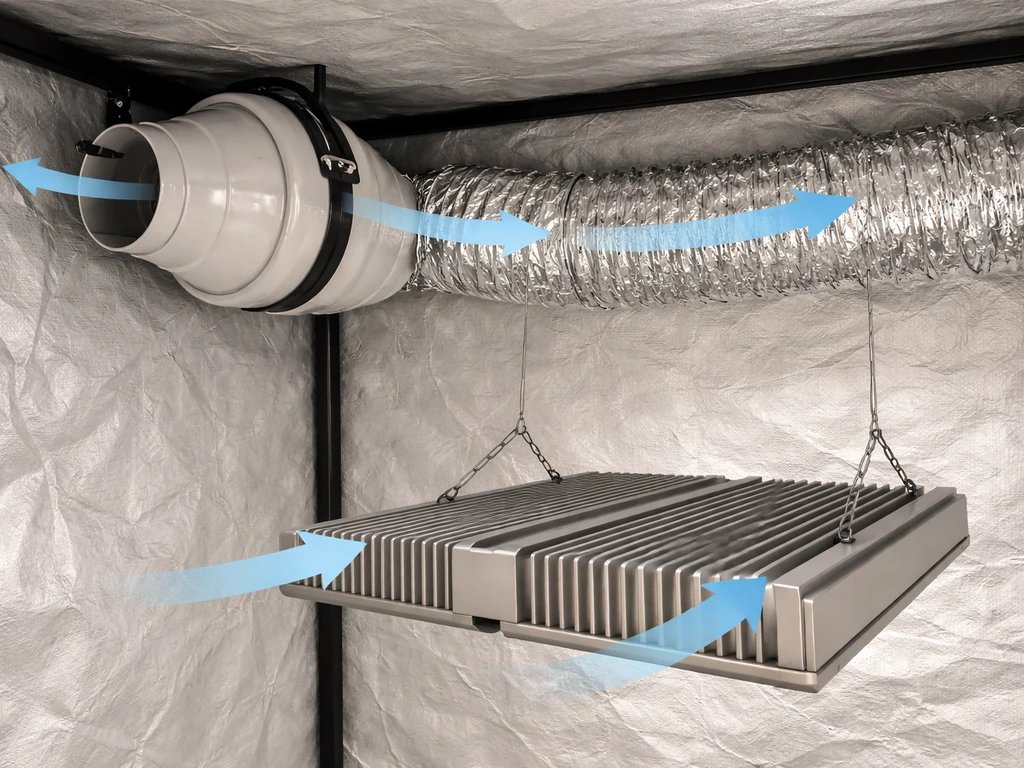
In a standard grow tent, mount your inline exhaust fan near the top corner, pulling air out through the top vent. Run a short section of flex duct (4-inch or 6-inch depending on your fan) from the fan out through the tent wall to the room or, better, to a window or exterior vent. Your intake can be passive (just open the bottom mesh vents on the tent) or active (a second, smaller fan pushing room air in through a lower port). Passive intake works fine for tents up to 4x4 if the room stays below 27°C (80°F). Hotter room or bigger tent, go active intake.
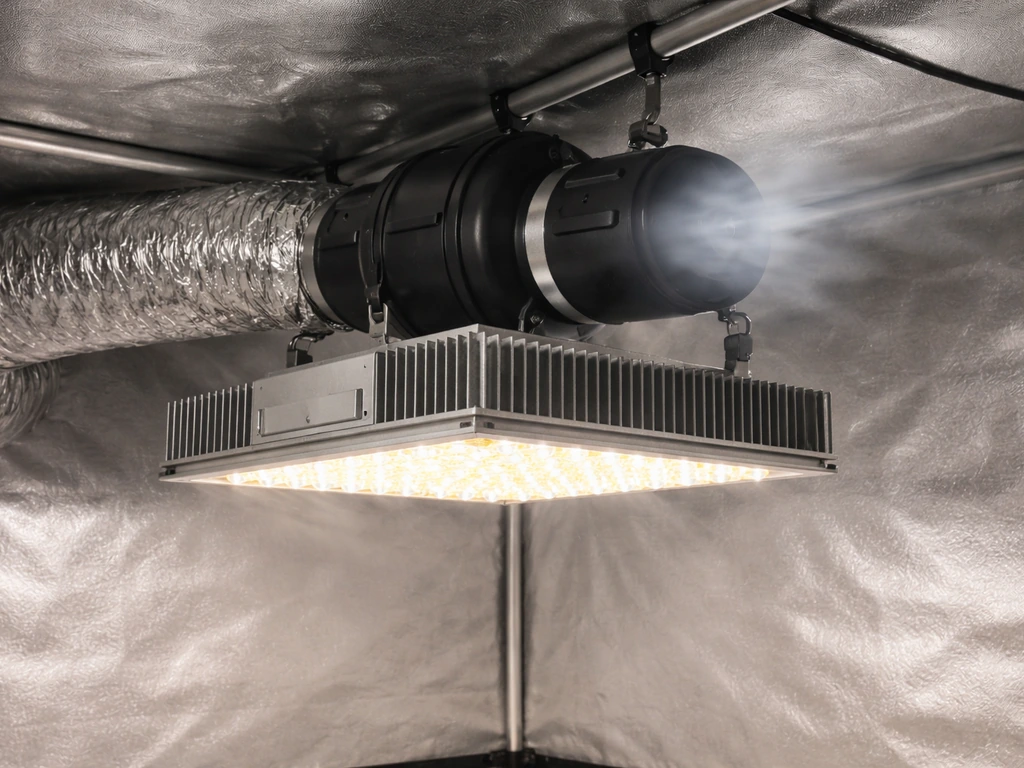
For the grow light specifically, you want the exhaust fan pulling air across the heatsink and out of the tent. Position the inline fan so the hottest air, which collects near the top of the tent right where the light hangs, gets pulled out first. If your fixture has a driver box mounted separately or on the side, make sure the airflow path runs past that too, not just across the light bar or panel itself.
Open room or shelf grow
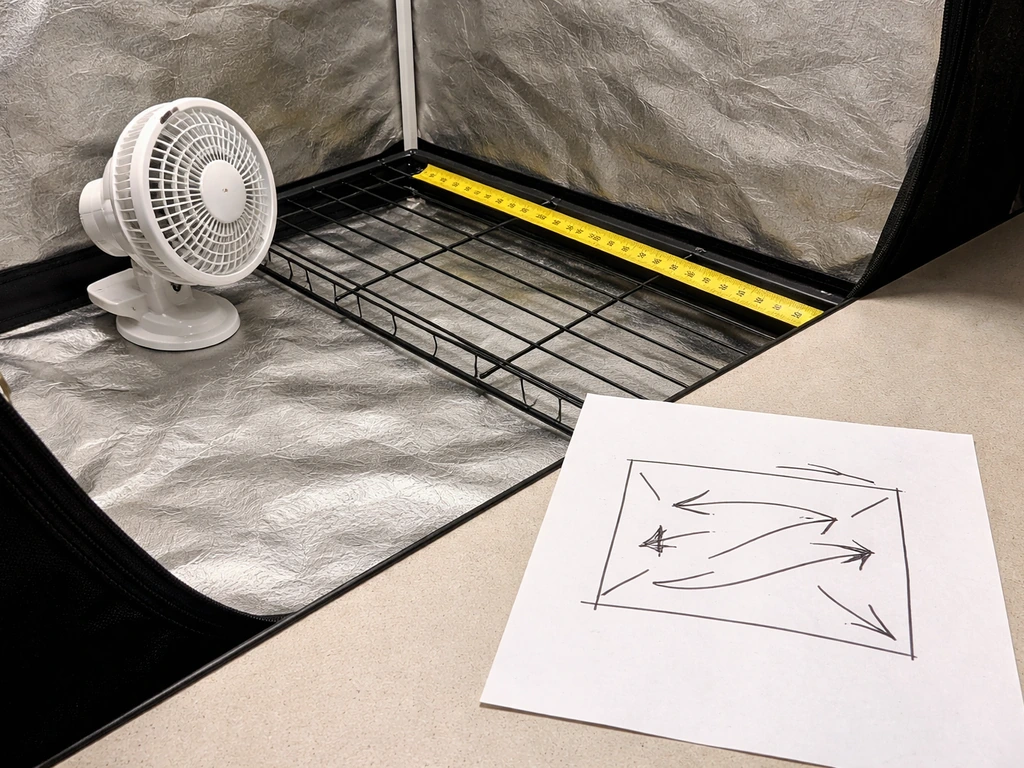
In an open setup without a tent, a small clip-on fan aimed at the heatsink handles the fixture itself. But you also need the room to not overheat. A small oscillating fan circulating room air and a window cracked for fresh air exchange is often enough for one or two fixtures. If you are running three or more high-output panels in a small room, treat it like a tent: dedicate a box fan or inline fan to exhaust and bring in air from another part of the house or outside.
Ducting tips
Keep duct runs short and straight where possible. Every 90-degree bend in flex duct costs you roughly 10 to 15 percent of your effective airflow. If you need to turn a corner, use a rigid duct elbow instead of bending the flex duct sharply. Insulated flex duct (the foil-wrapped kind with a fiberglass layer) also helps if you are routing hot exhaust through a cooler space and want to avoid condensation forming on the outside of the duct.
Step-by-step installation for LED panels and bar lights
This walkthrough covers the most common scenario: an LED panel or multi-bar fixture hanging in a grow tent with a 4-inch or 6-inch inline exhaust fan. Adjust steps as needed for your setup.
- Hang your grow light first at the correct height for your plants and let it run for 30 minutes to establish a baseline temperature reading (heatsink surface and ambient air).
- Mount the inline fan at the top of the tent, near the exhaust vent port. Most fans have an arrow on the housing indicating airflow direction. Make sure that arrow points toward the duct going out of the tent, not back into it.
- Attach a section of flex duct to the fan's outlet and route it out through the tent's top duct port. Use a duct clamp or foil tape to seal the connection, loose joints bleed air and reduce effectiveness.
- On the inlet side of the fan (the side pulling air from inside the tent), leave the connection open to the tent interior or use a short piece of duct to position the inlet directly above the grow light heatsink. This creates a direct draw path: cool air in at the bottom, warm air pulled up across the heatsink, out through the fan.
- Open the bottom passive intake vents on the tent about halfway. If you have an active intake fan, mount it at a lower port pointing inward.
- Plug the fan into a speed controller or thermostatic controller. Set the controller to maintain 28°C (82°F) inside the tent. The fan will ramp up if temps climb and back off when the space cools down.
- For bar-style fixtures (multi-bar LED arrays), make sure the airflow path runs lengthwise across the bars, not perpendicular to them. Bar fixtures have heatsink channels that direct airflow in one direction, so aligning your fan to that orientation improves cooling noticeably.
- For panel-style LEDs with a central driver box, direct a small secondary clip-on fan (120mm PC fan works) at the driver box if it runs warm to the touch. Drivers generate heat independently of the LEDs and sometimes need their own airflow.
- Run everything for one full light cycle (18 hours for veg, 12 for flower) and log temperatures every 2 hours using your thermometer.
Testing and tuning after installation
Once your fan setup is running, give it a full cycle before adjusting anything. Then check three numbers: heatsink surface temp, ambient air temp at canopy level, and the difference between the two. A healthy heatsink runs 15 to 25°C above ambient. If the ambient is 27°C and the heatsink is at 45°C, that is a normal 18-degree differential and things are working. If the heatsink is at 65°C with the same ambient, airflow across the fins is insufficient and you need more fan speed or a more direct airflow path.
Ambient temperature at canopy height should stay between 22°C and 28°C (72°F to 82°F) for most plants. If it is above 30°C even with the fan running at full speed, the issue is the incoming air temperature, not the fan size. You need to either bring in cooler air (from another room, an AC unit, or night-air ventilation) or reduce the fixture's intensity. Dimming the light 10 to 20 percent drops heat output noticeably without gutting your photon delivery to the plants. If you still need to reduce heat after improving airflow, dimming your LED grow lights is usually the next lever to pull.
Light distance also plays into this. Hanging the fixture 2 inches higher creates a larger footprint and slightly reduces intensity at the canopy, which reduces the thermal load on the plants even if the heatsink temp stays the same. If you are already tuning fan speed, do not overlook distance adjustments as a complementary tool.
Troubleshooting common air-cooling problems
Lights still running too hot after adding fans
The most common cause is that you are fighting hot incoming air. If your LED grow light still runs too hot after you add fans, use these checks to pinpoint the real cooling bottleneck LED grow light still running too hot. If the room feeding your intake is already at 32°C (90°F), even a powerful inline fan cannot get the tent below that temperature. The fix is source cooling: a portable AC unit, an evaporative cooler, or routing intake air from a cooler part of the building. As a short-term workaround, running the lights during the cooler nighttime hours can drop your baseline ambient by 5 to 10°C.
Uneven cooling across the fixture
If one end of a bar-style fixture or one corner of a panel runs much hotter than the rest, the fan is not creating airflow across the full heatsink surface. Try repositioning the fan to blow along the length of the heatsink fins rather than across them, or add a second small fan on the other side. For panel lights, check that nothing is blocking the heatsink fins on one side (a zip-tied cable, a piece of reflective film, or the tent wall being too close).
Fan noise and vibration
Inline fans vibrate against duct connections and mounting brackets. The fix is simple: use short sections of flexible duct on both the inlet and outlet of the fan so it is not rigidly connected to anything hard. Foam weatherstripping between the fan mounting bracket and the tent pole also helps. If the fan itself is rattling, check that the impeller has nothing caught in it (a clump of pet hair or pollen can unbalance it) and that the housing screws are snug.
Condensation or humidity spikes
When warm humid air from the grow space hits a cooler duct wall or exits into a cold room, you can get condensation. Use insulated flex duct for runs longer than 3 feet. If you are exhausting into a cold basement or outside in winter, angle the duct slightly downward at the outlet so any condensed water drains out rather than sitting in the duct. Also monitor your grow space humidity: good air exchange tends to drop humidity, which is useful in flower but can dry out seedlings if the fan is running at full speed 24/7.
Fan failing or overheating
Inline fans are not rated for indefinite 100 percent operation in high ambient temps. If your room is already at 35°C and the fan is running flat-out in that heat, the fan motor can overheat over days or weeks. Make sure the fan itself has some clearance around its housing and is not stuffed into a sealed box. Budget clip-on fans are also more prone to early failure: if you are running anything above 400W of LED in a sealed tent, spend the extra $20 on a quality inline fan with a real warranty.
Preventing dust buildup on heatsinks and fans
Dust is a slow killer. It insulates heatsink fins and reduces their ability to shed heat, and it coats fan blades, reducing airflow efficiency. In a grow space, pollen, spores, and organic debris build up faster than in a typical room. Every 4 to 6 weeks, power everything off and use compressed air to blow out the heatsink fins and the fan blades. Every 4 to 6 weeks, power everything off and use compressed air to blow out the heatsink fins and the fan blades how to clean led grow lights. A soft brush works for the fan blades if you do not have a compressed air can. Never use a wet cloth on a heatsink while the light is powered, even partially. If you want to stay ahead of dust, adding a thin foam intake filter over your lower vent ports significantly reduces how much particulate gets pulled into the space in the first place.
Bar-style vs panel-style: different cooling needs
Bar-style fixtures spread heat across a larger surface area than a single panel, which is inherently better for passive heat dissipation. They often need less aggressive active cooling for the same wattage. Panel-style LEDs concentrate more heat in a smaller heatsink area, especially around the driver box. If you are adding air cooling to a panel and find the edges stay cool but the center runs hot, the center heatsink channels are not getting enough airflow. Try angling the fan slightly toward the center, or add a second small fan on the opposite side to create a cross-flow pattern.
Safe operation: a few things worth double-checking
Always run your grow light and any added fans on a grounded (3-prong) circuit. Do not daisy-chain multiple high-draw devices through a single power strip without checking its rated amperage. A 600W LED plus a 100W inline fan plus a humidifier on one cheap power strip is a fire risk if the strip is not rated for it. Use a power strip with a circuit breaker built in, or better yet, plug high-draw items directly into wall outlets on separate circuits.
Also keep fan wiring and power cords away from areas where they can get wet. In humid grow spaces, water from misters or condensation can drip onto extension cords. Route cords along the frame of the tent, off the floor, and use cord clips or zip ties to keep them from pooling water at the connectors.
Finally, once your cooling system is dialed in and temps are stable, it is a good time to revisit your light schedule and intensity settings together. A fixture running cooler can safely be run at higher intensity or for longer duration without thermal stress. But make changes gradually: bump intensity by 10 percent, run another full cycle, check temps again. Good cooling gives you headroom to optimize, not an excuse to immediately run everything at 100 percent.
FAQ
Should I target ambient temperature or heatsink temperature when learning how to air cool grow lights?
It depends on what you are trying to measure. Ambient limits usually refer to air around the fixture (not the canopy), and heatsink limits refer to the metal fins. If you only track canopy air, you can miss a case where the incoming air is fine but airflow across the fins is blocked.
Can I use only an exhaust fan, or do I always need intake airflow too?
Yes, if you use a properly sized intake path and exhaust near the top. Stagnant air pockets can still form in corners even with an exhaust fan, so check with a simple method: hold a tissue near the canopy and observe whether air is actually flowing toward the exhaust.
Why does my inline fan with high CFM not seem to cool the lights enough?
If the lights are ducted, a fan that is rated for high free-air CFM can still underperform because ducting requires static pressure. For ducted setups, match the fan to your duct diameter and plan for airflow loss from bends, filters, and any carbon canisters.
What should the temperature difference between heatsink and ambient be when I air cool grow lights?
Watch the difference, not just a single number. A common healthy pattern is heatsink around 15 to 25°C above ambient. If that differential stays high after you increase fan speed, repositioning the airflow path or improving fin-side flow is usually more effective than adding more speed.
My lights cooled well at first, but temps are rising later. What should I check?
Dust and restricted intake are two common hidden causes. If temps climb over weeks without changes, clean the heatsink fins and fan blades, and remove any foam or filter material that has clogged to the point it is acting like a dam.
Is it okay to use reflective material or wrap insulation to help with cooling and light control?
Do not cover fins with reflective mylar, tape, or cloth even temporarily, and avoid wrapping the fixture body in insulation. If you need to manage light leaks, use barriers that do not form a seal around the heatsink or block side fin exposure.
How do I place a thermostatic fan controller sensor so it actually protects my LEDs?
Set controllers based on air temperature at canopy height, not just a nearby wall or vent. If the sensor is in direct airflow from the exhaust, it can trick the thermostat into turning off early, causing heatsink temps to creep up.
How can I take accurate IR or thermometer readings of heatsinks and ambient air?
Don’t rely on a thermometer gun from too far away. For IR checks, keep the distance consistent, aim at the same fin area each time, and account for emissivity differences between bare metal and dustier surfaces.
Can I run ducting that pulls air from inside the tent or nearby rooms instead of outside?
Yes, but do it carefully. Ducting a grow light exhaust into the same tent can recirculate heat, and ducting intake from a hot space can erase the benefits of stronger airflow. Intake should come from the coolest available air source.
What should I do if only one corner or one side of my LED stays hot?
If one side or one corner is hotter, it often means airflow is not contacting the full fin area. Fix by changing fan position to align with the fin direction, adding a second small fan to create cross-flow, or removing anything physically blocking fins on that hot side.
Are PC fans okay for air cooling grow lights when I am using ducting?
PC-style fans and box fans can work to blow across heatsinks in open rooms, but they are usually the wrong tool for ducted runs because they struggle against static pressure. Use backward-curved inline fans for ducted setups.
Why does my inline fan rattle, and how do I stop the vibration?
Vibration can transfer to the duct and bracket, making rattling louder and gradually loosening connections. Use flexible duct sections at the fan inlet and outlet, confirm screws are snug, and ensure the fan housing is not rigidly touching the tent frame.
How do I prevent condensation inside my exhaust duct when air cooling grow lights?
Condensation usually happens when moist warm air hits a colder duct wall. Insulate flex duct for longer runs, and if exhausting outdoors or to a cold basement, slope the duct slightly downward near the outlet so any water drains out instead of pooling.
Can the grow light or the fans overheat even if I am air cooling correctly?
Fans can overheat too. If your room is already very hot, running the fan at full throttle for long periods can reduce fan motor life. Make sure the fan has clearance, use a quality fan with adequate warranty, and consider cooling the intake air or reducing light output.
Does raising the grow light help cooling, or is it only about plant distance and intensity?
Yes, and it is a common thermal mistake. If the light is mounted higher, intensity drops and plant heat stress may improve, but the fixture itself still must stay within heatsink limits. Adjust height for canopy response, but continue monitoring temps.
What is the safest order to change fan speed and LED dimming after my temperatures stabilize?
If you must change both light intensity and fan settings, change one variable at a time. Increase intensity in small steps, run a full temperature cycle, then confirm heatsink and ambient stay within targets before making another adjustment.
How often should I clean fans and heatsinks for air cooled grow lights, and what happens if I skip it?
Dust buildup can insulate the fins and reduce fan efficiency, which is why temps can worsen gradually. Plan a routine cleaning interval (for most grows, every 4 to 6 weeks), and also check for clogged intake filters.
Next Article
How to Clean LED Grow Lights Safely and Effectively
Step-by-step how to clean LED grow lights safely, removing dust, film, and bugs to prevent overheating and restore outpu