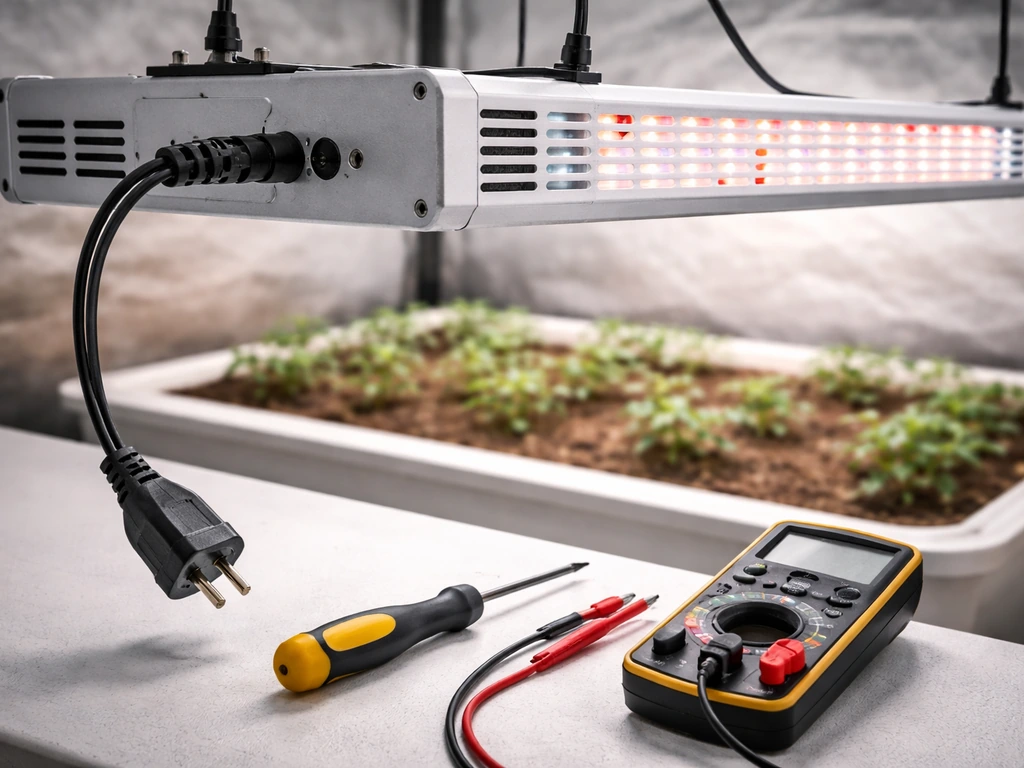
Most LED grow light problems come down to one of five things: a dead or failing driver, a loose connection, a bad outlet or timer, a cooling issue, or a controller conflict. In the majority of cases, you can narrow it down in under 10 minutes with no special tools. Start with the simplest checks first, work your way inward, and you will almost always find the culprit before you even need to think about opening anything up.
How to Fix LED Grow Light: Troubleshooting and Repairs

Marcus Tillman
17 May 2026
Stop and run through this safety checklist first
Before you touch anything, do these in order. Skipping them is how a fixable problem turns into a dangerous one.
- Unplug the light from the wall completely. Do not just flip a switch or timer off.
- Wait at least 60 seconds after unplugging before touching any internal components. Capacitors inside the driver store charge and can still shock you after power is cut.
- Do not work with wet hands or near standing water. Water and grow-room humidity are serious risks around mains electricity.
- Do not immerse or spray the fixture with water. Moisture inside the driver or LED board causes permanent damage.
- Do not open the fixture housing unless you are certain it is designed to be user-serviceable. Most commercial grow lights are not. Manufacturers including Gavita and Nextlight explicitly state there are no serviceable parts inside and that opening the unit voids the warranty and can cause serious injury.
- Do not reconnect or disconnect the light while it is under load. Always cut power first.
- If you smell burning, see charring, or notice melted plastic, stop. Do not plug it back in. That light needs to be replaced, not repaired.
What exactly is your light doing? Pin down the symptom first
The fix depends heavily on the symptom. A light that won't turn on at all has a different root cause than one that flickers or runs hot. Match your situation to the descriptions below before moving to diagnostics.
| Symptom | Most likely cause | Where to start |
|---|---|---|
| Completely dead, no indicator light | No AC input, driver failure, or protection mode triggered | Power and outlet checks |
| Flickers or pulses | Incompatible dimmer, loose connection, voltage fluctuation, or failing driver capacitors | Dimmer and connection checks |
| Dims or runs much lower than expected | Driver failure, bad dimming signal, or controller conflict | Dimmer/controller, then driver |
| Uneven brightness (some bars or panels dark) | Loose connection, daisy-chain break, or partial driver failure | Cable and connection checks |
| Overheating or shuts off after a while | Blocked airflow, dirty heat sinks, or driver running out of spec | Cooling and placement checks |
| Buzzing or high-pitched whine | Failing electrolytic capacitors in the driver | Driver replacement |
| Burning smell or visible scorch marks | Electrical fault, do not reuse | Replace the unit |
Basic diagnostics: power, outlet, timer, dimmer, and cables
Work through these in order. Each step rules out one potential cause. Most failures are caught here.
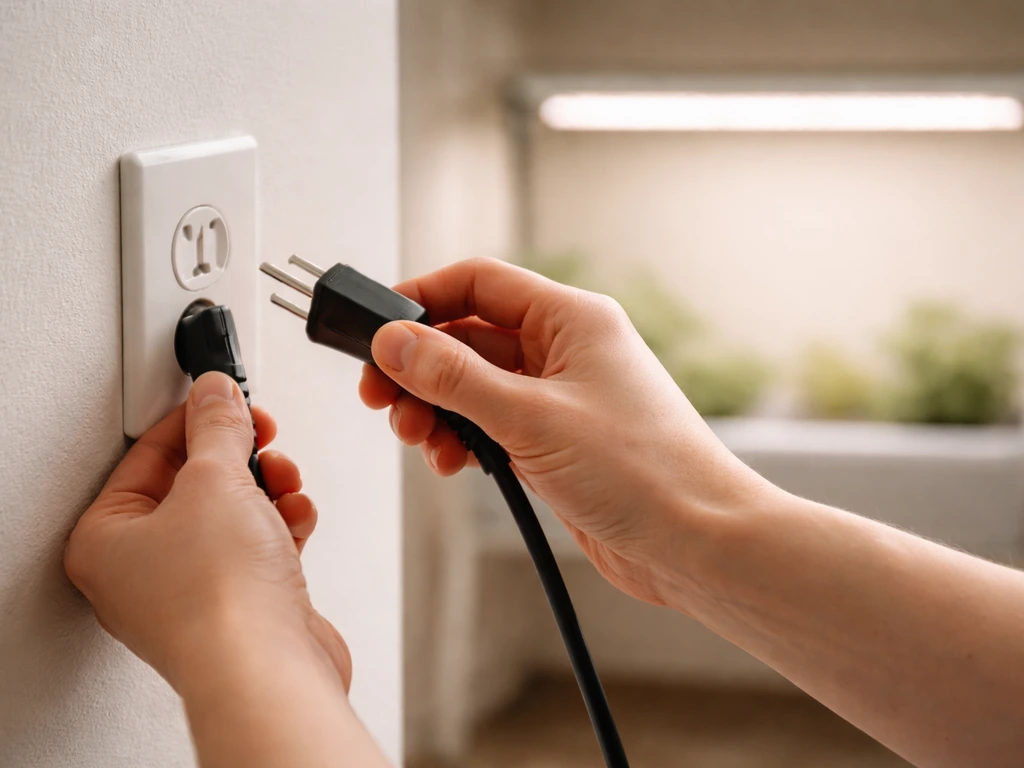
Check the outlet and power path

Plug something else into the same outlet, a phone charger or a lamp, and confirm it works. If it does not, the problem is the outlet, not the grow light. Check your breaker panel and reset any tripped breaker. If the outlet is on a GFCI circuit (common in garages and grow tents near water), press the reset button on the GFCI outlet itself. Also check whether the light's power cord has a built-in fuse at the plug end. Some units do. If the fuse window looks dark or the fuse wire is visibly broken, replace it with a fuse of the exact same amperage rating.
Check the timer and any inline switches
Plug the light directly into the wall, bypassing any timer or smart plug. If it works, the problem is the timer. Plug-in mechanical timers can fail, get stuck between on and off positions, or lose their programmed schedule. Digital timers need to be reprogrammed if they lose power. Confirm the timer is actually in the ON portion of its cycle when you are testing. If you have a controller or switch box in the chain, test by plugging the light directly past it to confirm the controller itself is not the source of the problem.
Check the dimmer and controller
If your light uses a dimmer, this is one of the most common flicker and dimming problems. Many LED grow lights use 0-10V dimming, which sends a low-voltage analog signal over two dedicated control wires to tell the driver what output level to use. This is a completely separate circuit from the AC power. If those control wires are loose, corroded, or connected to an blank" rel="noopener noreferrer">incompatible dimmer, the light will flicker, refuse to dim, or run stuck at full or zero output. Set the dimmer to 100% (maximum) and test. If the light works fine at 100% but flickers or drops out when you try to dim it, the issue is in the dimming control path, not the LEDs themselves. Try a different dimmer or controller before replacing anything else.
Also check whether other high-draw appliances (fans, pumps, dehumidifiers) are on the same circuit as your grow lights. GrowLightInfo also points to too-low voltage, loose wiring, having grow lights on the same circuit as other appliances, and a faulty LED driver as common causes to check when you notice flickering other high-draw appliances. Shared circuits cause voltage fluctuations that can make LEDs flicker and shorten driver life. If you can, put your grow lights on a dedicated circuit.
Check all cables and connections
Unplug everything, then go through every connector in the system: the power cable at the driver, any daisy-chain cables between fixtures, any RJ port or signal cables going to a controller, and any connections between the driver and the LED bar or panel. Push each connector in firmly and listen for a click if it has a locking tab. Loose connections are one of the most common causes of uneven brightness across a multi-bar fixture. On dimmable bar systems with daisy-chaining, a single bad cable connection can cause one or more bars to go dark while the rest work normally. After reseating everything, test again before moving forward.
Troubleshooting the LED driver and power supply
If the power source, outlet, timer, and connections all check out but the light still does not work correctly, the driver is the most likely culprit. The driver is the box (sometimes built into the fixture, sometimes external) that converts AC mains power to the correct DC voltage and current for your LEDs. It contains capacitors and complex circuitry that degrade over time, especially in warm grow room conditions.
Signs that point directly to the driver
- Light is completely dead but the outlet has power: driver may have failed completely or entered a protection mode with no way to reset
- Light flickers or dims and you hear a high-pitched whine or buzzing from the driver box: electrolytic capacitor failure, replace the driver
- Light works fine when cool but flickers or dims after warming up for 15-30 minutes: this is a classic sign of a driver component that is failing under thermal stress
- Light output jumps around or sags when you put load on it: unstable driver regulation
- Reduced brightness that cannot be corrected by the dimmer: driver output voltage or current has dropped below spec
Testing the driver with a multimeter
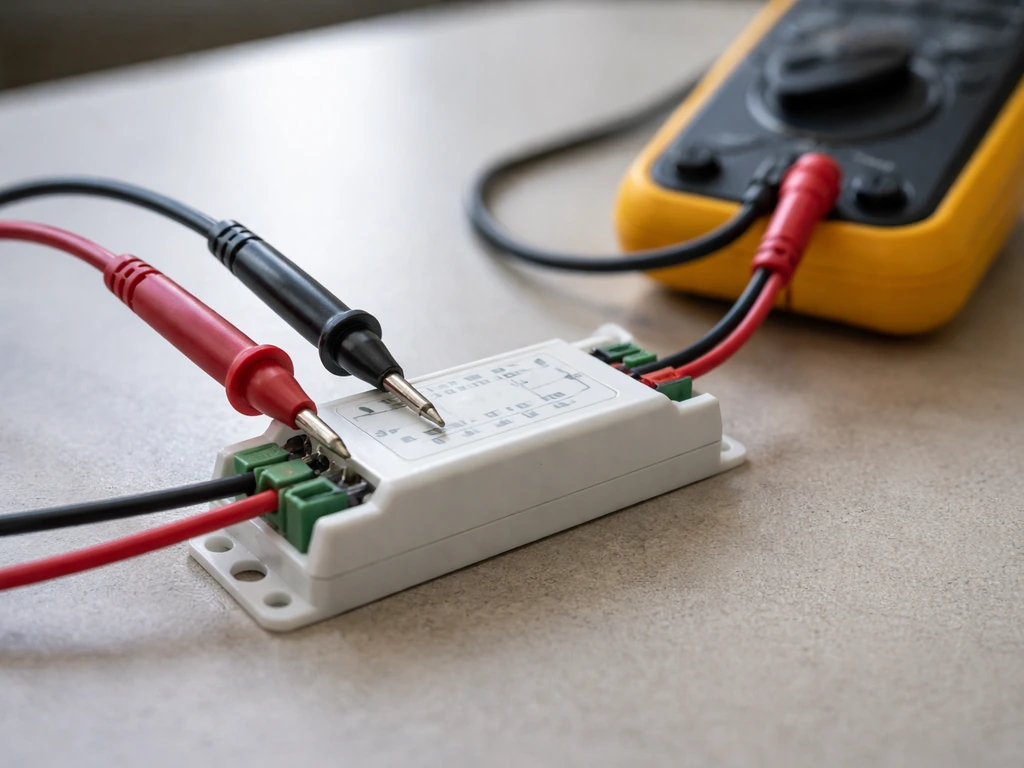
If you have a multimeter, you can test driver output. Power off at the breaker and verify power is off with the meter before touching anything. With the fixture unplugged, locate the driver's output terminals. Check your driver's label for its rated output voltage and current. Reconnect power (carefully, do not touch terminals), set your multimeter to DC voltage, and measure across the output terminals. A healthy driver should read close to its rated output. Zero output with AC power present means the driver has failed. Wildly fluctuating or out-of-spec readings mean the driver is failing. If the driver has AC input but no DC output, the problem is inside the driver, not the LEDs or wiring downstream.
Replacing the driver
Driver replacement is often the right move and is much cheaper than replacing the whole fixture. To find a compatible replacement, you need to match several things exactly: output current (in milliamps or amps), output voltage range, total wattage, and the dimming method. Dimming method matters a lot. If your fixture uses 0-10V dimming, you need a 0-10V dimmable driver, not a phase-cut or PWM driver. Using the wrong type will cause flicker, damage, or no dimming at all. You also need to match the connector type so the wiring physically fits. Check the label on your existing driver for all of these specs before ordering. Many grow-light brands sell replacement drivers directly, which is the safest option since compatibility is guaranteed.
On larger fixtures with multiple power supplies (some big panels have six or more internal driver boards controlling different LED rows), replacing only the failed board is possible if you can identify which rows are dark. If you replace one driver and still have dark rows, the remaining boards or LED panel connections need attention, and at that point contacting the manufacturer or a repair service is usually the smarter call.
Fixture-level checks: connections, heat sinks, cleaning, and placement
Internal connections (where you are allowed to access them)
Some grow lights have external driver boxes with removable connector blocks between the driver and the LED board. If yours does, and it is clearly designed to be accessed (removable screws, no sealed housing), you can carefully inspect and reseat those connectors. Look for discoloration, corrosion, or any wires that have pulled out of their terminals. Do not pry anything that looks sealed or glued shut. If the fixture is a single sealed unit with no access panels, do not try to open it.
Heat sinks and cooling
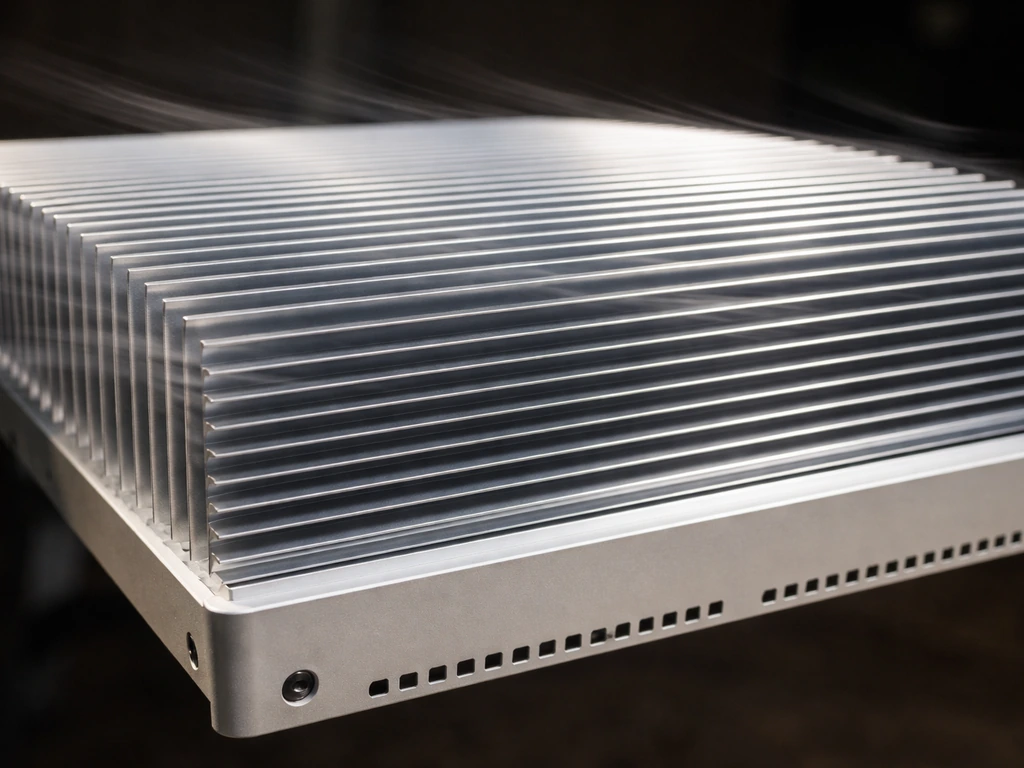
Heat is the biggest killer of LED drivers and LED chips. If your light runs hot to the touch, shuts down after a while, or your grow room is consistently above 85°F (29°C), cooling is likely part of your problem. If you want to air cool grow lights safely and effectively, focus on airflow, clearance, and clean heat sinks so the fans can pull heat out efficiently. Inspect the heat sink fins on your fixture. They should be free of dust and debris. A layer of dust acts as insulation and can raise component temperatures enough to trigger thermal shutdown or accelerate capacitor failure. Clean them gently with compressed air while the light is unplugged. If you are trying to improve how to cool LED grow lights, start by cleaning the heat sink fins and making sure the fixture has enough airflow. Keeping your LED grow lights clean, especially the heat sink fins, helps prevent overheating and can extend driver life clean LED grow lights. For active cooling (fans built into the fixture), listen for the fan running when the light is on. A failed cooling fan can cause the whole fixture to overheat within minutes. Replacing a small internal fan is possible on some fixtures and the part is usually inexpensive.
Placement and airflow
Check that your fixture has at least 6 inches of clearance above it and is not sitting flush against a shelf, ceiling panel, or reflective hood in a way that traps heat. If you are running multiple fixtures in a tight space, make sure your tent or room has enough airflow to exhaust heat. A grow light that is thermally throttling due to poor airflow will dim unevenly, flicker, and fail years before its rated lifespan. Improving ventilation is sometimes the entire fix for a light that keeps shutting down or running dim.
When to stop DIYing and call in support (or replace the unit)
There is a clear line between what is reasonable to fix yourself and what is not. Multiple manufacturers, including Gavita and Nextlight, are explicit in their manuals that you should not open or disassemble their fixtures, that there are no user-serviceable parts inside, and that doing so voids the warranty and can cause serious injury. That guidance exists for good reason. If your fixture is still under warranty (most quality grow lights carry a 3 to 5 year warranty), contact the manufacturer before you do anything else. Attempting to open the unit will almost certainly void the warranty and you will lose coverage for a free replacement or repair.
Here is a practical decision tree to help you decide:
- Is the light under warranty? Yes: stop, document the fault, contact manufacturer support first.
- Have you checked power, outlet, timer, cables, and the dimmer/controller? No: do those checks before touching the fixture.
- Is the driver clearly external and labeled with replaceable specs? Yes: find a matching replacement driver and swap it. No: contact support.
- Is the fixture sealed with no access panels? Yes: do not open it. Contact support or replace.
- Do you see burning, melted components, or a persistent burning smell? Yes: replace the entire unit. Do not attempt repair.
- Have you replaced the driver and the problem persists? Contact the manufacturer or source a full replacement fixture.
Replacement is often cheaper than a repair shop visit for a budget or mid-range fixture. For premium commercial lights, manufacturer support and depot repair programs are usually available and worth pursuing before writing a unit off.
Set it up right so you do not end up back here
Most grow light failures are preventable. Once you get the light running again, a few setup habits will dramatically extend its life.
Mounting and ventilation
Mount your light with secure, rated hardware and make sure it has room to breathe. If you want to keep your grow lights out of view, hiding them usually comes down to controlling glare, placement, and ventilation rather than changing the wiring hide grow lights. Keep at least 6 inches of clearance around the top and sides of the fixture. Run an exhaust fan to move heat out of your tent or grow space. Aim for an ambient temperature below 80°F (27°C) at the canopy level. If your driver is external (many bar-style systems have a separate driver box), mount the driver box outside the tent or in the coolest part of your space. Drivers last significantly longer when they are not sitting in an 85°F grow tent.
Intensity settings for your plants
Running a grow light at 100% intensity 24 hours a day is a fast way to shorten driver life and stress your plants. For seedlings and clones, 30 to 50% intensity is typically enough. Vegetative growth generally calls for 50 to 75%. Full flower or fruiting stages may use 75 to 100%, but only for the specific hours your plants need it. Reducing intensity slightly (even 80% instead of 100%) can meaningfully reduce driver heat and extend component life without hurting yields.
Schedule and timing
Use a reliable timer and set consistent light and dark periods. Use a reliable timer and set consistent light and dark periods how to suspend grow lights. Most plants need 6 to 8 hours of darkness for recovery, and running lights continuously damages many flowering plants. A consistent schedule also helps your timer and controller hold their programming without drift. Digital timers with a battery backup hold their schedule through power outages. Simple mechanical timers are reliable but check them occasionally since they can slip over time. If you are using a smart controller or app-based timer, make sure the firmware is up to date because bugs in older firmware versions have been known to cause erratic on/off behavior that looks exactly like a hardware fault.
Quick prevention checklist
- Keep the grow space below 80°F with active exhaust ventilation
- Clean heat sink fins with compressed air every 4 to 8 weeks
- Inspect all cable connections and daisy-chain cables every few months
- Put grow lights on a dedicated circuit, not shared with pumps or fans
- Use a compatible dimmer or controller for your specific dimming type (0-10V, PWM, or phase-cut)
- Mount fixtures securely with rated hardware and check the rigging periodically
- Keep water, nutrient solution, and spray bottles well away from the fixture and driver
- Do not run intensity at 100% longer than your plants actually need
FAQ
How can I tell if the issue is the outlet versus the grow light driver?
Try a different outlet on a different circuit if possible. A GFCI reset only helps for issues on that specific protected circuit, and an in-line power strip can also fail under heat. If the light runs when plugged into a known-good outlet, the problem is upstream (outlet, strip, or wiring), not the driver.
My LED grow light turns on briefly, then shuts off, what does that usually mean?
If the light clicks, flashes once, then goes dark, look for a failing driver capacitor or a thermal cutoff. Confirm whether it restarts after cooling for 10 to 20 minutes, and check whether the fan runs (if present). Restarting behavior after cooling strongly points to heat-related shutdown or intermittent driver output.
What should I check if my light is flickering only when I adjust dimming?
Before replacing anything, reseat and inspect the specific low-voltage dimming control wiring separately from the AC power leads. Corrosion and loose crimps in the 0-10V control pair can make the fixture behave as if it is stuck at minimum or maximum. If your driver has a dedicated control connector block, check that it is fully seated and not oxidized.
Can I use any dimmer for an LED grow light?
Check whether your fixture uses 0-10V (two control wires) versus phase-cut dimming or PWM from a controller. If you connect a 0-10V fixture to a phase-cut dimmer, the driver may not understand the signal and can flicker or refuse to change output. Setting the dimmer to 100% is a useful test, but also verify the dimmer type match on the replacement driver spec label.
What is the safest way to troubleshoot a setup with a timer, smart plug, and controller?
Yes, but identify the correct unit first. Many setups use a timer plus a separate controller, or multiple fixtures share one controller. Test by bypassing everything step by step, plugging the grow light directly to wall power, then adding the controller back one component at a time so you can isolate which device actually triggers the fault.
Why does my grow light flicker when other devices run on the same circuit?
Use the breaker panel and look for shared loads that cycle. Fans, dehumidifiers, and humidifier coils can create voltage dips that cause LED drivers to flicker. If possible, run the grow light alone on its own outlet circuit, not just a different timer, and re-test while those other appliances are off.
If other devices work in the same outlet, could my grow light still be dealing with bad power?
A dedicated circuit or outlet can still have loose internal wiring. Even if other devices work, wiggle the plug slightly and observe whether the light behaves differently, then inspect the cord end for heat damage and confirm the plug prongs are firmly seated. If there is any scorch smell or visible browning, stop and have the outlet or cord replaced by a qualified person.
What should I do first if only one bar or one section is dark?
If you see uneven brightness, treat it like a connection or localized driver issue. For daisy-chained bars, start at the connector feeding the dark section, reseat both ends, and check for a damaged cable where it flexes. If one reseating change restores a full run, you likely found the fault without opening the fixture.
My multimeter shows no DC output, does that mean the LED panel is bad?
If you measure DC voltage and it is zero while AC is present, do not assume the LEDs are bad. It usually indicates the driver is not converting power, or it is in protection mode. Also verify you are measuring across the correct driver output terminals (polarity and terminal labels) and that you are using a DC voltage range appropriate for the rated output.
What are common reasons a replacement driver still does not fix the problem?
When a replacement driver is correct electrically but still causes no dimming or new flicker, the dimming method match is often the cause (0-10V versus the wrong control style). Also match connector type and total wattage headroom, because an under-rated wattage driver can run hotter and fail faster. If the fixture has multiple internal driver boards, keep the identical part number for each row type.
Should I open the fixture if it is still under warranty?
If the fixture is in warranty, do not open sealed sections, even if it seems simple. Contact the manufacturer with the model and serial number and ask for an RMA or replacement driver program if they offer one. Opening can void warranty, and it can also create safety hazards if you disturb insulation or thermal interfaces.
My light is hot and keeps shutting down. Is increasing clearance enough?
If the fixture is thermally cutting out, you need both airflow and cleanliness, not just more space. Clean heat sink fins first, ensure at least about 6 inches of clearance around the top and sides, and confirm any fan spins freely when power is applied. If the room consistently exceeds 85°F (29°C) at the canopy, driver life will suffer even if it temporarily works.
How do I troubleshoot erratic on/off behavior that seems like a hardware fault?
If it is safe to remove the controller battery backup, do not assume the controller is dead. Power-cycle the controller, then re-check the schedule settings and firmware version, especially if behavior became erratic after an outage or firmware update. Also confirm the controller output is actually ON during your test window, because many issues look like hardware failure when the schedule is wrong.
What are red flags that mean I should stop and get help immediately?
If you smell burning or see melted insulation, treat it as an electrical fault and stop troubleshooting immediately. Unplug the fixture, and do not test again until the cord, connector block, or driver is replaced or inspected by a qualified technician. Visible damage at the plug end or driver output wiring is a reason to replace the affected part, not just reseat it.
Once it works again, how can I confirm the repair is stable?
After repairs, start at lower intensity to reduce stress while you confirm stability. For example, test at 30 to 50% first, then step up over a few days while monitoring temperature at the driver area and checking for any flicker during dimming changes. Consistent stable output is a better success check than just seeing the light power on once.
Next Article
How to Cool LED Grow Lights: Step-by-Step Fixes
Fast fixes to cool LED grow lights: airflow, mounting, clearance, dimming, and troubleshooting overheating shutdowns.
