CFL grow lights work, and they work well when you set them up correctly. The problem most people run into is not the bulbs themselves but the placement, the schedule, or the wrong color temperature for the growth stage. Get those three things right and a simple CFL setup will take you from seed to flower without spending a fortune. This guide covers everything: which bulbs to buy, how close to hang them, how many hours to run them, and exactly what to do when your plants start showing signs that something is off. If you are new to grow lighting, a grow lights guide can also help you compare setups like CFL versus LED and choose the right distance and schedule for your plants. If you want a quick overview of how grow light specs work in practice, the grow light explained section can help connect wattage, spectrum, and distance to plant results grow lights guide. If you want to dial in distance, schedule, and bulb specs for the best results, this indoor grow light guide is a helpful next step.
CFL Grow Lights Guide: Setup, Sizing, Safety, Troubleshooting
What CFL grow lights are (and why people still use them)
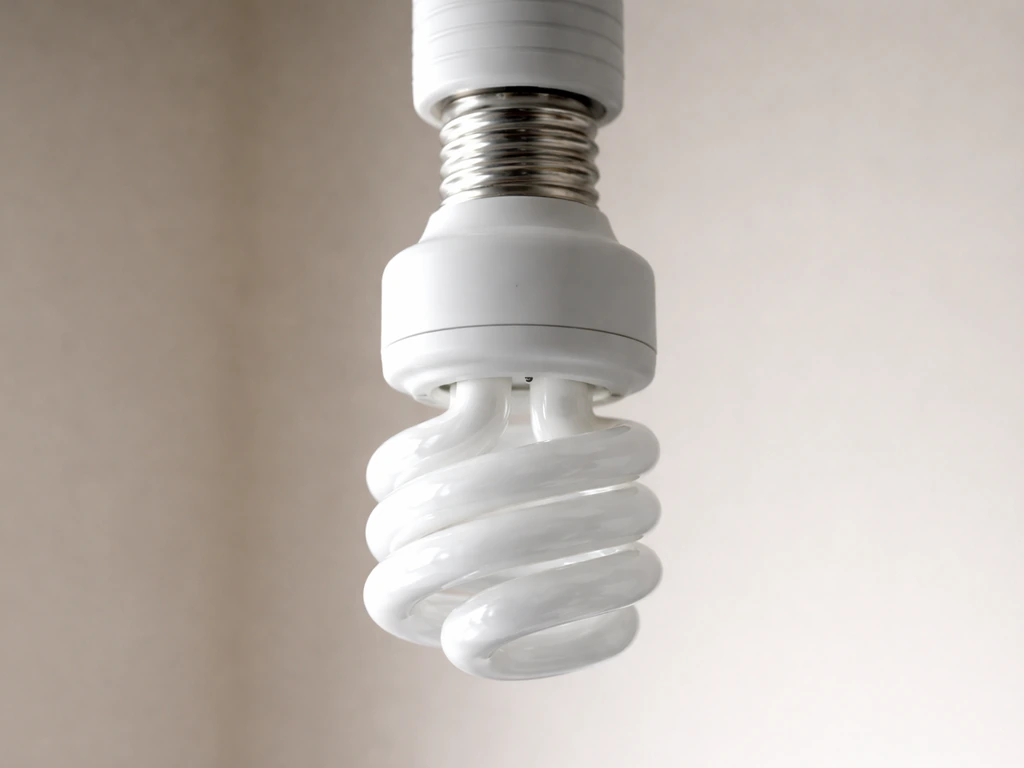
CFL stands for compact fluorescent lamp. These are the spiral or folded-tube bulbs that screw into standard incandescent-style sockets, which means you can use them in ordinary shop-fixture clamp lights or pendant sockets without buying a dedicated grow-light fixture. They produce light by passing electricity through a gas-filled tube coated with phosphor, and that phosphor coating is what determines the color of light you get.
One thing to know upfront: CFLs contain a small amount of mercury sealed inside the tube. Under normal use that is not a problem, but if a bulb breaks you need to handle cleanup carefully (more on that in the safety section). The FDA flags this specifically for consumers, so it is worth knowing before you hang bulbs directly over a plant you plan to eat from.
So why do people still use CFLs in 2026 when LED grow lights are everywhere? If you are considering switching, use this led grow light guide to compare brightness, coverage, and schedules for your plants LED grow lights are everywhere. A few real reasons. CFLs are cheap to buy upfront, available at any hardware store, fit into fixtures most beginners already own, and produce enough usable light for seedlings, clones, low-light houseplants, and small vegetative setups. They are also forgiving for beginners because they do not generate the intense heat that high-pressure sodium (HPS) lights do, so a placement mistake is less likely to fry a seedling overnight. If you are starting seeds on a budget or keeping a few houseplants healthy through winter, CFL is a completely sensible choice. If you are trying to flower a large plant through to harvest, you will probably hit the limits of what CFL can do, and I will tell you exactly when and how to think about upgrading.
Choosing the right CFL bulbs and fixtures
Wattage and lumen output
Wattage tells you how much electricity the bulb uses, not how much light it produces, but it is still the easiest shorthand for sizing your setup. Missouri Extension recommends 10 to 15 watts of fluorescent light per square foot for low-light plants, and that is a reliable baseline. A 2-square-foot seedling tray needs at least 20 to 30 watts of actual CFL wattage over it. For medium-light plants or a vegetative grow, push toward the higher end of that range or beyond.
Lumens are the brightness rating you will see on every CFL box. A 27-watt CFL typically produces around 2,800 lumens; a smaller 13-watt bulb produces roughly 780 to 900 lumens. Lumens are useful for comparing bulbs to each other, but they are not the right metric for deciding if your plant is getting enough light. Plants use photosynthetically active radiation (PAR), measured in PPFD (photosynthetic photon flux density), not lumens. Lumens are weighted toward what the human eye sees best, not what chlorophyll absorbs. Use lumens for rough comparisons, but do not assume a high-lumen bulb automatically means good plant growth.
Color temperature: the one spec that actually changes what you buy
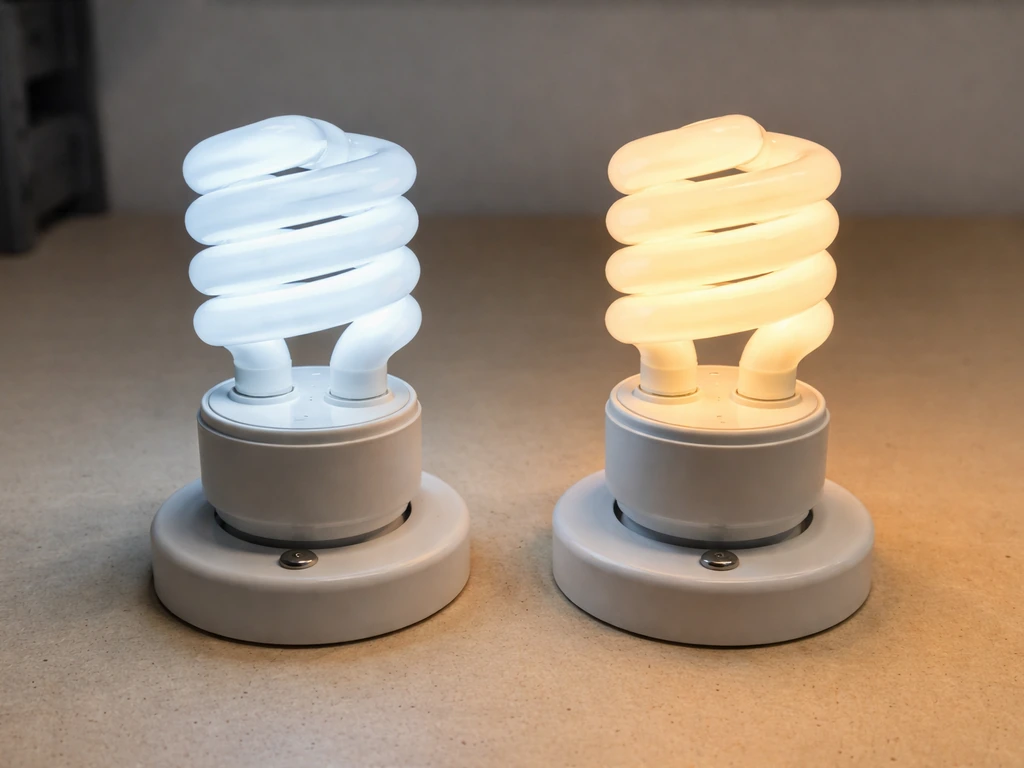
Color temperature is measured in Kelvin (K) and printed on every CFL box. For indoor growing you need to know two numbers: 6500K and 2700K. That is genuinely the whole story at a practical level.
| Color Temp | Light Appearance | Best Used For | Example Stage |
|---|---|---|---|
| 6500K (cool/daylight) | Bluish-white | Vegetative growth, seedlings, clones | Germination through veg |
| 2700K (warm white) | Yellowish-white | Flowering, fruiting, late-stage growth | Pre-flower through harvest |
| 3000K–4000K (neutral) | Neutral white | General houseplants, mixed-stage grows | Year-round houseplant maintenance |
The 6500K bulbs mimic outdoor daylight and push plants toward compact, leafy vegetative growth. The 2700K bulbs shift toward the red/orange end of the spectrum, which signals to many plants that late summer has arrived and it is time to flower. This is a practical heuristic, not a perfect science, but it is the same logic used by dedicated CFL grow-bulb manufacturers who sell their 6500K variants as 'full-spectrum cool for vegetative development' and 2700K as 'full-spectrum warm for flowering.' A 125-watt grow-rated CFL at 6500K typically outputs around 7,000 lumens and is a popular single-bulb option for small vegetative setups.
CRI and why it matters less than you think
CRI (color rendering index) measures how accurately a light source renders colors compared to natural daylight, on a scale of 0 to 100. Most consumer CFLs score around 80 to 82 CRI. A higher CRI means colors look more natural under the light, which matters for photographers and retail displays. For plant growing it is a secondary concern. Your plants care about photon energy in the 400-700nm range, not how a red tomato looks to your eye. Buy the right Kelvin for your growth stage and do not stress about CRI beyond confirming it is in the normal 80-plus range.
Fixture types and sockets
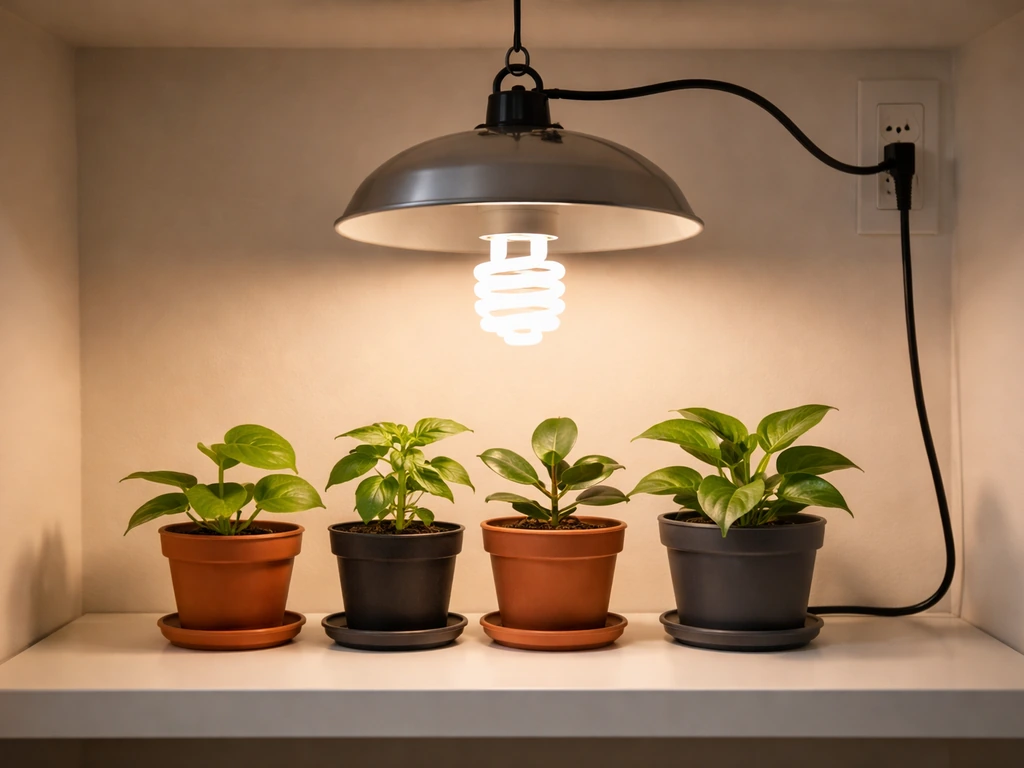
Most spiral CFLs use a standard E26 (medium) screw base, the same as a typical household bulb. You can use these in clamp-style work lights, pendant lamps, or any socket that accepts a screw-in bulb. Some higher-wattage grow-specific CFLs use a 2-pin (GX23 or similar) base and require a matched ballasted fixture. If you are just starting out, stick with screw-base spiral CFLs in adjustable clamp fixtures. They are the most flexible, cheapest setup and give you full control over positioning.
How to size and place CFL lights for seedlings vs. houseplants
Seedlings and cuttings
Seedlings need light close and early. Iowa State Extension recommends placing fluorescent lights 4 to 6 inches from the top of seedlings, and that advice translates directly to CFLs. Start them as soon as germination is visible. The most common beginner mistake is hanging lights too high because it feels safer, but the result is leggy, stretched seedlings that are weak from the start. CFLs lose intensity quickly with distance, so every extra inch costs you meaningful light output.
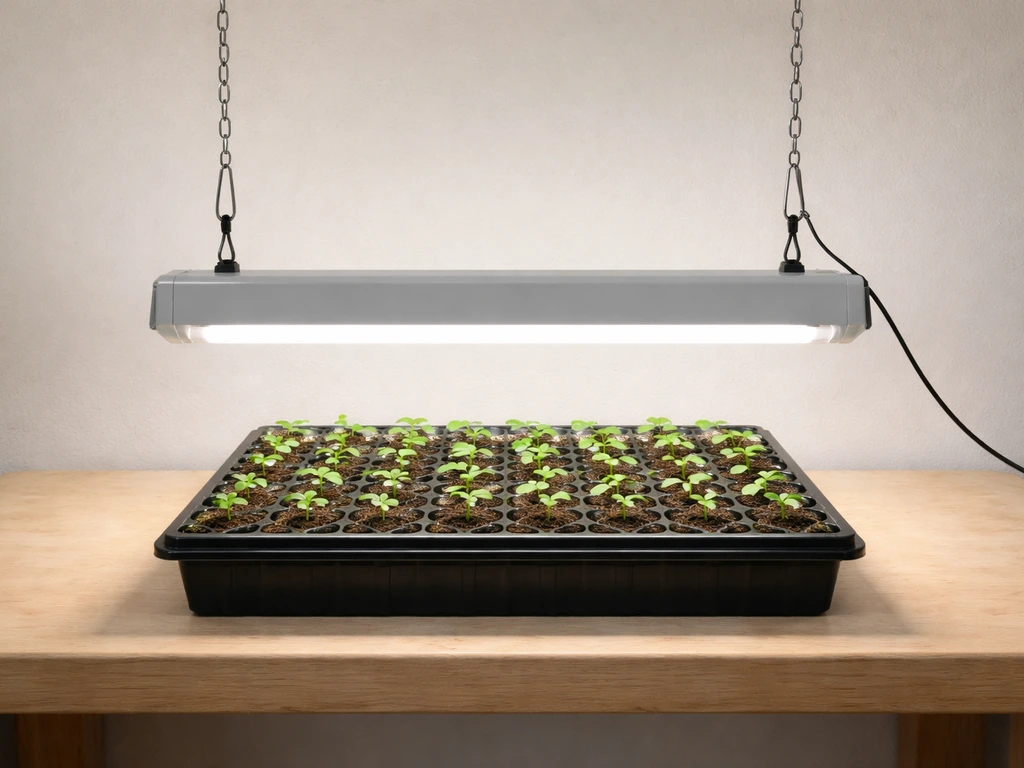
Use adjustable hanging or a simple chain-and-hook setup so you can raise the fixture as plants grow. Start at 4 to 6 inches, raise to 6 to 8 inches as the first true leaves develop, and keep adjusting upward throughout the vegetative stage. A standard 27W CFL covers roughly 1 to 1.5 square feet of seedling tray at 4 to 6 inches effectively. For a standard 1020 tray (about 2 square feet), plan on two to three 23-27W bulbs, or one 125W grow-rated CFL centered above the tray.
Established houseplants and low-light foliage
For mature houseplants that you are supplementing through winter or keeping healthy in a low-light room, you have more flexibility. Low-light plants (pothos, snake plants, peace lilies) do fine with 10 watts of CFL per square foot at a distance of 12 to 24 inches. Medium-light plants (most herbs, some ferns, tropicals) prefer 15 watts per square foot and want the light closer, around 8 to 12 inches. High-light plants (basil, peppers, tomatoes in veg) need the full treatment: 20-plus watts per square foot and placement at 4 to 8 inches.
Coverage drops off fast with CFLs. A single 23W spiral bulb covers maybe 1 square foot well at 6 inches. At 18 inches, that same bulb struggles to cover even one plant adequately. If you have a wide shelf of plants, use multiple bulbs spaced every 8 to 12 inches rather than one powerful bulb in the center. Even coverage beats peak intensity in a single spot.
Scheduling your lights: photoperiod, hours, and growth stages
A timer is not optional. Running your lights manually leads to inconsistent schedules, and inconsistency confuses plants that use day length to regulate their growth stage. A basic mechanical outlet timer costs a few dollars and is one of the best investments in your grow setup.
Vegetative growth and seedlings
For seedlings and vegetative growth, run your CFLs 16 to 18 hours on and 6 to 8 hours off. Some growers push to 20 hours on, especially for seedlings that need a strong start. Long-day schedules (13 or more hours of light) keep most plants in active vegetative mode, pushing leaf and stem development. Use your 6500K bulbs during this phase.
Triggering and supporting flowering
To trigger flowering in photoperiod-sensitive plants, switch to 12 hours of light and 12 hours of uninterrupted darkness. The darkness period is critical. Even a brief light leak, like a TV in the same room or a phone charger LED, can prevent a plant from transitioning properly. University of New Hampshire Extension gives the example of poinsettias being prevented from flowering by ambient room light at night. Switch to your 2700K bulbs when you make this schedule change. Keep the 12/12 schedule consistent until harvest.
One mistake worth avoiding: switching to 12/12 too early. If your plant has not developed enough vegetative structure before you flip the schedule, it will produce a smaller, weaker flower set and the whole grow will take longer overall because the plant spends weeks establishing itself after the switch. Let seedlings and young plants run on 18/6 for at least 4 to 6 weeks before flipping.
Houseplants and year-round maintenance
For houseplants you are just keeping healthy through low-light seasons, 12 to 14 hours of light per day is plenty. You are supplementing natural light, not replacing it entirely. A neutral 3000K to 4000K bulb or a mix of 2700K and 6500K works well here. Run the lights during the day when you are awake, keep the schedule consistent, and let the plants have a genuine dark period at night.
Mounting, safety, heat, and electrical basics
Heat and burn risk
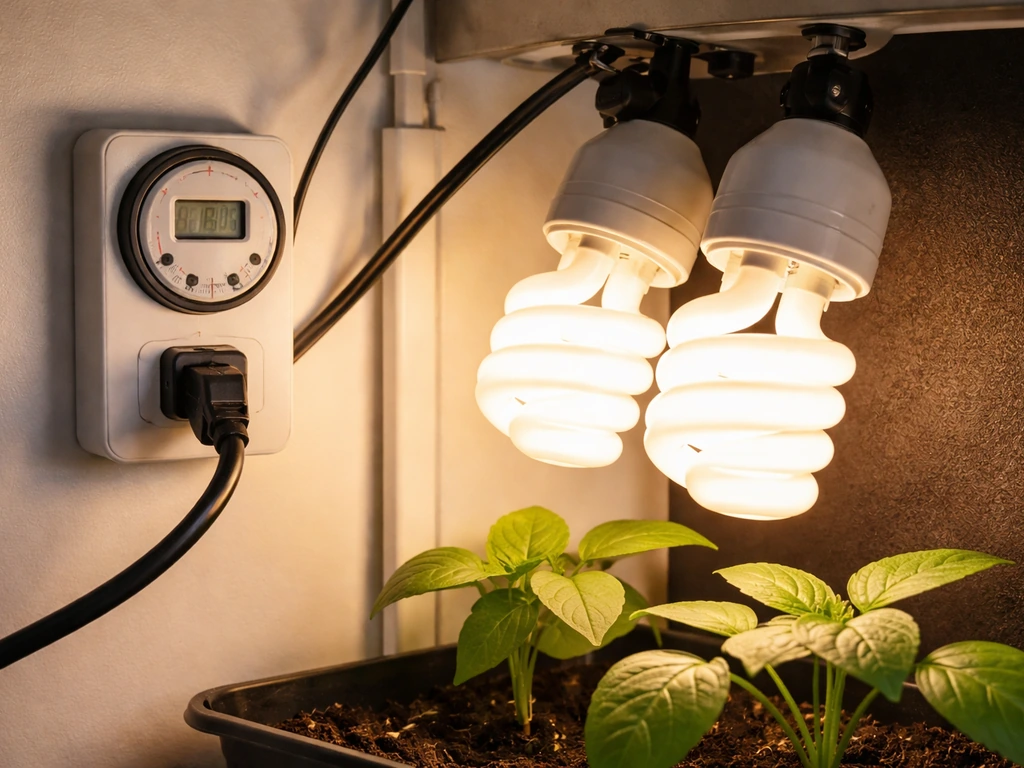
CFLs run much cooler than HPS or incandescent bulbs, but they do generate heat, especially the higher-wattage grow-specific versions. A 125W CFL gets warm enough to burn leaves on contact. Keep at least 4 inches of airspace between the bulb and the plant canopy at all times, and check the underside of leaves closest to the light every few days for early signs of heat stress (bleaching or papery texture).
Reflectors
CFLs emit light in all directions. Without a reflector, roughly half the light goes upward and sideways, wasted. A basic dome reflector (the kind that comes with clamp work lights) redirects that wasted light downward and can effectively double the usable light reaching your plants without buying another bulb. If your fixture did not come with a reflector, buy a clip-on dome reflector for a dollar or two. Mylar or flat-white painted walls around your grow area also help bounce light back onto plants and keep coverage even.
Electrical safety
Do not daisy-chain multiple fixtures through cheap power strips not rated for continuous loads. Grow setups run lights for 12 to 18 hours a day, every day, and that is a continuous-duty load. Use a power strip or surge protector rated for the total wattage of your setup. Do not run extension cords under rugs or through tight spaces where heat can build up. Keep all electrical connections away from water and misting areas.
On the mercury question: if a CFL bulb breaks, do not vacuum it up. The EPA recommends scooping up glass fragments and powder carefully with stiff cardboard, then sealing all debris in a glass jar with a metal lid to contain mercury vapor. Air out the room for at least 15 minutes before and after cleanup. Dispose of the sealed container at a CFL recycling drop-off, not in household trash.
Mounting options
- Adjustable hanging chains or ratchet hangers: the most flexible option for grow tents or shelving, lets you raise lights as plants grow
- Clamp-style work light fixtures: cheap, available everywhere, and perfect for a single-plant or small tray setup on a shelf or table
- Under-shelf mounted fixtures: good for permanent houseplant shelving, but hard to adjust height once installed
- DIY overhead boards with multiple socket cords: works for wider coverage with multiple bulbs, just make sure total wattage stays within the cord and outlet rating
Troubleshooting common CFL grow problems
Leggy, stretched growth
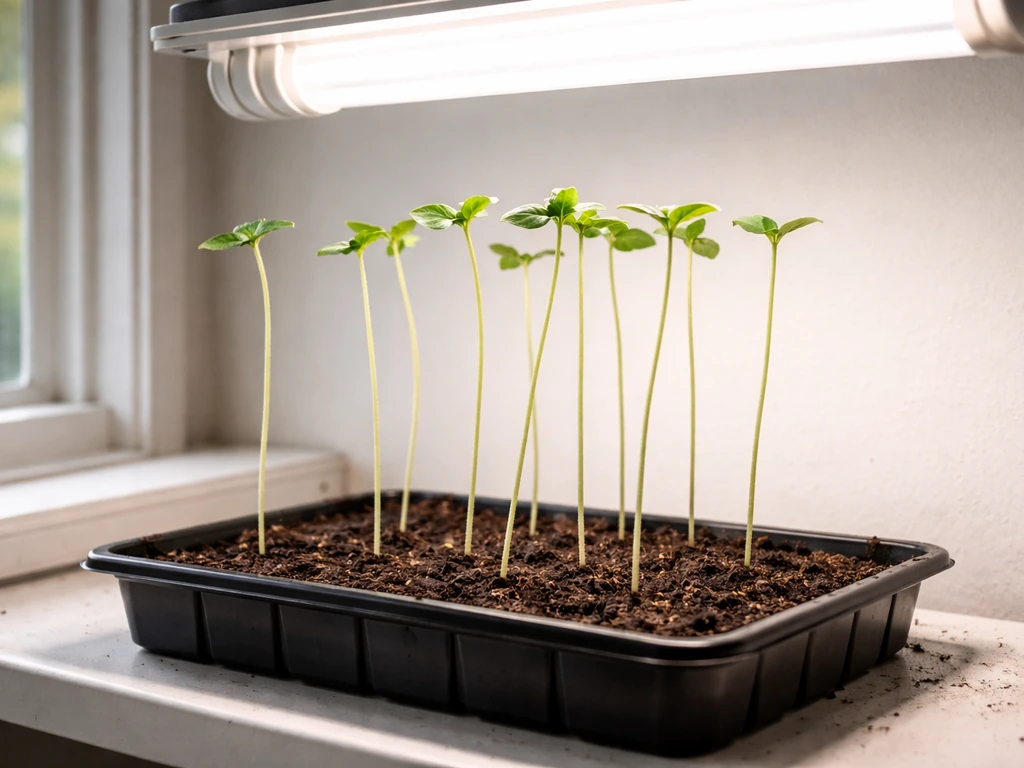
Stretching is the most common CFL problem and the easiest to fix. If your seedlings are tall and thin with long gaps between nodes, the light is too far away or too weak. Move the light closer, aiming for 4 to 6 inches above the canopy for seedlings. Add more bulbs if one is not enough to cover the whole tray. This is almost always a distance problem, not a timer or spectrum problem.
Yellowing leaves
Yellowing has multiple causes, but under CFL lighting the most common are: too much light heat directly on the leaf (check for papery texture and bleaching near the top), too little light causing lower leaves to die off as the plant prioritizes upper growth, or a watering and nutrition issue that has nothing to do with your lights. If yellowing is happening on upper leaves near the bulb, raise the light. If it is happening on lower leaves with otherwise healthy top growth, it may just be natural leaf senescence or a fertilization gap.
Weak or absent flowering
If your photoperiod-sensitive plant is not flowering, the first thing to check is light leaks during the dark period. Any ambient light, even a small LED, can interrupt the darkness signal. Cover the grow space completely and check for cracks. Second, confirm you are actually running 12 hours on and 12 hours off, not 13/11 or an inconsistent schedule. Third, switch to 2700K bulbs if you have not already. Finally, if you flipped to 12/12 from a very young plant, it may need a few more weeks of vegetative development before it has the energy to flower.
Uneven growth across the canopy
Plants closest to the bulb grow faster; plants at the edges stretch toward the light. Fix this by adding more bulbs spaced across the canopy rather than relying on one central bulb, and by using reflectors to push light outward. Rotating plants every few days also helps even out growth if you cannot add more fixtures right now.
Bulb flicker
CFL flicker is usually a sign the bulb is failing, the fixture's internal ballast is failing, or the bulb is not fully seated in the socket. Try reseating the bulb first. If it still flickers, replace the bulb. A flickering CFL is not delivering consistent light to your plants and should be swapped out. CFL lifespan in a grow setup is roughly 6,000 to 10,000 hours, but running them on a 18/6 cycle means they can degrade meaningfully within a year of continuous use.
When to upgrade: CFL vs. LED vs. T5 vs. HPS
CFL has real limits. If you are hitting any of these situations, it is worth thinking about a different light type:
- You need to cover more than 4 square feet effectively
- You are trying to flower a plant that needs high light intensity through to harvest
- Your electricity cost is noticeable and you want better efficiency
- You need to adjust the spectrum more precisely than warm/cool bulb swaps allow
| Light Type | Best For | Upfront Cost | Running Efficiency | Heat Output | Spectrum Control |
|---|---|---|---|---|---|
| CFL | Seedlings, small veg, houseplants | Very low | Moderate | Low | Basic (2700K vs 6500K) |
| T5 fluorescent | Seedlings, clones, leafy greens | Low-moderate | Good | Low | Basic |
| LED grow light | Full-cycle grows, larger coverage | Moderate-high | Excellent | Very low | Excellent (full spectrum or tunable) |
| HPS | Large flowering/fruiting plants | Moderate | Moderate | High | Limited |
T5 fluorescent panels are a natural step up from CFLs for seedling and clone setups. They produce more even coverage across a tray, are easy to hang at fixed heights, and run cool. LED grow lights are the most efficient option for any setup bigger than a few square feet or any grow that runs through flowering. The upfront cost is higher than CFL, but the electricity savings over a full grow cycle often make up the difference, and the spectrum control is far better. HPS is still used for large flowering grows but generates significant heat and requires ventilation most small setups do not have. For most people upgrading from CFL, a quality LED panel is the right next step.
If you are already exploring LED options, comparing the two technologies side by side in detail can help you pick the right wattage and coverage area for your space. The core principles around photoperiod scheduling and distance from the canopy carry over from CFL to LED, so the time you have spent dialing in your CFL setup is not wasted knowledge.
Your next steps
Here is the short version of everything above turned into a checklist. If you are starting fresh, work through this in order. If you are troubleshooting an existing setup, start at the step that matches your symptom.
- Choose 6500K CFLs for seedlings and vegetative growth, 2700K for flowering. Start with at least 10 to 15 watts per square foot of grow area.
- Hang lights 4 to 6 inches above seedlings and 6 to 12 inches above established plants. Use an adjustable hanging method so you can raise the light as plants grow.
- Add a dome reflector to every fixture. If you do not have one, get one before you hang the light.
- Plug into a mechanical timer set to 18/6 for vegetative growth or 16/8 for houseplant maintenance. Switch to 12/12 to trigger flowering, and check for any light leaks before making that switch.
- Check plants every 2 to 3 days in the first week. Look at the top leaves for heat stress and the stems for stretching. Adjust distance as needed.
- If growth looks weak or leggy after one week, move the light closer before changing anything else.
- Replace any bulb that flickers or has been running continuously for more than 12 months.
- If you need more coverage, more intensity, or better flowering results than CFL can deliver, look at LED grow lights as your next upgrade.
FAQ
Can I use any clamp light or household socket with CFL grow lights?
If your CFL bulbs are screw-base spirals (E26), you can usually use them in ordinary clamp work lights as long as the socket matches the bulb and the fixture can handle continuous duty. For higher-wattage grow CFLs that use a 2-pin base, you need the matched ballasted fixture they came with (or the exact replacement spec), because wiring a different style ballast can cause poor output or failure.
Will using reflective materials (Mylar, white paint) replace adding more CFL bulbs?
Yes, but only with a good reason. Mylar or flat-white walls help bounce light into the sides of plants, which matters because CFLs emit in multiple directions. If your problem is height or weak coverage, reflectors won’t fix it, they only improve what your bulbs already deliver.
Is it safe to put CFL grow lights inside a closed hood or cabinet?
Avoid placing CFLs in fully enclosed, hot fixtures. Even though CFLs run cooler than HPS, enclosed housings reduce airflow and can raise surface temperature near the bulb and leaves, increasing bleaching or papery spots. Leave ventilation space and periodically check the underside of leaves closest to the light.
What’s the best way to prevent schedule mistakes if I use an outlet timer?
Yes. If your timer fails, or you bump the schedule, plants can respond quickly because day length drives growth state. Use a reliable outlet timer and verify it daily during the first week by comparing what you set to when the light is actually on (some timers drift or default after power outages).
How can I detect light leaks that might stop flowering?
For photoperiod-sensitive plants, the darkness period must be uninterrupted. Turn off any indicator lights, cover LEDs from chargers, and consider blocking light from under doors. A quick test is to use a room-lighting app or phone camera view to see whether any light is getting through during the “dark” window.
My plants at the edges are stretching, what should I change first?
Use a two-bulb strategy when coverage is uneven. If you see edge plants stretching or lagging, add bulbs spaced every 8 to 12 inches rather than trying to “solve” it by lowering one central bulb (which can overheat the center). Reflectors can also help distribute light outward without raising wattage.
When is it too early to switch from vegetative lighting to 12/12?
Start the transition later if you do not have a strong vegetative base. A common mistake is flipping to 12/12 while the plant is still building structure, which can delay flowering and reduce total yield. As a rule of thumb from common CFL practice, wait about 4 to 6 weeks on an 18/6 schedule before changing to 12/12 for young plants.
What should I do if my CFL grow light starts flickering?
If you see a lot of flicker, replace the bulb first by reseating it, then swapping to a known-good CFL. If the flicker continues with a new bulb, the ballast or socket connections are likely failing, and the fixture should be serviced or replaced. Consistent light matters because plants respond to daily photoperiod and intensity stability.
How do I know when it’s time to replace CFL bulbs even if they still turn on?
If you run lights for 18 hours a day, expect faster degradation than the stated “lifespan.” Many growers treat flicker, dimming, or sudden weak growth as signs to replace bulbs even if they have not reached the maximum hours. In practice, a year of frequent use can mean noticeable output drop.
Can I blend CFL lighting with natural sunlight during the day?
Yes. If you are supplementing natural daylight, try to keep the total photoperiod consistent rather than switching to random start times. Use daylight as part of the day portion, but make sure the dark period remains truly dark and uninterrupted, because consistent timing supports reliable growth patterns.
Is it okay to use mixed CFL color temperatures all the time?
Do not. Fluorescent plant bulbs are typically marketed with specific color temperatures and intended use, and buying a random mix can leave you short on either vegetative or flowering bias. Instead, plan a deliberate switch from cooler (6500K) to warmer (2700K) at the correct stage, and keep the bulbs at the correct height during that change.
What’s the correct cleanup and disposal process if a CFL bulb breaks?
If you break a bulb, do not vacuum. Scoop fragments and powder carefully with stiff cardboard, seal them in a glass container with a metal lid, ventilate the room for at least 15 minutes before leaving it, and dispose through a CFL recycling drop-off rather than household trash.
LED Grow Lights FAQ: Setup, Spectrum, Schedules, Troubleshooting
LED grow lights FAQ with setup, spectrum, schedules, coverage, and troubleshooting for healthier indoor plants fast.