Setting up an indoor grow light doesn't have to be complicated, but there's a real difference between plugging something in and actually getting it right. This guide walks you through the whole process: figuring out what your plants need, picking the right light, mounting it correctly, dialing in the schedule, and fixing problems when they show up. Whether you're keeping houseplants alive through a dark winter or starting seedlings under lights, the same core principles apply.
Indoor Grow Light Guide: Choose, Set Up, and Optimize

Marcus Tillman
13 Apr 2026
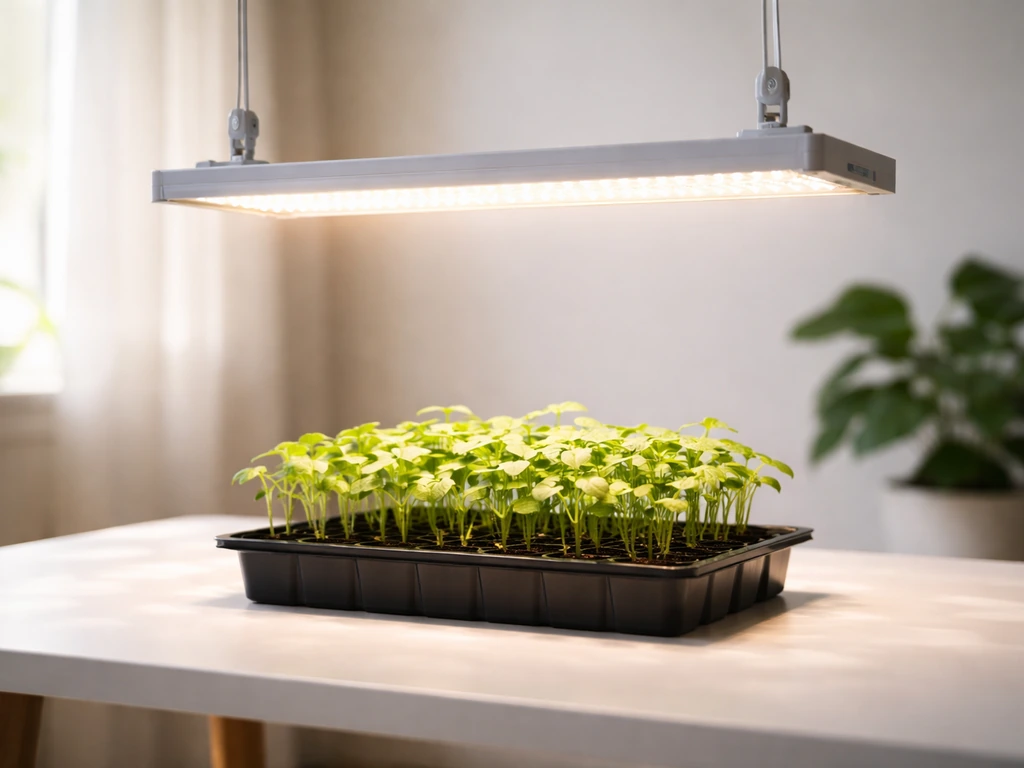
Figure out what your plants actually need first
Before you buy anything or adjust anything, you need to know what you're growing and what you want it to do. That sounds obvious, but most lighting mistakes start here. A low-light tropical houseplant sitting under a high-intensity seedling light is going to have a bad time, and so will a tomato seedling under a lamp designed for a desk succulent.
The core measurement you'll keep running into is PPFD, which stands for Photosynthetic Photon Flux Density. It's just a measure of how much usable light (in micromoles per square meter per second, or µmol/m²/s) is actually landing on your plants. Photosynthetic Photon Flux Density (PPFD) is commonly expressed in units of micromoles per second per square meter (µmol·s⁻¹·m⁻²) blank" rel="noopener noreferrer">micromoles per square meter per second, or µmol/m²/s. University of Maine extension research lists typical ranges for common houseplants: blank" rel="noopener noreferrer">low-light plants like African violets do well at around 50 to 150 PPFD, while flowering or fruiting plants can need several times that. Seedlings and young plants generally need higher PPFD than mature low-light houseplants, but less than full-sun fruiting crops.
The second number that matters is DLI, or Daily Light Integral. As MSU's Erik Runkle explains, DLI is simply the total amount of light your plants receive over a full day, and it's determined by both intensity (PPFD) and duration (how many hours the light runs). A plant can meet its DLI target with lower intensity and longer hours, or higher intensity and shorter hours. Knowing your target DLI for your crop type lets you balance those two levers intelligently.
Here's a practical starting framework by plant type:
| Plant Type / Goal | Target PPFD Range | Typical Photoperiod | Notes |
|---|---|---|---|
| Low-light houseplants (pothos, snake plant, peace lily) | 50–150 µmol/m²/s | 12–14 hours | Supplemental only; they don't need much |
| Medium-light houseplants (African violets, herbs) | 150–300 µmol/m²/s | 14–16 hours | Good for compact grow light fixtures |
| Seedlings and young plants | 150–250 µmol/m²/s | 16–18 hours | Consistent light is key; avoid extremes |
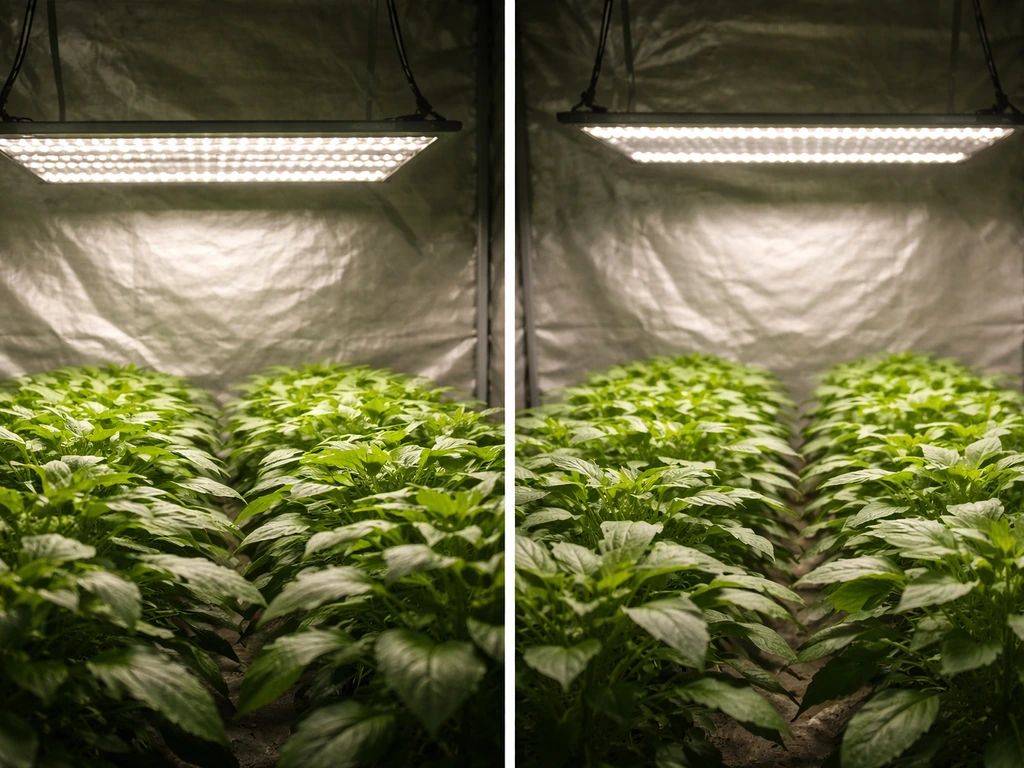
| Flowering / fruiting crops (tomatoes, peppers) | 400–600+ µmol/m²/s | 16–18 hours (veg), 12 (flower) | Needs a capable LED panel, not a bulb fixture |
Choosing the right grow light type and specs
Once you know what your plants need, you can match a light to those requirements without overthinking the marketing copy. There are a few main types of grow lights you'll encounter: LED panels, fluorescent and CFL (compact fluorescent), and HID (high-intensity discharge, like HPS and metal halide). For most home growers in 2026, LED is the default recommendation, but it's worth knowing why.
LED vs. other options
LEDs have come down dramatically in price and now offer the best combination of efficiency, spectrum control, low heat output, and lifespan. If you want a deeper breakdown, the led grow light basics article covers the core technology in plain language. The short version: quality LEDs convert more electricity into usable plant light and less into wasted heat, which matters a lot in small indoor spaces.
CFL bulbs are still a reasonable budget option for seedlings or very small setups. They're cheap, easy to find, and work with standard fixtures. The tradeoff is lower efficiency, higher heat relative to output, and shorter lifespan. If you're starting seeds on a windowsill shelf and need supplemental light for a few weeks each spring, CFLs can absolutely work. For a thorough rundown of their strengths and limits, the cfl grow lights guide is worth reading before you buy.
HID lights (HPS and metal halide) are powerful and were the industry standard for years, but they run very hot, consume a lot of electricity, and need ballasts and reflectors. For home growers with small to medium setups, they're generally not worth the complexity and heat management unless you're running a dedicated tent with proper ventilation.
| Light Type | Efficiency | Heat Output | Best For | Typical Lifespan |
|---|---|---|---|---|
| LED panel | High | Low | All plant types, any stage | 50,000+ hours |
| CFL | Moderate | Moderate | Seedlings, small spaces, budget setups | 8,000–15,000 hours |
| T5 Fluorescent | Moderate | Low-moderate | Seedlings, cuttings, low-light plants | 20,000 hours |
| HPS/MH (HID) | High output, low efficiency | Very high | Large dedicated grow rooms | 10,000–18,000 hours |
Recommendation: if you're setting up for houseplants or seedlings and your budget allows it, buy a quality LED fixture. You'll spend less on electricity, deal with less heat, and get better spectrum control. If budget is tight and you're just starting seeds, a T5 or CFL setup is a perfectly reasonable starting point.
Specs that actually matter
Ignore wattage as your primary comparison metric. A 45W quality LED often outperforms a cheap 100W LED because efficiency varies enormously. Instead, look at these specs when shopping:
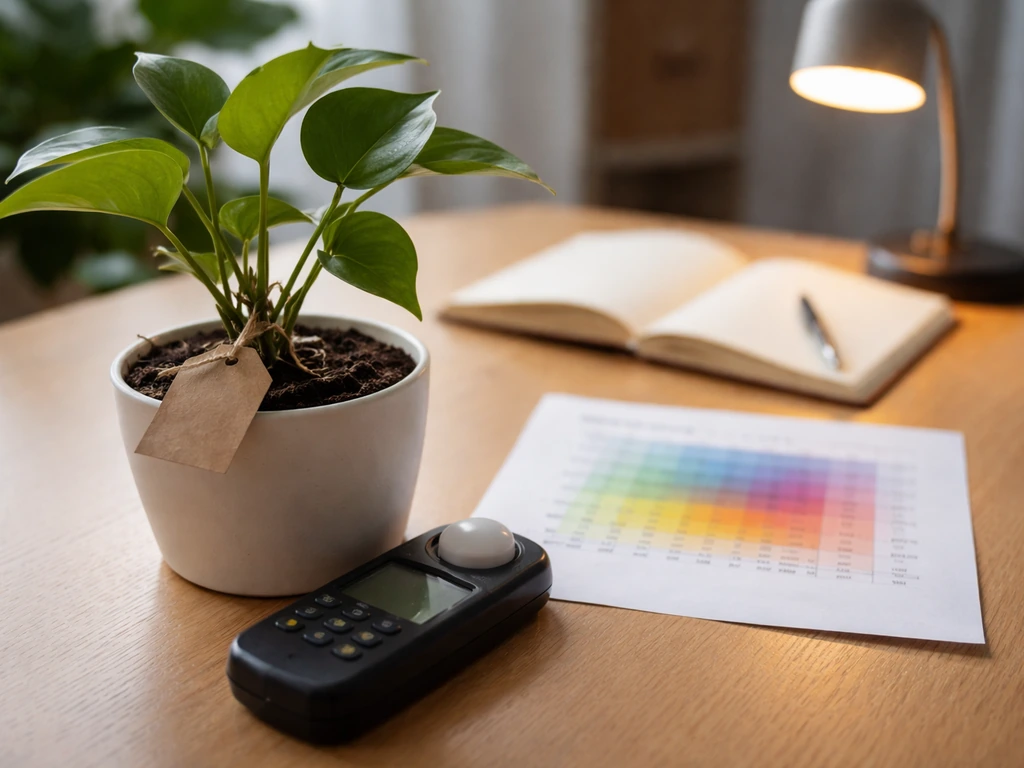
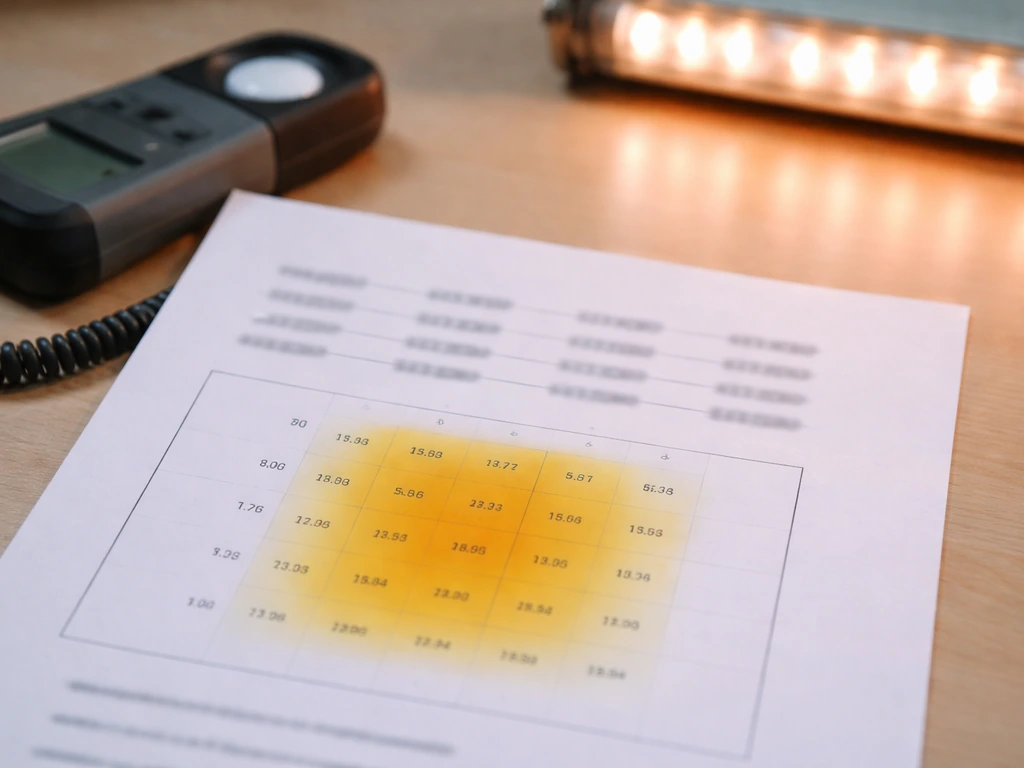
- PPFD at a stated distance: A reputable brand will publish a PPFD map showing light levels across the coverage area at a specific hanging height. Match this to your plant's target range.
- Coverage footprint: Most panels list a coverage area (e.g., 2x2 ft, 3x3 ft, 4x4 ft). This is usually measured at a specific height, so check the fine print.
- Spectrum: Look for "full spectrum" or "broad spectrum" LEDs that include both blue (around 400–500nm) and red (around 620–700nm) wavelengths. Some also include far-red and UV. White-light LEDs with a full spectrum are generally the most versatile for home growers.
- Dimming capability: A dimmer is very useful. It lets you reduce intensity for seedlings or sensitive plants, ramp up as plants mature, and avoid bleaching. If your first LED doesn't have one, it's a feature worth paying for on the next one.
- Heat output and cooling: Check whether the fixture has passive or active (fan) cooling. Active cooling is louder but handles heat better in smaller fixtures.
If you want a deeper dive into what LED specs mean in practice before you buy, the led grow light guide covers shopping decisions and spec comparisons in much more detail.
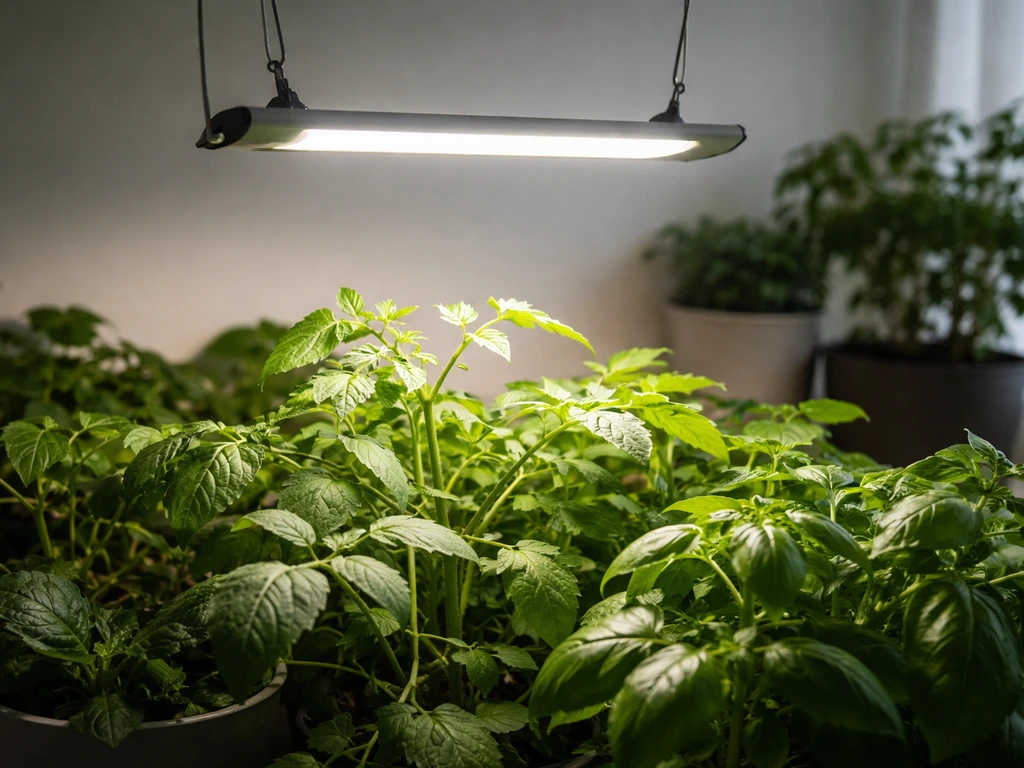
Placement and setup basics
Getting your light in the right position is where a lot of people go wrong, and it's usually not the light's fault. The two biggest variables are height above the canopy and the angle of the fixture. Get these wrong and you'll either stress your plants with too much intensity or waste most of your light.
Mounting height
PPFD drops significantly as you move the light farther from the plant canopy. This is basic physics (the inverse square law), and it's one of the reasons published PPFD specs always include a hanging height. As UMN Extension notes, light intensity measured at the plant surface decreases with distance from the source, which is why mounting height isn't just an aesthetic choice.
Here are practical starting heights for common setups. These are starting points, not rules set in stone:
| Light Type | Seedlings / Clones | Vegetative Growth | Flowering / Fruiting |
|---|---|---|---|
| Low-power LED (< 200W) | 4–8 inches | 12–18 inches | Not ideal for fruiting |
| Mid-power LED (200–400W) | 12–18 inches | 18–24 inches | 18–24 inches |
| High-power LED (400W+) | 18–24 inches | 24–36 inches | 24–36 inches |
| T5 Fluorescent | 2–6 inches | 6–12 inches | Not ideal for fruiting |
| CFL | 2–4 inches | 4–10 inches | Not ideal for fruiting |
Always start at the higher end of the range and move down only if your plants are stretching toward the light. If you're seeing bleached or curled leaves, move the light up immediately.
Spacing, angle, and coverage
Most grow light fixtures are designed to hang horizontally and point straight down, which gives the most even coverage across a flat canopy. Avoid angling the fixture unless you're deliberately trying to supplement light to the sides of tall plants. For shelf setups, hang or mount the light directly above the plants and centered over the growing area. If you're running multiple fixtures, overlap their coverage areas by 10 to 15 percent to avoid dark spots between them.
Heat deserves its own mention here. LEDs run cooler than HID lights, but they still produce heat, especially at close range. A simple rule: if you hold your hand at canopy level for 30 seconds and it feels uncomfortably warm, the light is too close or your growing space needs better airflow. A small clip fan can make a big difference in both heat management and strengthening plant stems.
How long to run your lights
Photoperiod (the number of hours of light in a 24-hour cycle) is one of the most important variables in your grow setup, and it's easy to get right once you understand the basics. As UMN Extension defines it, light duration is simply the number of hours of light your plants receive each day. That sounds simple, but the specific number matters a lot depending on what you're growing.
Recommended schedules by plant type
- Low-light houseplants (pothos, snake plants, ZZ plants): 10–12 hours per day. These don't need much, and running lights longer wastes electricity without benefit.
- Medium-light houseplants and herbs (basil, mint, African violets): 14–16 hours per day. This is the sweet spot for most tabletop and shelf grow light setups.
- Seedlings and young plants: 16–18 hours per day. Consistent long days support strong, compact growth. MSU's indoor lighting research for young plants under LEDs confirms that higher daily light integrals during the seedling stage improve quality and development.
- Flowering/fruiting plants (tomatoes, peppers, cannabis): 18 hours (vegetative), then drop to 12 hours to trigger flowering in photoperiod-sensitive varieties.
- Succulents and cacti: 12–14 hours per day. They want light but not as long a day as tropical plants.
Acclimating plants to artificial light
If your plants are coming from a window or a low-light environment and you're moving them under a grow light for the first time, don't jump straight to full intensity and full photoperiod. Start with the light dimmed to 50 to 60 percent (or raise the fixture a few inches higher than your target height) and run it for 10 to 12 hours for the first week. Then gradually move toward your target height and duration over the following week or two. This prevents shock, which shows up as sudden leaf curl, yellowing, or brown crispy patches.
Seasonal adjustments are worth thinking about too. In winter, natural light through windows is both weaker and shorter. You may need to run supplemental lights for longer periods or at higher intensity to compensate. In summer, your lights may barely need to run if plants are near windows. Adjust based on what you're observing, not just the calendar.
Dialing in intensity and fixing common lighting problems
Even after you've set everything up correctly, you'll likely need to make some adjustments. Here are the three most common problems home growers run into, and how to fix them.
Leggy, stretched growth
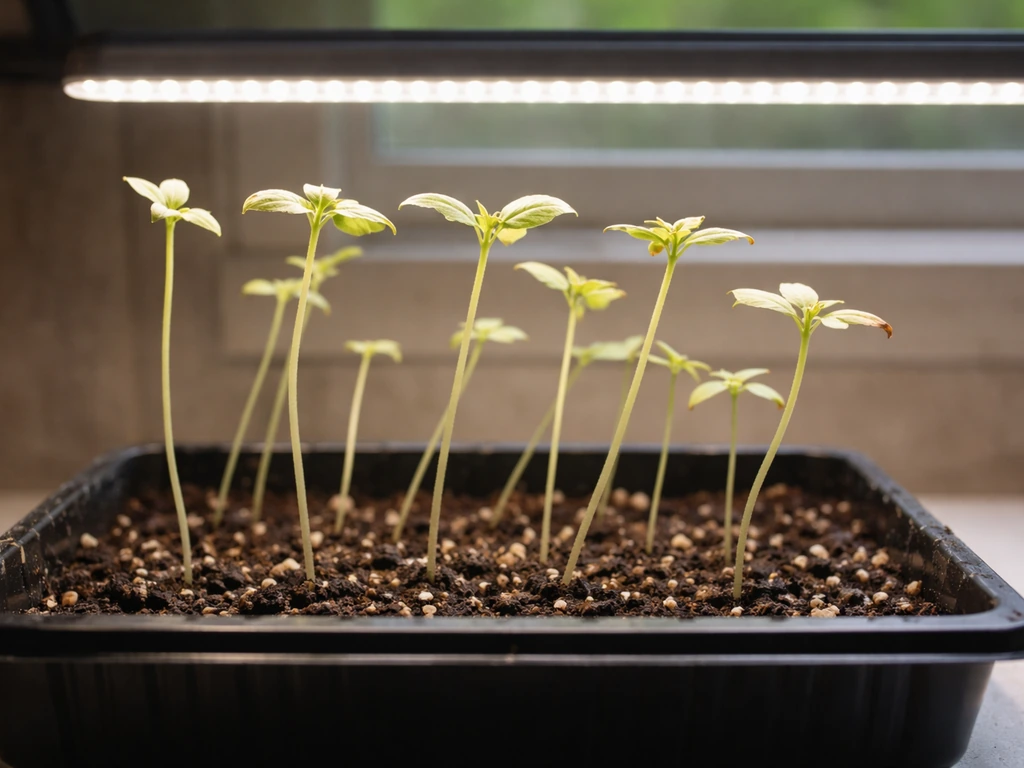
If your seedlings are tall and spindly, with long gaps between leaf nodes, or your houseplants are reaching dramatically toward the light, they're not getting enough. This is the most common problem with grow lights that are mounted too high, set to too low an intensity, or run for too few hours. Fix it by lowering the fixture, increasing dimmer output, or adding 2 to 4 more hours to your photoperiod. Do one change at a time so you can tell what worked.
Bleaching, yellowing at the top, or burnt leaf tips
This is the opposite problem: too much light hitting the top of the canopy. New leaves or the growing tip look washed out, pale yellow, or white. Leaf tips and margins may show brown burn spots. Raise the fixture, reduce dimmer output, or shorten your photoperiod. If you're running a high-powered LED close to seedlings, this can happen fast. Check your canopy daily in the first two weeks after setup.
Dark, slow-growing foliage
Dark green, slow-growing leaves that don't show any bleaching or stretching can be a sign of slightly too little light, or it can just mean the plant is comfortable. The key diagnostic is growth rate: if the plant is growing at a normal or healthy pace, dark green foliage isn't a problem. If growth is very slow and the plant looks like it's just maintaining, increase intensity or extend the photoperiod by an hour or two and observe for a week.
Troubleshooting and dialing in your setup over time
A grow light setup is not a set-it-and-forget-it situation, at least not at first. The goal is to get to a stable routine that works, and then you really can just let it run. Here's how to get there faster.
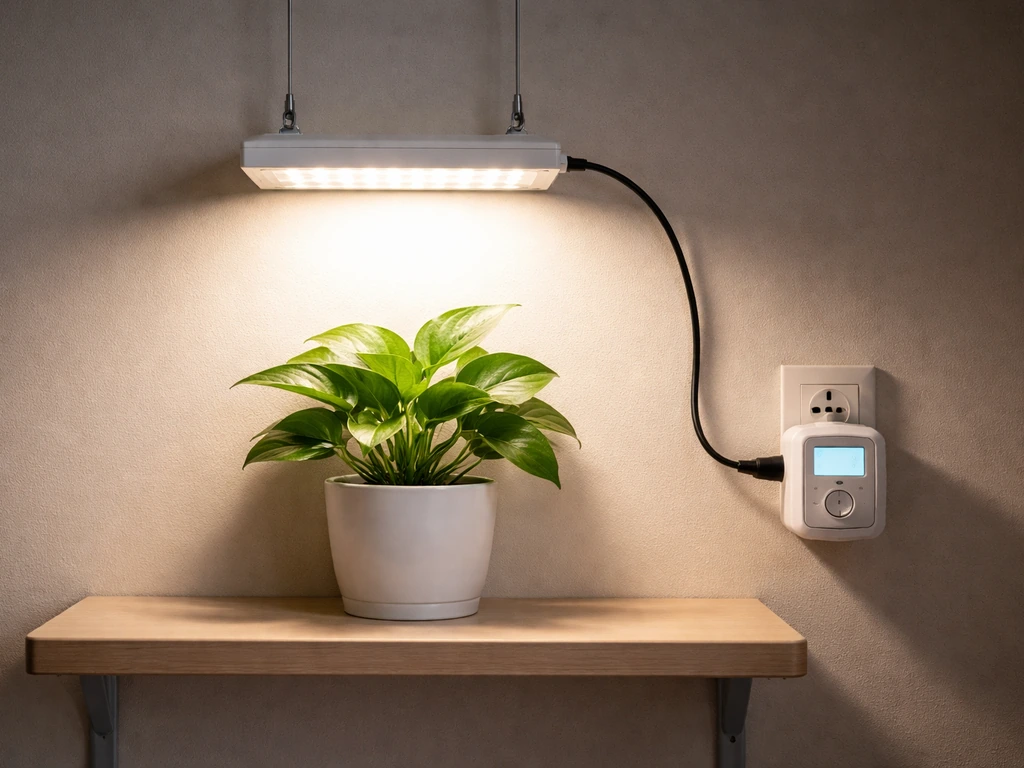
Use a timer, not guesswork
A mechanical or digital outlet timer is one of the best investments in your grow setup. Plants respond to consistent light cycles, and manually turning lights on and off leads to inconsistent photoperiods, which disrupts growth rhythms and, in photoperiod-sensitive plants, can interrupt flowering. A basic mechanical outlet timer costs a few dollars and will pay for itself in healthier plants within a week. Set it, check it once a week to make sure it hasn't shifted, and leave it.
Fixing uneven coverage
If some plants in your setup are thriving while others nearby look pale or leggy, you're dealing with uneven coverage. This happens when a fixture's PPFD footprint doesn't match your growing area, or when the light is off-center. Check the fixture position first. If it's centered and plants at the edges are still underperforming, you have a few options: move the underperforming plants closer to the center, add a second fixture, or use reflective material (white foam board, mylar) around the sides of your growing area to bounce light back toward the edges.
Diagnosing problems by symptom
- Tall, spindly growth with long internodes: Too little light. Lower fixture or increase intensity.
- Pale or white patches on new growth / top leaves: Too much light. Raise fixture or reduce dimmer.
- Brown crispy edges or tips: Could be light burn or low humidity. Check light distance first, then check humidity.
- Yellowing lower leaves: Usually not a light problem. Check watering and fertilization.
- Slow growth across entire plant: Check DLI. Increase either intensity or photoperiod, not both at once.
- Plants growing well on one side, poorly on the other: Rotate your containers 90 degrees every few days, or reposition the fixture.
- Timer not triggering lights: Check outlet connection, confirm timer is set to the correct 12/24-hour mode, and verify it hasn't shifted due to a power interruption.
Keeping good records
Write down your setup: light type, mounting height, dimmer setting, and timer schedule. When you make a change, write that down too. This sounds tedious, but after a few weeks of adjustments it becomes impossible to remember what changed and when. A note in your phone or a sticky note on the fixture is enough. When you find what works, you'll know exactly what to replicate.
If you're running into repeated problems even after working through these steps, it's worth revisiting your fixture choice. Not all budget LEDs perform as advertised, and a light that claims 45W equivalent output but delivers inconsistent PPFD is harder to troubleshoot than a properly spec'd fixture. The led grow light tips article has practical advice on getting the most out of your fixture regardless of brand.
Putting it all together
The formula for a working indoor grow light setup is simpler than it looks once you strip away the marketing language. In community discussions, growers also commonly compute DLI from PPFD using the typical relationship DLI = (PPFD × light hours/day × 3600) ÷ 1,000,000 and measure average PPFD at the canopy formula for a working indoor grow light setup. Know your plant's light needs in PPFD, pick a light that can deliver that over your growing area, mount it at the right height, put it on a timer for the right number of hours, and then watch your plants for a week or two and adjust from there. Most problems resolve with one or two small changes.
If you're still in the early stages of understanding how grow lights work conceptually, the grow light explained article breaks down the technology without assuming any prior knowledge. And if you want a broader overview of the equipment landscape across all light types before committing to a purchase, the grow lights guide is a solid starting point for comparison shopping.
One last thing worth mentioning: LEDs have gotten good enough that the most common mistake now isn't buying the wrong type of light, it's not reading the specs carefully. Before you mount anything, pull up the manufacturer's PPFD map for your fixture, compare it to your plant's target range, and confirm the coverage footprint matches your growing area. That one check will save you a lot of frustration. For answers to the most frequently asked questions that come up after setup, the led grow lights faq covers the questions most people have after their first week of running lights.
FAQ
Do I need a light meter to dial in an indoor grow light guide setup?
Not always. If your fixture includes a PPFD map, you can make good first adjustments using mounting height and dimmer position. A meter is most useful when (1) the fixture lacks PPFD coverage data, (2) you have uneven plants near the edges, or (3) you’re trying to hit a specific DLI for a crop that’s sensitive to under-lighting.
What’s the difference between PPFD and “wattage” when comparing lights?
Wattage tells you electrical power, PPFD tells you usable light reaching the canopy. Two fixtures with the same watts can produce very different PPFD due to efficiency, optics, and how evenly they distribute light across the grow area. That’s why the indoor grow light guide focuses on PPFD and DLI rather than a single watt number.
How do I choose a timer if my fixture supports dimming?
Use the timer for photoperiod (the total hours) and use dimming to fine-tune intensity. Avoid changing both at once early on, pick one variable at a time so you can tell whether stretching, bleaching, or slow growth is caused by hours or intensity.
Can I run my grow lights 24 hours a day for faster growth?
For most houseplants and seedlings, no. Many plants need a true dark period, and running lights continuously can reduce stress tolerance, slow normal growth rhythms, and make troubleshooting harder. If you’re using high intensity, even more important to stick to crop-appropriate photoperiods instead of maximizing hours.
What should I do if only one plant in the group is stretching or bleaching?
First check distance and centering. Even small shifts matter because PPFD drops quickly with height and off-center placement. If plants are equally spaced but one still differs, rotate the pot every few days and verify the leaf height is consistent with the canopy height you’re measuring.
Do I need to worry about light color, like “full spectrum,” for indoor growing?
Spectrum matters, but the bigger win is matching intensity and coverage first. For LEDs, a fixture labeled “full spectrum” may still have different ratios of red, blue, and far-red that affect morphology. If you’re seeing persistent issues that aren’t solved by height or timing (for example, constant stretching despite adequate PPFD), then spectrum balance becomes worth investigating.
How do I set the hanging height precisely?
Measure from the fixture surface to the current top of the canopy (or the highest growing point). Since plants grow during the run, re-check height weekly. If you can’t measure easily, do a hand-heat check at canopy level and adjust in small steps before moving to a major change.
Is reflective material (foil, mylar, white foam board) always helpful?
It usually helps by improving light reaching the sides and back of a canopy, especially in shelf or corner setups. But it’s not a substitute for correct fixture placement and coverage. Also keep reflective surfaces away from components that can get hot, and ensure they don’t create hotspots near the top of the canopy.
What causes seedlings to get pale or burned even when the fixture is “low power”?
Common causes are fixture being too close, wrong mounting angle (light hitting the canopy harder in one spot), and uneven coverage where the brightest zone lands on the seedling tray. Another factor is dry heat and poor airflow, which can make leaves respond more severely to the same light intensity.
How quickly should I expect changes after adjusting PPFD or photoperiod?
Some signs appear quickly. Bleaching or leaf-tip burn can show up within days if intensity is too high. Stretching and slow growth usually take longer to confirm, often about a week. Make one change at a time, then give it enough time for new leaves to reflect the adjustment.
What’s a common mistake when using dimmers on grow lights?
People often set the dimmer based on “what looks right” rather than canopy PPFD. Also, some fixtures dim in a way that changes the output distribution, not just the total output. If your fixture has a PPFD map, use it at your dimmer setting, otherwise expect some trial and error with height and spacing.
Should I position seedlings on a tray directly under the center of the light?
Yes, start centered to maximize uniformity, then spread outward after you confirm canopy health. If the tray is larger than the fixture’s main PPFD footprint, the edges will underperform and seedlings will become leggy there. Centering, plus adding a second fixture or shifting plants toward higher-intensity zones, usually prevents that.
How do I handle seasonal changes if some plants are near windows?
Treat it as two light sources. In winter, extend the photoperiod or increase intensity only if plants are clearly underperforming. In summer, reduce time or intensity to avoid unintended overshoot, especially for plants that are already receiving daylight. Re-check height and placement because the window angle can change how light hits the canopy.
Why do my plants look “dark green” but still aren’t thriving under the lights?
Dark green alone doesn’t prove adequate light. If growth rate is flat, new leaves are smaller, or internodes are long, your light may be slightly too low. The practical check is growth momentum over about a week, then increase intensity or photoperiod gradually by small increments.
Next Article
Grow Light Explained: Definition, Types, and Setup
Grow light explained: what it is, how it differs from bulbs, and how to choose, place, and schedule for indoor plants