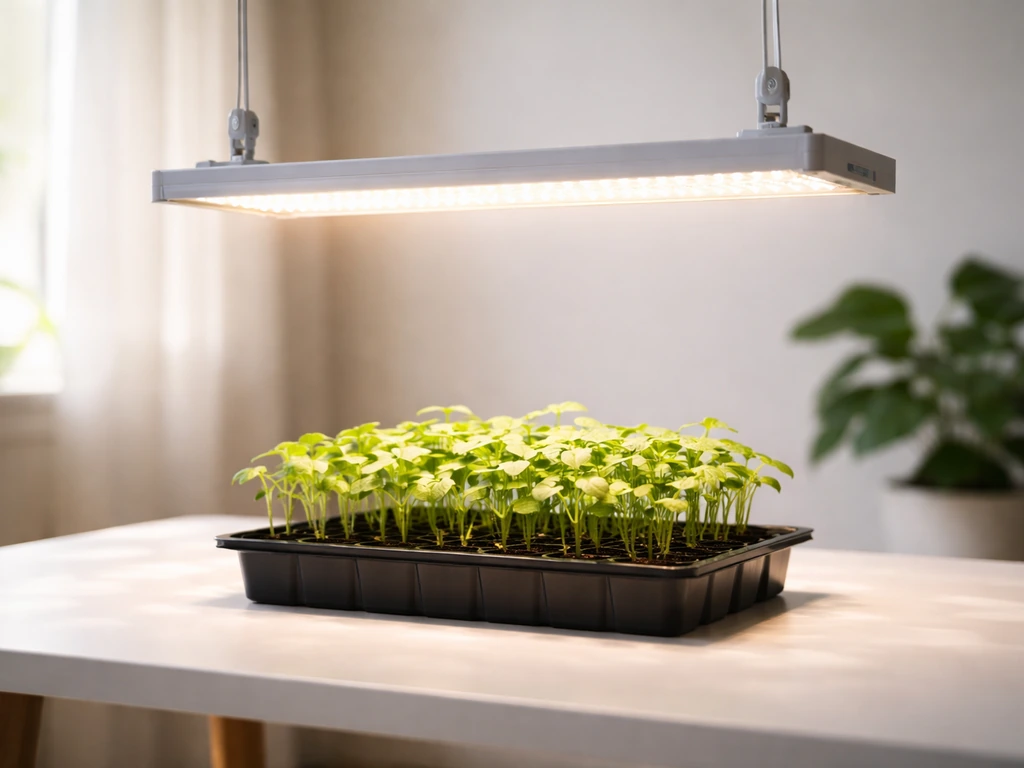
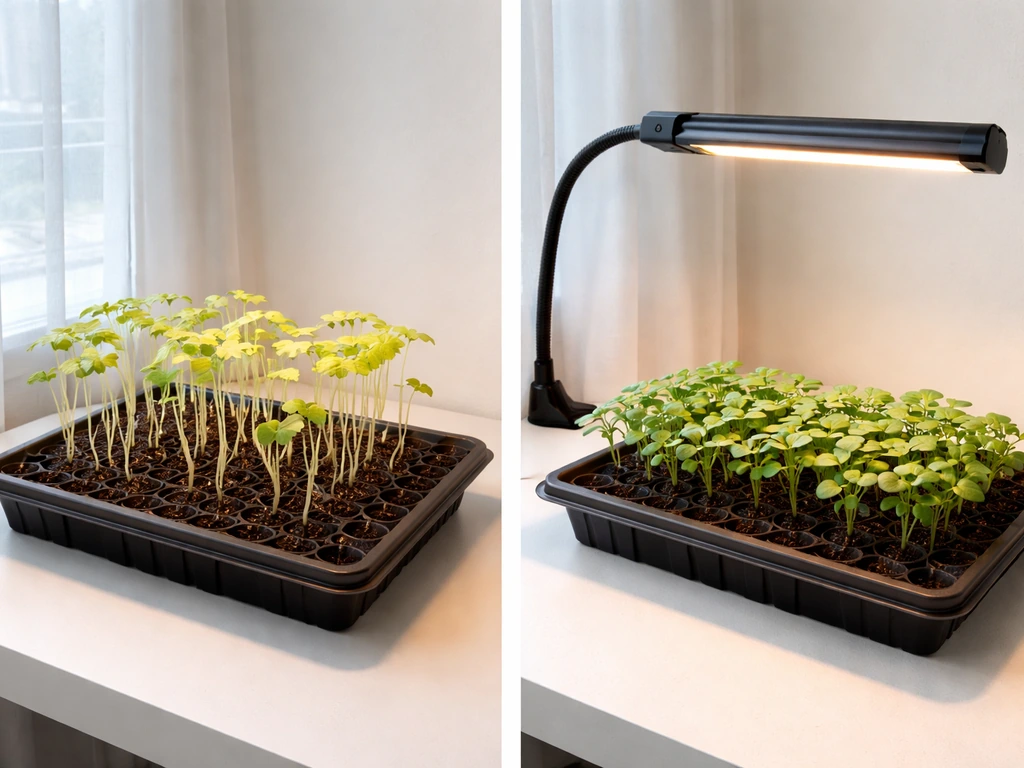
LED grow lights work brilliantly when you match the right fixture to your plants, hang it at the correct distance, and run it on a sensible schedule. Get those three things right and your plants grow strong. Get them wrong and you end up with stretched, yellowing, or bleached plants and a frustrating mystery. This guide walks you through every practical decision, from reading a product spec sheet to wiring your own DIY build, so you can set up a working indoor grow today.
LED Grow Light Guide: Buy, Set Up, and DIY Successfully

Marcus Tillman
16 Apr 2026
How to choose the right LED grow light
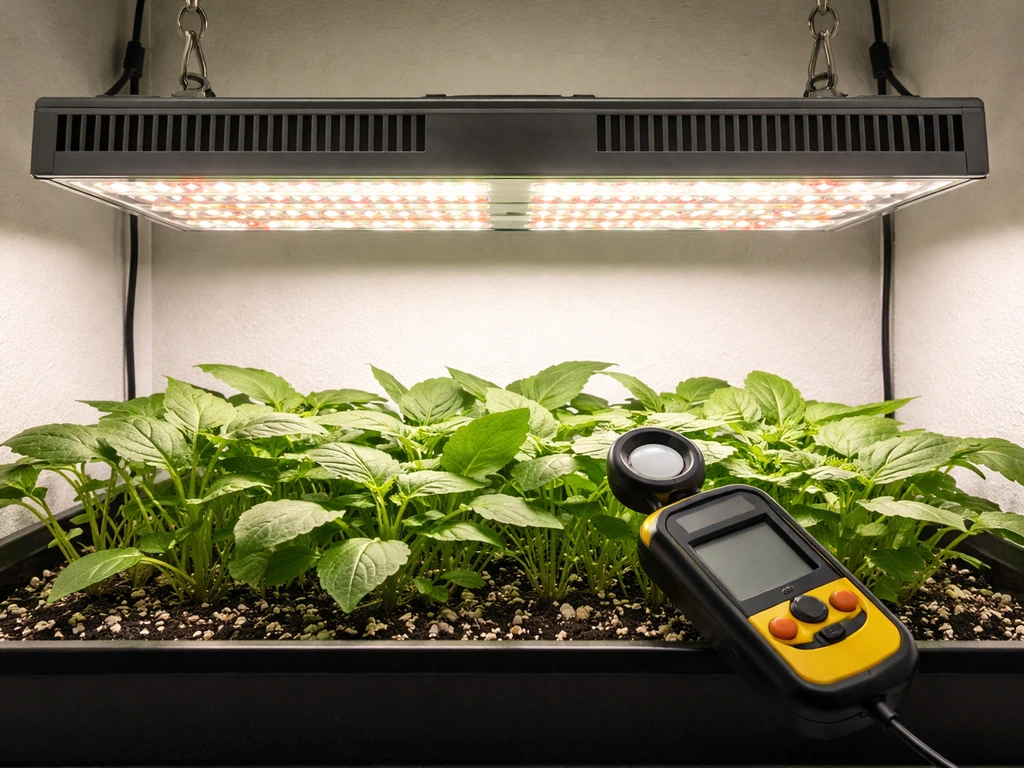
The single biggest mistake beginners make is shopping by wattage alone. Watts tell you how much electricity a fixture consumes, not how much usable light your plants actually receive. The number you want is PPFD, which stands for Photosynthetic Photon Flux Density, measured in micromoles per square meter per second (µmol/m²/s). A quality manufacturer will publish a PPFD map showing light intensity across the fixture's coverage footprint, usually tested at a specific hanging distance like 18 or 24 inches. If a brand doesn't publish a PPFD map, treat that as a red flag.
Alongside PPFD, you'll also see DLI (Daily Light Integral) mentioned in more technical product descriptions. DLI combines your PPFD reading with how many hours per day the light is on, using the formula: DLI (mol/m²/day) = PPFD × light hours × 0.0036. So a light delivering 400 µmol/m²/s for 16 hours gives a DLI of roughly 23 mol/m²/day. Seedlings do well around 12–20 DLI, leafy greens thrive at 15–25, and fruiting or flowering plants often need 25–40. Thinking in DLI is the most reliable way to build a light plan, because it accounts for both intensity and time together rather than treating them separately.
For spectrum, most modern full-spectrum white LEDs or red/blue quantum boards cover what plants need from seedling to flower. Look for a fixture that includes blue wavelengths (roughly 400–500 nm) to drive compact, bushy vegetative growth and red wavelengths (roughly 620–700 nm) to support flowering. Some lights also add far-red (700–800 nm), which can accelerate flowering and improve canopy penetration. You don't need to obsess over spectrum ratios as a beginner, but avoid lights that emit only a single color purple-pink glow, as those older-style blurple fixtures are generally less efficient than modern full-spectrum designs.
Coverage area is the other key specification. Most LED grow light product pages list a "veg coverage" and a "flower coverage," and the flower coverage is always smaller because flowering plants need higher PPFD. A common 240-watt quantum board, for example, typically covers a 4x4-foot footprint during veg and a 3x3 or 3x4-foot footprint for flowering. Match the light's coverage to the actual space you're growing in, not the maximum footprint claimed at the lowest intensity. If you want a broader overview of how different fixture types compare before committing to LED, the CFL grow lights guide is worth a quick read to understand why efficiency differences matter at scale.
Reading efficiency specs: PPE and efficacy
Photosynthetic Photon Efficacy (PPE) is expressed in µmol/J and tells you how efficiently a fixture converts electricity into plant-usable light. Budget fixtures often land around 1.5–2.0 µmol/J. Mid-range and quality fixtures hit 2.3–2.8 µmol/J, and the best commercial quantum boards now exceed 3.0 µmol/J. Higher efficacy means lower electricity cost for the same light output, which matters a lot if you're running lights 16–18 hours a day for months.
Placement and mounting: getting the distance right
Hanging height directly controls how much PPFD your plants receive. Move a light closer and intensity increases sharply (light follows the inverse square law, so halving the distance roughly quadruples intensity). Move it too far away and plants stretch toward the light. The sweet spot depends on both your fixture's output and your plant's needs.
| Plant Stage | Recommended PPFD (µmol/m²/s) | Typical Starting Distance from Canopy |
|---|---|---|
| Clones / Seedlings | 150–200 | 24–30 inches |
| Vegetative (leafy greens, herbs) | 200–400 | 18–24 inches |
| Late veg / pre-flower | 400–600 | 16–20 inches |
| Flowering / fruiting | 600–900 | 14–18 inches |
These distances are starting points, not absolutes. Always verify with your fixture's published PPFD map at the hanging distance you're using, because a 100-watt bar light and a 600-watt commercial panel behave very differently at the same height. Adjust in small increments of 2 inches, then watch your plants for 3 to 5 days before moving again.
Beam angle matters just as much as distance for even coverage. Most LED quantum boards have a wide beam angle of around 120 degrees, which spreads light broadly but means intensity drops off toward the edges of your canopy. Bar-style fixtures with individual lens optics often use tighter 90-degree or 60-degree beam angles, which concentrates light more directly below the fixture. In a small 2x2 or 2x4 tent, a wide-beam panel works well. In a taller grow space or a narrow rack setup, a bar light with directional lenses helps maintain consistent PPFD across multiple rows. Adding reflective mylar or white paint to your walls can recover 20–30% of light that would otherwise be lost.
For mounting, use adjustable rope ratchets or a light rail if your grow space allows. Rope ratchets let you raise the light quickly if plants grow faster than expected overnight, which happens more often than you'd think during a vigorous veg push. Secure your mounting points to studs or a sturdy crossbar, not just drywall anchors, especially for fixtures heavier than 5 pounds.
Light schedule and timing: hours per day and when to adjust
For clones and seedlings, an 18-hour light / 6-hour dark cycle is the standard starting point, with a PPFD intensity in the 150–200 µmol/m²/s range. This gives young plants enough light to develop without overwhelming their limited leaf area. Leafy greens and herbs under continuous vegetative growth also do well on 16–18 hours per day. For fruiting and flowering plants, switch to a 12-hour light / 12-hour dark cycle to trigger and maintain flowering. These are the same cycles used in commercial horticulture operations, and they hold up well for home growers too.
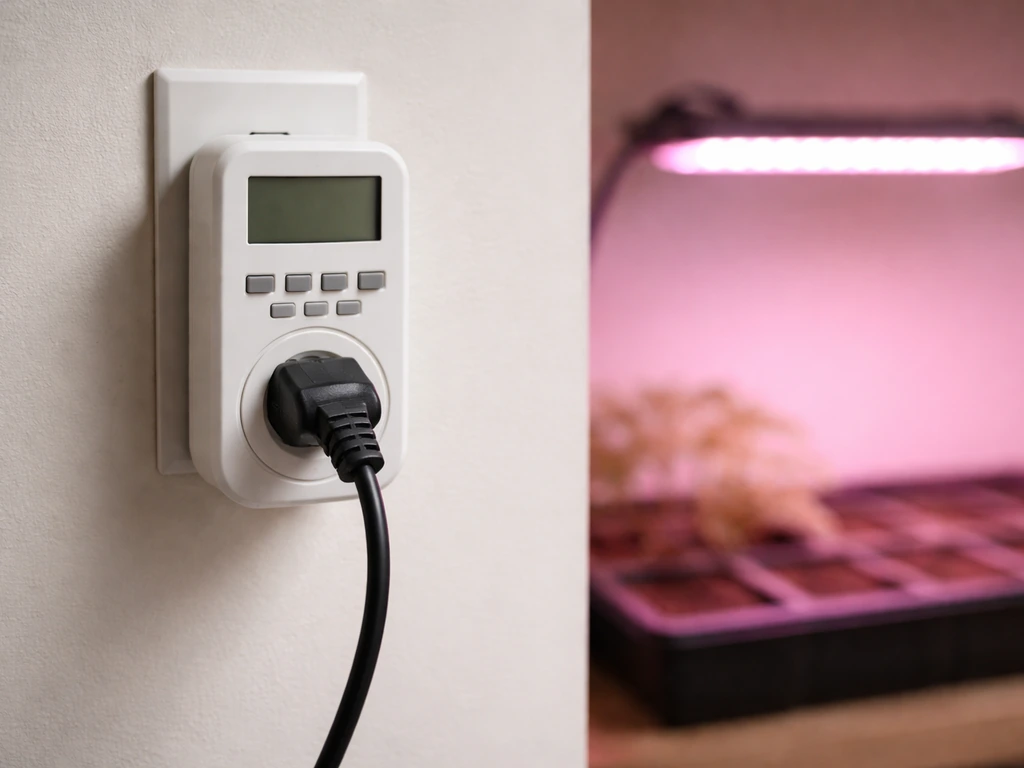
Use a digital outlet timer, not a mechanical one. Mechanical timers can drift by 10 to 30 minutes over a few weeks, and inconsistent light cycles can stress flowering plants into hermaphroditism (producing both male and female flowers), which ruins a fruiting crop. A digital timer costs about $10–$15 and holds its schedule reliably for months. Set the light period to overlap with your waking hours if possible, since grow lights produce heat and you'll want to monitor plant response during the day.
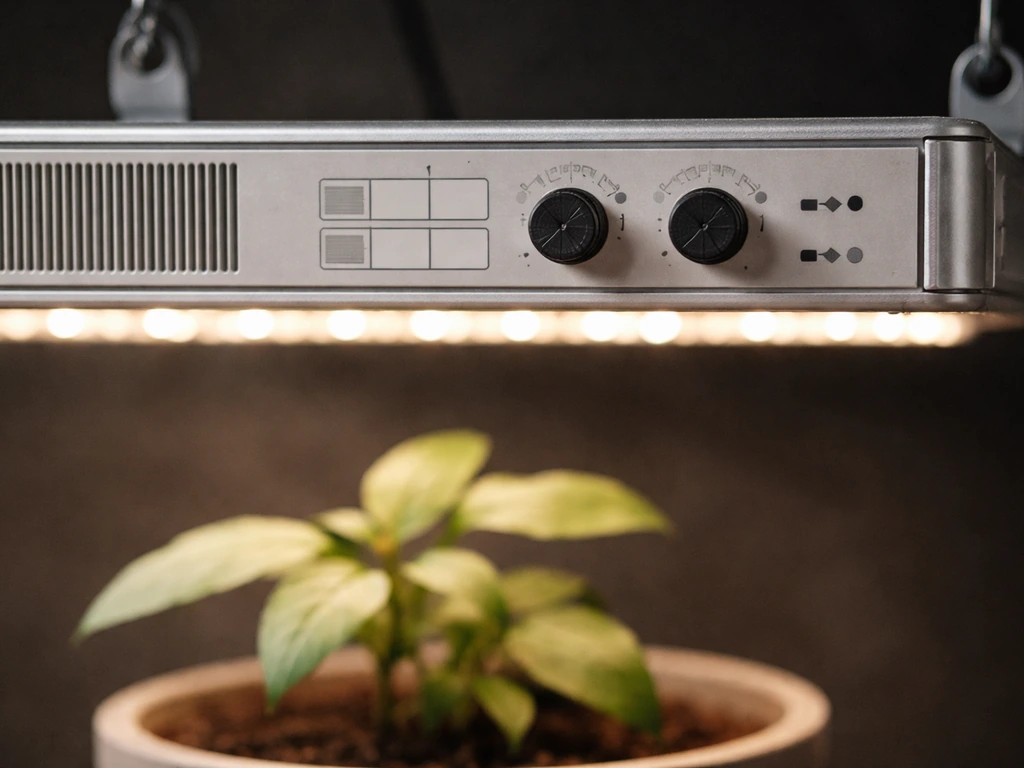
If your fixture has dimming capability, use it. Start seedlings at 40–50% power even if the distance is already at 24–30 inches, then gradually ramp intensity up over 7–10 days. This acclimation period prevents shock and gives you a buffer against accidental placement errors. Fixtures with a knob dimmer or controller let you dial in PPFD without changing height, which is a genuinely useful feature in a small tent where headroom is limited. If you want deeper insight into scheduling nuances for different plant types, the tips in this led grow light tips resource cover additional timing strategies worth applying.
Setup checklist for common indoor plants
Here's a practical setup reference for the most common indoor growing scenarios. Use these as your starting configuration, then observe your plants and adjust.
- Seedlings and clones: 18 hours on / 6 off, PPFD 150–200 µmol/m²/s, fixture at 24–30 inches, dimmer at 40–50% if available. Keep humidity at 60–70% to reduce seedling transpiration stress.
- Leafy greens and herbs (basil, lettuce, mint): 16–18 hours on / 6–8 off, PPFD 200–400 µmol/m²/s, fixture at 18–24 inches. Lettuce is sensitive to high DLI; cap at around 17 mol/m²/day to prevent tip burn.
- Vegetative houseplants (pothos, monsteras, ferns): 14–16 hours on, PPFD 100–300 µmol/m²/s at 18–24 inches. These plants tolerate lower light and don't need aggressive intensity.
- Fruiting and flowering plants (tomatoes, peppers, cannabis in flower): 12 hours on / 12 off, PPFD 600–900 µmol/m²/s at 14–18 inches. Maintain consistent dark periods with no light leaks.
- Succulents and cacti: 12–14 hours on, PPFD 200–500 µmol/m²/s at 18–24 inches. These plants need good light but are very sensitive to overwatering, so focus more on soil and watering discipline than on pushing light intensity.
Troubleshooting: what your plants are telling you
Leggy, stretched growth is the most common problem and almost always means the light is too far away or the intensity is too low. If your seedlings are growing tall and thin with wide gaps between nodes, lower the light by 2 inches, wait 5 days, and see if internodal spacing tightens up. If you're already at the minimum safe distance for your fixture and plants are still stretching, you need a more powerful light or a second fixture.
Yellowing leaves can have several causes, and light is only one of them. If the yellowing starts on upper leaves closest to the fixture and the leaves also look washed out or bleached, the light is too close or the intensity is too high (light stress, sometimes called photoinhibition). Raise the light by 3–4 inches immediately. If yellowing starts on lower, older leaves and works upward, that's more likely a nitrogen deficiency or a watering issue, not a light problem at all.
Bleaching and white or tan patches on leaf tips or the top of the canopy directly under the fixture is heat or light stress. Check the temperature at canopy level first: if it's above 85°F (29°C), add airflow or raise the light. If temperature is fine but PPFD at that distance is extremely high (above 1000–1200 µmol/m²/s for most plants), the light is simply too close. Some high-light crops like tomatoes or peppers can handle 900–1000 µmol/m²/s when properly acclimated, but most houseplants cannot.
Uneven growth (one side of the plant grows faster than the other) usually points to an off-center hanging position or a fixture with poor edge coverage. Rotate your pots 90–180 degrees every week or two if you can't reposition the fixture. Dimming or flickering from the light itself is almost always a driver issue. Cheap drivers in budget fixtures can flicker at low frequencies invisible to the eye but stressful to plants over time. If you notice unusual plant stress alongside a fixture that buzzes or flickers visibly, the driver is failing and the fixture needs to be replaced. For more systematic diagnosis approaches, the led grow lights faq covers a broader range of issues including flicker, heat, and spectrum-related problems.
Buying vs DIY: what to think about before you install anything
Ready-made LED grow lights from reputable brands are the right choice for most home growers. They're tested, warrantied, and come with mounting hardware, a driver, and a power cord. You plug them in, hang them up, and they work. The main decisions are budget and coverage area. For a 3x3-foot tent, a quality 240-watt quantum board from a brand like Mars Hydro, AC Infinity, or Spider Farmer runs $120–$200 and will outperform most DIY builds in the same price range because those companies buy LEDs in bulk at prices individuals can't match.
When shopping for a ready-made fixture, look for compliance with UL 8800, the published safety standard for horticultural lighting equipment. UL 8800 (ANSI/CAN/UL 8800:2019, with revisions as recent as March 2025) covers electrical safety and photobiological hazards, including potential eye and skin risks from high-intensity grow light exposure. Under NEC 2020 Article 410, horticultural lighting equipment is actually required to be listed under UL 8800 in many jurisdictions. Buying a UL 8800 Listed fixture means it's been independently tested, not just self-certified. This is one area where paying a bit more for a name brand is genuinely worth it. If you want a full breakdown of how different light technologies fit different applications before making a purchase decision, this indoor grow light guide lays out the full picture in practical terms.
DIY makes more financial sense once you're running multiple lights, building a large rack system, or trying to hit a specific PPFD target that off-the-shelf fixtures don't quite reach. It also makes sense if you enjoy electronics projects and want to understand your system at a deeper level. The trade-off is time, research, and the responsibility of making sure your build is electrically safe.
DIY LED grow light guide: parts, wiring, and safety
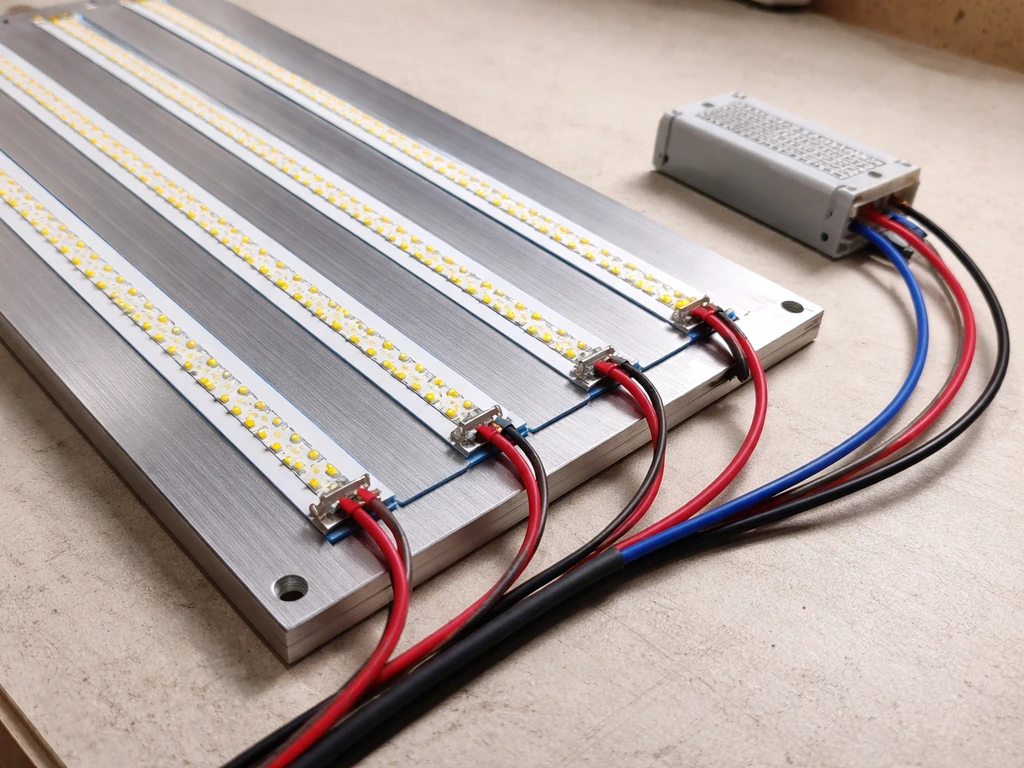
A DIY LED grow light has three main components: the LED chips or strips (usually mounted on an aluminum heatsink), the driver (the power supply that converts AC mains power to the DC voltage and current the LEDs require), and the housing or frame that holds everything together. Getting the LED-to-driver match right is the most technically important step.
Choosing LEDs and heatsinks
The most popular DIY LED choice right now is Samsung LM301H or LM301B strips, which are the same diodes used in many commercial quantum boards. These strips run at low voltage (typically 24V or 48V DC) and low current, which means they run cooler and more efficiently than high-power individual chips. You'll attach them to an aluminum heatsink, which is just a flat aluminum bar or plate that dissipates heat away from the LEDs. Heatsink sizing matters: a rough rule of thumb is 5–10 cm² of heatsink surface per watt of LED power. Undersize the heatsink and your LEDs overheat, which reduces output and shortens lifespan dramatically.
Choosing a driver
The driver is the heart of the DIY build. Mean Well is the gold-standard brand used by almost every reputable commercial fixture manufacturer. Their HLG (constant voltage/constant current) series and ELG series are designed specifically for LED strips and boards. Match the driver's output voltage range to your LED strip's forward voltage, and make sure the driver's output current matches your strip's rated current. A common beginner mistake is buying a driver with the right wattage but wrong voltage range, which causes the LEDs to run incorrectly or not at all. Dimmable Mean Well drivers (those with a "B" suffix like HLG-240H-48B) accept a 0–10V or PWM dimming signal, so you can connect a simple potentiometer or a controller to adjust intensity without changing height.
Wiring and safety considerations
The DC side of an LED grow light build (from driver output to LEDs) is relatively safe to handle because the voltages involved, typically 24–54V DC, are low enough that accidental contact is unlikely to cause serious harm. The AC mains side (the input to the driver) is a different matter entirely. Mains voltage (120V or 240V AC) can kill, and wiring mistakes cause fires. Use appropriately rated wire gauges for the current you're running. In the US, 14 AWG wire is the minimum for 15-amp circuits and 12 AWG for 20-amp circuits. Secure all AC connections inside a properly rated enclosure, use strain relief on the power cord entry point, and never leave exposed AC terminals accessible inside a grow space where humidity is high. If you're not comfortable terminating AC connections, hire a licensed electrician to do that portion of the build.
Even on the DC side, waterproof your connections. Grow spaces involve regular watering, misting, and high humidity. Use waterproof wire nuts or silicone-sealed connectors on any junction inside the grow area. Mount the driver outside the tent if possible, since drivers generate heat and keeping them outside the canopy helps maintain lower grow-space temperatures. Seal any openings you route wires through to maintain your tent's light seal and humidity control.
Before powering up your DIY build for the first time, do a visual inspection of every connection, check that no bare wire is exposed outside its terminal, and use a multimeter to verify the driver's output voltage matches your LED strip specification before connecting the strips. A 10-minute pre-power check can save you from burning out $80 worth of LED strips in the first second. For a reference on how all the components in a grow light system fit together conceptually, this grow light explained resource is a good companion read while you're planning your build.
Eye and skin safety with DIY and commercial fixtures
High-intensity grow lights, especially those with significant UV or blue output, pose real photobiological risks to eyes and skin with prolonged direct exposure. UL 8800 explicitly addresses these photobiological hazards as part of its safety requirements for commercial fixtures. IES notes that safety standards for evaluating horticultural lighting products in the U.S. and Canada incorporate requirements from ANSI/CAN/UL 8800:2019 and IEC 62471, including photobiological assessment methods and hazard wavelength ranges UL 8800 explicitly addresses these photobiological hazards. For DIY builds, you're responsible for your own protection. Wear UV-blocking safety glasses whenever you're working under or adjusting a running fixture, and avoid staring directly at the light even briefly. This isn't just caution for the sake of it: high-PPFD full-spectrum LEDs are genuinely bright enough to cause eye fatigue and potential retinal damage with repeated direct exposure.
Putting it all together
The practical path forward looks like this: decide on your grow space dimensions, calculate the PPFD and DLI your target plants need, choose a fixture (bought or DIY) that can deliver that PPFD across your canopy at a workable hanging height, set up a digital timer for the right photoperiod, and then spend the first two weeks observing your plants closely rather than adjusting constantly. Most problems reveal themselves in 5–10 days and most solutions involve a 2-inch height adjustment or a 10% intensity change, not a complete rebuild.
If you're still early in the decision-making process and want to understand the full range of grow light options before settling on LED, the grow lights guide covers the broader landscape including HID, fluorescent, and LED comparisons. And if you want a concise reference for the foundational concepts that underpin everything in this guide, the led grow light basics article is the right place to start. Once your setup is running, keep a simple grow journal: note your hanging height, timer settings, and any plant symptoms each week. That record will save you enormous time diagnosing problems and dialing in your next grow.
FAQ
How do I calculate DLI if my light spec only lists PPFD at one point, not a full PPFD map?
Start with the PPFD value at the stated test distance and assume it is closest to the center of the canopy. To avoid overdriving plants, use a conservative estimate like 90% of that center reading for your planning DLI, then verify by observing leaf stretch and bleaching after 3 to 5 days.
What if my fixture covers the tent, but my PPFD seems low at the plant level?
First confirm hanging height matches the manufacturer test height, then check for edge drop-off from beam angle. If you are near the tent wall, rotate the pot lineup or add a second fixture, because “coverage footprint” claims often assume optimal placement and minimum distance.
Should I run the same light schedule for every plant stage, or can I stagger it?
You can stagger schedules, but keep photoperiod transitions smooth. For example, avoid jumping from an 18/6 seedling cycle directly to a flowering 12/12 cycle overnight, instead ramp down by 30 to 60 minutes every day or two so the plants do not experience a sudden hormonal shock.
Do I need to worry about heat affecting PPFD, even if I set the hanging height correctly?
Yes. As canopy temperature rises, plants may close stomata and reduce growth efficiency, making it look like “too little light.” Use a thermometer at canopy level, and aim to resolve heat first (airflow or raising the fixture slightly) before increasing intensity.
How can I tell whether yellowing is from excess light versus watering or nutrients quickly?
Use location and pattern. Light stress often appears on upper canopy leaves closest to the brightest zone and can look bleached, while nutrient or watering issues commonly start on older leaves and progress upward. If you have a reflective wall or poor airflow, also check for uneven drying that mimics light stress.
What is a safe first adjustment if my plants are stretching?
Make one change at a time. Lowering by about 2 inches is a good first step, but only if you are confident you are not already near the fixture’s upper intensity limit. If you also have dimming, try a 10% intensity increase before moving the light to reduce risk.
Can I use dimming to compensate for a higher hanging height instead of moving the fixture?
Often, yes, but only if the dimmer is designed for the driver and stays stable at low output. Dimming works best when you keep the fixture near the published test distance, then fine tune PPFD. If the light flickers when dimmed, stop using that dimming mode and address the driver.
Are LED grow lights safe for indoor use around kids or pets?
The electrical safety depends on proper enclosure and cord management, but the more immediate concern is eye exposure. Even if the fixture is “plant safe,” avoid letting anyone stare at the lit panel while it is on, and keep it behind a diffuser or with a proper height and barrier in shared spaces.
How do I choose the right wire gauge for a DIY build if I do not know the driver current precisely?
Use the driver’s labeled input current (or the maximum input current on the specifications). Select wire and circuit protection based on that input current, not the LED side current. If the numbers are unclear, err on the side of thicker wire and use a licensed electrician for the mains portion.
Is it okay to mount the driver inside the tent if I’m trying to simplify cable runs?
Prefer not to. Drivers run hot and can add heat near the canopy, which increases the chance of heat stress. Mount the driver outside the tent when possible, and route cables through properly sealed openings so you do not lose the tent’s humidity and light seal.
What should I do if my DIY driver output voltage does not match the LED strip rating during the multimeter test?
Do not power the build “to see what happens.” Verify you matched the driver’s DC output voltage range to the strip specification, confirm polarity, and recheck wiring continuity before reconnecting LEDs. A mismatch can overstress diodes or result in no light output.
How do I avoid uneven growth when I cannot reposition the fixture easily?
Rotate the plants, and also compensate for beam shape. If you have wide-angle coverage, rotate 90 to 180 degrees every week or two. If you have tight lenses but rows are not centered under the fixtures, add a simple reflective panel on the low-PPFD side to even out losses.
Next Article
Indoor Grow Light Guide: Choose, Set Up, and Optimize
Step-by-step indoor grow light guide to choose, place, schedule, and troubleshoot LEDs for seedlings or houseplants.