A solid LED grow setup comes down to four things: picking a light with real performance specs, mounting it at the right height, putting it on a timer, and moving enough air so things don't overheat. Get those four right and your plants will tell you immediately by growing faster and looking healthier. Get them wrong and you'll spend weeks wondering why your seedlings are leggy or your houseplants keep dropping leaves. This guide walks you through every step, with actual numbers you can use today.
LED Grow Setup Guide: Build, Install, and Optimize

Marcus Tillman
3 Apr 2026
How to choose the right LED grow light for your setup
The biggest mistake beginners make is shopping by watts or lumens. Neither tells you how much usable light actually reaches your plants. The metric you want is [PPFD (photosynthetic photon flux density), measured in µmol/m²/s](https://www. ies.
org/definitions/photosynthetic-photon-flux-density-ppfd/), which tells you how many photons land on the plant canopy per second. Closely related is PPF (the fixture's total photon output) and DLI (daily light integral, which is total photon dose over a full day). A fixture's efficacy, expressed in µmol/J, tells you how efficiently it converts electricity into plant-useful photons. Look for fixtures rated above 1.
9 µmol/J as a minimum baseline, that's the threshold used by the DesignLights Consortium for qualifying horticultural LED products, and aim for 2. 5 µmol/J or higher if your budget allows.
For reference, high-end fixtures from brands like HLG reach around 3. 0 µmol/J, while solid mid-range options like the PerfectPar 330W sit around 2. 7 µmol/J.
Budget matters a lot here. Here's a practical breakdown of what your money actually buys:
| Budget Tier | Typical Wattage | Efficacy Range | Best For | Rough Cost |
|---|---|---|---|---|
| Entry / Cheapest | 30–100W | 1.5–2.0 µmol/J | Small shelves, herbs, low-light houseplants | $20–$80 |
| Mid-Range | 100–300W | 2.0–2.5 µmol/J | Seedlings, vegetables, 2x2 to 3x3 ft tents | $80–$250 |
| High Efficiency | 300–700W | 2.5–3.0+ µmol/J | Full tents, fruiting crops, serious grows | $250–$700+ |
For coverage area, most LED panels list a recommended footprint. A 100W mid-range LED covers roughly a 2x2 ft area for flowering plants and up to a 3x3 ft area for vegetative growth. A 300W covers about 3x3 ft for flowering and 4x4 ft for veg. Don't try to stretch a light further than its rated coverage, you'll end up with weak PPFD at the edges and uneven growth. If you're working in a vertical rack or a narrow shelf, look for bar-style fixtures that spread light more evenly than a single panel.
Everything you actually need: the full equipment list
Here's the complete list of components for a functional indoor LED grow setup. You don't need all of them for a basic shelf grow, but if you're building a dedicated grow tent or grow room, every item on this list earns its place.
- LED grow light fixture (sized to your coverage area and plant type)
- Adjustable rope ratchets or a light rail/track mount for raising and lowering the fixture
- Programmable digital timer (a 24-hour outlet timer works fine for most setups; smart plugs with scheduling apps are even better)
- Inline exhaust fan with a CFM rating appropriate for your space volume (more on sizing below)
- Flexible ducting and duct clamps to connect the fan to an exhaust port
- Oscillating circulation fan (clip-on or floor fan) to move air around the canopy
- Carbon filter if odor control matters (common in cannabis or herb grows)
- Grow tent or reflective mylar sheeting if you're not using a dedicated room
- PAR meter or smartphone PAR meter app to verify actual PPFD at canopy level
- GFCI-protected outlet or power strip — required by NEC code wherever moisture is present
- Thermo-hygrometer to monitor temperature and humidity in real time
One thing that often gets skipped: the GFCI outlet. Grow spaces involve water, and anywhere water and electricity coexist, GFCI protection is required under the National Electrical Code. Don't plug your lights and irrigation into a standard outlet. Use a GFCI-protected receptacle or a GFCI-equipped power strip. It's a $15–$30 fix that could save your life.
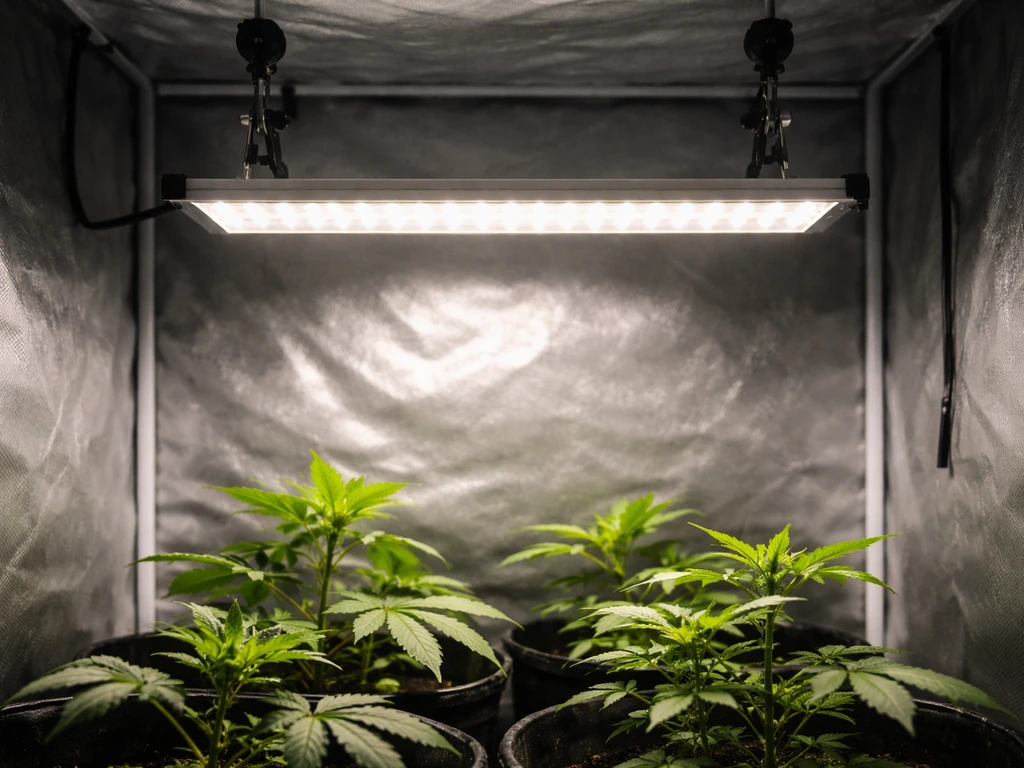
Placement basics: height, distance, and coverage
Height is where most beginners go wrong, and it directly controls the PPFD your plants receive. The further the light is from the canopy, the lower the PPFD. The closer it is, the higher the PPFD, but too close causes light burn and heat stress. Use these starting distances as a guide, then measure with a PAR meter to fine-tune:
| Growth Stage | Target PPFD (µmol/m²/s) | Starting Light Height Above Canopy | Notes |
|---|---|---|---|
| Seedlings / Clones | 100–300 | 18–24 inches | Use lower intensity or higher hang to avoid stress |
| Vegetative growth | 400–600 | 12–18 inches | Can increase intensity as plants establish |
| Flowering / Fruiting | 700–1000+ | 8–16 inches | Higher PPFD needs good airflow to manage heat |
| Low-light houseplants | 50–150 | 18–30 inches | Many tropical houseplants are easily over-lit |
For ceiling clearance, keep at least 6 to 12 inches between the top of your LED fixture and the ceiling or tent canopy. LED fixtures run cooler than HID lights, but they still produce heat, and trapping that heat directly above the light causes the driver to throttle output and shortens fixture life.
For small spaces and vertical racks, bar-style LEDs mounted at each shelf level work far better than a single overhead panel. Each bar can be placed 10 to 16 inches above its shelf, giving consistent PPFD across multiple tiers without needing one powerful (and hot) central fixture. Vertical setups are great for herbs, seedling trays, and succulents, if you're planning one, check out the specific guidance in this succulent grow light setup article for low-light species that thrive on shelves.
Don't trust the 'looks bright' test. Your eyes adapt to light intensity and are a terrible proxy for plant-level photon delivery. A PAR meter app (like Photone on iOS) costs nothing and gets you in the right ballpark. A dedicated quantum sensor costs $30 to $500 but gives you exact PPFD readings you can actually act on.
Step-by-step installation: from a single shelf to a full grow room
Single shelf or small space (beginner starting point)
- Choose your shelf or space and measure it. Write down the length, width, and height in feet.
- Select a bar-style or panel LED fixture rated for that footprint. For a 2x4 ft shelf, a 100W bar fixture works well.
- Hang or mount the fixture using rope ratchets attached to the shelf above, or use the included mounting hardware. Start at 18 to 24 inches above the plant surface.
- Plug the fixture into a 24-hour programmable timer. Set the timer to your target photoperiod (see the scheduling section below).
- Place a clip-on fan at one end of the shelf, aimed to move air across the canopy without blasting plants directly.
- Set up your thermo-hygrometer at canopy level. Target 70 to 80°F and 50 to 70% relative humidity for most plants.
- Turn everything on, wait 30 minutes, and take a PPFD reading at the center and edges of your shelf. Adjust height up or down to hit your target range.
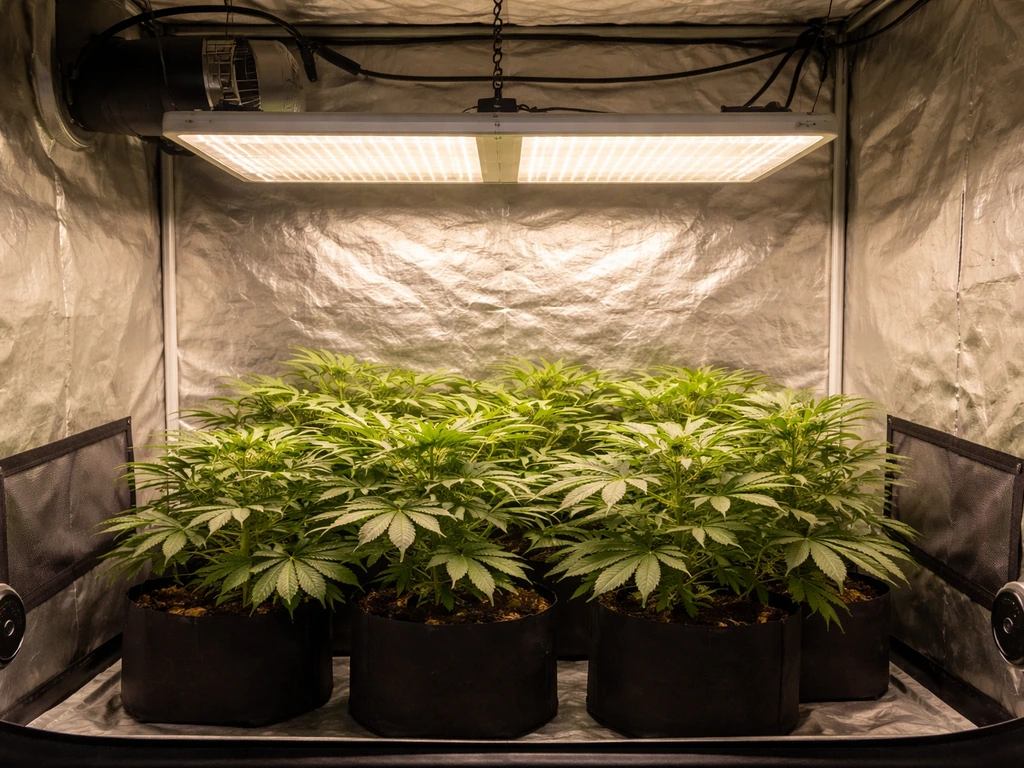
Grow tent or dedicated grow room setup
- Assemble your grow tent on a flat surface. Common starter sizes are 2x2 ft, 3x3 ft, and 4x4 ft.
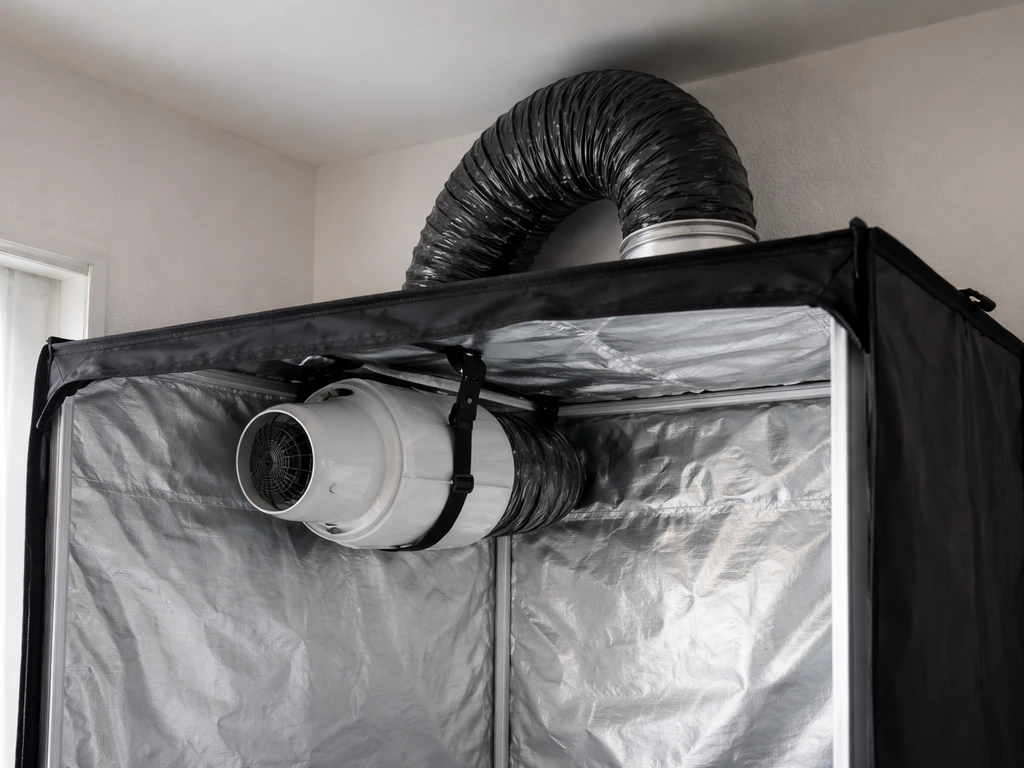
- Install your inline exhaust fan at the top of the tent (hot air rises). Connect flexible ducting from the fan through the tent's exhaust port to an outside space, window, or another room.
- If using a carbon filter, hang it inside the tent at the top and connect it to the inline fan with a short duct run. The airflow path should be: tent air → carbon filter → inline fan → duct → outside.
- Size your exhaust fan to the tent volume. Calculate volume as length x width x height in feet, then aim for a fan that can exchange that volume of air every minute or two. For a 4x4x6.5 ft tent (104 cubic feet), a fan rated at 200–250 CFM handles the load, accounting for filter and ducting resistance.
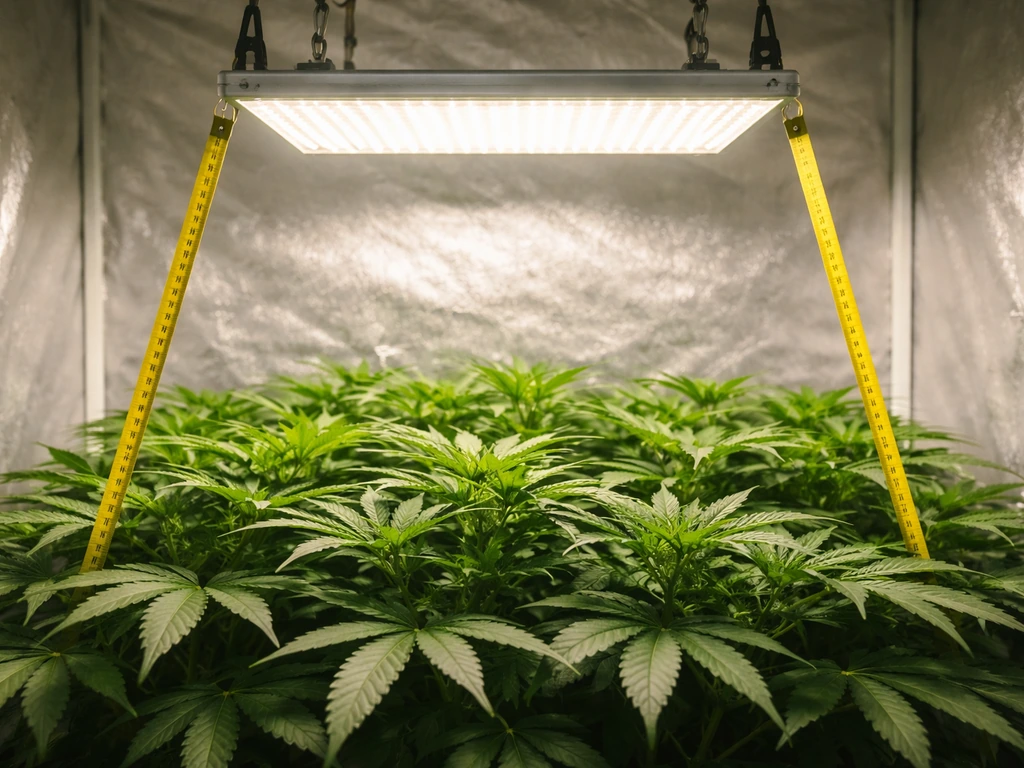
- Hang your LED fixture from the tent's top crossbars using rope ratchets. Start at 24 inches above where the plant canopy will be.
- Add a circulation fan inside the tent, aimed at the canopy but not directly blasting the tops of plants.
- Run all electrical through a GFCI-protected outlet. Use a programmable timer for the LED and a separate outlet for fans (most growers run circulation fans 24/7 and put the exhaust fan on a temperature controller).
- Before adding plants, run the empty tent for 24 hours. Check temperature and humidity. If temperature exceeds 85°F with the light on, increase exhaust fan speed or raise the light.
If you're setting up a cannabis-specific grow room with higher-intensity lighting needs, there are additional considerations around light cycles and canopy management covered in the cannabis grow light setup guide. And if heat management is a primary concern, an air cooled grow light setup or a cool tube grow light setup can pull heat directly out of the light housing before it even enters the grow space.
Light scheduling: how long and how intense for each plant type
Plants don't need the same light schedule across all stages. The daily light integral, total photons delivered over a full day, is what drives growth, and you control DLI through both intensity and duration. Here's how to think about scheduling for the most common scenarios:
| Plant Type / Stage | Light Duration (Hours ON) | Light OFF | Notes |
|---|---|---|---|
| Seedlings / clones | 16–18 hours | 6–8 hours | Keep PPFD low (100–300); more hours compensate for weaker intensity |
| Vegetative crops (tomatoes, peppers, herbs) | 16–18 hours | 6–8 hours | Higher PPFD (400–600); dimmable fixtures help dial in DLI |
| Flowering / fruiting crops | 12 hours | 12 hours | Critical for photoperiod-sensitive plants like cannabis |
| Tropical houseplants | 10–14 hours | 10–14 hours | Most need far less than growers assume; check species needs |
| Low-light houseplants (pothos, snake plant) | 8–12 hours | 12–16 hours | Excess duration causes bleaching, not faster growth |
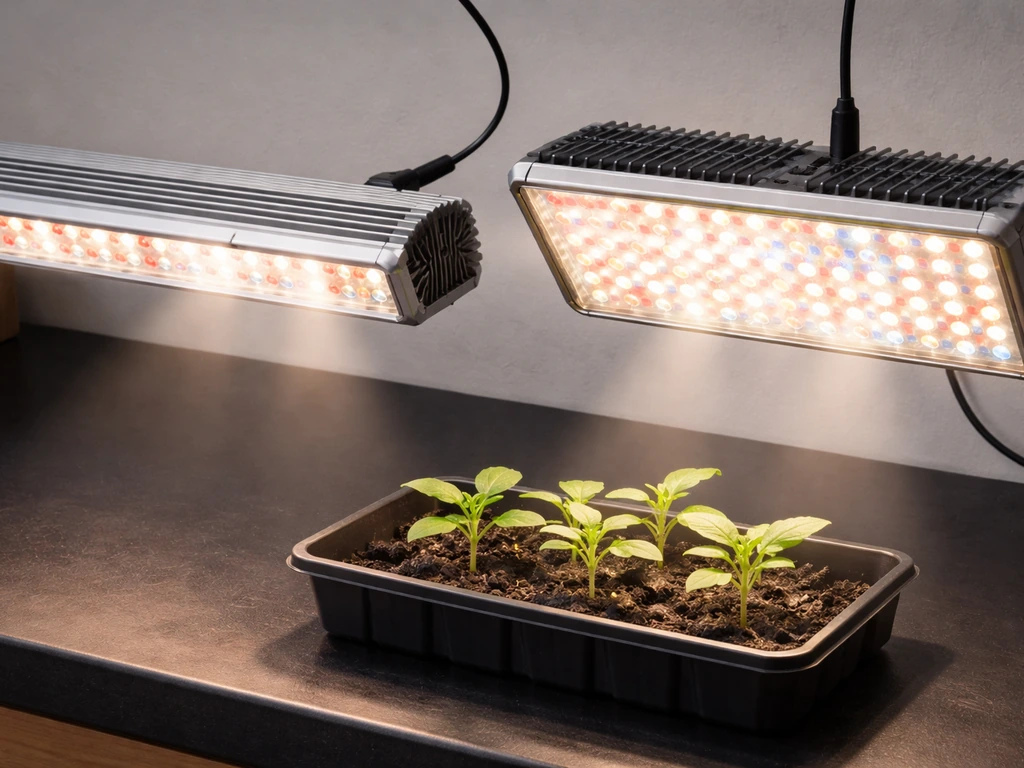
For seedlings specifically, the 14 to 16 hour photoperiod is a sweet spot for rapid establishment without stressing young plants. A gentle intensity around 150 to 200 µmol/m²/s is often recommended as a starting band, which aligns with general horticultural crop baselines. As plants develop true leaves and move into active vegetative growth, you can step up both duration and intensity incrementally. The full breakdown for starting seeds under lights is covered in this seedling grow light setup guide.
Always use a timer. Manual switching introduces inconsistency that disrupts plant circadian rhythms, especially for flowering crops. A basic 24-hour mechanical outlet timer works, but digital timers and smart plugs give you more precision and the ability to set gradual ramp-up periods. Plug your LED into the timer, set it, and don't touch it unless you're changing growth stages.
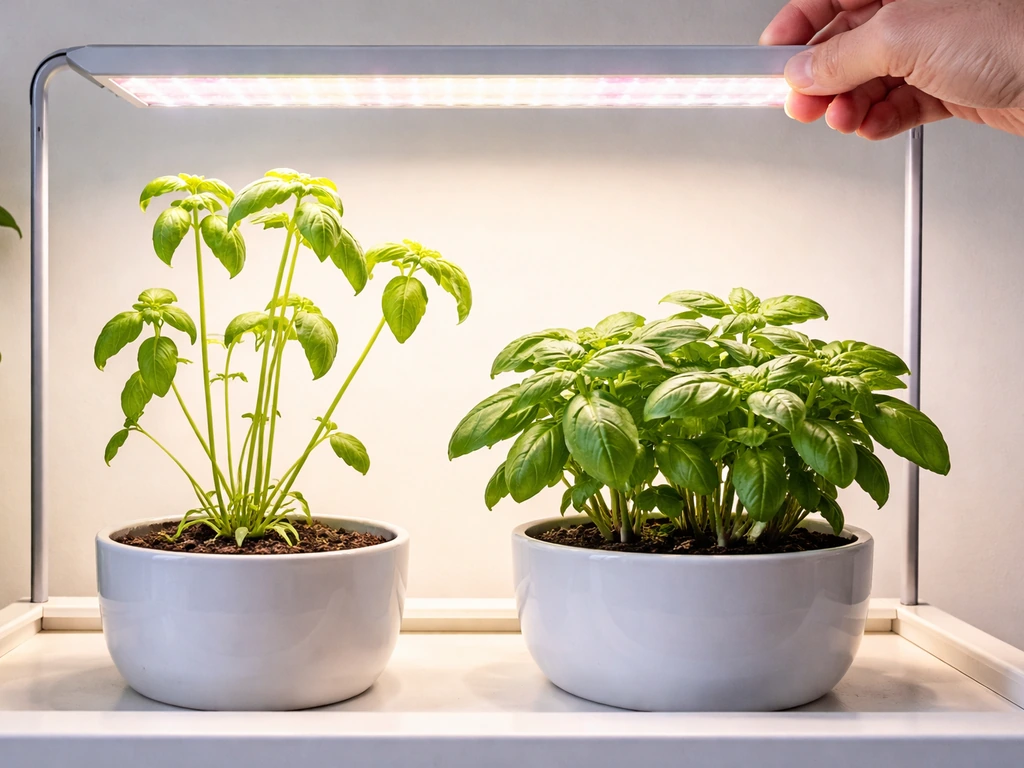
Houseplants like alocasia are a good example of where people over-light and cause more harm than good. They want bright indirect light, not direct high-intensity LED exposure. Understanding the specific alocasia grow light requirements before placing them under a full-power fixture can save you from a lot of bleached, burned leaves.
Budget options vs. high-efficiency upgrades: which is worth it
If you're just starting out or growing low-demand plants like herbs and leafy greens, an entry-level LED in the $30 to $80 range gets the job done. These fixtures typically land in the 1.5 to 2.0 µmol/J efficacy range. They're not efficient by commercial standards, but they work for small shelves and hobbyist setups where electricity cost isn't a major concern.
The real argument for spending more is electricity savings over time. A 2.7 µmol/J fixture delivers the same amount of photosynthetically active light as a 1.5 µmol/J fixture while using significantly less electricity. If you're running lights 16 hours a day, that difference adds up quickly on your power bill. For a 4x4 ft tent running a 300W fixture 16 hours per day, you're consuming about 1.44 kWh daily. Over a year, the difference between a 1.5 µmol/J and a 2.7 µmol/J fixture, assuming you'd need fewer watts from the efficient one to hit the same PPFD, can translate to $50 to $150 in electricity savings depending on your local rate.
High-efficiency fixtures also tend to run cooler (less waste heat), which reduces your cooling and ventilation costs. When you buy a top-tier LED at 3.0 µmol/J, you're partly buying a simpler thermal management problem. For anyone running a serious grow or paying high electricity rates, the payback period on a premium fixture is often 12 to 18 months.
A quick note on HID vs. LED for those considering both
HID (high-intensity discharge) lights, including HPS and MH fixtures, were the standard for indoor growing for decades. They're still capable of producing excellent results and have lower upfront costs for high-wattage applications. The tradeoffs are significant, though: HID setups run much hotter (requiring more aggressive ventilation), consume more electricity for equivalent photon output, and require ballasts, reflectors, and bulb replacements every 12 to 18 months.
A 1000W HPS system generates so much heat that a small grow tent often becomes unmanageable without an air-cooled reflector hood ducted to an exhaust fan. If you're transitioning from HID to LED, the main adjustment is recalibrating your light height and intensity, LEDs are often brighter than they look and can cause light stress at the same distances you used with HPS.
Troubleshooting: when your plants still aren't thriving
Even with a good setup, things go wrong. Here's how to diagnose the most common LED grow setup problems:
Plants are stretching toward the light (etiolation)
This is the number-one sign of insufficient light intensity (too low PPFD). The plant is reaching for more photons. Fix it by lowering your light by 2 to 4 inches at a time, checking PPFD after each adjustment. Alternatively, increase fixture intensity if yours is dimmable. Target at least 200 to 300 µmol/m²/s for seedlings and 400+ for vegetative plants.
Leaf tips are bleaching or burning white/yellow
This is usually light burn from too-high PPFD at the canopy, or the light is too close. Raise the fixture 2 to 4 inches and re-measure PPFD. If you're seeing it only on the plants directly under the center of the fixture but not the edges, you have a hotspot, either the fixture is too close, or you need to spread the light with a diffuser or by raising it. Also check your temperature: if canopy temps exceed 85°F, heat stress can mimic light burn.
Temperatures are too high
LED fixtures produce less heat than HID, but they still generate meaningful heat in an enclosed space. If your grow tent is running above 82 to 85°F with the light on, your exhaust fan isn't moving enough air. Increase fan speed, check that your ducting isn't kinked (every 90-degree bend reduces effective CFM significantly), and make sure you have passive intake holes open so fresh air can enter. Recalculate your CFM target: multiply your tent volume by at least 1 (ideally 2 to 3 for tents with filters and multiple bends) to get your minimum fan rating. For heat-intensive setups, an inline fan with a temperature controller that ramps up automatically is worth every dollar.
Uneven growth across the canopy
Plants at the edges of the grow area are smaller and paler than those in the center. This is a coverage problem. Either your fixture is too small for the space, or it's mounted too high (which reduces PPFD uniformity at the edges). Try lowering the light slightly, or add a second fixture. Reflective walls (mylar or white painted walls) help bounce light toward the edges and can meaningfully improve uniformity without adding any power consumption.
Plants look fine but growth is just slow
Slow growth with no obvious symptoms is usually a DLI problem: the plants are getting enough light each hour, but not enough total photons per day. Either increase photoperiod (add 2 hours to your light cycle and observe for a week), increase intensity, or both. Also rule out root zone issues like overwatering, underwatering, or poor drainage, no amount of better lighting fixes a suffocated root system.
The fixture itself isn't performing as expected
If your PPFD readings are consistently lower than the fixture's published specs, check whether you're measuring at the right height (specs are usually listed at a specific distance). Also make sure the fixture is running at full power, some LED drivers throttle output if the ambient temperature around the driver is too high. Keep drivers ventilated and confirm the fixture specs were tested to LM-79 standards, not just estimated from LED chip ratings. Chip efficacy and delivered fixture efficacy are different numbers; always look for measured fixture-level data.
Building a successful LED grow setup is more iterative than it is complicated. Pick a light with real specs, hang it at the right height, put it on a timer, keep your air moving, and then actually measure what's happening at plant level. A cool tube grow light setup can still be “set and forget” if you measure PPFD, keep temperatures stable, and tune the schedule to your plants. Adjust from there. Most problems are discovered and fixed within the first two weeks if you're paying attention to your plants and your numbers, and that's exactly how experienced growers do it too.
FAQ
What PPFD should I target if I do not know my plant type or growth stage yet?
Start with a conservative seedling band (about 150 to 200 µmol/m²/s) and adjust after 7 to 10 days using canopy response. If you see stretching and pale leaves, raise PPFD gradually (2 to 4 inches at a time or small intensity steps), if you see bleaching or taco-shaped leaf stress, back off immediately and re-measure with a PAR meter.
My fixture lists a coverage footprint, but my plants are not growing evenly across the whole area. What’s the fastest fix?
First confirm light height matches the manufacturer’s measurement distance, then check for hotspotting by measuring PPFD at center and at least two edge points. If edges are low, the quickest improvement is adding a second fixture or lowering the existing light slightly, rather than trying to compensate with longer photoperiod.
How do I use DLI correctly if my timer hours are not exact every day?
Treat DLI as a range, not a single number. If your schedule can drift, use a timer with minimum switching capability (and avoid manual plugging/unplugging), then sanity check with PPFD at your canopy. Small daily timing errors matter less than sustained PPFD errors, so prioritize measuring intensity before fine-tuning hours.
Is it better to run a higher intensity for fewer hours or lower intensity for more hours?
Plants respond to total daily photon dose first, so either approach can work if DLI lands in the right range for the crop. However, very high intensity for long periods increases heat stress and risk of light burn, while very low intensity for long periods can reduce vigor. Use PPFD measurement, then adjust duration in 1 to 2 hour increments while watching leaf posture and growth rate.
Do I need a diffuser for my LED grow setup?
Only when you see strong center-to-edge PPFD differences. If your PPFD map is uneven, a diffuser can improve uniformity, but it can also reduce overall PPFD. A better first step is correct mounting height and fixture spacing, then use a diffuser or add fixtures if the hotspot remains after measurement.
What should I check if my PAR meter readings do not match the fixture’s published PPFD at the same height?
Confirm the measurement height is identical to the published spec distance, verify the fixture is at full output (no dimming or power limiting), and make sure the sensor is oriented correctly (some meters are sensitive to angle). Also account for measurement surface reflectivity, if your sensor is not on the same plane you plan to grow on, readings can shift.
Do I need to worry about GFCI for smart plugs and power strips too?
Yes. A smart plug does not automatically provide GFCI protection, you still need GFCI protection upstream or a GFCI-equipped power strip or receptacle. For grow spaces with frequent watering, default to GFCI power wherever you connect irrigation or any device that could be exposed to water splashes.
How do I set up airflow so my LEDs stay efficient instead of throttling?
Aim to keep driver and canopy temperatures stable, then verify with a thermometer, not just an assumption. If your canopy is fine but performance seems low, check for driver overheating and improve ventilation around the fixture body. When calculating fan size, plan for reduced airflow from duct bends (each 90-degree bend costs meaningful effective CFM).
Can I run my LED grow setup closer than the listed heights to get more PPFD?
You can, but go slowly and watch for immediate stress signals. Even without visible burn, very close mounting can cause leaf temperature spikes, bleaching, and driver throttling. Raise or lower in 2 to 4 inch steps and re-measure PPFD after each change, especially in tents where heat accumulates.
Why are my seedlings leggy even though the light is on long hours?
Legginess usually means insufficient photons reaching the canopy, but sometimes it is a combination of intensity and DLI. Confirm PPFD at seedling height (not at shelf height), then increase intensity or shorten the distance in small steps. Also rule out root stress, if the root zone is waterlogged or under-drained, better lighting will not fully correct the growth slowdown.
How can I tell light stress from heat stress quickly?
Check temperatures at the canopy while lights run. If canopy temps exceed the mid-80s Fahrenheit range, heat stress can mimic light burn, especially leaf curl and droop. If temperatures are controlled, then bleaching and bleaching-like whitening is more likely PPFD-related, adjust height by 2 to 4 inches and re-measure.
When should I switch from ‘leafy green mode’ to ‘higher intensity vegetative mode’?
Use a two-step approach: keep photoperiod consistent first, then step PPFD upward once seedlings establish (new true leaves and less stretching). Move in gradual increments, then observe for 5 to 7 days. If leaves become darker and thicker without curling or whitening, you can continue increasing, if you see edge bleaching or stress, back off.
What’s the safest way to measure PPFD if my plants are not at the same height as the sensor?
Measure at canopy height at the start and repeat after you change light height or when plants grow. If you measure on a table at a fixed distance but your plant canopy rises over time, you can accidentally underdose or overdose. Keep notes of canopy height, fixture settings, and PPFD so you can adjust consistently through the grow.
Next Article
Innova Grow Light Instructions: Setup, Use, and Troubleshooting
Step-by-step Innova LED grow light instructions: setup, mounting, distance, schedules, intensity, and fast troubleshooti