Pick a full-spectrum LED, hang it 18 to 24 inches above your plants, run it for 12 to 16 hours a day depending on the plant type, and dial the intensity up or down based on how your plants respond over the first two weeks. That covers about 80% of what you need to succeed. The rest is just dialing in the details for your specific plants, space, and goals, and that's exactly what this guide walks you through.
How to Grow Plants with a Grow Light Step by Step

Marcus Tillman
30 Apr 2026
Choosing the right grow light for your plants
The most important choice you'll make is the light type. For most home growers, a full-spectrum LED panel or LED bar light is the right call. They're energy-efficient, run cool enough to hang close to plants without burning them, and the 'full-spectrum' design covers both vegetative and flowering growth stages without needing to swap bulbs. Fluorescent T5 tubes are a solid budget option for seedlings and low-light houseplants, but they lose intensity quickly with distance, so they need to stay within 4 to 6 inches of the canopy to be effective.
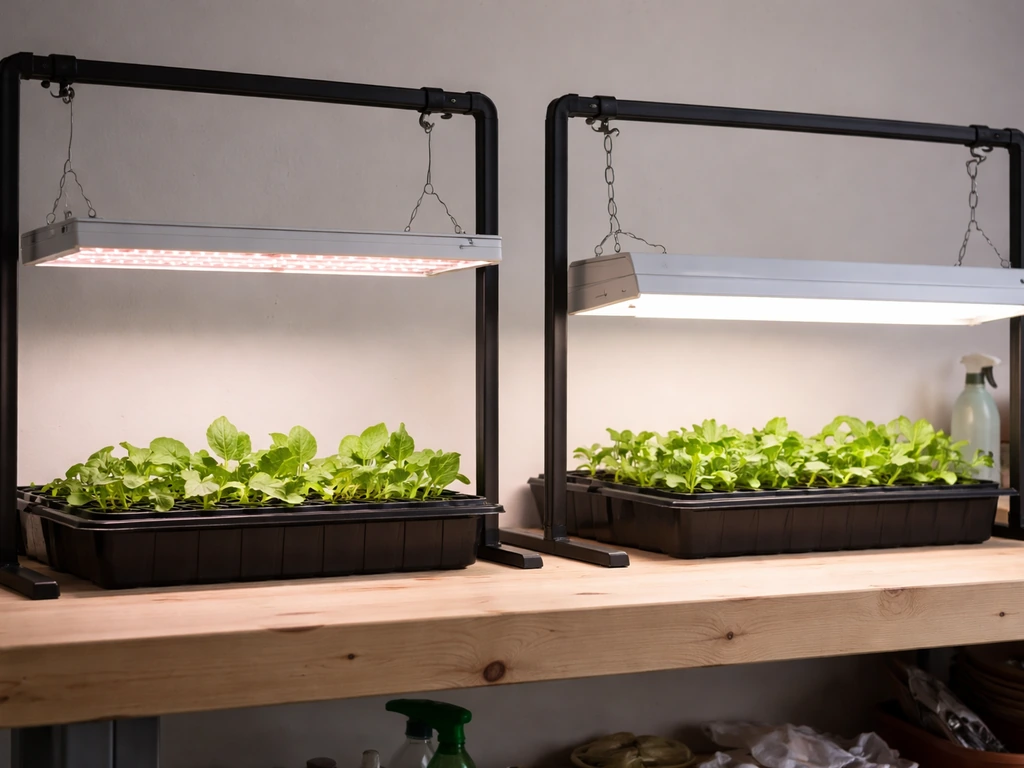
Strip lights and bar lights work great for shelving setups where you're stacking multiple levels. They spread light more evenly across a long, shallow canopy than a single-point panel does. Single-panel LEDs are the most popular choice for a dedicated grow tent or a small table setup, and most brands now publish a coverage footprint and PPFD map in their specs, which tells you exactly how intense the light is at different distances and positions.
When you're comparing products, look past watts and marketing language. The number that actually matters is PPFD, which stands for Photosynthetic Photon Flux Density. It measures how many photons land on your plant's leaf surface per second, expressed in micromoles per square meter per second (µmol/m²/s). PPFD (photosynthetic photon flux density) measures photosynthetically usable photons incident on a surface, typically expressed in micromoles per second per square meter (µmol·s⁻¹·m⁻²) PPFD measures how many photons land on your plant's leaf surface per second. This is the real measure of how much usable light your plant receives at canopy level. A light rated at 'equivalent to 1000W' means nothing if the PPFD at 18 inches is only 200 µmol/m²/s.
| Light Type | Best For | Typical PPFD Range at Canopy | Pros | Cons |
|---|---|---|---|---|
| Full-spectrum LED panel | General houseplants, herbs, seedlings, flowering plants | 200–900+ µmol/m²/s (adjustable) | Efficient, versatile, long lifespan | Higher upfront cost |
| LED bar/strip light | Shelf setups, seedling trays, cuttings | 150–600 µmol/m²/s | Even coverage, space-efficient | May need multiple bars for larger areas |
| T5 fluorescent | Seedlings, low-light houseplants | 100–300 µmol/m²/s close-range | Low cost, gentle, easy to find | Less intensity at distance, shorter lifespan |
| HID (HPS/MH) | Large-scale fruiting/flowering | Up to 2,000+ µmol/m²/s | Very high output | Hot, energy-heavy, not beginner-friendly |
For almost every home grower, a dimmable full-spectrum LED panel is the best starting point. It gives you the flexibility to run seedlings at low intensity and crank it up for fruiting plants, without buying two separate lights.
Setting up placement, mounting height, and coverage
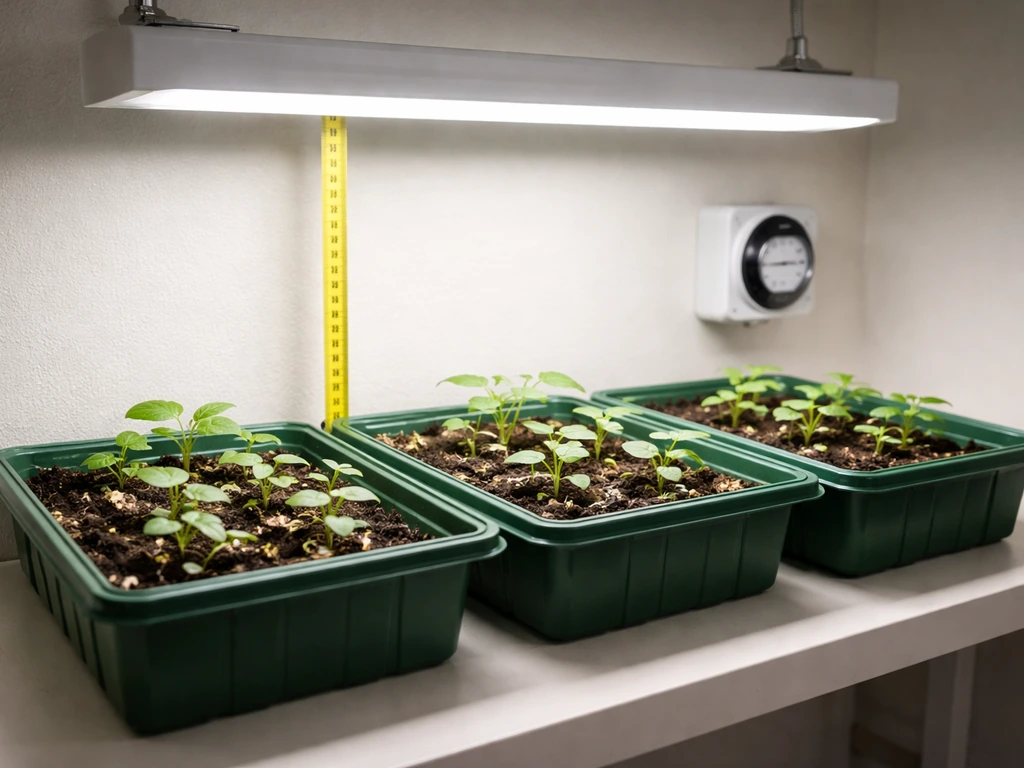
Height above the canopy is one of the biggest variables beginners get wrong. If you want a step-by-step walkthrough, see our guide on how to set up grow lights, including best placement and mounting height for different plant stages. Too high and your plants stretch toward the light, growing tall and spindly instead of compact and healthy. Too low and you risk bleaching or burning the leaves. The sweet spot for most LED panels is 18 to 24 inches above the top of your plant canopy, measured from the light surface to the leaves, not the floor. If you want more specific guidance on how to position grow lights, focus on height, coverage, and PPFD at the leaf surface.
Seedlings and young clones are more sensitive to intensity, so start them at 24 to 30 inches and move the light closer as the plants mature and you confirm they're not stressed. For established houseplants under moderate-output LEDs, 18 inches is a good starting point. High-output LEDs designed for flowering and fruiting may need to stay 24 inches or higher even at full canopy, so check the manufacturer's PPFD map if available.
Coverage matters as much as height. A single panel marketed as covering a '4x4 foot footprint' usually delivers consistent intensity over a 3x3 foot area in the center, with drop-off at the edges. If you're growing in a larger space or have plants arranged in a row, plan for overlap between lights or accept that edge plants will get less intensity. Reflective walls, whether a grow tent's Mylar lining or white-painted walls, bounce stray light back toward your plants and can meaningfully improve coverage without any extra electricity.
- Mount lights on adjustable rope ratchets so you can raise or lower them easily as plants grow
- Keep the light level, not tilted, so intensity is consistent across the canopy
- Measure height from the top of the tallest plant, not the pot rim or the floor
- If using multiple lights, overlap coverage by about 20% to avoid dim spots between them
- Add reflective material to walls if you're not using a tent, white foam board or emergency blankets work well
Configuring intensity and spectrum for healthy growth
Intensity and spectrum work together, but they're separate controls. Spectrum is the color balance of the light, and intensity is how much of that light your plant actually gets. Full-spectrum LEDs deliver a broad range of wavelengths that support all growth stages, so for most home growers the spectrum question is already answered: just use full-spectrum and don't overthink it. If you want the full picture on how grow lights work, focus on both the spectrum and the intensity they deliver to your canopy how to grow lights work.
That said, there's practical value in understanding the basics. Blue-heavy light (in the 400 to 500 nanometer range) keeps plants compact and supports strong vegetative growth. Red-heavy light (600 to 700 nanometers) drives flowering and fruiting. Some LED panels have separate veg and bloom switches or dial in the ratio. For seedlings, you want more blue to avoid stretching. For plants you want to flower or fruit, shift toward red. Full-spectrum covers both, which is why it's the go-to recommendation.
For intensity, use the PPFD ranges below as your starting targets. These are the ranges recommended for different plant types and growth stages, measured at the canopy surface.
| Plant Stage or Type | Target PPFD (µmol/m²/s) | Notes |
|---|---|---|
| Seedlings and clones | 75–150 | Start low; young plants are sensitive |
| Vegetative growth (most houseplants) | 100–500 | Wider range depending on plant species |
| Succulents and cacti | 100–200 | Moderate intensity; avoid overdriving |
| Orchids | 40–500 | Highly species-dependent; start conservative |
| Flowering and fruiting plants | 400–1,200 | Higher end for tomatoes, peppers, etc. |
| Seedlings under 16-hr schedule | 150–300 | Targets common DLI for young transplants |
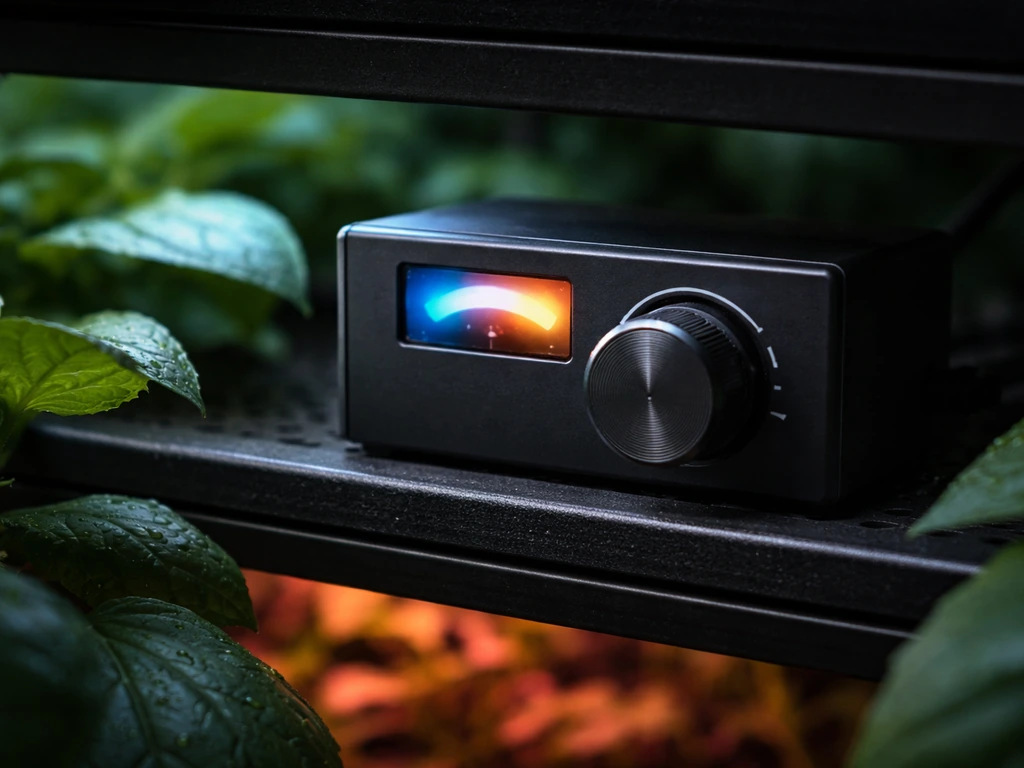
If your light is dimmable, start at 50 to 60% power and observe your plants for a week before increasing. If they're stretching toward the light, bump intensity up or lower the fixture. If leaf tips are curling or upper leaves look washed out, reduce intensity or raise the fixture. This trial-and-error approach is normal and expected, especially with a new light or a new plant.
There's a useful concept called Daily Light Integral, or DLI, that connects intensity and schedule into one number. DLI measures the total amount of photosynthetically active photons your plant receives in a full day, expressed in moles per square meter per day (mol/m²/day). The formula is: DLI = PPFD × hours of light × 3,600 (for unit conversion), divided by 1,000,000. For example, a PPFD of 510 µmol/m²/s over a 9-hour photoperiod delivers a DLI of about 16.5 mol/m²/day, which is appropriate for many fruiting crops. You don't need to calculate this every day, but it helps you understand why running a lower-intensity light longer can achieve the same result as a brighter light run for fewer hours.
Light schedules: how long and when to run grow lights
Most indoor plants thrive on 12 to 16 hours of light per day, with 8 to 12 hours of uninterrupted darkness. The exact schedule depends on what you're growing and what result you want. This daily on/off cycle is called the photoperiod, and it's one of the most important signals plants use to regulate growth and flowering.
Use a timer. Seriously, don't rely on manually turning lights on and off. Inconsistent schedules stress plants and can disrupt flowering cycles. A basic mechanical outlet timer costs a few dollars and solves the problem completely. Set it once and let it run.
| Plant Type | Recommended Daily Light Hours | Notes |
|---|---|---|
| Seedlings | 16–18 hours | More light compensates for lower intensity |
| General houseplants (low to medium light) | 12–14 hours | Good starting point for most species |
| Herbs and leafy greens | 14–16 hours | Promotes bushy, productive growth |
| Succulents and cacti | 12–14 hours | Don't over-light; they need dark cycles too |
| Flowering plants (day-neutral) | 14–16 hours | Consistent schedule matters more than exact hours |
| Short-day plants (e.g., poinsettia) | 10–12 hours | Need long dark periods to trigger flowering |
Some flowering plants are photoperiod-sensitive, meaning they bloom only when the day length falls below (or above) a certain threshold. Poinsettias, for example, need at least 12 to 14 hours of uninterrupted darkness to trigger bloom. Oklahoma State University Extension also notes that poinsettias need long, uninterrupted nights, recommending complete darkness from 5 p.m. to 8 a.m. each night to help them flower by Christmas. If you're growing these plants and wonder why they won't flower, the light schedule is usually the culprit. Even brief interruptions to the dark period, like a light flicking on in the room at night, can reset the flowering clock.
The best time to run your lights is during the day or early morning hours. Plants do their metabolic work during the light period, and running lights overnight disrupts your own sleep if the setup is in a bedroom or living space. A schedule of 6 AM to 10 PM covers a 16-hour day and aligns with natural light cycles, which is a perfectly fine starting setup for most growers.
Plant-specific starting guides: houseplants vs seedlings
Starting houseplants under grow lights
Most houseplants you're supplementing with a grow light because your windows don't provide enough natural light. In that case, you're not trying to replace the sun entirely, just fill in the gap. Start with a 12 to 14 hour light schedule and position your LED panel 18 to 24 inches above the plant. For low-light species like pothos, snake plants, or peace lilies, aim for a PPFD of around 100 to 200 µmol/m²/s at the leaf surface. Medium-light plants like monsteras, philodendrons, and most aroids do well at 200 to 400 µmol/m²/s.
Succulents and cacti often get less light than they need indoors, even near south-facing windows. Under a grow light, target 100 to 200 µmol/m²/s and a 12 to 14 hour photoperiod. They can handle more intensity than that, but starting conservatively and watching for stress signs before pushing higher is the smarter approach. Orchids vary enormously by species, but most popular varieties like Phalaenopsis do well at 100 to 250 µmol/m²/s, 12 to 14 hours a day.
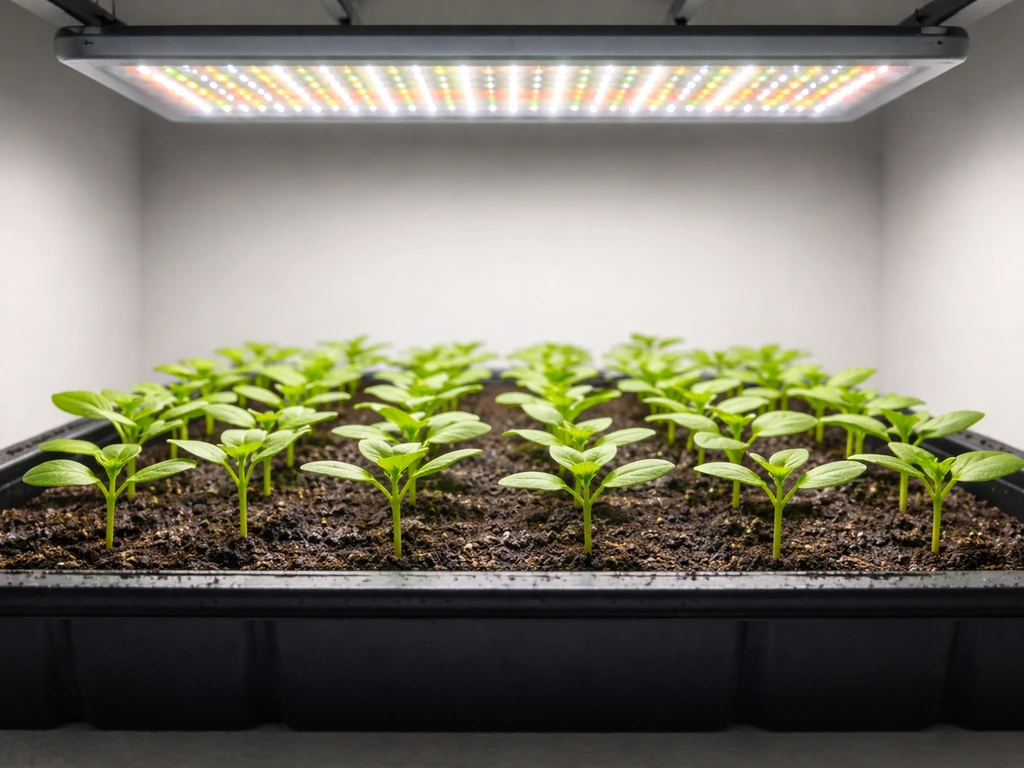
Starting seeds under grow lights
Seedlings need more light hours but less intensity than mature plants. Run your light for 16 to 18 hours a day and keep PPFD in the 75 to 150 µmol/m²/s range for the first week or two. This is lower than you might expect, but germinating seedlings are fragile and you want to encourage root development alongside shoot growth, not push stems to stretch rapidly. As seedlings develop their first true leaves (the second set after the seed leaves), you can begin increasing intensity toward 150 to 300 µmol/m²/s.
Keep your LED or T5 fixture close, around 4 to 6 inches for T5 fluorescents or 18 to 24 inches for LED panels at lower power settings. The goal in the seedling stage is compact, stocky growth. Leggy, thin stems with large gaps between leaf nodes are a sign you need more intensity or to move the light closer. A blue-forward spectrum (higher Kelvin, around 5000K to 6500K) during the seedling stage promotes compact vegetative growth, so if your light has a veg mode, use it here.
Troubleshooting common light problems and fixes
Lighting problems show up in predictable ways once you know what to look for. Here are the most common issues and how to fix them.
Leggy, stretching plants
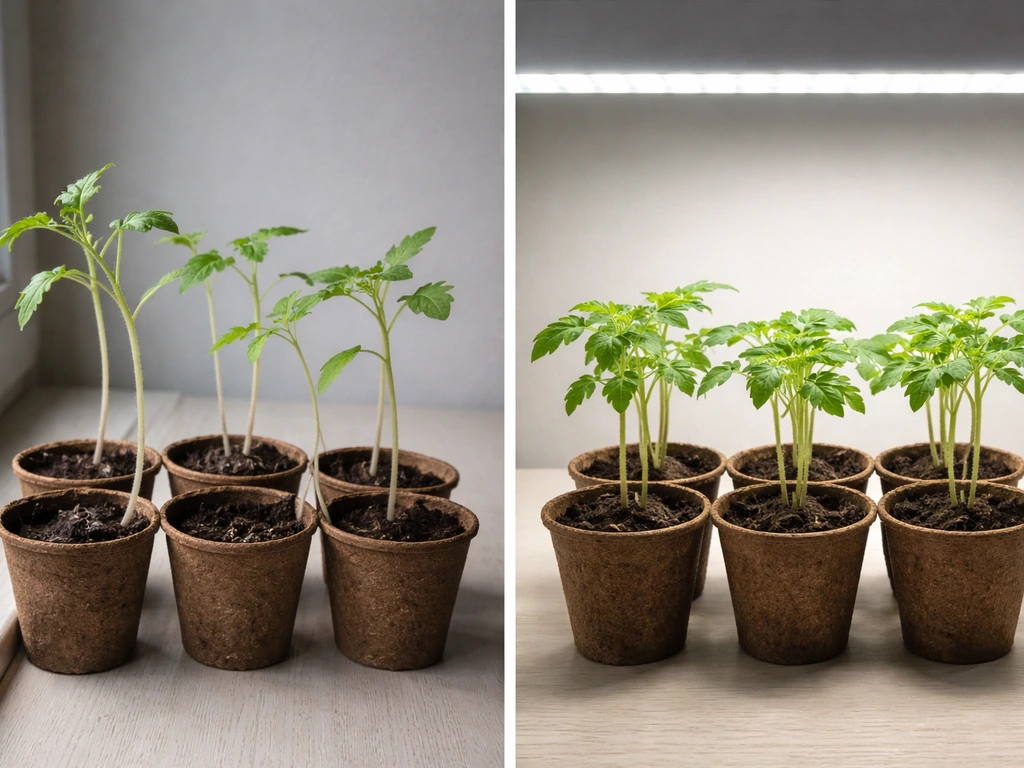
If your plant is growing tall with long gaps between leaves (especially seedlings with thin, floppy stems), it's reaching for more light. This is called etiolation, and it's caused by insufficient intensity or too much distance between the light and the canopy. Fix it by lowering the fixture, increasing intensity on a dimmable light, or both. Don't wait too long: etiolated stems don't thicken back up after the fact. Prevention is much easier than correction.
Yellowing upper leaves (chlorosis or bleaching)
When the newest, uppermost leaves look pale, washed out, or yellow while lower leaves stay green, the plant is likely getting too much light intensity. This is especially common when growers run high-output LEDs too close. Raise the fixture by 4 to 6 inches and reduce intensity if the light is dimmable. Give the plant a few days to recover before making further adjustments. Note: yellowing of lower or older leaves is usually a nutrient issue, not a light problem, so look at which leaves are affected before assuming light is the culprit.
Burnt or crispy leaf tips
Crispy brown tips, especially on leaves closest to the light, usually mean heat stress or intensity is too high. First check whether the light is generating significant heat: hold your hand at canopy level for 30 seconds. If it's noticeably hot, add airflow with a small fan and raise the fixture. LEDs generally run cooler than HID lights, but even LEDs can cause heat stress if hung too close, especially in a small enclosed space without ventilation.
Slow or stunted growth
If your plants are alive but barely growing, they're probably not getting enough total light over the day. The fix can be more intensity, a longer photoperiod, or moving the light closer. Check your setup against the PPFD targets in the table above and consider whether your light schedule is giving plants enough total daily photon exposure. Remember, a lower-intensity light can achieve the same DLI as a brighter light by running longer.
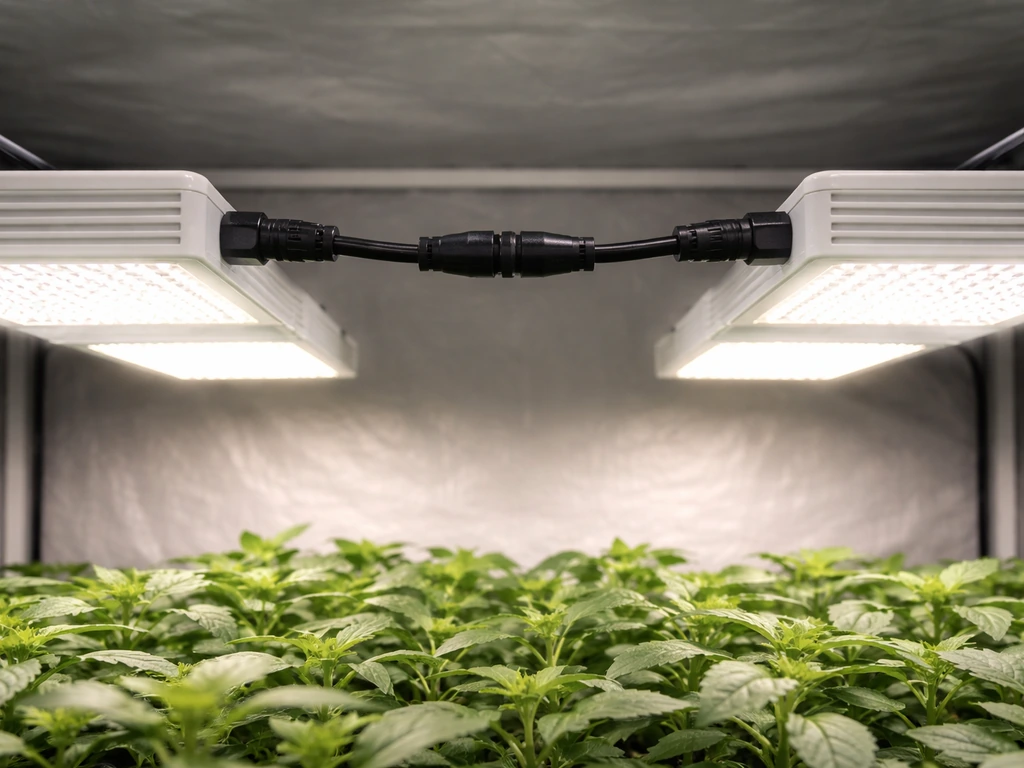
Uneven growth across the canopy
Plants on one side of the grow area lean toward the center, or plants near the edges grow slower than those in the middle. This is almost always a coverage issue. Either the light's footprint doesn't reach the edges, or the fixture is off-center. Fix it by repositioning the light, adding a second light, or rotating your pots every few days so each plant gets even exposure. You can also daisy chain grow lights, but make sure the total wattage stays within the power limits of your outlets, cords, and any surge-protection equipment. Reflective walls make a significant difference here and are worth adding before buying another light.
Quick setup checklist and how to fine-tune over time
Here's a practical checklist to get your grow light setup running from scratch. Use it as your starting point, then adjust based on what your plants tell you in the first two to four weeks.
- Choose a full-spectrum LED panel or bar light sized for your grow area (check the PPFD coverage map if available)
- Mount the light on adjustable rope ratchets, starting at 18 to 24 inches above the canopy (or 24 to 30 inches for seedlings)
- Set intensity to 50 to 60% if dimmable, or confirm wattage is appropriate for your space
- Plug into a timer and set the schedule: 16 hours for seedlings, 12 to 14 hours for houseplants and succulents, 14 to 16 hours for herbs and most fruiting plants
- Add reflective material to walls if not using a tent
- Check plants after 5 to 7 days: look for stretching (move light closer or increase intensity), yellowing upper leaves (raise light or reduce intensity), or burning (raise light and add airflow)
- After two weeks, make one adjustment at a time and wait another week before evaluating again
- As plants grow, lower the fixture to maintain the same distance from the canopy to the light
- For flowering plants, confirm your dark period is uninterrupted if the species is photoperiod-sensitive
Fine-tuning is an ongoing process, not a one-time setup. The biggest mistake growers make is adjusting too many things at once. Change one variable, whether it's height, intensity, or schedule, then give the plant a week to respond before changing another. Plants signal what they need pretty clearly once you know the signs, and after a couple of grows you'll be able to read them quickly.
Once you're comfortable with the basics covered here, the natural next steps are learning how to position multiple lights for even coverage across a larger space, understanding how to create specific light environments like bright indirect light for shade-loving plants, and exploring how to daisy chain lights for larger setups without running a cable to every fixture. Getting the fundamentals right first makes all of those refinements much easier to implement and understand.
FAQ
Can I run my grow light 24/7, and will plants still grow properly?
Yes, but only if you keep the dark period truly uninterrupted. For photoperiod-sensitive plants, even brief light interruptions during the “night” can disrupt flowering. Use the timer to ensure the lights never turn on due to manual switches or room lamps, and consider a blackout curtain if the fixture is in a frequently lit room.
How do I know whether my problem is too little intensity or just the light being too far away?
If you see stretching, pale new growth, or rapid leaf spacing changes, you likely have too much distance and/or too low PPFD. Start by adjusting height within your recommended range (for LEDs, typically 18 to 24 inches from the canopy at moderate output), then use dimming to correct intensity. Avoid changing schedule and spectrum at the same time, adjust one variable first.
What should I trust when comparing grow lights, watts or PPFD?
Do not rely on “watts” or fixture brand claims. Aim for PPFD at leaf height using the manufacturer’s PPFD footprint or map, then compare to your plant type targets. If your light has no PPFD data, you’ll need either a PPFD meter or a more conservative height-and-dimming approach while you watch for stress signs.
Is it okay to start seedlings at full power to make them grow faster?
Start with the lowest effective intensity you need for the current growth stage, then increase gradually over 7 to 14 days. A fast jump often causes bleaching (pale, washed leaves) or crispy tips, especially near the canopy. If your light is dimmable, begin around half power and fine-tune based on leaf response.
If my plants need more light, can I just increase the number of hours instead of the intensity?
Yes, but use it to keep plants within the recommended PPFD band rather than to chase a higher number. Even if you can run a long photoperiod, too much total light can lead to stress, tip burn, and reduced growth quality. For many houseplants, 12 to 16 hours light with 8 to 12 hours dark is a safer starting range.
Do reflective grow tents or white walls replace needing a stronger light?
Reflective material helps, but it has limits. Mylar or white walls increase the usable bounce-back light, improving coverage and uniformity, but they cannot fix a light that is simply too weak for the distance or footprint. If edge plants still look dim, you’ll usually need overlap from another fixture, repositioning, or a taller dimmable plan.
Do I need a different spectrum for flowering versus growing foliage?
For most modern full-spectrum LEDs, you typically do not need to swap bulbs, and it is fine to focus on intensity and photoperiod. Use “veg” or “bloom” modes only if the manufacturer provides them and you are deliberately targeting a vegetative versus flowering goal, otherwise full-spectrum at correct PPFD generally performs well.
What’s the difference between PPFD, PAR, and DLI?
“Par” and “PPFD” are related, but they are not the same as DLI. PPFD is the rate at the leaf (µmol/m²/s), while DLI is the daily total (mol/m²/day) and depends on both PPFD and how many hours you run the light. If you have PPFD, you can estimate DLI, but you should not mix up units or measure meanings.
Why are my plants leaning toward the center or growing slower on the edges?
Rotate plants and ensure the fixture is centered, especially in tents, shelves, and multi-level setups. A common mistake is leaving all pots in the same spot so one side gets consistently higher PPFD. Even small rotations every few days can fix leaning, and edge plants may still need additional overlap.
Can LEDs cause leaf burn even if they run cooler than HID lights?
It can, particularly in indoor rooms where temperature and airflow vary. If leaves develop crispy brown tips near the canopy, first check whether the fixture area is hot by holding your hand at leaf height for about 30 seconds, then add airflow or raise the light. Even LED setups can cause heat stress in enclosed, poorly ventilated spaces.
My light is rated for a 4x4 area, but my plants are in a row, will edge plants still get enough light?
Yes, but confirm that “coverage” is realistic for your layout. A claim like “4x4 footprint” often assumes center intensity, with drop-off at edges, so a full-width row may get uneven PPFD. Plan overlap between lights or accept that outer plants will get less, then correct by repositioning or adding a second fixture.
What if I adjust the light but my plants do not seem to improve?
If you are adjusting and nothing changes after about a week, the issue might be wrong target PPFD, light blocked by leaves, or non-light problems like nutrients, watering, or root stress. Return to basics: verify distance, ensure leaves are not shading each other, and compare what you see (stretching, bleaching, slow growth) to the light-symptom patterns.
Is daisy chaining grow lights safe, and does it affect performance?
You can, but treat it as a coverage and uniformity tool, not a way to avoid PPFD targets. Daisy-chaining helps cable management, yet total electrical load must stay within outlet, cord, and surge-protection limits. Also ensure all fixtures at different heights still align to your canopy PPFD goal.
Next Article
How to Daisy Chain Grow Lights: Safe Step-by-Step Guide
Step-by-step for daisy chaining LED grow lights: compatibility, wiring limits, placement, scheduling, troubleshooting, a