Grow lights work by producing specific wavelengths of light that plants can actually use for photosynthesis, replacing or supplementing sunlight indoors. The core idea is simple: plants need photons in a particular range of the light spectrum to grow, and a grow light's job is to deliver enough of those photons, at the right intensity, for the right amount of time each day. Everything else, including the type of bulb, the height you hang it, and the timer schedule you set, flows from that basic principle.
How to Grow Lights Work: Setup, Spectrum, Sizing, Timing

Marcus Tillman
8 Apr 2026
How grow lights actually produce plant-ready light
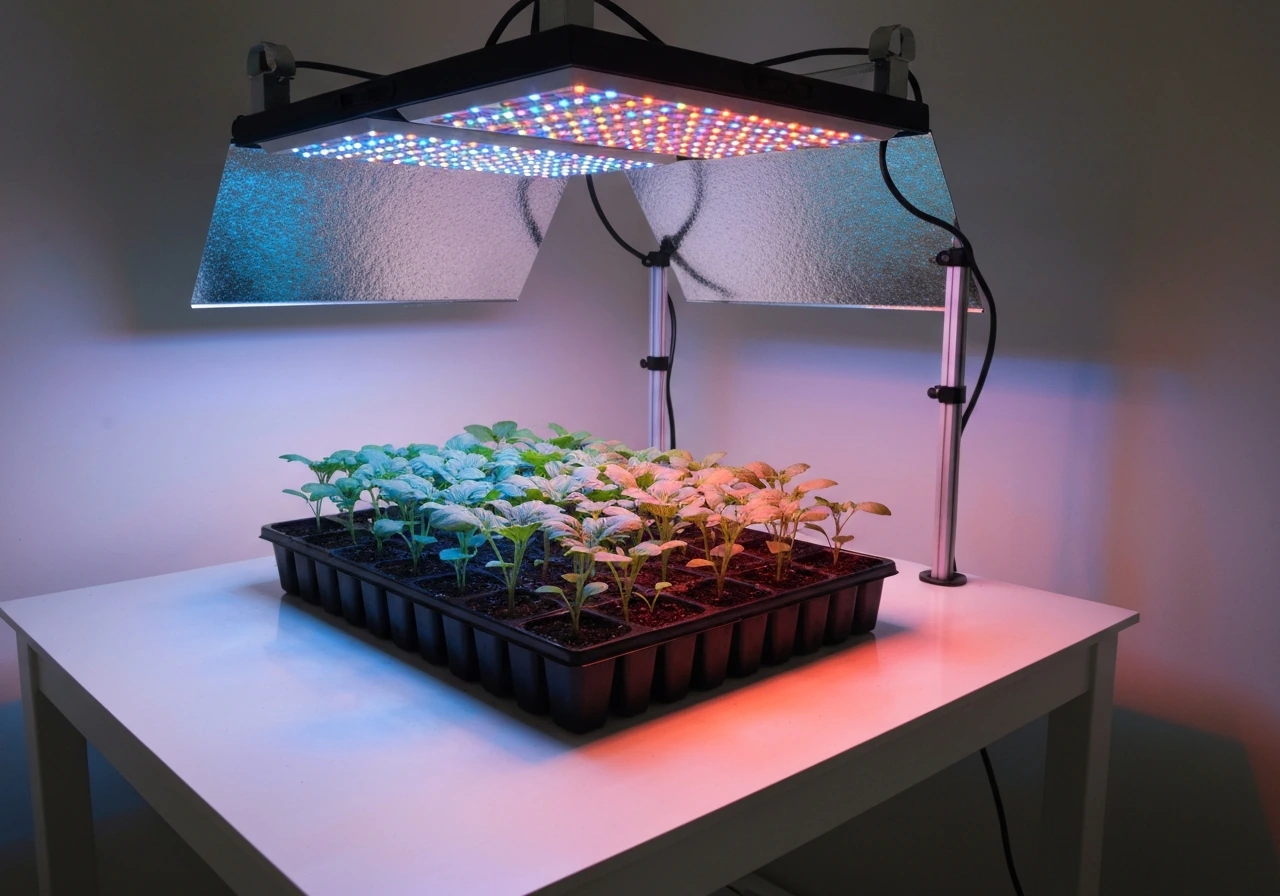
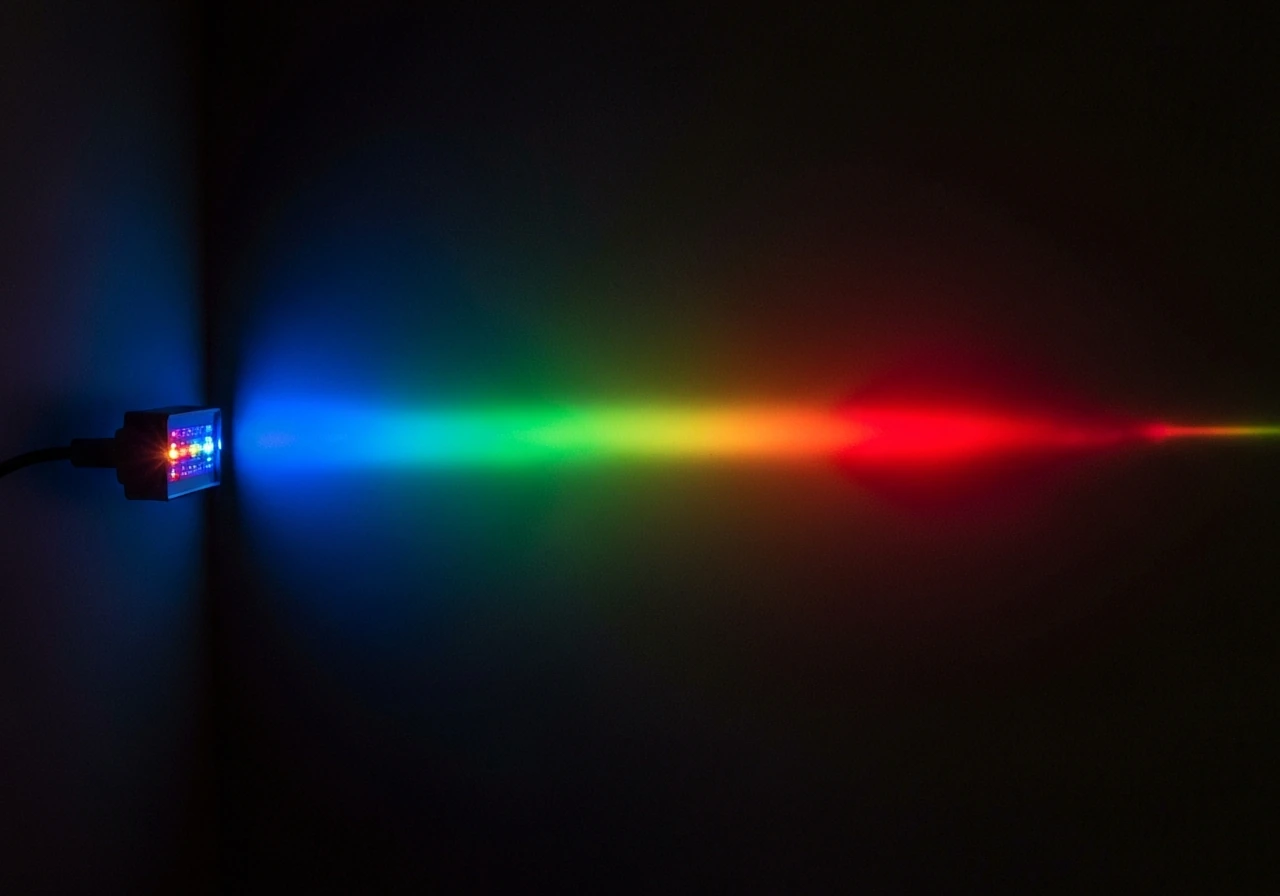
Plants photosynthesize using light in the 400–700 nanometer (nm) range. This range is called PAR, or photosynthetically active radiation. Blue light (roughly 400–500 nm) drives compact, leafy vegetative growth. Red light (roughly 600–700 nm) promotes flowering and fruiting. Most modern grow lights aim to cover both ends of this range, which is why you'll often hear the term "full spectrum" thrown around.
Here's the thing about measuring light for plants: the standard lux reading on a phone app doesn't tell you much. Lux is calibrated to human vision, not plant biology. What actually matters is PPFD, or photosynthetic photon flux density. PPFD counts the PAR photons (in the 400–700 nm range) hitting a square meter of canopy every second, measured in micromoles per square meter per second (μmol·m⁻²·s⁻¹). That number is what determines whether your plant is getting enough light to grow well, or just enough light to survive.
A related concept worth knowing is DLI, or daily light integral. DLI is basically the total amount of PAR photons a plant receives over a full day. You can think of it as PPFD multiplied by the number of seconds the light is on, divided by one million. Low-light houseplants might need a DLI of 5–10, seedlings often do well at 10–20, and fruiting plants can want 20–40 or higher. These numbers help you connect intensity (PPFD) and duration (photoperiod) into a single picture of what your plant is actually getting.
The main types of grow lights and when to pick each
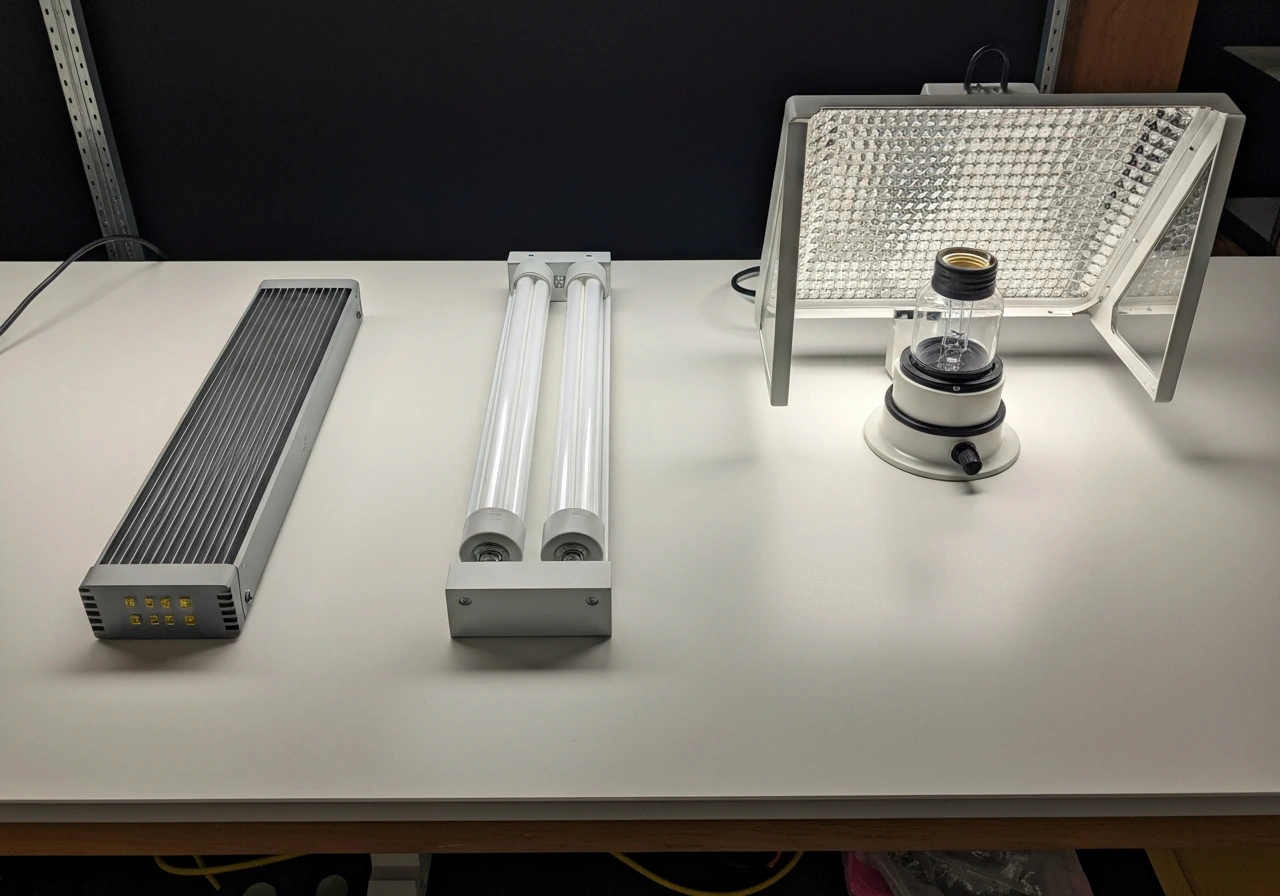
There are three main categories you'll encounter: LED, fluorescent (including T5), and HID (high-intensity discharge, which includes HPS and MH bulbs). Each has a real use case, and none is universally the best choice for every grower.
| Type | Efficiency | Heat Output | Best For | Typical Cost |
|---|---|---|---|---|
| LED (full-spectrum panel) | High (often 2–3 μmol/J) | Low to moderate | Most indoor setups, seedlings to fruiting | $$–$$$ |
| T5 Fluorescent | Moderate (around 1 μmol/J) | Low | Seedlings, cuttings, low-light houseplants | $ |
| HID – MH (Metal Halide) | Moderate-high | High | Vegetative growth in larger spaces | $$ |
| HID – HPS (High-Pressure Sodium) | Moderate-high | High | Flowering/fruiting in larger spaces | $$ |
| CFL (Compact Fluorescent) | Low-moderate | Low | Very small spaces, single plants | $ |
For most home growers in 2026, a quality LED panel is the right starting point. LEDs have gotten dramatically better and more affordable over the last few years. They run cooler than HID lights, use less electricity, and modern full-spectrum LEDs cover the PAR range well from 400–700 nm. T5 fluorescents are still a solid, budget-friendly pick for seedling trays and cuttings because they're forgiving, inexpensive, and easy to find. HID lights (MH and HPS) make more sense if you're running a larger grow space, say 4x4 feet or bigger, and you're chasing maximum yield from fruiting plants. They're powerful but hot and expensive to run long-term. CFLs are fine for a single small plant or a propagation experiment but don't scale well.
LED form factors also vary. Quantum board LEDs spread light evenly and are great for shelves and small tents. Bar-style LEDs are excellent for wide coverage like 2x4 grow tents. Blurple LEDs (the old purple ones with only red and blue diodes) still work, but white full-spectrum LEDs have mostly replaced them because they're easier to work under and more efficient.
The specs that actually matter when you're shopping
Shopping for grow lights feels overwhelming because brands throw a lot of numbers at you. Here are the four specs worth paying attention to, and what they actually mean for your plants.
Spectrum
A light labeled "full spectrum" should cover 400–700 nm at minimum. Some lights extend into the far-red range (700–750 nm), which can speed up flowering and increase stem elongation. For most home growers, a balanced full-spectrum LED hitting both blue and red PAR wavelengths is all you need. Don't get too hung up on exact color ratios unless you're growing very specific crops for commercial purposes.
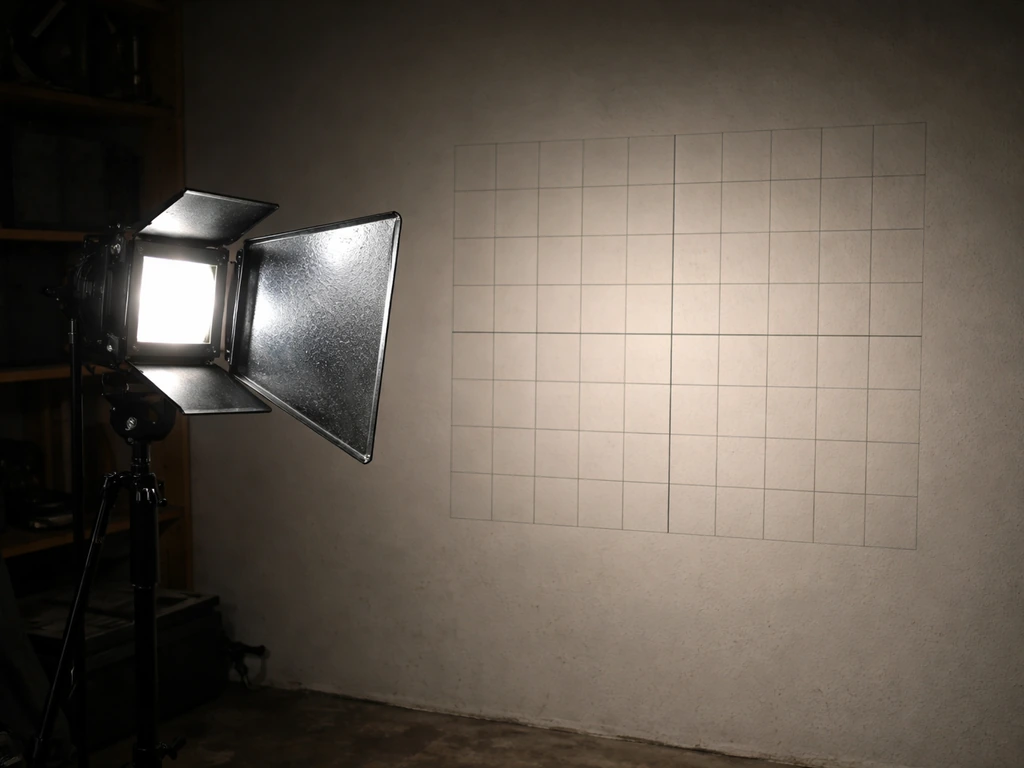
PPFD
This is the most important number on a spec sheet. Look for a PPFD map, which shows light intensity at different distances from the light. A good manufacturer will publish a grid showing μmol·m⁻²·s⁻¹ values at 12 inches, 18 inches, and 24 inches. Be skeptical of a single peak PPFD number with no map attached, because that peak is usually measured at the dead center directly under the light, not across the whole coverage area.
Wattage and efficiency
Wattage tells you how much electricity the light consumes, not how much light it produces. Efficiency is measured in μmol/J (micromoles of PAR photons per joule of electricity). A decent LED in 2026 should hit at least 2.0 μmol/J. Budget lights often land around 1.5, and premium lights can reach 2.8 or higher. Higher efficiency means more light per dollar on your electricity bill every month.
Coverage area
Coverage area claims from manufacturers are often generous. A light advertised for a "4x4 coverage" is usually providing adequate intensity only in the center of that space. For seedlings and vegetative growth, that same light might cover a true 3x3 at a useful PPFD. For flowering, coverage shrinks further. Always cross-reference coverage claims with the actual PPFD map, not just the headline number.
Setting up your grow lights: placement, height, angle, and reflectors
Getting the physical setup right is where most beginners lose results. Even a great light underperforms if it's hung too high, aimed wrong, or placed over only part of the canopy. If you want a complete walkthrough of the full installation process, the guide on how to set up grow lights covers it step by step, but here are the fundamentals you need right now.
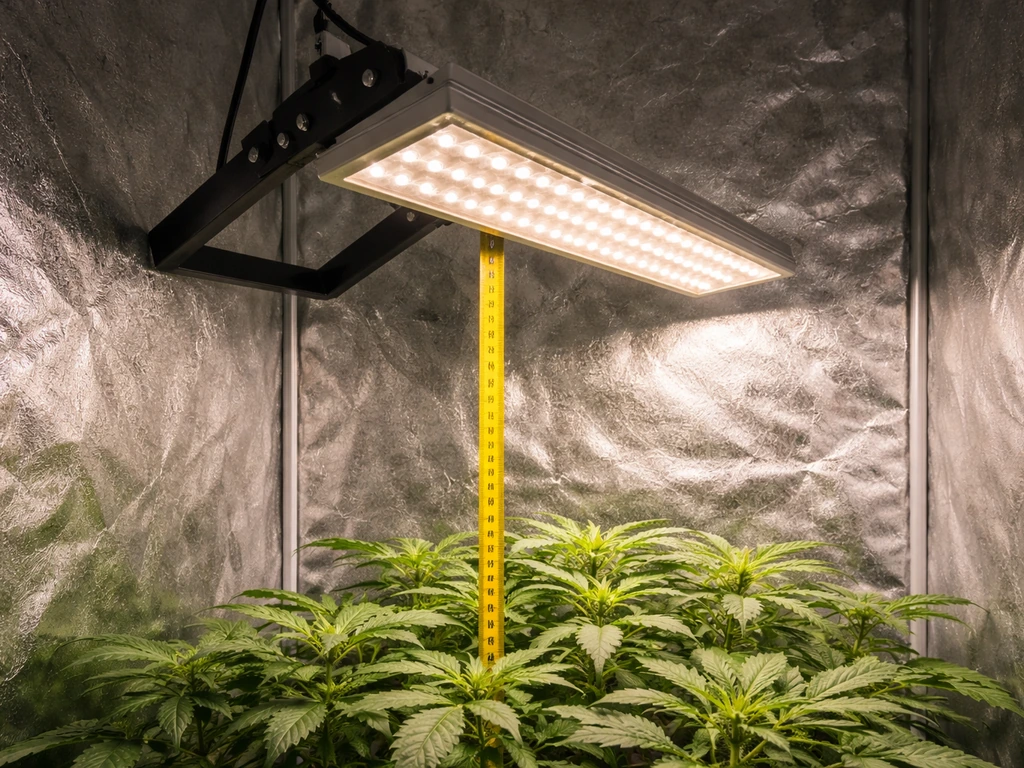
Height above the canopy
Light intensity drops sharply as distance increases (following the blank" rel="noopener noreferrer">inverse square law, which means doubling the distance quarters the intensity). As a starting point: T5 fluorescents work well 2–4 inches above seedlings and 4–8 inches above mature low-light plants. LED panels typically hang 12–24 inches above the canopy, depending on their wattage and PPFD output. HID lights usually start at 18–36 inches away because of heat. Always start higher and lower the light gradually while watching for stress signs. For a deeper look at dialing in positioning precisely, check out this guide on how to position grow lights for different plant types and shelf configurations.
Spacing across shelves
On a multi-shelf setup, make sure the light for each shelf is dedicated to that shelf only. Light from one shelf doesn't meaningfully reach the shelf above or below. If you're running multiple lights across a wide area, overlap their coverage zones slightly so you don't have dark spots. A simple way to check: use a PPFD meter or a free light meter app calibrated for PAR (knowing it won't be perfectly accurate but will show relative distribution) and look for obvious dimmer zones.
Beam angle and reflectors
Most LED panels have a wide beam angle (120 degrees is common), which gives you decent spread without needing reflectors. If you're using a bare bulb or HID setup, reflective walls or mylar sheeting dramatically improve how much of that generated light actually reaches your plants instead of getting absorbed by the walls. White-painted walls reflect about 85–90% of light. Mylar can hit 95–97%. Even just lining the back wall of a shelf with white foam board makes a noticeable difference in coverage efficiency.
One more thing worth knowing: if you're running several lights in a row, you can often daisy chain grow lights together using the passthrough outlets many LED bars and T5 fixtures include. This simplifies wiring and lets you control multiple lights from a single timer, which is really convenient once you're running more than two or three fixtures.
Running your lights correctly: timers, schedules, and photoperiod
The number of hours your light runs each day is called the photoperiod, and it's just as important as the intensity. Plants use photoperiod as a biological clock. Get it wrong and you'll either stress your plants or prevent flowering entirely.
Standard photoperiod starting points
- Seedlings and cuttings: 16–18 hours of light per day
- Vegetative houseplants (pothos, monsteras, herbs): 12–16 hours per day
- Flowering plants (petunias, tomatoes, peppers in bloom): 12–16 hours depending on species
- Short-day flowering plants (chrysanthemums, poinsettias): 12 hours or fewer to trigger bloom
- Long-day flowering plants (lettuce, spinach going to seed): 16–18 hours to encourage bolting, or shorter to delay it
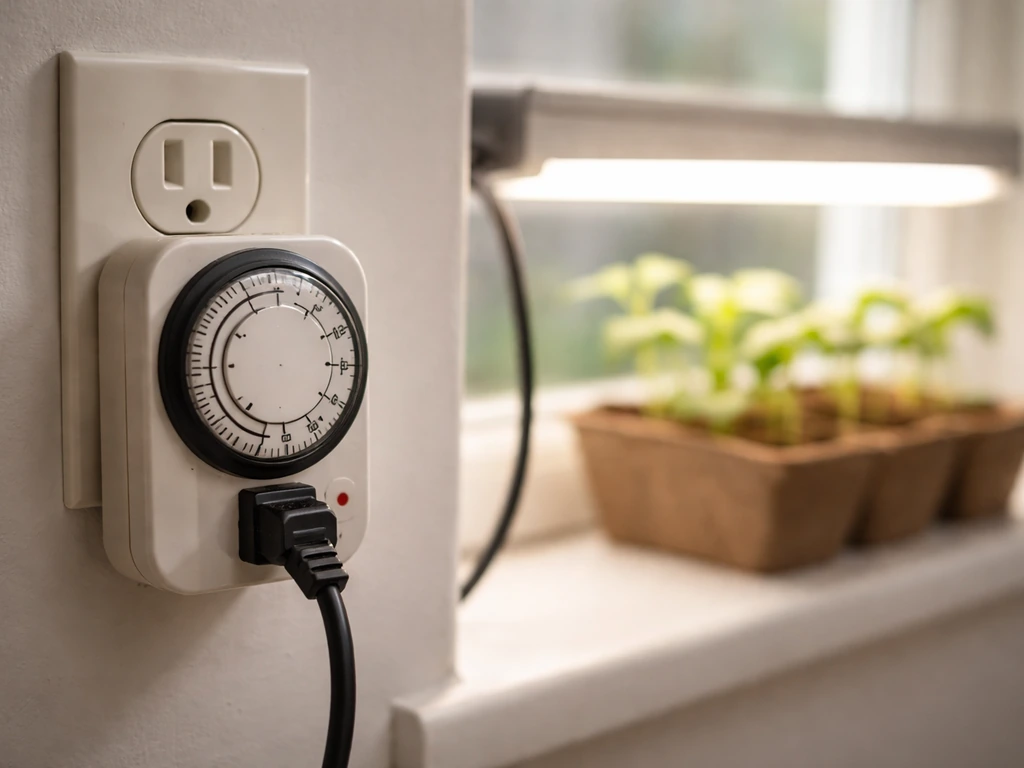
Use a mechanical or digital outlet timer. Set it and forget it. Inconsistent photoperiods, like forgetting to turn lights on or off manually, are one of the most common reasons plants stall or fail to flower on schedule. A $10 mechanical timer is genuinely one of the most useful tools in any indoor grow setup.
Night interruption for flowering control
For photoperiod-sensitive plants, it's not just total light hours that matter but also whether the dark period is interrupted. A technique called night interruption uses a short burst of light in the middle of the dark period (typically 10–30 minutes around midnight) to fool long-day plants into thinking the night is shorter, encouraging them to flower without having to run the lights all day. This is a strategy used in commercial greenhouse production, but a timer with multiple on/off settings makes it doable at home too. If you're growing plants where flowering timing is the goal, it's worth researching your specific species' day-length requirements.
Adjusting over time
Don't set your timer once and ignore it. As plants grow taller, they get closer to the light and receive higher PPFD. Lower the light or raise the plants to maintain your target distance. In propagation specifically, controlling both PPFD and photoperiod matters for rooting success: cuttings often do better with slightly lower intensity early on to reduce transpiration stress while roots haven't formed yet. Once rooted, you can increase intensity gradually.
Sizing your setup for the plants you're actually growing
One of the most common mistakes beginners make is buying a light sized for the wrong use case. Here's how to think about it for the three most common plant categories home growers deal with.
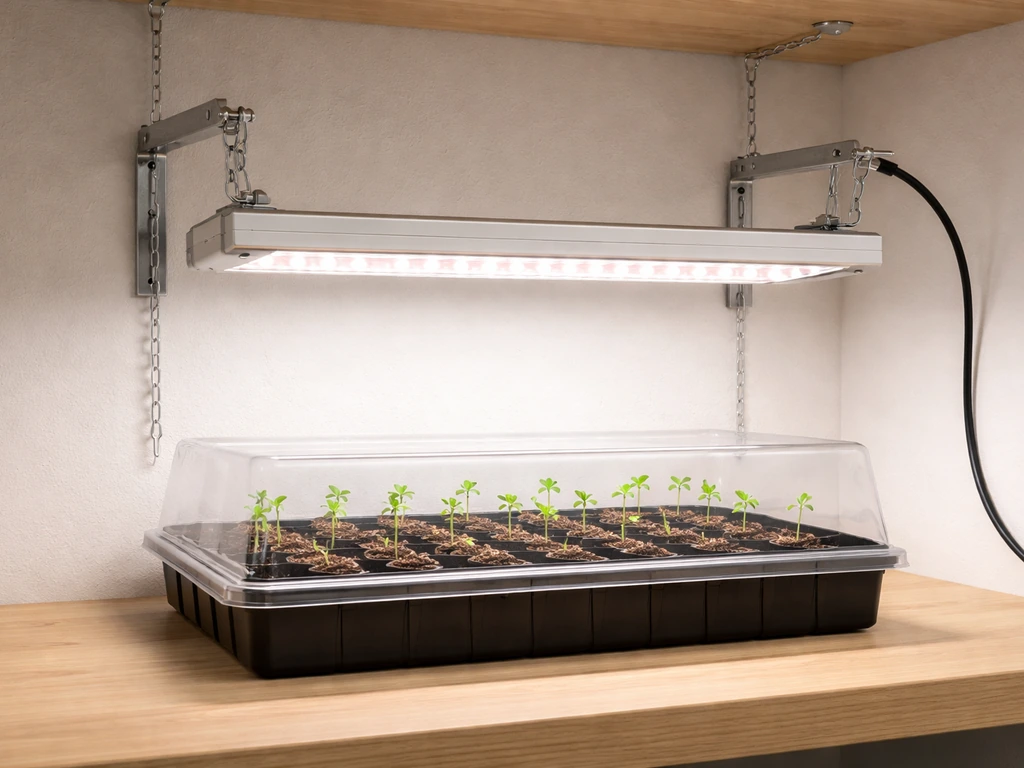
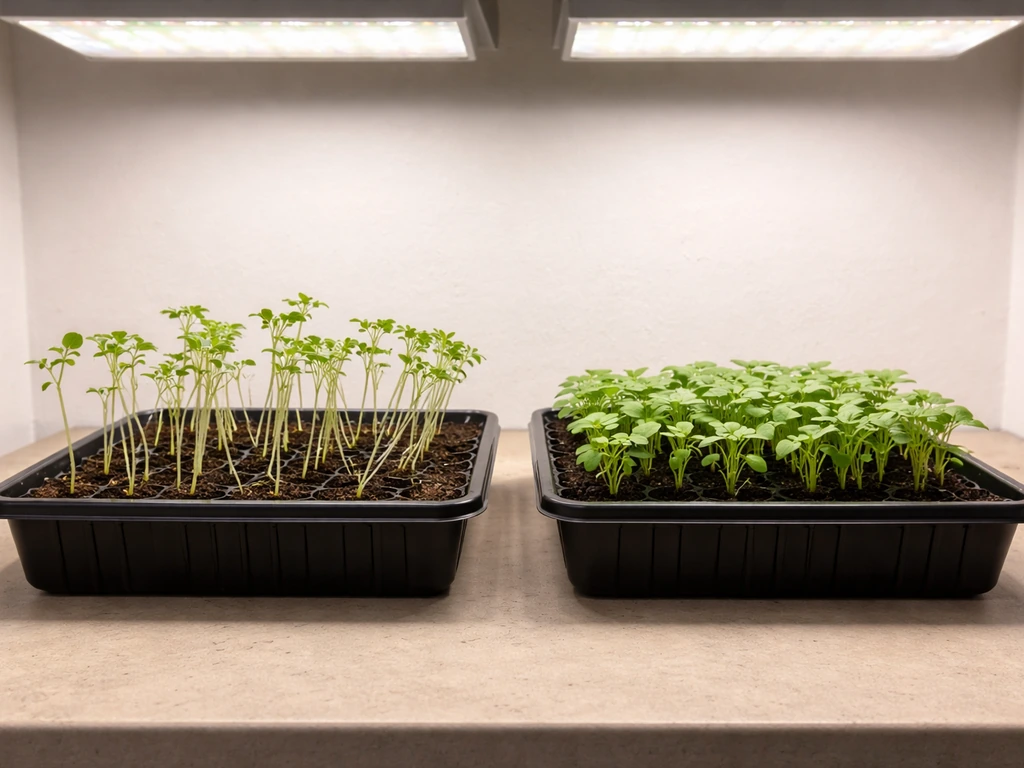
Seedlings and cuttings
Seedlings need consistent but moderate light, typically 100–300 μmol·m⁻²·s⁻¹ PPFD. Too much intensity too early causes bleaching and stunted growth. A single T5 4-bulb fixture or a low-wattage LED panel (30–50W for a standard 10x20 seedling tray) is more than enough. Run them 16–18 hours per day. Height matters here more than anywhere: keep T5s 2–4 inches above the tray, LEDs 12–18 inches depending on output. If you're starting seeds and unsure what else you need beyond the light, the broader guide on how to grow plants with a grow light walks through the full picture from soil to harvest.
Houseplants
Most popular houseplants (pothos, philodendrons, peace lilies, snake plants) are low-to-medium light plants that want 50–150 μmol·m⁻²·s⁻¹ PPFD. A small LED grow bulb in a standard lamp, a single bar-style LED, or even a clip-on grow light is usually enough for one or two plants. The goal here isn't maximum growth but maintaining healthy color and preventing decline in rooms that don't get enough natural light. Many houseplants also do well with simulated indirect light rather than direct intense grow light exposure. If you're trying to replicate a bright windowsill environment, there's a useful approach in this article on how to create bright indirect light with grow lights that's worth checking out.
Flowering and fruiting plants
Tomatoes, peppers, strawberries, and cannabis need significantly more light, often 400–800 μmol·m⁻²·s⁻¹ PPFD or higher during peak production. This is where higher-wattage LEDs (200–600W depending on space) or HID setups make sense. A 3x3 foot space at this intensity needs roughly 200–300W of actual LED draw from a quality fixture. You also need to manage heat and airflow more carefully at this scale. For a full rundown on making this kind of setup work well, the guide on how to grow with grow lights goes into the depth this plant category needs.
Troubleshooting problems and staying safe
Most grow light problems have straightforward causes once you know what to look for. Here are the most common issues and how to fix them.
Leggy, stretching plants
Long, weak stems reaching toward the light are almost always a sign of insufficient PPFD. The plant is stretching to find more light. Move the light closer (carefully, to avoid heat or light burn), increase wattage, or extend photoperiod slightly. Check that your light is actually covering the full canopy and not just the center.
Slow growth or yellowing leaves
Slow growth with generally pale or yellow leaves can indicate low light, but it can also be a nutrient issue. Before blaming the light, check your watering and fertilization first. If those are fine, increase PPFD or extend the photoperiod by 2 hours and observe over 7–10 days. Yellow leaves specifically on the lower canopy (while upper leaves look fine) often mean the light isn't penetrating deep enough, which is more of a plant density issue than a light issue.
Bleached or burned leaves
White or bleached patches on the leaves directly under the light, or crispy brown edges, mean too much intensity or the light is too close. Raise the light 3–6 inches and give the plant a few days to recover before adjusting further. This is especially common with high-power LEDs hung too low. Heat stress looks similar: if the leaves closest to the light feel noticeably warm to the touch, the light is too close or the fixture is running too hot.
Algae or mold on the growing medium
Green algae growing on the top of your soil or growing medium is a sign of light hitting wet soil. This is common when lights are positioned low and the growing medium stays moist. Allow the surface to dry out between waterings, or block direct light from hitting the soil surface. Mold in the grow space is usually a humidity and airflow problem compounded by light-generated heat: add a small fan and reduce watering frequency.
Plants not flowering
If a plant that should flower isn't doing so, the most common culprit is photoperiod. Check whether your species is a short-day, long-day, or day-neutral plant, and make sure your timer is giving it the right dark period. Even a small amount of stray light during the dark period (from a window, a phone charger LED, or light leak from an adjacent room) can disrupt photoperiod-sensitive species.
Safe operation basics
- Use a surge protector or properly rated power strip, not a standard extension cord daisy-chained into another extension cord
- Make sure your fixture is rated for the amperage you're pulling, especially if running multiple lights on one circuit
- Keep electrical connections away from water, humidity, and any overhead irrigation
- Check hanging hardware (ratchet hangers, hooks, chains) monthly for wear, especially in humid environments
- Allow adequate airflow around fixtures: LEDs still generate heat at the driver, and HID ballasts get very hot
- Never leave a new setup unattended for the first several hours; check for unusual smells, heat, or flickering
The learning curve with grow lights is genuinely shorter than most people expect. Once you understand that PPFD is the intensity your plant feels, photoperiod is the schedule it lives by, and spectrum determines which biological processes get triggered, everything else (height, timer settings, fixture choice) is just applying those principles to your specific setup. Start with a quality LED, a reliable timer, and the correct hanging height for your plant type, and you'll be ahead of most indoor growers who are still guessing.
FAQ
Do I need a PPFD meter, or can I just use the light’s specs to set up correctly?
You can start using published PPFD maps, especially if the manufacturer includes a grid at your target hanging heights. A meter helps for two common edge cases: when your plants sit in a nonstandard canopy shape (shelves, varying heights) and when multiple lights overlap, because apps and lux readings will not show PAR accurately.
What PPFD and DLI targets should I use if I don’t know my plant’s exact requirements?
If you are unsure, pick a safe middle range first (around 80–150 μmol·m⁻²·s⁻¹ PPFD) and monitor symptoms for 7 to 10 days. Then adjust using DLI logic (more time if intensity is reasonable, more intensity if the plants look stretched or dull), rather than making large changes in both at once.
Why is my plant stretching even though the light seems bright?
Stretching usually means the plant is not receiving enough PPFD at the canopy, not that the room is dim. Common causes are the light being too high, coverage missing the edges of the canopy, or growth occurring faster than your setup assumptions, so recheck height and re-measure at plant level when growth accelerates.
Can I rely on lux readings from a phone app to judge how strong my grow light is?
Not reliably. Lux is weighted for human vision, not for the 400–700 nm photons plants use. Phone lux can still be useful only as a rough relative check for placement within the same room, but it is not a substitute for PPFD or a PAR-calibrated measurement.
My light is labeled “full spectrum,” but leaves look wrong, what else should I verify?
Confirm that “full spectrum” actually means enough PAR output, not just a marketing label. Look for PPFD maps and efficiency (μmol/J), and check that the spectrum includes sufficient blue and red PAR rather than being mostly decorative visible light. Also verify hanging height, because spectrum cannot compensate for distance-related intensity loss.
How do I prevent light burn or bleaching if my light is adjustable?
Start higher than you think you need, then lower in small steps (for example, 2–4 inches at a time depending on fixture power) while watching the newest growth. If you see white patches or crispy edges directly under the lamp, raise the light and give it a recovery window of a few days before changing anything else.
Should I run my grow lights longer instead of using a stronger light?
Often no. Plants can respond negatively when you overextend photoperiod, especially if the species is sensitive to the dark period. A safer approach is to reach the right PPFD first, then adjust duration gradually, and for flowering goals make sure the dark period is uninterrupted.
How can I avoid accidental light leaks during the dark period?
Use a blackout approach: close curtains, keep the timer-controlled lights on separate circuits from night lights, and cover indicator LEDs on chargers, power strips, and smart plugs. Even small stray light from windows or adjacent rooms can interrupt flowering-sensitive plants.
Is night interruption for everyone who wants flowering?
No. Night interruption is mainly a tool for specific long-day plant strategies, not a universal flowering hack. If you do try it, keep the extra light brief (often 10–30 minutes) and consistent, because an inconsistent schedule can do more harm than running the correct standard photoperiod.
What’s the difference between PPFD and DLI when deciding how to schedule lights?
PPFD is the intensity at the canopy at a moment in time, DLI is the total PAR exposure over 24 hours. If your plants are pale, increasing PPFD can help, but if your goal is total daily exposure, adjusting photoperiod can raise DLI even when intensity stays the same. Use both terms to avoid chasing symptoms.
If I’m using multiple shelves or multiple lights, how should I place them to avoid uneven growth?
Dedicate a light to each shelf, then overlap zones slightly only if you are truly covering a larger footprint. Unevenness often shows up as brighter tops and duller lower areas, or darker “valleys” between fixtures. For troubleshooting, measure or visually compare PPFD near the front, center, and corners.
How do I size a grow light for a plant, not for the box size?
Use the plant’s footprint and canopy shape, then match to the manufacturer’s PPFD map rather than the marketing coverage area. If flowering plants are the goal, assume coverage shrinks and plan for higher effective PPFD at the far edges by lowering height or choosing a wider fixture.
Do LEDs run cooler, so can I ignore heat and airflow?
You should still manage airflow. LEDs generally reduce radiant heat compared with HID, but heat and humidity issues can still develop from total power, enclosed tents, or limited ventilation. If leaves closest to the light feel warm to the touch or you see increased leaf stress, improve airflow and adjust height.
What is the right way to “increase intensity gradually” for seedlings and cuttings?
For propagation, reduce early intensity slightly, then ramp upward once roots establish. Increase one variable at a time, typically height first (or small PPFD steps) and keep photoperiod steady during the initial rooting window. This avoids creating both high light stress and high transpiration demand at once.
If algae or mold appears, is it always the light’s fault?
Not always. Algae on wet soil usually means light is hitting the moist surface, so shielding the medium surface and letting the top dry between waterings helps. Mold is more often a humidity and airflow problem, and adding gentle airflow while reducing how often you keep the medium saturated typically resolves it.
My plants are healthy but not flowering, what should I check first?
Start with photoperiod and any stray light during the dark period. Then verify whether your species is short-day, long-day, or day-neutral, and adjust the timer schedule accordingly. Nutrients and temperature matter too, but photoperiod mistakes are the most common root cause indoors.
Next Article
How to Set Up Grow Lights: Installation, Placement, Setup
Step-by-step how to set up, install, and place grow lights for houseplants or seedlings, including LED mounting, safety,