You can grow almost anything indoors with an LED grow light if you get three things right: choosing a light that matches your plants, placing it at the correct height, and running it on a schedule that fits the growth stage. Get those three things dialed in and your plants will thrive. Miss any one of them and you will be scratching your head wondering why your seedlings are stretching toward the ceiling or your tomato plant refuses to flower. This guide walks you through every decision, with real numbers, so you can start growing today and fix problems before they cost you a harvest.
How to Grow With Grow Lights: LED Setup, Timing, and Fixes

Marcus Tillman
14 Apr 2026
Choosing the right LED grow light for your plants
Not all grow lights are the same, and the biggest mistake beginners make is buying a light based on wattage claims alone. The number that actually matters is PPFD (photosynthetic photon flux density), measured in micromoles per square meter per second (µmol m⁻² s⁻¹). That is the amount of usable light hitting your plant canopy, and it is the only number that tells you whether your light is strong enough for what you want to grow.
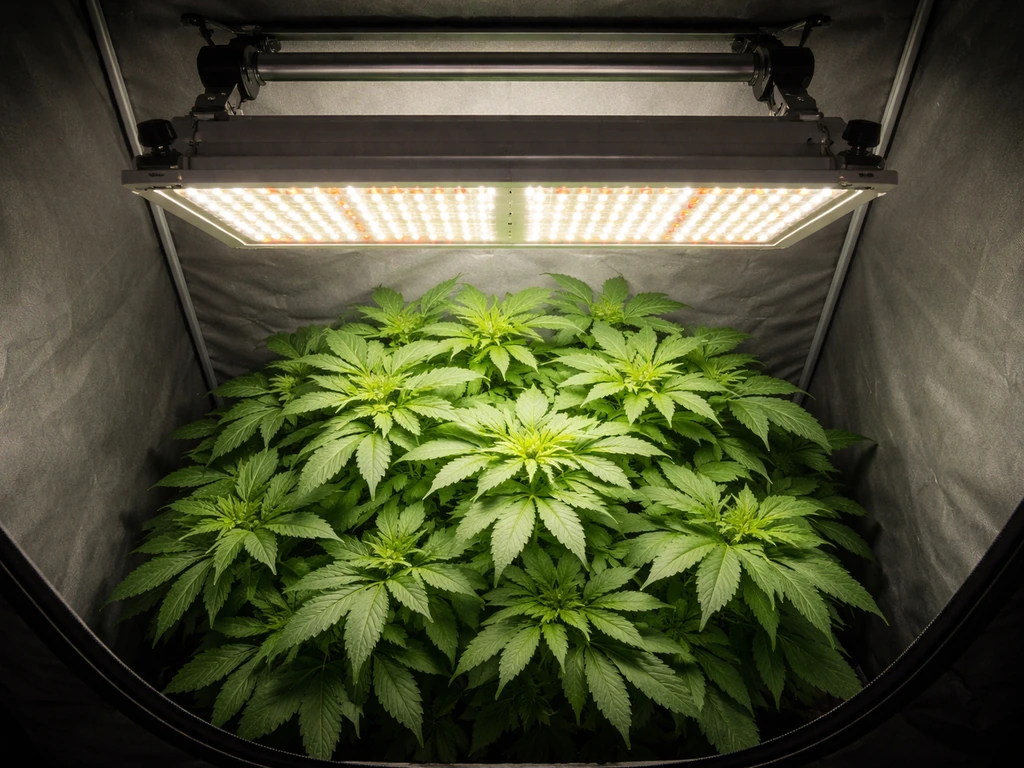
Before you buy anything, match the light to your plants and growth stage. Seedlings and clones need very little light, under 100 µmol m⁻² s⁻¹ PPFD. Plants in vegetative growth need 100 to 250 µmol m⁻² s⁻¹ for leafy greens and herbs, or up to 400 µmol m⁻² s⁻¹ for heavier feeders like tomatoes and peppers. Flowering and fruiting crops need 400 to 1,200 µmol m⁻² s⁻¹ depending on the crop. A light that can cover those ranges with adjustable output is the most versatile option for home growers.
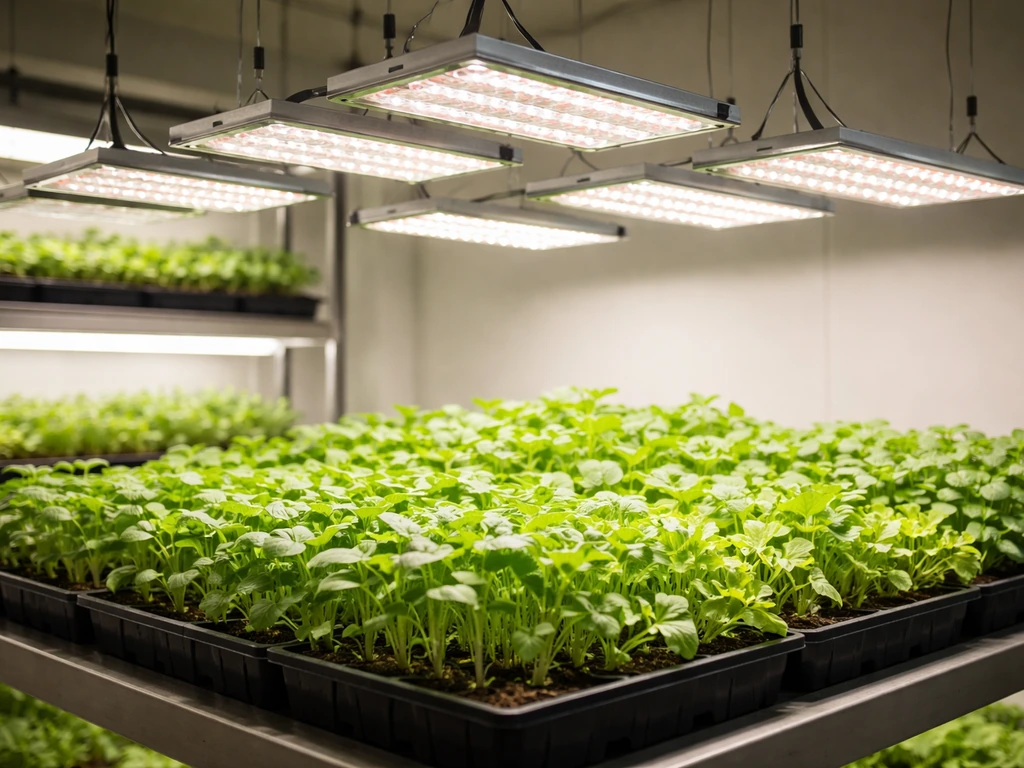
For most home setups, full-spectrum LED panels or bar lights are the best starting point. They run cool, use less electricity than HID or fluorescent alternatives, and their spectra are designed to support both vegetative growth and flowering. If you want to understand how grow lights work at a deeper level before buying, it is worth reading up on the underlying physics so you know what the spec sheet is actually telling you.
Coverage area is the other critical spec. Manufacturers publish coverage footprints, but these are often based on lower intensity levels. A bar fixture might cover a 2x4 foot area for leafy greens at adequate PPFD, but that same fixture may only cover 2x2 feet for a fruiting crop that needs higher intensity. Always check the PPFD map in the product documentation, not just the headline coverage claim. If the manufacturer does not publish a PPFD map, that is a red flag.
| Plant Type / Stage | Target PPFD (µmol m⁻² s⁻¹) | Example Crops |
|---|---|---|
| Seedling / Clone | Under 100 | Any seedling, rooting cuttings |
| Vegetative (low demand) | 100–250 | Lettuce, herbs, leafy greens |
| Vegetative (high demand) | 250–400 | Tomatoes, peppers, cannabis |
| Flowering / Fruiting | 400–1,200 | Tomatoes, strawberries, peppers |
Setting up grow lights: placement, height, and angle
Where you hang your light has a bigger impact on plant health than almost any other decision. Too high and the light spreads too thin, leaving plants starved for photons. Too low and you risk bleaching leaves, heat stress, or burning tips. Setting up grow lights correctly from day one saves you weeks of troubleshooting later.
As a starting point, most LED panels perform well at 18 to 24 inches above the canopy for vegetative growth and 12 to 18 inches for flowering, but always check your specific fixture's PPFD chart at different heights. The general rule: the closer the light, the more intense but the smaller the coverage footprint. Moving the light up increases coverage area but reduces intensity. You are always balancing those two factors.
For detailed guidance on how to position grow lights over different plant arrangements, including multiple plants in a row versus a single pot, it helps to think about the beam angle of your fixture. Narrow-beam lights concentrate intensity in a small spot below the fixture. Wide-beam lights spread light further but at lower intensity at any given point. A uniformity goal of no more than 20% PPFD variation across your canopy is a practical target to aim for when positioning multiple fixtures or adjusting a single one.
Angle matters less than height for most fixed-panel LED setups, but if you are using bar lights or adjustable fixtures, tilting bars slightly inward over the edges of your grow area can improve canopy coverage without reducing center intensity. For a single plant in a pot, keep the light centered directly overhead. For a row of plants or a shelf setup, offset lights slightly toward the edges so corner plants receive adequate intensity.
A practical tip: if you have a lux meter (a cheap smartphone app often works), measure the light at canopy level at several points across your grow area before you plant anything. You can then use a conversion table to translate lux into an approximate PPFD. Note that this conversion is spectrum-dependent, so it is an estimate rather than a precise reading, but it gets you close enough to verify your setup makes sense before committing your plants to it.
Understanding light intensity and coverage (foot-candles/PPFD)
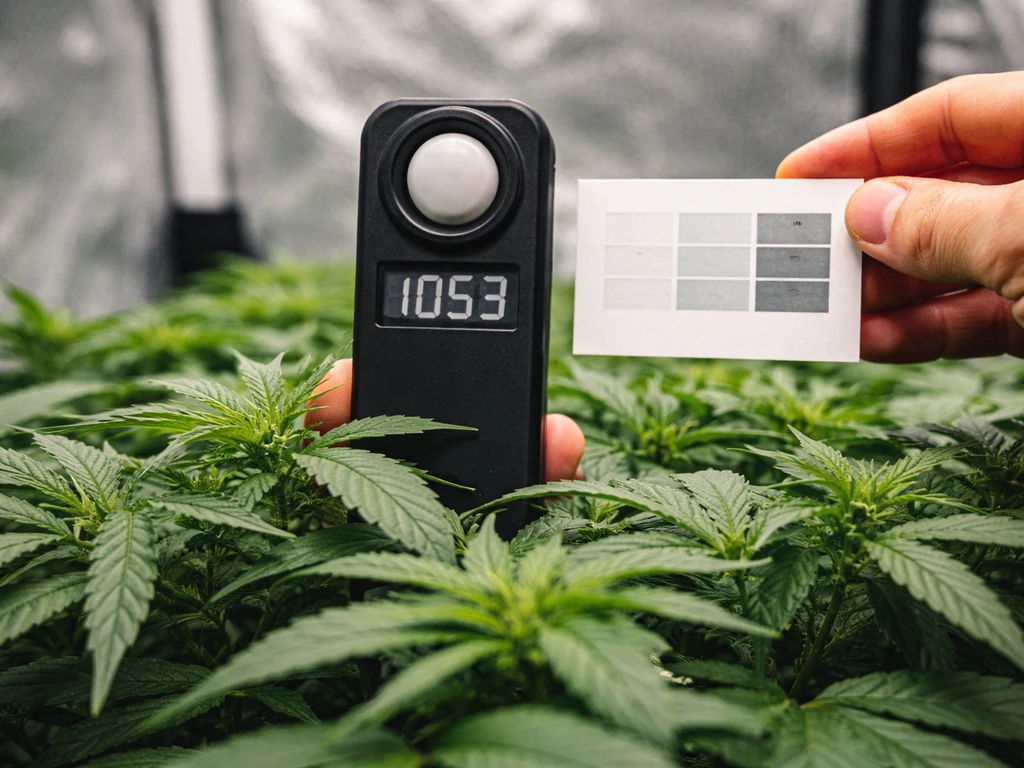
PPFD is the right unit for plant lighting, but many affordable meters and apps measure in lux or foot-candles instead. You can convert between them using a reference table, but be aware that the conversion factor depends on your light's spectrum. Lux-to-PPFD conversions are only an approximation and depend on the light spectrum and the sensor or fixture characteristics conversion factor depends on your light's spectrum. A broad-spectrum white LED and a purple blurple LED will give different PPFD values for the same lux reading. Use conversions as a rough guide, not an exact measurement.
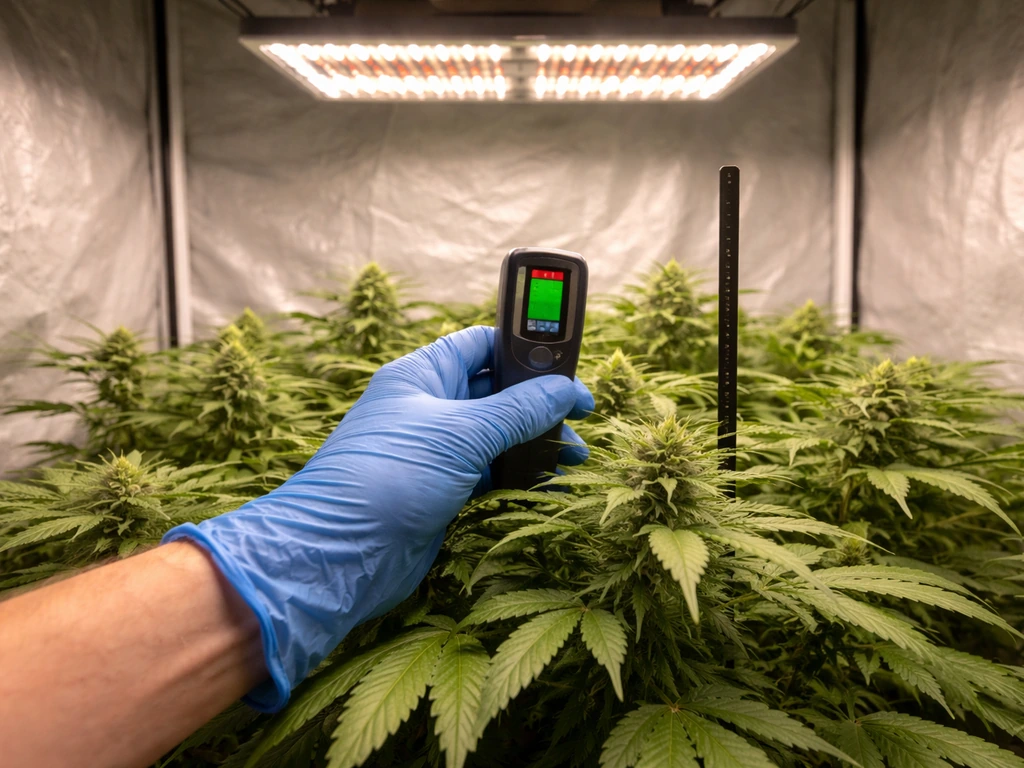
If you want precision, a dedicated PAR meter measures PPFD directly at canopy height. Some meters can even log DLI (daily light integral) across the whole day, which is the cumulative amount of light your plant receives over 24 hours. Virginia Tech’s introductory DLI guide describes daily light integral (DLI) as a plant-relevant metric based on integrating PPFD over the day blank" rel="noopener noreferrer">log DLI (daily light integral). DLI is calculated with the formula: DLI = 0.0036 × PPFD × light hours per day. So a plant receiving 200 µmol m⁻² s⁻¹ for 16 hours gets a DLI of roughly 11.5 mol m⁻² d⁻¹. Lettuce and leafy greens thrive at a DLI of 8 to 12, while fruiting crops want 20 to 30 or higher.
The practical reason DLI matters: you can hit the same DLI by running a dimmer light longer or a brighter light for fewer hours. This flexibility is useful when you need to control electricity costs, share a light between different growth stages, or match a schedule that works for your routine. Pepper seedlings, for example, do well at a PPFD of 150 to 350 µmol m⁻² s⁻¹ and a DLI of 8 to 18 mol m⁻² d⁻¹, which means you have real flexibility in how you deliver that light.
Coverage uniformity is just as important as average intensity. A light that delivers 300 µmol m⁻² s⁻¹ in the center but only 80 µmol m⁻² s⁻¹ at the edges will produce plants that grow unevenly. Check the PPFD map for minimum and maximum values across your footprint, not just the peak. If uniformity looks poor on paper, raise the fixture slightly or add a second light offset to fill the edges.
For growers who want to create bright indirect light with grow lights for shade-tolerant houseplants, the target PPFD is much lower, typically 50 to 150 µmol m⁻² s⁻¹, which means you can hang the light higher or run it at reduced power and still get good results without burning sensitive leaves.
Creating an effective schedule: duration and growth-stage timing
Light duration (photoperiod) is not just about giving plants enough light. For many crops, the length of the dark period controls whether a plant stays vegetative or triggers flowering. Getting this wrong can lock a plant in vegetative growth indefinitely or force it into flowering before it has enough size to produce a meaningful yield.
Here are the standard photoperiods to use as your starting point by growth stage:
| Stage | Light Hours / Day | Dark Hours / Day | Notes |
|---|---|---|---|
| Seedlings / Clones | 16–18 hours | 6–8 hours | Low PPFD, consistent cycle |
| Vegetative (most crops) | 16–18 hours | 6–8 hours | Maintain until desired plant size |
| Flowering / Fruiting (photoperiod crops) | 12 hours | 12 hours | Triggers flower initiation |
| Leafy greens / Herbs (day-neutral) | 14–16 hours | 8–10 hours | No strict requirement |
| Houseplants (supplemental) | 12–14 hours | 10–12 hours | Match natural daylight pattern |
A plug-in outlet timer is the single most useful accessory you can add to a grow light setup. Set it once and forget it. Consistency matters: plants that receive their light and dark periods at the same time each day respond better than those on irregular schedules. Even a few hours of interruption to the dark period can disrupt flowering in photoperiod-sensitive crops like cannabis or certain tomato varieties.
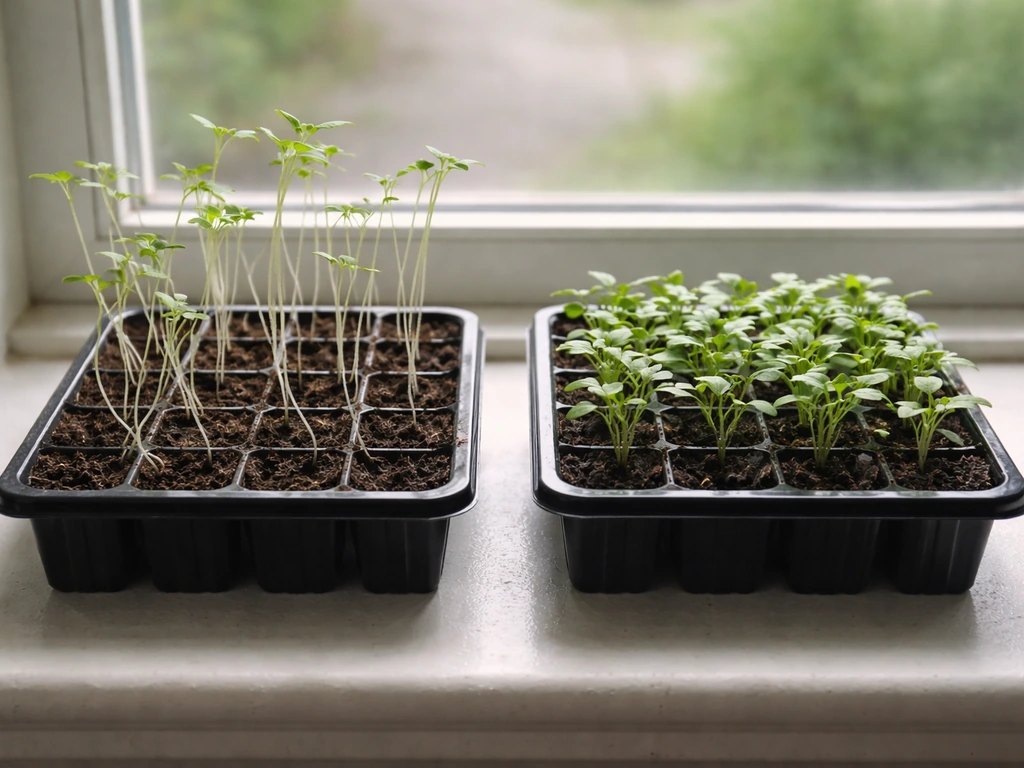
For seedlings specifically, start at 16 hours of light per day at low intensity (under 100 µmol m⁻² s⁻¹) and gradually increase intensity as the seedling develops its first true leaves. Jumping straight to high intensity on fragile seedlings is one of the fastest ways to stunt early growth. Think of it like easing someone into a bright room after sitting in the dark.
If you are managing multiple plants at different stages and want to expand your operation, understanding how to daisy chain grow lights can help you add fixtures without adding extra power outlets, which keeps your setup clean and easy to control with a single timer.
Remember that DLI and photoperiod work together. If you increase intensity (PPFD) without shortening the light period, you may push DLI beyond what your plant needs, which can cause stress even without visible burning. Conversely, if you extend the photoperiod to compensate for a dim light, make sure you are not accidentally disrupting the flowering trigger for photoperiod-sensitive crops. Always adjust both variables together, not just one at a time.
Troubleshooting common problems (stretching, yellowing, weak growth)
Most grow light problems fall into a small number of categories, and once you know the root cause of each, fixing them is straightforward. If your plants are struggling, run through this list before assuming you have a more complicated issue.
Leggy, stretching, or spindly growth
This is almost always an intensity problem. When a seedling reaches upward and produces long, weak stems between leaf nodes (called etiolation), it is telling you the light is too dim or too far away. The plant is stretching toward what it perceives as a better light source. The fix: lower the light or increase the intensity setting on a dimmable fixture. Measure PPFD at the canopy. If it is under 100 µmol m⁻² s⁻¹ for seedlings or under 200 µmol m⁻² s⁻¹ for vegetative plants, increase it. Spectrum can also play a role since lights with low blue output can push shade-avoidance behavior, so check that your fixture is a true full-spectrum design rather than a single-color grow light.
Yellowing leaves (chlorosis)
Yellowing has several possible causes, but lighting is frequently involved. If the yellowing starts at the top of the plant on the newest leaves and there is some bleaching or white patches mixed in, excessive light intensity is likely the culprit. Move the light up 4 to 6 inches and reassess over a few days. If the yellowing is on older lower leaves first, that pattern points more toward nutrient deficiency (especially nitrogen) or overwatering, not the light itself. Check your medium and feeding schedule before adjusting the light in that case. Either way, ruling out incorrect intensity early saves time.
Slow or weak overall growth
If your plant is green but just not growing at a reasonable pace, the most likely culprit is insufficient DLI. Calculate what your plant is actually receiving: multiply your PPFD reading at canopy height by 0.0036 and then by your daily light hours. Compare that to the DLI target for your crop. Leafy greens want a DLI of at least 8 to 12, fruiting crops want 20 or more. If you are well below target, either increase light intensity, extend the photoperiod (if the crop allows it), or add a second fixture.
Uneven growth across the canopy
If plants near the center of your grow area are doing well but edge plants are stunted, you have a coverage uniformity problem. Either the fixture's footprint is too small for your grow area or the light is hung too high, spreading intensity too thin everywhere. Try lowering the light or adding a second fixture offset to cover the edges. Rotating plants weekly is a simple short-term fix while you work on the underlying coverage issue.
Heat stress
LEDs run much cooler than HID lights, but fixtures hung too close to small plants can still cause heat stress. Hold your hand at canopy height: if it feels uncomfortably warm after 30 seconds, the light is too close. Leaf curl upward (taco-ing) and dry, crispy tips combined with bleaching are the classic signs. Raise the light 4 to 6 inches and see if new growth looks healthier within a week.
If you want a broader reference for diagnosing what is going wrong in your specific setup, a practical approach to growing plants with a grow light covers the full context of plant response to different lighting conditions, which helps you read your plants more accurately.
Best practices for indoor grow light operation and maintenance
A grow light that is installed and then never touched again will gradually underperform. LED efficiency does degrade over time (a process called lumen depreciation), and dirty lenses block light before it ever reaches your plants. Staying on top of a few simple habits keeps your system running at full capacity.
- Clean the lens and reflector surface with a soft, dry or lightly damp cloth every four to six weeks. Dust accumulation on optics can reduce light output noticeably over a growing season.
- Check the cooling fins or fan vents on your fixture monthly. Blocked airflow causes heat buildup inside the driver, which accelerates LED degradation. Even passive-cooled fixtures need airflow around the heat sink.
- Inspect hanging hardware (cables, hooks, ratchet straps) every few months. A fixture that has shifted in height changes your entire intensity and coverage profile without you realizing it.
- Re-measure PPFD at canopy height whenever you change plant size, move plants, or adjust the fixture. Do not assume the setup from last month still delivers the right intensity now that your plants have grown 6 inches taller.
- Keep a simple grow log: note your PPFD readings, light height, photoperiod setting, and any changes you make. When something goes wrong, you will be able to trace back exactly what changed.
- Replace fixtures that show significant dimming or color shift. LEDs typically maintain output for 50,000 hours, but cheaper fixtures can degrade much faster. If your plants started struggling and nothing else changed, measure output and compare it to when the fixture was new.
Use a mechanical or digital outlet timer to automate your photoperiod. Manual on/off switching introduces inconsistency that stresses plants and, for flowering crops, can reset or delay flower initiation. A basic plug-in timer costs a few dollars and is one of the highest-return purchases in a grow light setup.
If you are running multiple lights over a larger grow area, think about how they interact. Lights that overlap in coverage can create hot spots with excessive intensity in the center while the edges remain underpowered. Stagger bar lights or adjust panel spacing so the PPFD map across your canopy stays within that 20% uniformity target mentioned earlier.
Finally, revisit your setup every time your plants move into a new growth stage. The intensity and photoperiod that worked perfectly for vegetative growth will not be appropriate for flowering, and the height that was right for seedlings needs adjustment as plants mature. Growing with LEDs is not a one-time setup. It is an ongoing calibration, and the growers who get the best results are the ones who stay curious and keep measuring.
Your next steps to start growing today
Here is a concrete action plan to get started or fix what is not working in your current setup:
- Identify your plant type and current growth stage, then find the target PPFD range from the table above. That number tells you what your light needs to deliver at canopy height.
- Check your fixture's PPFD map at different hanging heights. If the manufacturer does not publish one, look up the model on third-party review sites or measure it yourself with a lux meter and a conversion table.
- Hang the light at the height that delivers your target PPFD at canopy center, then check the edges for uniformity. Adjust height or add a second fixture if the edge readings drop more than 20% below center.
- Set your timer to the correct photoperiod for your growth stage. For most vegetative plants, start at 16 hours on, 8 off. For flowering crops, switch to 12/12 when the plant reaches your target size.
- Calculate your DLI (0.0036 × PPFD × daily light hours) and compare it to the target for your crop. Adjust intensity or photoperiod if you are significantly above or below the target range.
- Clean your fixture lenses, check hanging hardware, and log your current settings so you have a baseline to troubleshoot against in the future.
- Monitor plants daily for the first two weeks and look for the warning signs covered above: stretching means more intensity, yellowing at the top means less, slow growth means more DLI.
Growing under lights successfully is genuinely learnable in a few weeks of hands-on practice. The plants give you feedback constantly. Once you know how to read that feedback and you understand the handful of variables that control it (intensity, duration, height, and uniformity), you have everything you need to grow just about anything indoors year-round.
FAQ
What should I do if my LED grow light listing only shows “coverage” and wattage, but no PPFD map?
If your light doesn’t publish PPFD maps, start by choosing a fixture with adjustable output and a known PPFD or at least tested PAR/PPFD data. Then verify with a PAR meter at canopy height (best) or use a lux/app conversion only as a sanity check. Without at least one verification method, you can easily end up with the right coverage claim but the wrong intensity where it matters.
How do I increase light as my plants grow without stressing them?
LEDs usually need their intensity ramped as plants grow, not just their clock. As a practical approach, increase PPFD in small steps over 3 to 7 days and re-check canopy response, especially for seedlings. If you have dimming, pair each increase with the same photoperiod until you confirm DLI is on target, then adjust duration later.
If my seedlings get enough hours but still grow slowly, what’s the first thing to check?
For seedlings, don’t judge by “time under the light” alone. Even at a longer photoperiod, very low PPFD can keep DLI below target and cause slow growth. Calculate DLI from your canopy PPFD and light hours, then compare to the crop. If you are below target, first raise intensity or add coverage, only then consider longer hours (and only if the crop tolerates the photoperiod).
Can too much light cause stress even when plants aren’t bleaching or burning?
Yes, but only if you understand what you’re trying to optimize. Too much DLI can cause stress even without obvious bleaching, so the fix is usually to reduce either PPFD or photoperiod to bring DLI back into range for your crop. If you are unsure which lever to pull, reduce intensity by a small amount and keep the schedule stable for several days, then re-measure.
How can I tell whether my issue is spectrum, not intensity or height?
If you suspect the “wrong spectrum” problem, look for evidence in plant response, not just the color of the LED. A true full-spectrum fixture typically includes enough blue to avoid chronic stretch, while single-color lights can bias growth patterns. If you see persistent shade-avoidance stretching despite adequate PPFD, try swapping fixtures or increasing blue content (for adjustable systems) and verify PPFD at canopy after the change.
Do I need to rotate plants, or should I fix uniformity another way?
Weekly or biweekly rotation helps, but it does not fix poor uniformity caused by the fixture footprint or mounting height. Use rotation as a short-term patch, then correct the system by adding a second offset fixture, lowering or raising height based on the PPFD map, and targeting similar minimum PPFD across the canopy (not just the center).
Is a smartphone lux meter good enough to set up my grow lights?
Avoid “lux-to-PPFD” guessing for decisions where precision matters, like flowering triggers or high-intensity fruiting. Use lux/app conversions only to check that you are in the right ballpark, then confirm with a PAR meter or an available PPFD chart. Spectrum differences can shift the conversion enough to lead you to under- or over-shoot DLI.
How strict do I need to be with the timer, and can I turn lights on and off manually when needed?
Not always. Some crops prefer continuous-ish stable lighting, but the key is avoiding interruptions that break the dark period. Use a mechanical or digital outlet timer, set it once, and avoid manual switching. If you must troubleshoot, pause changes during the same portion of the day and do not repeatedly interrupt the dark window for photoperiod-sensitive crops.
Can I experiment with photoperiods to find my best schedule, or will that mess up flowering?
It depends on crop and stage, but the safest way to test is gradual. If you want to change photoperiod, adjust in increments over several days and keep PPFD constant while you evaluate growth and any flowering response. For photoperiod-sensitive plants, changing the dark period length abruptly can delay or prematurely trigger flowering, so keep adjustments predictable.
What should I watch for when daisy chaining multiple grow lights together?
Daisy-chaining can work, but the limiting factor is not just outlets, it is total power draw and whether the fixtures share the same controller/timer correctly. Ensure each fixture is compatible with the same dimming or timing approach, and confirm your timer’s rated load before connecting multiple lights. Also consider that overlapping fixtures can create center hot spots, so revisit uniformity after expanding.
How do I know if my light is too close from a heat-stress standpoint, and what should I do?
Do a quick safety check at installation and after changes: verify the manufacturer’s recommended minimum clearance, then use the “hand test” at canopy height for heat stress. Also watch for electrical limits on dimmers and extension cords. If leaves taco upward and tips crisp after you move the light closer, raise it 4 to 6 inches and reassess new growth.
How should I set PPFD for houseplants that want bright indirect light?
For shade-tolerant houseplants, targeting PPFD is the point. Don’t assume the same “seedling” setup applies indoors near windows. Start in the 50 to 150 µmol m⁻² s⁻¹ range, hang higher or run lower power, and increase slowly only if plants show consistently healthy new growth without pale, washed, or scorched leaves.
When troubleshooting, how do I decide whether to adjust intensity (PPFD) or duration (hours) first?
Yes, you can use DLI to decide what to change. If DLI is low, increase PPFD (lowering light or increasing output) or extend hours if the crop tolerates it. If DLI is already in range but plants look uneven, focus on canopy uniformity, by correcting mounting height or adding an offset fixture. DLI targets give you a measurable reason to change intensity or duration.
Next Article
How to Position Grow Lights: LED Height, Angle, Spacing
Step-by-step rules to position LED grow lights: mount height, angle, spacing, coverage, and troubleshooting for indoor p