Setting up a grow room or grow tent with LED lights comes down to six things done in the right order: pick a light that actually covers your space, hang it at the correct height, wire it to a timer, dial the intensity for your plant's current growth stage, move enough air to keep temperatures and humidity in check, and then watch your plants closely for the first week and adjust. That's the whole system. Everything below breaks each step into specific numbers and actions so you can go from an empty space to a running grow today. If you're wondering how to get grow lights once human, start by choosing coverage and PPFD that match your canopy, then set the right hanging height and schedule.
How to Set Up a Grow Room With LED Lights Step by Step

Marcus Tillman
14 May 2026
Choose the right LED grow lights for your tent or room
Before you buy anything, match the light's advertised coverage area to your actual canopy footprint, not the tent's floor area. A 2x2 ft (0.6x0.6 m) canopy needs roughly 200–250 watts of quality LED power. A 4x4 ft (1.2x1.2 m) canopy needs 400–600 watts. A 5x5 ft or larger room should be treated as multiple 4x4 zones. These numbers assume a full-spectrum LED from a reputable brand running at actual (not 'equivalent') wattage. Discount blurple panels with inflated wattage claims will underperform even if the label says 1000W.
Look for lights that list PPFD (micromoles per square meter per second, written µmol/m²/s) in their spec sheets, not just lumens. If you want to become a grow light tester, learning to read PPFD specs and compare them with your own measurements is a key first step. Lumens measure brightness for human eyes, not photosynthetic output. A good full-spectrum LED should hit roughly 600–900 µmol/m²/s at the center of its coverage footprint at a normal hanging height. For flowering crops that need high light, you want lights capable of pushing 800–1000+ µmol/m²/s at canopy level. For seedlings and houseplants, 200–400 µmol/m²/s is plenty.
Dimming capability is genuinely important, not a luxury. Lights with a built-in dimming knob (like the Mars Hydro TSL 2000 and similar bar-style fixtures) let you run at 25–30% during seedling stages and ramp up to 100% for flowering without buying separate equipment. If you go with a light that uses 0-10V dimming through an external driver, make sure your timer or controller is compatible with that dimming protocol, as incompatible pairings can cause flicker and unpredictable output changes. Check before you buy.
For spectrum, a modern white-dominant full-spectrum LED with a warm white or mixed 3000K–4000K plus enhanced red (around 660 nm) will handle every stage from seedling through flowering. You don't need separate veg and bloom lights. A single quality fixture with dimming control covers the whole grow. If you're specifically targeting fruiting or flowering plants, look for fixtures that include a strong red channel at roughly 660 nm, which research has shown to be particularly effective for reproductive growth.
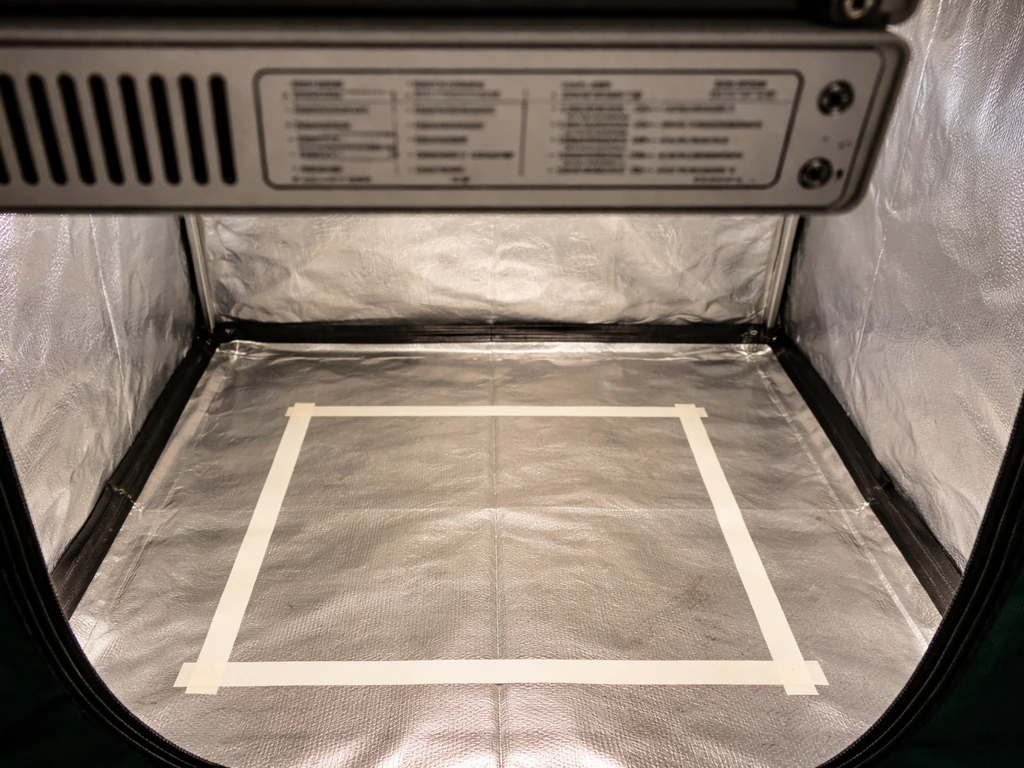
Plan your layout: tent vs grow room spacing and coverage
A grow tent is the easier starting point. Sizes run from 2x2 ft (perfect for 1–2 plants or a seedling tray) up to 4x8 ft and beyond. The tent's reflective interior bounces light back onto the canopy and helps even out coverage, which is a real advantage over a bare room. If you're using a dedicated room or closet instead, paint the walls flat white or hang Mylar sheeting to get similar reflectivity. Dark walls can waste 30–40% of your light output.
For a single light in a tent, center it over the canopy. Simple. For a grow room with multiple lights, space them evenly so their coverage footprints overlap by 10–15% at the edges. This prevents hot spots in the center and dark edges at the perimeter. Most bar-style LED panels have a stated coverage area (for example, a 240W bar light might cover 4x4 ft at flowering intensity). Take that coverage number seriously and don't try to stretch one light over a larger area just to save money. You'll get uneven growth.
Before you finalize your layout, measure your vertical clearance. A 5 ft tall tent with tall plants plus the light and hanging hardware can get tight. Leave at least 12–18 inches of vertical adjustment room above where you expect the canopy to be at peak height. Running out of height is one of the most common beginner mistakes and there's no easy fix once plants are tall.
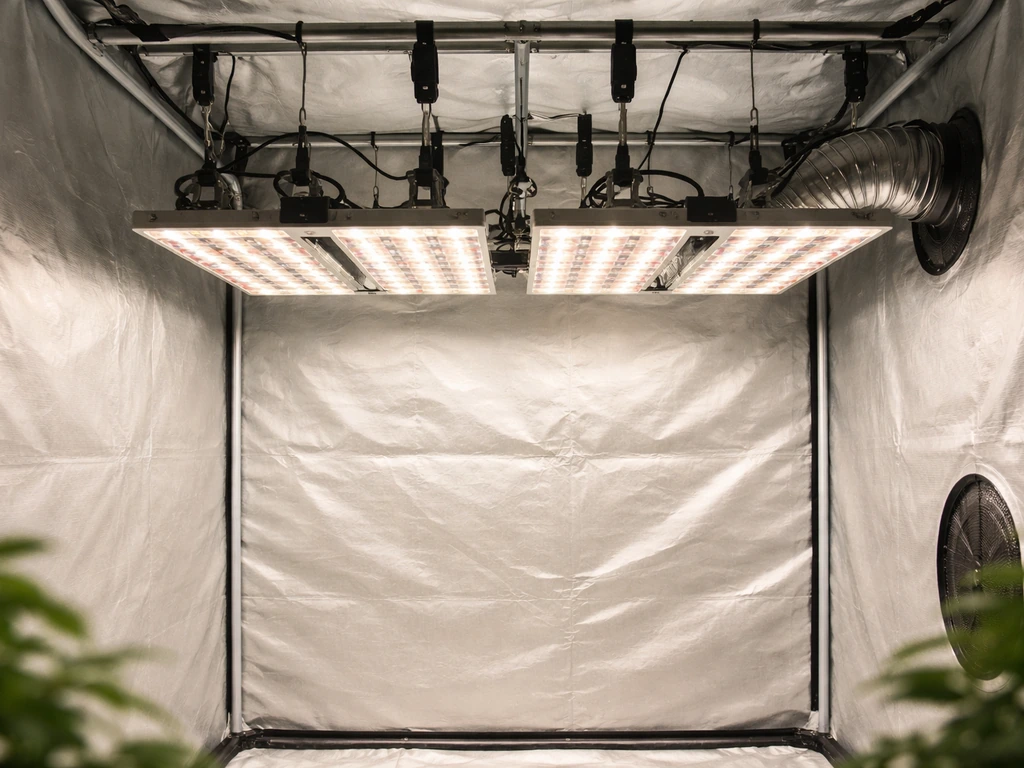
Mount and position the LEDs: height, angle, and overlap

Hanging height controls both intensity and coverage area. The closer the light, the higher the intensity and the smaller the coverage footprint. Pull it further away and you cover more area but with less intensity per square foot. There's no single correct height for every light, but here are practical starting points: seedlings do well with the light 24–36 inches above the canopy, vegetative plants at 18–24 inches, and flowering plants at 12–18 inches. Confirm with your specific fixture's PPFD chart if one is available.
The seedling distance especially matters. PPFD drops sharply with distance, so a light that delivers 800 µmol/m²/s at 18 inches might only deliver 300–400 µmol/m²/s at 30 inches. University research has shown that just moving a light from 8 inches to 20 inches above seedlings requires a significantly longer daily photoperiod to deliver the same total daily light dose (DLI). In practice this means: if your seedlings look pale and stretched, move the light closer before assuming you need a longer light schedule.
Use adjustable rope ratchets (the standard hanging hardware that comes with most lights). They let you raise and lower the fixture in seconds without tools, which you'll do regularly throughout a grow. Clip the ratchets onto the crossbars or hooks in your tent frame, not onto tent fabric. Make sure the light hangs level, not tilted, so light distribution is even across the canopy.
If you're running two or more lights side by side, aim for about 10–15% overlap in their coverage zones. Think of each light as a soft circle of intensity: the center is brightest, the edges taper off. Overlapping those tapered edges fills in the coverage gaps and prevents stripes of low light between fixtures. You can verify this with a cheap PPFD meter app or a dedicated quantum flux meter if you want to be precise.
Set up power, timers, and light schedules (photoperiod)
Every grow light needs to be on a timer. Manually switching lights on and off is unreliable, and consistent photoperiod (the number of hours of light per day) is critical for plant development, especially for any plants that flower based on day length. A basic mechanical outlet timer works fine, but a digital programmable timer gives you more precision. Just check that the timer's load rating exceeds the wattage of your light or lights, and confirm it's compatible with LED loads, since some older mechanical timers rated for incandescent fixtures can behave poorly with LED drivers.
For photoperiod schedules, the standard starting points are: 18 hours on / 6 hours off for seedlings and vegetative growth, and 12 hours on / 12 hours off to trigger and maintain flowering in photoperiod-sensitive plants. Seedlings that are just germinated can actually run 20 hours on / 4 hours off without issues. Autoflowering varieties don't need a photoperiod change to flower and can stay on an 18/6 or even 20/4 schedule throughout their life. Houseplants and herbs generally do well on 14–16 hours of light per day.
The relationship between intensity and photoperiod is important to understand. Daily Light Integral (DLI) is the total amount of photosynthetically active light delivered over a full day, calculated by multiplying your average PPFD by the number of seconds in a day and dividing by 1,000,000. Practically speaking: if you can't increase intensity, you can increase DLI by adding hours, and vice versa. A seedling needs roughly 6–12 mol/m²/day DLI to grow well. A vegetative cannabis or tomato plant needs 20–30 mol/m²/day. If you want a weed-specific walkthrough using LED lights, see our guide on how to grow weed with LED. Flowering high-light plants want 30–45 mol/m²/day. Use these as targets when dialing in your setup.
For wiring, keep it simple and safe. Run one power strip or outlet per tent, use only indoor-rated extension cords if needed, and keep all connections off the floor to avoid water damage. Don't daisy-chain multiple power strips. If you're running 400 watts or more of lights plus fans and other equipment, make sure your circuit can handle the load. A standard 15-amp circuit handles about 1,800 watts safely, so you have margin, but don't overload a single outlet.
Ventilation and basic climate targets to prevent heat and stress
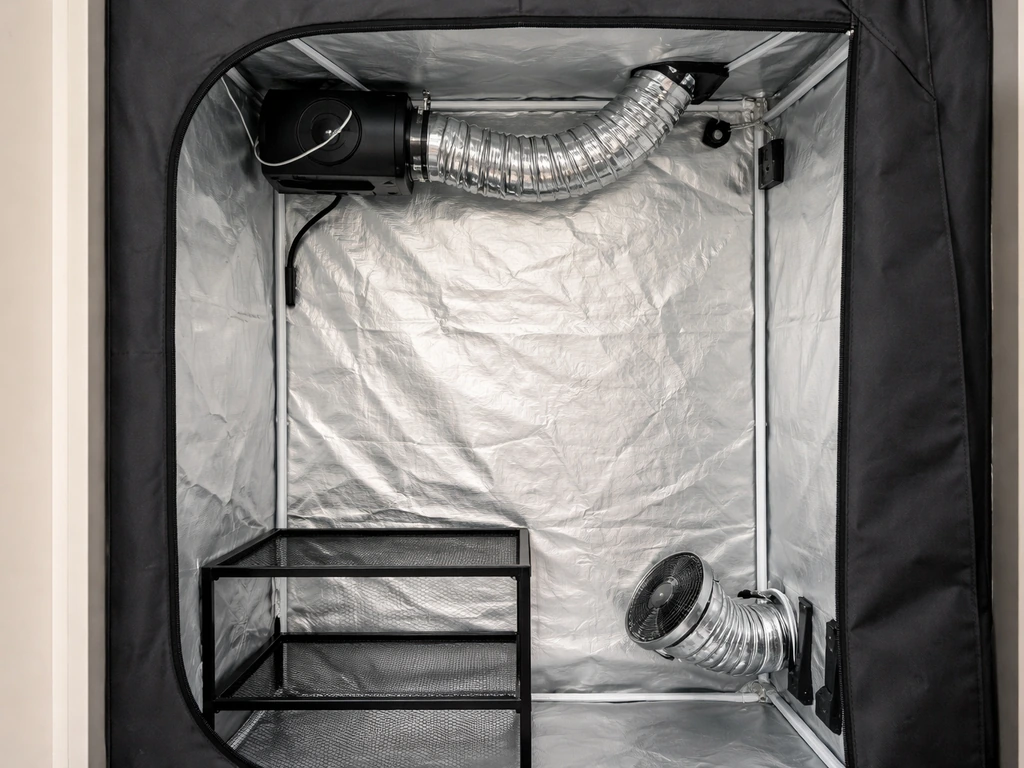
LEDs run cooler than HID lights, but they still add heat to an enclosed space. Without active ventilation, temperatures inside a tent can climb 10–20°F above ambient room temperature. Your goal is to exchange the air inside the tent at least 20–30 times per hour. For a typical 4x4x6.5 ft grow tent (roughly 105 cubic feet), that means you need an inline fan moving 35–50 CFM of actual net airflow at the tent's air volume exchange rate. The catch: a carbon filter and ducting reduce a fan's real-world CFM significantly compared to its rated spec, so size up. A fan rated 190–250 CFM with a matched 4- or 6-inch carbon filter will realistically deliver 50–80 CFM after losses.
Set up the exhaust fan to pull air out through the top of the tent (heat rises), and bring in fresh air through a lower passive intake vent or a small secondary fan. A slight negative pressure inside the tent is what you want: the tent walls should bow slightly inward when the exhaust fan is running. This means all the air leaving the tent passes through your filter, controlling odor and preventing stale air pockets.
Here are the temperature and humidity targets to aim for at each stage:
| Growth Stage | Temperature (Day) | Humidity (RH) |
|---|---|---|
| Seedlings / Clones | 72–78°F (22–26°C) | 65–75% |
| Vegetative | 72–80°F (22–27°C) | 55–70% |
| Flowering (early) | 68–78°F (20–26°C) | 45–55% |
| Flowering (late) | 65–75°F (18–24°C) | 35–45% |
Night temperatures can run 10–15°F cooler than daytime without causing problems for most plants. In fact, a moderate day-night temperature swing is normal and healthy. What you want to avoid is temperatures above 85°F at the canopy, which causes heat stress and reduces photosynthetic efficiency, and humidity above 70% during mid-to-late flowering, which creates mold risk. A basic digital thermometer/hygrometer combo (under $15) placed at canopy height gives you the readings you actually need.
Dial in intensity and adjust for seedlings vs vegetative vs flowering
Start every new grow at low intensity. Seedlings that emerge into full-blast lighting will bleach, stunt, and suffer light stress even from a gentle LED. Start at roughly 100–200 µmol/m²/s for the first 1–2 weeks. For a quick baseline, follow a staged light schedule and intensity targets for seedlings, vegetative growth, and flowering 100–200 µmol/m²/s. That's usually 20–30% dimmer output on a dimmable fixture, or the light hung at maximum height. As the first true leaves develop and the plant looks healthy and green, step up intensity gradually over 7–10 days.
- Week 1–2 (seedlings): 100–200 µmol/m²/s, light at 30–36 inches above canopy, dimmer at 25–40%
- Week 3–5 (early veg): 300–500 µmol/m²/s, light at 24–30 inches, dimmer at 50–60%
- Week 6+ (full veg): 500–700 µmol/m²/s, light at 18–24 inches, dimmer at 70–85%
- Flowering: 700–1000 µmol/m²/s, light at 12–18 inches, dimmer at 85–100%
These numbers assume a decent quality full-spectrum LED. If you're using regular LED bulbs rather than purpose-built grow lights, the spectrum and efficiency are different enough that the same µmol/m²/s comparison doesn't really apply the same way. If you are using normal LED bulbs instead of a purpose-built grow light, you will need to adjust your target intensity and placement because the usable light spectrum and efficiency can be different regular LED bulbs. For that situation specifically, you'd approach things differently than with a proper grow panel.
If you don't have a light meter, use DLI math as a cross-check. Multiply your estimated PPFD (from the fixture's spec sheet at your hang height) by 0.0864 to get the DLI per hour of light. Multiply that by your daily hours of light to get your total DLI. Compare it against the targets: seedlings want 6–12 mol/m²/day, veg plants 20–30, flowering plants 30–45. If your DLI is below target, either move the light closer, increase the dimmer, or add hours. This is the most practical way to validate your setup without expensive equipment.
Troubleshooting common setup problems and quick fixes
Most early problems fall into a handful of categories. Here's how to identify and fix them quickly.
Seedlings stretching tall and thin (etiolation)
This means the plants aren't getting enough light. Either the light is too far away, the intensity is too low, or both. Move the light 4–6 inches closer first. If the stretching continues, increase the dimmer output by 10–15%. Don't just add hours without also addressing intensity, because the plant needs a certain photon flux at the leaf, not just more time under weak light.
Leaf tips bleaching, curling up, or looking washed out
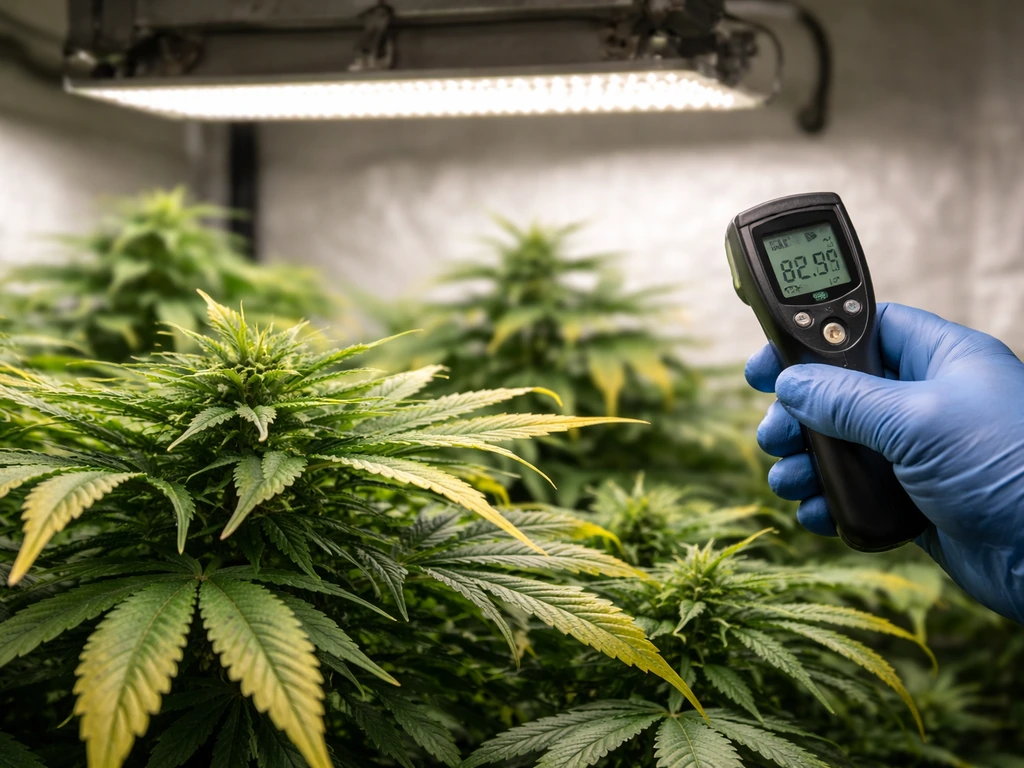
This is light stress or heat stress, or both. Raise the light 4–6 inches immediately. Check canopy temperature with your thermometer: if it's above 82–85°F, increase fan speed or improve air exchange. Also check if the dimmer is set too high for the plant's current stage. New growers often run seedlings at 80–100% intensity and wonder why the plants look burned.
Uneven growth or dark spots at the edges of the canopy
Your light isn't covering the whole canopy evenly. First, make sure the light is hanging level and centered. Second, check if the coverage footprint on the fixture's spec sheet matches your tent or canopy size. If you're trying to cover a 4x4 with a light rated for 3x3 at flowering intensity, the edges will be underlit. You either need to reduce your canopy size or add a second light.
Temperatures spiking above 85°F
Increase exhaust fan speed first. If you're at max fan speed and still over temperature, check whether your intake is restricted (blocked vent socks, pinched ducting). Make sure the room the tent sits in isn't itself overheated, as the tent can only cool down to near ambient room temperature with passive intake. A small oscillating fan inside the tent to move air across the canopy helps prevent hot spots even when overall temps are acceptable.
Timer not switching the light on or off reliably
First, confirm the timer's load rating isn't being exceeded. Second, check whether the timer is rated for LED loads specifically. Some mechanical timers designed for incandescent or resistive loads can have trouble with LED drivers. If you're seeing flicker at the on or off edge, or the light stays partially on when the timer says off, replace the timer with a digital model rated for electronic/LED loads. This is a cheap fix ($15–25) that eliminates a frustrating and potentially plant-damaging problem.
Humidity stuck too high or too low
High humidity is the more dangerous problem. Increase exhaust fan speed, which pulls humid air out faster. A small dehumidifier placed near the intake can help in very humid environments. During seedling stage, if you have a humidity dome over seedling trays, make sure to crack it open a little more each day after germination to gradually acclimate seedlings to lower ambient humidity before removing the dome entirely. Low humidity (below 40%) mostly affects seedlings and clones; a small ultrasonic humidifier on a timer is the easy fix.
Your quick-start checklist
- Measure your grow space (length x width x height) and calculate cubic feet
- Select an LED fixture sized for your actual canopy footprint at the wattage guidelines above
- Confirm the light has a dimmer and is compatible with your planned timer
- Hang the light centered over the canopy using adjustable rope ratchets at the correct starting height for your stage
- Set your digital timer to the correct photoperiod for your plant stage (18/6 for veg, 12/12 for flowering)
- Install an inline exhaust fan and carbon filter sized for 20–30 air changes per hour (size up to account for filter/duct losses)
- Add a passive intake vent or small intake fan at the bottom of the tent
- Place a digital thermometer/hygrometer at canopy level
- Set the light dimmer to the appropriate level for the current growth stage
- Run the system for 24 hours before introducing plants, and confirm temperatures, humidity, and airflow are within target ranges
- Check plants daily for the first week and adjust height, intensity, or ventilation based on what you see
Once you've run this system through one full grow cycle, you'll have a much clearer sense of where your specific setup needs fine-tuning. The variables that matter most are light intensity at canopy level, temperature consistency, and stable photoperiod timing. Get those three right and the rest is adjustments at the margins. Most beginner problems trace back to one of those three things being off, and all three are fixable with the information and numbers in this guide. If you're looking to cut costs, you can also look for ways to get free or discounted LED grow lights, then still dial the intensity and photoperiod to match your plants how to get free led grow lights.
FAQ
How do I tell what light height to use if my fixture doesn’t have a PPFD chart?
Start with the practical distances from the article (seedlings 24–36 in, veg 18–24 in, flowering 12–18 in), then validate by checking plant response over 7 days. If seedlings stretch or leaves look pale, lower the light (or increase dimmer), if leaves show bleached tips, raise it (or dim down). If you can, borrow or rent a basic quantum meter for one measurement at canopy height, so you can anchor your height to an actual PPFD instead of guessing.
Can I use a smart plug or app timer instead of a dedicated timer?
Yes, but only if the plug is rated for the light’s total wattage and the LED driver behaves well with frequent switching. Avoid “power-saving” modes, schedules that shorten time on, and any device that cycles power rapidly. For flowering plants, prefer a timer that does not lose schedule during power outages, because missed or irregular photoperiod can disrupt flowering timing.
Do I need an oscillating fan inside the tent even if my exhaust is strong?
Usually yes, for leaf-level airflow. Exhaust controls heat and odor, but an internal circulation fan reduces microclimates across the canopy and helps prevent localized hot or humid pockets. Use gentle, indirect airflow that does not whip plants or dry leaves excessively, and place it so air moves across the canopy rather than only at the top of the tent.
What is the safest way to handle carbon filter losses and fan sizing if my tent is smaller than a 4x4?
Use the tent volume target from the article as your starting point, then apply a “real-world CFM loss” buffer. If the fan’s catalog rating is 1.5x to 2x your required net exchange rate, you are more likely to land in the 20–30 air exchanges per hour range even after carbon filter and ducting losses. For smaller tents, you may still need to reduce duct length and keep bends minimal to preserve real airflow.
How do I know if I should add a second light versus increasing dimmer and light time?
If the issue is canopy-edge darkness or uneven growth (weak perimeter plants while the center looks fine), adding coverage is usually the fix, not longer photoperiod. Increase dimmer and light hours only when the whole canopy is uniformly under-lit. Use your fixture’s stated coverage area and confirm overlap (10–15% between lights) if you are adding another fixture.
Is it okay to run seedlings on 20/4 or 24-hour schedules?
It can work for short germination or early seedling periods, but monitor color, leaf thickness, and stretching. If seedlings look pale, dry, or show tip burn, reduce intensity or shorten the day first, because too much DLI at the seedling stage can cause stress even if the light is “on longer.” A gradual ramp after germination is safer than jumping straight to the highest output.
How can I avoid mold if my humidity keeps spiking at night?
Plan around the day-night temperature drop. When lights turn off, both temperature and relative humidity can shift quickly, raising mold risk even if daytime humidity seems fine. Use your canopy hygrometer reading at night (not just midday), increase exhaust slightly during the dark cycle, and consider running a small extra dehumidification strategy near the tent if spikes persist. Keep humidity below the mid-to-late flowering danger zone the article calls out.
Why does my LED flicker or act weird when I use a mechanical timer?
LED drivers can be sensitive to timer behavior, especially if the timer is designed for incandescent loads or has inconsistent cutoff. Flicker at the transition points (on or off edges) and “staying partially on” symptoms are strong indicators. Replace the timer with a digital model rated for electronic or LED loads, and confirm the timer’s load rating comfortably exceeds the light’s wattage.
Can I run grow lights on the same circuit as other devices like a heater?
Try not to. Even if your circuit can handle the total watts, combining loads can create voltage instability and heat near outlets, especially in tents where ventilation is limited. If you must share, run a separate circuit for the tent’s fans and lights when possible, and ensure all cords and connections stay above the floor and away from condensation.
What should I do if I’m using regular LED bulbs instead of a true grow panel?
Use the article’s main caveat: PPFD expectations and spectrum efficiency do not translate cleanly from purpose-built fixtures. Treat your setup as a different system, rely more on careful placement (often closer than you would with a panel), and validate using a meter or DLI math if you can measure intensity at canopy level. If you cannot measure, expect to use more distance tweaks and a slower intensity ramp because bulbs typically have different spectral distribution and output.
When adjusting intensity during a grow, how fast should I ramp up?
Use a gradual ramp over 7–10 days as the article suggests for moving from starter intensity to full output. Change only one variable at a time if possible, typically dimmer output or fixture height, then observe plant response for several days. If you see stress signs (bleaching, very dark green with clawing, or reddening), back off immediately by raising the light or reducing dimmer rather than waiting for the next week.
Next Article
How to Get Free LED Grow Lights: 10 Real Ways + Setup Tips
10 legit ways to get free LED grow lights and fast setup tips, fit checks, safe testing, and placement for strong harves
