You can grow weed successfully with LED lights by running a full-spectrum LED at roughly 200–400 watts (actual draw) per 4x4 foot area, hanging it 18–24 inches above seedlings and 12–18 inches during flower, running 18 hours of light per day in veg and switching to 12/12 to trigger flowering. Standard LED bulbs and other normal LED lights can work in a pinch, but you usually need to manage distance, output, and heat carefully to mimic a proper grow light normal LED lights as grow lights. That's the core of it. Everything else is dialing in the details so your plants stay healthy from seed to harvest.
How to Grow Weed With LED Lights Indoors Step by Step

Marcus Tillman
28 Apr 2026
LED grow setup essentials: indoor space, tent, or open room
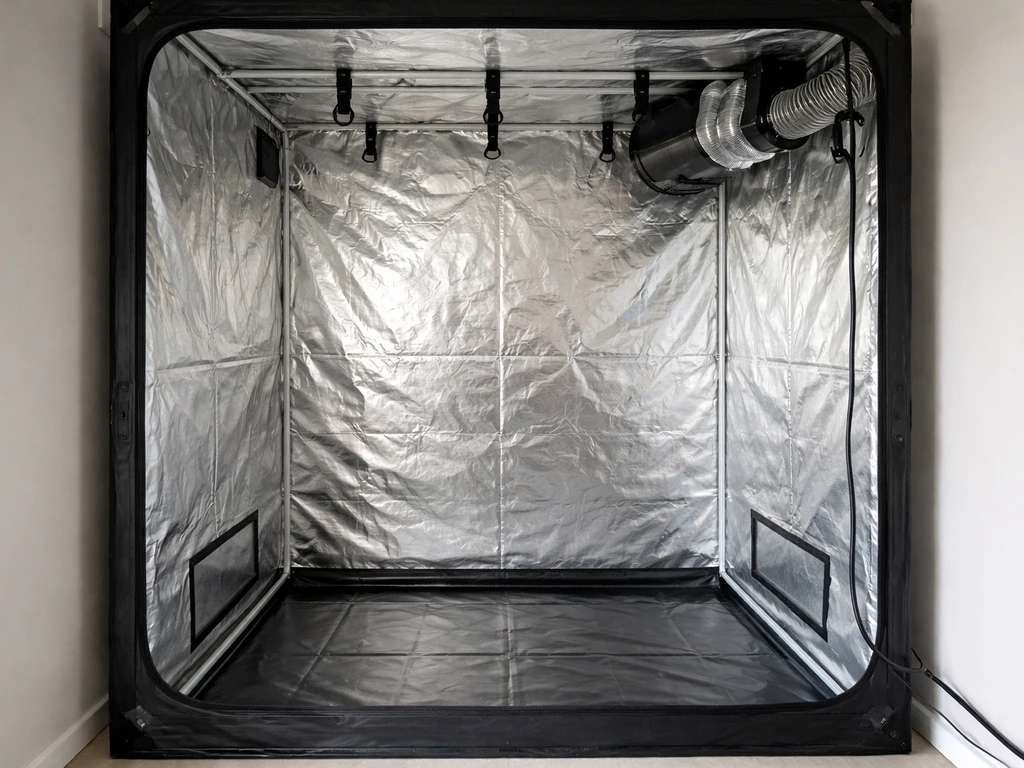
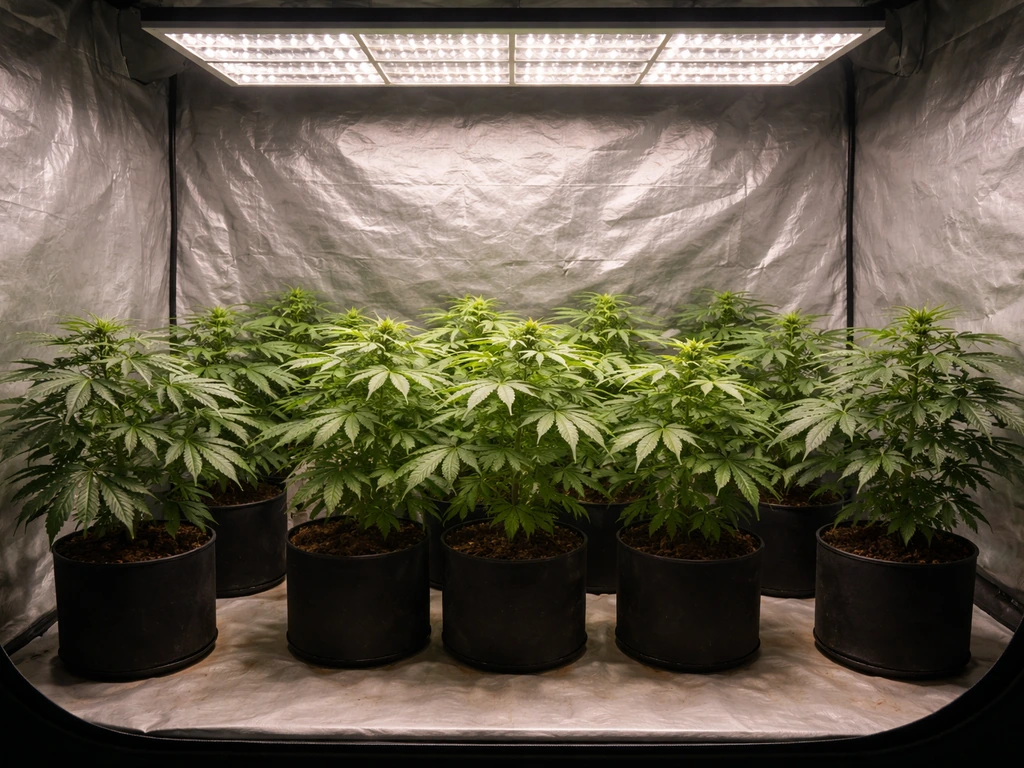
Before you hang a single light, you need to decide where your grow is happening. A dedicated grow tent is almost always the best starting point. Tents have reflective mylar interiors that bounce light back onto your plants (improving efficiency by 20–30%), and they make it much easier to control temperature, humidity, and odor. Common starter sizes are 2x2 (one plant), 3x3 (two to three plants), or 4x4 (four plants). If you're growing in a closet, basement corner, or spare room instead, you'll need to line the walls with white paint or panda film to stop light absorption and keep your environment contained.
Ventilation is non-negotiable no matter what space you use. Cannabis plants need fresh CO2-rich air, and stale hot air causes problems fast. For a 4x4 tent, an inline fan rated at 190–250 CFM paired with a carbon filter handles both airflow and odor. The standard configuration is carbon filter mounted inside at the top, ducted directly to your inline fan, then exhausted out of the tent. This creates negative pressure, meaning the tent walls pull slightly inward, which keeps odors from leaking out. If you're adding a carbon filter, expect a 25–30% airflow penalty on your effective CFM, so size your fan slightly larger than the raw tent volume calculation suggests.
Temperature and humidity control matter just as much as the light itself. Aim for 70–85°F (21–29°C) during the light period and no colder than 60°F (15°C) lights-off. Relative humidity should sit at 60–70% for seedlings and early veg, drop to 40–60% in late veg, and land at 40–50% in flower to reduce mold risk. A digital thermo-hygrometer in the canopy zone will tell you what's actually happening at plant level, which is the only number that matters. Smart climate controllers like the AC Infinity Controller 69 PRO+ can automate your fan speed based on live temperature, humidity, and VPD readings if you want to remove the guesswork.
Choosing the right LED: spectrum, wattage, and coverage area
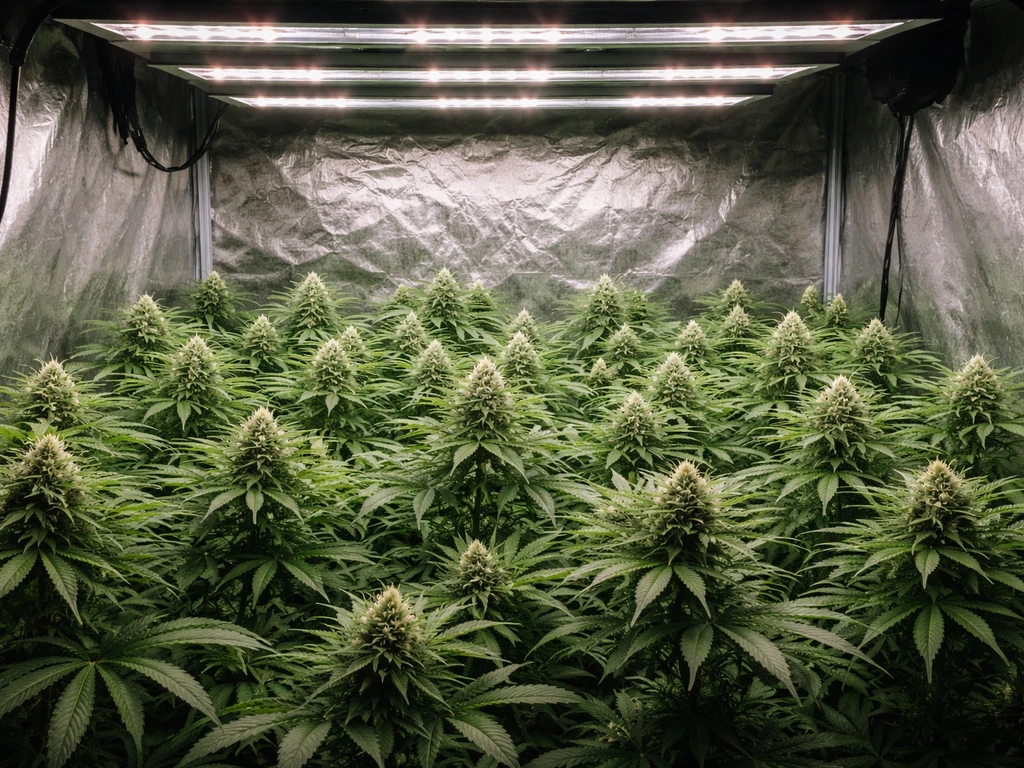
This is where most beginners make their biggest mistake: buying a light based on the inflated wattage number on the box. A fixture advertised as "1000W" often only pulls 100–150 watts from the wall. What matters is actual power draw (listed in the specs as "true watts" or "actual draw"), not the equivalent claim. For vegetative growth you want around 25–35 watts per square foot of actual draw. For flowering you want 35–50 watts per square foot. A 4x4 tent is 16 square feet, so you're looking for a light that draws 400–600 real watts for flowering.
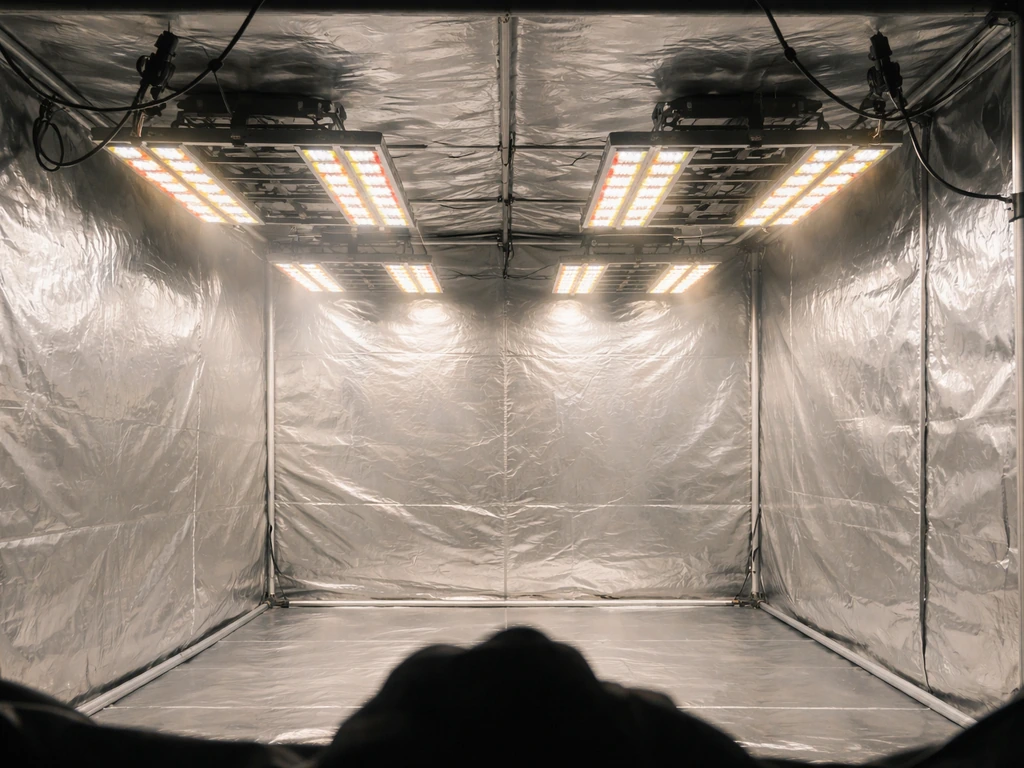
On spectrum: full-spectrum LEDs with a white light base (Samsung LM301B or LM301H diodes are common quality benchmarks) cover everything your plant needs from seedling to harvest. Some lights add extra red diodes (650–670nm) for flowering and a deep red (730nm far-red) to improve flowering response. You don't need separate veg and bloom lights with a quality full-spectrum fixture. Quantum board-style LEDs and COB (chip on board) fixtures are the two most popular formats. Quantum boards spread light more evenly across a wide canopy, COBs deliver intense point-source light and work well in taller spaces. For most beginners, a quantum board setup in a tent is the easiest to manage.
| Grow Space | Plants (approx.) | Recommended Actual Draw | Light Type |
|---|---|---|---|
| 2x2 ft (4 sq ft) | 1 | 100–150W | Quantum board or small COB |
| 3x3 ft (9 sq ft) | 2–3 | 200–300W | Quantum board |
| 4x4 ft (16 sq ft) | 4 | 400–600W | Quantum board or 2x COB |
| 5x5 ft (25 sq ft) | 4–6 | 600–750W | Dual quantum board or 4x COB |
| 4x8 ft (32 sq ft) | 6–8 | 800–1000W | 2x quantum boards |
If you're not ready to invest in a purpose-built grow light yet, it's worth knowing that standard LED bulbs can fill a gap in a pinch, though they're far less efficient and effective than dedicated grow fixtures. The tradeoffs there are significant enough to plan around as soon as your budget allows.
Starting seedlings and clones under LED
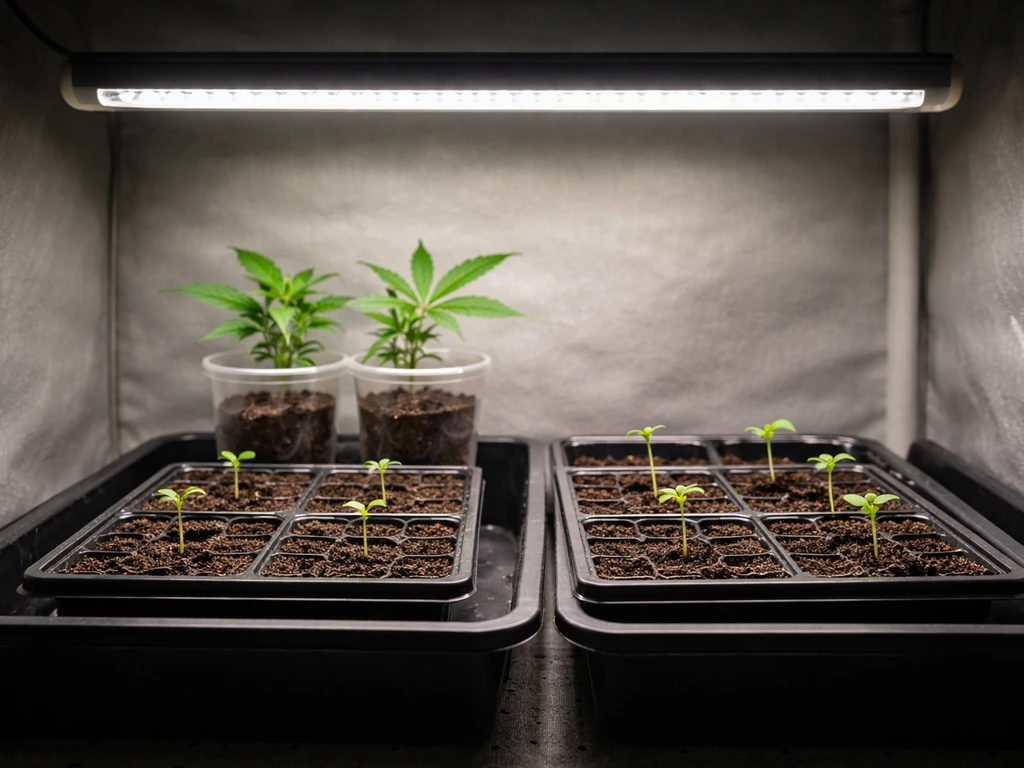
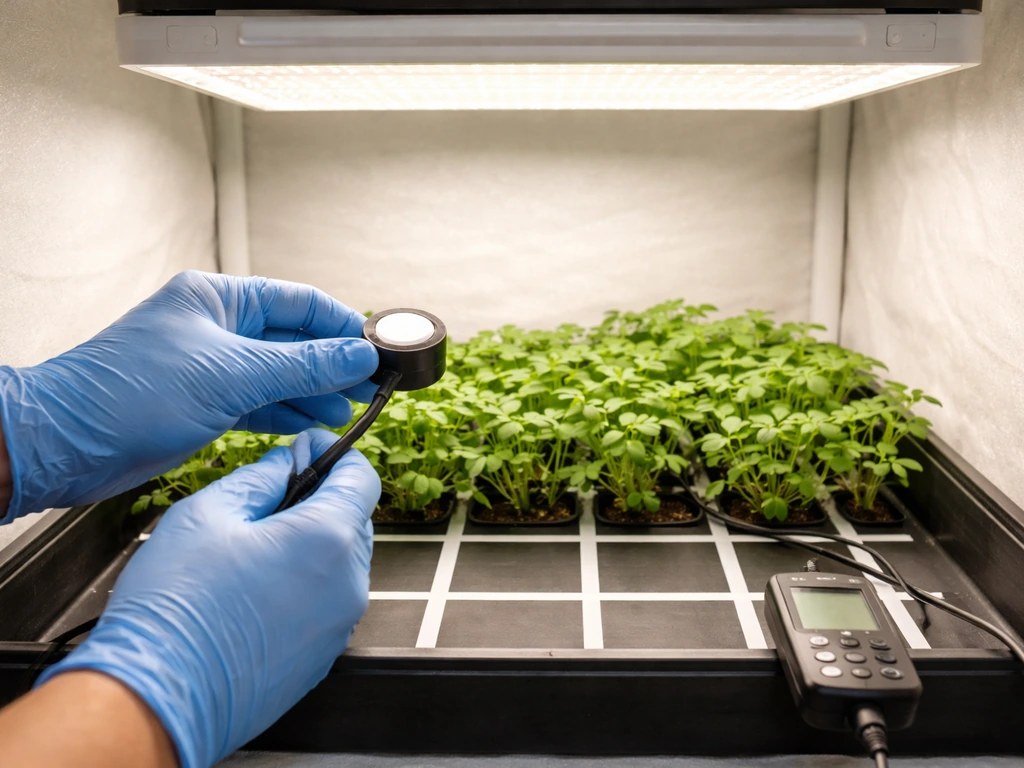
Seedlings and fresh clones are fragile and don't need intense light yet. If you blast them with full power from day one, you'll stress them before they've even established roots. Start your LED at 20–30% intensity if it has a dimmer, or raise it to 24–30 inches above the seedling tray if it doesn't. You want around 200–400 PPFD (micromoles per second per square meter) at the canopy during this stage, which is well below the maximum output of most grow lights.
Run the light on an 18/6 schedule (18 hours on, 6 hours off) right from the start. This gives seedlings enough energy for strong early growth without triggering flowering. Keep humidity high, around 65–70%, and temperatures at 72–78°F. A dome over seedling trays helps hold moisture until taproot development is visible. Clones need the same low-intensity light and high humidity until you see new growth and roots have taken hold, usually 7–14 days.
Watch for two early warning signs. If seedlings are stretching tall and leggy with big gaps between nodes, they're not getting enough light and you need to lower the fixture or increase intensity slightly. If the first true leaves show yellowing edges or curl downward, back off the intensity or raise the light. These problems are almost always fixable in the first week if you catch them fast.
Vegetative growth: dialing in intensity, height, and photoperiod
Once seedlings have 2–3 sets of true leaves (usually 10–14 days after sprouting), you can start ramping things up. Move the light down to 18–22 inches above the canopy and increase intensity to 50–75% if you have a dimmable fixture. Target PPFD of 400–600 for early veg, moving toward 600–900 PPFD as the plants establish and fill out. Healthy veg growth means wide internodal spacing (nodes close together), dark green leaves, and new growth appearing every day.
Keep the 18/6 light schedule through all of veg. To help you dial in flowering properly, make sure you understand how to grow light dep strains and manage the schedule consistently. Photoperiod strains will stay in veg mode as long as they receive 18 or more hours of light.
Wikipedia notes that vegetative indoor cannabis growers commonly use longer photoperiods (often 18, 24 hours of light) and that flowering is initiated by switching the photoperiod and dark cycle under controlled conditions photoperiod/dark cycle in controlled conditions. Autoflowering strains don't rely on light schedule at all and will flower on their own timeline regardless of photoperiod, but they still respond to intensity and spectrum.
For photoperiod plants, the length of your veg period is up to you. Most home growers veg for 4–8 weeks depending on how large they want plants to get before flipping to flower.
During veg, check your canopy height against your light every few days. Plants can grow 1–2 inches per day in healthy veg, and if you're not adjusting the light height accordingly, you'll end up with light that's either too close (causing stress) or too far (causing stretch). Raise the light as plants grow, not after you notice a problem.
Flowering and budding: light schedule, intensity, and environmental targets
To trigger flowering in photoperiod strains, switch your timer to a 12/12 schedule: 12 hours of light, 12 hours of complete darkness. The dark period must be truly dark. Even a small light leak from a phone charger or a cracked tent zipper can disrupt the flowering hormone cycle and cause hermaphroditism or revegging. Autoflowering strains skip this step entirely and flower based on age.
During the first 2–3 weeks of flower (the stretch phase), plants can double in height. Plan for this. A plant that's 18 inches tall when you flip may hit 36 inches by week 3, so make sure your tent height can accommodate and your light is mounted high enough to track that growth without burning the tops. Lower the light gradually as buds develop: aim for 12–18 inches from the canopy and 600–1000 PPFD during peak flower (weeks 3–8).
Environmental targets shift in flower. Bring humidity down to 40–50% to protect developing buds from bud rot (Botrytis). Temperature can drop a few degrees compared to veg, with a lights-on target of 75–82°F and lights-off no colder than 65°F. A bigger temperature swing between lights-on and lights-off (10–15°F differential) can actually enhance terpene and anthocyanin development in the final 2 weeks, which improves both aroma and bag appeal.
In the final 2 weeks before harvest, some growers reduce light intensity by 10–20% and let the plant focus energy on bud ripening rather than photosynthesis. Watch trichomes with a jeweler's loupe or digital microscope: clear trichomes mean not ready, cloudy means peak THC, amber means THC is degrading into CBN for a more sedating effect. Harvest timing based on trichome color will make more difference to your end product than almost any other variable.
Troubleshooting common LED grow problems
Plants stretching toward the light
Long, leggy stems with wide gaps between nodes almost always mean the light is too far away or too dim. Lower the fixture by 2–4 inches, or bump intensity up by 10–15%. If stretching is happening during the flowering stretch phase (weeks 1–3 of 12/12), that's partially normal, but you can manage it by lowering the light and using low-stress training (LST) to bend the tops horizontally and keep the canopy even.
Slow or stunted growth
If plants look healthy but growth is just sluggish, check three things first: light intensity at the canopy (use a PPFD meter app or a dedicated sensor), nutrient pH in your root zone (5.8–6.2 for hydro, 6.0–6.8 for soil), and root zone temperature (should be 65–72°F). LED lights alone rarely cause stunted growth unless they're genuinely underpowered for the space. More commonly, slow growth under LEDs in a tent is a ventilation or root zone issue.
Light burn and bleaching
Light burn from LEDs looks different from nutrient burn. It shows up as yellowing or whitening at the very tops of your canopy (the buds and leaves closest to the light) while lower leaves stay green. Nutrient burn shows on leaf tips and edges throughout the plant. If you're seeing pale or bleached tops, raise the light immediately. A minimum distance for most high-power quantum boards during flower is 12 inches, but check your specific fixture's recommendations, especially for COB arrays which concentrate intensity much more.
Uneven canopy and hot spots
LEDs mounted too close create a bright central hot spot and underpowered edges, meaning center plants get burned while corner plants stretch. Raising the light increases spread and evens out the PPFD distribution. For a 4x4 tent, most quantum boards need to be 18 inches or higher above the canopy to achieve even coverage across the full footprint. If you have multiple plants at different heights, use plant risers or stakes to level the canopy before adjusting light height.
Light leaks during flowering
Check your tent for light leaks by getting inside it (carefully) with the light on and the tent zipped shut, then turning off any external lights. Any pinhole or crack will be obvious. Common culprits are zipper seams, duct port flaps, and cord/tube pass-throughs. Use black tape or light-blocking sleeves on ports. Timer malfunctions are another light-leak risk: a timer that fails open will keep the light on during the dark period. Use a mechanical timer as a backup or verify your digital timer every few days during flower.
Heat stress
Modern LEDs run much cooler than HPS lights, but they still generate heat, especially at full power in a small tent. If your tent temperature is consistently above 85°F during the light period, you have a ventilation problem before you have a light problem. Confirm your inline fan is actually exhausting at rated CFM (check for kinked ducting or a clogged carbon filter), add an oscillating fan for circulation, and consider running lights during nighttime hours when ambient room temperature is lower.
Your LED grow checklist: dialing it all in
Here's a practical checklist to run through at each stage of your grow. Pin this somewhere visible near your tent.
- Confirm actual wattage draw of your LED matches your square footage needs (35–50W per sq ft for flower)
- Set light height: 24–30 inches for seedlings, 18–22 inches for veg, 12–18 inches for flower
- Dial intensity: 20–30% for seedlings, 50–75% for veg, 75–100% for peak flower
- Set timer: 18/6 for veg (or from seedling), 12/12 to trigger and maintain flower
- Check canopy height against light daily during rapid veg and early flower stretch
- Confirm dark period is completely light-tight before and throughout flower
- Monitor temperature (70–85°F lights on) and humidity (65–70% seedling, 40–50% flower) at canopy level
- Inspect for stretch, bleaching, or slow growth weekly and adjust light height or intensity immediately
- Check trichome color in the final 2 weeks to time harvest accurately
Growing weed with LEDs has a real learning curve, but the variables are manageable once you understand what each one does. Most problems come down to light being too far, too close, or on the wrong schedule. Get those three things right and your plant will do most of the work. From there, it's about watching closely and making small adjustments rather than big reactive changes.
If you're looking to take things further, exploring how to set up a dedicated grow room with LED lights can help you scale up the same principles you're applying in a single tent. If you are interested in testing performance, the process behind how to become a grow light tester can help you evaluate fixtures more objectively how to setup a dedicated grow room with LED lights.
If you're moving beyond a tent, this guide on how to setup a grow room with LED lights will help you size the space and gear for consistent results. If you want to reduce costs even more, it helps to look into ways to get free LED grow lights or cheap replacement options before you commit dedicated grow room with LED lights.
If you’re trying to get grow lights without spending much, this also helps with how to get grow lights once human.
FAQ
How can I tell if my LED intensity is correct without a PPFD meter?
A PPFD number beats guesses from watts, distance, or “coverage” claims. If you do not have a PPFD meter, use a practical proxy: raise the light to avoid top bleaching, then increase intensity gradually in small steps (for example, 10 to 15% at a time) while watching the first signs of stress (stretching, pale canopy tops, or leaf edge yellowing). Re-measure or re-adjust after 2 to 3 days.
Can I overdo LED intensity, and what does “too much” look like?
Yes, you can run too much light, even if the fixture is the right size. In veg, excessive intensity often shows up as very dark, clawing leaves or slowed new growth, while in flower it can bleach the very top canopy first. If you see bleaching at the tops, raise the fixture 2 to 4 inches and drop intensity 10 to 20%, then reassess after a few days.
What’s the best way to handle different plant heights with one LED setup?
Multi-plant tents need canopy leveling. If plants are at different heights, the tallest ones get the highest PPFD and are most likely to bleach first, while lower ones may stretch. Use plant risers or LST to bring the canopy within about an inch or two, then adjust the light for even coverage.
Should I fix stress by lowering the LED or by dimming it?
If you are using a dimmable LED, dimming is generally safer than lowering the light all the way down, because it avoids creating a hot spot. A good approach is: keep the fixture at your normal flowering height for even spread, then adjust intensity gradually with the dimmer to hit your targets.
How do I know if my carbon filter or ducting is limiting airflow?
A carbon filter can clog over time or under certain humidity conditions, which reduces odor control and airflow. Watch for subtle signs: tent temperatures rise, fan speed needs to increase, and smells escape even though everything looks “tight.” Replace the filter when airflow drops, and confirm ducting is not kinked or collapsed.
How strict do I need to be about “complete darkness” during 12/12?
For flowering photoperiod plants, dark periods must be truly dark. Avoid any “ambient” light, like indicator LEDs from controllers outside the tent, under-door light, or reflections from a bright room. If you use blackout curtains or reflective tape on external surfaces, check that reflections do not bounce back into the tent during the 12 hours off.
Why is my tent getting hot even with LED lights?
LED heat is often lower than HPS, but it still raises tent air temperature and can raise leaf surface temperature if ventilation is weak. If your lights-on temperature stays above your target for days, prioritize fixing exhaust (fan capacity, duct length, filter loading) and add oscillating airflow inside the tent, because high leaf temperature can increase stress and reduce bud quality.
How do I tell whether sluggish growth is from light or from watering/root issues?
Yes, and it can matter. When plants are under-watered or root-bound, they take up nutrients poorly, which can be mistaken for a light problem (slow growth, dull color). Before changing the light again, check pot weight, runoff behavior, and root health, then confirm root zone temperature and nutrient pH before deciding you need more watts.
How should I ramp LED settings during the transition from veg to flowering?
A common approach is to follow the plant’s development rather than a fixed “calendar wattage.” Keep the same 12/12 schedule for photoperiod strains, then ramp intensity through the stretch and peak flower, using canopy appearance and top-leaf condition to guide reductions. If you are unsure, reduce intensity slightly rather than raising it, because overfeeding light stress during early flower is harder to recover from.
Can I combine different LED fixtures in the same tent, and what should I watch for?
For multi-fixture setups, ensure all lights are synchronized to the same timer and placed to prevent overlap hot spots. Turn on lights and do a quick visual check of brightness uniformity at canopy height, then adjust hanging heights or add spacing. If you mix fixtures with different spectra, prioritize hitting PPFD first, then fine-tune spectrum later.
What should I do to prevent timer-related flowering problems?
If your timer fails or power cycles during the dark period, photoperiod plants may respond unpredictably. Use a timer with a reliable dark-cycle output, and consider a basic mechanical backup for the lights. During flower, verify the timer at least every few days, and confirm no extension cords or adapters interrupt power.
Is it really useful to reduce LED intensity in the final two weeks, and how much is too much?
When you reduce light intensity late in flower, do it gradually and watch trichomes and canopy response. Too large a drop can reduce density and slow ripening, while a small reduction (for example, 10 to 20%) may help you shift more energy to finishing. Keep environmental targets stable, because humidity swings late in flower can do more harm than a modest intensity tweak.
Next Article
How to Become a Grow Light Tester: Step-by-Step Guide
Step-by-step guide to test grow lights: measure PPFD, check spectrum and coverage, optimize placement, and build a repea