Yes, you can use normal LED lights to grow plants indoors, but there are real limits you need to know upfront. Regular LEDs can absolutely support seedlings, herbs, low-light houseplants, and leafy greens if you pick the right bulb type, get the light close enough, and run it long enough each day. If you do not have grow lights yet, you can still get started with regular LEDs that are close enough and bright enough for the specific plants you are growing get grow lights. The problems start when people expect a desk lamp or a strip of warm-white LEDs to flower tomatoes. That won't happen. But with the right setup, a handful of daylight-spectrum LED bulbs or a bright LED shop light can do a surprisingly good job for the right plants.
How to Use Normal LED Lights as Grow Lights: Setup Guide

Marcus Tillman
28 Apr 2026
What regular LEDs are missing compared to real grow lights
Purpose-built grow lights are engineered around three things: spectrum, intensity, and efficiency. Regular LEDs are designed to look good to the human eye, not to drive photosynthesis. That creates a few specific gaps you need to understand before you decide whether your existing lights will work.
Spectrum: the right colors vs. just bright white
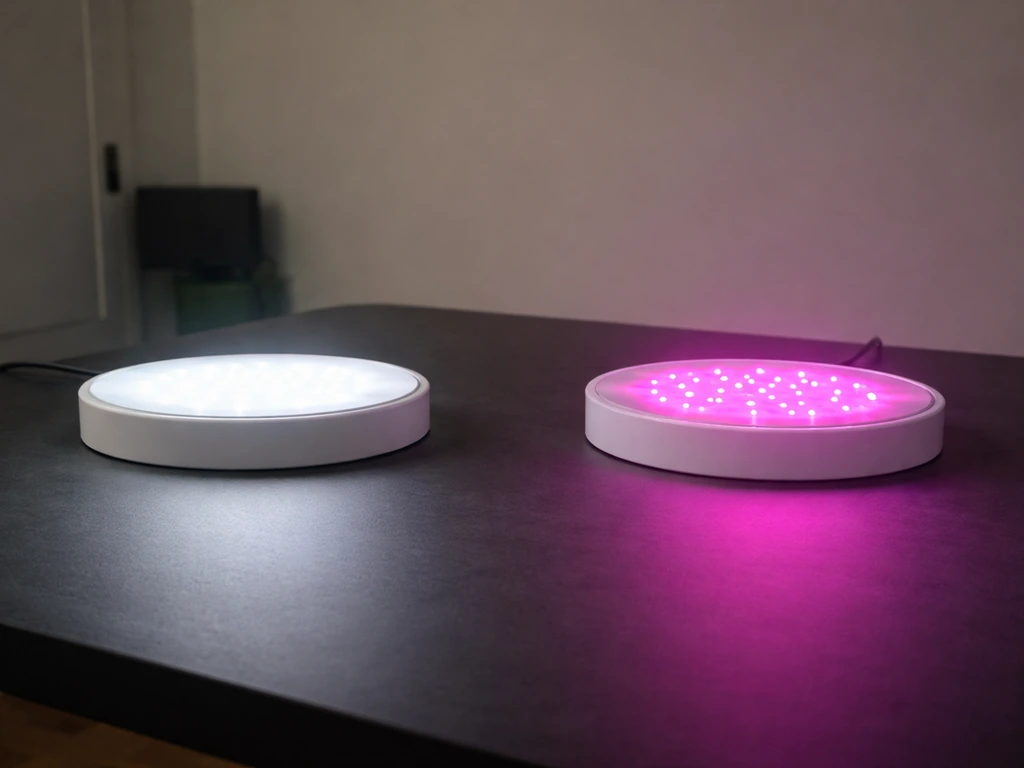
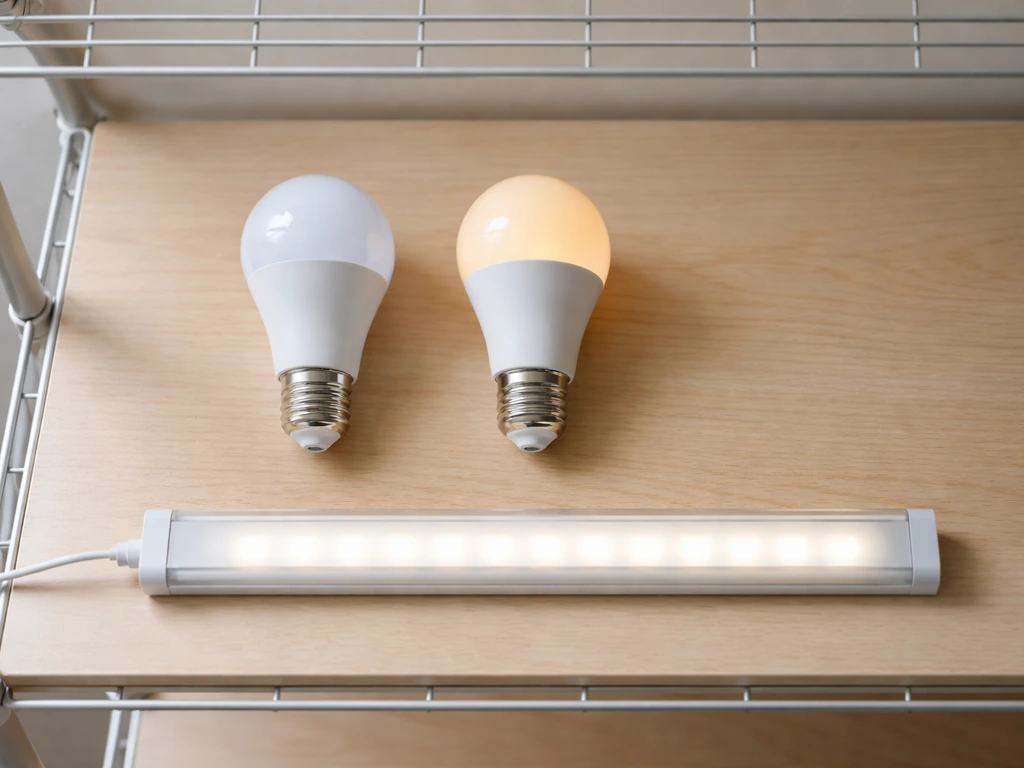
Plants absorb light primarily in the blue range (around 400-500 nm) for compact, leafy growth and in the red range (around 620-700 nm) for flowering and fruiting. Warm-white LEDs (2700-3000K) lean heavy on yellow and orange with some red, but they're weak on blue. Cool-white LEDs (5000-6500K) have a good blue peak but can be light on the deep red that triggers flowering. Standard "white" LED bulbs cover the visible spectrum unevenly compared to a quality grow light spectrum, and research consistently shows that plants respond differently to different red and blue proportions, both in growth rate and plant shape. A regular LED can still work for many plants, but you have to account for what it's missing.
Intensity: bright to your eyes, weak for plants
This is the bigger problem. Lux and lumens measure how bright light looks to human eyes, not how much usable photon energy plants are actually receiving. The metric that matters for plants is PPFD (Photosynthetic Photon Flux Density), measured in micromoles per square meter per second (µmol/m²/s). A regular LED bulb might look plenty bright in a room but deliver only 50-200 µmol/m²/s at canopy level, while most plants in active growth want 200-600+ µmol/m²/s, and flowering crops can need 600-1000+. Regular LEDs can hit these numbers, but usually only if you use multiple fixtures and get them close to the plant.
Efficiency: more heat, less usable light per watt
Dedicated grow lights are optimized for photon output per watt (a spec called PPE, or photon efficacy). A good quantum board grow light might produce 2.5+ µmol/J. A standard LED bulb is typically in the 0.8-1.5 µmol/J range if you're lucky. That means you'll need to run more watts and more fixtures to match what a single purpose-built grow light delivers. That's fine for small setups, but worth knowing so you can budget accordingly.
Pick the right type of normal LED for plants
Not all regular LEDs are equally useful for growing. Your choice of fixture type will make or break how well this works. Here's how the main options stack up.
| LED Type | Best Use | Key Advantage | Key Limitation |
|---|---|---|---|
| Daylight LED bulb (5000-6500K, A19/BR30) | Seedlings, herbs, houseplants | Cheap, easy to find, standard socket | Low total output, small coverage area |
| LED shop light / utility bar (4000-6500K) | Seedlings, lettuce, herbs, small veg | Good spread, affordable, easy to hang | Moderate intensity, not ideal for flowering |
| LED work light (5000-6500K, flat panel) | Seedlings to early veg, cuttings | High lumen output, wide angle | Can run warm, limited spectrum control |
| LED strip lights (5000-6500K, high-density) | Supplemental, small shelves, propagation | Flexible placement, thin profile | Low per-strip intensity, need many strips |
| LED desk lamp (adjustable neck, 5000-6500K) | Single small plants, herbs on a counter | Easy positioning, budget-friendly | Very limited coverage and intensity |
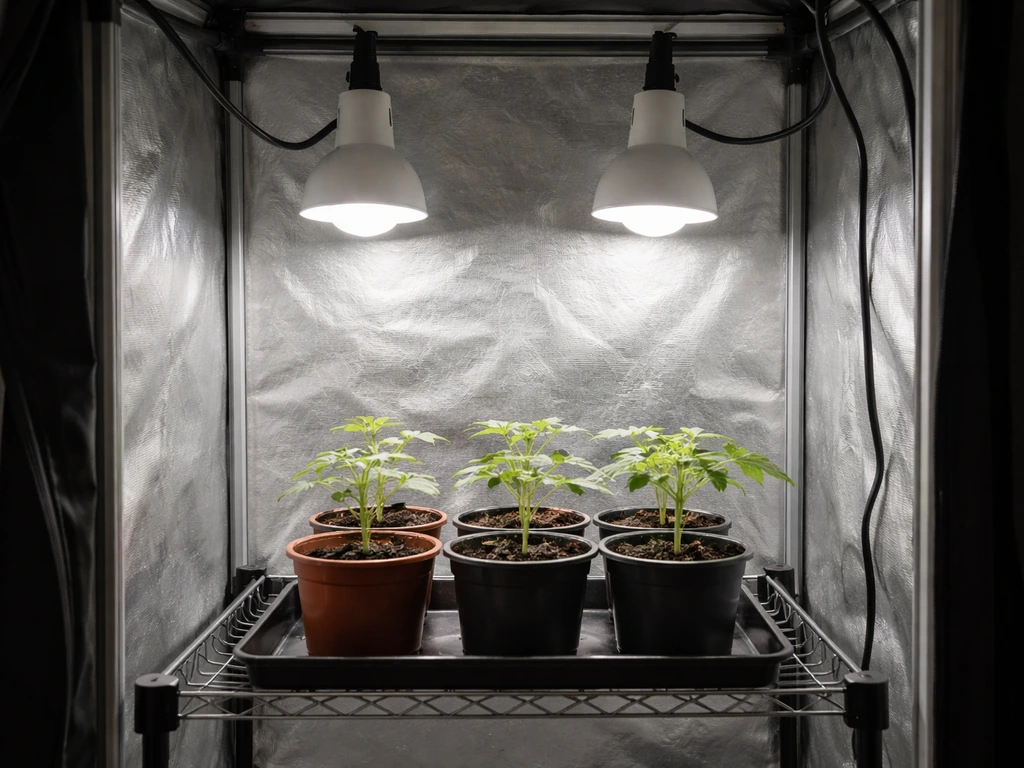
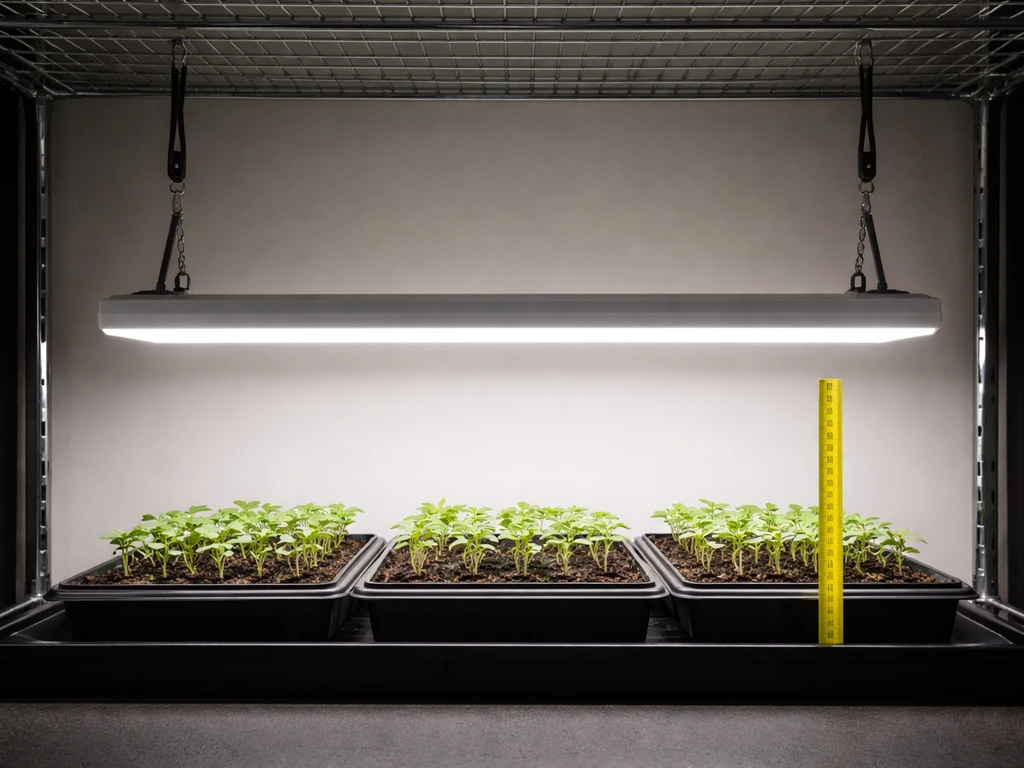
The single best budget option for most readers is a 4-foot LED shop light rated 4000-5000 lumens, with a color temperature of 5000-6500K. These run $15-$40 at hardware stores, hang easily, and cover a 2x4 foot area reasonably well for seedlings and leafy greens. If you're working with shelving, two or three of them stacked per shelf transforms a basic wire rack into a functional grow station. For individual plants or small herb pots, a 23-watt LED bulb (daylight, 5000-6500K) in a clamp reflector socket positioned 6-12 inches overhead is a practical starting point.
Check brightness and estimate whether you have enough light
You don't need a $300 quantum sensor to estimate whether your lights are doing enough work. You do not need specialized sensors to get started, but if you want to take it further, learning how to become a grow light tester is a helpful next step. Here's a practical approach using tools most people either already have or can get cheaply.
Use a lux meter or phone app first
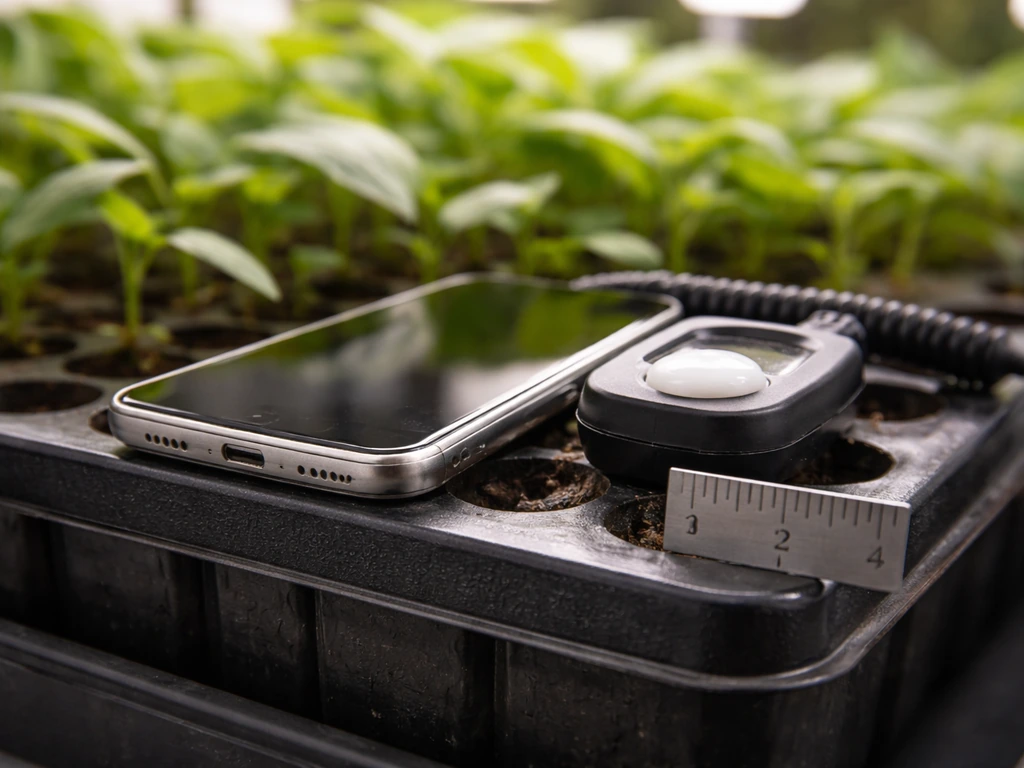
Download a lux meter app on your phone (Photone and Lux Light Meter Pro are both usable for estimates) or pick up a handheld lux meter for $15-$30. Hold the sensor at the top of your plant canopy, pointing at the light source, and take a reading. As a rough guideline, you want at least 10,000-15,000 lux for seedlings and low-light plants, 20,000-40,000 lux for herbs and leafy greens, and 40,000-70,000+ lux for fruiting or flowering plants. These are estimates, not guarantees, but they'll tell you whether you're in the right ballpark.
Convert lux to PPFD (with caveats)
You can convert a lux reading to an approximate PPFD using a conversion factor. For cool-white or daylight LEDs (5000-6500K), a commonly used factor is to divide lux by roughly 70-80 to get an approximate PPFD in µmol/m²/s. For example, if your lux meter reads 30,000 lux under a daylight shop light, your estimated PPFD is around 375-430 µmol/m²/s. This is an approximation: the real conversion depends on the specific spectral power distribution of the bulb, which you don't have access to for most regular LEDs. Use it to compare relative readings across your canopy and to make adjustments, not as a precise measurement. For warm-white LEDs (2700-3000K), the conversion is even less reliable because more of the output falls outside the photosynthetically active range.
Calculate your daily light dose (DLI)
DLI stands for Daily Light Integral, and it measures the total photon dose your plants receive in a day (mol/m²/day). It's the most useful single number for deciding whether your setup is working. You calculate it from your estimated PPFD and the number of hours you run the lights: DLI = PPFD (µmol/m²/s) × hours per day × 3600 / 1,000,000. So if you're delivering 300 µmol/m²/s for 16 hours, your DLI is about 17.3 mol/m²/day. Research-backed DLI targets for common plants include seedlings at 5-10, lettuce and herbs at 12-17, basil at 15-25, and tomatoes at 20-30. If your goal is to learn how to grow light dep plants, the same focus on PPFD and daily light integral will help you dial in a schedule that supports healthy flowering. If your estimated DLI falls short, you have two levers: increase intensity (move lights closer or add more) or increase the photoperiod (run lights longer).
Set up placement: distance, mounting, reflectors, and coverage
How you position your lights matters as much as which lights you choose. This is where most beginners either burn their plants or leave them struggling in dim conditions.
Start with these distance guidelines
Regular LEDs are not as intense as dedicated grow lights, so you generally need to hang them closer. For a 4-foot LED shop light (4000-5000 lumens), start at 4-6 inches above seedlings and 6-12 inches above established plants. For a cluster of A19 LED bulbs in reflector sockets, position them 4-8 inches above the canopy. For LED work lights or flat panels, 8-14 inches is a reasonable starting point. Check your lux reading at canopy level after positioning, and use that to fine-tune. blank" rel="noopener noreferrer">Remember the inverse-square law: if you double the distance from the light to the plant, you get roughly one-quarter of the light intensity. Moving from 6 inches to 12 inches doesn't cut your light in half, it cuts it to about 25%. That's a significant drop from a relatively weak light source.
Use reflectors to make the most of what you have
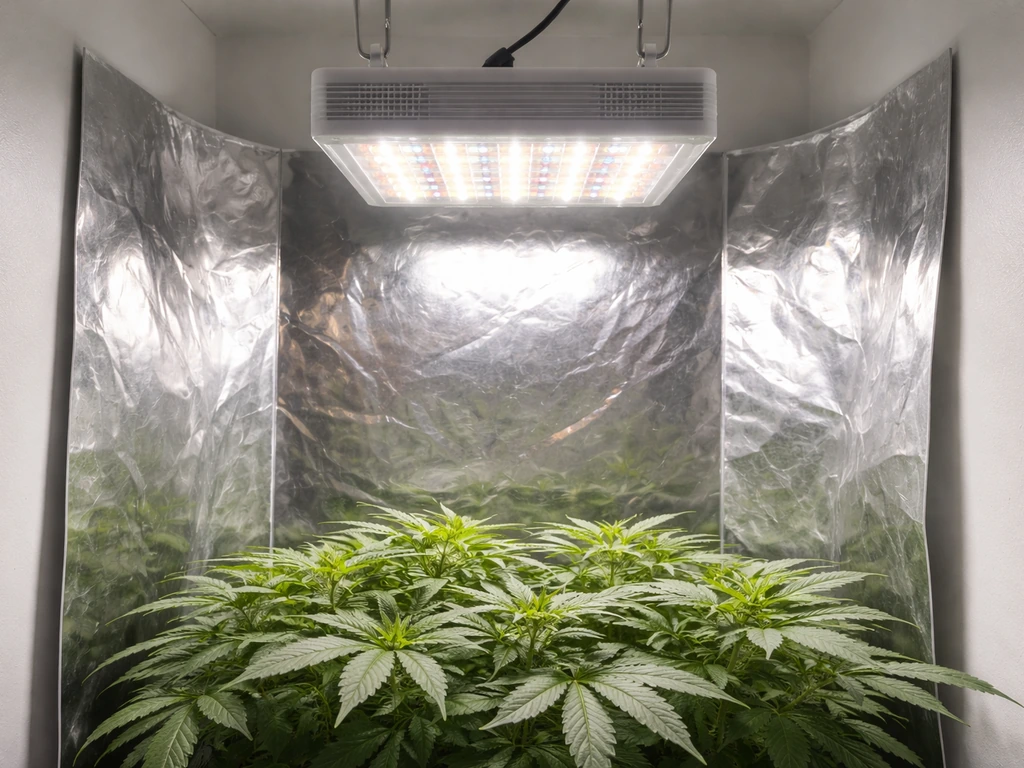
White walls, white painted surfaces, and Mylar reflective film can meaningfully increase effective light reaching your plants by bouncing stray light back toward the canopy. In a small grow space or shelf, lining the back and sides with white foam board or Mylar can increase effective light intensity by 20-40% without spending a dollar on new fixtures. This matters a lot when you're working with lower-output regular LEDs. If you're using a clamp reflector socket for individual bulbs, choose a white or metallic reflector bowl rather than a plain socket, which wastes a lot of side-scatter.
Coverage area: don't spread too thin
A single 4-foot shop light can reasonably cover a 2x2 foot tray of seedlings when hung 4-6 inches above the canopy. Trying to cover a 2x4 foot area with that same single shop light at 12 inches means every plant is getting much less light, and the corners and edges are getting significantly less than the center. Either add a second light, keep the coverage area smaller, or accept that plants on the edges will grow slower. Measure lux at several points across your canopy to check for hot spots and dim zones. The goal is even light distribution, not just a bright center.
Scheduling: how many hours per day for each growth stage
Because regular LEDs produce less intensity than purpose-built grow lights, you often compensate by running them longer. But photoperiod (the number of light hours per day) also affects plant development in ways that go beyond just accumulating photons. Here's how to schedule by growth stage.
| Growth Stage | Recommended Hours/Day | Target DLI (mol/m²/day) | Notes |
|---|---|---|---|
| Germination / sprouting | 14-16 hours | 5-10 | Low intensity is fine; gentle, consistent light |
| Seedlings (first true leaves) | 16-18 hours | 8-14 | Longer photoperiod compensates for lower PPFD |
| Vegetative growth | 14-18 hours | 15-25 | More light hours needed if intensity is limited |
| Flowering / fruiting (day-neutral) | 14-16 hours | 20-30 | Regular LEDs may fall short for fruiting crops |
| Flowering (short-day plants) | 12 hours max | 15-22 | Must reduce to 12 hours to trigger flowering |
For most herbs and leafy greens under regular LEDs, 16 hours on and 8 hours off is a solid default. This gives you a long enough photoperiod to accumulate a decent DLI even at moderate intensity. Use a plug-in mechanical or digital timer: consistent on/off timing matters and doing it manually is how schedules slip. For seedlings specifically, 16-18 hours is standard, and some growers push to 18 hours when their lights are underpowered. Plants still need a dark period, so don't go to 24 hours on, even if you're tempted to compensate for weak lights that way.
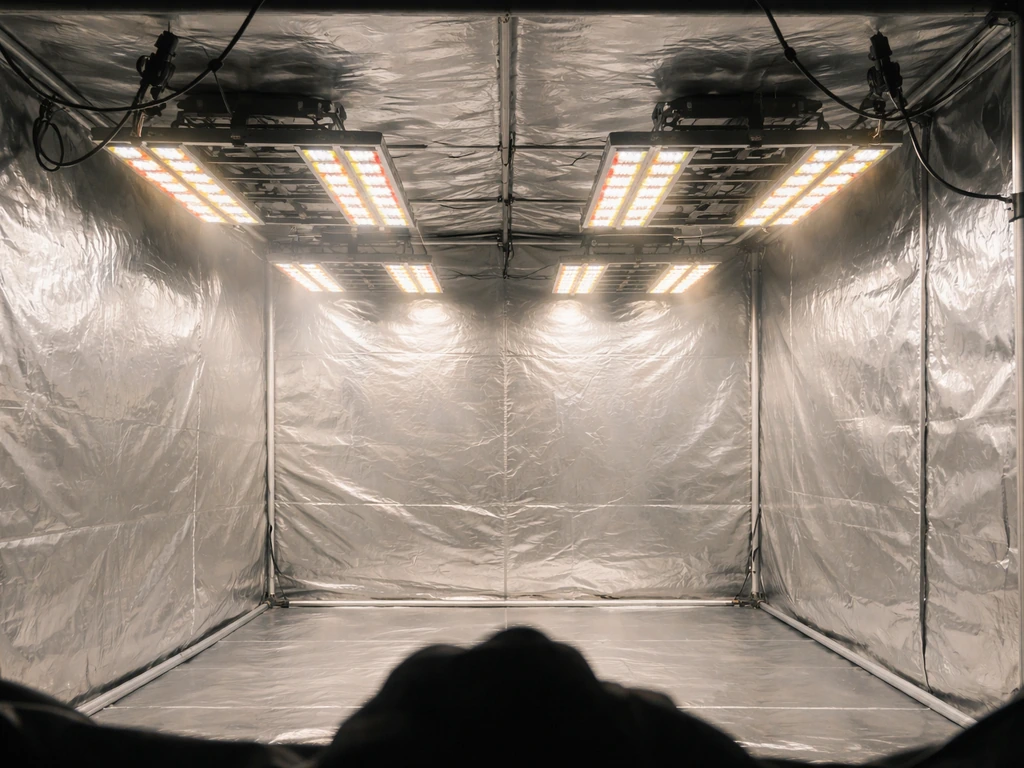
If you're trying to flower a short-day plant like cannabis or certain herbs, a strict 12 hours of uninterrupted darkness is required to trigger the flowering response. Regular LEDs can work for this photoperiod trigger, but the intensity during the 12-hour light period needs to be high enough to support flowering, which is where most regular LEDs start to fall short. For a practical step-by-step approach to how to grow weed with LED lighting, plan your schedule and light intensity carefully and measure your results grow cannabis. If growing cannabis or fruiting plants is your goal, the setup tips in a dedicated grow room guide will take you further than regular LEDs alone can.
Troubleshoot common problems and fix them
Most problems with regular-LED grow setups come down to too little light, wrong light placement, or the wrong spectrum for the plant's stage. Here's how to diagnose what you're seeing and what to change first.
Leggy, stretching stems
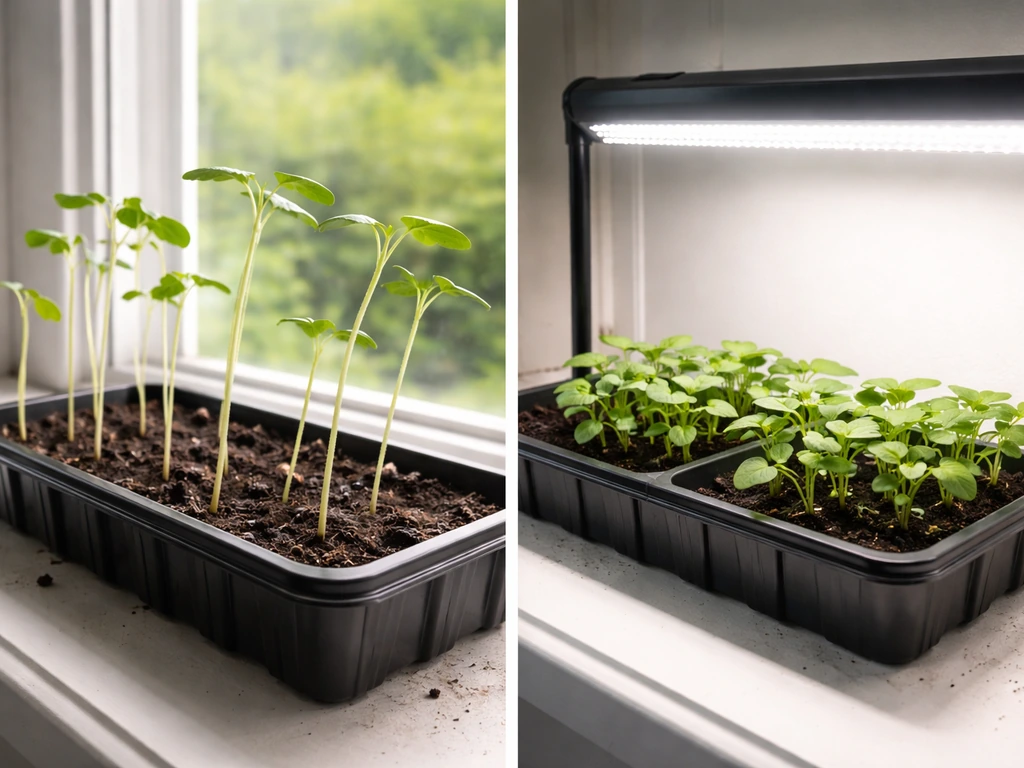
Etiolation (long, weak stems with wide spacing between leaves) is the clearest sign of insufficient light intensity. The plant is literally reaching for more light. Fix this by moving your lights closer first, aiming to roughly double the intensity. If you're already at the minimum safe distance (2-4 inches for lower-heat LEDs), add another fixture. Also check that your lights include enough blue spectrum: warm-white LEDs with almost no blue output can cause stretching even at decent intensity because blue light promotes compact, sturdy stem development.
Slow or stalled growth, pale leaves
If growth just seems sluggish and leaves look washed out or light green, your DLI is probably too low. Check your lux reading and estimate your DLI. If you're under the target for your crop (say, under 12 mol/m²/day for basil), extend the photoperiod by 1-2 hours and re-check in a week. If you're already running 16-18 hours, you need more intensity, which means more or better-positioned fixtures.
Leaf curling, browning tips, or bleaching
This usually means the lights are too close, especially with work lights or large LED panels that generate more heat. Move the lights up by 2-3 inches and check again in 48 hours. Also check the temperature at canopy level: if it's above 85°F (30°C) directly under the light, you need more distance or better airflow. Note that some regular LEDs run hotter than dedicated grow lights, especially work lights with poor heatsinks.
Uneven growth across your tray or canopy
Plants near the center thriving while edges look weak means your light footprint is too small for your growing area. Measure lux at the center and at the edges. If edge readings are less than 50% of center readings, you need to either shrink your growing area or add supplemental fixtures at the edges. Reflective side walls help here too.
Algae on soil surface
Green algae growing on your soil or growing media under the lights is a sign that light is hitting moist soil directly. This doesn't hurt most plants directly, but it can compete for nutrients and indicates you might be overwatering. It's not a light problem per se, but it's more common when lights are positioned low over trays of seedlings. Reduce watering frequency and let the soil surface dry slightly between waterings.
Quick troubleshooting reference
| Symptom | Likely Cause | First Fix | Second Fix |
|---|---|---|---|
| Leggy, stretched stems | Too little light intensity or blue spectrum | Move lights 2-3 inches closer | Add a second fixture or switch to 5000K+ bulb |
| Pale/yellow leaves, slow growth | DLI too low | Extend photoperiod by 2 hours | Add more fixtures |
| Leaf tips curling/browning | Too close, too hot | Move lights up 2-3 inches | Improve airflow around fixture |
| Leaf bleaching/whitening | Light burn (too intense or too close) | Move lights up immediately | Check canopy temp, add airflow |
| Weak plants on tray edges | Uneven coverage | Add reflective side walls | Add edge fixture or reduce tray size |
| Purple/red leaf undersides | Phosphorus deficiency or cold stress | Check temps and feeding | Switch to slightly warmer light spectrum |
Safety, smart setup habits, and when to upgrade
Electrical and heat safety
Most regular LED fixtures are designed for dry, open-air indoor spaces, not the humid environment of a grow tent or covered shelf. When you put a regular LED shop light or work light inside a tent or enclosure, watch the driver temperature. LED drivers (the internal or external power supply) are the most common failure point, and they fail fastest when confined in warm, poorly ventilated spaces. Leave at least 2-3 inches of air clearance around any fixture, and if your space runs warm, add a small fan to keep air moving around the lights, not just the plants. Don't zip a tent closed with lights running until you've confirmed temperatures are stable. Regular LEDs also are not rated for wet or damp locations, so if you're misting or using a humidifier, keep water spray away from the fixtures directly.
Eye safety with high-intensity cool LEDs
High-intensity cool-white LEDs (especially 6500K work lights and multi-bulb arrays) produce significant blue light. Looking directly at them is uncomfortable and potentially harmful with repeated exposure. This is covered by photobiological safety standards that classify luminaires into risk groups based on blue-light exposure. When working in your grow space, avoid staring directly at the lights, especially powerful LED work lights at close range. If you're setting up or adjusting plants under these lights regularly, inexpensive blue-light blocking safety glasses are worth the few dollars they cost.
Setup do's and don'ts
- Do use a timer: consistent photoperiod control is one of the easiest wins in any grow setup
- Do measure lux at canopy level before planting to confirm your setup is adequate
- Do use white or reflective surfaces around your grow space to recapture stray light
- Do leave airflow gaps around enclosed fixtures and drivers
- Don't use warm-white LEDs (2700-3000K) as your primary light: they lack the blue spectrum plants need for healthy, compact growth
- Don't seal regular LED fixtures in airtight spaces without checking heat buildup first
- Don't look directly at high-intensity cool LEDs when they're on
- Don't try to compensate for low intensity by running lights 24 hours a day: plants need a dark period
- Don't place lights so close that canopy temperature exceeds 85°F (30°C)
When it's worth it vs. when to just buy a grow light
Regular LEDs work well for: seedling starting trays, low-light houseplants, herbs on a kitchen shelf, lettuce and leafy greens in a small space, and propagating cuttings. They're also a reasonable option when you already own the fixtures and want to test indoor growing before committing to dedicated equipment. The math gets unfavorable fast when you're trying to fruit tomatoes, grow peppers, or flower cannabis. You'd need so many regular LED fixtures, positioned so precisely, and running so many hours that you'd spend more on electricity and fixtures than a single entry-level quantum board grow light would cost. A decent 200-watt quantum board running at full efficiency will outperform $150 worth of rigged-up shop lights every time for fruiting crops. If you're serious about growing fruiting vegetables, setting up a proper grow room with purpose-built LED grow lights is the more practical path. If you want a complete step-by-step plan for designing your room, start with purpose-built LED grow lights and measure your coverage and daily light dose. For everything else, the regular LED approach covered here works, as long as you choose the right bulbs, get them close enough, and measure rather than guess. If you specifically want tips for getting free LED grow lights, look for practical ways to score used or discounted fixtures and what to check before you power them on.
FAQ
How can I tell quickly if my normal LEDs are intense enough without buying special sensors?
Start by matching your plant stage to a light target you can actually measure. For seedlings and low-light plants, use roughly 10,000 to 15,000 lux at canopy level as a starting check, then compute an estimated PPFD and DLI from your lux reading. If your lux is already in-range but growth is still slow, the issue is often distance or uneven coverage, not just brightness.
Is cool-white (6500K) always better for growing with normal LEDs?
Not always. Many “daylight” bulbs are 5000 to 6500K, but their blue and deep-red balance can still differ a lot from grow-optimized fixtures. If your plants stretch (etiolation) even when lux seems acceptable, that usually means the blue proportion or delivered PPFD is too low, so replace with a known 5000-6500K daylight LED or add a second fixture rather than only increasing hours.
Can I rely on lux readings when my lights are warm-white (2700 to 3000K)?
If you use the same lux-to-PPFD conversion you would for cool or daylight LEDs, you can significantly under- or over-estimate. Warm-white outputs more outside the photosynthetically active range, and the conversion factor gets less reliable. In practice, treat warm-white as supplemental lighting, and verify with canopy lux plus a DLI estimate.
What should I do if my plants grow well in the center but not at the edges?
Plan on spacing your fixtures so PPFD stays even across the whole canopy. A common mistake is using one bar or one bulb and assuming it covers the entire tray, then discovering edge plants lag. Measure lux at the center and edges, then either add a second light, shrink the covered area, or add corner supplement lights until edge readings are close to center readings.
How do I avoid heat stress when using shop lights or work lights as grow lights?
Increase distance cautiously and watch for a sign of heat stress. Many work lights run hotter than purpose-built grow fixtures, so if canopy temperature under the light is above about 85°F (30°C), raise the light by a couple inches and improve airflow. If you still need more intensity, add another fixture rather than trying to compensate by lowering one hot light.
How strict do I need to be with the light schedule when using normal LEDs?
Use an inexpensive photoperiod timer that locks on a schedule, but verify it does not drift. Mechanical timers can shift slightly over weeks, which affects DLI for light-hungry crops. Also avoid power interruptions, since a “brief off” during the dark period can disrupt flowering triggers for short-day plants.
Will normal LEDs work for flowering if I set a 12-hour light cycle?
For short-day flowering, the dark period must be truly uninterrupted, and light leaks matter. Even small LED glow from the fixture, indicator lights, or reflections can count as light during the dark window. Use the timer to shut power fully, and keep the grow area enclosed and dark, then measure dark-period integrity by checking for any visible light in the off window.
Can I fix underpowered lights by running them longer each day?
Yes, but only if you treat it as a photoperiod strategy, not a replacement for intensity. Running lights longer increases DLI linearly, but plants also require a consistent dark period and you can encourage other issues like algae from overly wet media. For weak setups, change one lever at a time (hours or fixture distance or number of lights), then re-check after about a week.
Does adding reflective material like Mylar actually help, and can it cause problems?
Use reflective materials to improve efficiency, but do it safely. Mylar and shiny foams can increase effective light by bouncing stray light, yet they can also introduce hotspots if you bring fixtures too close. Keep fixtures with adequate air clearance, and do not let reflective surfaces touch hot parts or drivers. If you see uneven growth, reduce hotspots by spacing lights or adjusting height.
What’s the correct way to use a phone lux meter or handheld lux meter on my LED setup?
Measure at canopy height with the sensor held steady and oriented toward the light source, and take multiple readings across the area. A common mistake is reading too far above the plant, or taking one reading at the brightest point and assuming it applies everywhere. Average several points (center, mid-edge, corners) and use the lowest reading to set your plan.
Next Article
How to Grow Weed With LED Lights Indoors Step by Step
Step-by-step LED indoor cannabis grow guide: setup, light distance, veg and flowering schedules, and LED troubleshooting