A solid T5 grow light setup comes down to four things: the right fixture and bulbs for your plant stage, mounting it at the correct height (usually 2 to 6 inches above seedlings, up to 12 inches for established plants), running it on a consistent daily schedule (16 to 18 hours for seedlings, 12 to 14 for vegetative growth), and keeping cords and connections safe.
T5 Grow Light Setup: Step-by-Step Guide for Indoor Plants

Marcus Tillman
12 May 2026

NCSU CES fluorescent lighting guidance also calls out practical photoperiod ranges, such as running lights about 12 to 18 hours per day for fluorescent setups [photoperiod ranges (12 to 18 hours)](https://hortscans. ces. ncsu. edu/uploads/f/l/fluoresc_53a054f8ceabe.
pdf). Get those four things right and your plants will grow compact, healthy, and fast. Miss one and you end up with leggy, yellowing, or burned plants wondering what went wrong.
What a T5 grow light setup actually includes
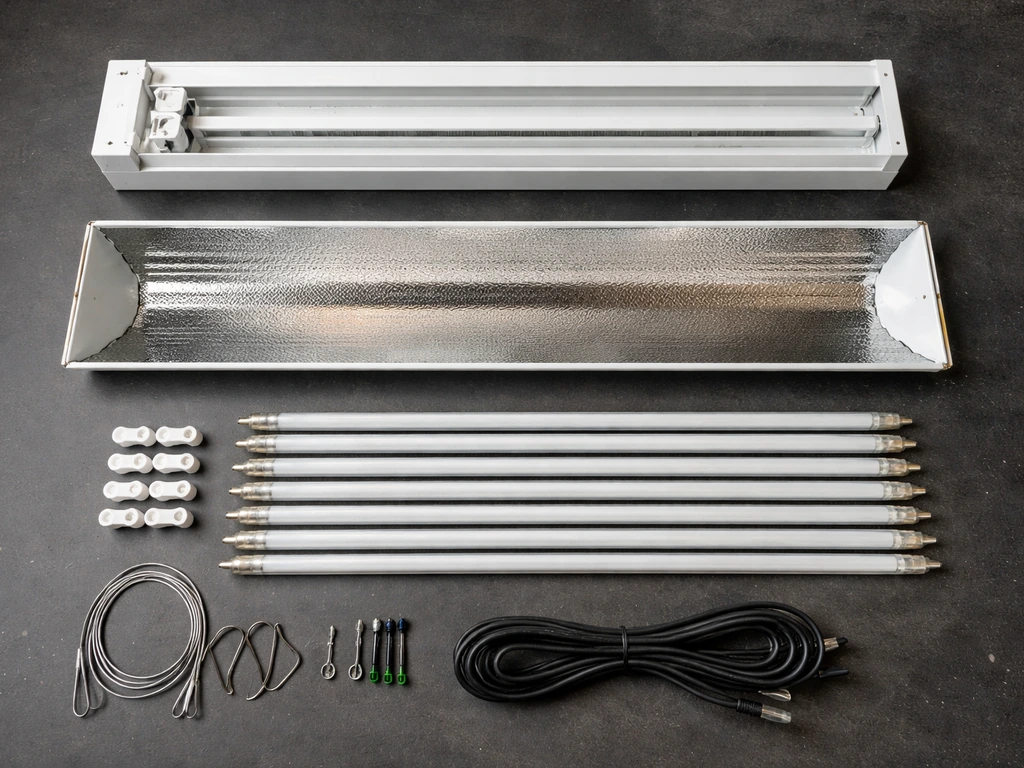
A complete T5 system is more than just a tube and a plug. Most quality kits, like Hydrofarm's Jump Start line, bundle everything into one package so you are not hunting for compatible parts. Here is what a full setup looks like when you unbox it.
- Fixture/hood: The housing that holds the bulbs and contains a built-in ballast. T5HO (high-output) fixtures are the standard choice for grow applications because they push more lumens than standard T5 fixtures of the same physical size.
- T5 fluorescent bulbs: Sold separately or included with the fixture. Common sizes are 2-foot and 4-foot tubes. A 4-foot T5HO tube runs at 54 watts and is the most widely available grow-light bulb format.
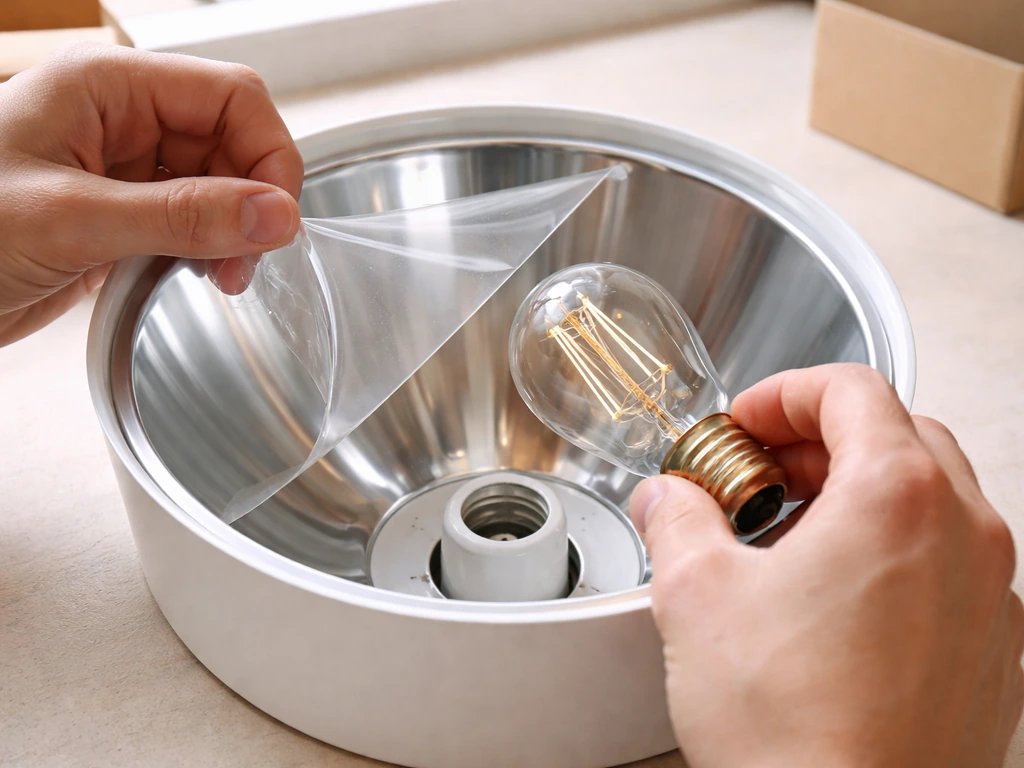
- Reflector/hood interior: Most fixtures include a mirrored or white reflective interior to bounce light downward. Some T5HO fixtures ship with a protective film on the reflector that you must peel off before use.
- Silicone endcaps: T5HO lamps seat into silicone endcaps inside the fixture to protect the lamp pins. These are typically pre-installed in the fixture.
- Hanging hardware: Hanger hooks, cables, or ratchet hangers for suspending the fixture above your plants. Kits from brands like HTG Supply include this hardware in the box.
- Power cord and daisy-chain receptacle: Most fixtures have a standard power cord plus a secondary outlet or receptacle that lets you connect additional fixtures in a chain from one wall plug.
- Timer (often sold separately): A basic mechanical or digital outlet timer to automate your photoperiod. This is one of the most important pieces and is frequently not included with budget fixtures.
If you are buying a modular system like the Hydrofarm Jump Start, the fixture is designed to expand by adding more modules without custom wiring each time. That is a big deal when you start scaling up because it keeps the whole setup clean and safe. For a first-time buyer, I always recommend a kit that includes the fixture, at least one bulb, and hanger hardware so you are not hunting for compatible parts at the last minute.
Choosing the right T5 system for your plants and space
The two main decisions are fixture size and bulb count. Fixture size (2-foot vs. 4-foot) should match your growing tray or shelf length. Bulb count (2-bulb, 4-bulb, 6-bulb, or 8-bulb fixtures) determines how much light you can push at the canopy. For seedlings and clones on a single tray, a 2-bulb or 4-bulb 2-foot fixture is usually enough. For a full vegetative shelf, a 4-bulb or 8-bulb 4-foot fixture gives you the coverage and intensity you need.
| Setup type | Recommended fixture | Bulb count | Best for |
|---|---|---|---|
| Seed starting tray (10x20 in) | 2-ft, 2-bulb T5HO | 2 x 24W | Germination, early seedlings |
| Single shelf propagation | 4-ft, 4-bulb T5HO | 4 x 54W | Seedlings, clones, herbs |
| Vegetative growth bench | 4-ft, 8-bulb T5HO | 8 x 54W | Larger plants, aggressive veg growth |
| Multi-shelf rack | Multiple 4-ft fixtures daisy-chained | 4–8 x 54W per shelf | High-volume seedlings, lettuce, greens |
T5 and T5HO are physically the same diameter tube, but T5HO fixtures run the tubes at higher wattage and deliver significantly more usable light at the canopy. For any grow application beyond casual houseplant supplementation, use T5HO. Standard T5 simply does not have enough output to keep plants from stretching when mounted at a practical height.
One comparison worth making: if your space is large or your plants have high light demands during flowering, a T5 setup will eventually hit its limits. LED panels and HPS systems deliver higher PPFD at greater canopy distances, which matters for fruiting plants. T5 shines (literally) for seedlings, clones, greens, herbs, and low-to-medium light houseplants. For those use cases, it is hard to beat the even, gentle light distribution and low heat output.
Installation and safe mounting
Step-by-step assembly
- Unbox the fixture and peel off any protective film from the reflector interior before installing bulbs. Leaving the film on kills your light output and can cause heat buildup.
- Seat each T5HO tube into the silicone endcaps on both ends of the fixture. Press firmly until the tube is fully locked in. A loose pin is a common cause of flickering.
- Attach the hanger hooks or ratchet hangers to the fixture's mounting points, usually two points along the top rail.
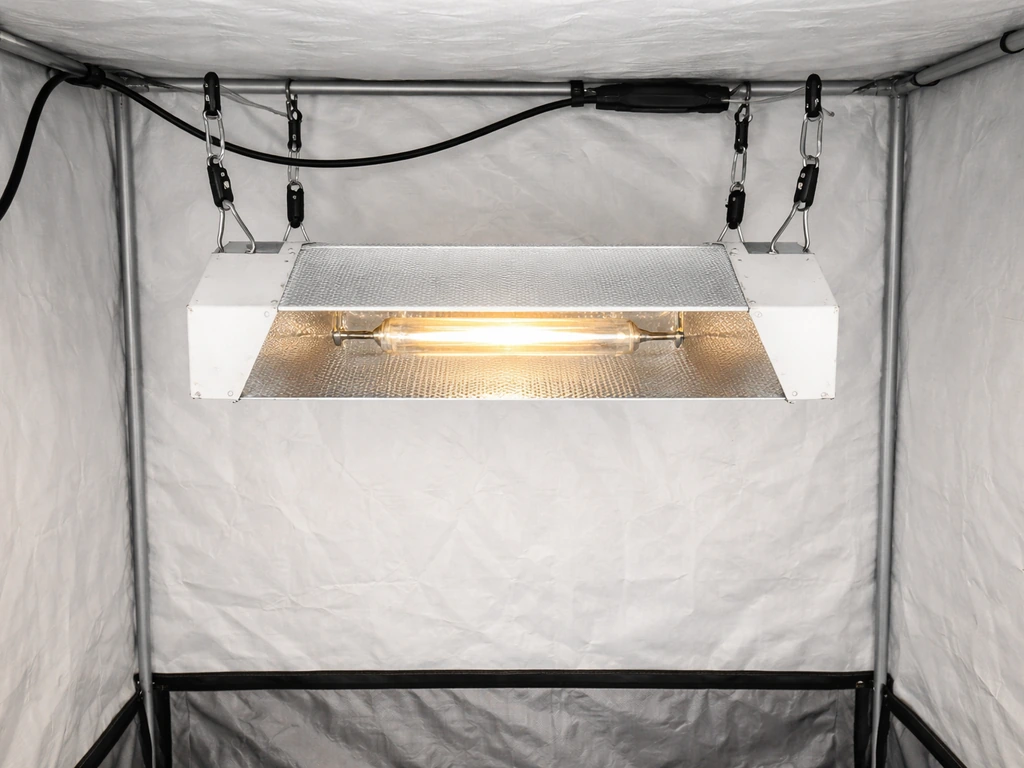
- Suspend the fixture from a solid overhead structure: a shelf rail, a grow tent crossbar, or a purpose-built lighting rack. Make sure the anchor points can hold at least three times the fixture weight.
- Route the power cord away from any water sources, drip lines, or spray zones. Use cable clips or zip ties to keep cords off the floor and out of pinch points. Damaged cord insulation is a real fire hazard in humid grow spaces.
- Plug into a grounded outlet. If your setup is in a garage, basement, or any outdoor-adjacent space, use a GFCI-protected outlet.
- Plug your timer into the wall, then plug the fixture into the timer. Set your schedule before you walk away.
Height and distance guidelines
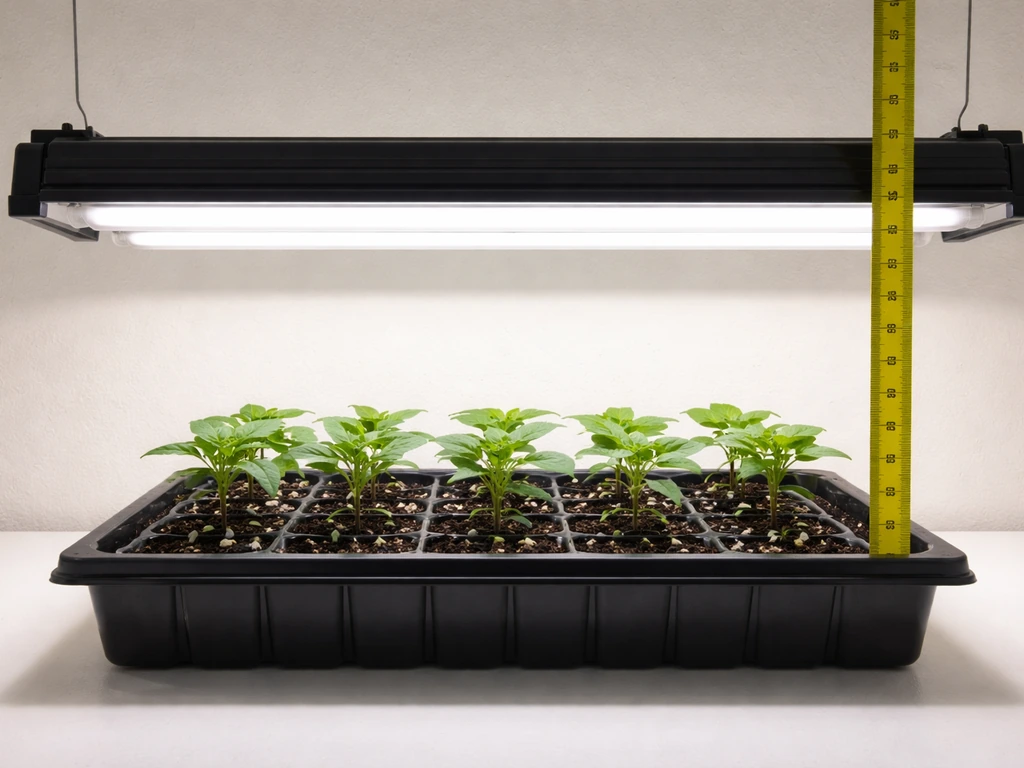
Mounting height is where most beginners make their first mistake, and it usually shows up as leggy, stretched seedlings within a week. For seedlings and clones, keep the T5HO fixture 2 to 6 inches above the canopy. University of Maryland Extension recommends keeping transplant tops just 1 to 2 inches from fluorescent lights, which is closer than most people expect. UNH Extension puts the range at 6 to 12 inches for seed-starting. The difference comes down to how many bulbs you are using and whether you are working with delicate germinating seeds or established seedlings. Start at 4 to 6 inches, watch for a week, and adjust from there.
For larger vegetative plants, 6 to 12 inches is a reasonable starting range. Beyond 12 inches, T5HO output drops off fast enough that you will start seeing slow growth and stretch. If you find yourself needing to mount a fixture more than 12 inches away to manage heat, you are either running too many bulbs in a tight space or you need better airflow, not more distance.
Airflow and heat management
T5HO fixtures run cooler than HPS or many LED drivers, but they still generate heat that accumulates in enclosed spaces. A small clip fan moving air across the canopy solves most heat problems and also strengthens stems. If you are stacking multiple fixtures on a rack, make sure there is at least 6 inches of clearance between the top of the fixture and any shelf or ceiling above it. Trapped heat above a fixture shortens ballast life and can warp the hood over time.
Dialing in intensity: bulb choice, reflectors, and spacing
Picking the right bulb spectrum
T5HO bulbs come in different color temperatures, and the right choice depends on what your plants are doing right now. The two most common grow-specific options are 6500K (blue-spectrum, marketed for vegetative growth) and 3000K (red-spectrum, marketed for flowering and bloom induction). You do not need to change fixtures to switch spectrums, just swap the tubes.
| Color temperature | Spectrum emphasis | Best plant stage | Notes |
|---|---|---|---|
| 6500K | Blue/cool white | Seedlings, vegetative, clones | Encourages compact, leafy growth; standard choice for most T5 grow applications |
| 3000K | Red/warm white | Flowering, late vegetative | Promotes bloom development; useful for herbs going to flower or fruiting starts |
| Mixed (3000K + 6500K) | Broad spectrum | General purpose, transition stages | Run half your tubes at each temp for a balanced output across the whole growth cycle |
blank" rel="noopener noreferrer">A 54W 4-foot T5HO tube in 6500K is the single most useful bulb for a general seed-starting and propagation setup. If you want a complete solar panel grow light setup, plan for both the light run time and a reliable battery or grid backup. If you are growing herbs that you want to bolt or fruiting starts that need a flowering push, swap a couple of tubes to 3000K. For most readers here, start with all 6500K and only mix in 3000K when you have a specific reason to.
Getting more light from the same fixture
The reflector inside your fixture matters more than most people think. A clean, highly reflective hood can meaningfully increase the usable light reaching your canopy compared to a dull or dirty one. Keep the interior of your fixture clean (dust it every few weeks), peel off any protective films at setup, and replace bulbs every 12 to 18 months even if they are still glowing because T5HO output drops significantly before the tube actually fails.
Spacing fixtures side by side across a wide bench also smooths out hot spots. A single 4-bulb fixture aimed at the center of a wide shelf will leave the edges dim. Two narrower fixtures placed 8 to 10 inches apart cover the same width with more even PPFD across the whole canopy. If you have a PAR meter or can borrow one, measure PPFD at canopy level and at the edges of your growing area. Move fixtures closer together or raise them slightly to smooth out the readings.
Lighting schedule: hours per day and stage-based adjustments
Consistency matters as much as duration. Plants respond to predictable light and dark cycles, so a timer is not optional. A mechanical outlet timer costs under $10 and pays for itself immediately in better plant performance and avoided mistakes.
| Growth stage | Recommended hours per day | Notes |
|---|---|---|
| Germination (seeds just sprouted) | 16–18 hours | UMN Extension baseline; some growers run 18 hours for faster establishment |
| Seedlings (first true leaves) | 16–18 hours | UNH Extension recommends 18 hours; run closer to lights to prevent stretch |
| Vegetative growth | 14–16 hours | University of Maryland Extension baseline for transplants and established seedlings |
| Herbs and greens (ongoing) | 14–16 hours | Adjust based on plant response; most herbs do well at 14–16 hours |
| Flowering starts or light-sensitive plants | 12–14 hours | Shortening the photoperiod signals flowering in many species |
If you want to push growth speed for sun-loving plants and your space stays cool enough, UNH Extension research supports running lights up to 22 hours per day to hit higher daily light integral targets. That is an aggressive schedule and requires good airflow and temperature control to avoid heat stress. For most home growers, 16 to 18 hours covers everything from germination through early vegetative growth without pushing plants into stress territory.
Set your timer so the lights come on when you are around to check on your plants at least once during the photoperiod. That way you catch problems like a tripped circuit, a flickering tube, or overheating before a full 16-hour dark period hides the damage.
Troubleshooting common T5 problems
Leggy, stretched seedlings
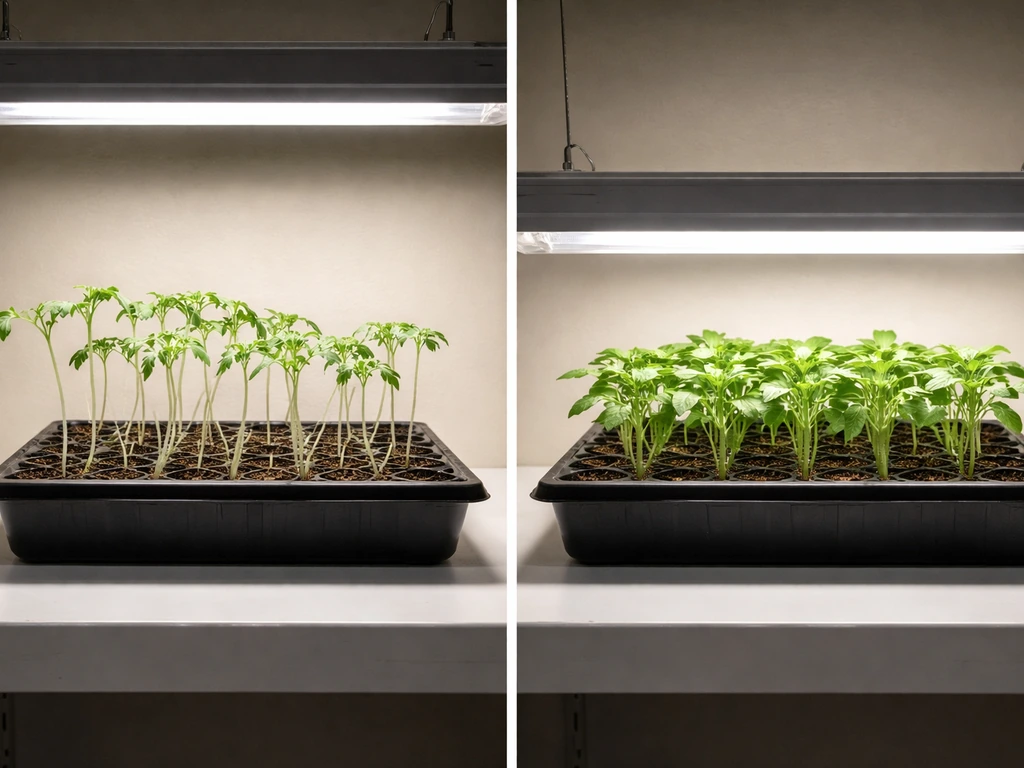
This is the most common T5 problem and almost always comes down to one of three causes: the fixture is too far from the canopy, you are running too few hours per day, or you are using standard T5 bulbs instead of T5HO. Etiolation (the scientific term for stretch) happens when a plant redirects energy into stem elongation searching for more light. Fix it by dropping your fixture to 2 to 4 inches above the canopy, bumping your photoperiod to 16 to 18 hours, and confirming your bulbs are actually T5HO rated. High heat can also cause rapid, weak growth that looks like stretching, so check your canopy temperature too.
Yellowing leaves
Before blaming the light, check the watering. Overwatering is the most common cause of yellowing on indoor plants, and it looks almost identical to light-related chlorosis. If the soil is consistently wet and the yellowing starts on lower leaves, watering is likely the culprit. If the plant is properly watered and lower or interior leaves are yellowing while new growth looks healthy, increase your daily light hours or move the fixture slightly closer. If the newest leaves at the top are yellowing, that points more toward a nutrient issue than a lighting problem.
Slow or stalled growth
Slow growth under T5 usually means not enough light reaching the canopy. Check your bulb age first: T5HO tubes lose a meaningful portion of their output after 12 to 18 months even if they look fine. Replace old bulbs and see if growth picks up within a week. If your bulbs are new, check the fixture distance and your photoperiod. Also confirm you are using the right color temperature: running 3000K bulbs through an entire seedling phase gives plants less of the blue spectrum they need for tight, compact growth.
Heat stress symptoms
Signs of heat stress include leaf curling (edges rolling up or cupping), wilting during the light period even when the soil is moist, bleached or scorched patches on leaves closest to the fixture, and shriveled growing tips. If you see any of these, raise the fixture immediately by 2 to 3 inches and add a fan to move air across the canopy. T5HO fixtures are low-heat compared to HPS or some LED drivers, but in small enclosed spaces or with fixtures mounted extremely close, heat stress is still possible.
Uneven growth across the canopy
If plants directly under the fixture center are growing faster or darker green than plants at the edges, your coverage is uneven. Either add a second fixture to cover the edges, rotate your trays every few days so all plants spend time under the center, or raise the fixture slightly (which spreads light more evenly at the cost of some intensity). For multi-shelf setups, space fixtures so their coverage areas overlap slightly at the edges.
Flickering or non-starting tubes
A tube that flickers or fails to strike is almost always a loose pin connection in the endcap. Power down, reseat the tube firmly on both ends, and try again. If the problem persists, swap the tube into a known-working fixture to determine if the tube or the ballast is the issue. Never run a T5HO tube in a fixture it is not rated for: the ballast drives the tube at a specific current and a mismatched tube can overheat or fail prematurely.
Upgrades and scaling up
Adding more fixtures safely
Most T5HO fixtures include a secondary outlet that lets you daisy-chain additional fixtures from a single wall plug. This is clean and convenient, but it has a hard limit. Hydrofarm's instructions for their 4-bulb 4-foot fixture (FLT44, rated 4x54W) cap the daisy-chain at 7 fixtures maximum. Exceeding that limit overloads the circuit and creates a fire risk.
Before you chain another fixture, add up the total wattage on that circuit and make sure you are staying under 80 percent of the circuit's rated capacity. A standard 15-amp, 120V circuit gives you 1,800 watts of continuous capacity, so stop at 1,440 watts (80 percent) of connected load. Some growers also use purpose-built configurations like method seven operator HPS plus grow room glasses to simplify how they plan and monitor lighting in a larger setup.
For larger multi-shelf setups, daisy-chain cords designed for specific fixture lines (like LighTech's daisy-chain cord for their T5 strip fixtures) keep wiring clean and reduce the tangle of individual power cords running to the wall. One power cord per shelf, fixtures chained along the shelf, timers at the wall. That is the cleanest and safest way to scale.
Timers, controls, and automation
A basic mechanical outlet timer handles 90 percent of what most home growers need. Set it once and forget it. If you are running multiple shelves at different growth stages, use separate timers per shelf so you can run a 16-hour seedling schedule on one tier and a 14-hour vegetative schedule on another without rewiring anything.
Smart outlet plugs with app control are a step up that is worth considering once you are managing three or more shelves. They let you adjust schedules remotely and track runtime without touching the physical timer. Just make sure any smart plug you use is rated for the wattage of the fixture string it controls.
When to consider moving beyond T5
T5 setups are excellent for seedlings, clones, greens, herbs, and low-to-medium light plants. If you are moving into fruiting plants, cannabis in flower, or any crop that needs high PPFD at canopy distances above 12 inches, T5 will start to limit you. If you are considering an HPS grow light setup for higher PPFD needs, start by matching the lamp wattage and reflector coverage to your canopy distance and schedule high PPFD.
LED quantum boards and HPS systems deliver more raw photon output at the canopy for those applications. A full LED grow setup or an HPS system is worth evaluating when you find yourself stacking fixtures just to get enough intensity, because at that point the cost and heat from multiple T5 fixtures starts to outweigh the simplicity advantage.
If you are trying to build a cheap CFL grow light setup, you can still use the same basic principles like safe wiring, proper mounting height, and a consistent light schedule.
Cord management and electrical safety
Grow spaces are wet, busy environments and power cords get stepped on, pinched, and soaked. OSHA guidelines on flexible cord use stress protecting cords from accidental damage, which in a grow space means keeping power cords off the ground, away from water lines, and secured with clips or zip ties along stable structures. Never run an extension cord under a mat, through a water source, or bundled tightly in a way that traps heat. If any portion of your grow setup uses an outdoor-adjacent outlet (garage, patio, basement wall), use a GFCI outlet or a GFCI adapter to protect against ground faults in wet conditions.
FAQ
Can I use regular plant timers, or does my t5 grow light setup need a special timer?
A standard mechanical outlet timer works for most T5 grow light setups, but avoid “dimming” timers or anything marketed for LED-only. If you are using a daisy-chained string, use a timer rated for the total watts of the entire fixture set, and check it weekly for consistent on and off timing.
How do I dial in the exact mounting height for my specific plants, instead of guessing 2 to 6 inches?
Start at the mid-range (for seedlings, about 4 to 6 inches), then adjust in small steps after 5 to 7 days. If plants are stretching, move closer by 1 to 2 inches. If you see any bleaching, tip burn, or leaf cupping, move farther away and add airflow rather than compensating with more hours.
What should I do if my plants look too dark or too light under a t5 grow light setup?
If they look dark and growth is slow, first confirm you are using T5HO tubes and that the fixture is clean inside, including the reflector hood. Then check bulb age (replace after 12 to 18 months) and only after that adjust distance and photoperiod. If they look bleached or scorched near the fixture, raise the light and increase fan airflow to reduce heat stress.
Is it better to run longer hours or mount the fixture closer when I need more growth speed?
For most home setups, adjust duration before distance. Moving the fixture closer can increase the risk of bleaching or heat stress, especially in tight enclosures. If you already have plants very close to the canopy, increase photoperiod in small increments (for example, 1 to 2 hours) and keep a strict daily schedule to avoid swings.
Can I mix 6500K and 3000K tubes in the same fixture for a t5 grow light setup?
Yes, many growers mix them to balance vegetative form and early flowering behavior without swapping fixtures. A common approach is using mostly 6500K for the bulk of the day or with most tubes being 6500K, then switching some tubes to 3000K when plants show they are ready for a flowering push.
How often should I clean the reflector and change bulbs in a t5 grow light setup?
Plan to dust the inside of the fixture every few weeks because a thin dust layer can reduce usable output. For bulbs, replace T5HO tubes every 12 to 18 months even if they still glow, because light output can decline well before the tube fails completely.
What is the safest way to daisy-chain multiple fixtures without overloading the circuit?
Stay within the fixture manufacturer’s daisy-chain cap (for example, some kits limit the count), and also calculate the total wattage on that wall circuit. As a practical rule, do not exceed 80 percent of the circuit’s continuous capacity, and do not chain across different circuits or with unspecified adapters.
My t5 grow light setup flickers, is it always a tube issue?
Most flicker problems come from loose endcap pin connections. Power down, reseat the tube firmly on both ends, and try again. If it still flickers, test the tube in a known-working fixture to isolate whether the tube is failing or the ballast/driver is the issue.
Do I need a fan even if the fixture runs cooler than HPS or many LEDs?
Yes, a small clip fan is still useful because it reduces heat buildup in enclosed racks and can strengthen stems through gentle air movement. If you stack fixtures on shelves, leave adequate clearance above the top fixture so heat does not accumulate and shorten ballast life.
Should I rotate trays under a t5 grow light setup?
Rotation helps when you do not have a PAR meter, because edge plants often receive less intensity than the center. Rotate trays every few days so all plants spend time closer to the fixture center, and consider adding a second fixture or overlapping coverage if you consistently see edge slowdown.
Is t5 grow light setup okay for fruiting plants, or should I switch lights earlier than flowering?
T5HO can work for herbs and greens, but once plants need high canopy PPFD, you may hit practical limits unless you stack fixtures. If your setup requires mounting beyond about 12 inches to manage issues or you find yourself adding many fixtures just for intensity, it is usually time to evaluate HPS or LED rather than continuing to scale T5.
How do I prevent yellowing from watering issues being mistaken for light problems?
Check where the yellowing starts. Yellowing on lower leaves with soil that stays wet or heavy usually points to overwatering. If lower leaves yellow while new growth looks healthy, that is often watering-related. If the newest growth is yellow, consider nutrients first and then verify light schedule and distance.
What electrical safety steps matter most for cords in a grow space?
Keep cords off the ground, away from water exposure, and secured along stable structures. Avoid running cords under mats or through wet areas, and use a GFCI outlet or adapter for outdoor-adjacent outlets like garage or patio-adjacent walls.
Next Article
HPS Grow Light Setup Guide for Tent and Open Space
Step-by-step HPS grow light and tent setup: choose parts, mount safely, manage heat, wire power, and dial height/timer.