A full LED grow setup means having four things working together: the right LED light for your space and plant stage, a safe way to mount and power it, a timer or dimmer to control the schedule, and a basic environment (airflow, temperature, humidity) that keeps your plants from cooking or drying out. Get all four right and your plants will thrive. Miss one and you'll spend weeks wondering why they're stretching, yellowing, or just sitting there doing nothing.
Full LED Grow Setup Guide: Plan, Install, Run, Troubleshoot

Marcus Tillman
26 Apr 2026
What a full LED grow setup actually includes
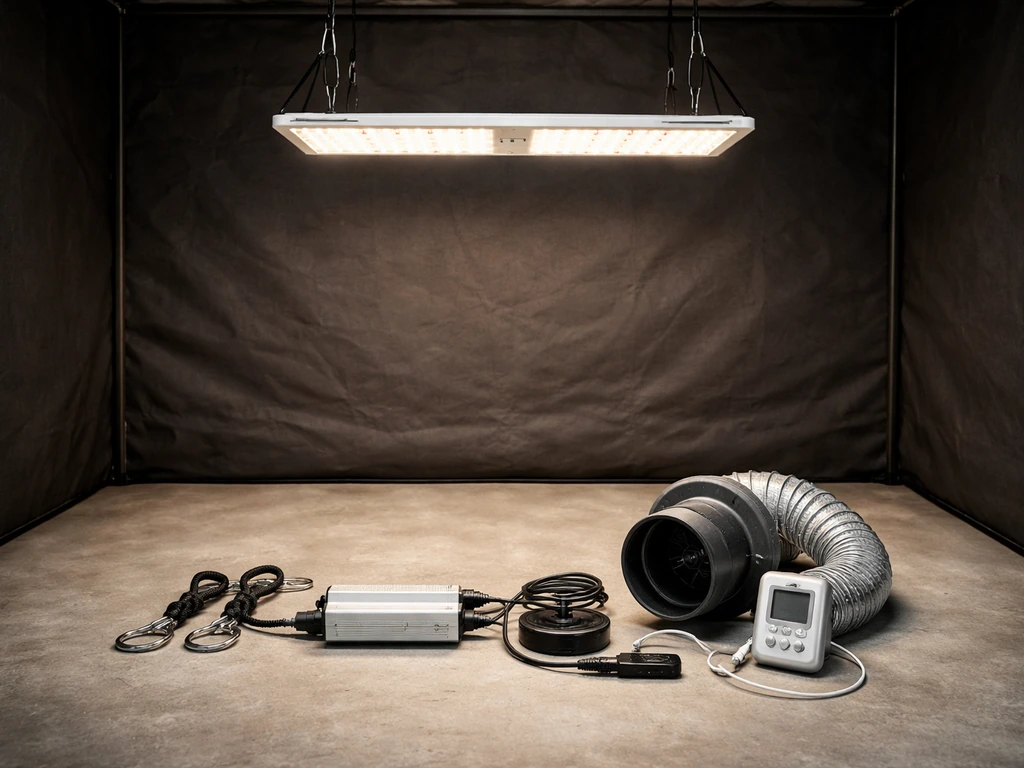
A lot of beginners buy a light and call it a setup. That's only step one. Before you spend a dollar, run through this checklist so you know exactly what you're buying and why.
- LED grow light sized to your canopy area (not just marketed wattage, but actual PPFD coverage)
- Mounting hardware: adjustable ratchet hangers, a tent crossbar, ceiling hooks, or a light rack
- Timer: a mechanical outlet timer works fine; a smart plug or inline digital timer is better
- Dimmer or driver control: many quality LEDs have a built-in knob or dimmable driver; confirm before buying
- GFCI-protected outlet or power strip where the light plugs in
- Exhaust fan and carbon filter (for enclosed spaces) or at minimum a circulation fan
- Intake vent or passive holes if you're in a tent
- Thermometer/hygrometer combo to track temperature and humidity
- Grow space itself: tent, shelf, closet, or dedicated room with reflective walls
You don't have to buy everything at once, but you do need to plan for all of it. The most common mistake I see is someone setting up a light in a sealed closet with no airflow, then wondering why their plants are wilting at 95°F. The environment is not optional.
Choosing the right LED light for your plants
Stop shopping by watts, start shopping by PPFD
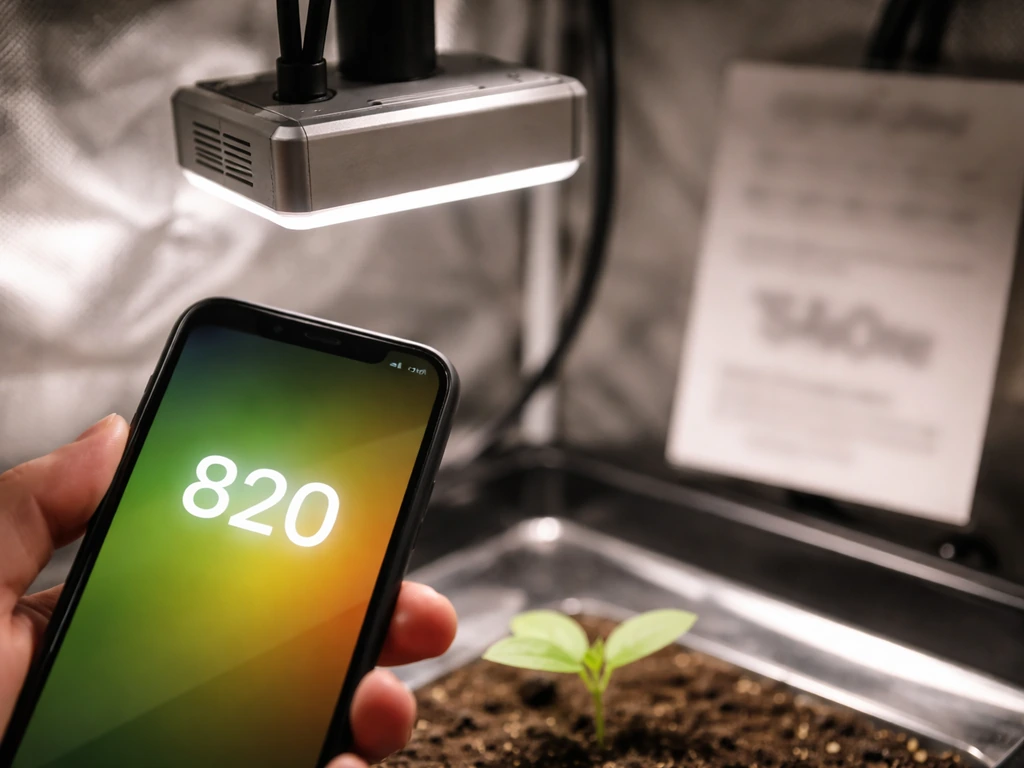
Wattage tells you how much electricity a light pulls from the wall. It does not tell you how much usable light actually reaches your plants. The number you want is PPFD: photosynthetic photon flux density, measured in µmol per square meter per second (µmol·m⁻²·s⁻¹). This is the intensity your plant canopy actually receives at a given mounting height. Any reputable LED brand will publish a PPFD map for their fixture. If they don't, skip that brand.
As a practical intensity target, aim for 400 to 800 µmol·m⁻²·s⁻¹ at canopy level for vegetative growth and flowering crops. Seedlings and clones need far less, under 100 µmol·m⁻²·s⁻¹ to start. Flowering and fruiting plants can use up to 1,200 µmol·m⁻²·s⁻¹ when conditions (CO₂, water, nutrients) are dialed in. Pushing intensity higher than your plant and environment can support just causes light stress, not faster growth.
Match coverage area to your space
PPFD maps on manufacturer spec sheets show coverage at a specific height, usually 18 to 24 inches above the canopy. A 2x2 ft space needs a light that delivers useful PPFD across roughly 4 sq ft. A 4x4 ft tent needs coverage across 16 sq ft. Check the PPFD map, not the "covers up to X sq ft" marketing claim, because those claims are usually based on supplemental-level intensity that's fine for houseplants but too weak for heavy fruiting or flowering.
Full-spectrum vs. targeted spectrum
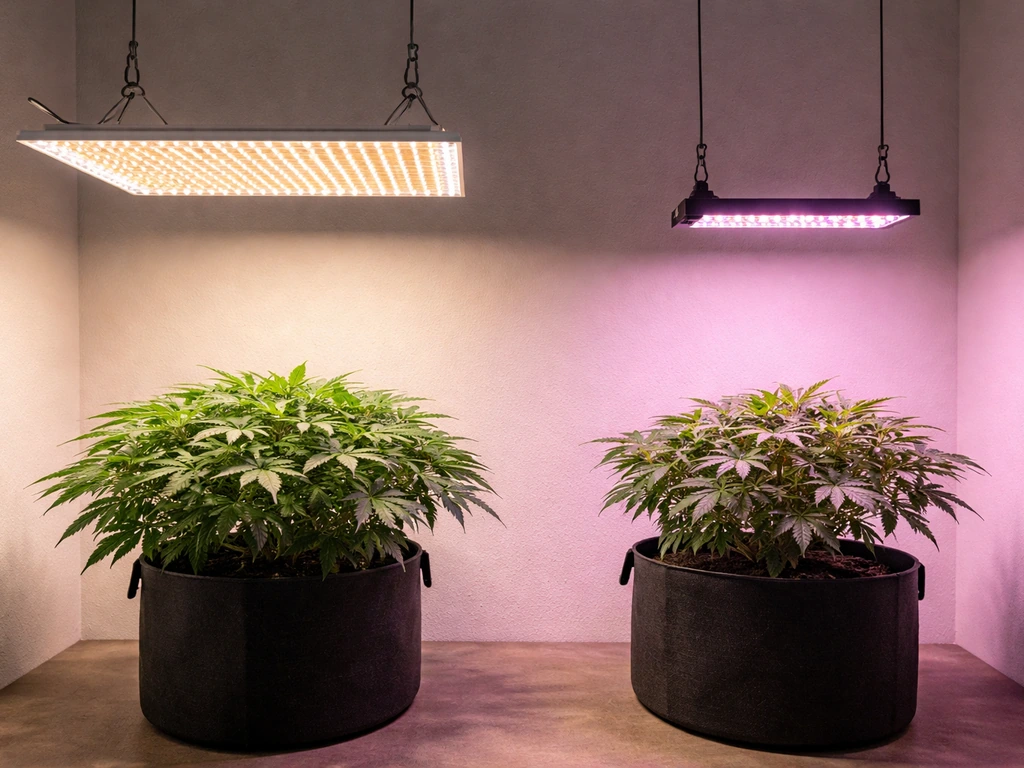
For most home growers, a broad full-spectrum white LED (often called quantum board or board-style) with good representation across 400 to 700nm plus some far-red is the right call. It works through every stage without swapping fixtures. Dedicated red/blue "blurple" lights work but are less efficient and harder to use for diagnosing plant health because everything looks purple. Full-spectrum white is easier to work under and is what most quality brands use today.
Quick light-size reference by space
| Grow Space | Recommended Canopy PPFD (Veg/Flower) | Approximate True Wattage Range |
|---|---|---|
| 2x2 ft (4 sq ft) | 400–800 µmol·m⁻²·s⁻¹ | 100–150W |
| 3x3 ft (9 sq ft) | 400–800 µmol·m⁻²·s⁻¹ | 200–300W |
| 4x4 ft (16 sq ft) | 400–800 µmol·m⁻²·s⁻¹ | 400–600W |
| 5x5 ft (25 sq ft) | 400–800 µmol·m⁻²·s⁻¹ | 600–800W |
| Seedling shelf (any) | Under 100 µmol·m⁻²·s⁻¹ | 25–50W or dim larger fixture |
These are real-watt (draw from the wall) numbers, not the inflated "equivalent" wattage some brands print on the box. If a brand says "1000W equivalent" but the actual draw is 100W, treat it as a 100W light when sizing.
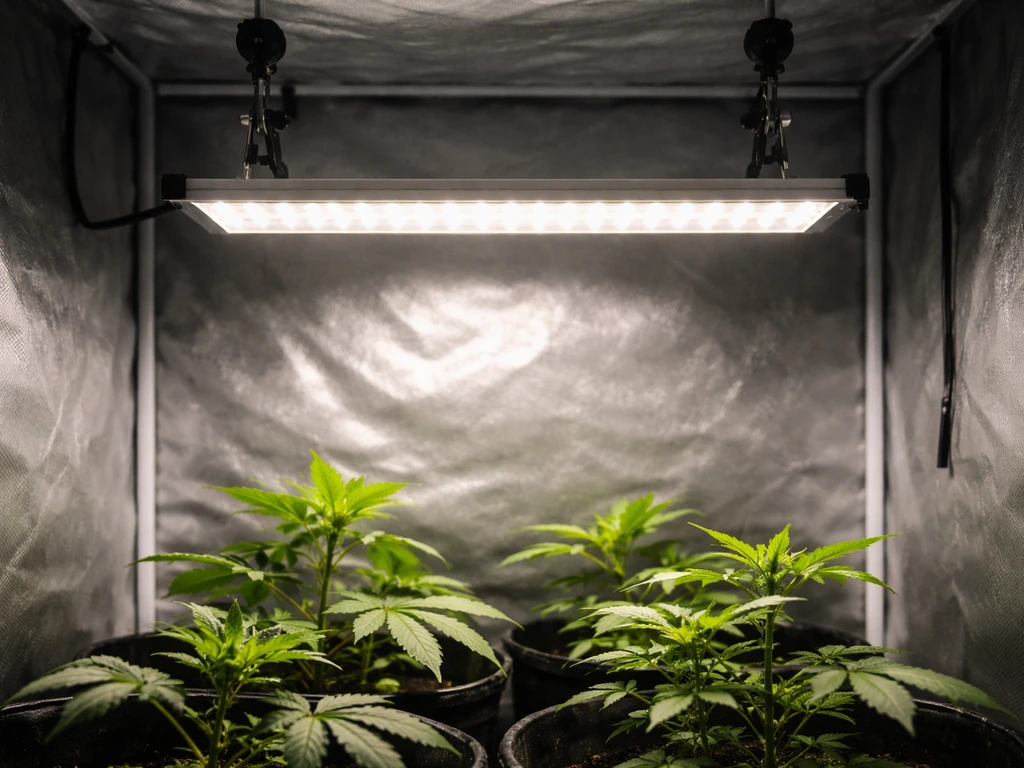
Layout and mounting: height, spread, and coverage
Starting height by growth stage
Mounting height is your primary intensity control when you don't have a dimmer. Moving a light further away reduces PPFD significantly because light intensity drops with the square of distance. Here are safe starting points you can adjust from:
| Growth Stage | Starting Height Above Canopy | Notes |
|---|---|---|
| Seedlings / clones | 24–36 inches | Keep intensity low; look for slow, compact growth |
| Early vegetative | 18–24 inches | Plants should look stocky, not stretching toward the light |
| Full vegetative | 16–20 inches | Adjust down as intensity is confirmed adequate |
| Flowering / fruiting | 12–18 inches | Confirm no leaf curl or bleaching at this distance |
These are starting points, not rules. Check your manufacturer's PPFD map for your specific fixture at these distances and adjust accordingly. If you have a PPFD meter, take a center and corner reading at canopy height and compare them. More than a 2:1 ratio between your hottest and dimmest spot means you have a coverage problem.
Beam spread and coverage
Board-style LEDs spread light more evenly than bar-style or COB fixtures. If you're using a single-point COB or a narrow bar array, raising the height improves uniformity but reduces intensity. The tradeoff is real. For spaces bigger than 3x3 ft, using two smaller fixtures instead of one large one almost always gives you better canopy coverage and more flexibility to dial in intensity per zone.
Reflective walls help more than you'd think
If you're in a grow tent, the mylar walls are already doing this job. If you're in a closet or open shelf, line the walls with white paint or panda film (white/black poly sheeting). Flat white paint reflects around 85 to 90% of light. Mylar and emergency blankets can hit 95% but create hot spots if they're wrinkled. Even a simple white-painted closet meaningfully increases the effective PPFD your plants receive without changing the fixture at all.
Mounting hardware
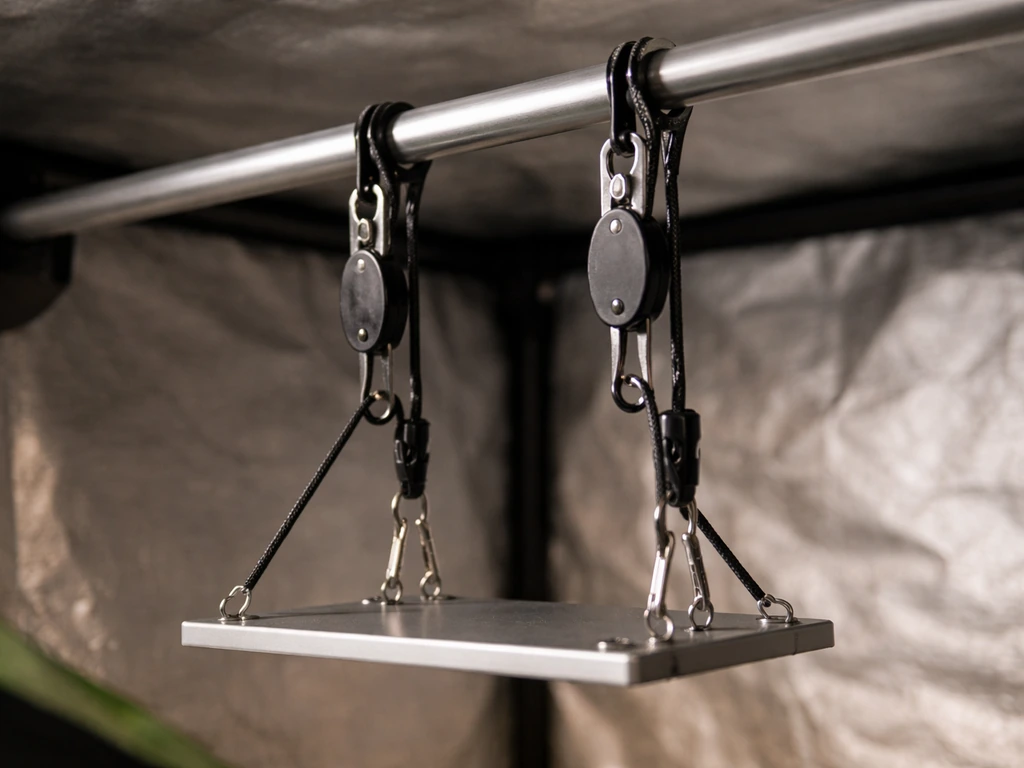
Ratchet rope hangers are the simplest solution for tent setups. They clip to the crossbar above and the fixture below, and you can adjust height in seconds. For ceiling mounts, use a stud-anchor or toggle bolt rated for at least twice the fixture weight. Most LED panels weigh 5 to 15 lbs, but you want a margin for cord tension and any vibration from fans. Never hang a fixture solely from its power cord.
Electrical and safety basics
GFCI protection is not optional
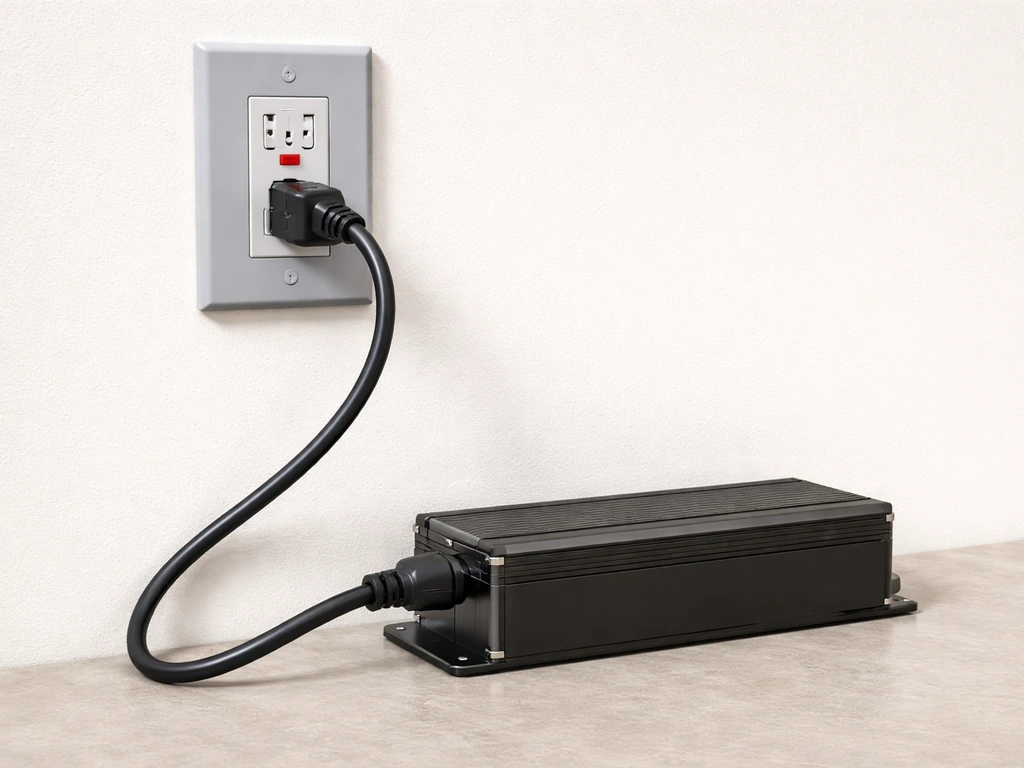
Under NEC Article 410.184, horticultural lighting equipment that uses flexible cords or separable connectors must be supplied by a GFCI-protected outlet. In plain terms: the outlet your LED plugs into needs GFCI protection. You can satisfy this with a GFCI outlet, a GFCI circuit breaker, or a GFCI power strip upstream of your equipment. This is especially important in grow tents and humid grow rooms where water and electricity are close together. Don't skip it.
Drivers, dimmers, and compatible controls
Most quality LED grow lights use an external or integrated driver that converts AC wall power to the DC voltage the LEDs need. If your driver has a dimming knob or a 0-10V dimming port, you can control intensity directly without changing height. This is very useful because it lets you run the same fixture from seedling stage to flower by dialing intensity up as plants mature rather than re-hanging the light constantly. If your driver does not have a built-in dimmer, you can raise or lower the fixture to adjust intensity instead.
Do not plug dimmable LED drivers into standard lamp dimmers (the kind on a wall switch). They are not compatible and can damage the driver or create a fire hazard. Use only the dimmer port built into the driver or a 0-10V controller designed for your specific driver.
Timers
An outlet timer is one of the most important parts of your setup and one of the cheapest. A basic mechanical 24-hour outlet timer costs a few dollars and is completely reliable. Digital timers let you set multiple on/off cycles and are worth the small upgrade. Smart plugs with scheduling apps work well too, but check that the smart plug is rated for the amperage your fixture draws. Most LED setups pull 2 to 8 amps at 120V. A fixture drawing 600W pulls 5 amps, well within the 15-amp limit of a standard household outlet.
Strain relief and cord management
Route power cords so they're not under tension, pinched by the tent zipper, or sitting in water. Use cable ties to keep cords away from the canopy. If your fixture has a hanging driver, mount it outside the tent if possible so it runs cooler and is easier to access for adjustments. Drivers generate heat and airflow around them extends their lifespan.
Setting up your grow environment
Temperature
Most plants grow best with air temperatures between 70 and 82°F (21 to 28°C) during the light period and 60 to 70°F (15 to 21°C) during the dark period. LED fixtures produce far less heat than HPS or MH lights of equivalent output, but they still add heat to an enclosed space. A 400W LED in a 4x4 tent can raise tent temperature 10 to 15°F above room temperature if there's no exhaust. Without active ventilation, your tent will overheat. It's that simple.
Humidity
Target 60 to 70% relative humidity (RH) for seedlings and clones, 50 to 60% for vegetative growth, and 40 to 50% for flowering. High humidity during flower stage dramatically increases mold risk, especially in dense canopies. A $15 thermometer/hygrometer combo placed at canopy height gives you the readings you need. If humidity is consistently above 65% in a flowering space, increase exhaust or add a small dehumidifier.
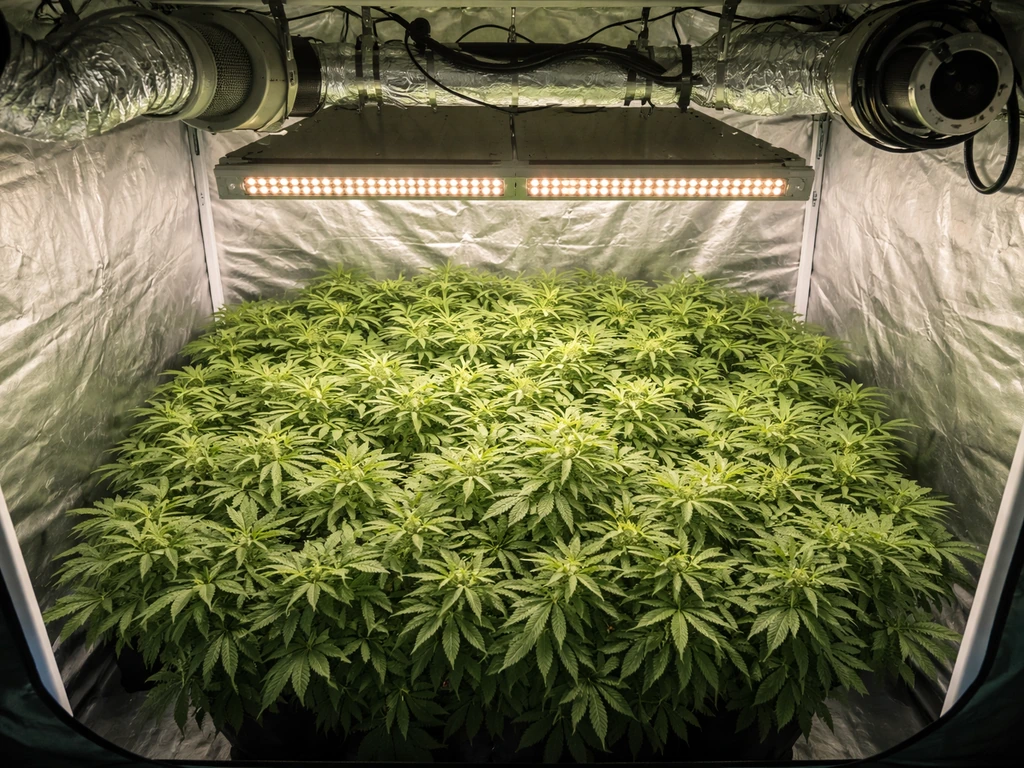
Airflow and ventilation
You need two types of airflow: circulation (a small fan blowing gently over the canopy to strengthen stems and prevent hot/humid pockets) and exchange (exhausting stale warm air and bringing in fresh cooler air). For a tent, the standard approach is an inline exhaust fan pulling air out through a carbon filter at the top, with passive intake vents at the bottom. Size your exhaust fan to exchange the tent's air volume at least once per minute. For a 4x4x7 ft tent (112 cubic feet), a 4-inch inline fan rated at 200 CFM is enough. For heat management in summer, go bigger.
CO₂: optional but useful at higher light levels
CO₂ supplementation is genuinely optional for most home growers, but it becomes worth considering once you're running high-intensity LEDs (above 800 µmol·m⁻²·s⁻¹) in a sealed space. At ambient CO₂ levels around 400 ppm, plants approach their CO₂ saturation point at high light intensities, meaning more light doesn't produce more growth. Supplementing to 800 to 1,200 ppm allows plants to use that extra light for accelerated growth. If you go this route, CO₂ must be managed alongside ventilation. Running CO₂ with a constant exhaust fan wastes it. If you're a beginner, skip CO₂ and focus on getting light, temperature, humidity, and airflow right first. Those basics make far more difference.
Scheduling, dimming, and hitting your DLI targets
What DLI actually means for your setup
DLI (daily light integral) is the total amount of photosynthetically active light your plants receive in a full day. It accounts for both intensity (PPFD) and how long the light is on (photoperiod). blank" rel="noopener noreferrer">The formula is: DLI = PPFD × hours × 0.0036. So a light delivering 500 µmol·m⁻²·s⁻¹ for 16 hours gives a DLI of 500 × 16 × 0.0036 = 28.8 mol·m⁻²·d⁻¹. This is why DLI matters: you can hit the same DLI with a dimmer light running longer, or a brighter light running shorter. That flexibility is useful when you're optimizing for photoperiod-sensitive plants or just trying to avoid overdriving seedlings.
DLI targets by growth stage
| Growth Stage | Target DLI (mol·m⁻²·d⁻¹) | Typical PPFD + Photoperiod Example |
|---|---|---|
| Seedlings / clones | 5–10 | ~100 µmol × 16 hrs = DLI 5.8 |
| Early vegetative | 10–20 | ~300 µmol × 16 hrs = DLI 17.3 |
| Full vegetative | 20–30 | ~500 µmol × 16 hrs = DLI 28.8 |
| Flowering / fruiting | 30–50 | ~700 µmol × 12 hrs = DLI 30.2 (or more with longer photoperiod for non-photoperiodic plants) |
Recommended photoperiods
For seedlings, 16 to 18 hours of light per day at low intensity is a good standard. Vegetative plants (non-photoperiodic) do well on 16 to 18 hours. Photoperiod-sensitive flowering plants (like cannabis) need a shift to 12/12 (12 hours light, 12 hours uninterrupted dark) to trigger and maintain flowering. Fruiting vegetables like tomatoes and peppers are day-neutral and can run 14 to 18 hours throughout. If you don't have a PPFD meter, start with a 16-hour photoperiod at manufacturer-recommended height and watch your plants for two weeks before making intensity changes.
No meter? Use this practical approach
Start at the manufacturer's recommended height, run 16 hours on for seedlings and veg, 12 hours for flowering, and watch plant behavior. Compact, dark-green, steadily growing plants are getting enough light. Stretchy, pale, or leaning plants need more. Curling leaves, bleached tips, or stunted growth suggest too much intensity or too little distance. Adjust height by 2 to 3 inches at a time and give plants 5 to 7 days to respond before changing anything else. This slow-adjust method is how you dial in a setup without instruments.
Troubleshooting common problems after setup
Stretching and leggy growth
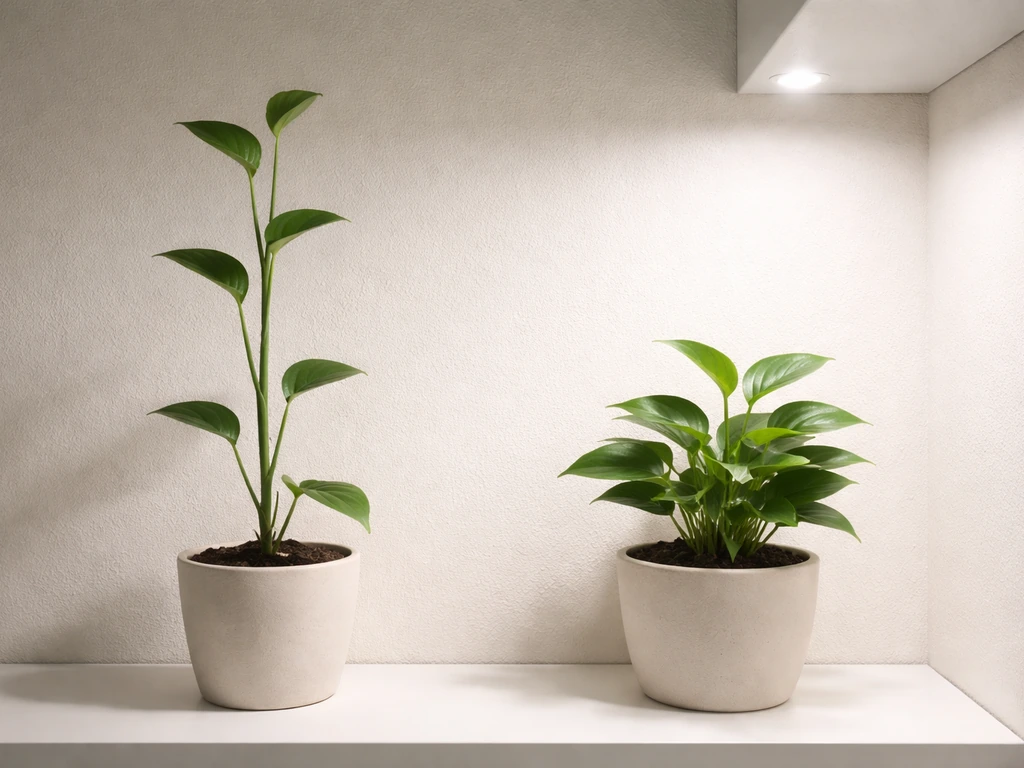
Stretching means your plants are not getting enough light. The plant is reaching toward the source because intensity is too low at canopy level. Fix: lower the light by 2 to 4 inches, or increase intensity via dimmer if available. If you've already lowered the light as far as safe and plants are still stretching, you may need a stronger fixture or a second light. In the meantime, support stems with stakes and bury the leggy stem deeper at the next transplant.
Yellowing leaves
Yellowing has multiple causes, but light-related yellowing usually follows one of two patterns. If the newest top leaves are yellowing or bleaching and you recently lowered the light or increased intensity, that's light stress. Raise the fixture 4 to 6 inches and give plants a week. If older lower leaves are yellowing while the top looks fine, it's almost certainly a nutrient issue (usually nitrogen), not a light problem. Don't adjust your light setup to fix a nutrient deficiency.
Leaf curl and tacoing
Leaves curling upward (tacoing) are usually a sign of heat stress or light stress, often both at once. Check your canopy temperature. If it's above 85°F, increase exhaust fan speed or add an oscillating fan. If temperature is fine but leaves are still curling, the light is too close. Raise it 4 to 6 inches. Downward-cupped leaves point more toward overwatering or root problems rather than light.
Slow or stalled growth
If plants look healthy but just aren't growing, the most likely causes are insufficient DLI (light is on for too few hours or intensity is too low) or root/environment issues. Check that your timer is actually working as programmed, that DLI is appropriate for the stage, and that temperature is in the right range. Plants below 60°F grow very slowly regardless of light.
Uneven canopy: some plants dark green, others pale
This is a coverage problem. Plants directly under the center of the fixture are getting more light than plants at the edges. Fix this by raising the fixture to spread the beam more evenly, adding a second fixture, or using low-stress training (LST) to physically spread and even out your canopy. If you're in a tent, check that the mylar isn't sagging away from the walls, which reduces light bouncing back to the edges.
Heat issues from the fixture itself
Quality LED drivers and diodes run warm but shouldn't be burning hot to the touch. If your driver housing is too hot to hold for more than two seconds, airflow around it is inadequate. Mount the driver outside the tent or point a small fan at it. LEDs that run too hot throttle their own output and have significantly shorter lifespans. Check that your driver's ambient temperature stays below 104°F (40°C) for reliable operation.
Quick diagnostic checklist
| Symptom | Most Likely Cause | First Fix |
|---|---|---|
| Stretching / leaning toward light | Too little light intensity (low PPFD or DLI) | Lower fixture 2–4 inches or increase dimmer setting |
| Top leaves yellowing or bleached | Light stress: too much intensity or too close | Raise fixture 4–6 inches; check temperature |
| Leaf edges curling upward | Heat stress or excessive light intensity | Check canopy temp; raise light and/or increase exhaust |
| Pale outer plants, dark center plants | Uneven coverage (hot spot under fixture) | Raise fixture; add second light; improve wall reflection |
| Healthy looking but not growing | Insufficient DLI or temp below 65°F | Extend photoperiod; check timer; check temperature |
| Driver or fixture very hot | Poor airflow around driver | Move driver outside tent or add fan directly on driver |
How LED compares to other light types
If you're weighing whether LED is even the right choice, it's worth a quick comparison. HPS setups deliver extremely high PPFD at the cost of significant heat output and high electricity use, which is why HPS grows need robust ventilation and cooling. If you're setting up a solar panel grow light setup, the same efficiency-first mindset applies so you can maximize usable light while managing heat and power limits HPS grows.
CFL setups are cheap and work well for seedlings and clones, but lack the intensity for serious vegetative or flowering growth. CFLs can be a budget-friendly way to start, but if you want a cheap CFL grow light setup, plan around limited intensity and keep good coverage at canopy height CFL setups. T5 fluorescents are excellent for seedlings and low-light houseplants, but fall short for high-demand crops.
LED wins for efficiency, lifespan, and spectrum flexibility, which is why it's the default choice for home growers today. The upfront cost is higher than CFL or T5, but the electricity savings and lower heat load make it practical even on a tight budget when you factor in running costs.
Your next steps after reading this
- Measure your grow space and decide on a canopy area before looking at any fixtures
- Find a fixture with a published PPFD map that covers your footprint at 400–800 µmol·m⁻²·s⁻¹ at canopy height
- Confirm your outlet has GFCI protection before plugging anything in
- Set up your exhaust and circulation fans before you turn the light on for the first time
- Program your timer to the correct photoperiod for your plant stage
- Place a thermometer/hygrometer at canopy height and take a reading after 30 minutes of operation
- Start at the manufacturer's recommended height and observe your plants for 7 days before adjusting anything
- Use the DLI formula to check you're hitting the right daily light dose for your plant's growth stage
The honest truth is that a well-dialed full LED grow setup is not complicated once you understand the four pillars: light (intensity and schedule), mounting (height and coverage), power (safe wiring and control), and environment (temperature, humidity, airflow). If you're comparing options, an HPS setup can be effective too, but it changes your heat, ventilation, and power requirements versus LED HPS vs LED. Build the checklist, follow the numbers, watch your plants, and adjust slowly. That's the entire system.
FAQ
How do I choose a light if the brand only lists “coverage” instead of PPFD maps?
For a full LED grow setup, look at the PPFD map at the height you plan to mount, then confirm the intensity is adequate at canopy level across the area you intend to grow. A “coverage up to X sq ft” claim can be misleading because it often assumes houseplant-level intensity. If you cannot find a PPFD map (with mounting height clearly stated), choose a different brand or plan on using a meter to verify.
Can I control LED intensity without moving the light up and down?
Not necessarily. If your driver or dimming controller supports 0-10V or has an integrated dimmer, you can run a dimmable LED driver with the correct dimming method instead of moving the light. If your driver has no dimming capability, then height is your primary control and you will need to adjust mounting height as plants grow.
Is it safe to use a regular wall dimmer switch with a dimmable LED grow light?
Yes, but only when you do it correctly for that driver. Do not use a standard wall dimmer meant for incandescent or generic lamp loads. Use only a dimmer built for the driver, a 0-10V dimming system, or the driver’s intended dimming port to avoid driver damage and potential fire risk.
Should I rely on longer photoperiods to boost growth for seedlings and clones?
Most of the time, 16 to 18 hours on for seedlings and vegetative plants is fine, but the more important check is DLI and plant response at your actual measured intensity. If you are running high intensity early, seedlings may show stress even with a normal photoperiod. Start conservatively, confirm canopy conditions, and increase intensity gradually rather than extending hours to compensate.
My plants at the edges look worse than the ones under the center, what usually causes this?
No. A full LED grow setup can still fail without proper uniformity, even if the center area looks great. If you see strong growth in the middle but weak growth at edges, it usually means coverage is uneven. Fix it by adjusting height using the PPFD map, adding a second fixture, or using light-spreading via canopy training.
How can I confirm my outlet timer is really controlling the LED correctly?
If your timer is wrong, everything else becomes unreliable. Verify by doing a physical test: place a small lamp on the same outlet or confirm the outlet’s current schedule setting, then ensure the LED turns off for a full uninterrupted dark period (especially during flowering). Smart plugs can also lose schedules if Wi-Fi is interrupted or the app resets.
Do I still need strong ventilation with LED if the lights run cooler than HPS?
Yes, and it is a common overheating path in enclosed tents. LED fixtures produce less heat than HPS, but the driver and enclosed air still warm up. Add an intake path, ensure the exhaust fan is sized for the tent volume (at least about one complete air exchange per minute as a baseline), and do not point cords or the driver into stagnant heat pockets.
What should I do if the LED driver gets extremely hot?
Yes. Even with a properly ventilated tent, the driver can become the limiting factor if it is trapped or poorly cooled. If the driver housing is too hot to hold for more than a couple seconds, improve airflow and consider mounting the driver outside the tent if your setup allows it.
How can I tell whether yellowing is from light stress or a nutrient issue?
Light stress can look similar to some nutrient problems, but a key tell is where the yellowing starts and whether you recently changed intensity or height. New top leaves yellowing or bleaching after raising intensity usually points to light stress, while older lower leaves yellowing with tops staying green usually points to nutrients. Use that pattern before changing your light settings.
My plants look healthy but growth is slow, what are the first two checks I should do?
If your plants are not growing, first confirm DLI and temperature rather than immediately increasing light. Plants below roughly 60°F will grow slowly no matter how bright the LEDs are. Also check the scheduled hours, and verify the fixture height against the PPFD map so you know you are delivering the intensity you think you are.
What mounting hardware is safest for a ceiling-installed LED in a grow room?
For a ceiling-mounted fixture, anchor choice matters as much as load rating. Use a stud-anchor or toggle bolt rated for at least twice the fixture weight, account for cord tension and fan vibration, and ensure the fixture is secured structurally rather than supported by the power cord.
Is there a quick way to test whether my canopy lighting is uniform?
To reduce the risk of uneven coverage and hot spots, you can use a simple uniformity check with a PPFD meter. Take readings at canopy level near the center and corners, if the hottest spot is more than about twice the intensity of the dimmest spot, you likely have a coverage problem that needs height adjustment, spreading, or additional fixtures.
Do I need CO2 for a full LED grow setup to work well?
Depending on your stage, CO2 can be ignored if you are staying below high intensity or if your space is not well sealed and managed. It becomes more relevant when you run high-intensity LEDs above about 800 µmol·m⁻²·s⁻¹ in a relatively sealed environment. If you supplement CO2 while constantly exhausting, you can waste the CO2 and see little benefit.
What electrical protection should I use for LED grow lights in tents or humid rooms?
Electrical safety is not optional in a grow tent. Under NEC rules, horticultural lighting equipment that uses flexible cords or separable connectors must be on a GFCI-protected outlet. In practice, that means a GFCI outlet, GFCI breaker, or GFCI strip upstream of the equipment, which is especially important where humidity and water exposure are possible.
Next Article
Innova Grow Light Instructions: Setup, Use, and Troubleshooting
Step-by-step Innova LED grow light instructions: setup, mounting, distance, schedules, intensity, and fast troubleshooti