An HPS grow light setup needs five things to work well: a ballast matched to your bulb wattage, a reflector hood, the bulb itself, a timer rated for HID loads, and a ventilation plan that handles the serious heat HPS throws off. Get those five things right and you can run a productive, safe grow in a tent or open space. Skip any one of them and you will either stress your plants or create a fire hazard. This guide walks through every step in the order you actually do them.
HPS Grow Light Setup Guide for Tent and Open Space

Marcus Tillman
11 May 2026
What you need for an HPS grow light system
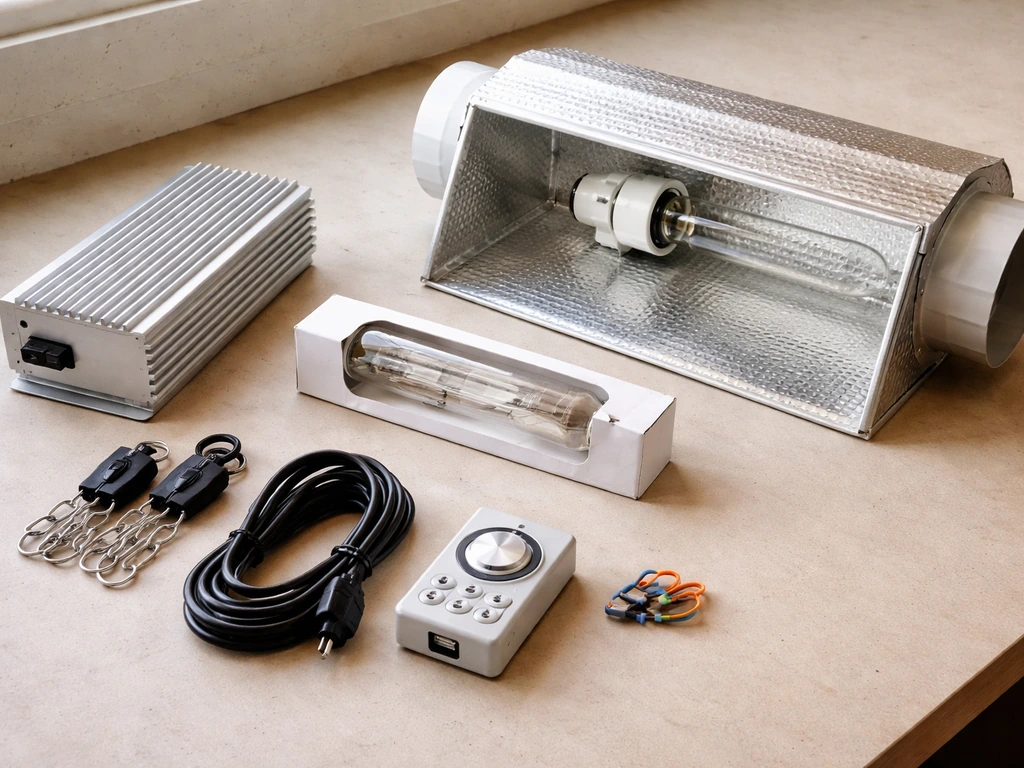
Before you buy anything, write out a short list. HPS kits look simple but the components have to match each other. Here is everything you need for a complete, working system:
- HPS ballast (magnetic or digital) rated to match your bulb wattage exactly
- HPS bulb (same wattage as ballast, 400W / 600W / 1000W are the most common)
- Reflector hood or cool tube (open-wing style or air-cooled sealed glass style)
- Heavy-duty timer rated for HID/ballast loads (not a standard lamp dimmer or basic plug-in timer)
- Adjustable rope ratchets or heavy-duty light hangers
- Inline exhaust fan sized to your space (6-inch for most home tents)
- Ducting (4-inch or 6-inch aluminum flex duct to match your fan)
- Carbon filter if odor control matters to you
- Clip-on or oscillating circulation fan for in-tent air movement
- Surge-protected power strip or dedicated circuit for the ballast
- Thermometer/hygrometer to monitor heat and humidity
If you are buying a kit, most 600W HPS kits bundle the ballast, bulb, and reflector together. That is fine, but always check that the ballast cord uses a Lock & Seal type connector (or equivalent proprietary plug) to connect to the hood, and that those two pieces are from the same manufacturer. Mixing a ballast and reflector from different brands using adapter cables is asking for connection failures mid-grow.
Choosing bulb wattage and reflector hood for your space
The most common home grow sizes map cleanly to specific wattages. Use the table below as your starting point, then read the notes underneath it.
| Grow Space | Recommended Wattage | Hood Type | Expected Coverage |
|---|---|---|---|
| 2x2 ft (60x60cm) | 250W HPS | Open wing or small cool tube | 2x2 ft canopy |
| 3x3 ft (90x90cm) | 400W HPS | Open wing reflector | 3x3 ft canopy |
| 4x4 ft (120x120cm) | 600W HPS | Open wing or air-cooled hood | 4x4 ft canopy |
| 5x5 ft (150x150cm) | 1000W HPS | Air-cooled cool tube or sealed hood | 5x5 ft canopy |
A 600W HPS is the sweet spot for most home growers. It covers a 4x4 foot space properly, uses a manageable amount of power, and replacement bulbs are widely available and inexpensive. The 1000W option covers more ground but generates a lot more heat, which demands a bigger ventilation investment.
Open wing reflector vs air-cooled hood
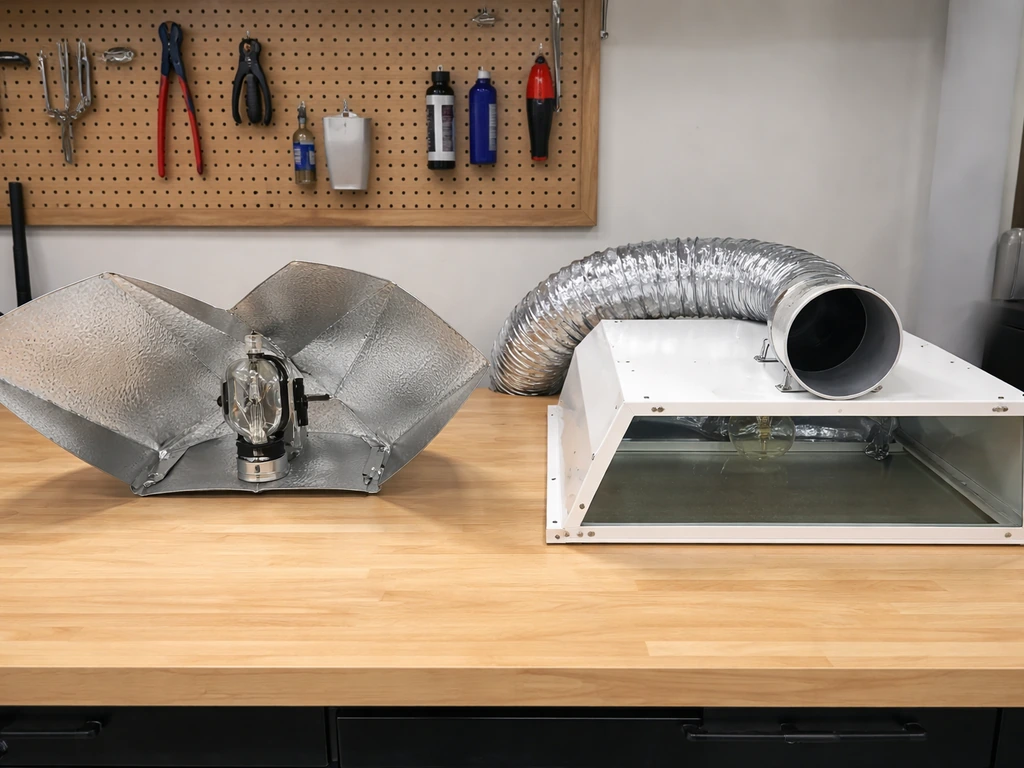
An open-wing reflector (like an Xtrasun aluminum wing) bounces light from a wide parabolic surface down into the canopy. It is simple, cheap, and effective. The tradeoff is that heat from the bulb radiates freely into the tent. An air-cooled hood (cool tube or sealed glass box reflector) lets you run ducting from your inline fan directly through the hood, pulling the lamp heat out of the tent before it warms the air your plants are sitting in. Hydrobuilder calls the air-cooled option the standard choice when you need to keep the light close to the canopy or when your room cooling is limited. If you are growing in a hot climate or a small tent where temperatures regularly push above 80°F (27°C), spend the extra money on an air-cooled setup. If your space stays cool, an open wing works fine and will cost less. One thing worth knowing: a quality reflector can increase the effective light hitting your canopy by roughly 30 to 50 percent compared to a bare bulb at the same height, so do not skip the reflector to save money.
How to set up an HPS grow tent (mounting, clearance, airflow)
Setting up inside a tent is the most common approach for home growers and it makes ventilation and light containment much easier. Here is the step-by-step order that works best.
- Set up your tent frame and fabric in its final location before you put anything inside. You will thank yourself for not trying to move a fully loaded tent later.
- Install the rope ratchets or hanging rails on the top crossbar. Use two ratchets per hood, spaced to match the hood's hanging points. Make sure the bar can handle the combined weight of your hood, ballast (if hanging), and ducting.
- Thread your ducting connections before the light goes up. Attach ducting to the fan port on an air-cooled hood at this stage. It is much harder to reach once the light is hanging.
- Hang the reflector at roughly the maximum starting height (see the next section for exact numbers). You will lower it later once you confirm temperatures are safe.
- Position the ballast outside the tent if at all possible. Ballasts emit significant heat, and placing them inside the tent adds unnecessary heat load to your environment. Run the power cord through a tent port.
- Connect the ballast to the hood using the manufacturer's Lock & Seal cord or equivalent. Do not substitute random extension cords for this connection.
- Run ducting from your inline fan through the tent's top or side duct port to the outside or to a carbon filter. Secure all duct connections with clamps or duct tape so air does not leak back in.
- Mount your circulation fan low on one of the tent's inner poles, aimed to move air across the lower canopy without blowing directly at plants.
One clearance rule that catches new growers off guard: leave at least 6 to 12 inches between the top of the tallest plant and the bottom of the reflector when you first power on, then adjust from there. You need enough vertical room above the light for your ducting and any remaining rope ratchet travel. Plan for it before you discover the light cannot go high enough.
Placement and height dialing to avoid heat stress and maximize coverage
HPS lights run hot, and getting the hanging height wrong is the most common cause of burned tips and bleached leaves in a first grow. The goal is to find the lowest safe hanging height for your wattage so plants get maximum intensity without heat damage.
| Wattage | Seedling Height | Veg Height | Flowering Height |
|---|---|---|---|
| 250W | 24 in (60cm) | 18–20 in (45–50cm) | 14–16 in (35–40cm) |
| 400W | 28 in (70cm) | 20–24 in (50–60cm) | 16–20 in (40–50cm) |
| 600W | 36 in (90cm) | 24–30 in (60–75cm) | 18–24 in (45–60cm) |
| 1000W | 40+ in (100+cm) | 28–36 in (70–90cm) | 24–30 in (60–75cm) |
These are starting heights, not fixed rules. The hand test is your real guide: hold the back of your hand at canopy height for 30 seconds. If it feels uncomfortably warm, raise the light. GroWell's guidance for 600W and 1000W setups references keeping at least a 150cm (about 59 inch) gap between the top of a propagator tray and the bottom of the reflector during early seedling stages, which reinforces erring on the high side at the start. For larger plants in flower, Adjust-A-Wings confirms that well-ventilated HPS setups can safely come as close as 45cm (about 18 inches) from the canopy once heat is under control.
Coverage also matters. An open-wing reflector at a higher hanging height covers a wider footprint but delivers less intensity. Lower it and intensity goes up but the hot spot directly under the bulb gets more concentrated. Move the light in a small horizontal arc every few days if you notice the center of your canopy is consistently more advanced than the edges. This is not a perfect fix but it helps even things out.
Wiring, power safety, timers, and first-start checklist
HPS ballasts draw more current at startup than they do during steady operation, and they run at either 120V or 240V depending on the model. The Hydrofarm SG 600W ballast, for example, is CSA certified and rated for 120/240V operation. Before you plug anything in, confirm your outlet and circuit can handle the load. A 600W ballast on 120V draws about 5 to 6 amps at steady state but can spike higher at ignition. A dedicated 15-amp or 20-amp circuit is ideal. Never run a ballast off a power strip that is also feeding other heavy appliances. If you are using an HPS method seven operator setup, double-check your grow room glasses and overall placement so the light is safe and effective method seven operator hps plus grow room glasses.
Picking the right timer
This is where a lot of beginners get burned (sometimes literally). Standard residential plug-in timers designed for lamp or fluorescent loads are not rated for HPS ballasts. The Intermatic EJ341C and similar basic timers are explicitly designed for incandescent and thermally protected fluorescent ballasts, not HID loads. You need a timer that is specifically rated for HID or ballast loads, lists a VA (volt-ampere) rating that exceeds your ballast's running draw, and has mechanical contacts heavy enough to handle inductive loads. Mechanical 24-hour timers rated for 1000W or higher ballast loads (look for 15-amp or 20-amp HID-rated models) are the safest and most reliable option for home HPS setups. Always check the load rating printed on the timer label and make sure it exceeds your ballast's actual draw.
First-start checklist
- Confirm the circuit is off before making any wiring connections (this is non-negotiable per HID ballast installation guidance)
- Verify ballast-to-hood connection is secure and locked
- Check that the bulb is fully seated in the socket and not cross-threaded
- Confirm the light is hanging at maximum starting height
- Turn on your inline fan BEFORE powering the ballast (especially critical for air-cooled cool tube setups, which must be actively vented during operation)
- Set the timer to the correct photoperiod before leaving the ballast running unattended
- Power on the ballast and wait: HPS bulbs take 2 to 5 minutes to reach full brightness (a pink/orange glow that transitions to a warm yellow-orange is normal)
- Check the hand test at canopy height after 15 minutes and verify your thermometer reads below 82°F (28°C)
- Check all duct connections for air leaks while the fan is running
Ventilation and heat management inside vs outside a tent
HPS is the most heat-intensive common grow light technology. A 600W HPS running in a 4x4 tent without adequate ventilation will push temperatures well above 90°F within an hour. You need to move enough air to replace the tent volume at least once per minute, preferably twice. HydroBuilder’s ventilation setup guidance recommends sizing your fan and carbon filter using grow dimensions and ducting, and notes that a 1-minute air exchange can be a reasonable baseline for some higher-load rooms GrowWeedEasy/HydroBuilder ventilation setup guide. For a standard 4x4x6.6 ft tent (about 106 cubic feet), that means a minimum of 106 CFM for one air change per minute, or 212 CFM for two. A 6-inch inline fan rated at 300 to 400 CFM handles this easily and gives you headroom for the resistance of a carbon filter and ducting. Grow Weed Easy specifically cites a 6-inch Can Max rated at 334 CFM as sufficient for a 600W HPS setup, which aligns well with these numbers.
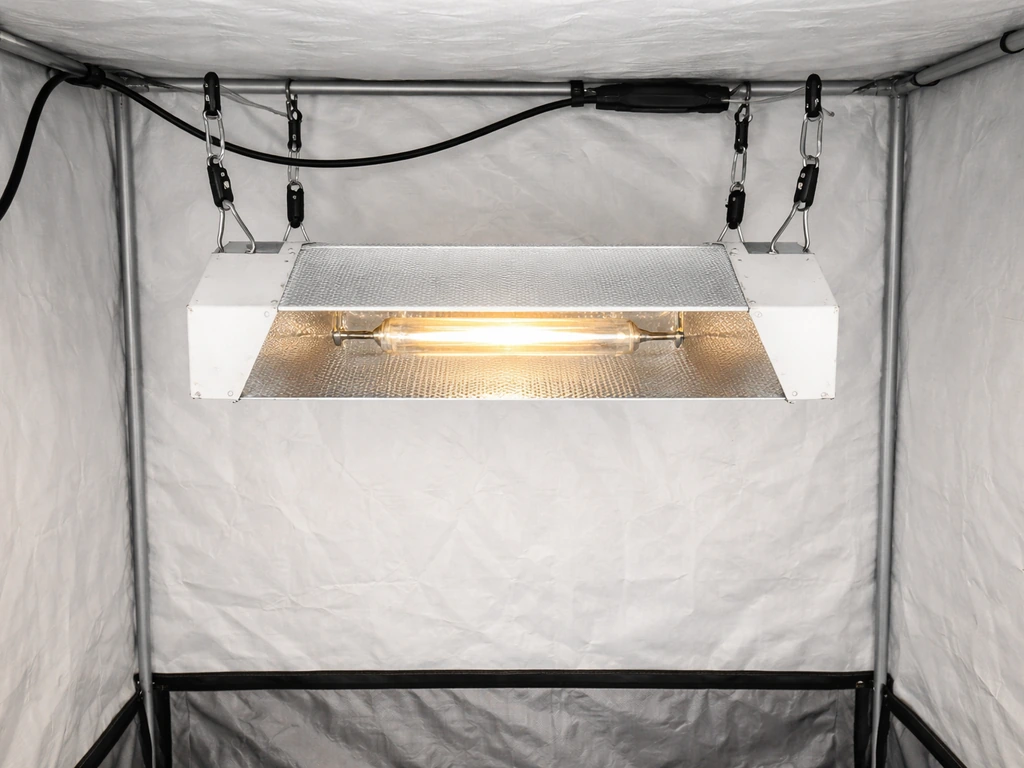
Air-cooled hoods change the math
If you are running a cool tube or sealed air-cooled reflector, you have two separate airflow loops to think about. The first loop pulls air through the hood itself, exhausting lamp heat directly out of the tent. Hydrofarm's cool tube instructions are clear that more CFM through the reflector is always better than less, and the cool tube must be actively vented whenever the light is on. The second loop is your general tent ventilation, which handles residual heat, humidity, and CO2 replenishment. You can run these on the same inline fan or use separate fans for each. Running them separately gives you more control but adds cost. For most home growers, a single 6-inch fan pulling through the hood first and then exhausting out the tent works well.
The ballast heat problem
Ballasts emit a meaningful amount of heat on their own, and placing one inside a tent adds directly to your temperature load. GroWell specifically flags this as a consideration in tent setups. Whenever your tent design allows, mount the ballast on the outside of the tent and run just the power cord through a port. If you must keep it inside, position it near the bottom where exhaust air is not yet circulating, and ensure your overall CFM is high enough to compensate.
Circulation fans inside the tent
Exhaust fans alone will not eliminate hot spots. You still need at least one small oscillating or clip fan inside the tent to break up stagnant air pockets above and below the canopy. Grow Weed Easy recommends this even in well-ventilated setups. A low-speed clip fan positioned to create gentle stem movement (not a wind tunnel) also strengthens plant stems over time, which is a bonus.
Scheduling, light cycle targets, and tuning by growth stage
HPS is most commonly used for cannabis and flowering crops that respond to photoperiod changes, but the scheduling principles apply to any plant. Here are the standard light schedules and what they do.
| Growth Stage | Light Hours | Dark Hours | Notes |
|---|---|---|---|
| Seedling | 18 | 6 | Keep light at max height, intensity is less critical than heat safety |
| Vegetative | 18 | 6 | Lower light as plants grow and temperatures confirm safe range |
| Pre-flower transition | 14–16 | 8–10 | Optional step-down before switching to full flower schedule |
| Flowering | 12 | 12 | 12 hours of uninterrupted darkness triggers and maintains flowering |
The 18/6 schedule (18 hours of light, 6 hours of darkness) is the standard for vegetative growth. The 12/12 switch is what triggers flowering in photoperiod plants. The darkness needs to be genuinely uninterrupted: even a brief light leak during the dark period can disrupt flowering or cause stress. Check your tent for light leaks with the light on and the room dark before you switch to 12/12.
Set your timer so the lights-off period falls at a convenient time for you to check the tent without accidentally tripping the schedule. Many growers run lights on during the day and off at night to reduce overall room temperature. Others flip it and run lights at night when ambient temperatures are lower, which can help keep tent temps in range without upgrading ventilation.
Watch the plants, not just the timer. If plants in veg are showing signs of light stress (leaf cupping, unusually compact internode spacing, bleaching near the top) even at correct scheduled hours, your hanging height is probably too low rather than the schedule being wrong. If flowering plants are not progressing as expected, double-check for light leaks before adjusting the timer.
Common setup problems and quick troubleshooting
The bulb flickers or does not reach full brightness
HPS bulbs take a few minutes to warm up. A pink or orange color that transitions to warm yellow-orange over 2 to 5 minutes is normal. If the light is flickering well past the warm-up period or cycling on and off, the most likely causes are a loose bulb connection, a mismatch between bulb wattage and ballast wattage, a failing bulb (especially in older bulbs past 12 to 18 months of use), or a damaged ballast cord connection. Check the bulb is fully seated, confirm wattage match, and try a new bulb before assuming the ballast is dead.
Temperature is too high even with the fan running
First, confirm fresh air is actually entering the tent. Exhaust-only setups create negative pressure but still need a passive or active fresh air intake near the bottom. If the tent walls are sucking inward hard, you are restricting airflow. Open a bottom vent partially to allow intake air. Second, check whether the ballast is inside the tent adding extra heat load. Move it outside if possible. Third, raise the light and lower the fan speed setting if you are running a variable speed controller, because sometimes the fan is working against itself at very low speed settings.
Hot spots and uneven canopy development
Plants directly under the center of the bulb getting more growth or more stress than the edges is a classic HPS hot spot problem. Try raising the light by 6 inches first, as a higher hang spreads the light footprint more evenly. If that does not help and you have an open-wing reflector, check that the reflector is level and the bulb is centered in it. Reflectors that are tilted or have bulbs off-center create uneven distribution across the canopy.
Inadequate coverage on the edges
If the center is fine but the edges of your canopy are lagging, your reflector may be too small for the space or you have the light hanging too low. A 600W HPS in a 4x4 tent with a wide wing reflector at 24 to 30 inches covers that footprint well. If you are in a 5x5 or larger and using a 600W, either add a second light or accept that the edges will be less productive.
Timer not turning the light on or off reliably
If your ballast is not responding to the timer consistently, the most common cause is using a timer not rated for inductive (HID) loads. The inrush current at HPS startup can exceed what basic timers are built to handle, wearing out the contacts prematurely or causing the timer to stick. Swap to a heavy-duty mechanical timer rated specifically for HID or ballast loads and the problem will almost certainly go away.
Comparing HPS to other setups
HPS is still a proven, effective technology, but it is worth knowing how it sits relative to alternatives. A full LED grow setup runs significantly cooler and draws less power for similar output, which reduces the ventilation burden considerably. A solar panel grow light setup can offset electricity costs by powering your HID lighting directly (with the right battery and inverter), especially for off-grid or backup use LED grow setup. T5 fluorescent setups are better suited to seedlings and clones than to flowering. If you are specifically planning a T5 grow light setup, you will want to focus on the right tube count, distance to the plants, and how you manage heat in your specific area T5 fluorescent setups. CFL setups are low-cost and low-heat but do not scale well past a small vegetative space. If heat management is a constant challenge in your environment, the LED route is worth considering. If you already have the HPS equipment or are working to a tight budget on hardware, a properly ventilated HPS tent absolutely delivers results.
FAQ
Do I really need a sealed air-cooled hood for an HPS in a tent, or can I use an open-wing reflector with good ventilation?
You can often use an open-wing reflector, but only if your exhaust and fresh-air intake keep canopy temperatures in check. If you cannot consistently maintain a stable tent temp (especially in summer), an air-cooled hood is safer because it routes lamp heat out through ducting, reducing the heat your plants experience. With an open-wing, your ducting cannot pull heat directly from the bulb, so you must compensate with higher overall tent airflow.
What size inline fan should I pick if I have a carbon filter and long duct runs?
Start with the CFM target for your tent volume, then add headroom for restriction. Carbon filters and duct elbows reduce airflow, so a fan that is rated near the minimum can underperform once static pressure is involved. A practical rule is to size up until your system still delivers your target CFM at the grow setup’s actual duct length and number of bends (not just the fan’s marketing rating).
How do I calculate airflow if my tent height is different from the common 6.6 ft example?
Use tent volume (area times height) in cubic feet, then multiply by the number of air changes per minute. For example, CFM needed for one change per minute is approximately your tent cubic feet divided by 1 minute, so CFM ≈ volume. If you target two changes per minute, double it. This keeps you from choosing a fan that looks right on paper but is underpowered for a taller tent.
Can I run the ballast and timer on the same power strip if I’m careful with wattage?
No. Even if the wattage seems within the strip’s rating, timers and HID ballasts place inductive, startup load demands that cheap strips may not handle reliably. Use a wall outlet on an appropriate dedicated circuit, and avoid splitting that circuit between other high-draw appliances (space heaters, microwaves, dryers).
How can I tell if my timer is truly rated for HID or if it will fail under startup spikes?
Check the timer label for a ballast, HID, or inductive load rating, and verify the VA rating exceeds your ballast’s running draw. If the timer only lists lamp or fluorescent ratings and you do not see explicit HID/ballast support, assume it is not safe. Also note that some timers work briefly then stick or wear out, which is a sign the contacts cannot handle inrush current.
My ballast hums and the light won’t reliably start, what should I check first?
First confirm the bulb is fully seated and the wattage matches the ballast. Next inspect and reseat any cord connections (including proprietary plugs) because intermittent contact is a common ignition failure cause. If everything matches and it still struggles to ignite, test with a known-good replacement bulb before condemning the ballast.
Is the hand-test method enough, or should I use a thermometer too?
The hand test helps you avoid immediate heat damage, but using a thermometer improves consistency. Place a temperature probe at canopy height near the center and at least one edge. Then adjust hanging height and airflow until the canopy temperatures stay within your target range for your environment, not just until “it feels warm.”
What causes a hot spot in the middle even after raising the light?
Common causes include an off-center bulb inside the reflector, a reflector that is not level, or using an open-wing reflector that is mismatched to your space size. If the center stays much more advanced than the edges, verify bulb centering and reflector orientation, then consider changing the footprint (better-sized reflector) or adding a second light for larger tents.
Can I use one oscillating fan for the whole tent instead of a small clip fan?
You can, but aim for gentle, continuous air movement where it matters. Exhaust airflow often creates strong currents near vents while leaving pockets of stagnant air elsewhere. A clip fan positioned to lightly move stems at canopy level is helpful because it reduces microclimates above and around leaves. If you only use an oscillating fan at the top, you may still get uneven airflow across the canopy.
How strict do I need to be about light leaks during the dark period?
Be strict. Photoperiod flowering plants can be disrupted by brief light intrusion during the dark window. In practice, check for pinholes around zippers, loose duct openings, indicator LEDs from equipment, and any room lights that spill into the tent. Use the lights-on test with the room dark to confirm the entire dark period is truly uninterrupted.
My seeds or young plants look stressed early on, should I raise the light immediately?
Often yes, start higher and ramp downward gradually. If you are using a grow tray and seedlings are close to the reflector, keep extra vertical clearance early, then lower only after you confirm temperatures and plant posture stay healthy. Also ensure you have enough fresh air intake, because early-stage growth can suffer from both light intensity and heat buildup.
Do I need to change anything about hanging height when switching from veg (18/6) to flower (12/12)?
Usually you do not change the schedule itself, but you may need to re-check hanging height and airflow once plants change size and transpiration patterns. Flowering often increases water uptake and can raise canopy humidity and local heat loads. Reassess canopy temperature and leaf symptoms after the transition, because the plant itself changes how it responds to the same light intensity.
Should the ballast always be mounted outside the tent?
Outside mounting is strongly preferred when your tent design allows it, because it reduces the total heat inside the grow space. If you must mount inside, place it where exhaust airflow is present rather than where it can recirculate into the canopy zone, and consider the added thermal load when selecting your fan speed and CFM.
Next Article
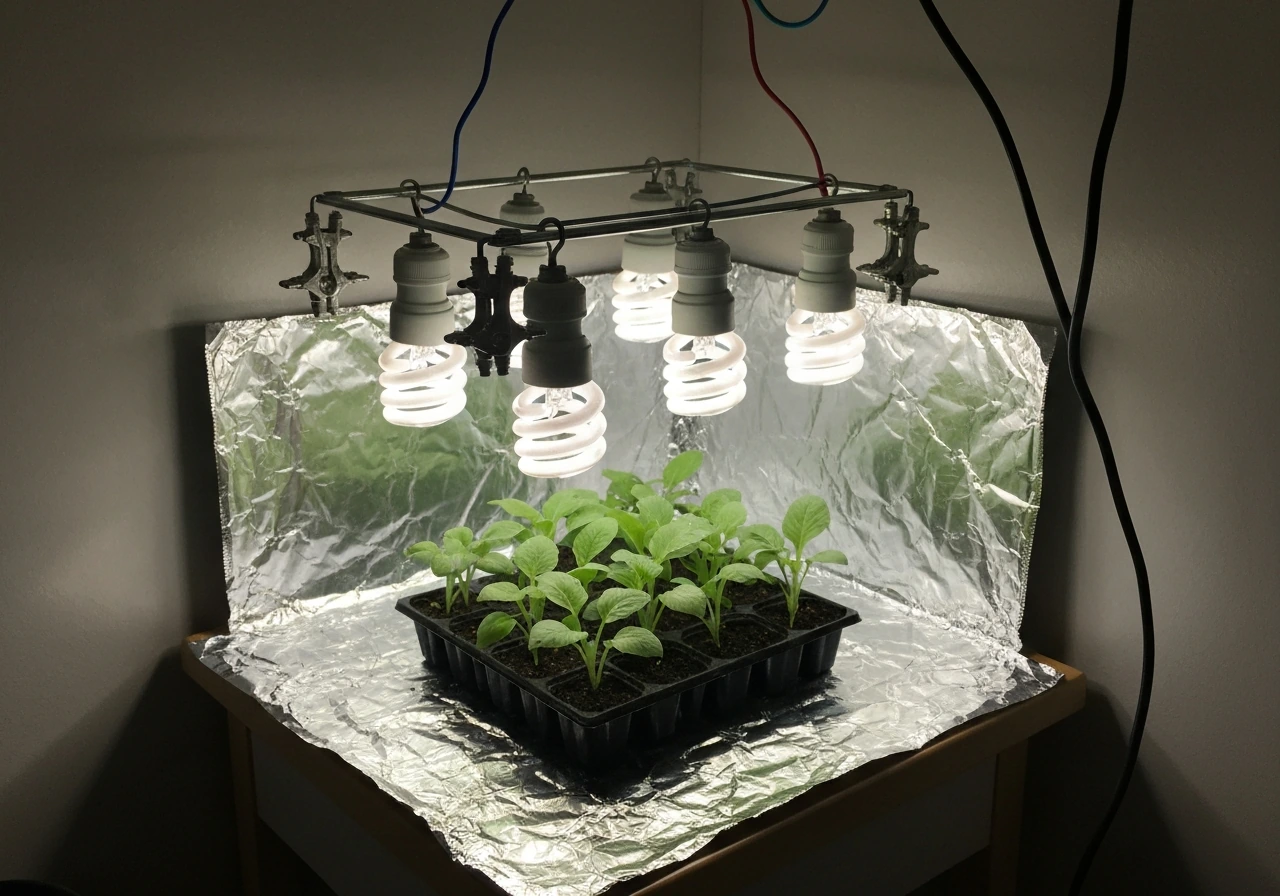
Cheap CFL Grow Light Setup: DIY Parts, Sizing, and Safety
Build a cheap CFL grow light setup with parts list, sizing, safe mounting tips, run schedules, and troubleshooting.