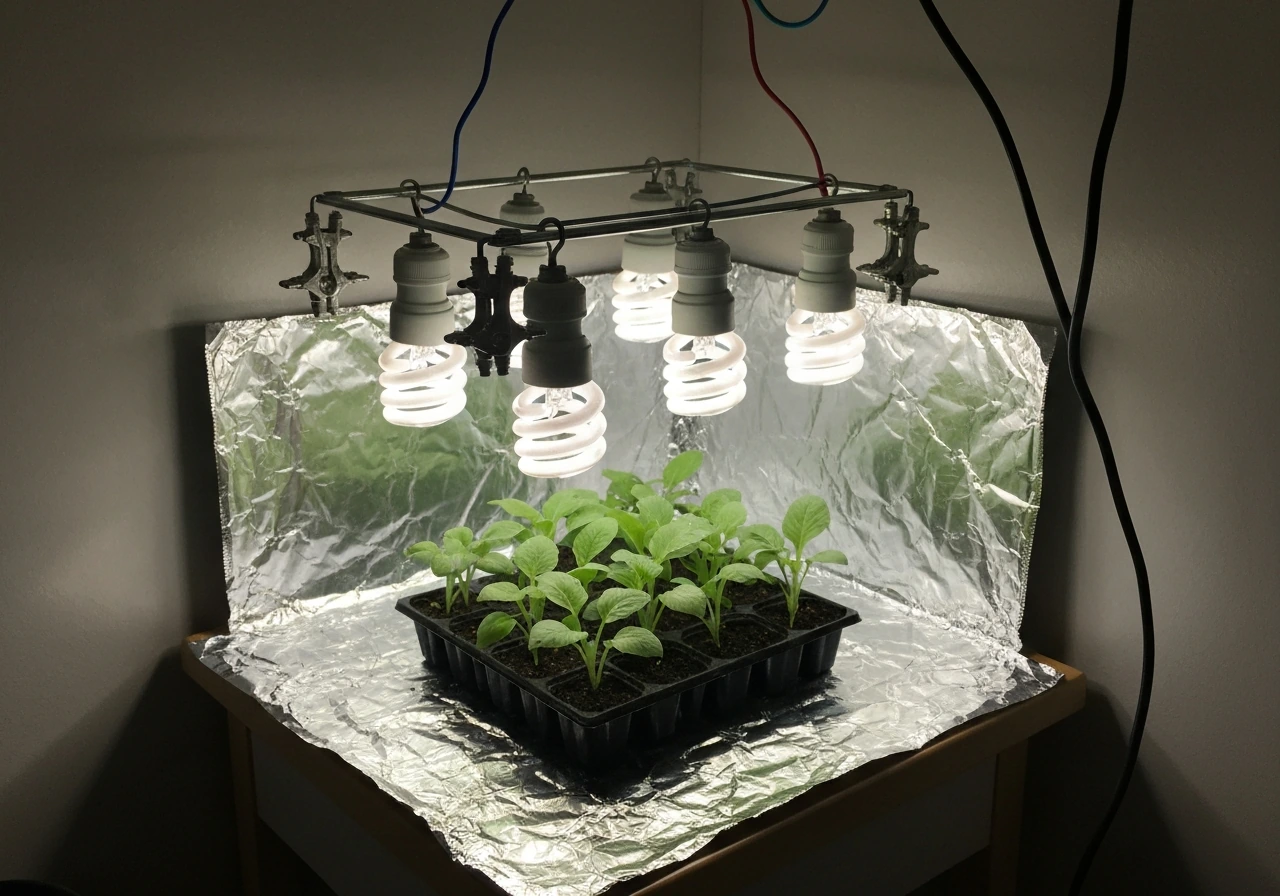
You can build a working CFL grow light setup for under $50 using standard spiral daylight bulbs (6500K for veg, 2700K for flowering), basic clamp-socket fixtures or a shop-light strip, a cheap outlet timer, and some reflective material. The minimum viable setup for one to two small plants is four 23W CFL spirals (roughly 6,400 total lumens) mounted 4 to 6 inches above the canopy, run 18 hours on and 6 hours off for seedlings and veg. That's genuinely enough to grow healthy plants from seed through vegetative stage without spending a fortune.
Cheap CFL Grow Light Setup: DIY Parts, Sizing, and Safety

Marcus Tillman
5 May 2026
Why CFLs still make sense for a cheap indoor grow
CFLs aren't the flashiest option in 2026, and they're not the most efficient either. A quality LED panel will outperform them on lumens per watt and lifespan. But efficiency isn't always the point when you're starting out. CFLs cost almost nothing upfront, run on a standard E26 screw base (the exact same socket as a regular house lamp), and you can buy them at any hardware store today. There's no ballast to wire, no driver to troubleshoot, and no intimidating setup. You plug them in and they work.
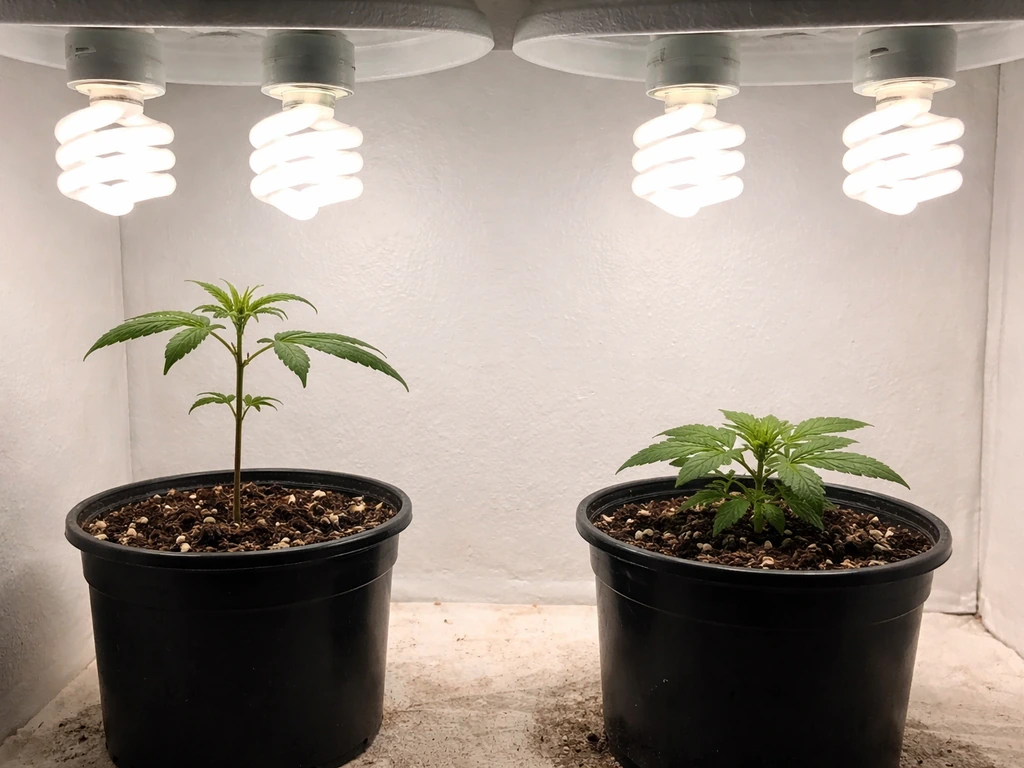
They're also forgiving for small spaces. A spiral CFL produces a lot of light in a tight cone close to the bulb, which suits seedling trays, clones, and small veg plants kept under 18 inches tall. Heat is manageable compared to HPS setups, and you don't need a dedicated exhaust fan just to keep the space safe. If you're eventually planning to scale up to a full LED grow setup or move to HPS for a larger flowering space, a CFL rig is a smart low-risk way to learn how indoor growing actually works before you spend serious money.
The honest downsides: CFL efficacy runs around 30 to 38 lumens per watt, which is noticeably below what modern LEDs deliver. Lifespan is typically 6,000 to 15,000 hours, and frequent on/off cycling (like a badly set timer) eats into that faster. They also don't scale well past a 3x3 foot area without getting awkward with fixture counts. But for one to four plants in a closet, a tent, or a shelf, they're genuinely hard to beat on cost.
Sizing your CFL setup: watts, lumens, and coverage
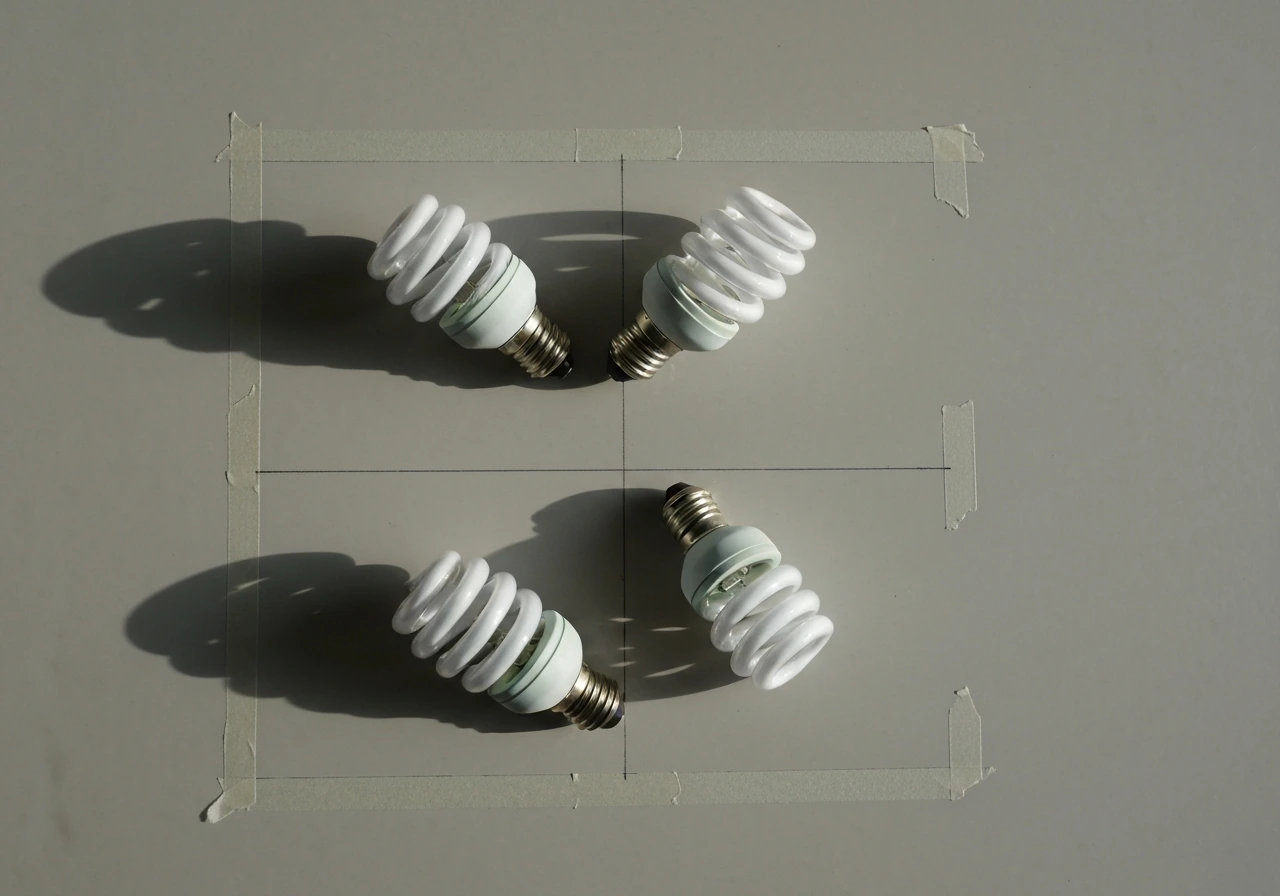
Forget the wattage numbers printed on CFL packaging that reference old incandescent equivalents. Focus on actual wattage and actual lumens. A single 23W CFL spiral at 6500K produces around 1,600 lumens. A 23W BR40 shape at 2700K produces about 1,200 lumens. A larger 42W CFL puts out around 3,200 lumens. Those are the real numbers to work with.
For sizing, aim for at least 2,000 to 3,000 lumens per square foot of canopy for veg, and closer to 3,000 to 5,000 lumens per square foot for flowering. A 2x2 foot grow space (4 square feet) needs roughly 8,000 to 12,000 lumens for healthy veg growth. That translates to five to eight 23W spirals or three to four 42W CFLs. For a single plant in a 1x1 foot spot, two to three 23W bulbs is enough to get real growth.
| Grow area | Target lumens (veg) | 23W CFLs needed | 42W CFLs needed |
|---|---|---|---|
| 1 sq ft (1 plant) | 2,000–3,000 | 2–3 bulbs | 1–2 bulbs |
| 2 sq ft (1–2 plants) | 4,000–6,000 | 3–4 bulbs | 2 bulbs |
| 4 sq ft (2x2) | 8,000–12,000 | 5–8 bulbs | 3–4 bulbs |
| 6 sq ft (2x3) | 12,000–18,000 | 8–12 bulbs | 4–6 bulbs |
CFL light drops off fast with distance. Because of the inverse-square relationship between light and distance, moving a bulb from 4 inches to 8 inches above a plant doesn't halve the light, it cuts it to roughly one quarter. Keep this in mind: closer is almost always better with CFLs, as long as you're not burning the plant with heat. The practical working range for most CFL spirals is 4 to 8 inches (10 to 20 cm) from the canopy.
What to buy: parts list and shopping checklist
Here's a concrete list for a DIY CFL setup covering a 2x2 foot veg area. Every item on this list is available at a hardware store or online today. Prices are approximate and will vary by region.
| Item | Spec / Notes | Approx. cost |
|---|---|---|
| 23W CFL spiral bulbs (6500K daylight) | 6 bulbs; ~1,600 lm each; E26 base | $15–$25 for a 6-pack |
| Clamp light sockets or plug-in lamp holders | E26, rated for at least 150W; ceramic preferred for heat | $5–$12 each (need 4–6) |
| Power strip with surge protection | 6-outlet minimum; grounded 3-prong | $10–$20 |
| Mechanical outlet timer | 15A rated; single-channel is fine | $8–$12 |
| Mylar emergency blanket or white foam board | For lining walls/tent as a reflector | $2–$8 |
| Zip ties or adjustable rope hangers | For mounting and height adjustment | $5–$10 |
| GFCI outlet adapter (if growing near water) | Required by NEC 2023 for wet/outdoor-adjacent locations | $10–$15 |
| Small clip fan (optional but recommended) | 4–6 inch; for airflow and stem strengthening | $10–$20 |
If you want a simpler ready-to-run option instead of building from scratch, look for a 4-bulb CFL clamp fixture kit designed for photography or work lights. These come pre-wired with four E26 sockets and a single power cord, and you just screw in your chosen CFL bulbs. You give up some flexibility in positioning, but the setup takes about 10 minutes.
One thing to double-check when buying sockets: make sure they're rated for the wattage of your bulbs and that they're open-style fixtures, not totally enclosed. For enclosed or recessed luminaires, ENERGY STAR requires taking blank" rel="noopener noreferrer">an in-situ measurement of ambient air temperature inside the fixture and performing a safety test for totally enclosed conditions. Enclosed fixtures trap heat around CFLs, which reduces light output and cuts bulb life significantly. This is a common mistake that tanks performance before you even start. ENERGY STAR specifically flags this: check CFL packaging for "totally enclosed fixture" compatibility before buying.
How to mount, wire, and position your CFLs safely
Mounting and reflectors
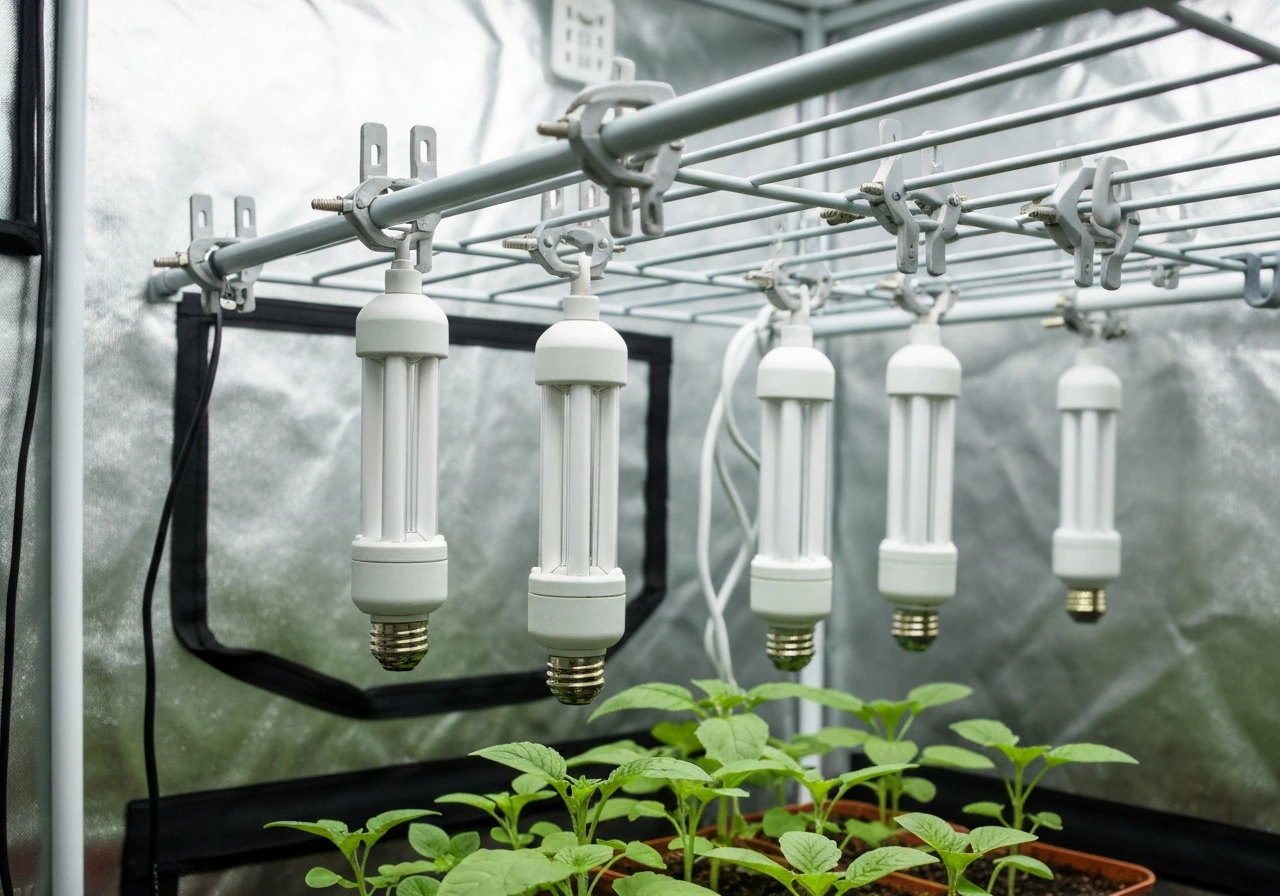
The simplest mounting approach is clamp sockets zip-tied or hung from a wire rack, a shelf, or a crossbar above your plants. Point bulbs straight down for seedlings and young veg plants. As plants get taller and bushier, you can angle a couple of bulbs to the sides to hit lower leaves. Line the walls of your grow space with white foam board or mylar emergency blankets. Reflective surfaces can recover 20 to 30 percent of light that would otherwise scatter and be wasted. This is one of the cheapest performance upgrades you can make.
If you're building inside a grow tent, the reflective interior lining is already doing this job. Just make sure bulbs are positioned close to the canopy and not firing at the tent walls from a foot away.
Height and distance
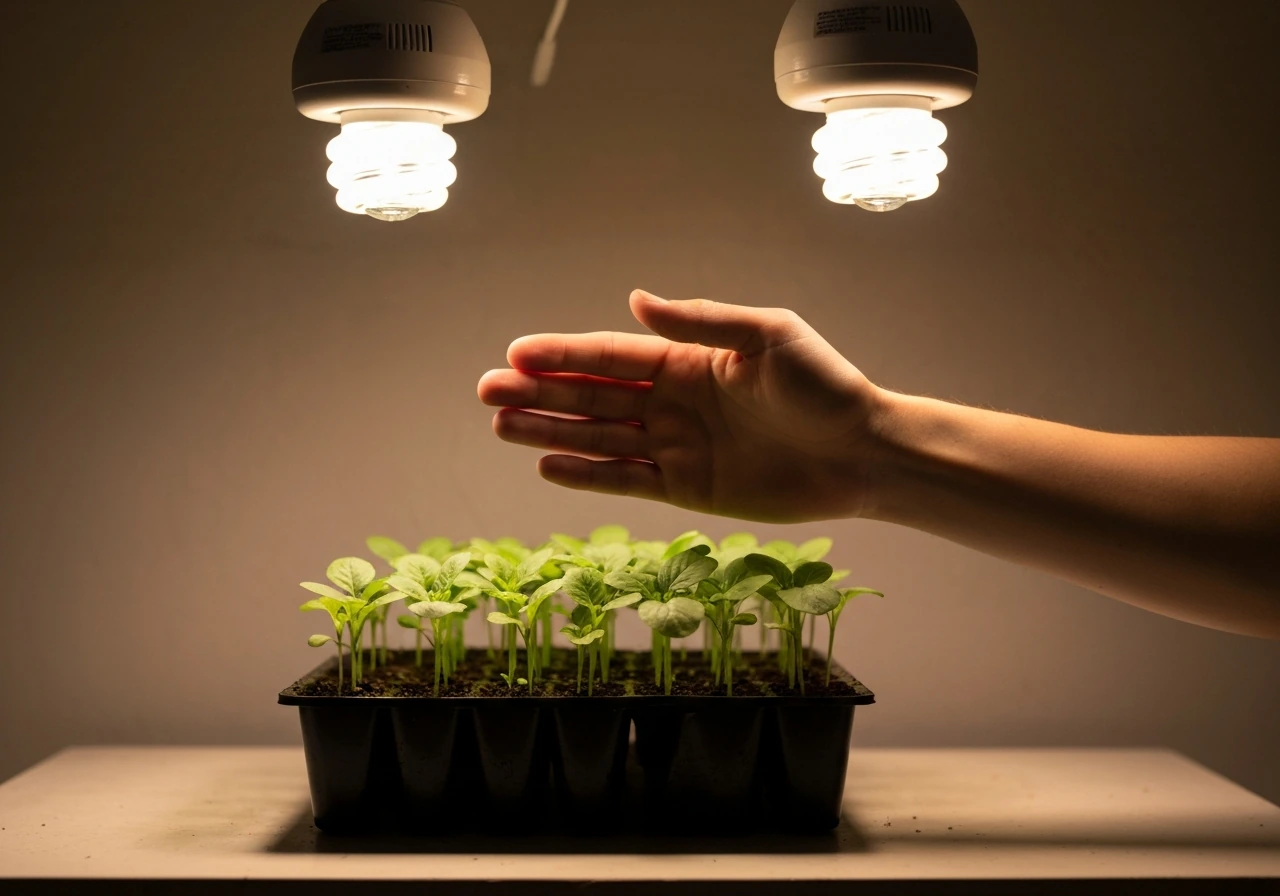
Start with bulbs 4 to 6 inches above seedlings and young plants. Check for heat by holding your hand at canopy level for 30 seconds. If it's uncomfortable, raise the lights. If the plant looks fine but growth is slow, lower the lights before adding more bulbs. For established veg plants with denser canopies, you can go up to 8 inches and compensate by adding one or two more bulbs rather than moving a single bulb further away. Never go beyond 12 inches with standard 23W CFLs: at that distance you're delivering almost no useful light to the plant.
Wiring and electrical safety
Plug all your sockets into a grounded power strip, then plug that strip into your timer, which plugs into the wall. Don't daisy-chain multiple power strips. If your grow space is anywhere near a water source (like a kitchen, bathroom, basement, or outdoor shed), use a GFCI outlet adapter between the wall and your timer. NEC 2023 rules require GFCI protection on outdoor and wet-location circuits at 150V or less, and it's smart practice for any grow room where water and electricity are in the same space. The adapters cost about $10 to $15 and could genuinely save your life.
Airflow
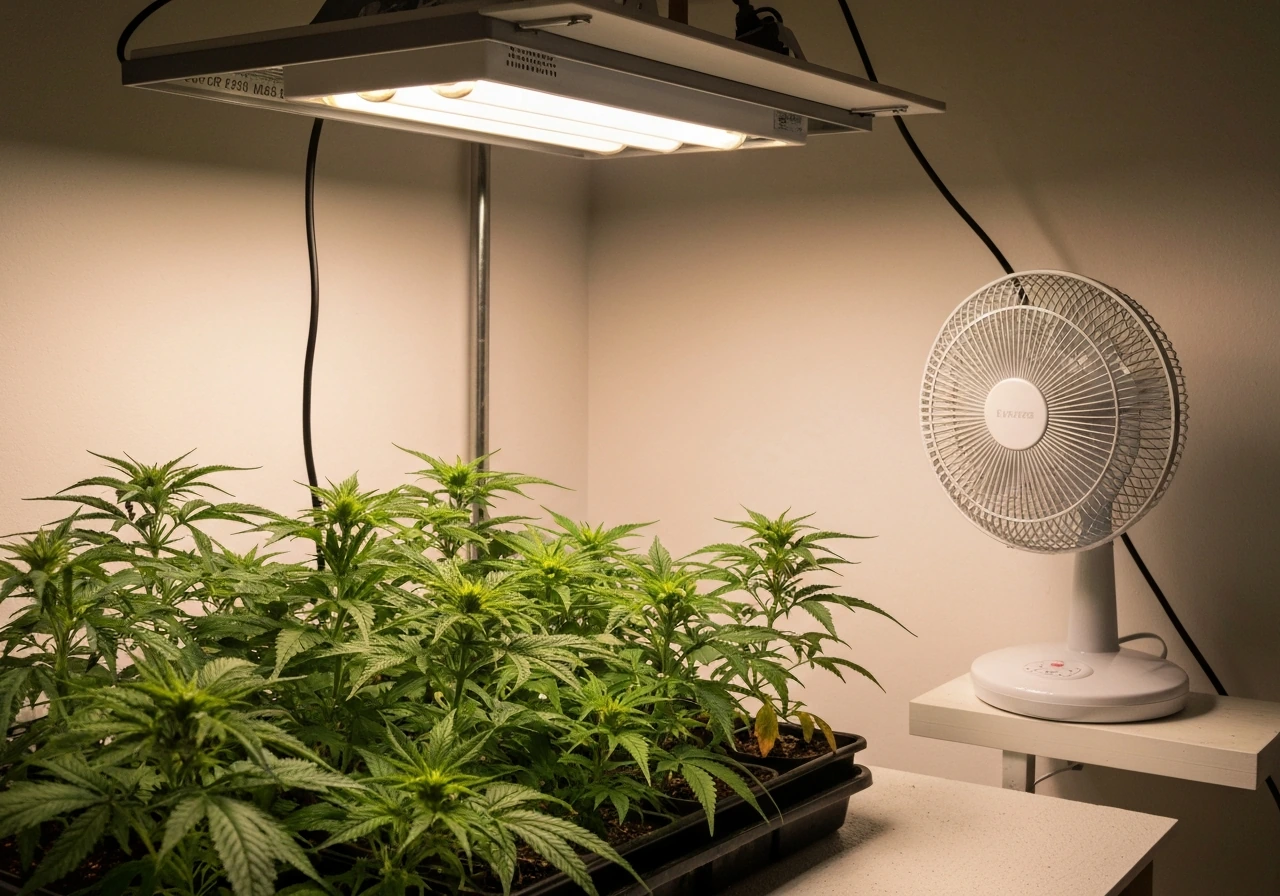
CFLs run cooler than HPS, but six or eight of them in a small enclosed space will still raise temperatures. A small clip fan pointing across (not directly at) your plants keeps air moving, helps stems develop strength, and prevents hot spots from forming near bulb clusters. Aim for 75 to 80°F (24 to 27°C) at canopy level. If you're regularly hitting 85°F or above, add ventilation before you add more bulbs.
Light schedules for every growth stage
Seedlings (first 1 to 2 weeks)
Run your CFLs 18 hours on, 6 hours off. Seedlings don't need blasting light, but they do need consistency. Use 6500K daylight bulbs at this stage. Keep them 4 to 5 inches from the tops of the seedling cells. If you see seedlings reaching upward aggressively (stretching), the light is either too far away or the schedule is too short. Drop the light an inch or two before increasing hours.
Vegetative growth
Stick with 18/6 (18 hours on, 6 hours off) and 6500K bulbs. Some growers push to 20/4 for faster veg, especially with herbs and leafy greens that don't require a dark trigger to flower. The extra two hours of light per day adds up to meaningful growth over a few weeks. Keep bulbs 5 to 8 inches above the canopy and train plants to stay low and wide to keep as much of the canopy in that close-distance sweet spot as possible.
Flowering (for plants that require it)
Switch to 12 hours on, 12 hours off, and swap your 6500K bulbs for 2700K warm-white CFLs. The 2700K spectrum is closer to the red/orange light of late-season sun, which triggers and supports flowering in photoperiod plants. A 23W 2700K bulb puts out around 1,200 lumens, so you may want to add one or two extra bulbs to keep total output consistent with what the plant had during veg. Many growers mix a few 2700K bulbs in with remaining 6500K bulbs during flowering rather than replacing all of them, which isn't a bad approach.
| Growth stage | Schedule | Color temp | Distance from canopy |
|---|---|---|---|
| Seedling | 18h on / 6h off | 6500K daylight | 4–5 inches |
| Vegetative | 18–20h on / 4–6h off | 6500K daylight | 5–8 inches |
| Flowering | 12h on / 12h off | 2700K warm white | 4–6 inches |
Set your timer once and don't keep changing it. Plants respond to consistency, and erratic light schedules confuse them. A basic mechanical dial timer handles this perfectly and doesn't need batteries or a Wi-Fi connection.
Troubleshooting weak growth and common CFL mistakes
Stretching (tall, leggy seedlings)
This is the most common CFL problem, and it almost always means your lights are too far away. Plants reach toward the light source when they're not getting enough. Drop the lights to 4 inches above the seedlings. If they're already touching or nearly touching, add more bulbs around the perimeter instead of moving one bulb closer. Stretching can also happen if you're using the wrong spectrum: 2700K during veg gives warmer light that can encourage stretch. Swap to 6500K for the vegetative stage.
Slow or stalled growth
If growth is slower than you expect, check three things in order: distance (probably too far), total lumen output (probably too few bulbs for the space), and schedule length (probably too short). Add one or two more 23W bulbs before assuming anything else is wrong. Also check that your bulbs aren't burned out or significantly dimmed from age. A CFL that's hit 10,000 hours is putting out noticeably less light than it was at startup.
Heat stress or bleaching
If leaf tips are curling upward or leaves directly under a bulb look washed out, your lights are probably too close or your space is running too hot. Raise the lights an inch at a time and check canopy temperature again. Also make sure your sockets are open-style and not trapping heat around the bulb base. Enclosed fixtures cause heat buildup that both stresses plants and shortens bulb life.
Uneven coverage and shadowing
One bulb in the center of a 2x2 space leaves the corners in the dark. Spread bulbs evenly across the canopy, and use reflective walls to bounce light into gaps. Rotating plants a quarter turn every few days helps even out coverage if you can't reposition fixtures easily. For taller, bushier plants in veg, angle one or two side bulbs inward toward the lower canopy to get light into the interior of the plant.
Wrong bulb for the stage
Using 2700K bulbs during veg or 6500K bulbs during flowering won't kill your plants, but it will slow them down. The spectrum match matters. If you only have one type of bulb available, 6500K is the more versatile choice since it supports both seedling and veg growth reasonably well, and many plants (herbs, leafy greens, houseplants) don't need a spectrum switch at all.
Insufficient intensity for the space
CFLs have real limits. If you're trying to cover a 3x3 or 4x4 foot space with CFL, you'll spend more on fixtures and bulbs than a decent T5 or entry-level LED panel would cost. If you want a more even, long-lasting option, compare this with a T5 grow light setup and spacing recommendations before you buy more CFLs decent T5 or entry-level LED panel.
At that point, it's worth comparing options: a T5 grow light setup delivers more uniform intensity across a larger area, and a full LED grow setup beats CFLs on efficiency and output for anything beyond a small-scale personal grow. If you decide to switch to solar-powered lighting, you can plan a solar panel grow light setup that matches your LED schedule and canopy needs full LED grow setup. CFLs shine in tight spaces with a handful of plants.
Trying to scale them up gets awkward fast.
Your minimum viable CFL layout and next steps
Here's the simplest setup that actually works for one to two plants through veg: four 23W 6500K CFL spiral bulbs in four open clamp sockets, mounted 5 inches above the canopy, plugged into a power strip connected to a mechanical timer set to 18 hours on and 6 hours off. Line the walls with white foam board or mylar. Add a small clip fan for airflow. That's it. You're looking at $40 to $60 total, and it will grow healthy plants.
When you're ready to flower, swap two of the four bulbs for 2700K warm-white CFLs and set the timer to 12/12. Add one or two extra 2700K bulbs if you want to keep total output up during the stretch.
If plants aren't responding after two weeks, work through this checklist in order: check distance (should be 4 to 6 inches), check total lumens (add bulbs if you're under 2,000 per square foot), check spectrum (right color temp for the stage), check temperature (should be under 82°F at canopy), and check schedule (timer working correctly and not cutting out). Most CFL problems trace back to one of those five things, and fixing them costs nothing.
Once you've dialed in the basics, you'll have a solid foundation for deciding whether to scale up with LED or HPS later. If you later move beyond CFLs, HPS grow room glasses and a proper method operator setup can help with safety and fit during brighter, hotter lighting. If you want a bigger jump for flowering, compare this baseline with an HPS grow light setup for higher output and different heat needs.
FAQ
Can I use regular LED bulbs or compact fluorescents that are not labeled “grow” in my cheap CFL grow light setup?
For best results, stick to CFL spirals sold as daylight or warm white (for example, 6500K and 2700K) and verify the base is E26 and the wattage matches your socket rating. “Plant” wording is optional, the key is the color temperature and actual wattage, because some “equivalent” claims can be misleading.
Is it safe to leave a CFL grow light setup on all day if I do not have a timer?
It is not ideal. CFL lifespans are affected by cycling, but the bigger risk is inconsistent schedules that can slow growth. Use a timer, even a basic mechanical one, so the on period stays stable day to day.
What is the correct way to calculate how many CFL bulbs I need for my space if corners look dim?
Use lumens per square foot first, then account for spread loss. If you have dark corners, don’t just add one bulb in the center, instead distribute bulbs evenly across the canopy (often adding one or two bulbs toward the perimeter) and consider rotating the plants every few days.
How can I tell if my reflective material is improving results or just wasting space?
If your canopy temperature and stretching symptoms improve after adding reflectors, that is a good sign. White foam board and mylar both work, but mylar can be harsher visually, and it can increase heat, so recheck canopy temperature after installing it.
Do CFL bulbs need to “warm up” before they produce full brightness for the plants?
Most CFL spirals reach near full output quickly, typically within a short period after turning on. Still, frequent off and on can reduce bulb life, so avoid manual switching and rely on the timer.
Can I mount CFLs inside a tent and point them at the tent walls?
You should avoid aiming bulbs directly at the tent walls from close range. The goal is reflective bounce, not scorching or constant heating of the fabric, keep bulbs aimed downward and close enough to the canopy to reduce the need for long-distance spill.
My canopy feels cool, but my plants look pale. Should I lower the lights?
Pale growth can be a spectrum or total-output issue, not only heat. If plants are far above the canopy, lowering usually helps because CFL intensity drops quickly with distance, but if distance is already correct, add one or two bulbs before making drastic schedule changes.
How often should I replace CFL bulbs in a cheap CFL grow light setup?
If bulbs have high age, their light output typically declines, and growth slows even if temperature looks fine. As a practical rule, check performance if you see the same space and setup suddenly underperform after a noticeable run time, then replace the oldest bulbs first.
Should I run the timer exactly at 18/6 or 12/12, or can I fine-tune it to match my wake schedule?
For photoperiod plants, keep the schedule consistent and do not drift day to day. If you need convenience, choose fixed timer settings and let the plants run on that schedule, a small shift is usually fine for veg, but erratic timing can cause problems.
What happens if I accidentally use 2700K bulbs during veg or 6500K bulbs during flowering?
It won’t instantly kill plants, but growth and flowering speed can slow because the spectrum match is off. If you only have one type, 6500K is generally more versatile for veg through early growth, and a mixed approach during flowering can help maintain output.
Can I daisy-chain multiple power strips to power more CFL sockets?
Avoid it. Daisy-chaining can overload outlets and increases fire risk, especially when you run several fixtures. Instead, plug sockets into one properly rated power strip, then connect that strip to the timer, and verify the total load stays within ratings.
Do I need a GFCI adapter only for outdoors?
GFCI protection is especially important where water might splash or where your grow setup is near wet locations, basement rooms, kitchens, or bathrooms. If you have any chance of moisture near the outlet, using a GFCI adapter is a prudent safety layer.
My seedlings are stretching upward even with CFLs. What is the most likely cause?
The most common cause is insufficient light intensity at the canopy due to bulbs being too high. Lower the lights first, then confirm your schedule is long enough, if distance is correct and stretching continues, add bulbs to increase total lumens.
What canopy temperature should I target, and how do I measure it correctly?
Aim for roughly 75 to 80°F at canopy level, 24 to 27°C, and measure near the top of the leaves, not from across the room. If you are already near the high end and plants still look stressed, improve airflow rather than adding more bulbs.
Can I use the same CFL setup for both veg and flower without buying more fixtures?
Yes, you can keep the fixture structure and just swap bulbs from 6500K to 2700K and change the timer to 12/12. If flowering output drops, add a couple of extra 2700K bulbs to maintain total lumens through the early stretch.
Next Article
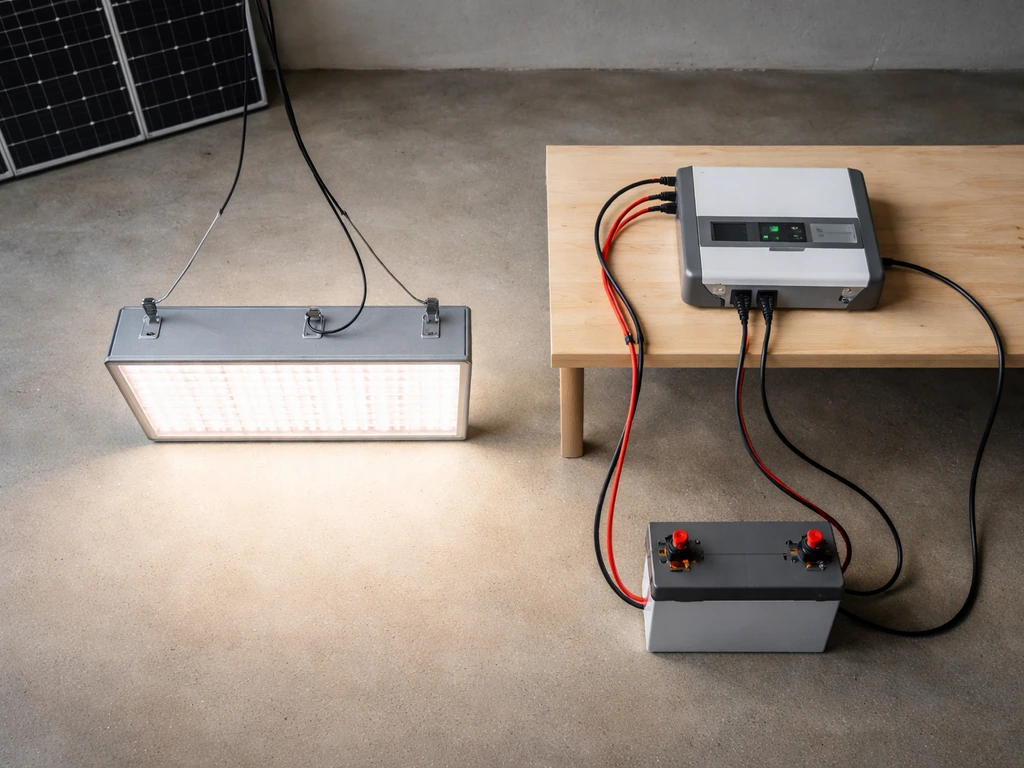
Solar Panel Grow Light Setup: Step-by-Step Indoor Guide
Build a solar panel grow light setup with sizing, wiring, inverter setup, safety checks, and troubleshooting.