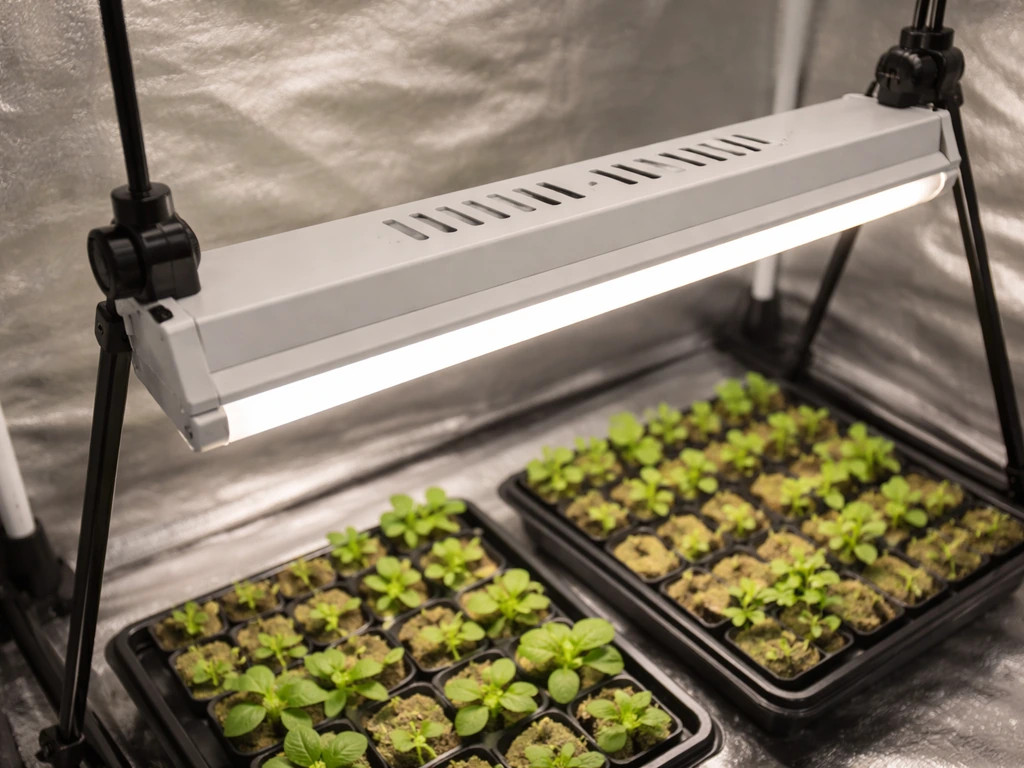
Mount your Giixer grow light 24–30 inches above seedlings, drop it to 18–24 inches for vegetative growth, and bring it to 12–18 inches for flowering. Run the VEG switch only for the first few weeks, then add the BLOOM switch when plants start to flower. Use an 18/6 light schedule for veg and 12/12 for flowering, and grab a cheap outlet timer from any hardware store since the most common Giixer model (the 1000W Dual Switch) does not include one.
How to Use a Giixer Grow Light: Setup, Timing, and Tips

Marcus Tillman
21 May 2026
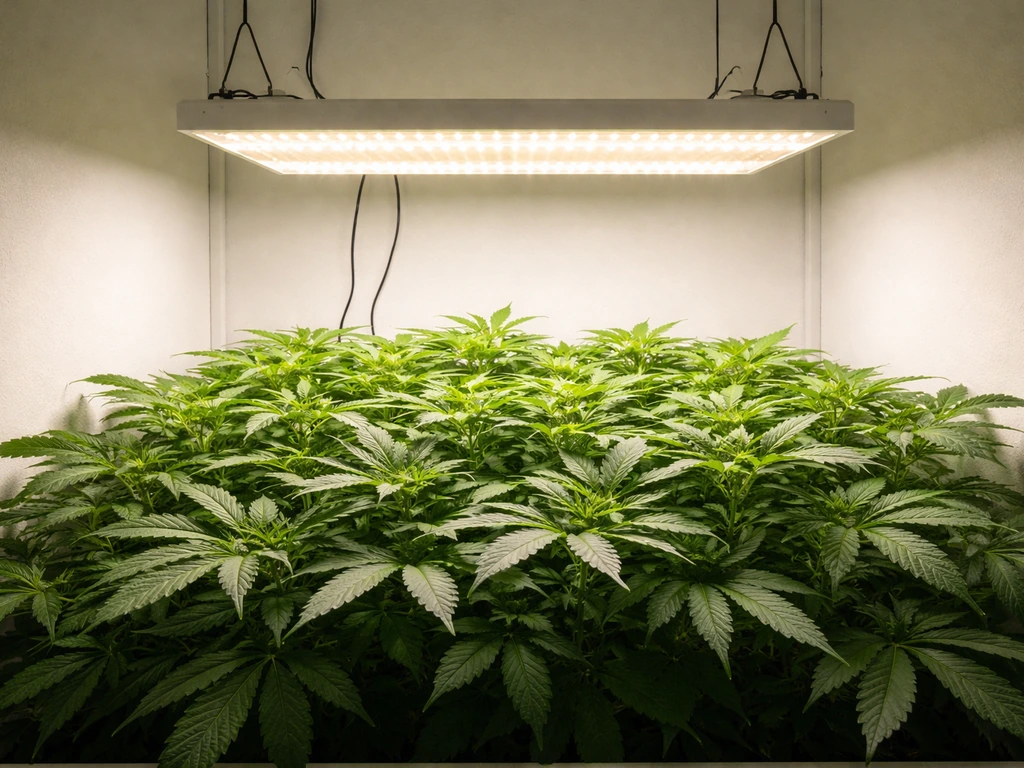
Figure out which Giixer model you have first
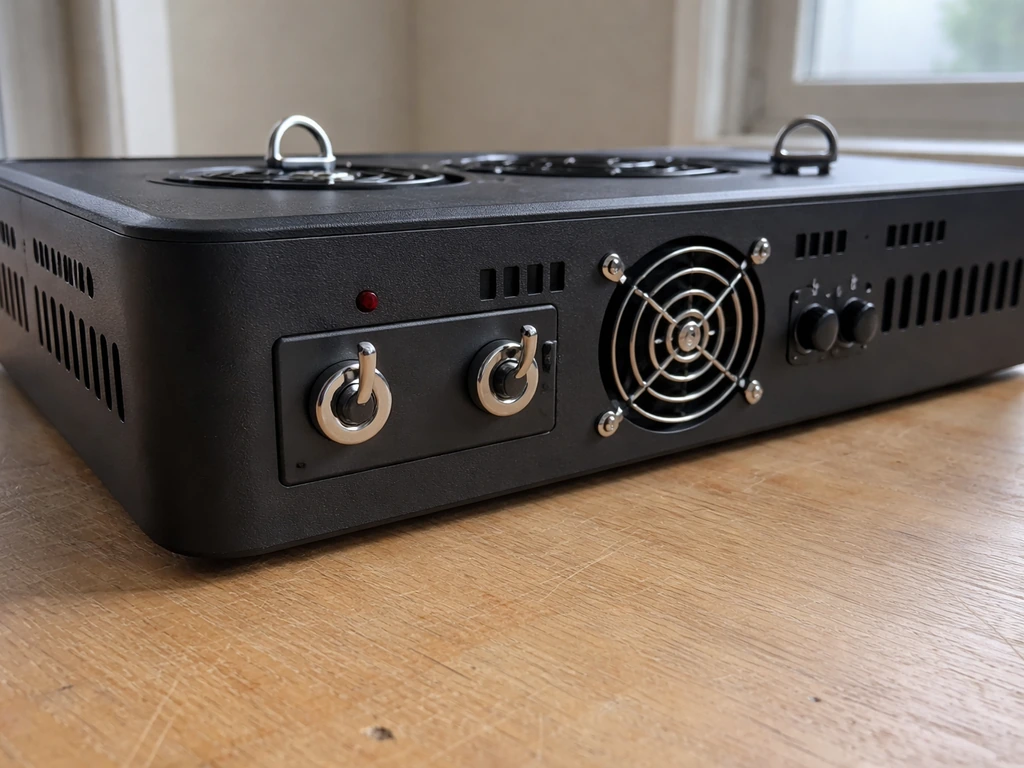
Giixer sells several grow lights, and the controls vary between them. The most widely sold version is the 1000W Dual Switch & Dual Chips model. It has two toggle switches on the back: one labeled VEG and one labeled BLOOM. That's the model most of the guidance in this article is built around. Some newer or bundled versions are listed with a built-in timer or dimming dial, but the 1000W Dual Switch does not include a timer and may or may not have a dimmer depending on which specific batch or listing you bought from.
Before you do anything else, look at the back or side of your unit. If you see two physical switches (VEG / BLOOM), you have the dual-switch version. If you see a dial or a rotary knob alongside those switches, you have a version with stepless dimming, you can reduce intensity from 100% all the way down, which is genuinely useful for seedlings. If you see a digital panel with timer presets (6/12/18 hours), your unit has a built-in timer and you can skip buying an external one. Check your unit before assuming, because instructions that match the wrong model will cause confusion fast.
What's in the box and what you need to assemble
The standard Giixer 1000W package includes the grow light panel, two adjustable rope ratchets (the hanging ropes), a hanging kit with hooks, a power cord, and a small thermometer and hygrometer combo for monitoring temperature and humidity in your grow space. There is no timer in the box for this model. You will need to supply your own.
Assembly is minimal. Thread the rope ratchets through the hanging brackets on the top of the light. Hook the other ends onto a bar, ceiling anchor, or grow tent crossbar. The ratchets are adjustable, so you can raise or lower the light easily by pulling the release tab. Run the power cord down and away from the light, keeping it clear of any dripping water or wet surfaces. That's the full assembly. There are no tools required and nothing complicated to wire.
One practical note: the Giixer 1000W is relatively lightweight, so the hanging kit is sufficient for most tents and shelving setups. Still, double-check that whatever you're anchoring to can hold the weight before you walk away. A dropped light ruins your grow and potentially your plants underneath it.
Where and how to hang it (coverage, height, and angles)
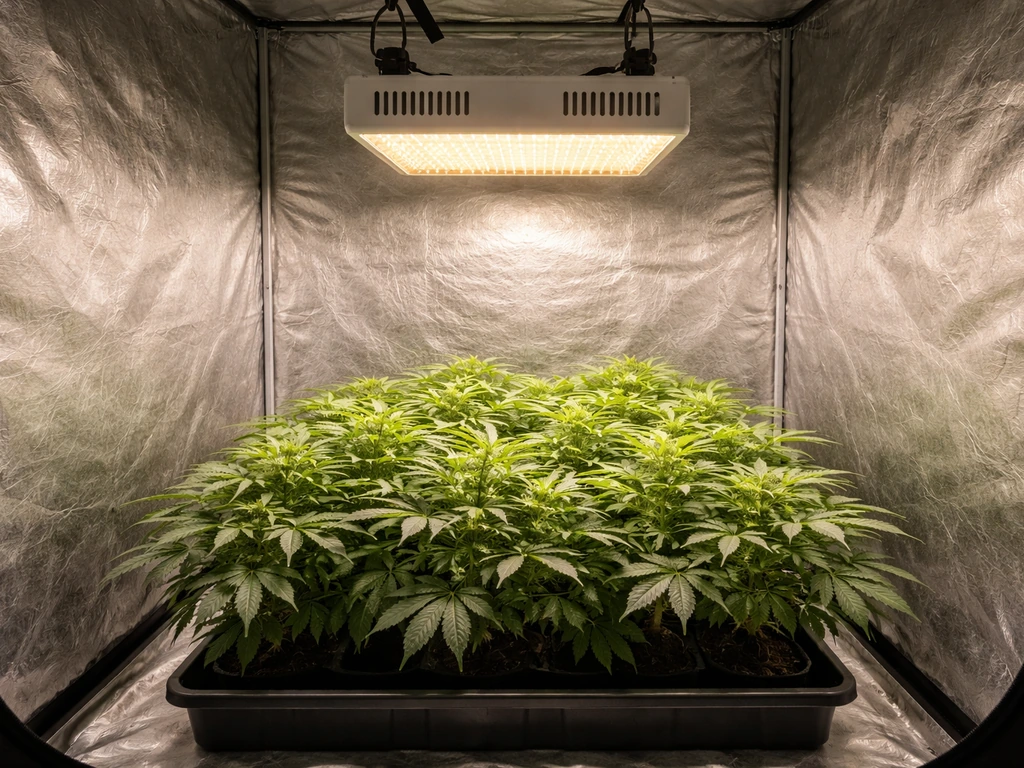
Center the light directly above your plants. The Giixer 1000W covers roughly a 2.5 x 2.5 foot footprint at around 16 inches of height during vegetative growth. That's your practical coverage area, it's not a large light, so if you're growing in a 4x4 tent, you'd need multiple units or a different fixture. For a 2x2 or 2x3 space, one unit works well.
Keep the light aimed straight down. The LEDs are designed for downward distribution, and angling the panel sideways doesn't improve coverage, it just concentrates intensity unevenly. If you want to cover a wider area, the 1000W supports daisy-chaining with up to 14 units connected together, which is worth knowing if you scale up later. A third-party review also describes the Giixer 1000W’s “daisy chain functionality” for connecting up to 14 units daisy-chaining with up to 14 units connected together.
Starting too close is one of the most common mistakes with this light. A Reddit r/nightowlseeds user also warned that if the Giixer 1000W is too close, it could burn the plant closest to it as plants get taller burn the plant closest to it as the plants grow taller. Multiple growers have reported burning the tops of plants that grew up toward the fixture. Start higher than you think you need to, then lower it gradually as you learn how your specific plants respond.
Intensity and distance by plant stage
Here's a simple breakdown by stage. These numbers assume the light is running at full intensity. If your model has a dimmer, you have more flexibility, you can keep the light lower and dim it down instead of raising it, which is a cleaner approach for seedlings.
| Plant Stage | Switch Setting | Recommended Height | Notes |
|---|---|---|---|
| Seedlings / Germination | VEG switch only | 24–30 inches | Dim to 50–70% if your model has a dimmer. Full power this close can stress new sprouts. |
| Vegetative Growth | VEG switch only | 18–24 inches | Blue and white spectrum promotes compact, leafy growth. Move light down as plants establish. |
| Pre-Flower / Transition | VEG + BLOOM both on | 16–20 inches | Running both switches gives the full spectrum at once, useful during the transition period. |
| Flowering / Blooming | BLOOM switch (VEG optional) | 12–18 inches | Red and white LEDs drive flowering. You can keep VEG on for full spectrum or turn it off to save wattage. |
The VEG switch activates blue and white LEDs, which are better suited for leafy, vegetative development. The BLOOM switch activates red and white LEDs, which drive flowering and fruiting. During early veg, just the VEG switch is enough. Once flowering begins, the BLOOM switch is the one doing most of the heavy lifting, though many growers run both for a full-spectrum effect throughout.
If your model has stepless dimming, use it during seedling stage. Set the dimmer to around 50–60% and hang the light at 24 inches. As seedlings develop their first true leaves and start growing steadily, slowly increase intensity and lower the height over the course of a week. This avoids the sudden shock that causes pale, stressed seedlings right out of the gate.
Daily light schedules and photoperiod basics

Most plants need consistent light cycles to thrive and, in the case of flowering plants, to know when to bloom. The Giixer 1000W does not include a built-in timer (on the standard model), so you need an external outlet timer. If you want the exact giixer 1000w led grow light instructions for setup, focus on your model’s switches, height, and timer schedule external outlet timer. A mechanical or digital outlet timer from any hardware store costs around $5–15 and handles this perfectly. Plug the timer into the wall, plug the grow light into the timer, set your schedule, and you're done.
Here are the schedules to use for each stage. An 18/6 schedule means 18 hours of light, 6 hours of darkness. This is the most common vegetative schedule. One grower using this exact light reported running 18/6, with lights on from 5:00 AM to 11:00 PM, a completely workable setup.
| Plant Stage | Recommended Schedule | Light On Duration | Dark Period |
|---|---|---|---|
| Seedlings | 18/6 | 18 hours | 6 hours |
| Vegetative | 18/6 | 18 hours | 6 hours |
| Flowering (photoperiod plants) | 12/12 | 12 hours | 12 hours |
| Autoflowering plants | 18/6 or 20/4 | 18–20 hours | 4–6 hours |
| Herbs and houseplants | 14/10 to 16/8 | 14–16 hours | 8–10 hours |
For photoperiod-sensitive flowering plants, the switch from 18/6 to 12/12 triggers the flowering process. Do this deliberately when you're ready for your plants to flower. Once you flip to 12/12, keep it consistent, irregular dark periods during flowering can stress plants and cause problems. That's exactly why a timer matters here, not just convenience.
Autoflowering varieties don't depend on light cycle to trigger flowering, so you can keep them on 18/6 or even 20/4 their whole life. Herbs like basil, mint, and cilantro do fine at 14–16 hours. Seedlings and young plants respond well to 18 hours whether they're eventually photoperiod or not.
Troubleshooting common problems
Slow or weak growth
If plants are growing slowly or look pale and stretched, the most likely cause is insufficient light intensity. Check two things: is the light high enough to cover the canopy without hotspots, and are you running the right switch? If you're only running the VEG switch and plants need more energy, try adding the BLOOM switch for a fuller spectrum. Also verify your timer is actually running the light for the correct number of hours, cheap timers sometimes slip or fail silently.
Leggy, stretching plants
Long, stretched stems with wide spacing between nodes means the plant is reaching for more light. Lower the fixture by 2–3 inches, or increase intensity if you have a dimmer. Leggy seedlings almost always mean the light is too far away or the schedule is too short. Try dropping to 18 inches and running 18 hours. If your seedlings are indoors under this light and still stretching, they're not getting enough usable intensity at that distance.
Leaf bleaching or burning at the top of the canopy
White, bleached, or yellowing leaves at the very top of the plant (closest to the light) are a sign the light is too close. Raise the fixture immediately, go up 4–6 inches and watch the new growth over the next several days. This is the most common user mistake with the Giixer 1000W. The light can run warm, and plants that grow up toward it without you adjusting the height will get scorched at the tips. Use the included thermometer to monitor canopy-level temperature: aim to keep it at or below 77–82°F (25–28°C) at plant height.
Uneven growth or hotspots
If plants directly under the center of the light grow faster or show stress while plants at the edges seem fine, your light is hanging too low for the coverage area you're trying to serve. Raise the light until the footprint evenly covers your canopy. Alternatively, the Giixer 1000W's 2.5x2.5 foot coverage may simply be too small for your space, no amount of height adjustment solves a coverage mismatch.
Flickering or the light won't turn on
Flickering is almost always a loose connection. Check that the power cord is fully seated at both the light and the outlet (or timer). If the light won't turn on at all, check that both switches are in the ON position, it's easy to flip one off by accident when adjusting the unit. The Giixer 1000W works on worldwide voltage (86V–264V AC), so if you're using it internationally, voltage mismatch is not a concern.
Safety, heat, and keeping the light running well
The Giixer 1000W has built-in overheat and overcurrent protection, which is helpful, but don't rely on it as your only defense against heat issues. The light can get warm during operation, reviewers have noted it's hot to the touch when running. Give it space: don't pack it into an enclosed shelf with zero airflow. In a grow tent, keep a small fan circulating air and make sure your intake and exhaust are working. The working temperature range is listed as up to 40°C (104°F) ambient, but your plants will suffer before that limit is reached.
On the electrical side, keep the power cord clear of water. If you're growing in a high-humidity environment, route cords up and away from any potential drips. Don't run the power cord under a doorway or anywhere it could get pinched. Use a grounded outlet, and if you're running multiple lights daisy-chained together, make sure your circuit can handle the load before plugging everything in at once.
For maintenance, wipe the LED panel surface gently with a dry cloth every few weeks to remove dust accumulation. Dust on the diodes reduces output over time. The service life on these lights is rated at approximately 50,000 hours, so consistent cleaning and keeping the unit from overheating will go a long way toward getting full lifespan out of it.
Your setup checklist before the first run
- Identify your specific Giixer model (dual switch, dual switch with dimmer, or timer-equipped version).
- Attach the rope ratchets to the hanging brackets and secure the light to a solid overhead anchor.
- Set the initial height: 24–30 inches for seedlings, 18–24 inches for veg, 12–18 inches for flowering.
- Connect an outlet timer (if your model doesn't have one built in) and set your light schedule: 18/6 for veg, 12/12 for flowering.
- Turn on the VEG switch only for seedlings and vegetative growth. Add BLOOM for flowering.
- If your unit has a dimmer, start seedlings at 50–60% intensity and ramp up over the first week.
- Place the included thermometer at canopy level and check that the temperature stays under 82°F (28°C).
- After the first 3–5 days, assess: are plants compact and healthy (good), or are they stretching (raise intensity/lower height) or bleaching (raise light height immediately)?
- Adjust the rope ratchets as plants grow so the light-to-canopy distance stays consistent.
The Giixer 1000W is a straightforward light to use once you understand its two-switch system and accept that height management is your main ongoing task. Most problems with this fixture, burning, stretching, uneven coverage, come down to placement decisions rather than anything wrong with the hardware. Get the height right for the stage, set a consistent timer schedule, and check on your plants every few days for the first couple of weeks. Giixer is marketed as a whole-cycle light intended for plants, flowers, and vegetables at all growth stages, which fits with setting the correct height for each stage while keeping your schedule consistent blank" rel="noopener noreferrer">set a consistent timer schedule. After that, you'll have a feel for exactly how your particular plants respond to this light in your specific space. Other budget dual-switch models from brands like Gooingtop and Noah's follow a similar logic, so the skills you build here transfer well if you expand your setup later. If you also have Noah's grow lights, see the Noah's led grow light instructions for model-specific setup tips and wiring checks. If you want step-by-step guidance for a different brand, see the jiffy hydro grow light instructions as a related starting point. If you are using a Gooingtop LED grow light, follow the same height, switch, and timer basics for stable results Gooingtop and Noah's.
FAQ
How do I tell if my Giixer has a built-in timer or if I truly need an external outlet timer?
Check for a digital control panel with pre-set timer options. If you only see two physical toggles labeled VEG and BLOOM (and no timer screen), you will need an external outlet timer. If your listing claims a timer but the hardware shows only switches, treat it as non-timer and verify with a quick test (turn it on at the wall, then confirm it cycles the light off and back on).
Can I run VEG and BLOOM together instead of switching at the start of flowering?
Yes, many growers run both for a fuller spectrum, especially during transition. However, when you flip to 12/12 for photoperiod flowering, keep the schedule consistent and avoid changing the cycle daily, since light interruptions matter more than whether you use both switches.
What’s the safest way to lower or raise the light during the first week to avoid seedling shock?
Make small adjustments, about 2 to 3 inches at a time, then wait several days to judge the response. If your model has dimming, you can keep the height steadier (around the recommended seedling distance) and reduce intensity first, then increase gradually rather than moving the fixture aggressively.
My seedlings look pale even when I run the right switch and height, what should I check first?
Confirm the timer is actually controlling the light. Some cheap timers fail silently, so verify by observing whether the fixture turns off during the dark period. Next, make sure you are using the correct switch for what you are growing, for example using BLOOM once plants show you are in the flowering or transition stage.
Is it okay to run the same schedule year-round, or do I need to change timing based on temperature?
Do not change the light cycle hours based on temperature alone. Keep VEG (commonly 18/6) and flowering (commonly 12/12 for photoperiod plants) consistent. If temperatures are an issue, solve it with airflow and height adjustments, not by shortening the dark period.
Can I use the Giixer on plants with different flowering triggers in the same tent?
It’s risky because photoperiod plants need uninterrupted dark periods to bloom reliably. If you must grow different trigger types, separate them by tent or at least use a strategy where photoperiod plants keep their exact 12/12 schedule, while any autoflowers stay on a different timer only if they are not exposed to the photoperiod dark window.
How close is too close for this light, and how do I correct it quickly if I see leaf-tip burn?
Leaf whitening or scorching at the very top is a sign the fixture is too close. Raise the light immediately by about 4 to 6 inches, then reassess within 3 to 5 days. If your model has dimming, reduce intensity instead of only raising height to stabilize stress faster.
What causes uneven growth, like plants at the edges doing better or worse than the center?
Usually it’s coverage mismatch or height placement. Center alignment matters, but if your canopy is wider than the usable footprint, no height adjustment fully fixes the edges. For best results, use one unit for roughly a 2x2 or 2x3 area, and scale to multiple units for larger tents.
Can I daisy-chain multiple Giixer 1000W units safely, and what do I need to check electrically?
Daisy-chaining is possible on this model, but you must confirm your circuit can handle the total load before plugging in. Avoid overloading a single outlet or power strip, and route the power cord so it does not get pinched or exposed to drips, especially if multiple fixtures share one timer.
What should I do if the light flickers or turns on intermittently?
First check that the power plug is fully seated at both ends (light and outlet or timer). Then confirm both VEG and BLOOM toggles are ON, since it’s easy to knock a switch when adjusting height. If it still flickers, inspect the cord for damage and replace any questionable extension cord or damaged plug.
How can I monitor whether the light is too hot at canopy level without guessing?
Use the included thermometer and place the sensor at plant height, not near the lamp body. If canopy temperature is consistently above the mid to high 70s Fahrenheit (25 to 28 C range), increase airflow and raise the fixture rather than waiting for the heat protection to intervene.
How often should I clean the LED panel, and what’s the proper way to do it?
Wipe the LED panel gently with a dry cloth every few weeks to remove dust buildup. Do not use wet cleaning methods on the fixture while it is powered, and avoid pressing hard on the diodes since you want to remove dust without scratching surfaces that affect output.
Do I need to run the light every day the same exact time, or is it fine if it drifts by an hour?
Try to keep the schedule stable and precise, especially during flowering for photoperiod plants. A timer with consistent on and off times helps prevent irregular dark periods, which can stress flowering plants even if you are roughly on target for the total daily hours.
Next Article
Jiffy Hydro Grow Light Instructions: Setup, Wiring, and Timing
Step-by-step Jiffy Hydro grow light setup: mounting, safe wiring, bulb choice, and timer timing for seedlings to floweri