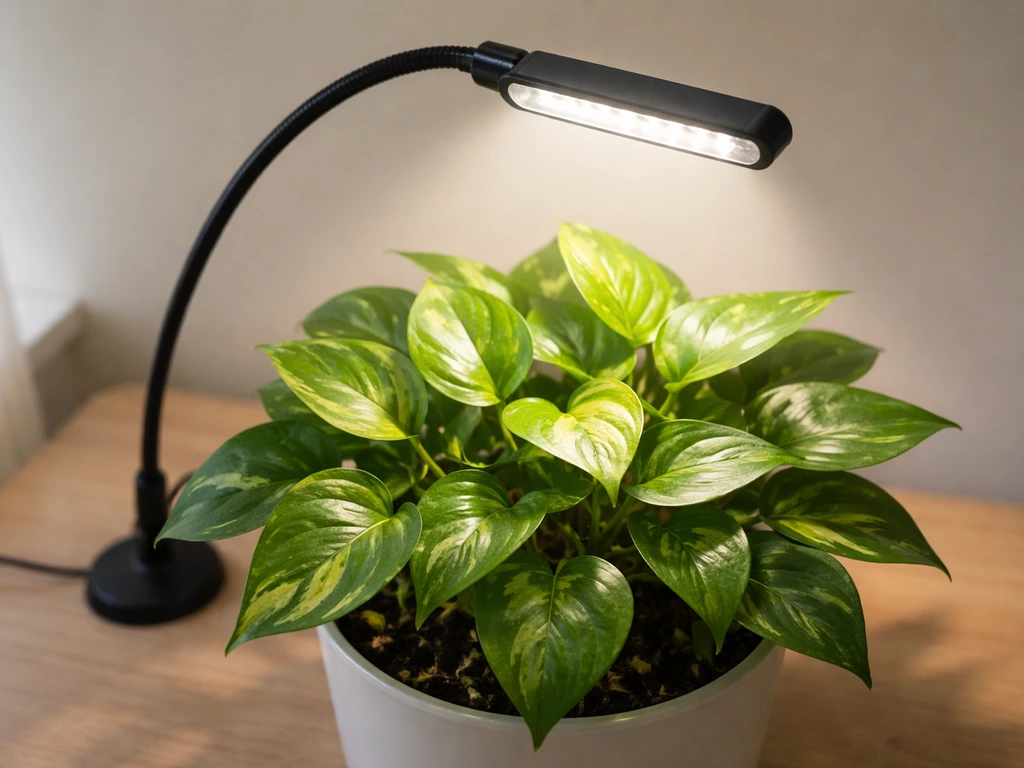
If you have a GooingTop LED grow light and you're staring at it wondering what to do next, here's the short answer: these are compact, USB-powered clip lights designed for houseplants, seedlings, and small indoor gardens. They're not complicated, but the manuals are thin and the box doesn't always tell you what you actually need to know about distance, timing, or troubleshooting. This guide covers all of it, step by step.
GooingTop LED Grow Light Instructions: Setup, Timing, Fixes

Marcus Tillman
10 Apr 2026
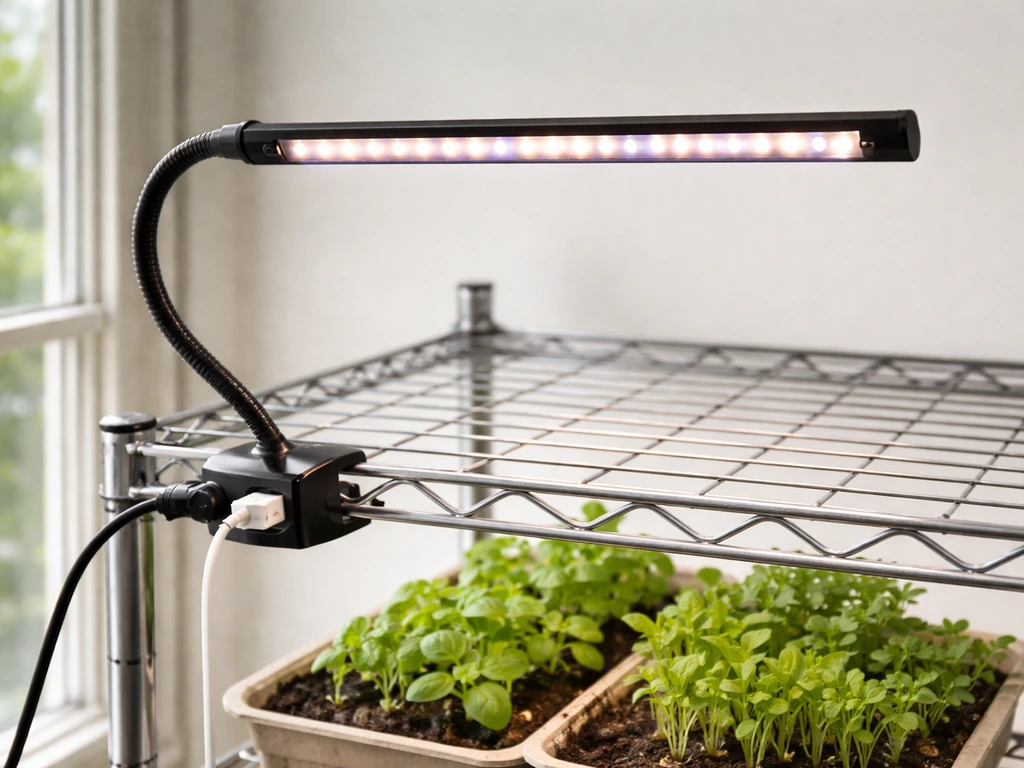
Figure out which GooingTop model you have
Before anything else, check your model number. It's usually printed on a sticker on the clamp body or the back of the light bar. The two most common GooingTop models you'll encounter are the Clip-OnePanel6500K-01 and the HY-021. Both are USB-powered clip-on grow lights with flexible gooseneck arms and built-in timers, but they have slightly different specs and controls, so knowing which one you have saves a lot of confusion.
The Clip-OnePanel6500K-01 is a single-panel light drawing about 6W at 5V DC, with an in-line remote on the USB cable for timer and dimming. Device-report’s Clip-OnePanel6500K-01 listing includes practical setup specs like a 5-foot cable length and notes the in-line remote controller type. The HY-021 is a multi-arm version drawing about 10W (roughly equivalent to a 50W halogen), with a control panel directly on the unit. Both run off standard 5V USB power, which means any phone charger, USB wall adapter, computer port, or power bank can run them. If you're not sure which you have, check whether your controls are on the cable (Clip-OnePanel6500K-01) or on the light body itself (HY-021).
Once you know your model, the instructions you actually need usually fall into one of four buckets: physical setup (clamp, gooseneck, placement), power and safety, light scheduling (timer and dimming), or troubleshooting when something isn't working. Most people searching for "GooingTop grow light instructions" need all four, so this guide covers them in order.
What's in the box and what to check first
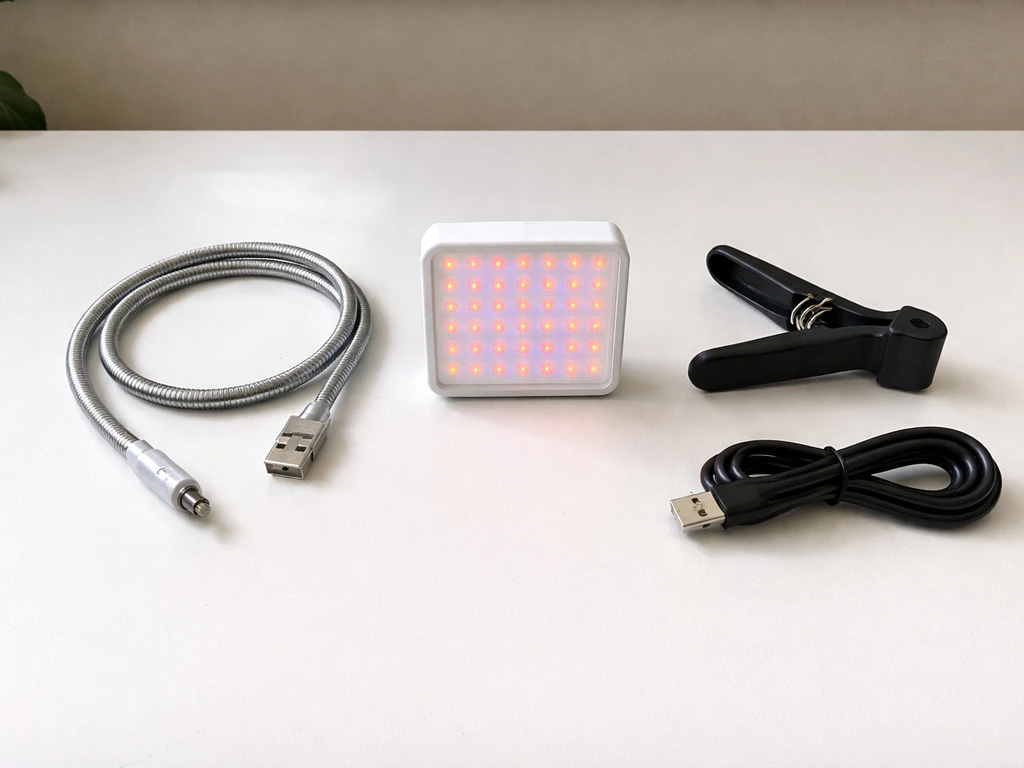
Open everything up and lay it out before you start. For the Clip-OnePanel6500K-01, you should have: the grow light with a flexible 360-degree gooseneck, a strong spring clamp, and an integrated USB power cable with an in-line remote control. For the HY-021, you should have: the LED grow light unit (with multiple gooseneck arms and clamp attached), a USB plug for power, and a printed user manual.
One thing that trips people up immediately: neither model includes a USB power adapter in the box. You need to supply your own 5V USB charger. Any standard smartphone charger rated at 5V/1A or higher will work fine. If you try to run it from a low-output USB port on an older laptop or a cheap charging hub, you might get dim or unstable output. A dedicated wall adapter is always the best option.
Check that the gooseneck moves freely and holds its position when you bend it. It should stay where you put it without drooping. Also check the clamp opens wide enough to fit your shelf edge, pot rim, or desk. If anything is missing or damaged, contact the seller before proceeding.
Safe setup and installation
Mounting the clamp
Attach the spring clamp to a stable surface: the edge of a shelf, a pot rim, a grow tent bar, or a desk edge. The clamp needs to be firm enough that the light doesn't shift when you adjust the gooseneck. If the clamp is slipping, the surface might be too thick or too smooth. Try wrapping a rubber band around the clamp pads for extra grip on smooth surfaces.
Once the clamp is secured, bend the gooseneck so the light panel points down toward your plants. Both models have 360-degree adjustable goosenecks, so you can angle the light from directly overhead or from the side. Overhead is almost always better for plant coverage, especially for seedlings. Make sure no part of the gooseneck is contacting flammable material like curtains or paper, and keep the light at least a few inches away from anything that could catch heat.
Power and safety basics
Plug the USB connector into your 5V power adapter and plug the adapter into a working wall outlet or power strip. The manual is explicit about this: the input voltage must match the 5V DC spec. Don't try to power these lights from a higher-voltage source or a cheap adapter of unknown rating. The lights draw very little power (6W for the Clip-OnePanel, 10W for the HY-021), so they're safe for continuous use as long as ventilation is adequate.
Ventilation matters more than people expect with compact LED grow lights. Both manuals specifically say to ensure proper ventilation around the lamp during operation. That doesn't mean you need a fan blowing on it, but don't stuff the light inside a sealed box or press it against a wall. A little airflow around the fixture keeps temperatures stable and extends the LED lifespan.
A few other safety points directly from the manual: don't expose the light to direct water spray or immerse it in water, even though it's labeled water-resistant. It's designed for indoor use, period. Avoid prolonged direct eye exposure to the LEDs, and never disassemble or modify the lamp. If something breaks internally, replace the unit rather than trying to repair it yourself.
Cable management
Route the USB cable so it doesn't hang across walkways or get pulled by pets or kids. A small binder clip or adhesive cable clip on the edge of a shelf works well. Keep the cable clear of water sources and away from plant foliage, especially with misting setups.
Getting the distance, angle, and coverage right
These GooingTop lights are small, low-wattage fixtures, and that's actually a feature rather than a limitation for the plants they're designed for. But it also means positioning is everything. Too far away and the plants don't get enough light. Too close and you risk light stress or heat stress on sensitive foliage.
The manuals don't give fixed distance measurements, and that's intentional. The 360-degree gooseneck is there so you can dial in coverage precisely for your specific plant and pot size. The right starting approach is to set brightness to a mid level, position the light about 6 to 12 inches above the canopy, and then watch the plants for the first few days. If leaves curl upward or show bleaching, move the light further away. If plants are stretching and leaning toward other light sources, move the light closer or increase brightness.
| Plant Type | Recommended Starting Distance | Brightness Level | Notes |
|---|---|---|---|
| Seedlings / Cuttings | 8–12 inches | Level 2–3 of 5 | Very sensitive to intensity; watch for bleaching |
| Vegetative houseplants | 6–10 inches | Level 3–4 of 5 | Adjust if leaves cup or show light stress |
| Succulents / Cacti | 4–8 inches | Level 4–5 of 5 | High light tolerance, but still watch for burn |
| Low-light tropicals | 10–16 inches | Level 2–3 of 5 | Pothos, philodendrons, ferns prefer diffuse light |
| Herbs (veg stage) | 6–10 inches | Level 3–5 of 5 | Basil, parsley, mint respond well to full brightness |
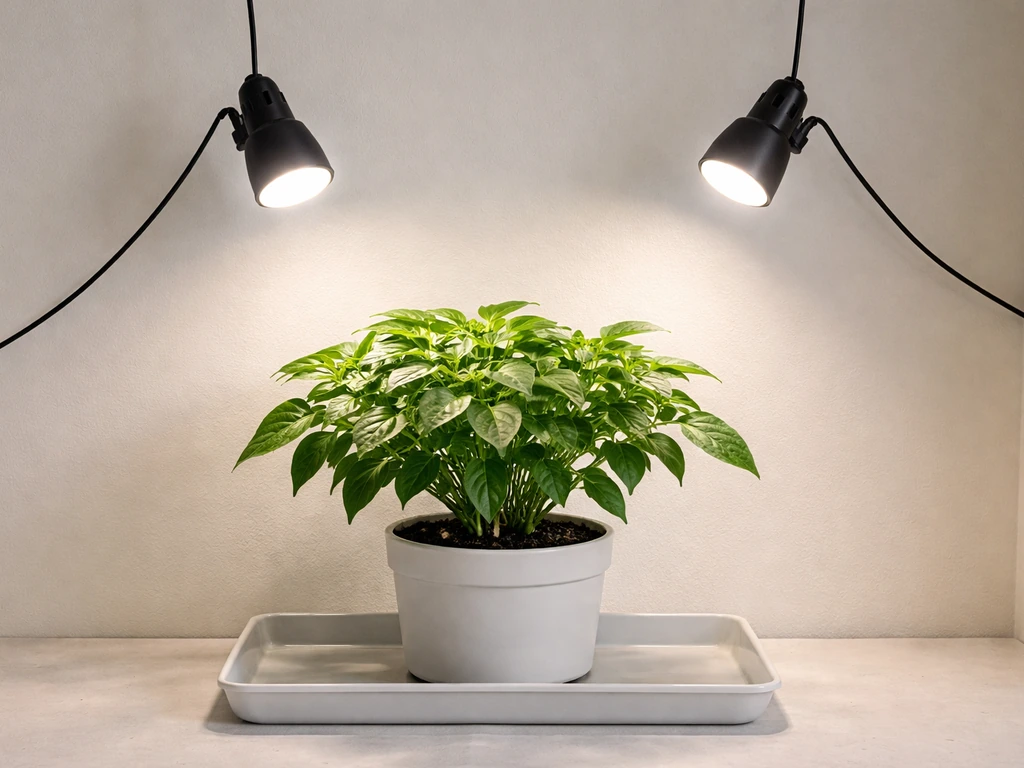
Coverage area is limited on these lights because of their wattage. A single GooingTop clip light realistically covers one to two small to medium pots well. If you're trying to light a tray of seedlings or multiple plants, position the light directly over the center of the group and use the gooseneck to spread the angle slightly. You can also add a second unit on the opposite side of a larger tray for more even coverage.
Timer settings, daily schedules, and photoperiod basics
This is where a lot of people get confused, so let's walk through it clearly. Both GooingTop models have a built-in timer that runs on a 24-hour repeating cycle starting from the moment you set it. The HY-021 timer uses fixed automatic durations of 4 hours, 8 hours, or 12 hours and repeats on a 24-hour cycle from the moment the timer is set HY-021 timer uses fixed automatic durations of 4, 8, or 12 hours and repeats on a 24-hour cycle. That means if you plug in at 8 AM and set the 12-hour timer, the light will run from 8 AM to 8 PM, then off until 8 AM the next day, repeating automatically as long as the unit stays powered.
Timer options by model
The Clip-OnePanel6500K-01 gives you four fixed timer options: 4H (on 4 hours, off 20), 8H (on 8, off 16), 12H (on 12, off 12), and 18H (on 18, off 6). You select these by pressing the Timing button on the in-line remote. The HY-021 offers three fixed options: 4H, 8H, and 12H, set via the clock button on the control panel. The HY-021 manual specifically recommends starting with 5 to 8 hours per day and adjusting based on your plant type and how much natural light the space already receives.
Which schedule to choose for different plants
For most houseplants and low-light tropicals, 8 to 12 hours is a solid starting point. For seedlings, you can push toward 14 to 16 hours since they're growing fast and don't have a strong light/dark preference yet. Herbs in vegetative growth do well at 14 to 16 hours too. If you're supplementing natural window light, subtract the natural hours from your target and run the grow light for the remainder. The 18-hour timer option on the Clip-OnePanel is mainly useful for seedlings or for situations with almost no natural light at all.
One critical thing: the timer resets if power is interrupted. If you unplug the light, lose power, or the outlet trips, you need to manually restart the timer at your preferred time. This is the single most common scheduling complaint with these units. The fix is simple: plug the light into a reliable, always-on outlet (not a power strip with a master switch that gets accidentally flipped), and set the timer right after plugging in at the time you want the light cycle to start.
Dimming controls
Both models support 5 levels of brightness. On the HY-021, use the + and - buttons on the control panel to step through levels. On the Clip-OnePanel, use the remote inline on the USB cable. Start at a mid-level (3 out of 5) for most plants and adjust up or down over a few days based on how the plants respond. Don't jump straight to maximum brightness on seedlings or recently propagated cuttings.
Troubleshooting the most common problems

Light won't turn on
This is the most common first-day problem. Start here: is the USB cable fully seated in the power adapter? These connectors can look plugged in without actually making contact. Unplug and re-seat it firmly. Then verify the power adapter is working by plugging your phone into it. If the adapter is fine, press the power button (on the in-line remote for the Clip-OnePanel, or on the control panel for the HY-021). If nothing happens after all that, try a different USB adapter. A lot of "dead" GooingTop lights are actually fine; the adapter was the problem.
Light flickers or dims unexpectedly
Flickering almost always points to an unstable power source. Swap the USB adapter for a known-good phone charger rated at 5V/1A or higher. Also check that the USB cable isn't bent sharply near the connector, which can cause intermittent contact. If you're running the light from a power bank, some banks automatically shut off when they detect low current draw, so a dedicated wall adapter is more reliable for overnight use.
Timer isn't working or the schedule is wrong
If the light is running continuously or not cycling, the most likely cause is that the timer was never set, or power was interrupted and it reset. Unplug the light, then plug it back in at the exact time you want the light cycle to begin. Immediately press the Timing button (Clip-OnePanel) or clock button (HY-021) and select your desired on-time. The timer starts counting from that exact moment. Make sure the outlet stays powered 24/7 after that.
Uneven coverage or one side of the plant is darker
This is a positioning issue, not a defect. Bend the gooseneck so the light panel is pointing straight down at the center of your plant canopy rather than at an angle. If you're covering multiple plants, rotate the pots every few days so all sides get even exposure. For the HY-021's multi-arm design, spread the individual arms outward to widen coverage rather than clustering them all in the same direction.
Brightness seems lower than expected
Check your dimming level first. It's easy to accidentally step down to level 1 or 2 on the remote without noticing. Also remember these are 6W and 10W lights respectively. They're not going to light up a room visibly, and they're not meant to. Their output is concentrated over a small area from close range. If your plant genuinely needs more intensity than the light can provide at maximum brightness, you may need a second unit or a higher-wattage fixture.
If you're comparing GooingTop's performance to other brands and wondering whether the output is actually sufficient, it helps to look at how similar USB clip lights from other manufacturers are spec'd. For example, how to use a Giixer grow light follows the same general USB-power and clip-mount approach, so the positioning and troubleshooting logic overlaps a lot.
Quick-start checklist
- Identify your model: Clip-OnePanel6500K-01 or HY-021
- Check box contents: light unit, clamp, USB cable, and (for HY-021) USB plug
- Source a 5V USB power adapter if one wasn't included
- Attach clamp to a stable surface near your plants
- Adjust gooseneck so light panel faces down over plant canopy
- Plug USB cable into 5V adapter and adapter into wall
- Press power button on remote or control panel
- Set brightness to level 3 of 5 as a starting point
- Press timer button and select your schedule (start with 8H or 12H for most plants)
- Confirm the 24-hour cycle starts at your preferred time
- Check plants after 48 hours and adjust distance or brightness as needed
GooingTop vs. other USB clip grow lights
Since a lot of people shopping in this category end up comparing a few similar brands, here's a quick honest comparison of GooingTop against other commonly purchased USB clip grow lights. This can help you decide whether to add another unit or switch formats entirely.
| Feature | GooingTop Clip-OnePanel | GooingTop HY-021 | Typical USB Clip Competitor |
|---|---|---|---|
| Power draw | 6W (5V DC) | 10W (5V DC) | 5–15W (5V DC) |
| Timer options | 4H / 8H / 12H / 18H | 4H / 8H / 12H | Varies (often 3H/6H/12H) |
| Dimming levels | 5 levels | 5 levels | 3–5 levels |
| Gooseneck | Single, 360° | Multi-arm, 360° | Single or multi-arm |
| Control location | In-line remote on cable | Control panel on unit | Varies |
| Timer resets on power loss | Yes | Yes | Yes (almost universal) |
| USB adapter included | No | No | Usually no |
| Best for | Single small plant or pot | Small tray or 2–3 pots | Depends on wattage |
The honest recommendation: GooingTop is a solid budget option for supplementing light on one to three small plants. If you need to cover more area or want more intensity for fast-growing herbs or seedling trays, look at a higher-wattage panel-style fixture. The Giixer 1000W LED grow light is one step up in terms of coverage and intensity for those who outgrow the clip-light format.
Keeping your GooingTop light running well long-term
Cleaning
Always unplug the light before cleaning. Wipe the light bar, gooseneck, and clamp with a soft, dry cloth. Don't use abrasive cleaners, solvents, or wet cloths on any part of the unit. Dust builds up on LED panels over time and reduces output, so a monthly wipe-down keeps things running efficiently. The HY-021 manual specifically mentions avoiding abrasive cleaners on the clamp as well.
Heat management
At 6W and 10W respectively, these lights don't run hot enough to be a fire risk under normal conditions. But if you notice the body getting warm to the touch after extended use, make sure there's airflow around the fixture. Never cover the light or drape anything over it. Running at full brightness continuously for 18+ hours will generate more heat than shorter cycles, so make sure ventilation is clear if you're using the 18H timer setting.
Storage when not in use
If you're putting the light away for a season, store it in a cool, dry place away from direct sunlight and moisture. The Clip-OnePanel manual says exactly this. The HY-021 manual adds: keep it away from liquids, excessive heat, and open flames during storage. Coil the USB cable loosely rather than wrapping it tightly, which stresses the cable near the connectors over time.
When to replace vs. repair
Neither the Clip-OnePanel nor the HY-021 is user-repairable. The manuals explicitly say not to disassemble or modify the lamp and to refer any repairs to qualified personnel. In practice, these are budget fixtures, and the cost of repair would exceed the cost of replacement. If the LEDs start failing or the in-line remote stops responding, replace the unit. The USB power adapter, on the other hand, is worth replacing independently if it's the source of problems, since a quality 5V adapter costs only a few dollars.
If you're running a hydroponic setup alongside your clip lights, the timer and power management principles here apply broadly. Something like the Jiffy hydro grow light setup covers how to integrate lighting into a hydro environment specifically, which is useful if you're expanding beyond soil pots.
For those running multiple grow light types in the same space, it's worth noting that timer resets on power loss are a universal issue across budget grow lights, not just GooingTop. If you want to compare how another brand handles scheduling and controls, the Noah's LED grow light instructions walk through a similar clip-style fixture with a comparable timer setup, which can help you build a consistent routine across units.
FAQ
Can I run a GooingTop LED clip light 24 hours a day, or is that a bad idea?
You can technically leave it powered, but the built-in timer is the intended control. If you need longer light for seedlings, use the longest available timer option rather than bypassing it, and keep an eye on leaf curl, bleaching, or “droopy” stress that can show up when intensity is too high for too long.
What timer should I choose if I have window light coming in part of the day?
Use your target daily light hours as your guide, then subtract the hours when your plants actually receive strong window light. If you cannot tell how much light is reaching the canopy, start by setting the grow light for the smaller range (around 8 hours) and adjust after 3 to 5 days based on stretching or leaf color changes.
Do I need to use a specific USB adapter, or will any charger work?
Stick to a stable 5V DC USB charger rated at 5V/1A or higher. Avoid “multi-port” hubs or low-output ports if you see dimming or resets, and do not use unknown-voltage adapters because these lights are designed for 5V input only.
My timer seems to start at the wrong time, what’s the correct way to set it?
The cycle starts from the moment you plug it in, so plug the light into an outlet that stays on, then immediately press the timer/clock button and select your on-time. If you plug it in and then wait, the schedule will be offset even if you later select the same on-duration.
If the light turns off too soon, could it be set to the wrong mode?
Yes. On the Clip-OnePanel, confirm you selected the intended duration using the remote timing button (4H, 8H, 12H, 18H). On the HY-021, confirm you pressed the clock button to cycle to the desired option, since accidentally stepping to a shorter setting is a common cause of “early” shutoff.
The light output looks weak, how can I troubleshoot without buying anything new?
First, verify the USB cable is fully seated at the adapter and at the light. Next, confirm you are within the intended placement range (about 6 to 12 inches above the canopy as a starting point). Finally, ensure you are using a known-good 5V adapter, then test by swapping only the adapter with a phone charger to isolate adapter issues from cable issues.
How do I prevent heat or light stress when plants are sensitive?
Start at mid brightness and keep the light slightly higher than you think you need, then lower it gradually only if plants are stretching. If you see whitening or crispy edges, increase the distance and reduce brightness, and avoid aiming the LEDs directly at very tender new growth for long periods.
Is it safe to run the clip light in a humid or damp area like a bathroom or near misting?
Avoid direct water spray and keep it away from misting streams. Water-resistant does not mean waterproof. If you mist your plants, route the cable higher and keep droplets off the light body and clamp, and stop any operation immediately if water exposure occurs.
Can I use the light inside a grow tent or sealed cabinet?
You can, but do not enclose it tightly with no airflow. Keep at least some circulation around the fixture, especially if running the longest timer option continuously. Also confirm the clamp is still secure on tent bars or shelf material that might be slightly flexible.
Will the light work for tall plants, or is it only for seedlings?
It is best for small to medium pots and seedlings because the wattage is low and coverage is limited. For taller plants, the light must be positioned to reach the canopy, so you may need multiple units spaced across the plant or switch to a higher-wattage fixture if leaves are not receiving light evenly.
How should I clean it without damaging the LEDs or the clamp finish?
Unplug first, then wipe with a soft dry cloth. Avoid abrasive cleaners, solvents, or wet cloths, especially near the clamp pads and any remote/control openings. If dust buildup is heavy, use gentle wiping only, since liquid cleaning can seep into seams.
What happens if the cable gets pinched or bent at the connector?
Intermittent flickering and “dead” behavior can result from poor contact. If you notice flicker when moving the cable, inspect the connector area for sharp bends and reroute the cable so it flexes gently, ideally clipped to the edge rather than left hanging across movement paths.
Can I replace just the USB adapter if the light itself is working?
Yes, and it is often the smartest fix. If the light won’t power on or flickers, test with a different known-good 5V/1A (or higher) phone charger. Replacing the adapter is usually cheaper than replacing the entire fixture, as the light unit itself is typically non-user-repairable.
Next Article
Innova Grow Light Instructions: Setup, Use, and Troubleshooting
Step-by-step Innova LED grow light instructions: setup, mounting, distance, schedules, intensity, and fast troubleshooti