If you searched for Noah's LED grow light instructions and landed here, here's the honest situation: "Noah's" is not a widely documented grow light brand with a centralized manual or official product page. What that means for you is that your light is most likely a white-label or small-batch LED panel sold under the Noah's name (or a variation like "Noah's Arc"), and the setup steps are nearly identical to most budget-friendly LED grow lights on the market today. This guide walks you through every step, from confirming what you have in the box to dialing in your schedule after two weeks of growth, using real numbers and practical advice that applies directly to your unit.
Noah’s LED Grow Light Instructions: Setup, Mounting, and Testing

Marcus Tillman
16 Apr 2026
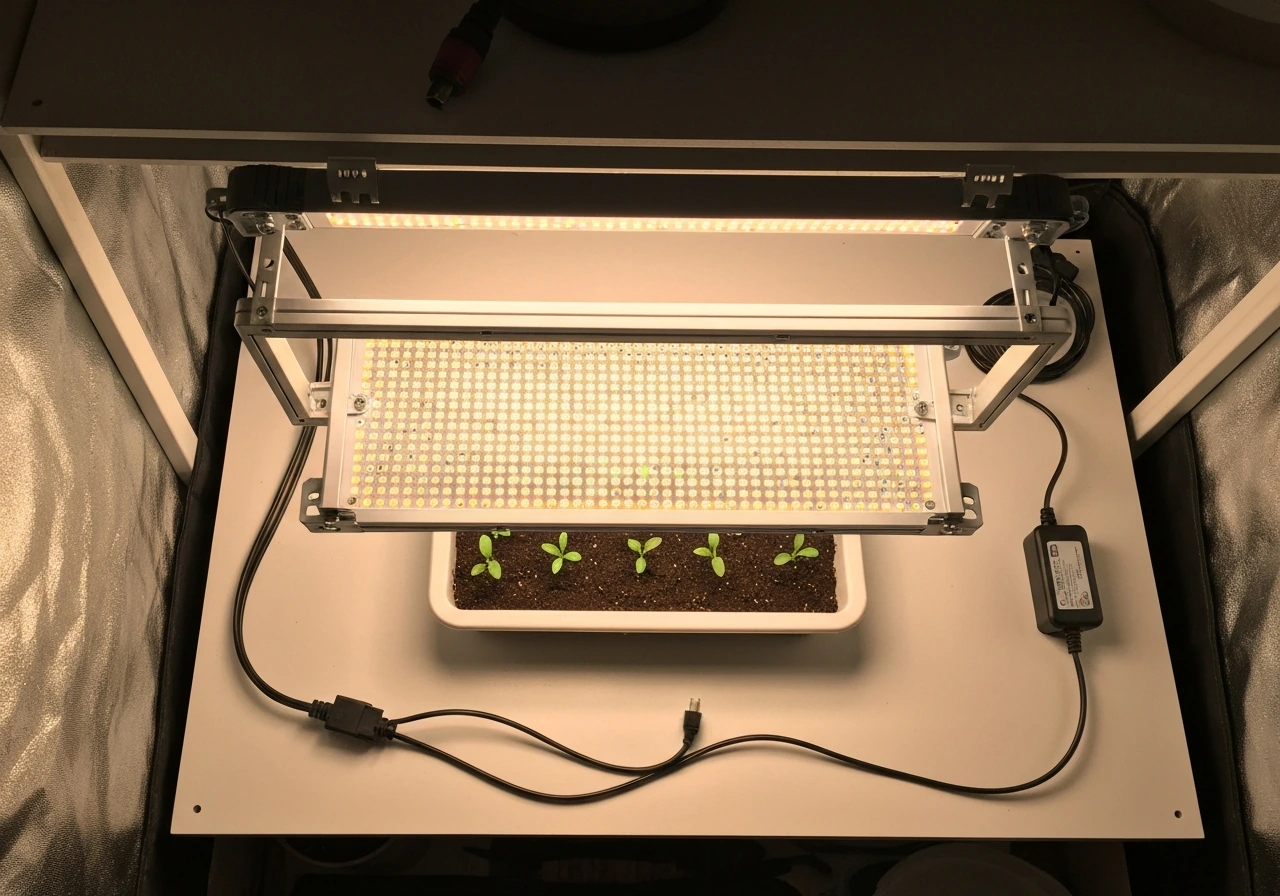
Figure out exactly which Noah's LED model you have
Before you plug anything in, take two minutes to identify your specific unit. One known reference to a Noah's-branded grow light is the "Noah's Arc 120W LED Grow Light," which appears to be a white-label panel manufactured by a third-party OEM supplier. Your unit may be labeled differently, so flip it over and look for a sticker on the back panel or the driver housing. You're looking for: the actual wattage (true draw, not the marketing wattage), the input voltage (most are 100-240V AC for worldwide use), and the spectrum type (full-spectrum, red/blue mixed, or quantum board style).
The "actual power" or "true draw" wattage is the number that matters most for placement. A panel marketed as "300W" might actually draw 120W from the wall, and that 120W figure is what you'll use for all your height and coverage decisions. If your sticker says something like "Input: 120W, AC100-240V 50/60Hz," that's your real number. Write it down now.
What should be in the box
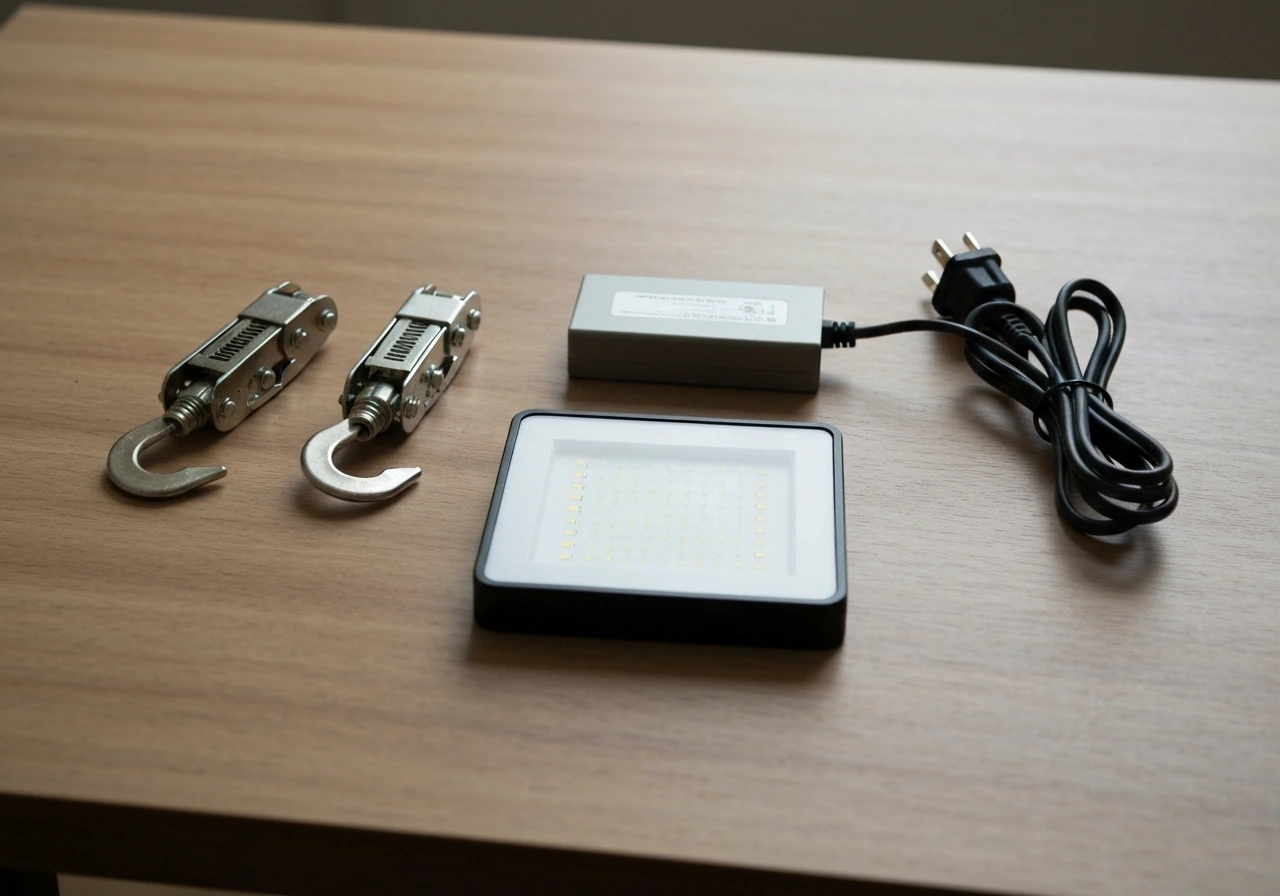
Most Noah's LED panels ship with the same basic kit. If anything is missing, contact your seller before installing.
- The LED panel itself (your main light unit)
- A hanging kit: two adjustable ratchet hangers or steel cables with hooks
- A power cord (attached directly to the panel or to an external driver box)
- An external driver or ballast (some models, especially those over 100W true draw, include a separate driver box connected by a multi-pin cable)
- A hanging rope or carabiner for attaching to a tent bar or ceiling hook
- A basic instruction sheet (often a single folded page, sometimes only in Chinese with diagrams)
Some models in this range include a separate dimmer knob, daisy-chain outlet, or a veg/bloom toggle switch. Note which controls your unit has before moving on, because those features affect the setup steps below.
Safety, power hookup, and your first test run
This is the step most beginners rush, and it's the one that causes the most problems. NCBI Bookshelf Prudent Practices in the Laboratory notes that using 110-V outlet receptacles with standard three-prong grounded plugs is expected, while two-prong “cheater” adapters are hazardous and should be prohibited blank" rel="noopener noreferrer">tripped breakers. Do this right and you'll avoid tripped breakers, damaged drivers, and fried LEDs on day one. The U.S. Fire Administration also recommends basic outlet safety practices, such as not forcing a 3-prong cord into a 2-slot outlet and not overloading power strips blank" rel="noopener noreferrer">avoid tripped breakers, damaged drivers, and fried LEDs on day one..
- Keep the light unplugged while you handle any cables, connectors, or mounting hardware.
- If your unit has an external driver (a separate black or silver box connected by a round multi-pin cable), connect that cable first before touching the power cord. Align the pins carefully and twist the collar clockwise until it clicks or seats firmly. Never force it.
- Check the input voltage on the driver sticker. If it says 100-240V, you're fine on a standard US 120V outlet. If it says 220V only, you need a step-up transformer or a different outlet.
- Plug into a grounded (three-prong) outlet. Do not use ungrounded adapters. LED drivers are sensitive to voltage spikes.
- Before hanging the light over your plants, plug it in at floor level in an open area and let it run for 10 minutes. Check that all LEDs light up, the driver isn't buzzing loudly, and the panel doesn't smell like burning plastic.
- If everything looks good, unplug it and proceed to mounting.
One thing worth noting: if your Noah's LED has a dimmer knob, set it to 50% for the first test run rather than full power. This gives you a chance to confirm everything is working before stressing the components at maximum output.
Mounting height, positioning, and coverage planning
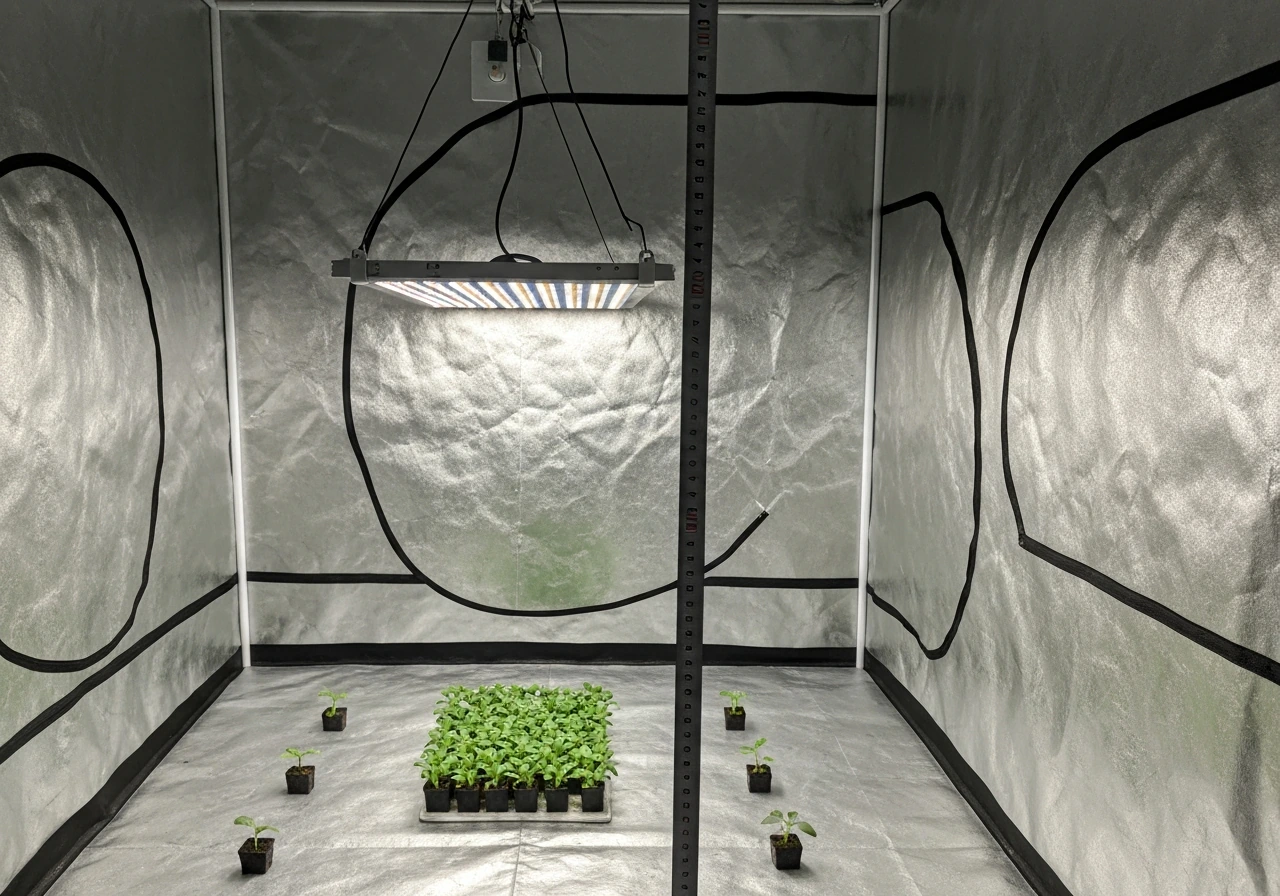
Hanging height is the single biggest variable that new growers get wrong. Too close and you burn or bleach your plants. Too far and your light is too diluted to drive real growth. Here are the starting heights based on true draw wattage for a Noah's LED panel.
| True Draw Wattage | Seedlings / Clones | Vegetative Growth | Flowering / Fruiting |
|---|---|---|---|
| Up to 50W | 20–24 inches | 16–20 inches | 12–16 inches |
| 51–100W | 24–30 inches | 18–24 inches | 14–18 inches |
| 101–150W | 28–36 inches | 22–28 inches | 16–22 inches |
| 151–250W | 32–40 inches | 24–32 inches | 18–24 inches |
These are starting points, not absolutes. After 48 hours, check your plants for signs of light stress: upward leaf curl, bleaching or white patches, or crispy leaf edges all mean the light is too close or too intense. Drooping combined with pale, slow growth usually means too far away or too dim.
For coverage area, a 100-120W true draw panel covers roughly 2x2 feet (about 0.37 square meters) at flowering intensity. At vegetative intensity, you can stretch that to about 3x3 feet (roughly 0.84 square meters). Center the panel directly over your grow space and position it so the light spread is as even as possible across the canopy. If you're growing in a tent, use the reflective walls to your advantage: a light positioned 2-3 inches off-center from the tent's midpoint will create noticeably uneven coverage.
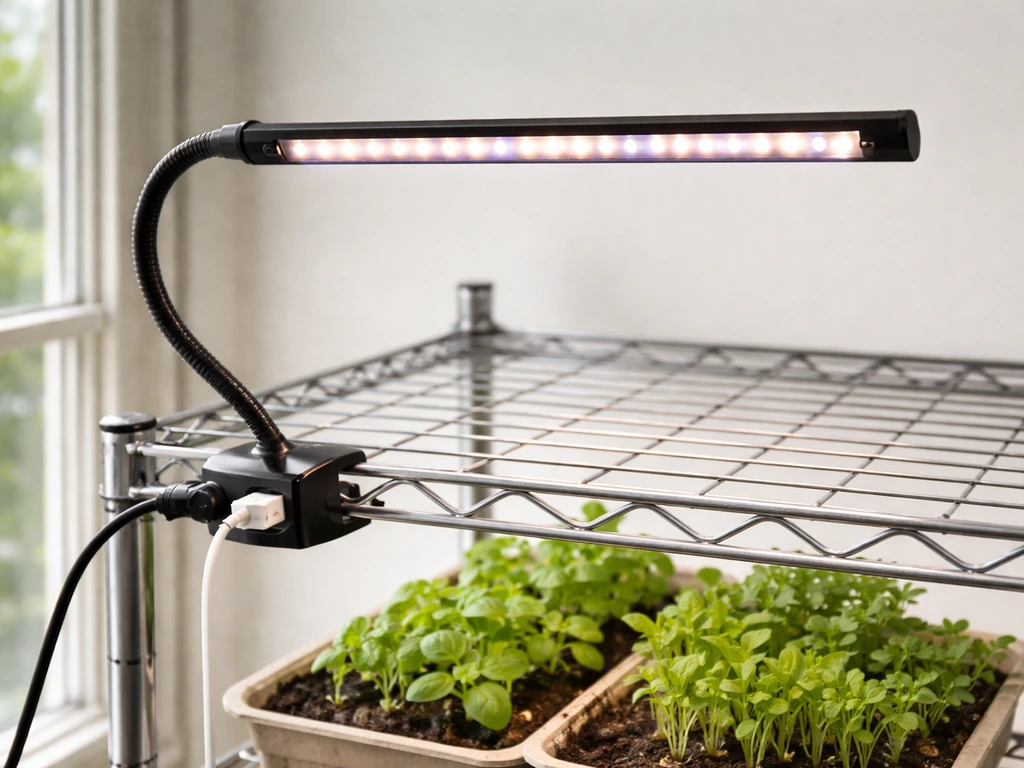
Hanging in a tent vs. open shelf or rack
In a grow tent, use both ratchet hangers attached to the top crossbars, keeping the panel level. An unlevel panel creates a hot spot (brighter, more intense zone) on one side of your canopy. On an open shelf or wire rack, use ceiling hooks rated for at least three times the panel's weight, and run the power cord along the frame rather than letting it hang free, where it can create a tripping hazard or get pinched.
Adjusting intensity and setting your photoperiod schedule
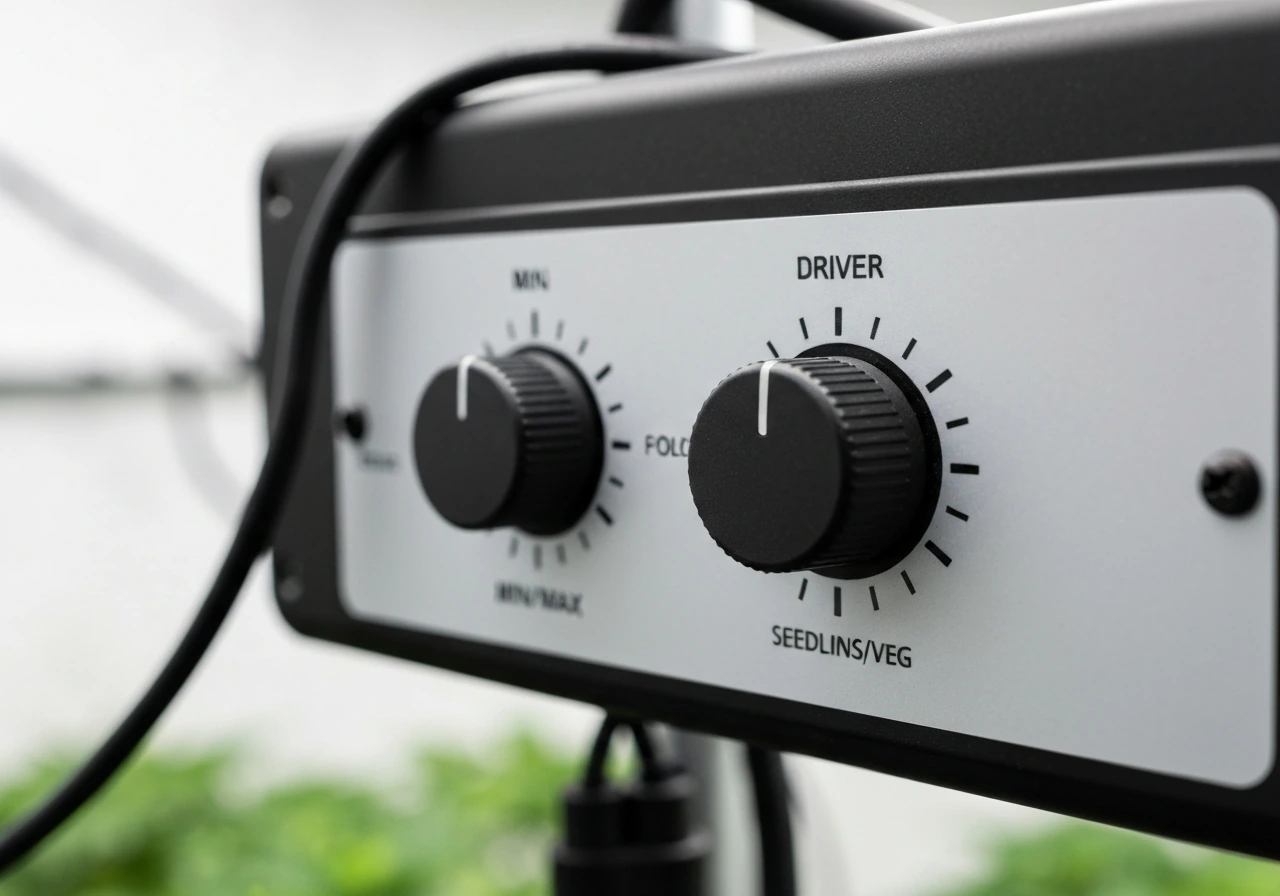
Not every Noah's LED has a dimmer, but if yours does, it's usually a rotary knob on the driver or panel labeled 0-100% or MIN/MAX. Some models have two separate knobs: one for the "veg" spectrum (blue-heavy) and one for the "bloom" spectrum (red-heavy). If you have two knobs, treat them as independent controls.
Recommended intensity settings
- Seedlings and clones (first 1-2 weeks): 40-50% intensity
- Vegetative growth: 60-75% intensity, or veg channel at 80% / bloom channel at 20-30%
- Flowering and fruiting: 90-100% intensity, or both channels at full power
- Houseplants and low-light species: 30-50% intensity is usually plenty
For photoperiod schedules, the rule of thumb is simple: more light hours for vegetative growth, fewer for triggering and maintaining flowering. Here are the three schedules you'll use most often.
| Plant Stage / Type | Daily Light Hours (ON) | Dark Hours (OFF) | Notes |
|---|---|---|---|
| Seedlings / clones | 16 hours on | 8 hours off | Keep intensity low; avoid 24hr light |
| Vegetative growth | 18 hours on | 6 hours off | Standard veg schedule for most plants |
| Flowering / fruiting | 12 hours on | 12 hours off | Critical for photoperiod-sensitive plants |
| Houseplants (foliage) | 14–16 hours on | 8–10 hours off | Adjust based on natural light available |
| Seedling propagation | 16–18 hours on | 6–8 hours off | Consistent schedule speeds germination |
Use a mechanical or digital outlet timer rather than relying on yourself to manually switch the light. Set your "lights on" period to match your waking hours so you can monitor your plants during the lit period. A 24-hour mechanical timer costs about $8-12 and eliminates one of the most common setup errors, which is inconsistent light cycles causing stress or delayed flowering.
Which setup works best: seedlings vs. houseplants vs. flowering plants
The same Noah's LED panel can serve all three of these use cases, but the settings are different enough that it's worth spelling out the approach for each. If you're new to grow lights in general, the setup logic here is nearly identical to what you'd find in guides for other budget panels, like the approach covered in how to use a Giixer grow light, where intensity-to-height ratios follow the same principles.
Seedlings and young starts
Seedlings are the most sensitive to light intensity and heat. Keep your Noah's LED at 40-50% power and hang it at the higher end of the range in the table above (30-36 inches for a 100-120W panel). Run a 16/8 schedule. A microgrowery community thread also flags how accidentally using the wrong light cycle, like 16/8 instead of 18/6, can affect growth timing and flowering stages Run a 16/8 schedule.. The goal here is gentle, consistent light that encourages root development without cooking the cotyledons. Check the soil surface temperature: if it's above 80°F (27°C) directly under the light, raise the panel or reduce intensity.
Houseplants and foliage plants
Most houseplants don't need high intensity. A 30-50% setting at 24-30 inches is usually enough for pothos, philodendrons, peace lilies, and similar low-to-medium light species. Run a 14-16 hour schedule. If your home gets a few hours of natural window light, reduce the LED photoperiod accordingly, total daily light (natural plus artificial) should stay below 18 hours for most foliage plants to avoid growth stress.
Flowering and fruiting plants
This is where the Noah's LED earns its keep. For tomatoes, peppers, herbs going to flower, or flowering annuals, run the light at 90-100% intensity and switch to a 12/12 schedule when you want to trigger flowering. Keep the panel at the lower end of the hanging range (16-22 inches for a 100-120W unit) to maximize photon delivery to the canopy. Check weekly that the ratchet hangers haven't slipped, since panel creep over a few weeks can push the light back into the danger zone.
Troubleshooting the most common Noah's LED problems

Most issues with budget LED panels fall into a handful of categories. Work through these in order before concluding the light is defective.
Light won't turn on at all
- Check the outlet: plug a phone charger in to confirm the outlet has power.
- Check the power cord connection at the driver box: the multi-pin connector may be unseated. Disconnect, realign, and reconnect firmly.
- Check the driver itself: some drivers have a small reset button or a fuse on the input side. Look for a tiny fuse holder near the power cord entry point.
- Try a different outlet on a different circuit: if your grow tent is on a circuit with other high-draw devices, you may have a tripped breaker.
Flickering or intermittent light
Flickering almost always points to a loose connection at the driver-to-panel cable, a failing driver, or a voltage issue at the outlet. Re-seat the multi-pin cable first. If the flickering continues, test the outlet voltage with a cheap multimeter: US outlets should read 110-125V. Readings below 105V suggest a wiring problem in your home or an overloaded circuit, both of which need an electrician, not a new grow light.
Dim output or only some LEDs lighting up
If your dimmer knob is set below 50%, that's the first thing to check. If the knob is at full and output still seems low, look closely at the LED array: individual dead LEDs are normal on budget panels and don't usually affect performance significantly. But if an entire section or row of LEDs is dark, that's a driver channel failure and the unit should be returned or replaced. For comparison, similar budget panels like those covered in Gooingtop LED grow light instructions share the same driver architecture, and the same dead-section diagnosis applies there too.
Overheating panel or hot driver
LED panels should be warm to the touch, not hot. If you can't hold your hand on the heat sink for 5 seconds without pulling away, that's a problem. Check that nothing is resting on top of the panel blocking airflow, and that the driver box has at least 4-6 inches of clearance on all sides. In a tent, make sure your exhaust fan is running and actually pulling air past the light. If the panel continues to overheat after clearing airflow, reduce intensity to 70-80% until you can improve ventilation.
Timer issues and inconsistent schedules
If your plants look like they're getting irregular light (some days more alert than others, inconsistent flowering triggers), the first step is to confirm your timer is actually cycling correctly. Mechanical timers can stick, especially cheaper ones. Plug the timer into the outlet and watch it manually cycle through on and off, or use your phone to time a full cycle. Digital timers are more reliable but need to be reprogrammed after any power outage. If you're running a hydroponic setup with integrated timing, the troubleshooting approach in Jiffy Hydro grow light instructions covers timer integration in more detail.
Your dial-in checklist for days 3 through 14
The first two weeks after setup are when you fine-tune everything. Most beginner growers either don't observe closely enough or overcorrect based on one bad day. Use this checklist every 2-3 days.
- Day 3: Check for leaf stress (curl, bleach, or drop). If you see any, raise the panel 4 inches or reduce intensity by 10-15%.
- Day 3: Confirm the timer is cycling on the correct schedule by checking the light at the expected on and off times.
- Day 5: Measure the canopy temperature with a cheap infrared thermometer. Target 72-82°F (22-28°C) at leaf level. Adjust fan speed or panel height if outside range.
- Day 7: Look at new growth. Healthy vegetative growth should show firm, normally-colored new leaves. Pale yellow new growth suggests light deficiency or the light is too far away. Reddish or purple tints on leaves can indicate phosphorus stress or too-intense blue light.
- Day 7: If you have a dimmer, bump intensity up by 10% if plants look healthy and you're in the veg stage.
- Day 10: Recheck hanging hardware. Ratchet hangers on budget kits can slip 1-2 inches over a week, especially if vibration from fans is present.
- Day 14: If flowering plants haven't started showing pre-flowers or bud sites after 10+ days on 12/12 schedule, confirm the dark period is truly dark (even a small light leak can delay or prevent flowering in photoperiod-sensitive plants).
- Day 14: Do a full visual check of the driver box and power connections. Look for any discoloration, melting, or unusual smell around connectors.
After two weeks of consistent observation and small adjustments, your setup should be dialed in enough to leave mostly alone. The biggest ongoing task is raising the light as plants grow taller during the vegetative stage, maintaining your target canopy-to-panel distance as they fill in. Budget grow light setups like this one, and similar panels like those explained in the Giixer 1000W LED grow light instructions, follow the same grow-and-adjust rhythm, so any experience you build here transfers directly to your next setup.
The fact that Noah's LED doesn't have a widely available official manual is genuinely frustrating, but it doesn't make setup harder in practice. These panels follow industry-standard LED grow light conventions, and once you know your true draw wattage and which controls your unit has, you have everything you need to run a successful grow from seedling to harvest.
FAQ
My sticker lists “300W,” but the real draw seems lower, how do I confirm the number before mounting the light?
Use the label value for “Input” or “Power draw,” not the marketing number. If the sticker is unclear, plug the light into a plug-in watt meter for 10 to 15 minutes at your intended dimmer setting, then record the watts while the light is on.
What should I do if my Noah’s LED driver has two output cables or extra connectors in the box?
Do not power the panel with any connector left unused if the kit includes an internal multi-pin link. Re-check the driver-to-panel cable seating, and if you have multiple spectrum channels, confirm which connector controls veg versus bloom before using the switches or second knob.
Can I run the Noah’s LED on a dimmer to reduce heat, or will dimming damage the LEDs?
For these panels, dimming is intended, but only use the built-in dimmer knob or controller. Avoid using an external household dimmer switch on the wall, and start at 50% for the first test run to confirm performance before lowering further.
How do I measure whether the light is too intense if I do not have a par meter?
Use plant signals plus a simple temperature check. If you see bleaching or white patches within 48 hours, raise the panel or reduce intensity. Also check for hot spots by feeling the heat sink area and confirming airflow around the driver, since heat stress can accompany excessive intensity.
Do I need to worry about humidity or rain because LEDs are used in tents?
The key risk is not the LEDs themselves, it’s moisture contacting the driver or cabling. Keep the driver box elevated and ensure cords do not drape over wet trays, use strain relief so connectors are not pulling, and avoid direct misting at the light assembly.
Can I combine two Noah’s LED panels on the same timer or power strip?
It depends on total watts and the rated current of your timer and strip. Add the true draw watts of both panels and ensure the timer and circuit are not overloaded, if you are unsure use a dedicated outlet or separate timers for each panel to prevent inconsistent cycles.
What if my timer clicks but the light does not turn on, where should I troubleshoot first?
First confirm the outlet is live by testing another device. Then check the timer’s plug orientation and settings, and verify the driver has power indicators or a secure power connection. If the panel still stays off, test the light by plugging directly into the wall to isolate whether the timer or driver is the issue.
My plants flower inconsistently. Besides the schedule, what else can cause timing drift?
Check that the lights are actually turning on and off as programmed, some mechanical timers can stick after weeks. Also make sure no additional room light leaks into the tent during the dark period, since even brief exposure can delay flowering responses.
Should I run the veg/bloom toggle in addition to using the second knob, or only one at a time?
If your unit has both a veg/bloom switch and separate spectrum knobs, treat them as independent controls as described for your model. Set veg spectrum first for early growth, then switch to bloom mode for flowering, avoid rapid toggling day to day when plants are transitioning.
How often should I re-check hanging height, and what’s a practical rule to prevent “panel creep”?
Do a quick check every 2 to 3 days at first, then weekly once dialed in. Reconfirm the ratchets stay tight, panels can slip slightly over time, and a small distance change can noticeably alter intensity across the canopy.
Is it okay if some LEDs appear dim or dead on a section of the panel?
A few isolated dead diodes are usually not a major performance loss on budget panels. However, if an entire row or section is consistently dark, that points to a driver channel failure, in that case you should stop troubleshooting and consider replacement or return rather than continuing the grow.
What is the safest way to test outlet voltage if I suspect flickering?
Measure at the wall outlet with a multimeter, check while the light is on, and note the reading. If you see values below about 105V, do not keep running the panel expecting stable output, investigate your home circuit with an electrician to avoid overheating or driver stress.
Next Article
GooingTop LED Grow Light Instructions: Setup, Timing, Fixes
Step-by-step GooingTop LED grow light setup, timing, mounting distance, quick fixes for flicker, dim output, timer issue