Plug in the Giixer 1000W, flip the VEG switch for seedlings and early veg, hang it 24 inches above your canopy to start, and set an external timer for 18 hours on / 6 hours off. That is the setup in one sentence. Everything below breaks that down step by step so you do it safely and get it dialed in for your specific plants and growth stage.
Giixer 1000W LED Grow Light Instructions: Setup to Troubleshoot

Marcus Tillman
14 May 2026
What comes in the box and quick safety checks
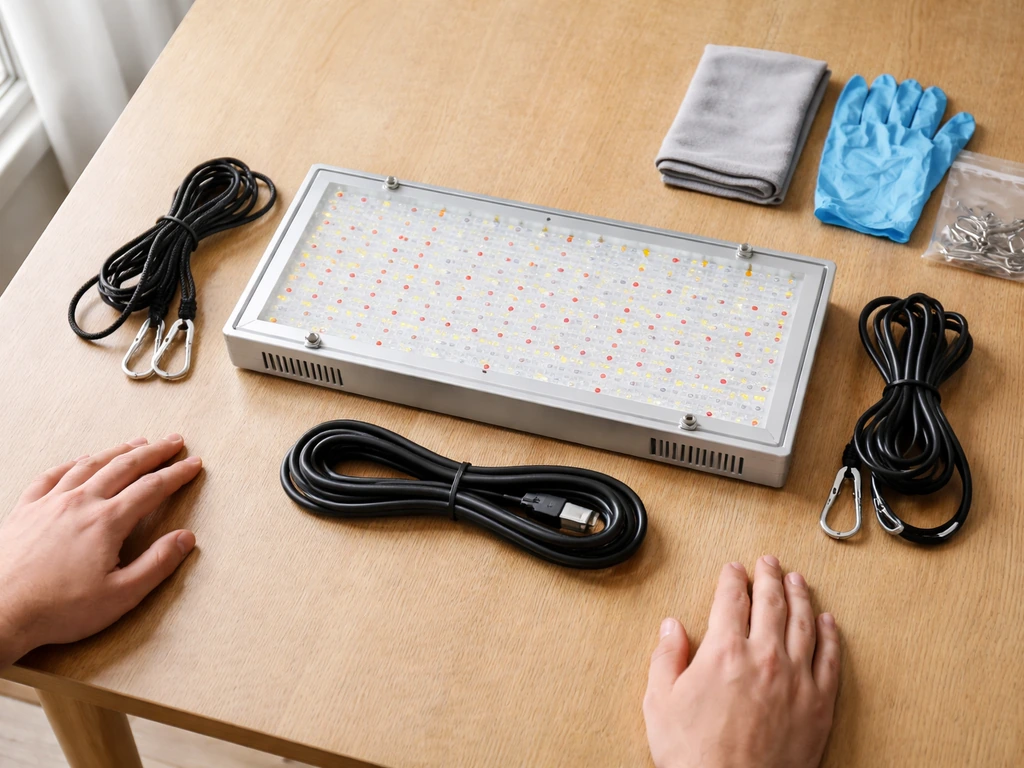
Before you hang anything, lay everything out on a table and confirm you have all the pieces. A complete Giixer 1000W package should include the grow light fixture itself, two adjustable rope ratchet hangers, a hanging kit (hooks and hardware), the power cord, a thermometer and hygrometer combo monitor, and a user manual. If anything is missing or the fixture shows visible damage to the housing, LEDs, or power cord insulation, stop and contact the seller before proceeding.
Now run through these safety checks before you touch the power outlet:
- Inspect the power cord end to end. No fraying, kinking, or exposed wire. If the cord looks damaged at all, do not plug it in.
- Check the fixture housing for cracks or loose panels. Give it a gentle shake and listen for anything rattling inside that should not be.
- Confirm the ceiling anchor point or tent bar you plan to use can hold at least 5 lbs. The Giixer 1000W is a lightweight panel, but a falling light can destroy plants and create an electrical hazard.
- Make sure your outlet is a standard grounded 3-prong outlet. The Giixer runs on worldwide voltage (AC 86V to 264V), so it will work on standard US household current without an adapter.
- Keep the light unplugged during the entire mounting process. Only plug it in after it is fully hung and the area beneath is clear.
Set the included thermometer and hygrometer somewhere at canopy level now. You will use it on your first run to verify temperature and humidity, so placing it before you hang the light saves you time later.
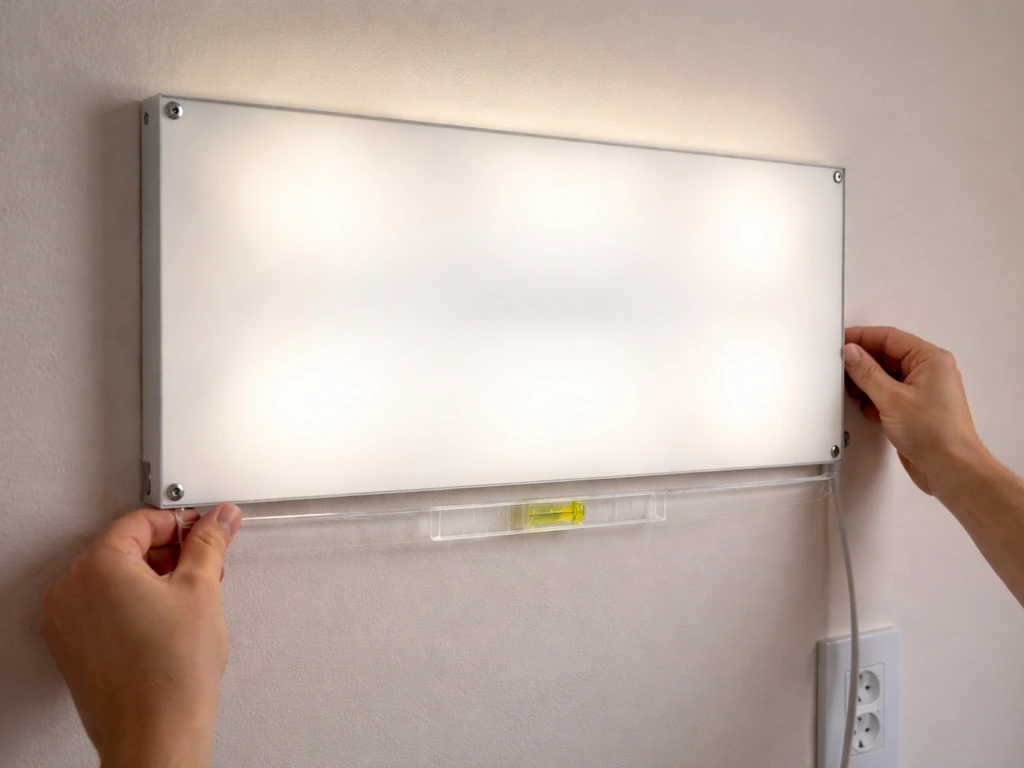
Mounting and hanging height for each growth stage
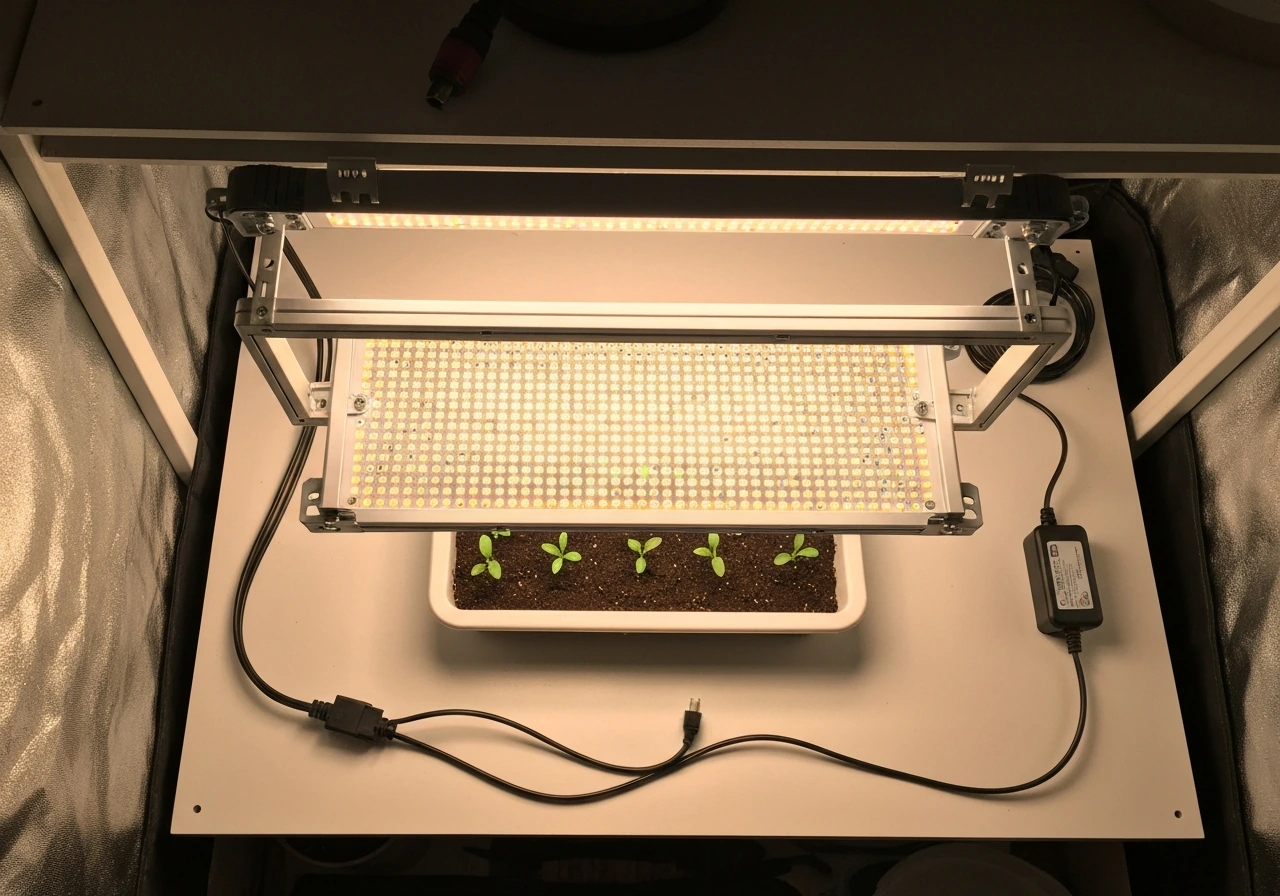
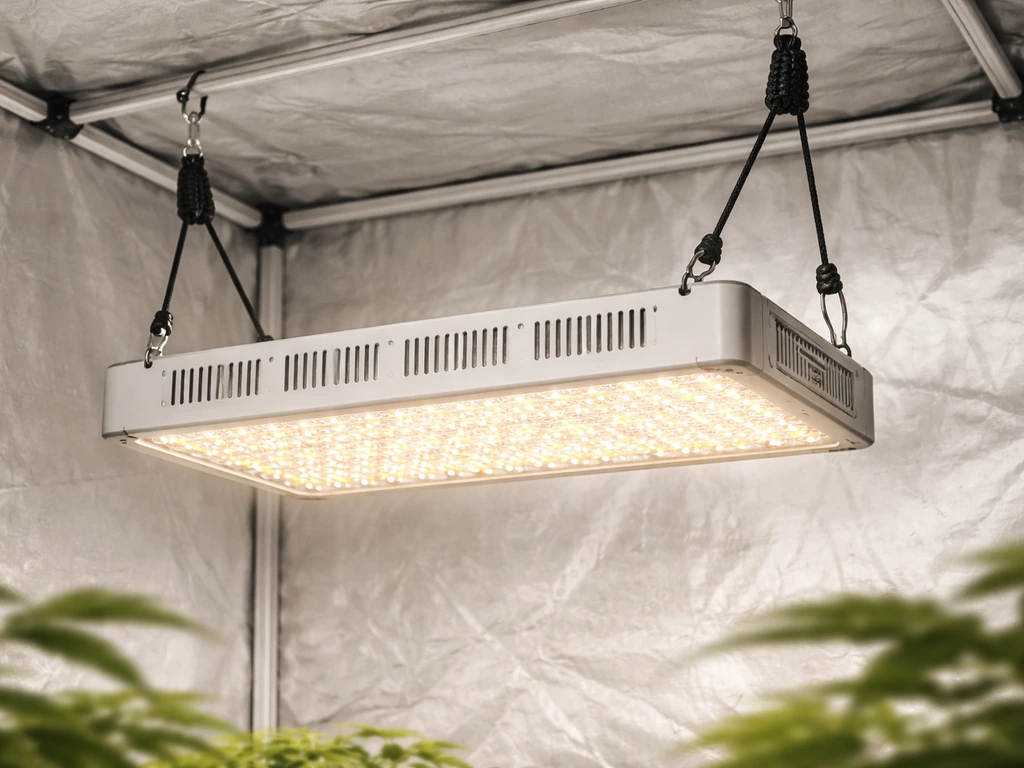
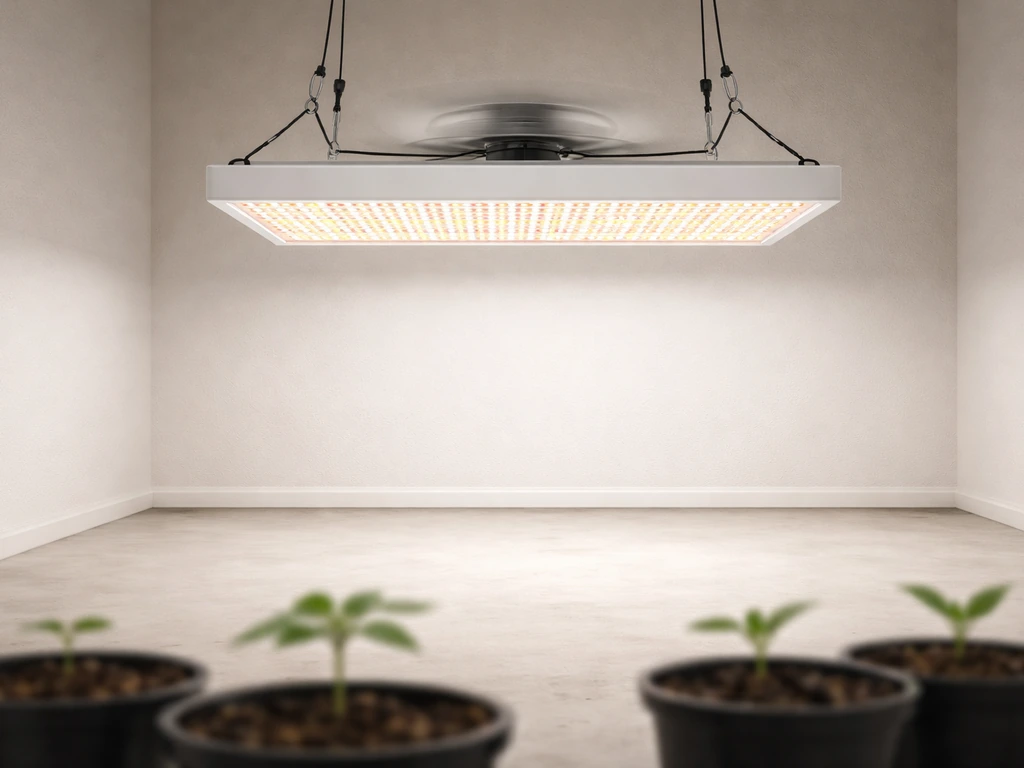
The Giixer 1000W hangs using the two rope ratchet hangers included in the box. Loop each hanger over your tent bar, roof anchor, or hanging rail, then clip the hooks through the mounting holes at each end of the fixture. The ratchet mechanism lets you adjust height in small increments by pulling the free end of the rope, which is exactly what you want since you will be moving this light up and down as your plants grow.
Height is the single biggest variable in whether this light helps or hurts your plants. Too close and you bleach or burn the canopy. Too far and your plants stretch toward the light and grow weak, leggy stems. Here are practical starting heights based on growth stage:
| Growth Stage | Recommended Starting Height | Switch Setting |
|---|---|---|
| Seedlings (first 1–2 weeks) | 24–26 inches above canopy | VEG only |
| Early veg (established seedlings) | 20–24 inches above canopy | VEG only |
| Full veg (mature vegetative growth) | 18–22 inches above canopy | VEG only or VEG + BLOOM |
| Flowering / blooming | 12–18 inches above canopy | BLOOM only or VEG + BLOOM |
Start at the higher end of each range and watch your plants for 48 hours before moving the light closer. Signs you are too close: leaf tips curling up or turning yellow at the top of the canopy, white or bleached spots on leaves directly under the light. Signs you are too far: the main stem stretches tall and thin between nodes, and the plant leans toward the light. Adjust in 2-inch increments and give the plant a day to respond before adjusting again. A user report on the Grasscity forum also mentions a Giixer 1000W being hung around 18 inches above the plant, which aligns with the idea that starting height often needs to be tested and adjusted rather than treated as a fixed rule Is my plant sick?.
For coverage area, this panel works best over a 2x2 to 2x4 foot footprint. If you are covering a larger space, either add a second unit or accept that edges of a bigger canopy will receive noticeably less intensity than the center.
Power, controls, dimming, and timer setup
The VEG and BLOOM switches
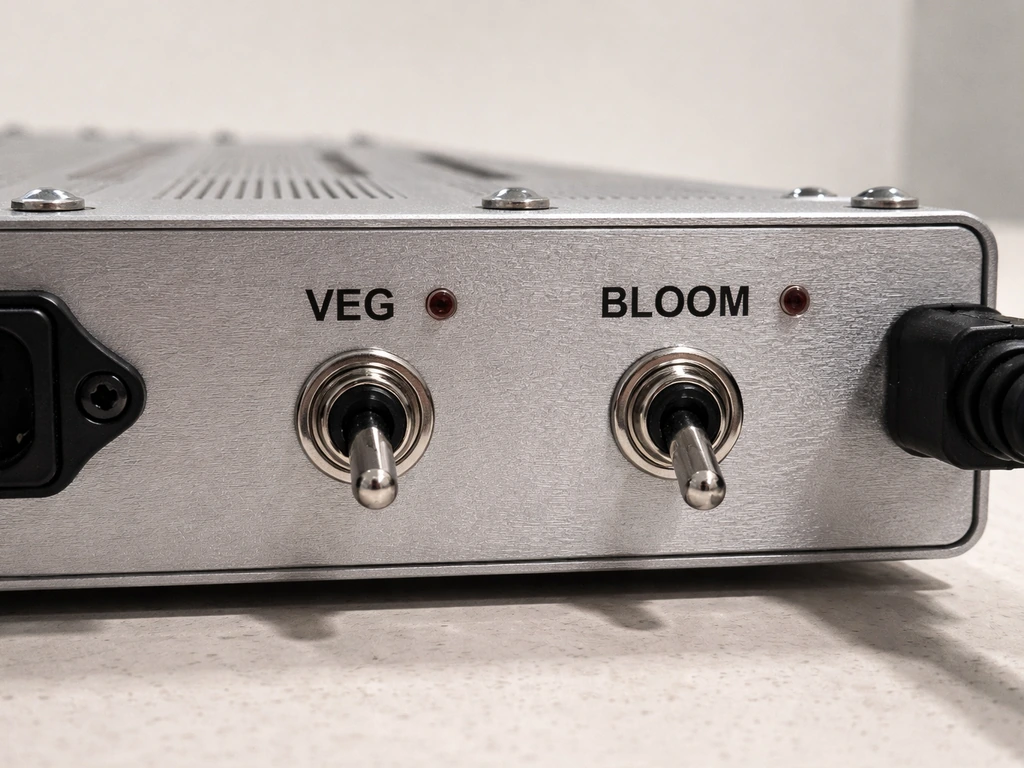
The Giixer 1000W has two switches on the back of the unit labeled VEG and BLOOM. These are not just labels; they actually activate different LED chips. The VEG switch powers the blue and white LEDs, which produce the cooler-spectrum light that supports leafy vegetative growth. The BLOOM switch powers the red and white LEDs, which deliver the warm-spectrum light plants need to trigger and support flowering. You can run either switch independently or flip both on at the same time for full-spectrum output.
- VEG only: Use for seedlings, clones, and vegetative growth. Blue-dominant spectrum encourages compact, bushy growth.
- BLOOM only: Use during flowering and fruiting stages. Red-dominant spectrum promotes bud and flower development.
- Both switches on: Use when you want maximum intensity and full spectrum, especially useful mid-veg through early flower.
The dimmer knob
Some versions of the Giixer 1000W include a stepless dimmer knob, usually located near the switches on the rear panel. Stepless means there are no preset percentages; you turn it smoothly from low to high, like a volume dial. A third-party listing claims the Giixer 1000W has a stepless dimmable design, with no exact percent step range provided stepless dimmer knob (no preset percentages). If your unit has this knob, start at around 70 to 75 percent intensity for seedlings and young plants. Dial it up to full for established veg and flowering. If your unit does not have a dimmer, intensity is controlled solely by switch combination and hanging height.
Setting up a timer (required)
The Giixer 1000W does not have a built-in timer, so you need to buy and use a separate plug-in outlet timer. This is not optional; running your light on a consistent schedule is one of the most important things you can do for healthy plant growth. A basic mechanical outlet timer costs a few dollars and is all you need. Plug the timer into your outlet, plug the grow light into the timer, then set your on and off times.
If you use other grow lights and are looking for timers or timer-equipped options, some brands like Gooingtop and Noah's LED do include integrated timer functionality in their units, which is worth knowing if you are shopping for a future upgrade. If you want to follow Gooingtop LED grow light instructions, focus on the integrated timer settings and switch schedule for your specific growth stage.
First run checklist and verifying light output and heat
Before your plants go under the light, do a 30-minute solo test run. Hang the light at your target height, power it on with just the VEG switch, and let it run. Here is what to check during and after that test:
- All LEDs light up with no dark patches across the panel. A handful of non-functioning LEDs is a warranty issue; contact Giixer support if you see a large dark section.
- The built-in cooling fans spin up within a minute of powering on. Put your hand near (not touching) the side vents and feel for airflow. No airflow means the fans may not be working.
- Check the fixture temperature after 20 minutes. The housing will be warm, but it should not be too hot to briefly touch. The Giixer has overheat and overcurrent protection built in, but good airflow in your grow space is still your responsibility.
- Check the thermometer you placed at canopy level. After 20 minutes of operation, the temperature directly under the light at your hanging height should not exceed 85°F (29°C). Ideally keep it between 70°F and 82°F (21°C to 28°C) during the light cycle.
- Look at light distribution on the floor or a piece of white paper at canopy level. The center should be bright and intensity should fade gradually toward the edges. If one side is noticeably dimmer than the other, check that the panel is hanging level.
Once you pass those checks, introduce your plants. On day 2, come back and look at the canopy again. Check for any early signs of light stress (leaf curl, bleaching) or stretch. Make your first height or intensity adjustment at this point if needed, not on day 1.
Recommended light schedules by growth stage
Light schedule is just as important as intensity and height. Here are the standard daily schedules that work for most indoor plants:
| Growth Stage | Light Hours On | Dark Hours Off | Switch Setting |
|---|---|---|---|
| Seedlings | 16–18 hours | 6–8 hours | VEG only |
| Vegetative growth | 18 hours | 6 hours | VEG only or both |
| Pre-flower / transition | 12–18 hours | 6–12 hours | Both switches |
| Flowering (photoperiod plants) | 12 hours | 12 hours | BLOOM or both |
| Autoflowering plants (any stage) | 18–20 hours | 4–6 hours | VEG for veg, BLOOM for flower |
For most houseplants and vegetables that are not strict photoperiod plants, 16 to 18 hours on is a good all-purpose starting schedule. If you are growing photoperiod cannabis, tomatoes, or other flowering plants that respond to day length, the 12/12 schedule is what triggers blooming.
How to adjust when something looks off
If your plants are growing slowly or look pale despite a correct schedule, try adding 1 to 2 hours of light per day before assuming something is wrong with the light itself. If growth is leggy and stretched, first lower the light by 2 inches and check again in 48 hours before increasing hours. If leaves are curling or showing bleaching at the tips, raise the light 2 inches or dial back the dimmer before shortening your schedule. Always change one variable at a time and wait 48 hours before judging the result.
Troubleshooting common issues
Light won't power on
Start at the simplest explanation: check that the outlet has power, the power cord is fully seated in both the outlet and the fixture, and at least one of the two switches (VEG or BLOOM) is flipped to ON. If you are running through an outlet timer, confirm the timer is set correctly and is currently in an ON window. If the outlet and connections are all fine but the light still does not come on, try a different outlet on a different circuit to rule out a tripped breaker. If it still does not power on, the unit is likely defective and you should contact Giixer support and document the issue with photos or video.
Flickering
Flickering is almost always caused by a loose connection. Unplug the light and firmly reseat the power cord at both ends. Also check the outlet itself; plug something else in to confirm the outlet is delivering stable power. If the flickering only happens on one switch setting (VEG or BLOOM), that specific LED channel or its driver may be failing. Try the other switch alone and see if the flicker persists. Persistent flickering that is not connection-related usually means an internal driver issue and warrants a warranty claim.
Uneven light coverage or dark sections on the panel
First, confirm the panel is hanging level. An unlevel fixture will project more light to one side of the canopy. If the panel is level and you still see a noticeably dark patch or dead section of LEDs on the fixture itself, that is a hardware defect. A few individual dead LEDs out of the full array is sometimes considered within tolerance, but a whole section going dark is not normal and qualifies as a warranty issue.
Overheating or fan not spinning
The Giixer 1000W has built-in overheat protection, so if the unit gets too hot it should shut itself off rather than damage anything. But if you are regularly hitting high temperatures, the fix is almost always better airflow in the grow space, not a light problem. Make sure there is at least 6 inches of clearance above the fixture for hot air to escape, and that your grow tent or room has active air exchange. If the fans inside the fixture are not spinning, the light will overheat faster. Fan failure is a warranty issue. The operating temperature range for this unit is -20°C to 40°C (up to 104°F ambient), so if your room temperature regularly exceeds 85°F to 90°F, address that first before blaming the light.
Timer behaving unexpectedly
Since the Giixer 1000W has no internal timer, any timer problems are with your external timer device. Double-check that the timer's clock is set to the correct current time and that your ON and OFF pins or settings are correctly positioned. Mechanical dial timers are simple but the pins are easy to knock out of place. Digital timers can lose their programming if there is a power outage. It is worth checking your timer settings every couple of weeks to make sure nothing has shifted.
When to stop and contact support
Stop using the light immediately and contact Giixer support if you smell burning, see scorch marks on the housing, notice the power cord getting hot to the touch, or observe any sparking. The Giixer 1000W comes with a 2-year warranty, so document the issue with photos and reach out to the seller or Giixer directly. Do not attempt to open the housing or repair internal components yourself.
Maintenance and long-term best practices
The Giixer 1000W is rated for around 50,000 hours of service life, which at 18 hours per day works out to roughly 7 to 8 years of continuous use. Keeping it clean and well-ventilated is the main thing you can do to hit anywhere near that number.
- Dust the lens and LED surface every 4 to 6 weeks using a soft, dry microfiber cloth. Dust accumulation on the LEDs reduces output over time. Never use liquid cleaners directly on the fixture.
- Check the fan vents monthly and clear any debris or buildup that could restrict airflow. Blocked vents are the most common cause of premature overheating.
- Inspect the power cord and plug every few months for any signs of wear, heat discoloration, or damage. Replace the cord if anything looks off.
- Store the light in a dry location if you take it out of use seasonally. Moisture inside the housing is a long-term reliability killer.
- Log your hanging heights and switch settings for each grow cycle. It sounds tedious but having a record saves real time when you are trying to replicate a successful grow or diagnose why the current one is underperforming.
- If your unit has a dimmer knob, avoid leaving it at full intensity for the entire life of the fixture. Running at 75 to 80 percent during seedling and early veg stages reduces thermal stress on the drivers and LEDs over time.
One last practical note: the Giixer 1000W is a solid, budget-friendly panel for a small grow space. It does exactly what it says with minimal complexity. If you later want a light with a built-in timer, daisy-chain capability, or a more advanced control interface, that is worth exploring as your setup grows. But for right now, with the right height, the correct switch setting for your stage, and a reliable external timer, this light gives you everything you need to grow successfully. If you are wondering how to use Giixer Grow Light effectively, start by setting the external timer to a consistent on and off routine for your plants’ growth stage.
FAQ
My tent runs hot, should I fix temperature by changing the schedule or the light height?.
Use the same method each time, thermometer first. If you see canopy temperatures climbing above your target (common sign is leaf tip stress), reduce intensity using the dimmer (if present) or raise the fixture 2 inches before you change the light schedule. Keep humidity adjustments secondary, since the fastest way to fix heat is usually height and airflow.
Can I start with VEG and later switch to BLOOM without retraining the schedule?.
Yes, you can start with VEG for seedlings and early vegetative growth, then switch to BLOOM when you want to trigger flowering and color transition. If you switch mid-cycle, give plants 48 hours to respond before making another adjustment, because leaf color changes and stretch can appear with a short delay.
What’s the safest way to dial it in if my plants are not responding fast enough?.
Follow a strict “one change at a time” rule. If you shorten photoperiod for a day and increase light height the next, you will not know what caused the response. Pick the correction you need most (height for stretch or bleaching, hours for slow growth), adjust, then wait 48 hours before changing anything else.
How can I tell whether the problem is the external timer or the grow light itself?.
If the light still runs but you suspect the timer, confirm by bypassing it temporarily. Plug the light directly into a live outlet (ensure the correct switch is on) to confirm it turns on reliably, then reintroduce the timer to test whether the timer is the failure point.
Where exactly should I place the thermometer and hygrometer sensor for accurate readings?.
Measure at canopy level where leaves actually sit, not near the top of the tent. For best control, place the sensor away from direct LED splash and not pressed against fabric, since heat buildup near tent walls can skew readings.
Is it safe to run the Giixer 1000W through an extension cord or power strip?.
Do a quick grid check of your wiring. Make sure the timer and extension cords (if any) are fully seated and rated for the light’s power draw, then look for heat discoloration around plugs after 30 minutes. If anything feels unusually warm, stop and replace damaged cords rather than continuing to operate.
How do I confirm whether I have a dead-LED hardware problem versus a connection issue?.
Because it is a panel, dead LED sections can look like a “block” rather than a random flicker. If you notice a whole section that stays off consistently across switch settings, treat it as a defect and document a clear photo showing the dark area.
What should I do if the light flickers but only on one switch setting?.
If both channels flicker, focus on power stability first (reseat cord, try another outlet, confirm no loose plugs). If flicker happens only on VEG or only on BLOOM, test the other switch alone to isolate a failing channel driver, then contact support if the issue persists.
What can cause the light to trip a breaker even if the outlet seems to work?.
If it keeps tripping or you cannot power it on, you may be overloading the circuit. Try a different wall outlet that is on a separate circuit, avoid running high-watt appliances on the same circuit, and do not defeat safety protections.
Why does my Giixer 1000W turn off during the day and then come back on?.
A light that shuts off repeatedly can be reacting to heat or a failing driver. First confirm fans inside the fixture are running and that you have at least 6 inches clearance above the unit, then improve room ventilation before changing switches or schedule.
Do I need complete darkness during the OFF cycle if I’m using the external timer?.
Start by matching the schedule to the plant’s photoperiod needs. If you are growing photoperiod plants (for example cannabis or tomatoes), avoid accidental “light leaks” during the off period, even with timers, because stray room light can interrupt flowering. Use dark, blackout conditions during the OFF window.
Next Article
Noah’s LED Grow Light Instructions: Setup, Mounting, and Testing
Step-by-step Noah’s LED grow light setup: identify model, mount, connect, test, set timers, adjust coverage, troubleshoo