The Jiffy Hydro grow light is a halide-based system that comes with an adjustable metal stand, a halide lamp with hangers, and (depending on your bundle) a single-outlet grounded timer. To set it up correctly: mount it at least 8 to 12 inches from any surface, position the bulb exactly as the manual specifies, run 18 hours of light per day for seedlings, and back the fixture off if leaves start wilting or showing burn spots. That's the core of it. Everything below walks you through each step in the right order.
Jiffy Hydro Grow Light Instructions: Setup, Wiring, and Timing

Marcus Tillman
18 May 2026
Identify your exact Jiffy Hydro model and what's in the box
Before you plug anything in, figure out which version of the Jiffy Hydro you have. The product has been sold through Home Depot Canada, Canadian Tire, Ocean State Job Lot, and CountryMax, and the exact bundle contents vary by retailer. Some include a timer, some don't. The wattage can differ too: Canadian Tire lists a 24W equivalence version, while other bundles reference a halide lamp with a ballast.
Canadian Tire also lists the Jiffy Hydro listing detail “Light Bulb Wattage Equivalence | 24 W,” which can help you confirm you have the 24W-equivalence variant Canadian Tire lists a 24W equivalence version.
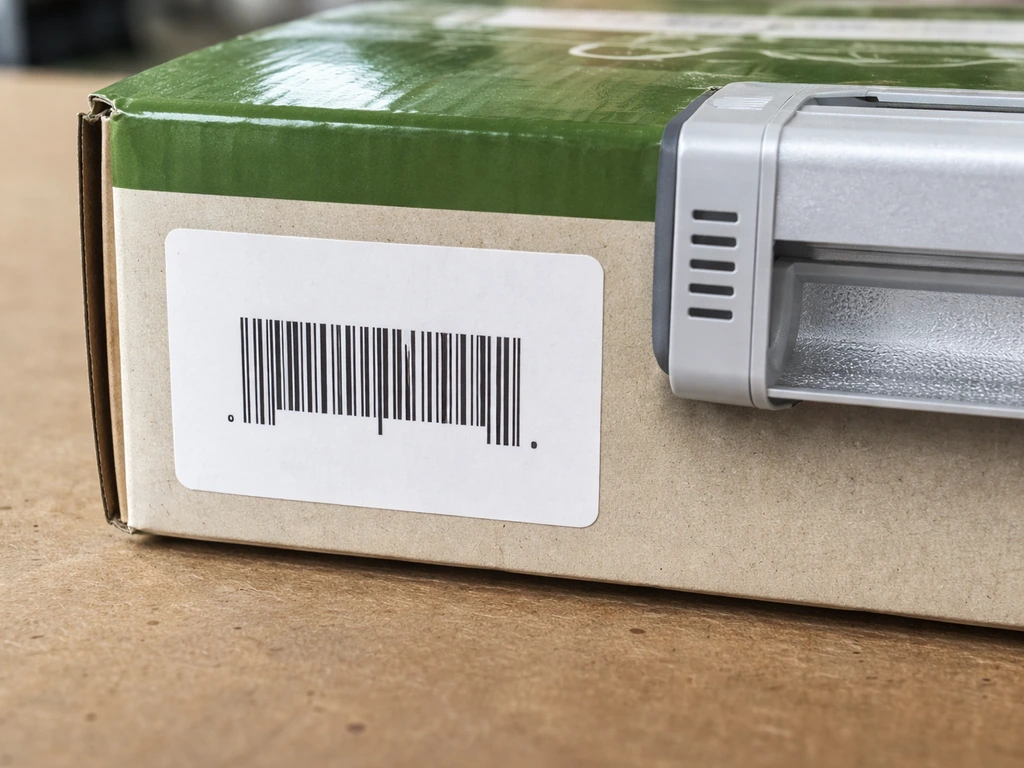
Your carton will have a SKU or UPC printed on it. [Cross-reference that number against the retailer's product page to confirm your exact kit. ](https://www. homedepot.
ca/product/jiffy-jiffy-hydro-grow-light/1001519804)
At minimum, one well-documented bundle includes three components: an adjustable metal stand, a halide lamp with hangers, and a single-outlet grounded timer. If you're missing any of these, check inside the box carefully before assuming something was left out. The stand hardware sometimes ships tucked underneath the foam tray.
The most important thing to nail down before setup is your ballast wattage. The manual is explicit: each ballast is rated for one specific wattage and bulb type. You cannot swap in a higher-wattage bulb or a different lamp type and expect it to work safely. Find the wattage printed on your ballast housing and keep a note of it. That number governs everything from bulb replacement to troubleshooting.
Safe setup: mounting, placement, and power hookup
Where and how to mount the fixture
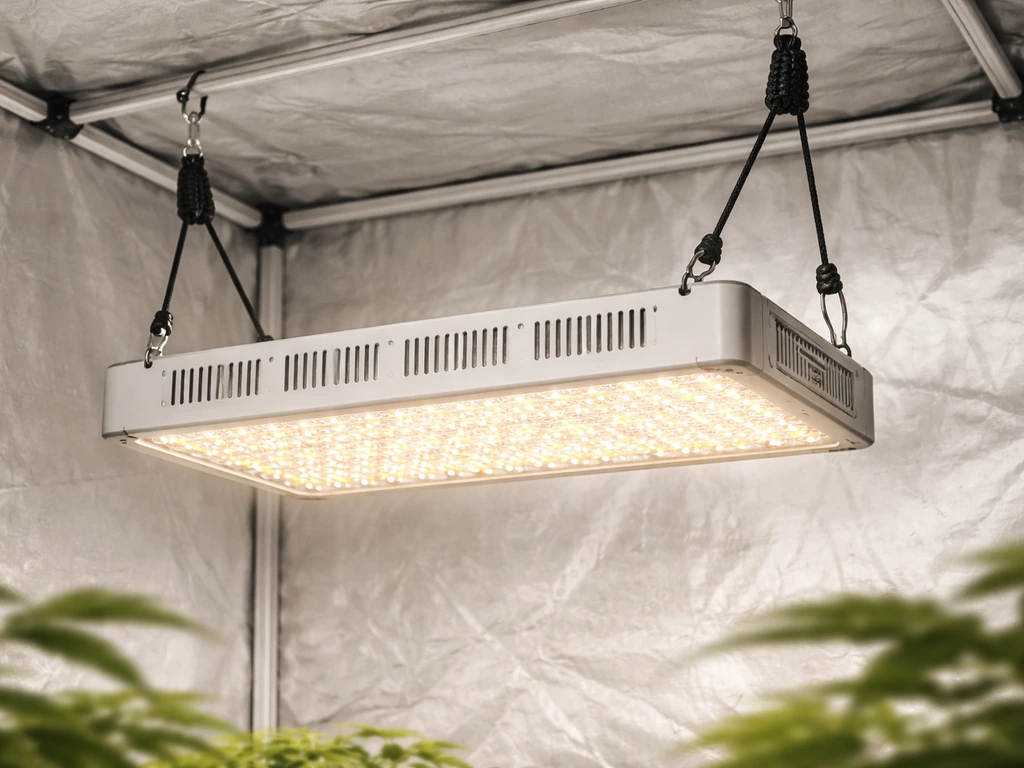
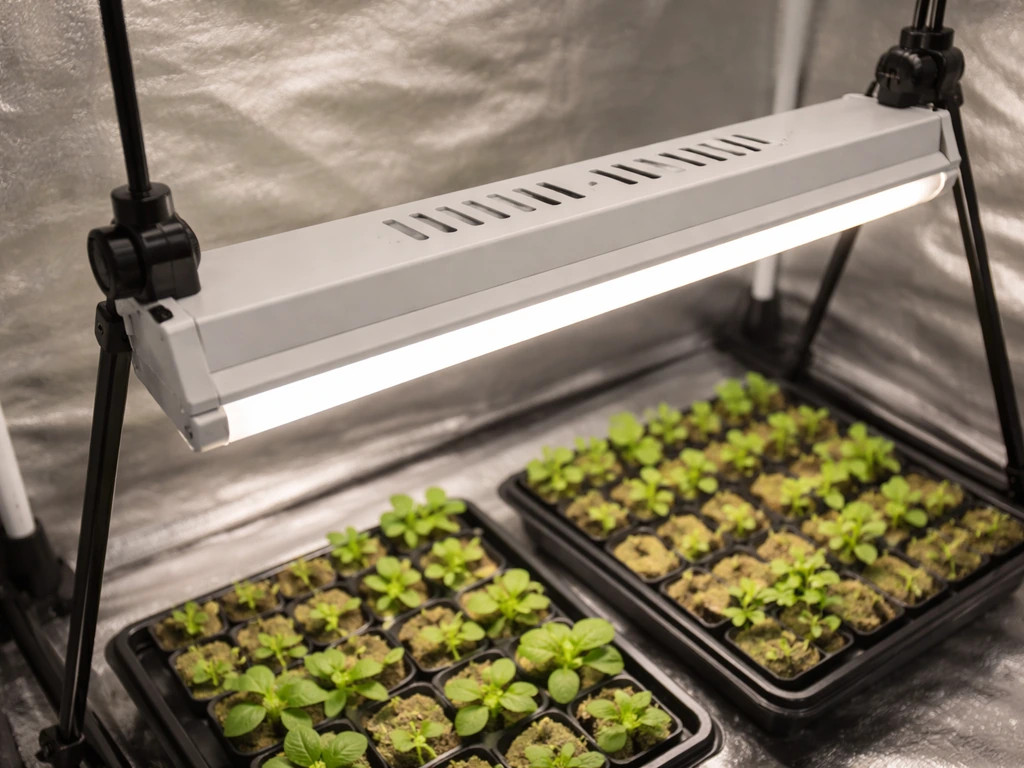
The manual's safety rules here are non-negotiable. You need at least 8 to 12 inches of clearance on all sides of the fixture. Do not mount it directly against any surface, including the ceiling of a grow tent or the underside of a shelf. This isn't just about heat; the halide lamp radiates UV energy and gets hot enough to cause real damage if it's boxed in. The included adjustable metal stand handles vertical positioning for most setups. If you're working in a grow tent or closet, use the stand or hang the lamp hanger from a horizontal bar with the cord routed safely out of the way.
Bulb position matters more than most people expect. The manual warns that operating the bulb in any position other than the recommended one reduces both bulb life and lumen output. Check your manual's diagram and orient the fixture accordingly. Most halide lamps are designed to operate either horizontally or vertically, not at an angle. Getting this wrong shortens your bulb life and cuts output right from day one.
Power and controller hookup
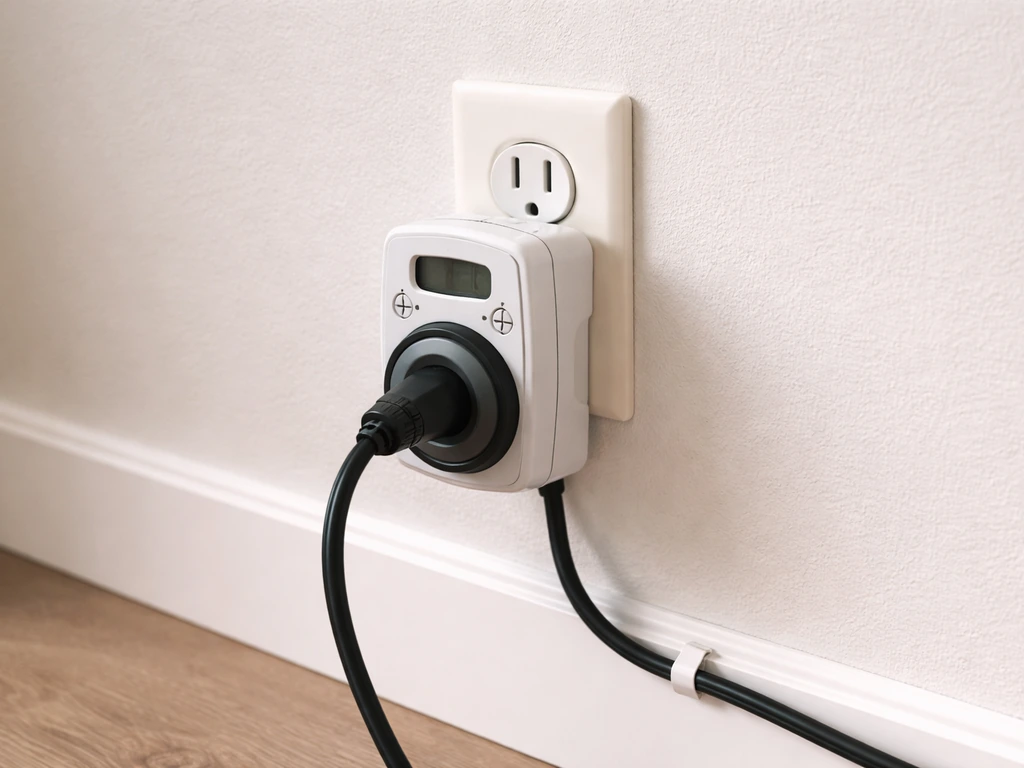
Plug your grounded timer directly into a wall outlet, not into a power strip or extension cord if you can avoid it. The manual specifically says to check the grounded timer by plugging the unit directly into your outlet. This rules out the timer as a variable when you're testing the setup. Once you've confirmed the light turns on without the timer, then introduce the timer into the circuit.
Give the bulb a few minutes to reach full brightness after powering on. This is normal behavior for halide lamps, not a sign of a problem. More importantly: if the power is interrupted for even a moment, the bulb will not restart immediately. You need to unplug the unit, let it cool for 15 to 30 minutes, and then restart. Trying to power cycle it immediately is one of the most common mistakes new users make, and it can damage the bulb.
One more hard rule from the manual: never mist your plants while the system is powered on. Moisture near a hot halide lamp is a serious hazard. If the bulb gets wet while hot, it can shatter. Always shut down and let the bulb cool before watering or misting anything in the vicinity.
How to set light distance, coverage, and intensity
The Jiffy Hydro does not have a dimmer or intensity dial. Your only tool for adjusting light intensity is distance. Move the fixture closer to increase intensity, further away to reduce it. The manual is clear that lower wattages allow less distance, and if you're running a fan to cool the reflector, you can also get away with running it a bit closer.
The practical way to find the right starting distance is to watch your plants. The manual tells you exactly what to look for: if leaves are wilting or showing burn marks, the light is too close. If you need a complete walkthrough, follow Noah's LED grow light instructions for the exact setup steps and safety checks. Start conservatively, especially with seedlings and cuttings. A good starting height for a halide system in this wattage range is 12 to 18 inches above the canopy for young plants, then adjust based on what you see over 48 to 72 hours.
If your plants are moving over from a lower-light environment, whether that's a windowsill, a fluorescent strip, or a low-power LED, don't drop the Jiffy Hydro right on top of them. The manual recommends keeping the light an extra foot away from the canopy during the transition and waiting for a positive response before moving it closer. Rushing this step is how you get bleached or burned leaves in the first week.
For coverage area, halide lamps don't have an even output across a wide footprint. The center of your tray or rack will receive the most intensity. If you're growing across a wide hydro tray, rotate your plants periodically or move edge plants toward the center every few days to even out the exposure.
Recommended light schedules from seedlings through flowering
The timer that ships with some Jiffy Hydro bundles makes scheduling easy, but you need to know what schedule to actually program. Here's what works for the most common use cases with this type of system:
| Growth Stage | Recommended Daily Light Hours | Notes |
|---|---|---|
| Seed germination | 16 hours on / 8 off | Keep fixture further away; moisture sensitivity is highest here |
| Seedlings and cuttings | 16–18 hours on / 6–8 off | Standard for the Jiffy Hydro's primary use case |
| Vegetative growth | 16–18 hours on / 6–8 off | Leafy herbs, greens, and vegging plants respond well to this range |
| Flowering and fruiting | 12 hours on / 12 off | Critical for photoperiod-sensitive plants; timer accuracy matters |
| Transplant recovery | 14–16 hours on / 8–10 off | Back off intensity too; plants need time to adjust |
For the Jiffy Hydro's primary purpose, which is seed starting and cuttings, 16 to 18 hours is the standard recommendation and what most growers run. Set your timer to turn on in the morning and off in the late evening. Keeping the dark period consistent matters more than the exact number of hours, so once you pick a schedule, stick to it.
Remember that the bulb needs a warm-up period every time it powers on. When you're setting your timer, account for the fact that full brightness won't hit immediately. This isn't a problem in practice since the warm-up is only a few minutes, but it's worth knowing so you don't panic the first time the light comes on and seems dim.
Troubleshooting: won't turn on, flickering, and timer problems
Light won't turn on at all
- Unplug the unit and check that the bulb is screwed all the way in. A partially seated bulb is the single most common cause of a non-starting light.
- Check that the outlet is live and the breaker hasn't tripped. Plug something else into the same outlet to confirm power.
- Listen to the ballast. Once plugged in and powered, the ballast should hum slightly. No hum usually means no power is reaching it.
- Bypass the timer. Plug the light directly into the wall outlet to rule out a faulty or mis-programmed timer.
- If the unit still won't start, the bulb may be at the end of its life or faulty. If you have an identical Jiffy Hydro unit, swap bulbs between them to identify whether the bulb or the ballast is the problem.
Light flickers or won't restart after a power interruption
Flickering in a halide system can mean a loose bulb, an aging bulb nearing end of life, or a warm restart attempt. If the light went off for any reason, even briefly, do not try to immediately power it back on. Unplug the unit, wait 15 to 30 minutes for the bulb to cool completely, then restart. A bulb that flickers during normal operation and is older than 12 to 18 months of daily use (running 12 to 18 hours per day) is simply due for replacement.
Timer and controller problems
If the light isn't following your programmed schedule, first confirm the timer's clock is set correctly, including AM/PM settings. Then plug the light directly into the wall to verify the fixture itself works. If it does, the issue is the timer. Check that the timer's pins or settings are correctly placed for your on/off times. Also make sure the timer is plugged into a grounded outlet, not a two-prong adapter or ungrounded strip.
Growth problems caused by wrong light setup and how to fix them
Most plant problems in a Jiffy Hydro setup trace back to either too much or too little light, or inconsistent scheduling. Here are the most common ones and what to do:
- Wilting or scorched leaf edges: light is too close. Raise the fixture by 2 to 4 inches and reassess after 24 hours. Check room temperature too; the manual recommends keeping it below 95°F with adequate air circulation, ideally a small fan running.
- Stretchy, leggy seedlings with long stems between nodes: light is too far away or the schedule is too short. Lower the fixture gradually and/or increase daily light hours toward 18.
- Yellowing leaves on plants that were recently moved under the light: classic light-transition stress. The manual recommends starting an extra foot away and moving the light closer only after you see positive growth response.
- Uneven growth across a tray: hotspot coverage from the center of the lamp. Rotate plants every few days to equalize exposure.
- Plants not flowering despite being the right age: if you're growing photoperiod plants, confirm your timer is actually delivering 12 hours of uninterrupted darkness. Any light leak during the dark period can delay or prevent flowering.
- Bulb putting out less light than before: if the bulb is over a year old and running 12 to 18 hours daily, it's likely degraded. Replace it. The manual recommends replacement after 1 to 1.5 years of continuous use at that schedule.
One thing to keep in mind: do not try to solve a light intensity problem by swapping to a different wattage bulb. The ballast is matched to one specific wattage and type. Putting in a different bulb won't give you more light; it will likely damage the ballast or the bulb. Your only legitimate intensity adjustment tools are distance, schedule duration, and air cooling.
Quick-start checklist and next steps
Run through this before and after your first power-on to make sure everything is set up correctly:
- Locate your model's SKU or UPC and match it to the retailer's product listing to confirm your kit contents and wattage.
- Check the box for all included parts: adjustable stand, halide lamp with hangers, and timer (if your bundle includes one).
- Assemble the stand and position the fixture so all sides have at least 8 to 12 inches of clearance from any surface.
- Orient the bulb in the correct position as shown in your manual diagram. Incorrect position reduces bulb life.
- Screw the bulb fully into the socket before attempting to power on.
- Plug the light directly into a grounded wall outlet first, without the timer, to confirm the fixture works.
- Allow 2 to 5 minutes for the bulb to reach full brightness. This is normal.
- Set the fixture height to at least 12 inches above the plant canopy to start. Adjust based on plant response over 48 hours.
- Program the timer: 16 to 18 hours on for seedlings and vegetative growth, 12 hours on for flowering plants.
- Set up a small fan to ensure air circulation and keep room temperature below 95°F.
- Never mist plants while the light is powered on. Always shut down and allow cooling before handling the bulb.
- Mark your calendar for bulb replacement at 12 to 18 months of continuous use.
Once you're up and running, the main job is observation. Watch your plants for the first three to five days and adjust height if you see any sign of stress in either direction.
If you've worked with other grow light setups before, such as the Giixer or Gooingtop LED systems, you'll notice the Jiffy Hydro's halide technology behaves differently: it needs more warm-up time, more ventilation, and stricter bulb handling rules, but it delivers excellent light quality for seedlings and cuttings when set up correctly.
If you switched from a Giixer 1000W LED grow light, follow the Giixer 1000W LED grow light instructions to dial in the right distance and schedule for LEDs. If you are also learning how to use a Giixer grow light, start by comparing its mounting distance and timer schedule with your Jiffy Hydro so you can keep your plants from getting stressed during the switch.
If you are switching from Gooingtop LED grow light instructions, re-check your distance and timing because halide lamps respond differently Giixer or Gooingtop LED systems. Stick to the safety rules from the manual, keep your schedule consistent, and you'll see results quickly.
FAQ
Can I use a fan to cool the Jiffy Hydro reflector, and will it affect how close I should mount the light?
Yes, but only if the fan does not route hot air or moisture toward the reflector, and you still maintain the same minimum clearance on all sides. Use a typical small clip fan to improve airflow around the fixture, and position cords so they cannot touch the lamp housing or hang where plants can snag them.
My Jiffy Hydro light will not turn on according to the timer schedule. What should I check first?
If the timer has a built-in clock, set it to the correct time and verify the AM/PM before blaming the light. Then do a one-day test by plugging the light into the wall directly and confirming the lamp turns on when expected, after which you reintroduce the timer.
Is it okay to manually switch the Jiffy Hydro on and off during the day instead of using the timer?
Avoid turning the fixture on and off repeatedly throughout the day. If you must change schedules, wait until the bulb has cooled and then do the switch once, not multiple times, because frequent power interruptions shorten bulb life and can trigger flicker-like behavior.
Can I replace the Jiffy Hydro halide lamp with a higher-watt bulb to get more intensity?
Do not. The ballast and bulb are matched for a specific bulb type and wattage, and using the wrong lamp can cause overheating or unsafe operation. If you need a replacement, use only the exact replacement bulb spec that matches what is printed on your ballast housing.
What’s the right way to respond if my plants show burn spots or bleaching within the first week?
If you notice leaves whitening or darkening, stop moving it closer immediately. Back the light up by a few inches, hold that distance for 48 to 72 hours, and watch the newest growth, because older damaged leaves often do not recover.
How can I tell whether dim brightness is normal warm-up versus a faulty bulb or connection?
If the bulb appears dim for more than about 5 to 10 minutes, or it repeatedly takes longer to warm up than it used to, check for loose connections in the lamp hanger and confirm the ballast is seated as originally installed. If the issue persists, treat it as a potential bulb aging problem and plan for replacement.
Can I enclose the Jiffy Hydro in a tent hood or add a cover to prevent light spill?
Covering the fixture with a canopy or reflective blanket can trap heat and UV energy, increasing risk. If you need to manage light spill, use a purpose-made grow tent flap or a properly rated light shield that does not enclose the lamp and still preserves the manual’s clearance.
How should I clean the reflector and light area without damaging the lamp?
Clean only when the light is unplugged and fully cool. Wipe the reflector and surrounding surfaces dry, avoid spraying cleaners near the lamp area, and keep any residues away from the lamp surface to prevent hotspots.
What if I want a longer photoperiod than the 16 to 18 hours recommended for seedlings?
For seedlings and cuttings, run a consistent dark period and avoid sudden schedule changes. If you extend light hours, do it in small increments over several days while monitoring stretch, leaf color, and droop, because halide systems respond quickly to timing changes.
I’m switching from an LED grow light. What adjustment should I make first, distance or timer length?
If you are switching from LED to the Jiffy Hydro, treat distance and schedule as separate adjustments. Start with the more conservative height, keep the same general on duration, then fine-tune height over 3 to 5 days based on leaf response, since halide heat and light spectrum can stress plants differently.
Next Article
Giixer 1000W LED Grow Light Instructions: Setup to Troubleshoot
Step-by-step Giixer 1000W LED grow light instructions for setup, mounting, height, timer modes, and troubleshooting.