Hang your T5 fixture 3 to 6 inches above seedlings and 6 to 12 inches above established plants, run it for 16 to 18 hours a day on a timer, and make sure you're using a 6500K bulb for vegetative growth or a 3000K bulb if you're pushing plants toward flowering. That's the core of it. Everything else is about dialing in coverage, avoiding a few common wiring mistakes, and knowing what to look for when something goes wrong.
How to Use T5 Grow Lights: Setup, Spacing, Timing, Tips

Marcus Tillman
12 May 2026
What you need for a T5 grow light setup
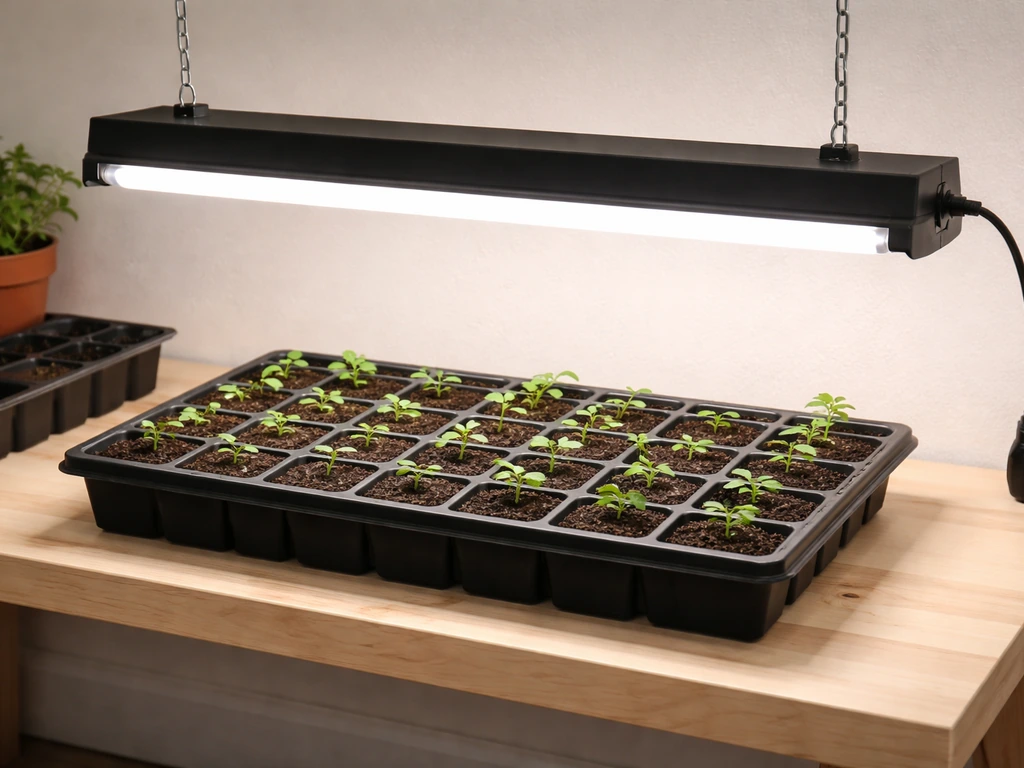
A typical T5 setup is simpler than most people expect. The fixture itself is a long, shallow housing that holds one or more fluorescent tubes. Most beginners start with a 4-foot fixture because it's the most common size and the easiest to find bulbs for. A single-lamp 4-foot unit runs one 54W T5HO tube, while 2-lamp and 4-lamp versions multiply that output. If you don't have 4 feet of horizontal space, 2-foot 24W fixtures are a real option too.
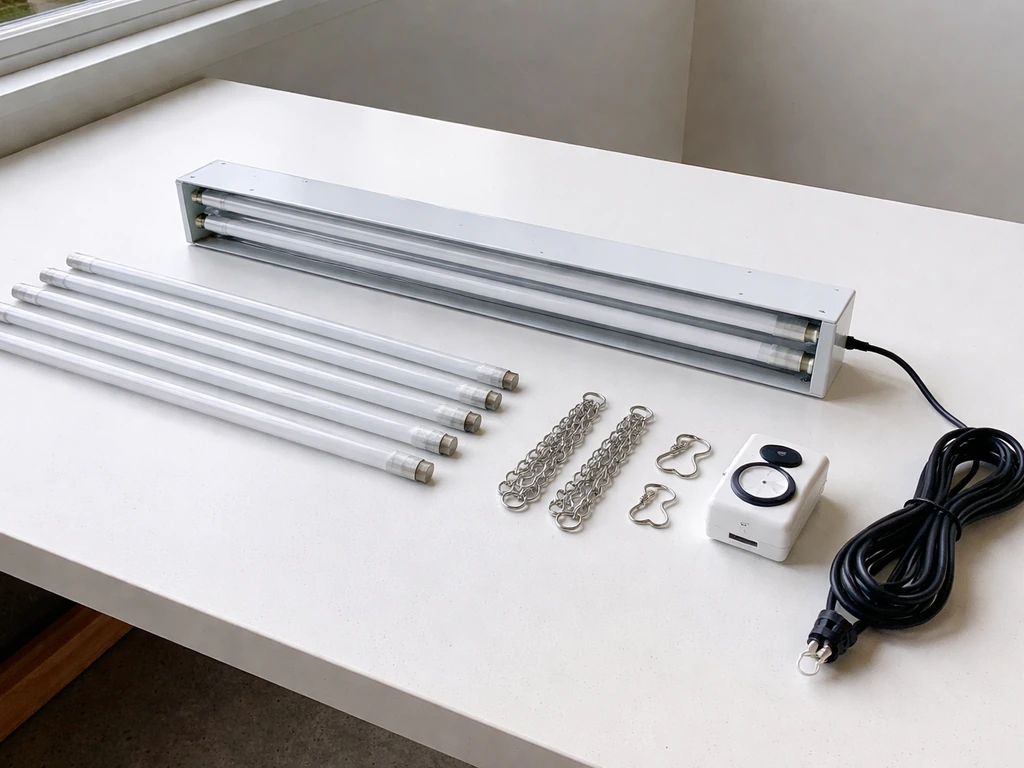
Here's what a complete setup includes, either in the box or purchased separately:
- T5 fixture or hood with built-in ballast (most consumer kits have the ballast integrated into the housing)
- T5HO tubes, typically 54W for 4-foot fixtures (often included with kit purchases; look for 6500K or 3000K depending on your plant stage)
- Reflector hood (usually built into the fixture; more tubes generally means a wider reflector for better coverage)
- Hanging hardware, such as wire hangers or adjustable rope ratchets, to suspend the fixture at the right height
- Grounded power cord (most kits include an 8-foot grounded cord; look for UL-listed fixtures)
- A plug-in mechanical or digital timer (this is the single most important accessory and it's not always included)
- Daisy-chain/jumper cord if you plan to link multiple fixtures to one outlet
You don't need a PAR meter or any special measuring tools to get started. Each 54W T5HO tube puts out roughly 5,000 lumens, which is a useful ballpark when you're deciding how much light your space needs. For a small seed-starting tray, one 4-lamp fixture is plenty. For a 4x4 foot grow area, you'd want to stack two fixtures side by side or choose a wider multi-lamp unit.
Install safely: mounting, wiring/power, and fixture setup
Most T5 grow light kits are genuinely plug-and-play. The ballast is built into the fixture, the tubes twist or push into place, and you plug the grounded cord into a standard outlet. That said, there are a few safety rules worth taking seriously before you flip anything on. Always follow the T5 owners manual’s grounding and installation guidance, and heed its warnings to reduce the risk of fire or electrical shock there are a few safety rules worth taking seriously.
- Install the tubes first, before plugging in. Never plug or unplug the lamp cord while the ballast is powered on. This is explicitly called out in manufacturer safety instructions and is one of the most common causes of premature ballast failure.
- Use only grounded, UL-listed fixtures and plug into a grounded outlet. Don't use an adapter to defeat the ground pin.
- Connect all lamp connectors securely before powering up. Loose end-cap connections cause flickering and can damage the ballast over time.
- Hang the fixture before running the cord to the outlet. Use adjustable rope ratchets or the included wire hangers so you can raise or lower the light easily as plants grow.
- If you're daisy-chaining multiple fixtures, connect the jumper cords between fixtures while everything is unplugged, then plug in the single power cord to the outlet.
- Once everything is connected and hanging, plug into your timer (not directly into the wall), so the schedule runs automatically from day one.
If your fixture came with a separate ballast and lamp cord rather than an integrated ballast, the same rule applies: wire it up completely while unplugged, double-check all connections, and only then power it on. Don't improvise with dimmer switches unless your fixture's ballast is explicitly rated for dimming. A mismatched dimmer is a common source of flickering and ballast damage.
Place and aim the lights: distance, coverage, and reflector tips
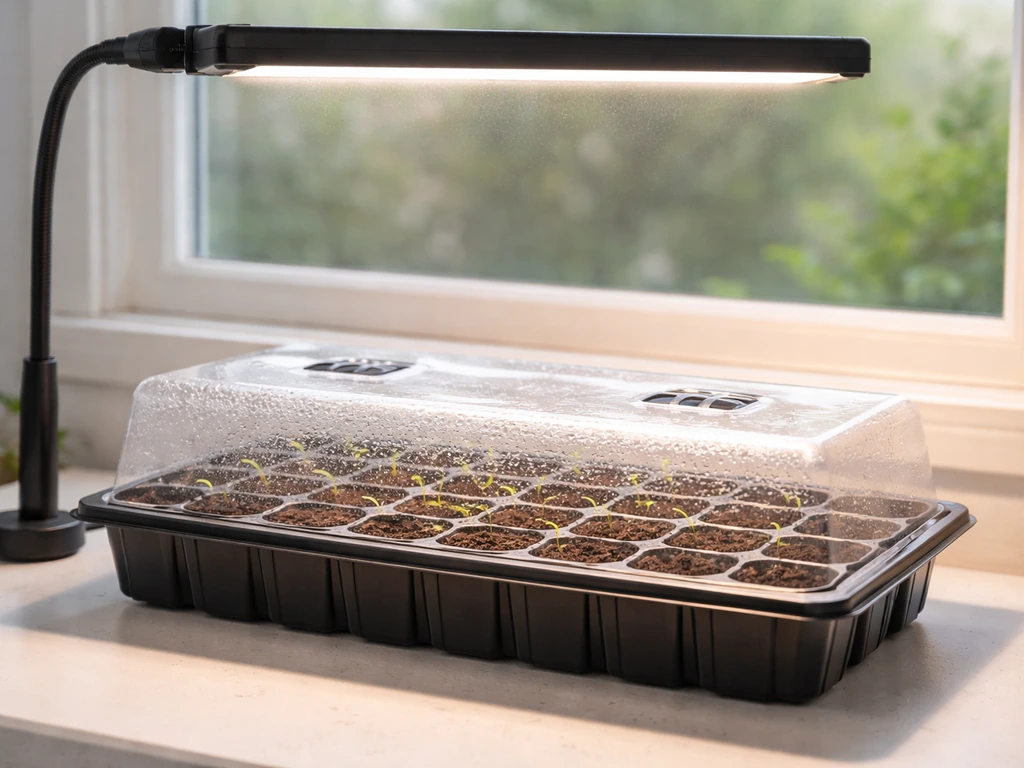
Getting the height right is where most beginners either burn their plants or end up with leggy, stretched seedlings. T5s are low-heat compared to HPS lights, which means you can get them much closer to the canopy without scorching leaves. That's actually one of the biggest advantages of T5s for seed starting.
Use these distance guidelines as your starting point, then adjust based on how your plants respond:
| Plant Stage / Type | Recommended Distance from Canopy | Notes |
|---|---|---|
| Seedlings (just sprouted) | 3 to 6 inches | Manufacturer-recommended starting point for most 4-ft T5HO fixtures |
| Vegetative herbs and starts | 4 to 8 inches | Raise slightly as plants get taller to maintain even coverage |
| Houseplants (low to medium light) | 10 to 14 inches | Many houseplants don't need intense light; farther distance reduces intensity |
| Flowering plants / bloom stage | 6 to 10 inches | Keep closer to maintain intensity; switch to 3000K tubes at this stage |
| Microgreens | 4 to 6 inches | Consistent, close placement produces compact, even growth |
Coverage is the other half of placement. A 4-foot single-lamp fixture covers a narrow strip, maybe 12 to 18 inches wide effectively. A 4-lamp fixture with a wide reflector hood covers a significantly larger footprint. If you're growing in a 2x4 or 2x2 tray, a 4-lamp 4-foot unit typically handles it well. For larger areas, position fixtures side by side so there's no unlit gap between them. The reflector does real work here: a polished interior reflector bounces light back down toward the plants instead of letting it scatter sideways. If your fixture has a reflective hood, make sure it's fully seated and clean.
One practical tip: raise the fixture by 2 to 3 inches every time your plants grow about that much. For specific height adjustment steps for the fixture, the Hydro Crunch T5 stand system manual describes how to raise and lower the fixture using the included system controls raise the fixture by 2 to 3 inches every time your plants grow. Don't let the canopy get closer than 3 inches, and don't let it drift past 12 to 14 inches unless you're intentionally giving low-light plants a break. Adjustable rope ratchets make this easy because you can move the fixture up in seconds.
How long to run: light schedules and transition strategies
For most indoor plants under T5s, 16 to 18 hours of light per day is the right starting point during the vegetative stage. The most common schedule is 18 hours on, 6 hours off (written as 18/6). This applies to seedlings, herbs, leafy greens, and most vegetative houseplants. Microgreens can do well on a slightly shorter 12 to 16 hour schedule, which saves a little electricity without sacrificing much growth.
If you're growing flowering plants that need a bloom trigger (like certain fruiting plants or photoperiod-sensitive varieties), you'll eventually drop to 12 hours on, 12 hours off. The key is that the dark period must be uninterrupted. Even a brief light leak during the 12-hour dark window can disrupt the flowering response. Make sure your timer is accurate and that ambient light doesn't sneak in when the fixture is off.
Don't jump straight from a short day to a long one. If your plants were sitting in a window getting maybe 8 hours of natural light and you suddenly hit them with 18 hours of artificial light, some sensitive plants will stress. A simple transition looks like this:
- Start at 14 hours on / 10 hours off for the first 3 to 5 days
- Move to 16 hours on / 8 hours off for the next few days
- Settle into 18 hours on / 6 hours off as your standard vegetative schedule
Always use a timer. Running lights manually means you'll forget, and inconsistent light cycles stress plants and invite problems like algae buildup in the soil or erratic growth patterns. A basic mechanical outlet timer costs a few dollars and removes the guesswork entirely.
T5 intensity choices for seedlings vs houseplants
T5 intensity comes down to two things: how many tubes you're running and what color temperature (Kelvin rating) those tubes are. Getting both right for your plant type makes a noticeable difference in growth quality.
Color temperature: 6500K vs 3000K
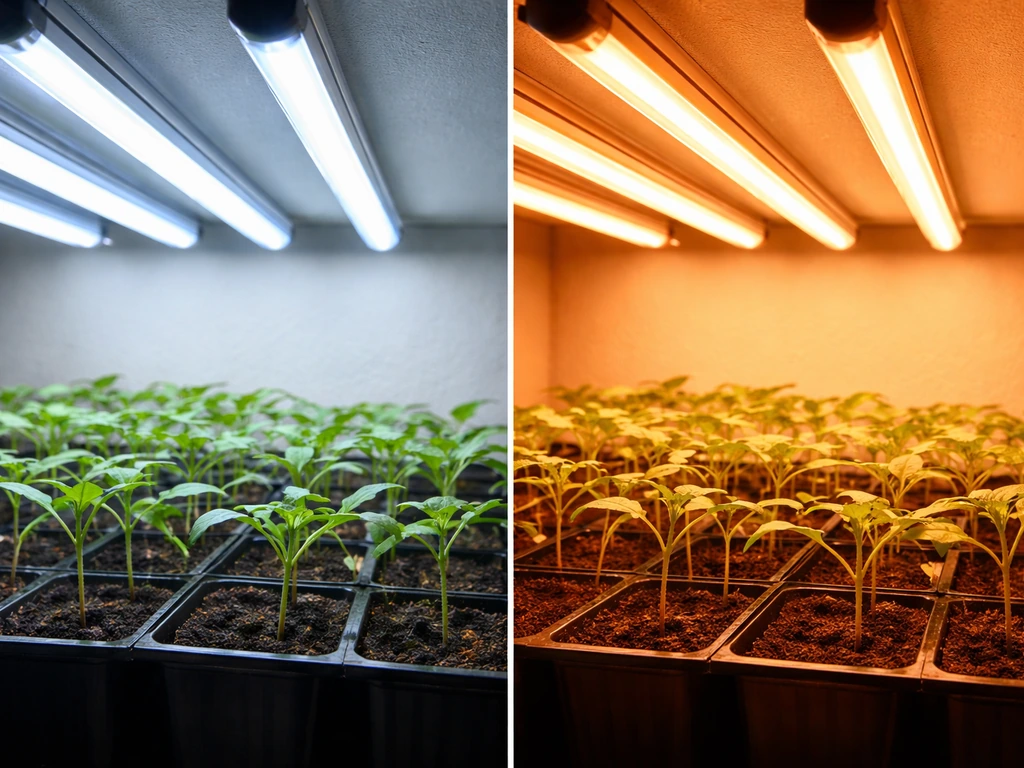
6500K bulbs produce a cool, blue-white light that mimics daylight. This spectrum encourages compact, leafy, vegetative growth and is the right choice for seedlings, cuttings, herbs, and leafy vegetables. 3000K bulbs produce a warmer, more orange-tinted light that encourages flowering and fruiting. Most T5 kits ship with 6500K bulbs, which is fine for the majority of home growers. If you're pushing plants toward bloom, swap in 3000K tubes or run a mix of both spectrums.
Number of tubes and intensity by plant type
| Plant Type | Tubes Recommended | Color Temp | Distance from Canopy |
|---|---|---|---|
| Seedlings and cuttings | 2 to 4 tubes (4-ft fixture) | 6500K | 3 to 6 inches |
| Herbs and leafy greens | 2 to 4 tubes | 6500K | 4 to 8 inches |
| Houseplants (low-light varieties) | 1 to 2 tubes | 6500K or mixed | 10 to 14 inches |
| Flowering and fruiting plants | 4+ tubes | 3000K or mixed | 6 to 10 inches |
| Microgreens | 2 to 4 tubes | 6500K | 4 to 6 inches |
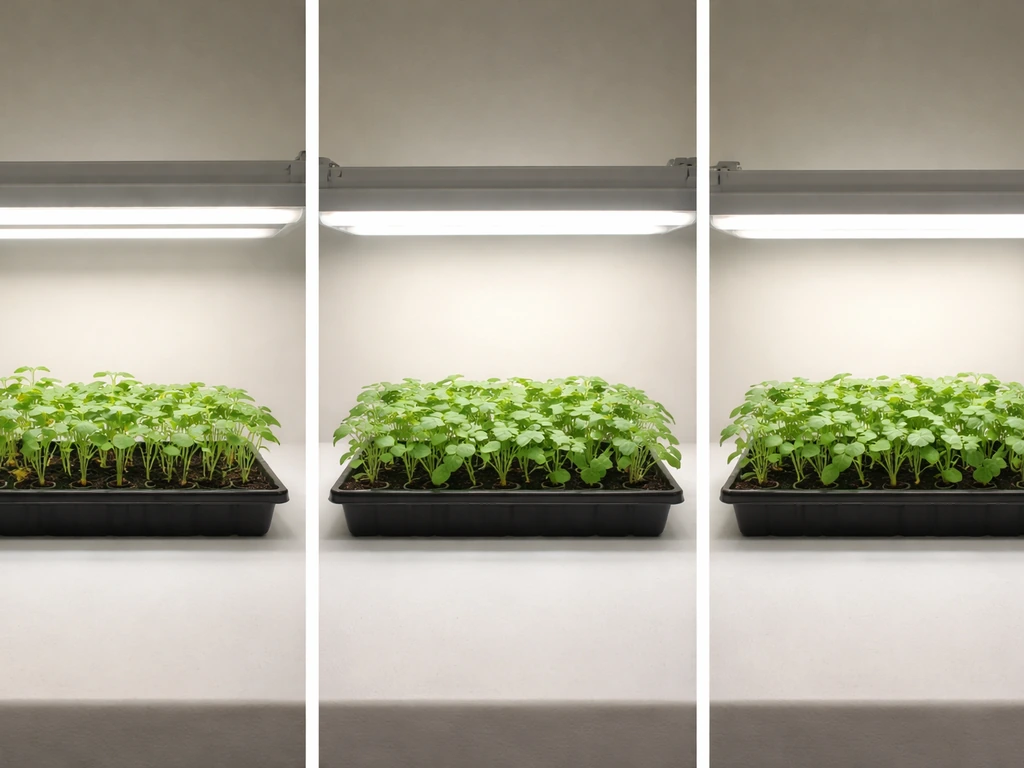
If you don't have a PAR meter (and most home growers don't), use the distance guidelines and watch your plants. Compact, dark green growth with short internodes means your light intensity is in a good range. Pale, yellow-green leaves suggest too little light or too much distance. Bleaching or crispy leaf edges suggest you're too close or running too many hours. Your plants will tell you what they need within a week or two of observation.
T5s are significantly cooler-running than HPS lights, which means you can get them much closer without worrying about heat damage. If you are switching to or comparing with HPS grow lights, the placement and heat tolerance rules change, so review an HPS-specific guide before adjusting your schedule HPS lights. If you're familiar with HPS setups, you'll actually need to recalibrate your instincts since the rules around distance are quite different between the two fixture types.
Troubleshooting common T5 problems (flicker, dimness, burn/stretch)
Flickering tubes
Flickering is almost always caused by one of three things: a tube that's reaching the end of its life, a loose connection at the end cap, or a ballast issue. Start by turning off and unplugging the fixture, then reseat the tube firmly. If it still flickers after reseating, try swapping in a new tube. If a fresh tube still flickers, the ballast is likely failing and the fixture needs to be replaced. Don't try to use a generic dimmer switch on a T5 fluorescent ballast; mismatched dimmers cause constant flickering and shorten ballast life significantly.
Dim output or tubes not starting
If a tube glows at the ends but the middle stays dark, the tube is near end-of-life and should be replaced. T5HO bulbs typically last 10,000 to 20,000 hours, but output drops noticeably before they fully fail. If the tube is completely dark (no glow anywhere), check the power connection and then try a known-working tube. If a fresh tube in the same socket still doesn't light, the ballast or wiring to that socket is the problem, not the tube.
Leggy, stretched plants
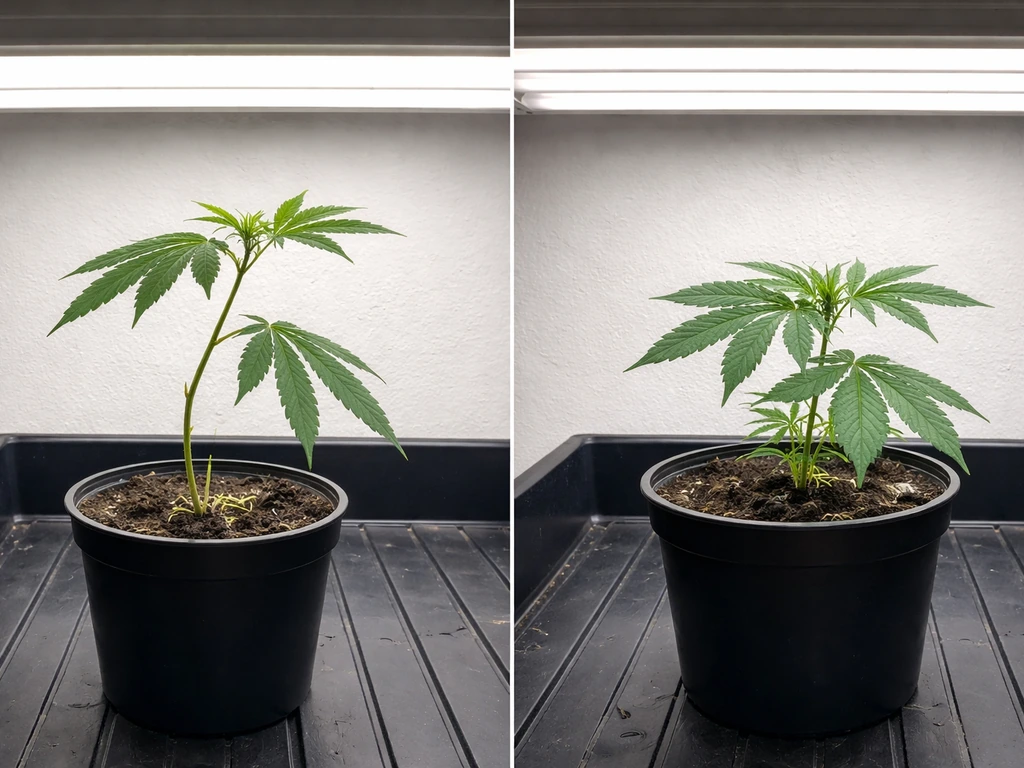
Stretching happens when plants aren't getting enough light intensity. The plant is reaching toward the source. Fix it by lowering the fixture closer to the canopy (aim for 3 to 6 inches for seedlings), adding more tubes if your fixture supports them, or extending your daily light hours up to 18. If you're already at 18 hours and 4 to 6 inches of distance and still seeing stretch, you may need a higher-output fixture or additional side lighting.
Leaf burn or bleaching
If leaf edges are going crispy or tops are bleaching white or yellow, your fixture is probably too close or running too long. Raise the fixture by 2 to 3 inches and reduce your photoperiod by an hour or two, then observe for a few days. T5s are forgiving compared to high-intensity LEDs or HPS lights, but seedlings with very thin, delicate leaves can still show heat or light stress at 2 inches or less.
Uneven coverage or hotspots
Plants directly under the center of the fixture grow faster than those at the edges. This is a normal characteristic of T5 fixtures and becomes more pronounced the closer the fixture is to the canopy. The fixes are: raise the fixture slightly (which spreads the light footprint), use a reflective surface on your walls or a grow tent with reflective lining, or rotate your trays every few days so all plants get even exposure over time.
Algae growth on soil surface
Green algae on the soil isn't caused by the light being too strong; it's caused by moisture sitting on the soil surface under continuous light. Reduce surface watering frequency, let the top inch of soil dry between waterings, and make sure your dark period is long enough to break the algae's light cycle. This is one reason skipping a timer and running lights 24/7 causes real problems beyond just stressing the plants.
Quick-start checklist and when to adjust over time
Use this checklist when setting up your T5 system for the first time or troubleshooting an existing setup:
- Choose the right fixture size: 4-foot for most setups, 2-foot if space is limited
- Verify your tubes are installed and seated firmly before plugging in
- Confirm you're using a grounded outlet and the power cord is UL-listed
- Set starting height: 3 to 6 inches above seedlings, 6 to 12 inches above established plants
- Plug into a timer, not directly into the wall
- Set your timer: 18 hours on / 6 hours off for vegetative growth; 12/12 for flowering
- Choose the right bulb color: 6500K for leafy/vegetative growth, 3000K for flowering
- Check your coverage: the fixture should span the full width of your grow area; rotate trays if needed
- Clean reflector hood interior monthly to maintain output
- Raise the fixture 2 to 3 inches every time your plants grow that much
After the first week, take a look at your plants and adjust. Compact, deep green growth means you're dialed in. Stretching means go closer or add more light. Pale or scorched leaves mean back off. Most growers find their stable setup within two weeks of starting, and after that it's mostly just raising the fixture as plants grow.
If you're using your T5s specifically for seed starting, the setup process pairs naturally with a seed starter kit workflow, where tray depth, dome humidity, and light timing all interact. And if you eventually want to scale up or move plants into a greenhouse environment, the scheduling principles here translate directly, though outdoor light supplementation works a bit differently.
If you're moving into a greenhouse, the main idea is still to match light intensity and timing to your crop, then fine-tune height and spacing as the season and plant growth change greenhouse environment. T5s are a great starting point because they're forgiving, affordable, and the bulb options are easy to find. Once you're comfortable with the basics here, you'll have the foundation to evaluate higher-output systems like HPS lights if your grow area expands.
FAQ
Can I use a T5 grow light over plants in a closed or mostly enclosed tent without improving ventilation?
Yes, because T5s run relatively cool, but you still need airflow. Stagnant air increases humidity around seedlings, which can drive fungus gnats and damping off. Aim for gentle circulation (for example, a small clip fan on low), and avoid letting the air become consistently saturated.
How do I know if my T5 fixture is evenly covering my tray, not just the center?
Check leaf color and internode length across the tray. If the center looks darker and denser while the edges stretch or fade, your reflector or hood may not be seated correctly, or the spacing between fixtures is too wide. Rotate the tray every few days and keep fixtures aligned so their light footprints overlap slightly.
What if my seedlings are stretching even though the light height and schedule seem correct?
Stretch can also come from weak seedlings due to low early rooting, overcrowding, or insufficient water and airflow. First, confirm you are using the correct bulb temperature for the stage (typically 6500K for vegetative growth). Then thin plants to avoid competition and ensure the tray is not sitting in a drafty, cool area that slows growth.
Is it better to run 24/7 light with a T5 to get faster growth?
No. Even if the fixture is cool, continuous lighting promotes surface algae and can contribute to inconsistent growth. Use an on/off cycle with a real dark period, and if you do microgreens, keep it in the shorter daytime range described (not truly 24/7).
Can I mix bulb types, like using both 6500K and 3000K in the same fixture?
Usually yes, if your fixture supports mixed tubes, and it can help bridge vegetative-to-flowering needs. Keep in mind that bulb position matters less than total output and distance, so still adjust height based on plant response. If the goal is strong vegetative growth, don’t let the warm bulbs dominate the overall output.
How often should I replace T5HO tubes if they still light?
Replace them when performance visibly drops, not just when they fully fail. Even when a tube still glows, output decreases before total failure, which can lead to slow or stretching plants. A practical approach is to track run hours and do a quick swap test if growth stalls despite correct height and schedule.
What’s the safest way to troubleshoot flickering?
Unplug first, then reseat the tube firmly at both ends. If flicker continues, try a known-working tube in the same socket to isolate the lamp versus the ballast. If a new tube still flickers, plan on replacing the fixture or having the ballast evaluated, and do not use a generic dimmer unless the ballast is explicitly rated for dimming.
My timer seems accurate, but flowering still fails when I switch to 12/12. What else could cause problems?
Light leaks are a common culprit beyond the timer itself. Check for any indicator LEDs, gaps in the timer-controlled circuit, or ambient light entering the grow area during the dark period. Use a blackout curtain or fully enclosed dark schedule setup, and ensure the dark window is uninterrupted for the whole 12 hours.
Can I dim or lower a T5 light by using a dimmer switch on the outlet?
In most cases, no. Fluorescent T5 ballasts often require specific control gear, and mismatched dimming can cause persistent flicker and ballast damage. The safer method is to adjust fixture-to-canopy distance, number of tubes in use, or photoperiod.
What should I do if my plants bleach white or develop crispy edges?
Raise the fixture by about 2 to 3 inches and reduce the daily light duration by an hour or two, then reassess after a few days. Also check that you are not running too many tubes for the space, and confirm you are not accidentally using a bulb temperature or tube type outside what your plants can tolerate at that height.
Do I need to adjust light spacing or angle when using two T5 fixtures side by side?
Yes, overlap matters. Position fixtures so their coverage overlaps enough that there is no visible unlit gap between footprints. If your reflector hoods are not fully seated or are dirty, coverage becomes uneven, so clean the interior and verify the hood alignment before fine-tuning spacing.
Is it okay to place the T5 directly on a surface or does it need to hang?
It should be supported so the height above the canopy stays consistent. Rope ratchets or other adjustable hangers help prevent accidental drift, especially as plants grow. Avoid resting the fixture on unstable stacks or soft surfaces that can shift and change the distance, leading to stress.
Next Article
How to Use a Seed Starter Kit With a Grow Light
Step-by-step setup for seed starter kits with grow lights, including light height, schedule, warmth, moisture, and troub