To use grow lights in a greenhouse correctly, you need to pick the right fixture type for your space, hang them at the right height above your canopy (usually 12 to 36 inches depending on fixture intensity), set a timer for 12 to 18 hours depending on what you're growing, and make sure your wiring is weatherproofed with GFCI protection. That's the core of it. Everything else, PPFD targets, scheduling adjustments, troubleshooting leggy growth, builds on those four basics. If you still end up with stretching after changing your timer and placement, also see how to use hps grow lights to compare fixture intensity and heat-driven placement issues troubleshooting leggy growth.
How to Use Grow Lights in a Greenhouse Step by Step

Marcus Tillman
5 May 2026
Using grow lights in a greenhouse is different from using them in a tent or spare room. You're dealing with condensation, variable natural light, structural mounting points that weren't designed for fixtures, and the need to coordinate your lights with whatever the sun is already doing. This guide walks through every step of that process so you can set things up right the first time and know exactly what to adjust when something goes wrong.
Choosing the right greenhouse grow lights
The two fixture types worth serious consideration for most greenhouse growers are LED and HPS (high-pressure sodium). Fluorescent T5 fixtures work well for seedlings and clones, but they don't have the output to supplement sunlight for mature fruiting or flowering plants across a full greenhouse bay. For details on how to use T5 grow lights specifically, including placement, timing, and output limits for seedlings versus mature plants, follow the guide for T5 grow light usage.
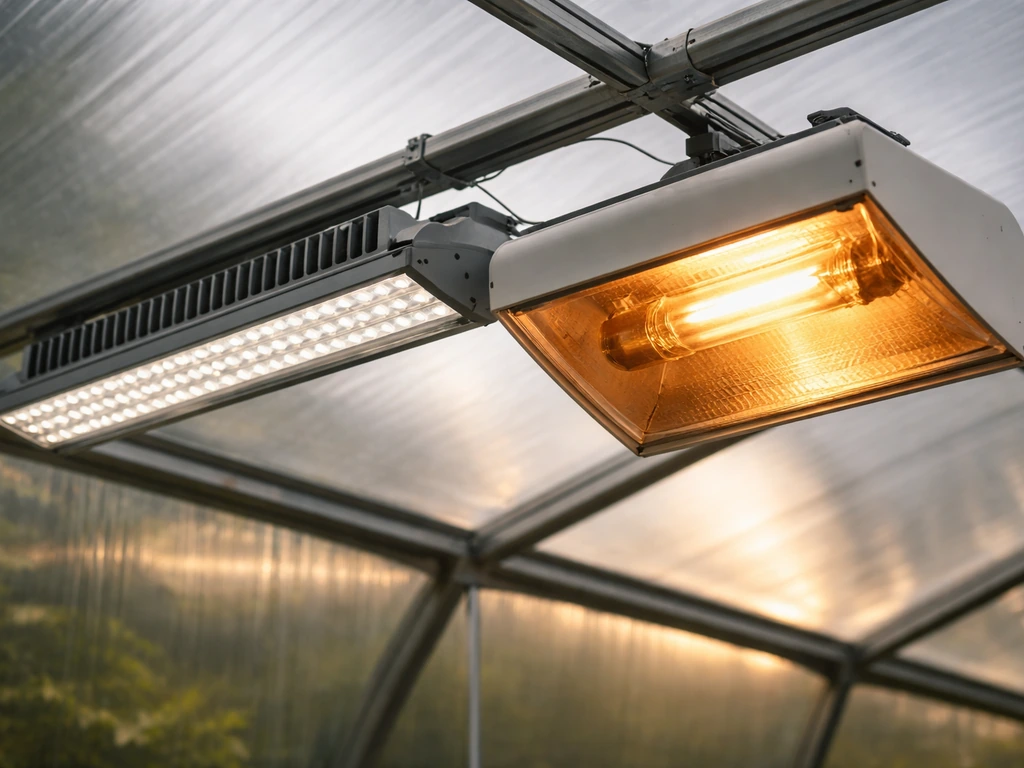
LED is the clear winner for most new greenhouse setups. Modern LED fixtures deliver between 2.1 and 3.7 micromoles of photosynthetically active light per joule (µmol/J), which means you're getting significantly more usable light per watt of electricity compared to older technology. HPS fixtures, even newer double-ended models, top out around 1.7 to 2.1 µmol/J. Over a full growing season, that efficiency gap translates directly into your electricity bill. LEDs also run cooler, which matters a lot in a greenhouse where heat buildup is already a challenge.
That said, HPS still has a place. If you're working with an existing HPS setup, the fixtures are proven, parts are cheap, and replacement bulbs are easy to source. Just be aware that you'll need more active ventilation to manage the heat load, and you'll be replacing bulbs more often than with LEDs.
| Feature | LED | HPS (Double-Ended) | T5 Fluorescent |
|---|---|---|---|
| Efficacy (µmol/J) | 2.1 – 3.7 | 1.7 – 2.1 | ~1.0 |
| Heat output | Low to moderate | High | Low |
| Upfront cost | Higher | Moderate | Low |
| Best use case | Full-cycle greenhouse growing | High-output supplemental lighting | Seedlings and clones only |
| Lifespan | 50,000+ hours | 10,000 – 24,000 hours | 20,000 hours |
| Weatherproofing options | Widely available (IP65+) | Limited | Limited |
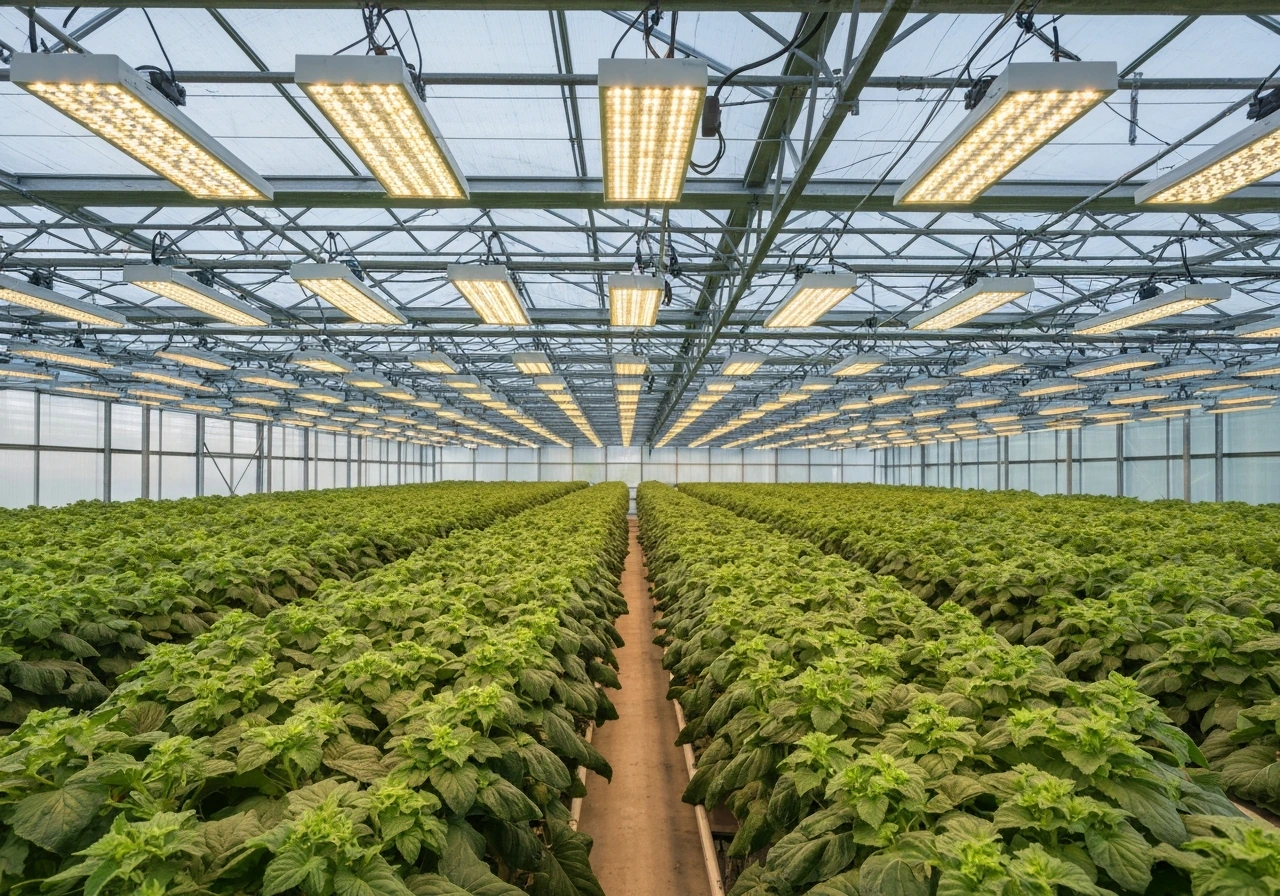
When you're picking a fixture, also pay attention to the form factor. Greenhouse structures have purlins, gutters, and cross-members at specific intervals, usually 4 to 8 feet apart. Choose a fixture width that fits your mounting points without requiring you to drill into structural members at awkward angles. Bar-style LED fixtures (like 4-foot or 8-foot linear arrays) mount cleanly across purlins and give you even coverage across a bench or bed. Round-hood HPS fixtures work fine too but need individual hanging points and can create hotspots if spaced too far apart.
For spectrum, full-spectrum LED (with a mix of blue, red, and white output) handles seedlings through harvest without swapping fixtures. If you're only supplementing for photoperiod control on a specific crop like chrysanthemums or cannabis, you can use a simpler red-heavy fixture, but for general greenhouse use, full-spectrum is the practical choice.
Placement and mounting in a greenhouse
Your mounting height above the plant canopy is one of the most important decisions you'll make, and it's specific to your fixture's wattage and output. As a starting point: low-wattage LED panels (under 200W) work well at 12 to 18 inches above the canopy. Mid-range fixtures (200 to 400W) should start at 18 to 24 inches. High-output fixtures (600W and above) often need 24 to 36 inches of clearance to avoid light burn, especially on young plants.
In a greenhouse, you're almost always mounting to the structure itself, purlins, hip boards, ridge poles, or overhead trusses. Use heavy-duty adjustable ratchet hangers rated for at least twice your fixture weight. This lets you raise fixtures easily when plants are young and lower them as you need more intensity. Don't hang fixtures from poly film panels or glazing bars, those aren't load-bearing and can crack or pull loose.
Spacing between fixtures depends on the coverage area per fixture listed in the manufacturer's specs, but a practical rule of thumb for supplemental greenhouse lighting is one 4-foot LED bar or one 1000W HPS per every 16 to 25 square feet of canopy. For seedling benches, you can cover more area because young plants need less intensity. Measure your bench dimensions first and work backward from coverage specs.
Reflective surfaces matter more in a greenhouse than people expect. White-painted interior walls and floors reflect light back up into the canopy, effectively increasing your usable PPFD without adding fixtures. If your greenhouse has a dark floor or exposed soil, laying white poly film or a reflective ground cover under your benches can noticeably improve coverage at the edges of your light footprint.
Aim for uniformity over peak intensity. A fixture hung too low might hit 1,200 µmol/m²/s in the center while dropping to 400 µmol/m²/s at the edges, that's a recipe for uneven growth. Raising the fixture slightly and adding a second unit if needed gives you a flatter, more consistent footprint across the whole canopy.
Calculating light intensity and coverage (PPFD and DLI)
PPFD stands for photosynthetic photon flux density, measured in micromoles per square meter per second (µmol/m²/s). It tells you how much usable light is hitting your plants at a given moment. blank" rel="noopener noreferrer">DLI (daily light integral) is the total amount of that light accumulated over a full day, measured in mol/m²/day. DLI is the number that actually predicts plant performance, PPFD is just how you get there.
Here's how to translate PPFD into DLI: multiply your PPFD reading by the number of hours your lights run, then multiply by 0.0036. For a constant PPFD, Wikipedia gives the common conversion: DLI (mol/m²/day) = 0.0036 × PPFD (µmol/m²/s) × hours of light. So if your lights deliver 400 µmol/m²/s for 16 hours, your DLI is 400 × 16 × 0.0036 = 23 mol/m²/day. In a greenhouse, you add whatever DLI the sun is already contributing (typically 5 to 20 mol/m²/day depending on season and location) to get your total plant DLI.
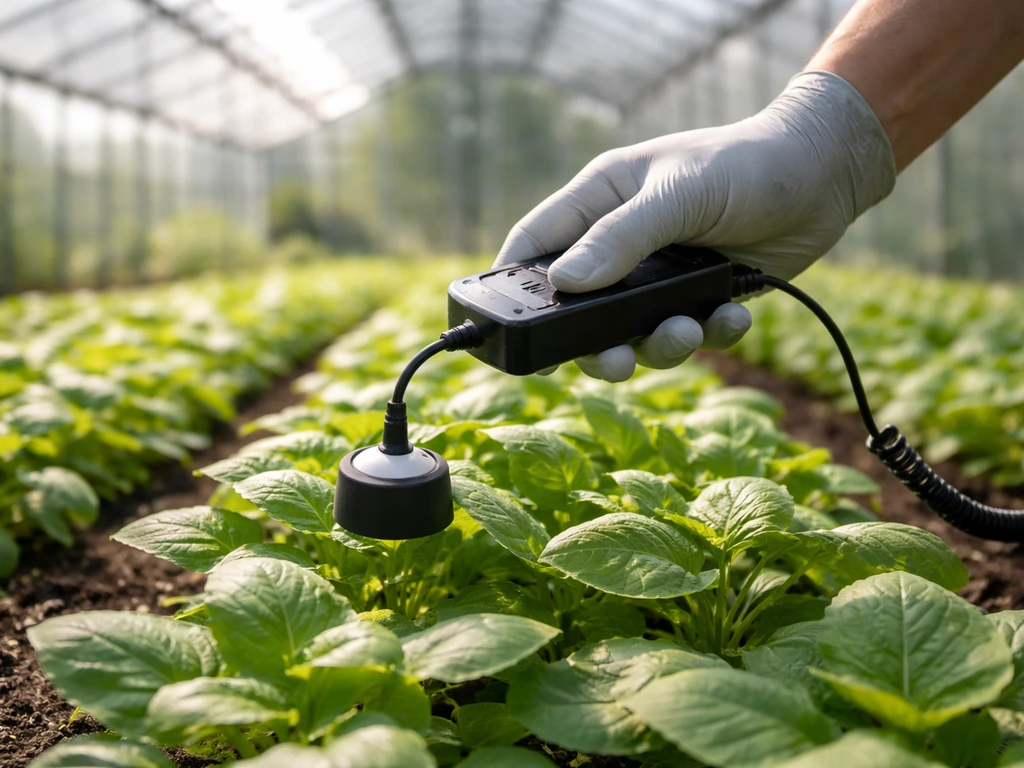
You don't need a $500 quantum sensor to get started. A decent PAR meter in the $100 to $200 range will give you accurate enough readings to dial in placement. Take readings at multiple points across your canopy, center, edges, and corners, and adjust fixture height or spacing until the variation is under 20 percent.
| Crop Type | Target DLI (mol/m²/day) | Target PPFD at Canopy (µmol/m²/s) |
|---|---|---|
| Seedlings / propagation | 10 – 15 | 150 – 250 |
| Leafy greens (lettuce, herbs) | 14 – 20 | 200 – 350 |
| Tomatoes / peppers (vegetative) | 20 – 30 | 400 – 600 |
| Tomatoes / peppers (fruiting) | 25 – 35 | 500 – 800 |
| Flowering plants / cannabis | 30 – 45 | 600 – 1,000+ |
In a greenhouse, you're usually supplementing natural light rather than replacing it entirely. That means on a bright summer day, your lights might only need to run for 2 to 4 hours at dawn and dusk to hit your DLI targets. In winter, you may be running lights for 10 to 14 hours to compensate for low sun angles and short days. A photosensor or light-integrated controller handles this automatically, more on that in the controls section.
Daily schedules and light timing for seedlings vs mature plants
Greenhouse lighting strategy falls into two categories: supplemental lighting (adding intensity to boost DLI on low-light days) and photoperiod lighting (extending or shortening the perceived day length to control flowering or dormancy). Most home greenhouse growers need supplemental lighting, but knowing the difference helps you set the right schedule.
Seedlings and propagation
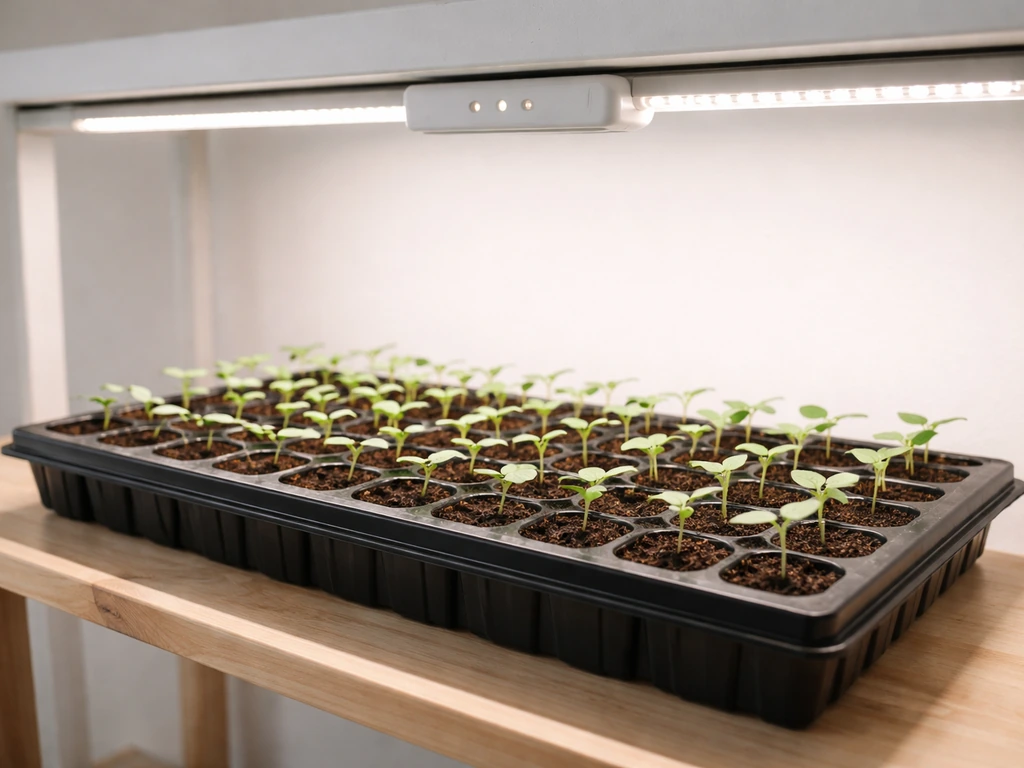
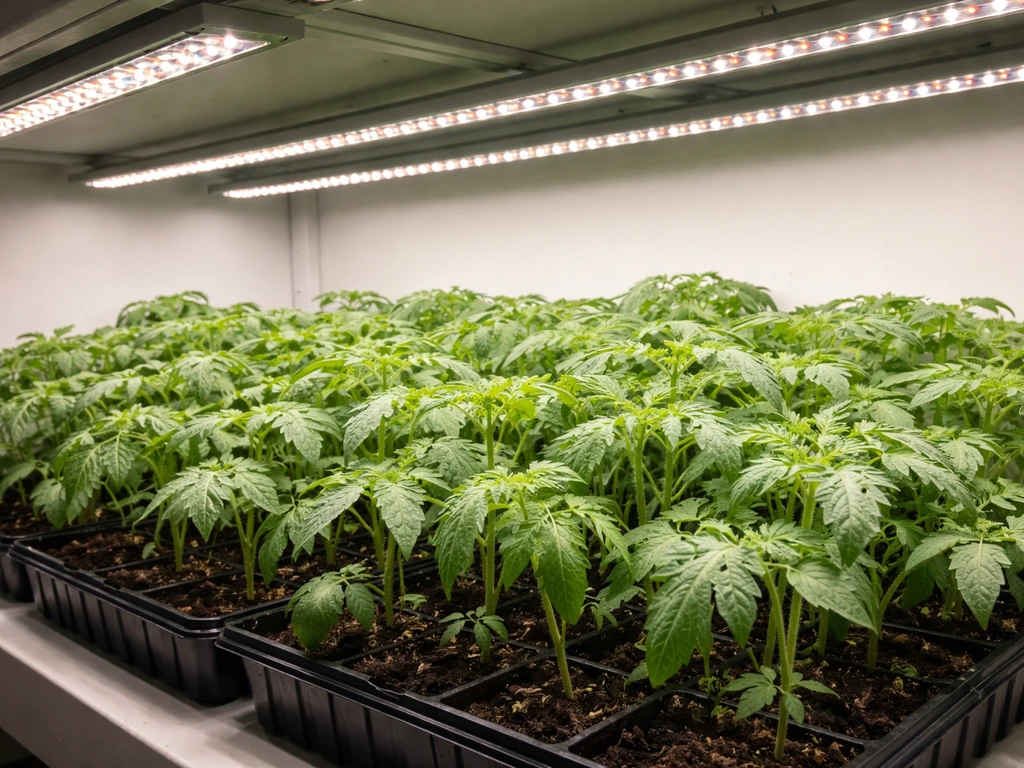
Seedlings are the most forgiving group when it comes to scheduling, but they're also the most sensitive to light burn. Keep PPFD around 150 to 250 µmol/m²/s and run lights for 16 hours on, 8 hours off. That long photoperiod encourages steady germination and compact growth. If you're using a seed starter kit with grow lights, this 16/8 schedule is your baseline starting point.
Leafy greens and herbs
Lettuce, basil, spinach, and most herbs are day-length neutral or actually prefer long days. A 14 to 16-hour photoperiod works well. In a greenhouse with decent winter sun, you might only need to run your lights for 4 to 6 hours as a morning and evening extension to hit 14 total hours of light. Run lights from 5 AM to 9 AM and then again from 5 PM to 9 PM, letting the natural midday sun cover the gap.
Fruiting crops: tomatoes, peppers, cucumbers
These plants are light-hungry. To translate that into real settings, see our guide on how to use grow lights for tomatoes These plants are light-hungry.. Target 16 to 18 hours of total daily light during vegetative growth and maintain at least 12 hours during fruiting. In a greenhouse setting during short winter days (8 to 10 hours of natural light), you'll need your grow lights running for 6 to 8 additional hours. Prioritize running lights in the morning, plants use light most efficiently in the first hours after sunrise, so a 5 AM to 11 AM supplemental window is more effective than running lights at midnight.
Flowering plants and photoperiod-sensitive crops
If you're growing short-day plants (chrysanthemums, poinsettias, cannabis in flower) in a greenhouse, you need to control photoperiod precisely. For cannabis flowering, a strict 12 hours on, 12 hours off schedule is required, and that means blocking any light leaks from outside during the dark period. In this case, blackout curtains or shade cloth that fully darkens the space are as important as the grow lights themselves. For T5 grow light users managing photoperiod crops, keep in mind that T5s won't provide enough supplemental DLI for fruiting or flowering, they're best reserved for seedling stages.
Ventilation, heat, and electrical safety basics
Heat is the number one operational problem in greenhouse lighting setups. Even LED fixtures produce heat, and in an enclosed greenhouse that heat accumulates fast. Keep a thermometer at canopy level and aim to stay between 65°F and 85°F (18°C to 29°C) when lights are on. If you're regularly hitting 90°F or above, you need more airflow or you need to raise your fixtures.
For ventilation, the basic rule is that you want to exchange the greenhouse air volume completely at least once per minute during peak heat periods. Horizontal airflow fans (HAF fans) work well for circulation inside the space, while ridge vents, louvers, or an exhaust fan with intake vents handle air exchange with the outside. Position intake vents low and exhaust high, hot air rises, and you want to pull it out at the top.
HPS lights add substantially more heat load than LEDs of comparable output, which is one of the practical reasons to choose LED for greenhouse applications where you're already managing solar heat gain. If you're running HPS, plan for about 3,400 BTU per hour per 1,000W fixture added to your greenhouse heat load.
On electrical safety: every grow light circuit in a greenhouse must be protected by a GFCI (ground fault circuit interrupter) breaker or outlet. Greenhouses are wet environments, condensation, irrigation spray, and humidity are constants, and a GFCI is what stands between a moisture event and a dangerous fault. This is non-negotiable. Use fixtures with an IP65 or higher ingress protection rating, which means they're sealed against water jets and condensation. Check the rating on the fixture label before you buy.
Make sure your circuits are correctly sized for your total fixture wattage plus a 20 percent safety buffer. If you're running 1,200W of lights, you need at least a 15-amp, 120V circuit (which maxes at 1,440W at 80 percent capacity), and ideally a 20-amp circuit to give yourself headroom for future additions.
Setting up wiring, controls, and weatherproofing
Run your power cables along structural members, purlins, trusses, or hip boards, and secure them with UV-resistant cable clips or conduit. Never let cables hang freely across the greenhouse or rest on glazing panels. Use outdoor-rated extension cords and power strips if you're using those temporarily, but for any permanent setup, run your circuits through weatherproof conduit (liquid-tight flexible conduit works well in greenhouse conditions where you have both rigidity needs and some flex required).
Drip loops are simple but critical: wherever a power cord connects to a fixture or outlet, create a loop in the cord so that it hangs below the connection point before coming back up. This prevents water from running down the cord and into the connection. It takes 10 seconds per fixture and it's one of the most effective ways to prevent water damage to your electrical connections.
For controls, you have three main options depending on your budget and goals. A basic mechanical or digital timer is the minimum, set your on/off times and let it run. A smart timer or programmable controller adds flexibility to change schedules by season without reprogramming manually. For serious supplemental lighting setups, a light-integrated controller with a photosensor is the best investment: it measures actual sunlight and runs your grow lights only as much as needed to hit your target DLI, which can cut your electricity use by 30 to 50 percent compared to running on a fixed timer year-round.
If your LED fixtures have a dimming feature (most quality fixtures do), use it. Running at 70 to 80 percent intensity during high-sun summer days and ramping up to 100 percent in winter gives you efficient, plant-appropriate output without burning your plants or wasting electricity. Connect dimmable fixtures to a 0-10V dimming controller for precise adjustment.
For weatherproofing connections, use waterproof junction boxes rated IP65 or better at every splice point. Wrap any exposed connectors with self-amalgamating (self-fusing) tape rather than standard electrical tape, regular tape degrades quickly in humid greenhouse conditions and can peel off within a season.
Troubleshooting common greenhouse grow light problems
Most grow light problems in a greenhouse fall into a handful of patterns. Here's how to diagnose and fix the ones you'll actually encounter.
Leggy, stretched plants
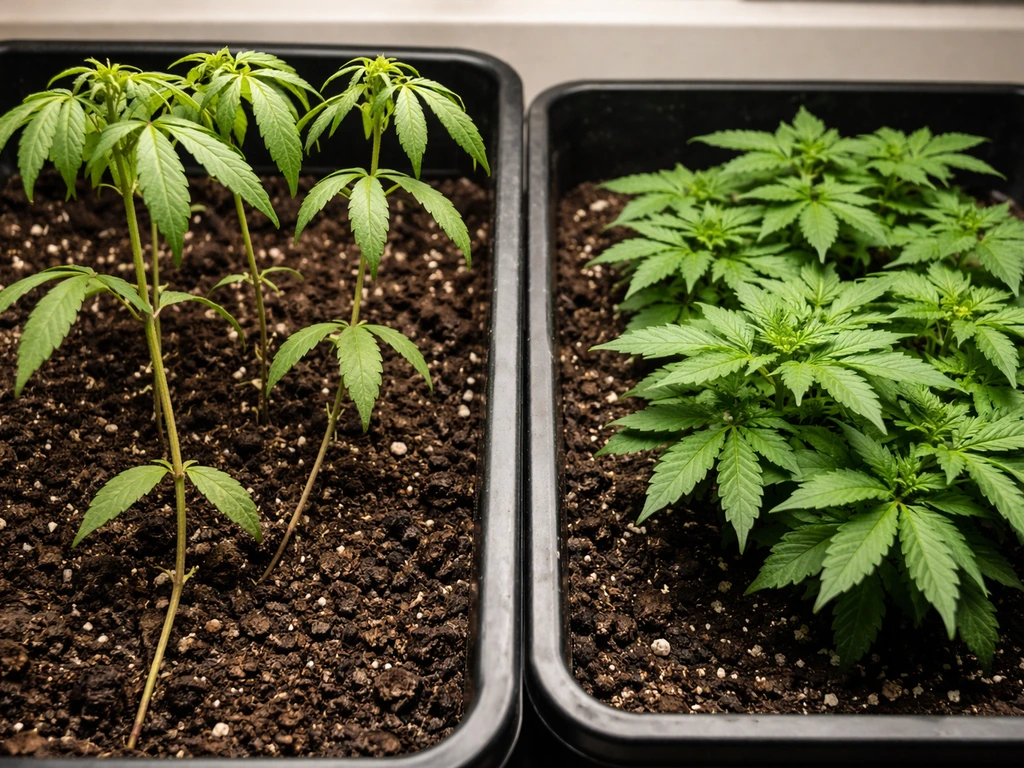
Stems stretching toward the light, wide gaps between leaf nodes, pale color, these are classic signs of insufficient light. Either your fixture is too far away, running too few hours, or underpowered for the canopy area. Measure PPFD at canopy level. If you're getting under 150 µmol/m²/s for seedlings or under 300 µmol/m²/s for vegetative crops, lower your fixture or increase photoperiod. Also check whether your natural light contribution has dropped seasonally, what worked in October may not be enough in December.
Bleaching, leaf curl, or tip burn
Washed-out color (especially near the center of the canopy), upward leaf curl, or brown leaf tips point to too much light intensity, the fixture is too close or running at too high an output for the plant stage. Raise the fixture by 4 to 6 inches at a time and wait 48 hours to see improvement. If you have dimmable LEDs, drop intensity by 20 percent first before adjusting height. For tomatoes and peppers specifically, also check for heat stress, bleaching and curl can look similar whether caused by excess light or excess temperature.
Uneven growth across the bench
Plants in the center of the bench thriving while edge plants are stunted (or vice versa) is a coverage uniformity problem. Measure PPFD at multiple points. If the difference between center and edge is more than 30 percent, you need to either raise the fixture (wider, softer coverage footprint) or add a second fixture. Reflective surfaces under and around the bench can also help fill in light at the edges without adding hardware.
Slow overall growth despite correct timing
If your timing looks right but plants are just growing slowly, check your DLI calculation against your actual crop targets. It's common to underestimate how much light a fruiting crop needs. Also consider whether temperature at night is dropping too low, below 55°F slows growth significantly for warm-season crops regardless of how much light they get during the day. Check that your PPFD measurements are taken at canopy level, not at the fixture or at bench level without plants present.
Algae and mold from excess humidity
Grow lights can warm water surfaces (irrigation trays, wet growing media) enough to accelerate algae and mold growth if airflow is poor. The fix is usually better air circulation at the bench level, a small HAF fan running continuously keeps a thin layer of moving air around the plant base that dramatically reduces fungal issues. Also avoid leaving standing water in trays under lights for extended periods.
Fixture flickering or short lifespan
Flickering in LED fixtures is almost always a driver problem, not an LED strip failure. If a fixture flickers consistently, check the driver connections first, in a humid greenhouse, corrosion at driver terminals is common. Clean with a contact cleaner spray and reseat the connectors. If flickering persists, the driver likely needs replacement (most quality LED fixtures sell replacement drivers separately, which is much cheaper than replacing the whole fixture). For HPS, flickering usually means the bulb is at end of life or the ballast is failing, replace the bulb first before assuming ballast failure.
Hotspots and fixture-level overheating
If one section of a multi-bar LED fixture is noticeably dimmer or discolored while others look fine, that section has likely been running too hot. Check that the fixture's passive heatsinks aren't blocked by mounting against a surface with no air gap, fixtures need at least 2 to 3 inches of clearance above the heatsink for convective cooling. In a hot greenhouse, even well-mounted fixtures can overheat; adding a small circulation fan blowing across the top of the fixture row can significantly extend driver and LED lifespan.
Maintenance, upgrades, and when to change bulbs or fixtures
Greenhouse environments are hard on fixtures. Humidity, temperature swings, dust, and pollen accumulate faster than you'd expect. Build a simple maintenance routine and your fixtures will last significantly longer.
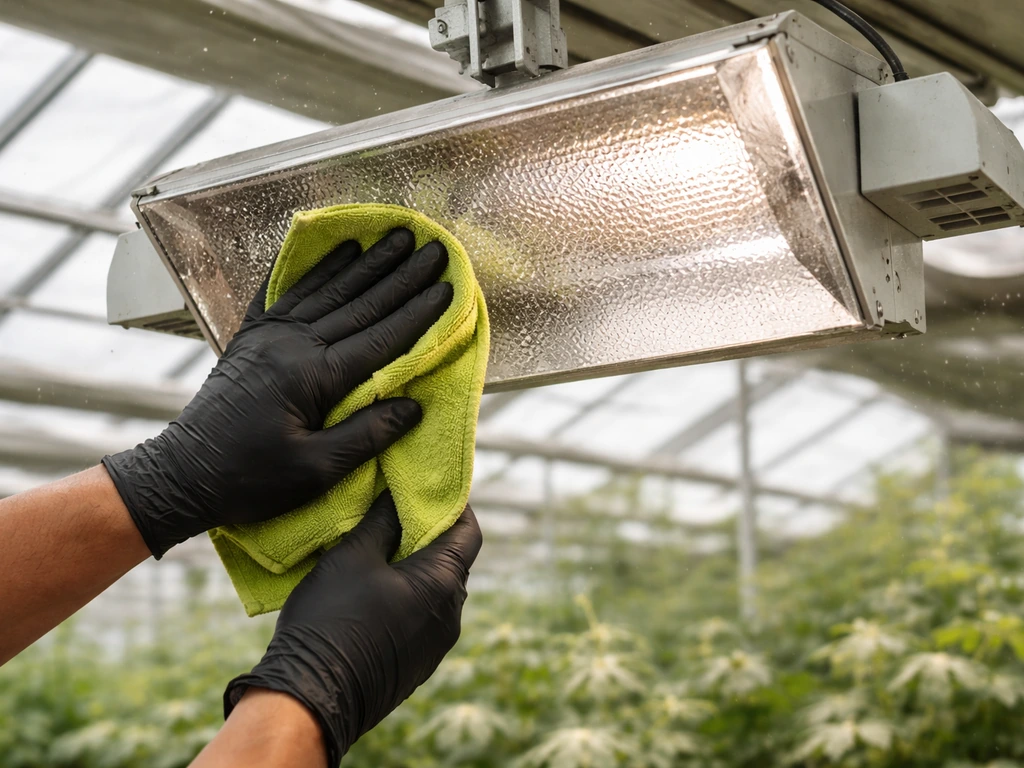
- Clean fixture lenses and reflectors monthly: use a dry microfiber cloth or a very lightly damp cloth (never spray water directly on an energized fixture). Dust and grime on the lens can reduce light output by 10 to 20 percent over a season.
- Inspect all cable connections and drip loops every 3 months: look for corrosion, cracked insulation, or drip loops that have sagged out of position. Reterminate any corroded connections.
- Check mounting hardware every 6 months: ratchet hangers can slip, and the load on mounting points changes as you adjust fixture height. Verify that all hanging points are secure and that safety cables (if installed) are intact.
- Re-measure PPFD at canopy level once per season: as plants grow and your canopy height changes, your effective PPFD at canopy changes too. Recalibrate fixture height seasonally to maintain your target intensity.
- Log your fixture run hours: most LED fixtures are rated for 50,000 hours, but output degrades gradually over time (called lumen depreciation). After 40,000 hours, expect 10 to 15 percent less output than when new — your plants may need longer photoperiods or closer fixture placement to compensate.
For HPS setups, replace bulbs every 10,000 to 12,000 hours even if they're still producing visible light. HPS bulbs shift spectrum and lose output before they visibly fail, and running degraded bulbs is one of the most common causes of unexplained slow growth in HPS greenhouse setups. Mark the bulb installation date with a marker directly on the fixture housing so you don't lose track.
When it comes to upgrades, the clearest signal that it's time to swap fixtures is when your plants consistently underperform your DLI targets even with fixtures at minimum hanging height and maximum run time. If you're already running lights 18 hours a day and PPFD at canopy is still below target, more efficient fixtures with higher output are the answer, not longer run times. Modern high-efficacy LED fixtures at 2.5 to 3.5 µmol/J will cut your electricity cost significantly compared to older units running at 1.5 µmol/J or below, and the payback period on the hardware difference is often under two growing seasons.
One upgrade worth considering as your setup grows is moving from a simple timer to a networked controller with data logging. Being able to see your actual daily light hours, catch timer failures immediately, and adjust schedules remotely makes a real difference for a greenhouse you can't check every day. It also gives you the historical data to understand why a particular crop performed better in March than in January, which is the kind of insight that turns a good grower into a great one.
FAQ
Can I use grow lights in a greenhouse all year with the same schedule and height?
You can start with one baseline, but you should plan for seasonal adjustment. Natural sunlight and day length shift, so most growers change photoperiod and either dimming level or fixture height at least once between winter and summer. Also re-check PPFD after major weather changes or after moving benches, since canopy height and reflectivity can drift.
How do I know if my PPFD readings are accurate and taken at the right place?
Take readings at canopy level with the plants in place or using an identical stand-in height, not at the fixture. Move the sensor to multiple points (center, edges, corners) and record the spread. If your “canopy” readings are taken too high, you will under-correct and plants will show stretching or slow growth later.
What should I do if my plants show both stretching and pale color, but my timer and placement seem correct?
First confirm you are meeting the crop’s DLI target, not just PPFD at one point. Stretching plus pale color can also come from temperature being too low, night temperatures dropping too far, or uneven light coverage where some plants never receive adequate photons. Measure PPFD at edges as well as the center, and confirm canopy temperature during the light period and at night.
Is it safe to run grow lights longer than 18 hours to push growth faster?
Often it backfires. Extending photoperiod increases DLI, but many crops also need a dark period for normal development and stress recovery. If you want more output, adjust intensity (dimming, fixture count, or height) and verify DLI instead of simply adding hours, and avoid running so long that nighttime temperatures become chronically higher or lower than your crop tolerates.
How do I prevent algae or mold when my greenhouse floors or trays stay wet under lights?
Use continuous bench-level airflow, and avoid leaving standing water in trays under the light footprint. If you use drip irrigation, route runoff away from areas directly under fixtures, and consider raising the growing medium slightly on stands so water does not pool. A small persistent horizontal airflow fan at canopy height is usually more effective than adding extra light.
What’s the best way to handle blackout requirements for short-day flowering crops in a greenhouse?
Blackout needs to prevent even small light leaks during the dark window, not just cover the plants. Seal gaps around doors, vents, and any roof openings that could transmit stray light. Use light-blocking curtains or shade cloth designed for near-total darkness, and test it by walking through during the “off” period and checking for any noticeable illumination.
Can I mix different fixture types, like LED bars and HPS, in the same greenhouse zone?
You can, but you must treat them as separate light sources when calibrating coverage and spectrum. Set placement and verify uniformity with PPFD mapping at canopy level, since HPS can create hotspots and LEDs may have a different beam spread. Also coordinate heat and airflow, because HPS zones can raise local temperatures even if the overall greenhouse temperature looks fine.
Do I need dimmers if I’m planning to use a photosensor or light-integrated controller?
Not always, but dimming helps with fine control. A photosensor controller can manage on-off cycles or ramping, but having dimmable fixtures (with a compatible 0-10V input) allows smoother adjustments and can reduce large swings in canopy PPFD. If your controller supports dimming, use it to stay closer to your DLI target without overshooting.
How do I choose between adding more fixtures versus raising or lowering existing ones?
Use height for quick correction and add fixtures when you have a uniformity problem. If center plants are thriving and edges lag, raising a single row may worsen uniformity if the beam is narrow, and adding a second fixture or changing spacing usually flattens the footprint. If you’re burning plants, lowering is rarely the fix, raise the fixtures and reduce output first before adding hardware.
What should I do if only part of a multi-bar LED row is dimmer or discolored?
Treat it as an overheating or driver issue for that specific section. Check that heatsinks have the required clearance for airflow, confirm mounting spacing, and look for blocked vents or fans blowing unevenly. If the section has a separate driver, test or reseat driver connections, since corrosion is common in humid environments and can create partial output failures.
How often should I clean grow light fixtures in a greenhouse?
Plan to clean on a schedule tied to dust and pollen accumulation, not once per season. In greenhouses, residue can reduce effective output and unevenly, which mimics coverage or height problems. Before major PPFD tuning, wipe lenses and housings (when power is off and cooled), and then re-measure at canopy level.
Do I need GFCI protection even if my greenhouse uses covered outlets and waterproof fixtures?
Yes. GFCI protection is still required for greenhouse grow light circuits because moisture, condensation, and irrigation spray are normal risks regardless of how “protected” an outlet looks. Also ensure any splices are in rated junction boxes, use drip loops at every connection, and route cables through weatherproof conduit for permanent installs.
Next Article
How to Use Grow Lights for Tomatoes: Step by Step Guide
Step-by-step setup for grow lights for tomatoes: choose, size, place, set timing and intensity, and troubleshoot issues.